
소스 이미지를 혼합하거나 오버레이하여 캔버스에 레이어된 이미지를 표시할 수 있습니다. 예를 들어 별도의 백그라운드 및 포그라운드 드로어블을 결합하여 Android 프레임워크가 앱 아이콘을 생성하는 방식을 재현할 수 있습니다. 레이어된 이미지를 표시하려면 다음을 실행해야 합니다.
- 캔버스에 이미지를 레이어로 배치합니다.
- 소스를 오버레이합니다.
버전 호환성
이 구현을 사용하려면 프로젝트 minSDK를 API 수준 21 이상으로 설정해야 합니다.
종속 항목
캔버스에 이미지 레이어 적용하기
다음 코드는 두 소스 이미지를 서로 겹쳐 배치하여 캔버스에 혼합된 이미지를 렌더링합니다.
class OverlayImagePainter constructor( private val image: ImageBitmap, private val imageOverlay: ImageBitmap, private val srcOffset: IntOffset = IntOffset.Zero, private val srcSize: IntSize = IntSize(image.width, image.height), private val overlaySize: IntSize = IntSize(imageOverlay.width, imageOverlay.height) ) : Painter() { private val size: IntSize = validateSize(srcOffset, srcSize) override fun DrawScope.onDraw() { // draw the first image without any blend mode drawImage( image, srcOffset, srcSize, dstSize = IntSize( this@onDraw.size.width.roundToInt(), this@onDraw.size.height.roundToInt() ) ) // draw the second image with an Overlay blend mode to blend the two together drawImage( imageOverlay, srcOffset, overlaySize, dstSize = IntSize( this@onDraw.size.width.roundToInt(), this@onDraw.size.height.roundToInt() ), blendMode = BlendMode.Overlay ) } /** * Return the dimension of the underlying [ImageBitmap] as it's intrinsic width and height */ override val intrinsicSize: Size get() = size.toSize() private fun validateSize(srcOffset: IntOffset, srcSize: IntSize): IntSize { require( srcOffset.x >= 0 && srcOffset.y >= 0 && srcSize.width >= 0 && srcSize.height >= 0 && srcSize.width <= image.width && srcSize.height <= image.height ) return srcSize } }
코드 관련 핵심 사항
- 소스 이미지 위에 이미지를 오버레이하는 데 사용할 수 있는 맞춤
Painter구현인OverlayImagePainter를 사용합니다. 혼합 모드는 이미지가 결합되는 방식을 제어합니다. 첫 번째 이미지는 다른 이미지를 덮어쓰지 않으므로 혼합 모드는 필요하지 않습니다. 두 번째 이미지의Overlay혼합 모드는 두 번째 이미지로 덮인 첫 번째 이미지의 영역을 덮어씁니다. DrawScope.onDraw()가 재정의되고 이 함수에서 두 이미지가 겹쳐집니다.- 결합된 이미지의 고유 크기를 올바르게 보고하기 위해
intrinsicSize가 재정의됩니다.
소스 이미지 오버레이
이 맞춤 페인터 Painter를 사용하면 다음과 같이 소스 이미지 위에 이미지를 오버레이할 수 있습니다.
val rainbowImage = ImageBitmap.imageResource(id = R.drawable.rainbow) val dogImage = ImageBitmap.imageResource(id = R.drawable.dog) val customPainter = remember { OverlayImagePainter(dogImage, rainbowImage) } Image( painter = customPainter, contentDescription = stringResource(id = R.string.dog_content_description), contentScale = ContentScale.Crop, modifier = Modifier.wrapContentSize() )
코드 관련 핵심 사항
- 결합할 이미지는
OverlayImagePainter를 사용하여 결합되기 전에 각각ImageBitmap인스턴스로 로드됩니다. - 결합된 이미지는 렌더링 시 맞춤 페인터를 사용하여 소스 이미지를 결합하는
Image컴포저블에 의해 렌더링됩니다.
결과
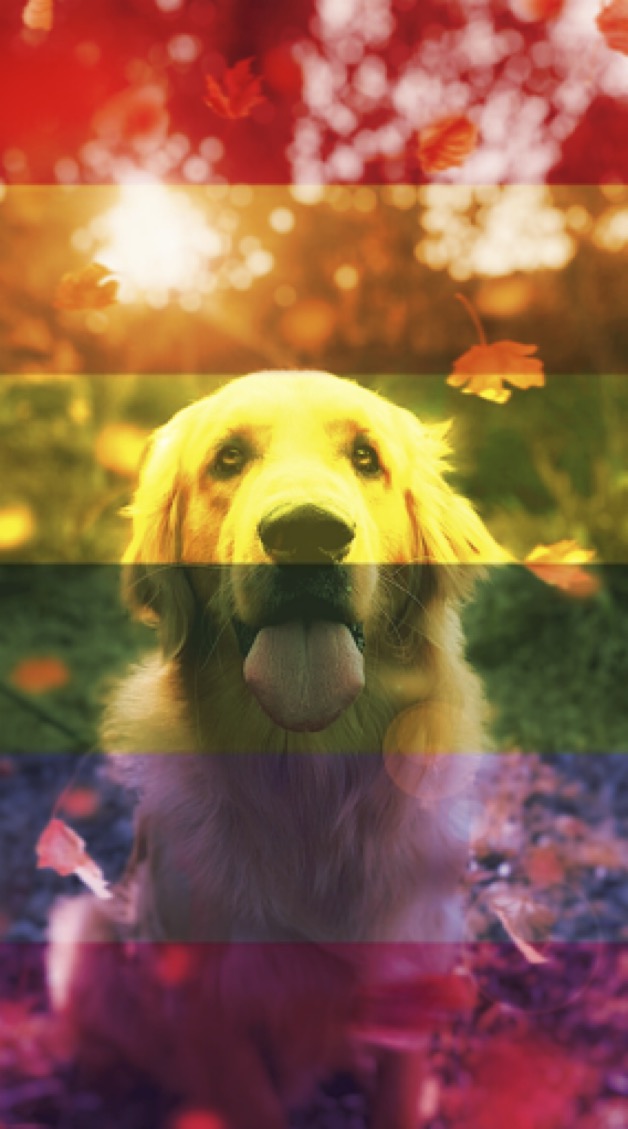
Painter를 사용하여 강아지 이미지 위에 반투명 무지개 이미지를 오버레이하는 Image입니다.이 가이드가 포함된 컬렉션
이 가이드는 더 광범위한 Android 개발 목표를 다루는 선별된 빠른 가이드 모음의 일부입니다.
이미지 표시
밝고 흥미로운 시각적 요소를 사용하여 Android 앱에 멋진 디자인과 분위기를 부여하는 기법을 알아보세요.
질문이나 의견이 있으신가요?
자주 묻는 질문(FAQ) 페이지로 이동하여 빠른 가이드를 알아보거나 문의하여 의견을 보내주세요.