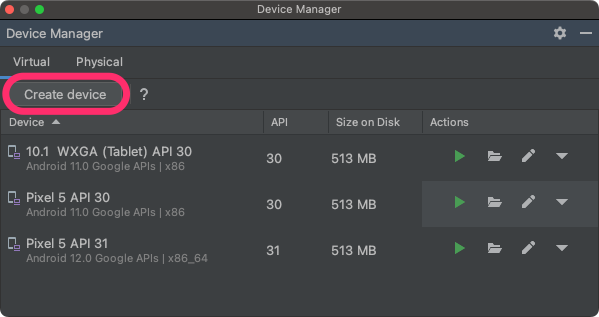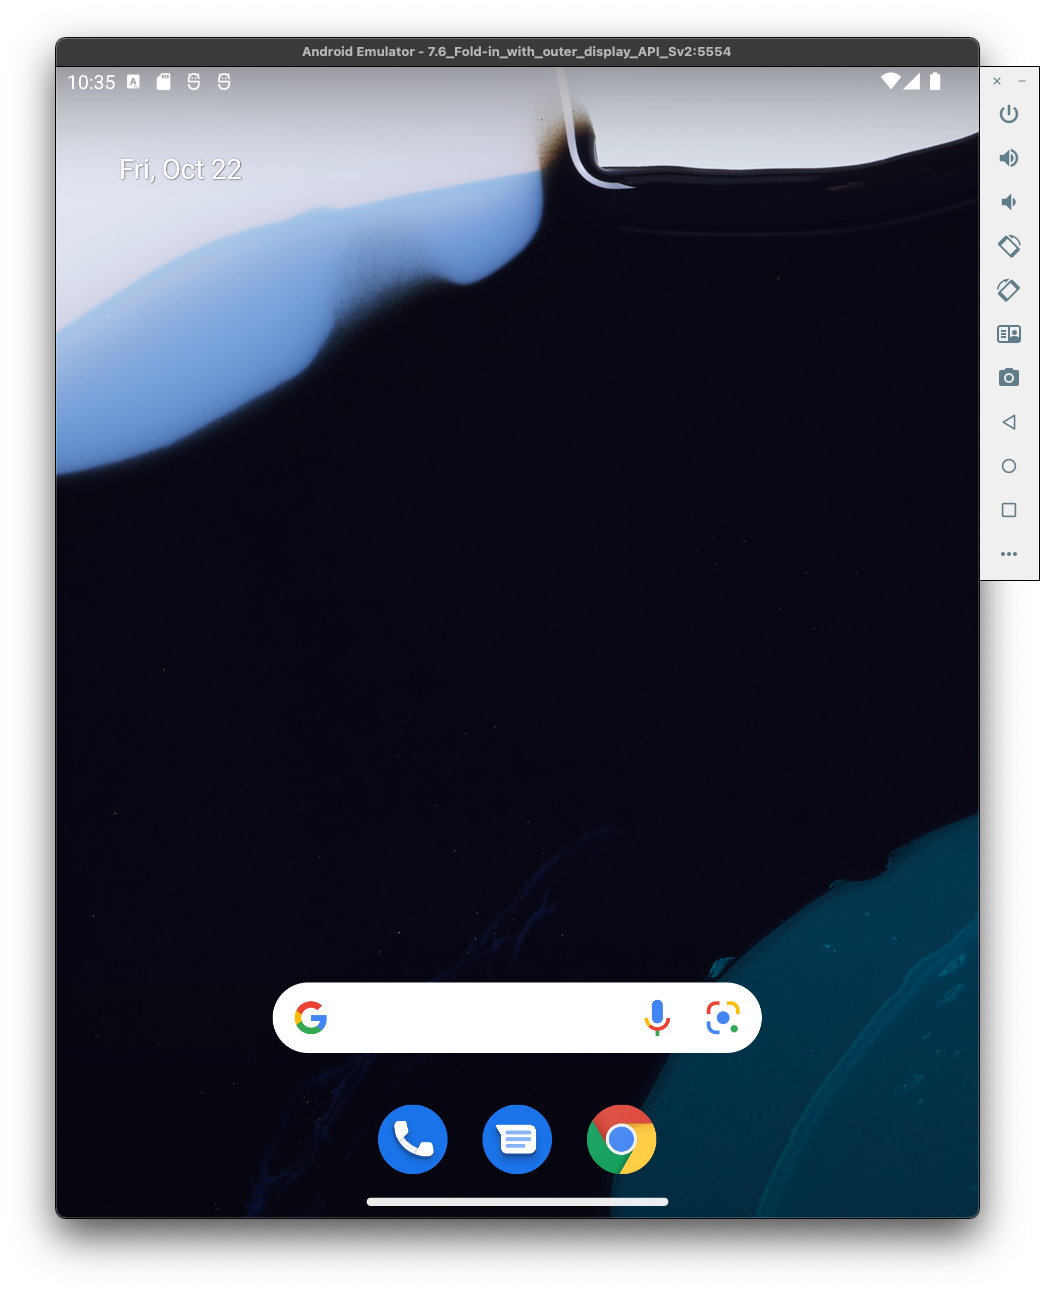
Tablet 카테고리의 Pixel C나 Phone 카테고리의 7.6" Fold-in with outer display와 같이 대형 화면이 있는 기기 정의를 선택하고 Next를 클릭합니다.
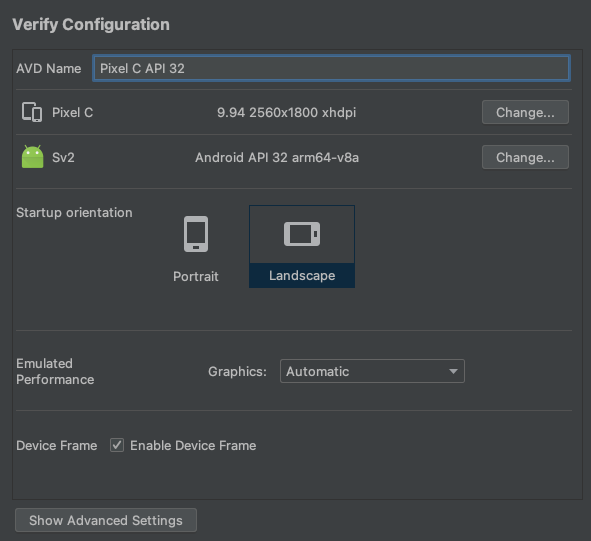
Android API 32라는 12L 시스템 이미지를 찾아 Download를 클릭하여 다운로드합니다. 다운로드가 완료되면 시스템 이미지를 선택하고 Next를 클릭합니다.
가상 기기의 다른 설정을 마무리하고 Finish를 클릭합니다.
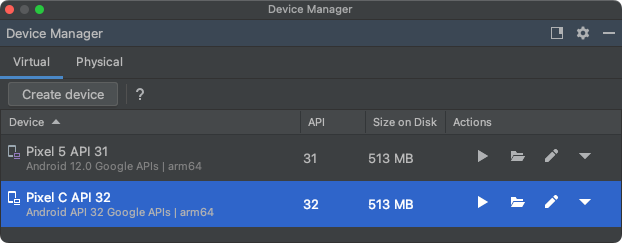
기기 관리도구의 가상 기기 목록으로 돌아간 후 12L 가상 기기를 찾아 Launch를 클릭하여 시작합니다.
이 단계를 반복하여 여러 대형 화면 시나리오에서 앱을 테스트하는 데 사용할 수 있는 다양한 대형 화면 기기 정의를 만듭니다.
크기 조절 가능한 에뮬레이터
12L용으로 구성한 대형 화면 가상 기기 외에도 Android 스튜디오 Chipmunk | 2021.2.1 이상에 포함된 크기 조절 가능한 기기 설정을 사용해 볼 수 있습니다. 12L 시스템 이미지와 함께 크기 조절 가능한 기기 정의를 사용할 때 Android Emulator를 사용하면 네 가지 참조 기기인 스마트폰, 폴더블, 태블릿, 데스크톱 간에 빠르게 전환할 수 있습니다. 폴더블 참조 기기를 사용할 때는 접힌 상태와 펼쳐진 상태 간에 전환할 수도 있습니다.
이러한 유연성 덕분에 같은 참조 기기를 사용하여 디자인 시간에 레이아웃을 쉽게 검증하고 런타임에 동작을 쉽게 테스트할 수 있습니다. 크기 조절 가능한 새 에뮬레이터를 만들려면 Android 스튜디오의 기기 관리도구를 사용하여 새 가상 기기를 만들고 Resizable 기기 정의를 선택합니다.
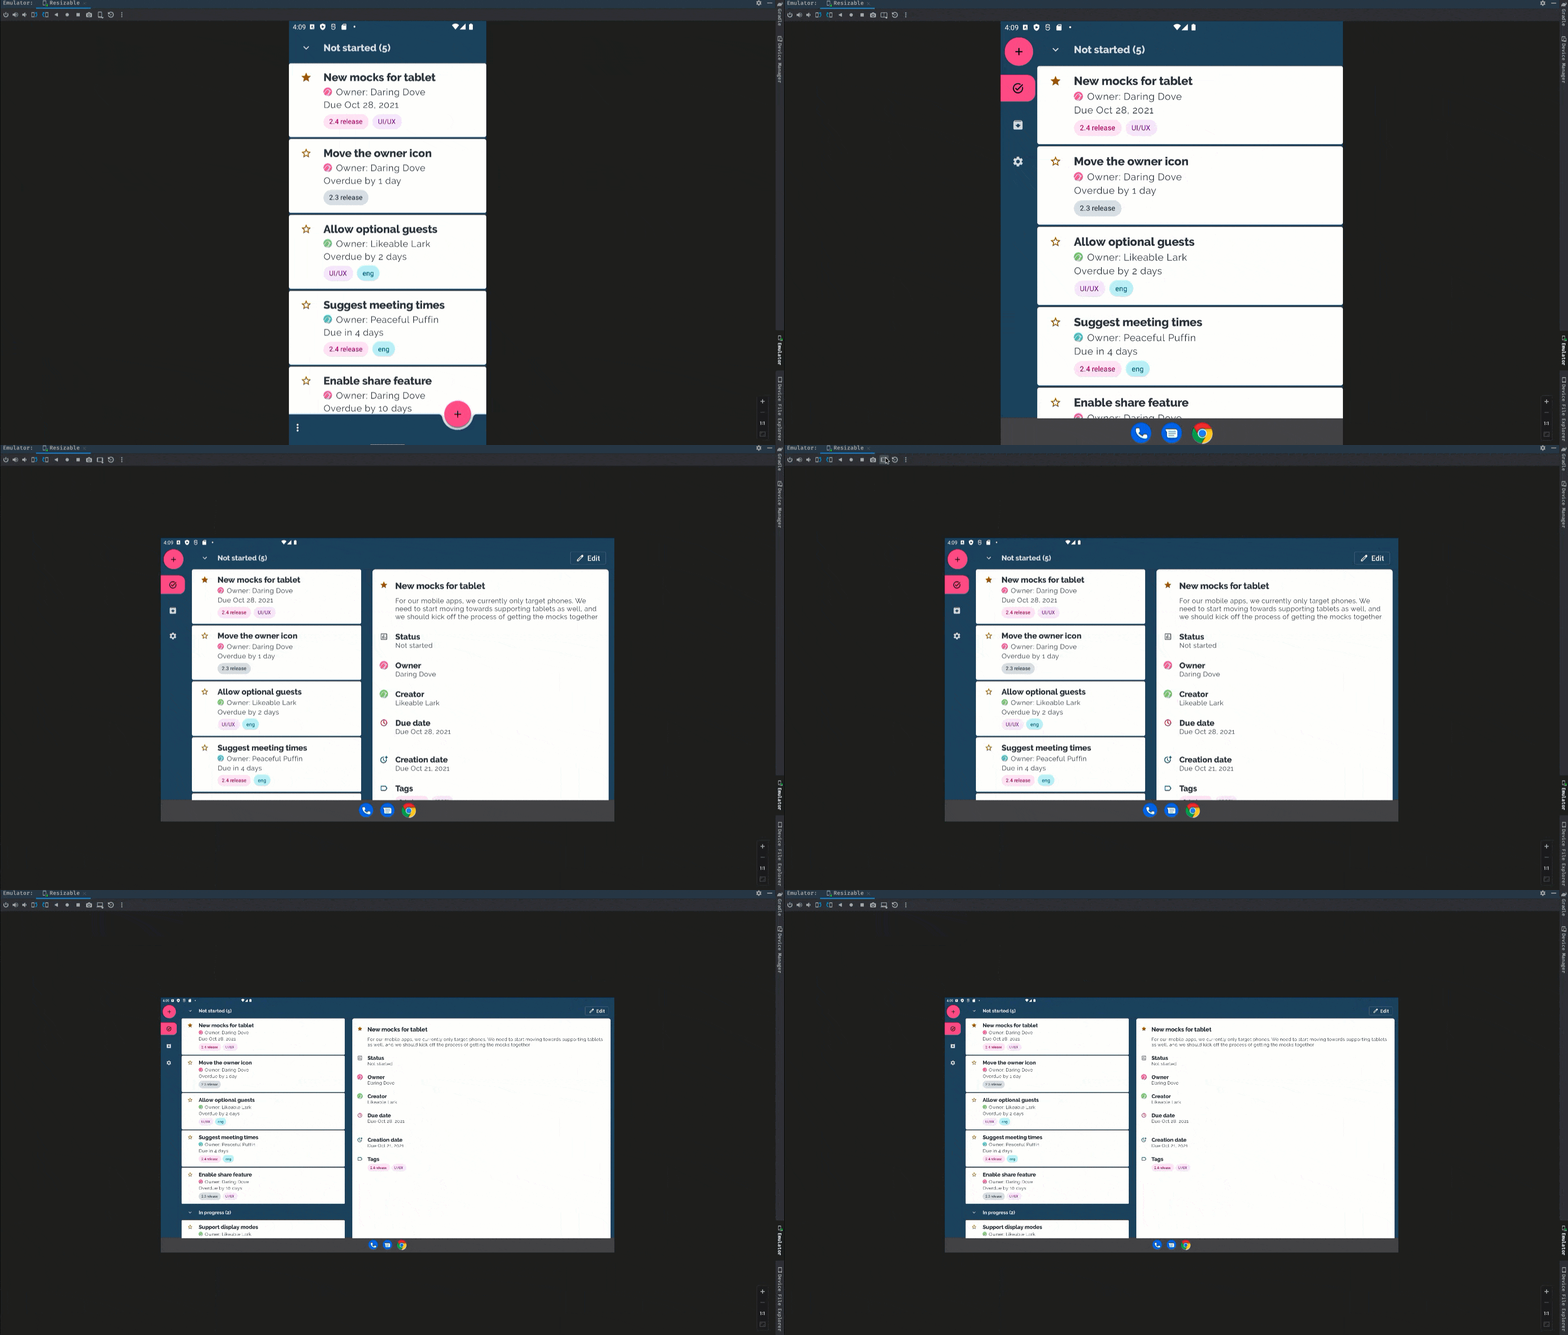
Android Emulator의 크기 조절 가능한 새 기기 정의를 사용하여 다양한 대형 화면 시나리오로 12L을 테스트합니다.
파트너 기기에 12L 다운로드
Google은 Lenovo P12 Pro에서 12L을 사용해 볼 수 있도록 Lenovo와 파트너 관계를 맺고 있습니다.
다른 이유로 기기를 수동 플래시해야 한다면 Pixel 다운로드 페이지에서 내 기기에 맞는 12L 시스템 이미지를 다운로드할 수 있습니다. 기기에 시스템 이미지를 플래시하는 방법에 관한 일반적인 안내를 읽어보세요. 이 방법은 자동화된 테스트 또는 회귀 테스트 등의 테스트를 더 세밀하게 제어해야 할 때 유용할 수 있습니다.
일반 시스템 이미지(GSI) 다운로드
Android 일반 시스템 이미지(GSI) 바이너리는 지원되는 트레블 준수 기기에서 앱을 테스트하고 유효성을 검사하는 용도로 개발자에게 제공됩니다. 개발자는 이러한 이미지를 사용하여 12L이 공식 출시되기 전에 12L의 호환성 문제를 해결할 뿐 아니라 OS 및 프레임워크 관련 문제를 찾아내 보고할 수 있습니다.
기기 요구사항, 플래싱 안내, 기기에 적합한 이미지 유형 선택에 관한 정보는 GSI 문서를 참고하세요. GSI 바이너리를 다운로드할 준비가 되면 GSI 출시 페이지의 Android 12 GSI 섹션을 참고하세요.
이 페이지에 나와 있는 콘텐츠와 코드 샘플에는 콘텐츠 라이선스에서 설명하는 라이선스가 적용됩니다. 자바 및 OpenJDK는 Oracle 및 Oracle 계열사의 상표 또는 등록 상표입니다.
최종 업데이트: 2025-08-27(UTC)
[[["이해하기 쉬움","easyToUnderstand","thumb-up"],["문제가 해결됨","solvedMyProblem","thumb-up"],["기타","otherUp","thumb-up"]],[["필요한 정보가 없음","missingTheInformationINeed","thumb-down"],["너무 복잡함/단계 수가 너무 많음","tooComplicatedTooManySteps","thumb-down"],["오래됨","outOfDate","thumb-down"],["번역 문제","translationIssue","thumb-down"],["샘플/코드 문제","samplesCodeIssue","thumb-down"],["기타","otherDown","thumb-down"]],["최종 업데이트: 2025-08-27(UTC)"],[],[],null,["You can get the 12L feature drop in any of the following ways:\n\n- [Download the 12L emulator image through Android Studio](#set-up-avd)\n- [Get 12L on a partner device](#on_partner)\n- [Get 12L on a Google Pixel device](#on_pixel)\n- [Get a generic system image (GSI)](#on_gsi)\n\nComplete instructions are below. Setup is fast and you can try your apps on a\nvariety of screen sizes.\n\nFor ideas on what to test, see [Get your apps\nready](/about/versions/12/12L/summary#get-apps-ready).\n\nSet up a 12L virtual device\n\nTo set up a 12L virtual device, follow these steps:\n\n1. Install [Android Studio Chipmunk \\| 2021.2.1 or higher](/studio).\n\n2. In Android Studio, click **Tools \\\u003e SDK Manager**.\n\n3. In the **SDK Tools** tab, select the latest version of **Android Emulator** ,\n and click **OK**. This action installs the latest version if it isn't\n already installed.\n\n4. In Android Studio, click **Tools \\\u003e Device Manager** , then click **Create\n device** in the **Device Manager** panel.\n\n5. Select a device definition with a large screen, such as the **Pixel C** in\n the **Tablet** category or the **7.6\" Fold-in with outer display** in the\n **Phone** category, then click **Next**.\n\n6. Find the 12L system image, called **Android API 32** , and click **Download**\n to get it. After the download completes, select this system image and click\n **Next**.\n\n7. Finalize other settings for your virtual device, then click **Finish**.\n\n8. After returning to the list of virtual devices in the Device Manager, find\n your 12L virtual device and click **Launch**\n to\n start it.\n\nRepeat these steps to create a variety of large screen device definitions that\nyou can use to test your app in a variety of large screen scenarios.\n\nResizable emulator\n\nIn addition to large screen virtual devices that you can configure for 12L, you\ncan try the resizable device configuration that's included in Android Studio\nChipmunk \\| 2021.2.1 or higher. When you're using a resizable device definition\nwith a 12L system image, the Android Emulator lets you quickly toggle between\nthe four reference devices: phone, foldable, tablet, and desktop. When using the\nfoldable reference device, you can also toggle between folded and unfolded\nstates.\n\nThis flexibility makes it easier to both validate your layout at design time and\ntest the behavior at runtime, using the same reference devices. To create a new\nresizable emulator, use the Device Manager in Android Studio to create a new\nvirtual device and select the **Resizable** device definition.\nUse the new resizable device definition for the Android Emulator to test 12L with variety of large screen scenarios.\n\nGet 12L on a partner device\n\nWe've partnered with Lenovo to make 12L available for you to try on the Lenovo\nP12 Pro.\n\nYou can learn how to install 12L on the Lenovo P12 Pro by visiting [Lenovo's\n12L preview site](https://dev.lenovo.com/home/puahAndroid12).\n\nLenovo provides 12L updates on its own timeline and provides its own channel for\nreporting issues found on their devices. We highly recommend using Lenovo's\nfeedback channels to report bugs and feedback that are specific to their\ndevices.\n\n\n[Go to Lenovo's preview site](https://dev.lenovo.com/home/puahAndroid12)\n\nGet 12L on a Google Pixel device\n\nIf you have a supported Google Pixel device, you can [check and update your\nAndroid version](https://support.google.com/pixelphone/answer/7680439) to\nreceive 12L over the air.\n\nIn most cases, you don't need to do a full reset of your data to move to 12L,\nbut it's recommended that you back up data before installing 12L on your device.\n\n12L OTAs and downloads are available for the following Google Pixel\ndevices:\n\n- Pixel 3a and 3a XL\n- Pixel 4 and 4 XL\n- Pixel 4a and 4a (5G)\n- Pixel 5 and Pixel 5a\n- Pixel 6 and 6 Pro\n\n| **Note:** Future Android 12 platform updates might not be available for some of these devices if the device's support window has passed.\n\nFlash or manually install a system image\n\nAlternatively, if you'd rather flash your device, we recommend using the\n[Android Flash Tool](https://flash.android.com/release/12.1.0).\n\n\n[Flash 12L to a supported device](https://flash.android.com/release/12.1.0)\n\nIf you need to flash your device manually for some other reason, you can get the\n12L system image for your device on the [Pixel downloads\npage](https://developers.google.com/android/images). Read the general\ninstructions for how to [flash a system\nimage](https://developers.google.com/android/images#instructions) to your\ndevice. This approach can be useful when you need more control over testing,\nsuch as for automated testing or regression testing.\n\nGet a generic system image (GSI)\n\nAndroid [Generic System Image (GSI)](/topic/generic-system-image) binaries\nare available to developers for app testing and validation purposes on supported\nTreble-compliant devices. You can use these images to address any compatibility\nissues with 12L as well as discover and report OS and framework issues\nbefore 12L is officially released.\n\nSee the [GSI documentation](/topic/generic-system-image) for device\nrequirements, flashing instructions, and information on choosing the right image\ntype for your device. Once you're ready to download a GSI binary, see the\n[Android 12 GSI section](/topic/generic-system-image/releases#android-gsi-12) on\nthe GSI releases page.\n\nNext steps\n\nAfter you have a device configured for 12L, here are some things to do next:\n\n- [Learn more about what's in 12L](/about/versions/12/12L/summary)\n- [Learn what to look for and test in your app](/about/versions/12/12L/summary#what-to-test)\n- [Optimize your app for large screens](/large-screens)\n- [Set up the 12L SDK](/about/versions/12/12L/setup-sdk)"]]