
ライブテレビ エクスペリエンスでは、ユーザーがチャンネルを変更し、 表示されなくなります。その他の種類の情報は メッセージ(「自宅では試してはいけません」)、字幕、広告を維持する必要があるかもしれません。他のテレビと同様に そのような情報が、画面上で再生される番組コンテンツに干渉しないようにする必要があります。
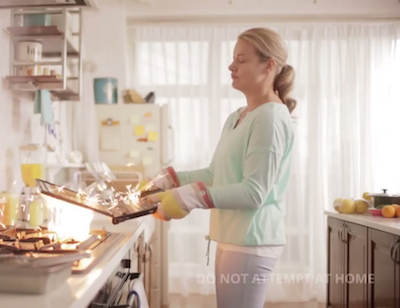
図 1. ライブテレビ アプリ内のオーバーレイ メッセージ。
また、与えられた特定のプログラム コンテンツを紹介すべきかどうかも検討してください。 コンテンツのレーティングや保護者による使用制限の設定、アプリの動作とユーザーへの通知 表示されます。このレッスンでは、TV 入力のユーザーを開発する方法について説明します。 経験を積んでください
<ph type="x-smartling-placeholder"></ph>をお試しください TV 入力サービス サンプルアプリ。
プレーヤーを Surface と統合する
TV 入力では、Surface オブジェクトに動画をレンダリングする必要があります。このオブジェクトは
TvInputService.Session.onSetSurface()
メソッドを呼び出します。再生に MediaPlayer インスタンスを使用する方法の例を次に示します。
Surface オブジェクトのコンテンツ:
Kotlin
override fun onSetSurface(surface: Surface?): Boolean {
    player?.setSurface(surface)
    mSurface = surface
    return true
}

override fun onSetStreamVolume(volume: Float) {
    player?.setVolume(volume, volume)
    mVolume = volume
}
Java
@Override
public boolean onSetSurface(Surface surface) {
    if (player != null) {
        player.setSurface(surface);
    }
    mSurface = surface;
    return true;
}

@Override
public void onSetStreamVolume(float volume) {
    if (player != null) {
        player.setVolume(volume, volume);
    }
    mVolume = volume;
}
同様に、を使用して行う方法は次のとおりです。 ExoPlayer:
Kotlin
override fun onSetSurface(surface: Surface?): Boolean {
    player?.createMessage(videoRenderer)?.apply {
        type = MSG_SET_SURFACE
        payload = surface
        send()
    }
    mSurface = surface
    return true
}

override fun onSetStreamVolume(volume: Float) {
    player?.createMessage(audioRenderer)?.apply {
        type = MSG_SET_VOLUME
        payload = volume
        send()
    }
    mVolume = volume
}
Java
@Override
public boolean onSetSurface(@Nullable Surface surface) {
    if (player != null) {
        player.createMessage(videoRenderer)
                .setType(MSG_SET_SURFACE)
                .setPayload(surface)
                .send();
    }
    mSurface = surface;
    return true;
}

@Override
public void onSetStreamVolume(float volume) {
    if (player != null) {
        player.createMessage(videoRenderer)
                .setType(MSG_SET_VOLUME)
                .setPayload(volume)
                .send();
    }
    mVolume = volume;
}
オーバーレイを使用する
オーバーレイを使用して、字幕、メッセージ、広告、あるいは MHEG-5 データ ブロードキャストを表示します。デフォルトでは、
オーバーレイが無効になります。セッションの作成時に次の呼び出しによって有効にできます。
TvInputService.Session.setOverlayViewEnabled(true),
次に例を示します。
Kotlin
override fun onCreateSession(inputId: String): Session =
        onCreateSessionInternal(inputId).apply {
            setOverlayViewEnabled(true)
            sessions.add(this)
        }
Java
@Override
public final Session onCreateSession(String inputId) {
    BaseTvInputSessionImpl session = onCreateSessionInternal(inputId);
    session.setOverlayViewEnabled(true);
    sessions.add(session);
    return session;
}
オーバーレイの View オブジェクトを使用します。このオブジェクトは、次に示すように TvInputService.Session.onCreateOverlayView() から返されます。
Kotlin
override fun onCreateOverlayView(): View =
        (context.getSystemService(LAYOUT_INFLATER_SERVICE) as LayoutInflater).run {
            inflate(R.layout.overlayview, null).apply {
                subtitleView = findViewById<SubtitleView>(R.id.subtitles).apply {
                    // Configure the subtitle view.
                    val captionStyle: CaptionStyleCompat =
                            CaptionStyleCompat.createFromCaptionStyle(captioningManager.userStyle)
                    setStyle(captionStyle)
                    setFractionalTextSize(captioningManager.fontScale)
                }
            }
        }
Java
@Override
public View onCreateOverlayView() {
    LayoutInflater inflater = (LayoutInflater) getSystemService(LAYOUT_INFLATER_SERVICE);
    View view = inflater.inflate(R.layout.overlayview, null);
    subtitleView = (SubtitleView) view.findViewById(R.id.subtitles);

    // Configure the subtitle view.
    CaptionStyleCompat captionStyle;
    captionStyle = CaptionStyleCompat.createFromCaptionStyle(
            captioningManager.getUserStyle());
    subtitleView.setStyle(captionStyle);
    subtitleView.setFractionalTextSize(captioningManager.fontScale);
    return view;
}
オーバーレイのレイアウト定義は次のようになります。
<?xml version="1.0" encoding="utf-8"?>
<FrameLayout
    xmlns:android="http://schemas.android.com/apk/res/android"
    xmlns:tools="http://schemas.android.com/tools"

    android:layout_width="match_parent"
    android:layout_height="match_parent">

    <com.google.android.exoplayer.text.SubtitleView
        android:id="@+id/subtitles"
        android:layout_width="wrap_content"
        android:layout_height="wrap_content"
        android:layout_gravity="bottom|center_horizontal"
        android:layout_marginLeft="16dp"
        android:layout_marginRight="16dp"
        android:layout_marginBottom="32dp"
        android:visibility="invisible"/>
</FrameLayout>
コンテンツの管理
ユーザーがチャンネルを選択すると、TV 入力によって TvInputService.Session オブジェクト内の onTune() コールバックが処理されます。システムのテレビ
コンテンツのレーティングに応じて、表示されるコンテンツがアプリの保護者による使用制限によって決定されます。
以下のセクションでは、
TvInputService.Session 個の notify メソッドが
システムの TV アプリと通信します。
動画が表示されないようにする
ユーザーがチャンネルを変更したときに、画面に意図しない表示がないようにします。
動画アーティファクトが生成されます。TvInputService.Session.onTune() を呼び出すと、
動画が表示されないようにするには、TvInputService.Session.notifyVideoUnavailable() を呼び出します。
そして、次のように VIDEO_UNAVAILABLE_REASON_TUNING 定数を渡します。
表示されます。
Kotlin
override fun onTune(channelUri: Uri): Boolean {
    subtitleView?.visibility = View.INVISIBLE
    notifyVideoUnavailable(TvInputManager.VIDEO_UNAVAILABLE_REASON_TUNING)
    unblockedRatingSet.clear()

    dbHandler.apply {
        removeCallbacks(playCurrentProgramRunnable)
        playCurrentProgramRunnable = PlayCurrentProgramRunnable(channelUri)
        post(playCurrentProgramRunnable)
    }
    return true
}
Java
@Override
public boolean onTune(Uri channelUri) {
    if (subtitleView != null) {
        subtitleView.setVisibility(View.INVISIBLE);
    }
    notifyVideoUnavailable(TvInputManager.VIDEO_UNAVAILABLE_REASON_TUNING);
    unblockedRatingSet.clear();

    dbHandler.removeCallbacks(playCurrentProgramRunnable);
    playCurrentProgramRunnable = new PlayCurrentProgramRunnable(channelUri);
    dbHandler.post(playCurrentProgramRunnable);
    return true;
}
次に、コンテンツが Surface にレンダリングされたときに、次の関数を呼び出します。
TvInputService.Session.notifyVideoAvailable()
動画を表示できるようにするには、次のようにします。
Kotlin
fun onRenderedFirstFrame(surface:Surface) {
    firstFrameDrawn = true
    notifyVideoAvailable()
}
Java
@Override
public void onRenderedFirstFrame(Surface surface) {
    firstFrameDrawn = true;
    notifyVideoAvailable();
}
この遷移は一瞬だけですが、空白の画面を表示すると、 映像で不自然なブリップやジッターを点滅させるより、視覚的に優れています。
処理の詳細については、プレーヤーを Surface と統合するもご覧ください。
Surface を指定して、動画をレンダリングします。
保護者による使用制限を考慮する
保護者による使用制限とコンテンツのレーティングによって特定のコンテンツがブロックされているかどうかを確認するには、
TvInputManager クラスメソッド、isParentalControlsEnabled()
および isRatingBlocked(android.media.tv.TvContentRating)。マイページ
コンテンツの TvContentRating が
現在許可されているコンテンツのレーティングのセットです。次の例では、このような制限を考慮した処理を行っています。
Kotlin
private fun checkContentBlockNeeded() {
    currentContentRating?.also { rating ->
        if (!tvInputManager.isParentalControlsEnabled
                || !tvInputManager.isRatingBlocked(rating)
                || unblockedRatingSet.contains(rating)) {
            // Content rating is changed so we don't need to block anymore.
            // Unblock content here explicitly to resume playback.
            unblockContent(null)
            return
        }
    }
    lastBlockedRating = currentContentRating
    player?.run {
        // Children restricted content might be blocked by TV app as well,
        // but TIF should do its best not to show any single frame of blocked content.
        releasePlayer()
    }

    notifyContentBlocked(currentContentRating)
}
Java
private void checkContentBlockNeeded() {
    if (currentContentRating == null || !tvInputManager.isParentalControlsEnabled()
            || !tvInputManager.isRatingBlocked(currentContentRating)
            || unblockedRatingSet.contains(currentContentRating)) {
        // Content rating is changed so we don't need to block anymore.
        // Unblock content here explicitly to resume playback.
        unblockContent(null);
        return;
    }

    lastBlockedRating = currentContentRating;
    if (player != null) {
        // Children restricted content might be blocked by TV app as well,
        // but TIF should do its best not to show any single frame of blocked content.
        releasePlayer();
    }

    notifyContentBlocked(currentContentRating);
}
コンテンツをブロックする必要があるかどうかを判断したら、システムのテレビに通知します。
呼び出すことで、
TvInputService.Session メソッド notifyContentAllowed()
または
notifyContentBlocked()
必要があります。
TvContentRating クラスを使用して、システム定義の文字列を
COLUMN_CONTENT_RATING を
TvContentRating.createRating()
メソッドを呼び出します。
Kotlin
val rating = TvContentRating.createRating(
        "com.android.tv",
        "US_TV",
        "US_TV_PG",
        "US_TV_D", "US_TV_L"
)
Java
TvContentRating rating = TvContentRating.createRating(
    "com.android.tv",
    "US_TV",
    "US_TV_PG",
    "US_TV_D", "US_TV_L");
トラック選択を処理する
TvTrackInfo クラスは、次のようなメディア トラックに関する情報を保持します。
トラックタイプ(動画、音声、字幕)として指定できます。
初めてテレビ入力セッションがトラック情報を取得する際は、
TvInputService.Session.notifyTracksChanged() は、システム TV アプリを更新するすべてのトラックのリストに置き換えます。タイミング
トラック情報の変更です。
notifyTracksChanged()
もう一度システムを更新します。
システム TV アプリは、ユーザーが特定のトラックを選択するためのインターフェースを提供する(複数のトラックがある場合)
特定のトラックタイプでトラックが利用可能な場合たとえば さまざまな言語の字幕などですテレビ
入力がトレーニングに
onSelectTrack()
システムテレビアプリから
notifyTrackSelected()
必要があります。null が
がトラック ID として渡されると、トラックの選択が解除されます。
Kotlin
override fun onSelectTrack(type: Int, trackId: String?): Boolean =
        mPlayer?.let { player ->
            if (type == TvTrackInfo.TYPE_SUBTITLE) {
                if (!captionEnabled && trackId != null) return false
                selectedSubtitleTrackId = trackId
                subtitleView.visibility = if (trackId == null) View.INVISIBLE else View.VISIBLE
            }
            player.trackInfo.indexOfFirst { it.trackType == type }.let { trackIndex ->
                if( trackIndex >= 0) {
                    player.selectTrack(trackIndex)
                    notifyTrackSelected(type, trackId)
                    true
                } else false
            }
        } ?: false
Java
@Override
public boolean onSelectTrack(int type, String trackId) {
    if (player != null) {
        if (type == TvTrackInfo.TYPE_SUBTITLE) {
            if (!captionEnabled && trackId != null) {
                return false;
            }
            selectedSubtitleTrackId = trackId;
            if (trackId == null) {
                subtitleView.setVisibility(View.INVISIBLE);
            }
        }
        int trackIndex = -1;
        MediaPlayer.TrackInfo[] trackInfos = player.getTrackInfo();
        for (int index = 0; index < trackInfos.length; index++) {
            MediaPlayer.TrackInfo trackInfo = trackInfos[index];
            if (trackInfo.getTrackType() == type) {
                trackIndex = index;
                break;
            }
        }
        if (trackIndex >= 0) {
            player.selectTrack(trackIndex);
            notifyTrackSelected(type, trackId);
            return true;
        }
    }
    return false;
}