
Wenn Nutzer Android-Apps auf einem Chromebook ausführen, haben sie Zugriff auf das riesige Android-Ökosystem. Android-Entwickler haben so die Möglichkeit, ChromeOS-Nutzer zu erreichen.
ChromeOS bietet Android-Entwicklern die Tools, mit denen sie ihre Apps auf Chromebooks bereitstellen und testen können. Um die Nutzerfreundlichkeit zu verbessern, sollten Sie Ihre Apps auf verschiedenen Formfaktoren testen.
Unabhängig davon, ob Sie Ihre Android-App direkt von ChromeOS aus (mit Android Studio auf Ihrem Chromebook) oder von einem anderen Gerät aus bereitstellen, können Sie Android Debug Bridge verwenden, um Ihre App bereitzustellen und verschiedene Interaktionen mit Chromebooks zu debuggen.
ADB-Fehlerbehebung aktivieren
Bisher war die Verwendung von ADB auf einem Chromebook nur im Entwicklermodus möglich. Seit Chrome 81 können Entwickler ihre Geräte im normalen Modus lassen und trotzdem Apps, die sie direkt in ChromeOS entwickeln, bereitstellen. So gehts:
Gehen Sie zu den Einstellungen und aktivieren Sie Linux, falls Sie das noch nicht getan haben.
Abbildung 1. Aktivieren von Linux in den ChromeOS-Einstellungen Sobald Linux verfügbar ist, öffnen Sie die Linux-Einstellungen.
Öffnen Sie die Option Android-Apps entwickeln.
Aktivieren Sie ADB-Fehlerbehebung aktivieren. Das Chromebook wird neu gestartet.
Abbildung 2. ADB-Fehlerbehebung in den Linux-Einstellungen aktivieren Nach dem Neustart des Chromebooks wird eine Meldung angezeigt, dass möglicherweise Anwendungen auf dem Gerät vorhanden sind, die nicht aus dem App-Store heruntergeladen wurden.

Abbildung 3. Hinweis zu Apps, die nicht aus dem Play Store stammen, nach dem Aktivieren von ADB Mit ADB können Sie jetzt Apps auf Ihrem Chromebook bereitstellen, Debugging-Befehle ausführen und direkt mit dem Gerät interagieren.
Damit Ihre Android-App auf verschiedenen Chromebooks und Formfaktoren gut funktioniert, empfiehlt Google, sie auf den folgenden Geräten zu testen:
- Ein ARM-basiertes Chromebook
- Ein x86-basiertes Chromebook
- Ein Gerät mit Touchscreen und eines ohne
- Ein Convertible, das sich von einem Laptop in ein Tablet verwandeln lässt
- Ein Gerät mit einem Eingabestift
Bereitstellung über ChromeOS
Nachdem Sie das ADB-Debugging aktiviert haben, können Sie eine Android-App mit Android Studio direkt auf Ihr ChromeOS-Gerät laden. Wenn Sie ein Android-Paketkit (APK) haben, können Sie es über das Terminal laden.
Mit Android Studio bereitstellen
Nachdem Sie Android Studio und ADB eingerichtet haben, können Sie Ihre Apps direkt aus Android Studio in den Android-Container des Chromebooks übertragen. Das Chromebook wird im Gerätemenü als Option angezeigt:

Wenn Sie Ihre App auf ein Chromebook übertragen, wird das ADB-Autorisierungsdialogfeld angezeigt. Nachdem Sie die Autorisierung erteilt haben, wird Ihre Anwendung in einem neuen Fenster gestartet.
Sie können die App jetzt auf dem Chromebook bereitstellen und sie testen und debuggen.
Mit dem Terminal bereitstellen
So stellen Sie Ihre App über das Terminal auf einem Chromebook bereit:
Installieren Sie ADB bei Bedarf mit dem folgenden Befehl:
sudo apt install adbStellen Sie mit dem folgenden Befehl eine Verbindung zum Gerät her:
adb connect arcEin Autorisierungsdialogfeld für das USB-Debugging wird angezeigt. So erteilen Sie die Autorisierung:
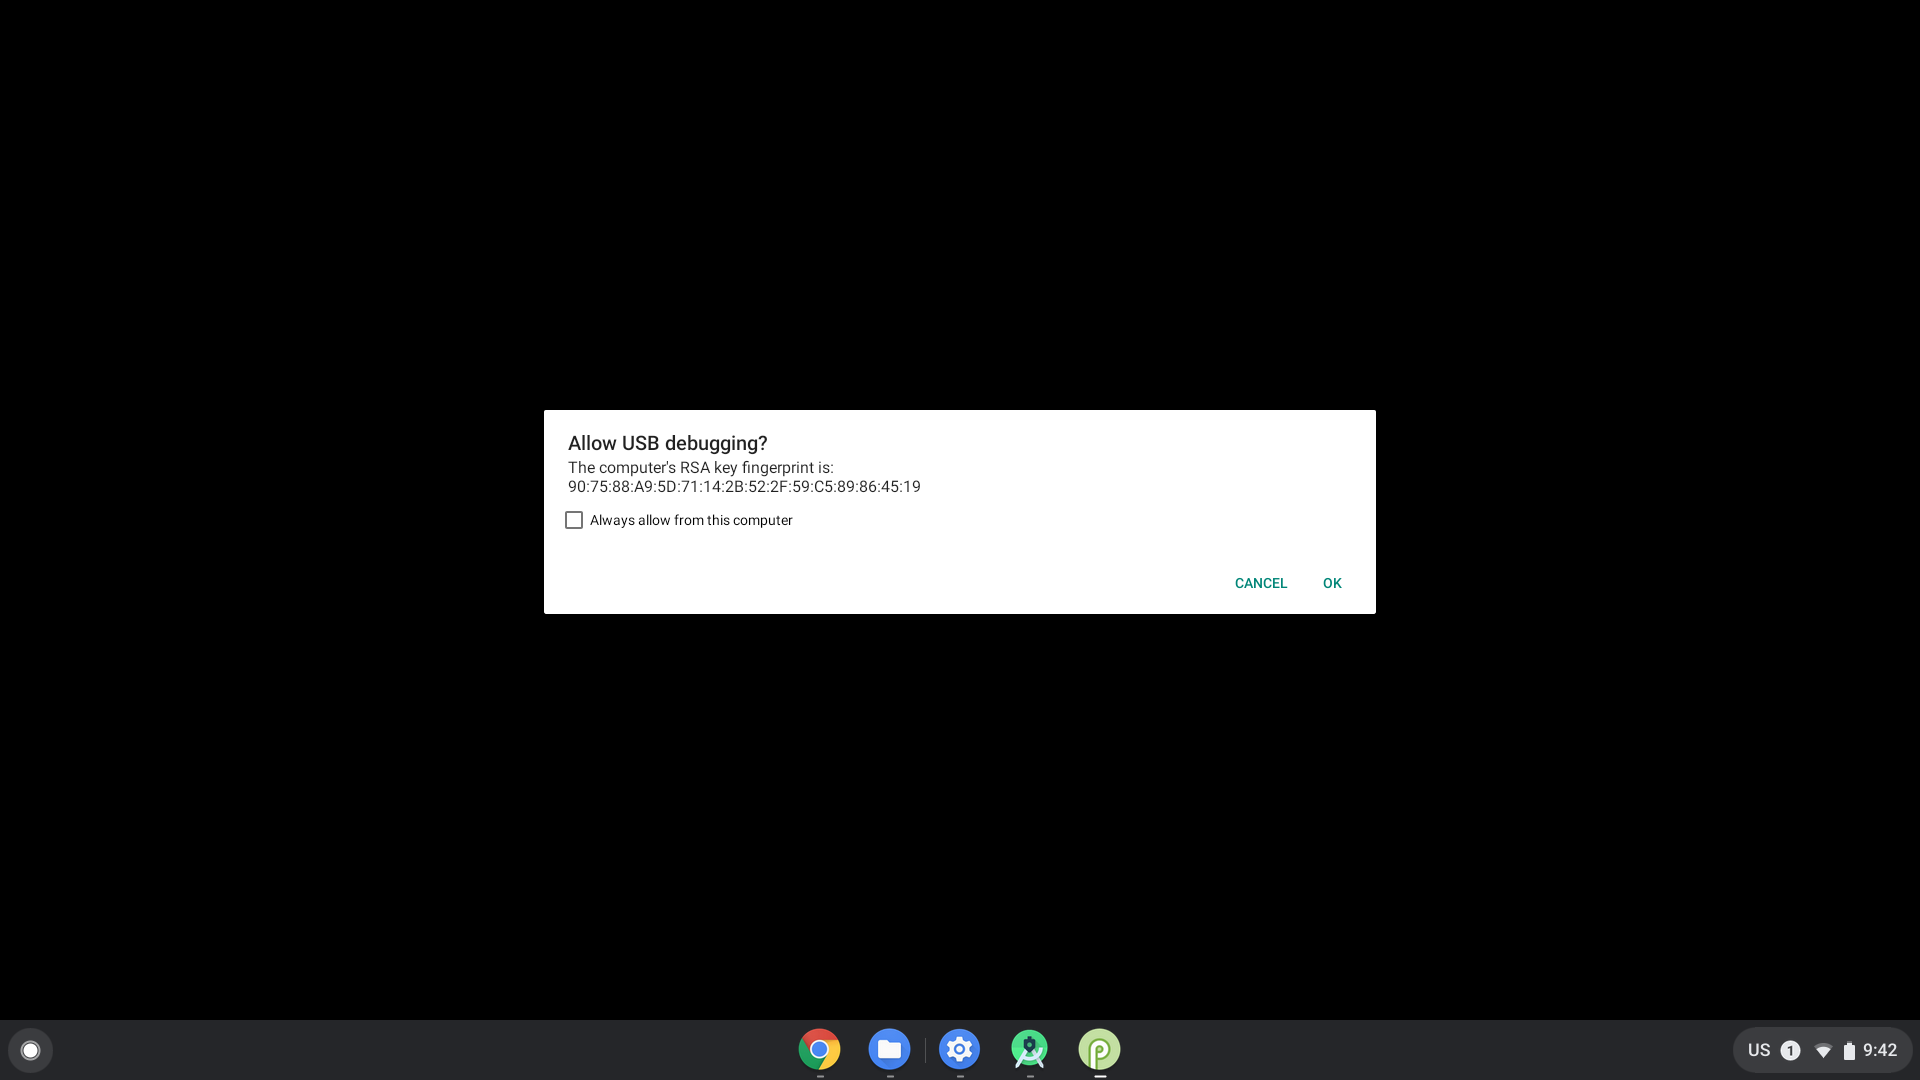
Abbildung 6: Dialogfeld zur Autorisierung für USB-Debugging. Installieren Sie Ihre App über das Terminal mit dem folgenden Befehl:
adb install [path to your APK]
Von einem anderen Gerät aus bereitstellen
Wenn Sie die oben beschriebene Methode nicht verwenden können und Ihre App von einem anderen Gerät aus übertragen müssen, können Sie das Gerät über eine USB-Verbindung oder eine Netzwerkadresse mit ADB verbinden.
Über ein Netzwerk mit ADB verbinden
So stellen Sie eine Verbindung zu ADB über ein Netzwerk her:
Achten Sie darauf, dass Sie die ADB-Fehlerbehebung aktiviert haben.
So ermitteln Sie die IP-Adresse Ihres Chromebooks:
- Klicken Sie rechts unten auf dem Bildschirm auf die Uhr.
- Klicken Sie auf das Zahnradsymbol.
- Klicken Sie auf den Netzwerktyp, mit dem Sie verbunden sind, z. B. WLAN oder mobile Daten, und dann auf den Namen des Netzwerks.
- Notieren Sie sich die IP-Adresse.
So stellen Sie eine Verbindung zu Ihrem Chromebook her:
Kehren Sie zu Ihrem Entwicklungscomputer zurück und stellen Sie mit ADB eine Verbindung zu Ihrem Chromebook über seine IP-Adresse her:
adb connect <ip_address>Klicken Sie auf Ihrem Chromebook auf Zulassen, wenn Sie aufgefordert werden, den Debugger zuzulassen. Ihre ADB-Sitzung wurde eingerichtet.
Fehlerbehebung beim ADB-Debugging über ein Netzwerk
Manchmal wird das ADB-Gerät als offline angezeigt, obwohl alles richtig angeschlossen ist. Führen Sie in diesem Fall die folgenden Schritte aus, um das Problem zu beheben:
- Deaktiviere ADB-Fehlerbehebung in den Entwickleroptionen.
- Führen Sie in einem Terminalfenster
adb kill-serveraus. - Aktivieren Sie die Option ADB-Fehlerbehebung wieder.
- Versuchen Sie,
adb connectin einem Terminalfenster auszuführen. - Klicken Sie auf Zulassen, wenn Sie aufgefordert werden, das Debugging zuzulassen. Ihre ADB-Sitzung wird eingerichtet.