
The Android Gradle plugin (AGP) Upgrade Assistant is a tool in Android Studio that helps you upgrade the version of AGP used by your project.
There are frequent releases for AGP changes related to new features for configuring your build, new APIs for use by other Gradle plugins, and refinements to the integration of the project build with Android Studio. Upgrading the version of AGP used by your project lets you benefit from the latest features.
For more information about recommended project structure for the Upgrade Assistant, see Setup on this page.
AGP Upgrade Assistant use cases
The AGP Upgrade Assistant guides you through the changes needed to upgrade AGP versions. The following are the most common use cases for the Upgrade Assistant:
Syntax changes: The Upgrade Assistant attempts to translate your build files for an older version of AGP to those needed for a newer version of AGP. As AGP is developed, build files are updated to support interfaces as they are replaced, deprecated, or unsupported over time.
Compatibility requirements between AGP and Gradle: The Upgrade Assistant is aware of the compatibility requirements between AGP and Gradle and helps ensure that you are using the version of Gradle required for your version of AGP.
Compatibility requirements between AGP and third-party Gradle plugins: The Upgrade Assistant is aware of the compatibility requirements between AGP and some third-party Gradle plugins and helps ensure that you are using the versions of third-party Gradle plugins that are required for your version of AGP.
In general, the Upgrade Assistant makes it easier to update build files and understand related error messages after an AGP upgrade. The Upgrade Assistant also explains why the proposed changes are necessary.
How to use the AGP Upgrade Assistant
To use the Upgrade Assistant, make sure your project structure accommodates the tool, and then run it from Android Studio, as described in Run the Upgrade Assistant.
Set up your project
Before you run the Upgrade Assistant, make sure your project is properly formatted and backed up. To ensure the AGP Upgrade Assistant is set up correctly, read the following sections.
Structure your project using the Gradle build files and domain-specific language
To get the best use out of the AGP Upgrade Assistant, do the following:
- Configure the build using the Gradle build files: The Upgrade Assistant
relies on static analysis of the Gradle build files. To get the most out of the
Upgrade Assistant, configure your build using these build files. Use
Gradle Version Catalogs
to refer to dependencies and plugins defined in a
libs.versions.tomlfile in thegradlesubdirectory of your project.
- Use the declarative build domain-specific language: Gradle build files are expressed in Groovy or Kotlin. However, the more declarative the expression of the project configuration, the more likely that the Upgrade Assistant successfully finds all the places that need adjustment for an upgrade.
Even if a project conforms to these limitations, the Upgrade Assistant might still fail to perform a clean upgrade. See Troubleshoot errors for guidance on how to resolve or report bugs.
Back up your project
Before you use the Upgrade Assistant, we recommend that your project has no uncommitted changes, as seen by your version control system. If you're not using version control, use a backup of a last known good version at this point.
After the Upgrade Assistant runs and the project is successfully built and tested, you can commit the new version of the project to your version control system.
Run the Upgrade Assistant
To run the Upgrade Assistant, follow these steps:
To launch the Upgrade Assistant, navigate to Tools > AGP Upgrade Assistant or click on the notification prompt, as shown in figure 1.
The tool window that appears displays the details of the default upgrade including the project's current version of AGP and the latest version supported by this version of Android Studio.
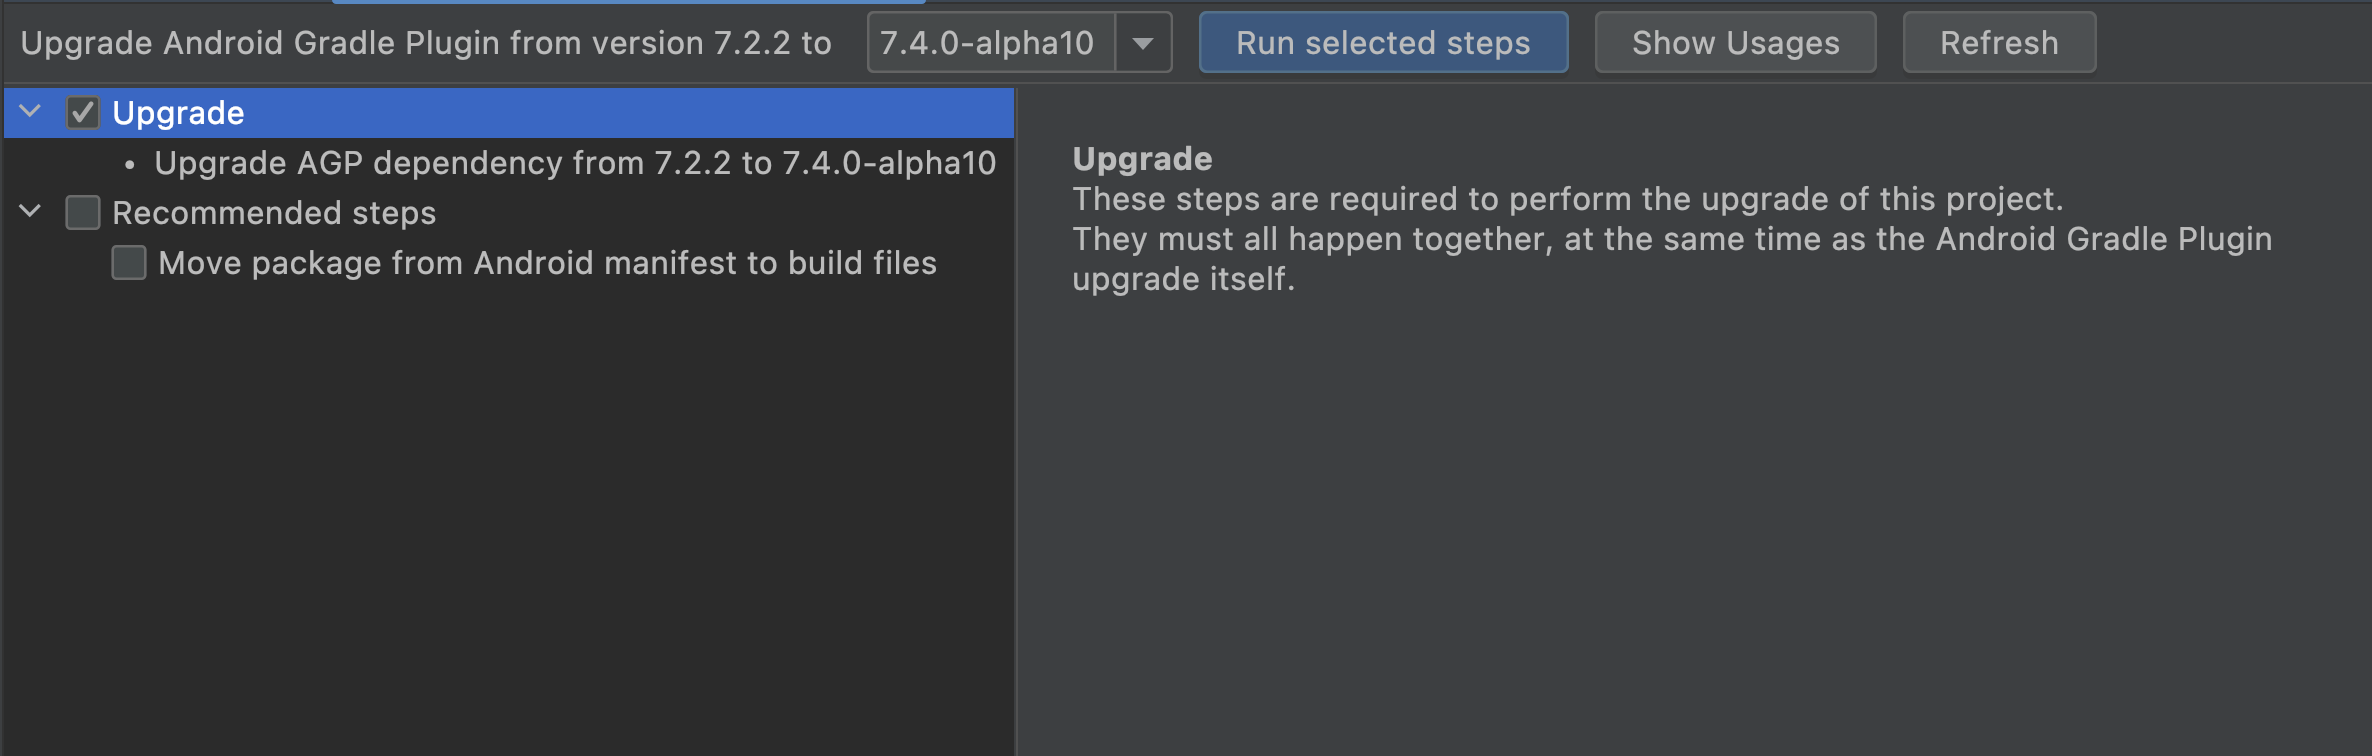
Figure 1. The AGP Upgrade Assistant tool window when launched with the notification prompt. Check the required and recommended steps.
In the left-hand panel, the tree with checkboxes details individual steps in the upgrade, categorized by whether they are required or recommended to update and whether they are prerequisites of other steps. Select individual items in the tree to display more details about each step in the main panel.
To run the upgrade, select the required and desired steps and click Run selected steps.
The Upgrade Assistant changes the project build files and attempts to sync the new project build with Android Studio. This may take a while if you have numerous modules, as new versions of plugins and libraries may need to be downloaded.
Review the post-upgrade report. This report describes the steps that were completed and if the upgrade was successful or unsuccessful. It also includes an action to revert changes that were made by the upgrade assistant if there are issues building or testing the project after the upgrade.
Once the project has successfully synced with Android Studio, build the project and run test suites to verify that the upgrade operation has not changed any functionality.
Once you have verified that your project is in a good state, commit the new version of your project to your version control system.
Troubleshoot errors
If the Upgrade Assistant suggests an upgrade but the upgrade fails, this is typically the result of making changes to the build files, resulting in a sync failure. Follow these steps to help isolate and fix the error:
First, inspect the error that led to the sync failure. Sometimes, the error has a clear cause, which you can address in the project's build files.
If the error message is not clear, or it's not obvious what is causing the problem, then return the project to its original state to break the upgrade down into smaller steps. Restore the original state from version control, or from backups, and make sure the project is in its original state and synced with Android Studio.
Investigate the error by following two kinds of upgrade breakdowns:
Upgrade to a different version of AGP that is not the latest version. If the upgrade that went wrong was an upgrade of a large number of versions, the best way to isolate the problem is to do a series of smaller upgrades, from version to version, to find the first upgrade that triggers the problem.
Within an upgrade, do individual steps one at a time. Once you determine the upgrade that triggers the problem, it might be possible to turn individual steps in the upgrade off. If it's possible, try doing each step one at a time to find which of those steps is responsible for the error. If you can't find the step responsible, check the release notes of any other Gradle plugins you are using for compatibility issues with Gradle or AGP. Sometimes, a new release addresses the use of deprecated or internal APIs.
Report a bug. Sometimes all the preparatory steps and sync succeed but the final upgrade step still fails. In this case, please report a bug. Even if you succeed in fixing the error yourself, report the original failure to the bug tracker, so that the problem can be addressed by the development team.