
لإنشاء وحدة Kotlin Multiplatform (KMP) ضمن مشروع Android، استخدِم نموذج وحدة Kotlin Multiplatform المشتركة المتوفّر في Android Studio Meerkat و"المكوّن الإضافي لنظام Gradle المتوافق مع Android" الإصدار 8.8.0 والإصدارات الأحدث.
يُنشئ نموذج الوحدة وحدة جديدة تلقائيًا باستخدام الحد الأدنى من الإعدادات التي تستهدف منصّتَي Android وiOS.
إعداد وحدة KMP المشتركة
لإنشاء وحدة KMP مشترَكة، اتّبِع الخطوات التالية:
- اختَر ملف > جديد > وحدة جديدة.
- اختَر نموذج وحدة مشترَكة لنظام التشغيل Kotlin المتوافق مع أنظمة التشغيل المتعددة في لوحة النماذج:
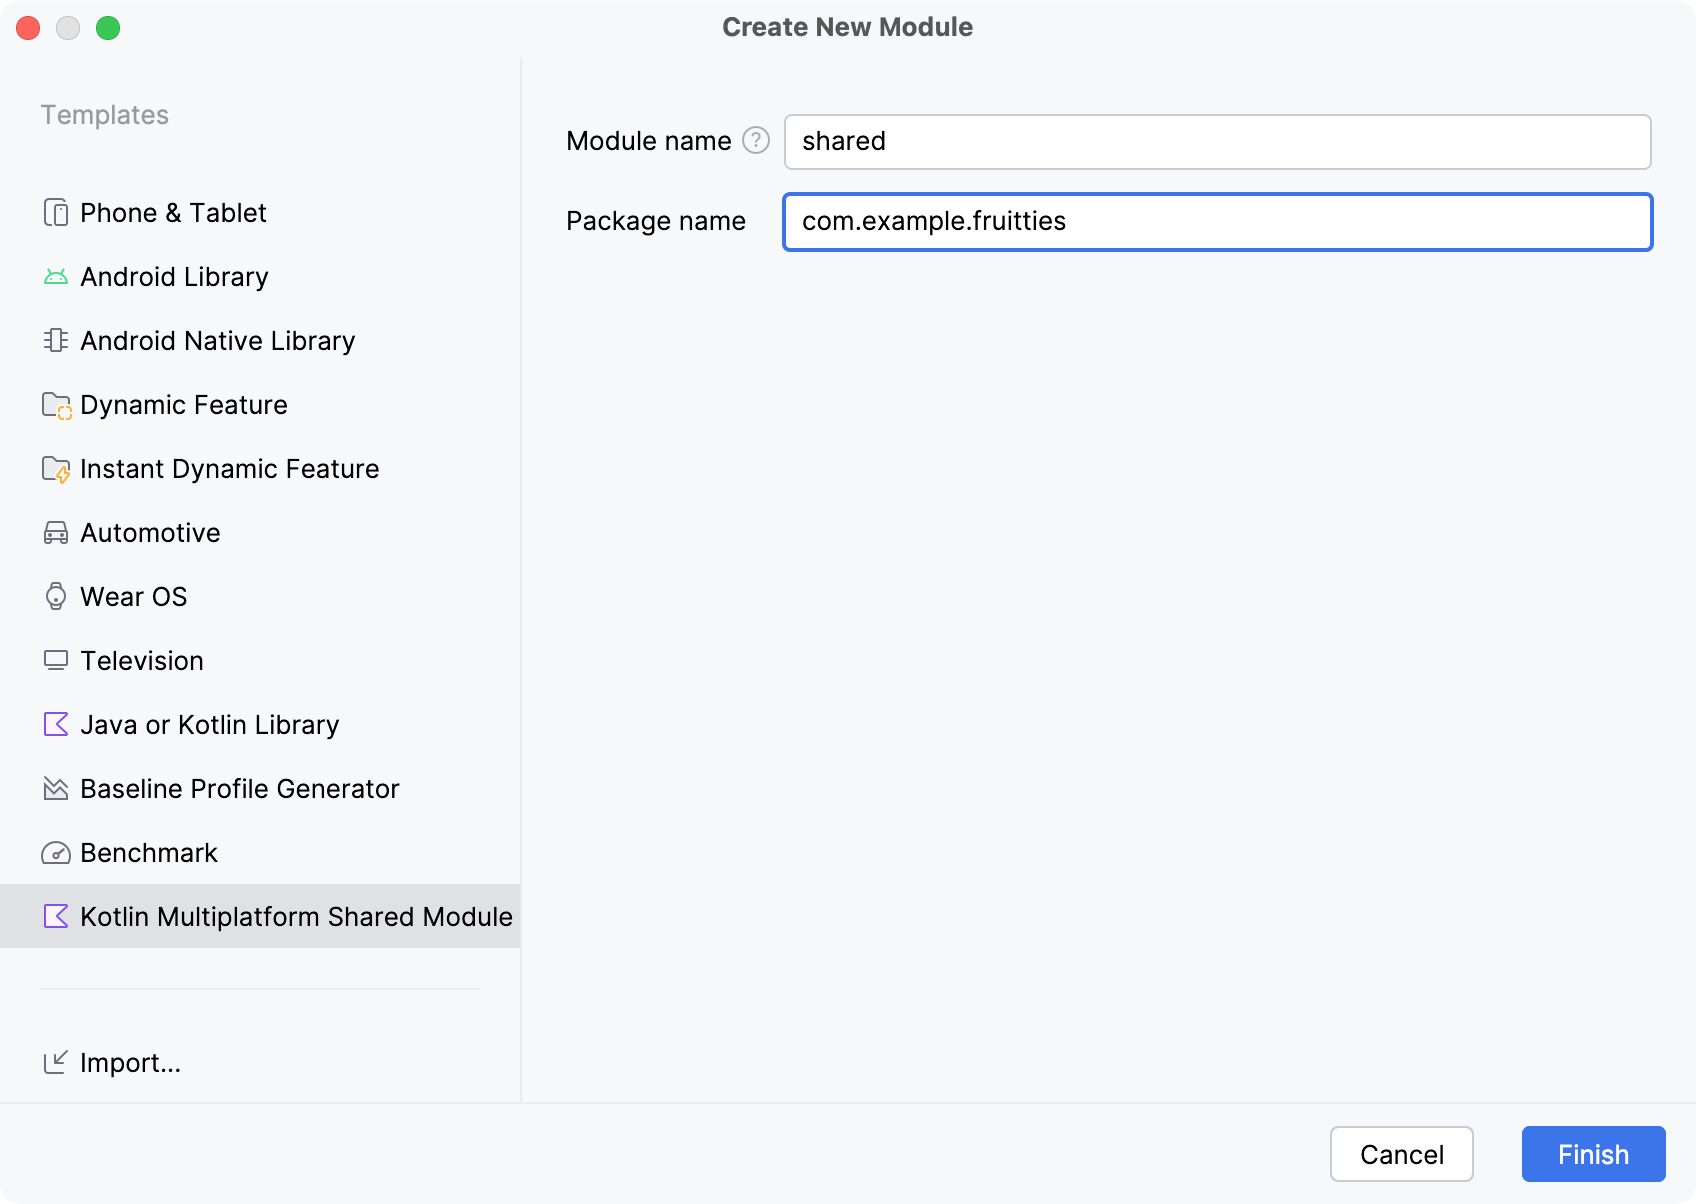
في ما يلي الحقول الواردة في النموذج:
- اسم الوحدة: يحدِّد اسم وحدة Gradle، بالإضافة إلى اسم إطار عمل iOS (يمكن تغييره لاحقًا).
- اسم الحزمة: يحدِّد اسم الحزمة للملفات في هذه الوحدة.
- انقر على إنهاء واسمح لـ Gradle بالمزامنة مع المشروع. قد يُطلب منك أيضًا إضافة ملفات الوحدة التي تم إنشاؤها حديثًا إلى وحدة التحكّم في المصدر.
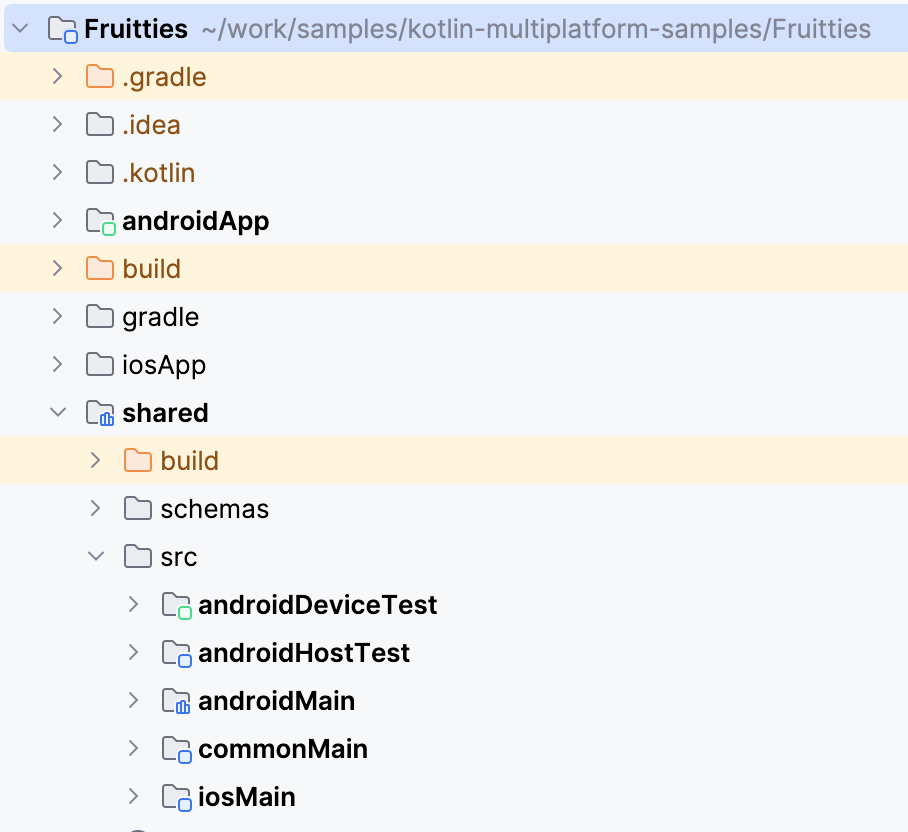
بعد اكتمال العملية، يعرض عرض المشروع في "استوديو Android" الوحدة المشترَكة الجديدة بالإضافة إلى مجموعة مصادر لكل نظام أساسي.
ربط الوحدة المشترَكة بتطبيق Android
لا يضيف معالج الوحدات الوحدة التي تم إنشاؤها حديثًا كعنصر تابع لأي وحدة حالية. في الخطوة التالية، عليك ربط الوحدة المشترَكة بإحدى وحدات Gradle الحالية تمامًا مثل متطلّبات Android الأخرى.
dependencies {
    ...
    implementation(project(":shared"))
}
بعد تفعيل الميزة، يمكنك الوصول إلى الرمز كالمعتاد. من تطبيق Android، يمكنك الوصول إلى الرمز المتوفّر في androidMain أو في commonMain.
لمزيد من المعلومات عن بنية مشروع Kotlin Multiplatform، اطّلِع على أساسيات بنية مشروع Kotlin Multiplatform.
إعداد الوحدة المشتركة في تطبيق iOS
لا يمكن لغة Swift استخدام وحدات Kotlin مباشرةً، وتتطلّب إنشاء إطار عمل ثنائي مُجمَّع.
يضبط نموذج الوحدة الجديد في Android Studio الوحدة المشترَكة لمحاولة
إنشاء إطار عمل لكل بنية من بنى iOS. يمكنك العثور على الرمز التالي في ملف build.gradle.kts الخاص بالوحدة المشترَكة:
val xcfName = "sharedKit"

iosX64 {
  binaries.framework {
    baseName = xcfName
  }
}

iosArm64 {
  binaries.framework {
    baseName = xcfName
  }
}

iosSimulatorArm64 {
  binaries.framework {
    baseName = xcfName
  }
}
راجِع هيكل المشروع الهرمي للحصول على معلومات عن تحديد أنواع البنية الأخرى.
ربط المكتبة المشتركة في مشروع iOS
لتفعيل الوصول إلى الرمز المشترَك من مشروع iOS، أضِف مرحلة نص برمجي ل إنشاء إطار عمل Kotlin قبل تجميع مصادر Swift:
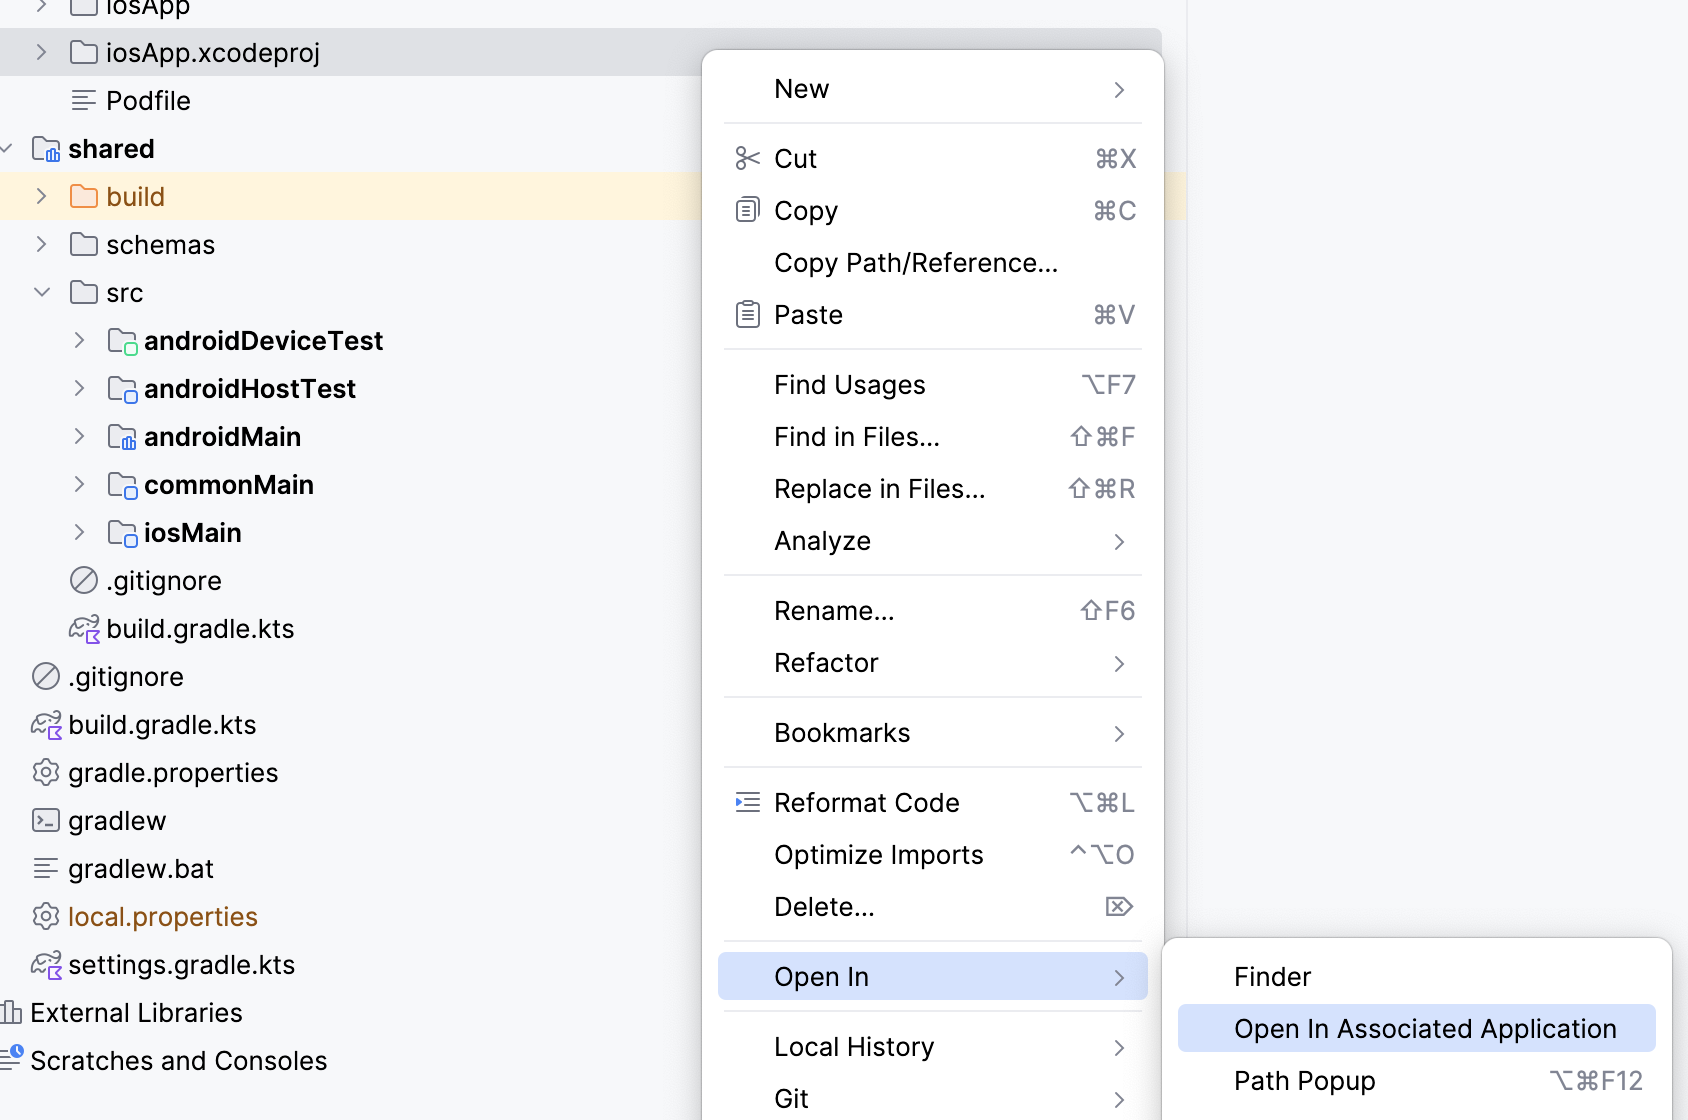
- انقر بزر الماوس الأيمن على الملف في Android Studio واختَر فتح في وفتح في التطبيق المرتبط. سيؤدي ذلك إلى فتح تطبيق iOS في Xcode.
- افتح إعدادات المشروع عن طريق النقر مرّتين على اسم المشروع في ملف التنقّل بالمشروع.

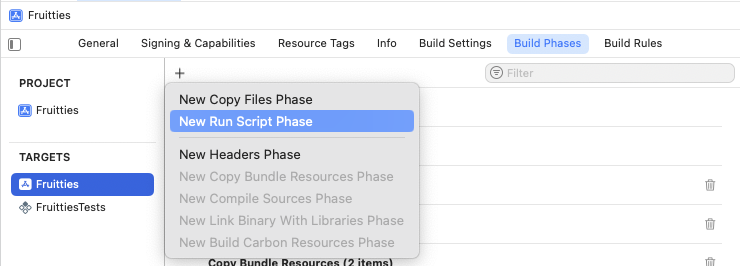
- غيِّر الاسم التلقائي Run Script (تشغيل النص البرمجي) إلى Compile Kotlin Framework (تجميع إطار عمل Kotlin) لتحديد دور هذه المرحلة بشكلٍ أفضل. انقر مرّتين على عنوان تشغيل النص البرمجي لتعديله.
- وسِّع مرحلة الإنشاء، وفي حقل النص Shell، أدخِل رمز الرمز التالي:
اسحب مرحلة تشغيل النص البرمجي قبل مرحلة تجميع المصادر.
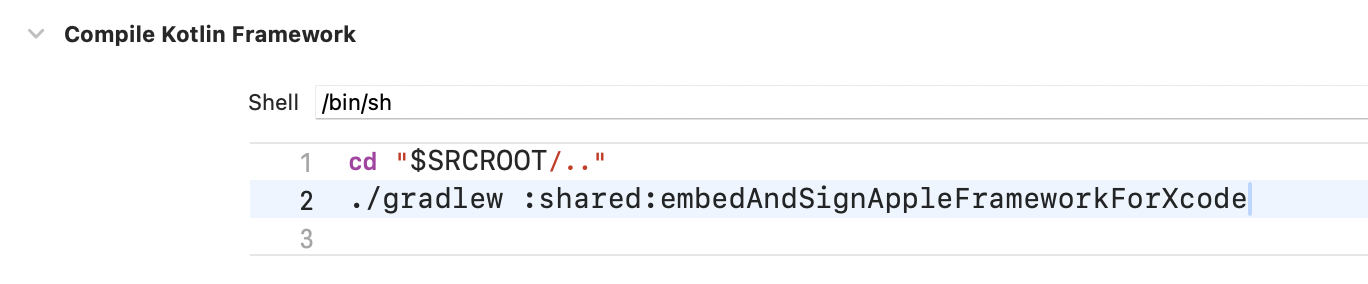
الشكل 6. تشغيل مرحلة إنشاء النصوص البرمجية قبل تجميع المصادر يمكنك إنشاء المشروع في Xcode من خلال النقر على ⌘B أو الانتقال إلى قائمة المنتج واختيار إنشاء.
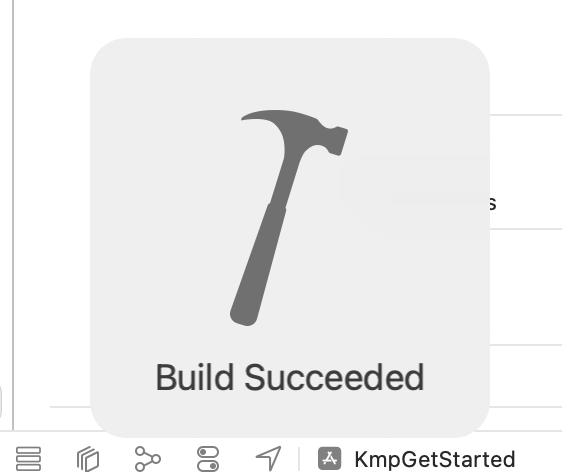
عند نجاح عملية الإنشاء، سيظهر لك الرمز التالي.
الوصول إلى الرمز المشترَك في تطبيق iOS
للتأكّد من أنّ تطبيق iOS يمكنه الوصول إلى الرمز البرمجي من الوحدة المشترَكة بنجاح، يُرجى اتّباع الخطوات التالية:
- في مشروع iOS، افتح ملف
ContentView.swiftعلى الرابط التالي:Sources/View/ContentView.swift - أضِف رمز الاستيراد
sharedKitفي أعلى الملف. - عدِّل عرض النص لتضمين معلومات
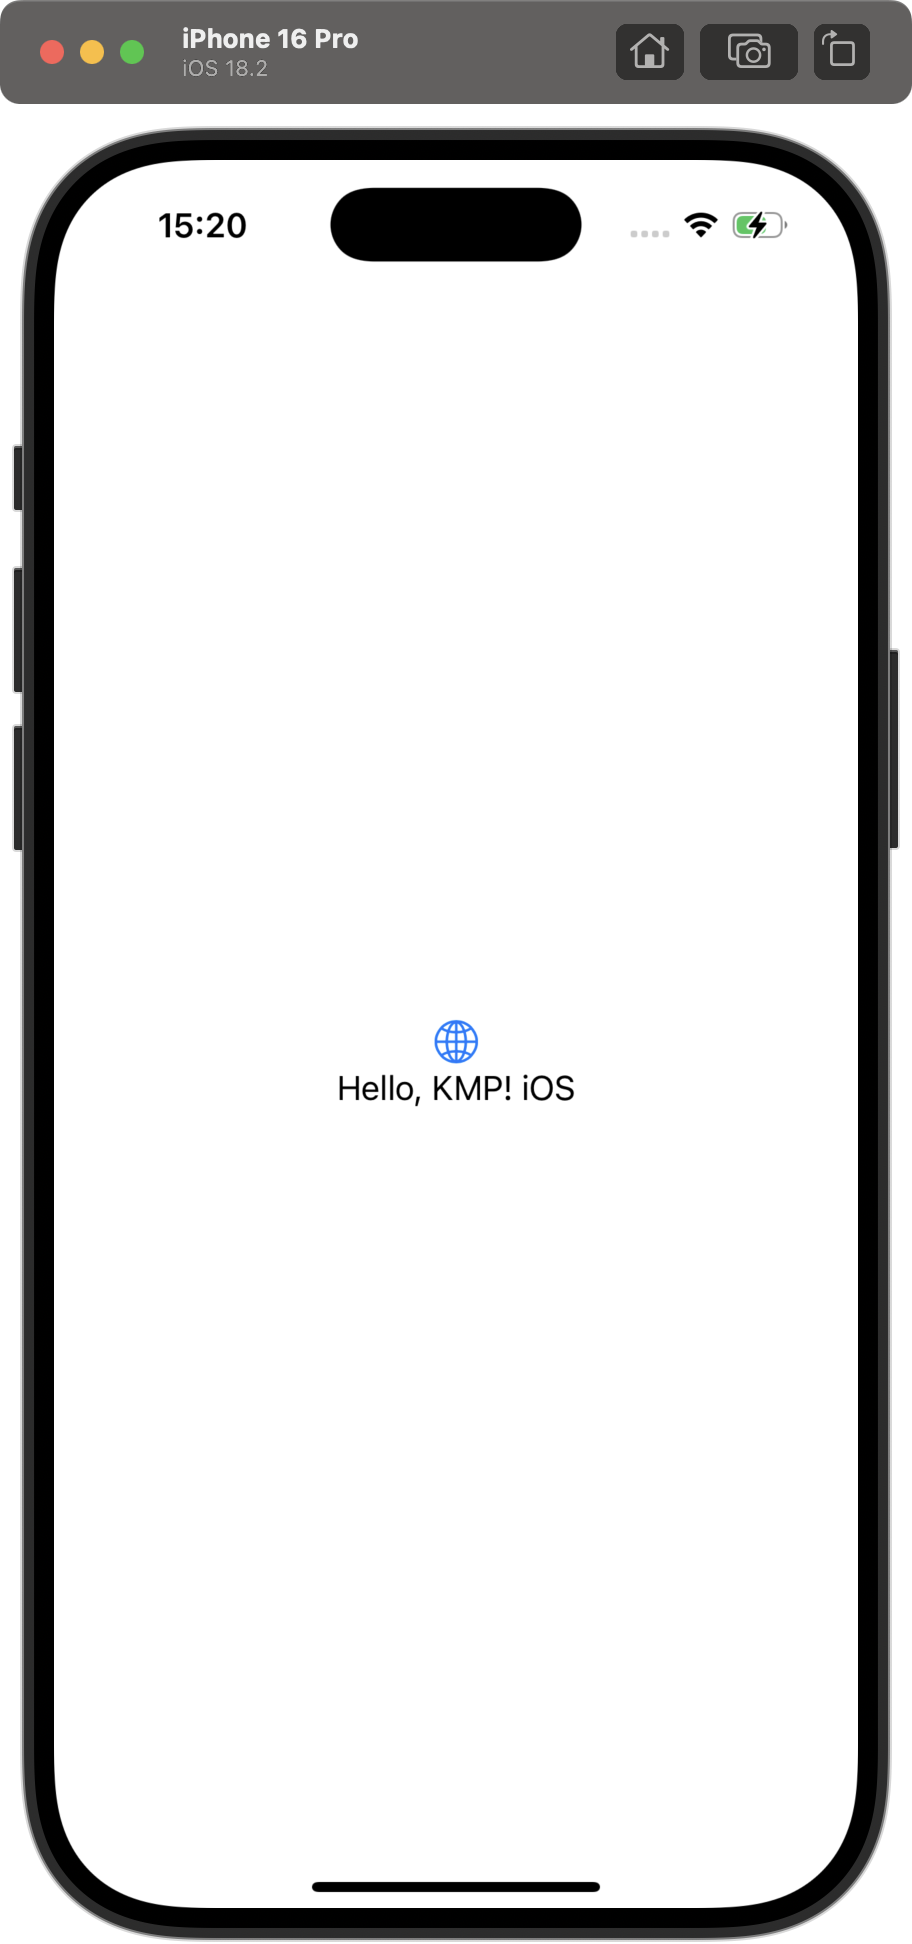
Platform_iosKt.platform()في السلسلة المعروضة على النحو التالي:
يتحقّق هذا التعديل مما إذا كان بإمكان التطبيق استدعاء دالة platform() من
الوحدة المشترَكة، والتي من المفترض أن تعرِض "iOS" عند تشغيلها على نظام التشغيل iOS.
مراجع إضافية
- إذا كنت مبتدئًا في تطوير تطبيقات KMP، يمكنك الاطّلاع على المستندات الرسمية لـ KMP للحصول على المزيد من الأدلة.
- إذا كنت مبتدئًا في تطوير تطبيقات iOS، يمكنك الاطّلاع على مستندات أساسيات Swift.
- للاطّلاع على المشاكل الشائعة في إعداد KMP، يُرجى الاطّلاع على المشاكل المحتمَلة والحلول.
- للاطّلاع على نماذج التطبيقات، راجِع نماذج تطبيقات Android Kotlin المتوافقة مع أنظمة التشغيل المتعددة.