
두 기기 간에 연결을 생성하려면 다음을 모두 구현해야 합니다.
서버 측 및 클라이언트 측 메커니즘이 있습니다.
다른 하나는 서버 기기의
MAC 주소입니다. 서버 장치와 클라이언트 장치는 각각 필요한
다른 위치의 BluetoothSocket
있습니다. 서버는 들어오는 연결이 해제될 때 소켓 정보를 수신합니다.
동의합니다. 클라이언트가 RFCOMM 채널을 열 때 소켓 정보를 제공
서버에 연결합니다
서버와 클라이언트는 각각
동일한 RFCOMM 채널의 연결된 BluetoothSocket. 이 시점에서 각
입력 및 출력 스트림을 수신할 수 있고 데이터 전송이 시작될 수 있으며,
자세한 내용은 블루투스 전송
데이터)를 참조하세요. 이 섹션
두 기기 간의 연결을 시작하는 방법을 설명합니다.
Google Cloud Storage에 블루투스 권한 및 전에 앱의 블루투스 설정을 블루투스 기기를 찾을 수 없습니다.
연결 기술
한 가지 구현 기술은 자동으로 각 기기를 서버로 준비하는 것입니다. 각 장치가 서버 소켓을 열고 연결을 수신 대기하도록 합니다. 포함 이 경우 어느 한 장치가 다른 장치와 연결을 시작하고 있습니다 또는 한 장치가 연결을 명시적으로 호스팅하고 다른 장치가 연결을 시작합니다.
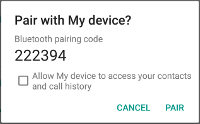
그림 1. 블루투스 페어링 대화상자
서버로 연결
두 개의 장치를 연결하려면
열어 줘
BluetoothServerSocket
서버 소켓의 목적은 들어오는 연결 요청을 수신 대기하는 것입니다.
요청이 수락되면 연결된 BluetoothSocket를 제공해야 합니다. 이
BluetoothSocket는 BluetoothServerSocket에서 획득됩니다.
BluetoothServerSocket는 원하는 경우 삭제할 수 있으며 삭제해야 합니다.
더 많은 연결을 수락해야 합니다.
서버 소켓을 설정하고 연결을 수락하려면 다음을 완료하세요 단계 시퀀스입니다.
다음을 호출하여
BluetoothServerSocket가져오기listenUsingRfcommWithServiceRecord(String, UUID)이 문자열은 식별 가능한 서비스 이름이며, 시스템에서는 새 SDP (Service Discovery Protocol) 데이터베이스 항목에 자동으로 쓰기 할 수 있습니다. 이름은 임의적이며 단순히 앱 이름일 수 있습니다. UUID (Universally Unique Identifier)도 SDP 항목에 포함됩니다. 클라이언트 기기와의 연결 계약의 기반을 형성합니다. 그 것이 클라이언트가 이 기기와 연결하려고 할 때 UUID를 전달한다는 것입니다. 고유 식별자는 연결하고자 하는 서비스를 고유하게 식별합니다. 이러한 연결을 수락하려면 UUID가 일치해야 합니다.
UUID는 고유 식별자에 대한 고유 식별자로 사용되는 문자열 ID의 표준화된 128비트 정보를 식별할 수 있습니다. UUID는 올바른 데이터 포인트에 필요한 정보를 UUID를 사용하지 않는 것이 좋습니다. 사실상 0입니다. 이 객체는 포드가 독립적으로 중앙 집중식 기관의 역할입니다 이 경우 이 번호는 블루투스 서비스에 연결할 수 있습니다. 앱에 사용할 UUID를 가져오려면 하나를 사용하면 됩니다. 여러 랜덤 중
UUID생성기를 사용한 다음 다음에 해당하는 UUIDfromString(String)다음을 호출하여 연결 요청 리슨을 시작합니다.
accept()이는 차단 호출이며, 연결이 해제된 경우 반환됩니다. 예외가 발생했습니다. 연결이 허용되는 경우에만 허용됨 원격 기기가 이 수신 서버 소켓에 등록된 것을 의미합니다. 성공하면
accept()는 연결된BluetoothSocket를 반환합니다.추가 연결을 수락하지 않으려면 다음을 호출합니다.
close()이 메서드 호출은 서버 소켓과 그 모든 리소스를 해제하지만 반환한 연결된
BluetoothSocket를 닫지 않음accept()입니다. TCP/IP와 달리 RFCOMM은 채널 수를 나타냅니다. 따라서 대부분의 경우close()BluetoothServerSocket: 연결된 소켓을 수락한 직후
accept() 호출은 차단 호출이므로 기본
할 수 있습니다. 다른 스레드에서 실행하면 앱이
다른 사용자 상호작용에 계속 반응합니다 일반적으로 모든 작업을 수행하는 것이 합리적입니다.
새 스레드의 BluetoothServerSocket 또는 BluetoothSocket와 관련된 항목
앱에 의해 관리됩니다. accept()와 같은 차단된 호출을 취소하려면 close()를 호출합니다.
다른 스레드의 BluetoothServerSocket 또는 BluetoothSocket에서 발생합니다. 참고
BluetoothServerSocket 또는 BluetoothSocket의 모든 메서드가
스레드로부터 안전합니다.
예
다음은 수신 연결:
Kotlin
private inner class AcceptThread : Thread() {

   private val mmServerSocket: BluetoothServerSocket? by lazy(LazyThreadSafetyMode.NONE) {
       bluetoothAdapter?.listenUsingInsecureRfcommWithServiceRecord(NAME, MY_UUID)
   }

   override fun run() {
       // Keep listening until exception occurs or a socket is returned.
       var shouldLoop = true
       while (shouldLoop) {
           val socket: BluetoothSocket? = try {
               mmServerSocket?.accept()
           } catch (e: IOException) {
               Log.e(TAG, "Socket's accept() method failed", e)
               shouldLoop = false
               null
           }
           socket?.also {
               manageMyConnectedSocket(it)
               mmServerSocket?.close()
               shouldLoop = false
           }
       }
   }

   // Closes the connect socket and causes the thread to finish.
   fun cancel() {
       try {
           mmServerSocket?.close()
       } catch (e: IOException) {
           Log.e(TAG, "Could not close the connect socket", e)
       }
   }
}
자바
private class AcceptThread extends Thread {
   private final BluetoothServerSocket mmServerSocket;

   public AcceptThread() {
       // Use a temporary object that is later assigned to mmServerSocket
       // because mmServerSocket is final.
       BluetoothServerSocket tmp = null;
       try {
           // MY_UUID is the app's UUID string, also used by the client code.
           tmp = bluetoothAdapter.listenUsingRfcommWithServiceRecord(NAME, MY_UUID);
       } catch (IOException e) {
           Log.e(TAG, "Socket's listen() method failed", e);
       }
       mmServerSocket = tmp;
   }

   public void run() {
       BluetoothSocket socket = null;
       // Keep listening until exception occurs or a socket is returned.
       while (true) {
           try {
               socket = mmServerSocket.accept();
           } catch (IOException e) {
               Log.e(TAG, "Socket's accept() method failed", e);
               break;
           }

           if (socket != null) {
               // A connection was accepted. Perform work associated with
               // the connection in a separate thread.
               manageMyConnectedSocket(socket);
               mmServerSocket.close();
               break;
           }
       }
   }

   // Closes the connect socket and causes the thread to finish.
   public void cancel() {
       try {
           mmServerSocket.close();
       } catch (IOException e) {
           Log.e(TAG, "Could not close the connect socket", e);
       }
   }
}
이 예에서는 하나의 수신 연결만 필요하므로
BluetoothSocket가 획득되면 앱은
별도의 스레드에 BluetoothSocket를 획득하면
BluetoothServerSocket하고 루프에서 벗어납니다.
accept()가 BluetoothSocket를 반환하면 소켓은 이미
연결됩니다. 따라서
평소처럼 connect()
분리할 수 있습니다
앱별 manageMyConnectedSocket() 메서드는
데이터 전송 스레드에 대한 자세한 내용은
블루투스 전송 중
데이터를 참조하세요.
일반적으로 작업이 완료되자마자 BluetoothServerSocket를 닫아야 합니다.
수신 연결을 수신 대기하는 것입니다 이 예에서 close()는
BluetoothSocket가 획득될 때 공개 IP 주소를 제공할 수도 있습니다.
이벤트에서 비공개 BluetoothSocket를 닫을 수 있는 스레드의 메서드
해당 서버 소켓에서 수신 대기를 중지해야 합니다.
클라이언트로 연결
네트워크 연결을 수락하는 원격 장치와의 연결을 시작하기 위해
연결을 위해서는 먼저 BluetoothDevice를 가져와야 합니다.
원격 기기를 나타내는 객체입니다. Cloud Storage 버킷에서
BluetoothDevice, 블루투스 찾기 참조
있습니다. 다음을 수행해야 합니다.
그런 다음 BluetoothDevice를 사용하여 BluetoothSocket를 획득하고
연결
기본 과정은 다음과 같습니다.
BluetoothDevice를 사용하여 다음을 호출하여BluetoothSocket를 가져옵니다.createRfcommSocketToServiceRecord(UUID)이 메서드는 클라이언트가 다음을 수행할 수 있도록
BluetoothSocket객체를 초기화합니다.BluetoothDevice에 연결합니다. 여기에 전달된 UUID는 사용된 UUID와 일치해야 합니다. 서버 기기에서listenUsingRfcommWithServiceRecord(String, UUID)드림BluetoothServerSocket를 엽니다. 일치하는 UUID를 사용하려면 UUID 문자열을 앱에 가져온 다음 서버 모두에서 이를 참조합니다. 클라이언트 코드가 포함됩니다connect()를 호출하여 연결을 시작합니다. 이 메서드는 차단 호출을 추가합니다.클라이언트가 이 메서드를 호출한 후 시스템은 SDP 조회를 수행하여 원격 기기를 찾습니다. 조회에 성공하고 원격 장치가 연결을 수락하는 경우 RFCOMM 채널을 공유하여
connect()메서드가 반환됩니다. 연결 상태가 실패하거나connect()메서드가 타임아웃되면 (약 12초 후) 메서드에서IOException이 발생합니다.
connect()는 차단 호출이므로 항상 이 작업을 실행해야 합니다.
기본 활동 (UI)과 분리된 스레드의 연결 절차
스레드가 필요합니다.
예
다음은 블루투스를 시작하는 클라이언트 스레드의 기본적인 예입니다. 연결:
Kotlin
private inner class ConnectThread(device: BluetoothDevice) : Thread() {

   private val mmSocket: BluetoothSocket? by lazy(LazyThreadSafetyMode.NONE) {
       device.createRfcommSocketToServiceRecord(MY_UUID)
   }

   public override fun run() {
       // Cancel discovery because it otherwise slows down the connection.
       bluetoothAdapter?.cancelDiscovery()

       mmSocket?.let { socket ->
           // Connect to the remote device through the socket. This call blocks
           // until it succeeds or throws an exception.
           socket.connect()

           // The connection attempt succeeded. Perform work associated with
           // the connection in a separate thread.
           manageMyConnectedSocket(socket)
       }
   }

   // Closes the client socket and causes the thread to finish.
   fun cancel() {
       try {
           mmSocket?.close()
       } catch (e: IOException) {
           Log.e(TAG, "Could not close the client socket", e)
       }
   }
}
자바
private class ConnectThread extends Thread {
   private final BluetoothSocket mmSocket;
   private final BluetoothDevice mmDevice;

   public ConnectThread(BluetoothDevice device) {
       // Use a temporary object that is later assigned to mmSocket
       // because mmSocket is final.
       BluetoothSocket tmp = null;
       mmDevice = device;

       try {
           // Get a BluetoothSocket to connect with the given BluetoothDevice.
           // MY_UUID is the app's UUID string, also used in the server code.
           tmp = device.createRfcommSocketToServiceRecord(MY_UUID);
       } catch (IOException e) {
           Log.e(TAG, "Socket's create() method failed", e);
       }
       mmSocket = tmp;
   }

   public void run() {
       // Cancel discovery because it otherwise slows down the connection.
       bluetoothAdapter.cancelDiscovery();

       try {
           // Connect to the remote device through the socket. This call blocks
           // until it succeeds or throws an exception.
           mmSocket.connect();
       } catch (IOException connectException) {
           // Unable to connect; close the socket and return.
           try {
               mmSocket.close();
           } catch (IOException closeException) {
               Log.e(TAG, "Could not close the client socket", closeException);
           }
           return;
       }

       // The connection attempt succeeded. Perform work associated with
       // the connection in a separate thread.
       manageMyConnectedSocket(mmSocket);
   }

   // Closes the client socket and causes the thread to finish.
   public void cancel() {
       try {
           mmSocket.close();
       } catch (IOException e) {
           Log.e(TAG, "Could not close the client socket", e);
       }
   }
}
이 스니펫에서 cancelDiscovery()는
발생할 수 있습니다 항상 connect() 전에 cancelDiscovery()를 호출해야 합니다.
특히 기기가 구성되었는지 여부와 관계없이 cancelDiscovery()가 성공하기 때문입니다.
탐색이 현재 진행 중입니다. 앱에서
기기 검색이 진행 중이라면
isDiscovering()
앱별 manageMyConnectedSocket() 메서드는
데이터 전송 스레드에 대한 자세한 내용은
블루투스 데이터 전송.
BluetoothSocket 사용을 마치면 항상 close()를 호출합니다. 만들기
연결된 소켓을 즉시 닫고 모든 관련 내부 연결을 해제합니다.
리소스를 배포합니다