Set up your development environment

To get started developing for Android XR, you'll need to use Android Studio Meerkat | 2024.3.1 Canary 5, which includes new tools and updates optimized for Android XR.

New features included in this version of Android Studio are:

  • Android XR Emulator
  • Addition of XR support in the Layout Inspector
  • XR Project template

Android Studio Hardware Prerequisites for XR development

  • RAM: 16 GB or higher
  • Currently supported and stability tested system configurations:
    • macOS on Apple Silicon (M1 chip or newer)
    • Windows 11 with NVIDIA graphics card (GeForce 10 series or later); both desktop and laptop GPUs are supported.

Install and configure Android Studio for XR development

Complete the following steps to download Android Studio and set up your development environment:

  1. Make sure to close any versions of Android Studio you already have installed.

  2. Download Android Studio Meerkat | 2024.3.1 Canary 5, extract it into your preferred location, and launch the application.

  3. Follow the installation instructions in the wizard.

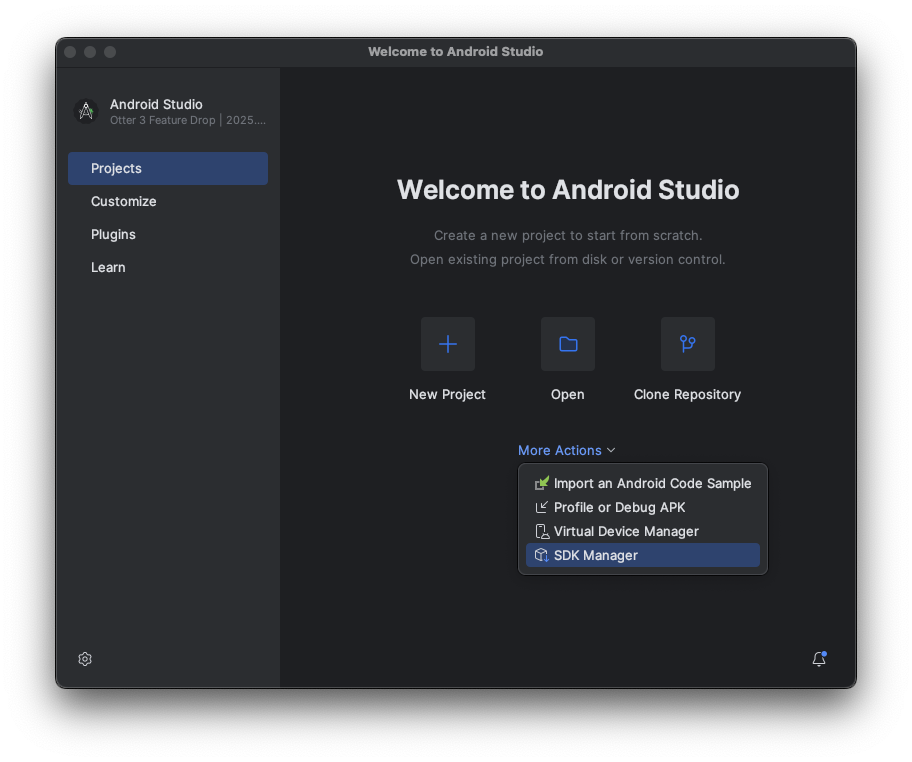
  4. In the Welcome to Android Studio dialog, click More Actions, and select SDK Manager.

    Android studio welcome screen

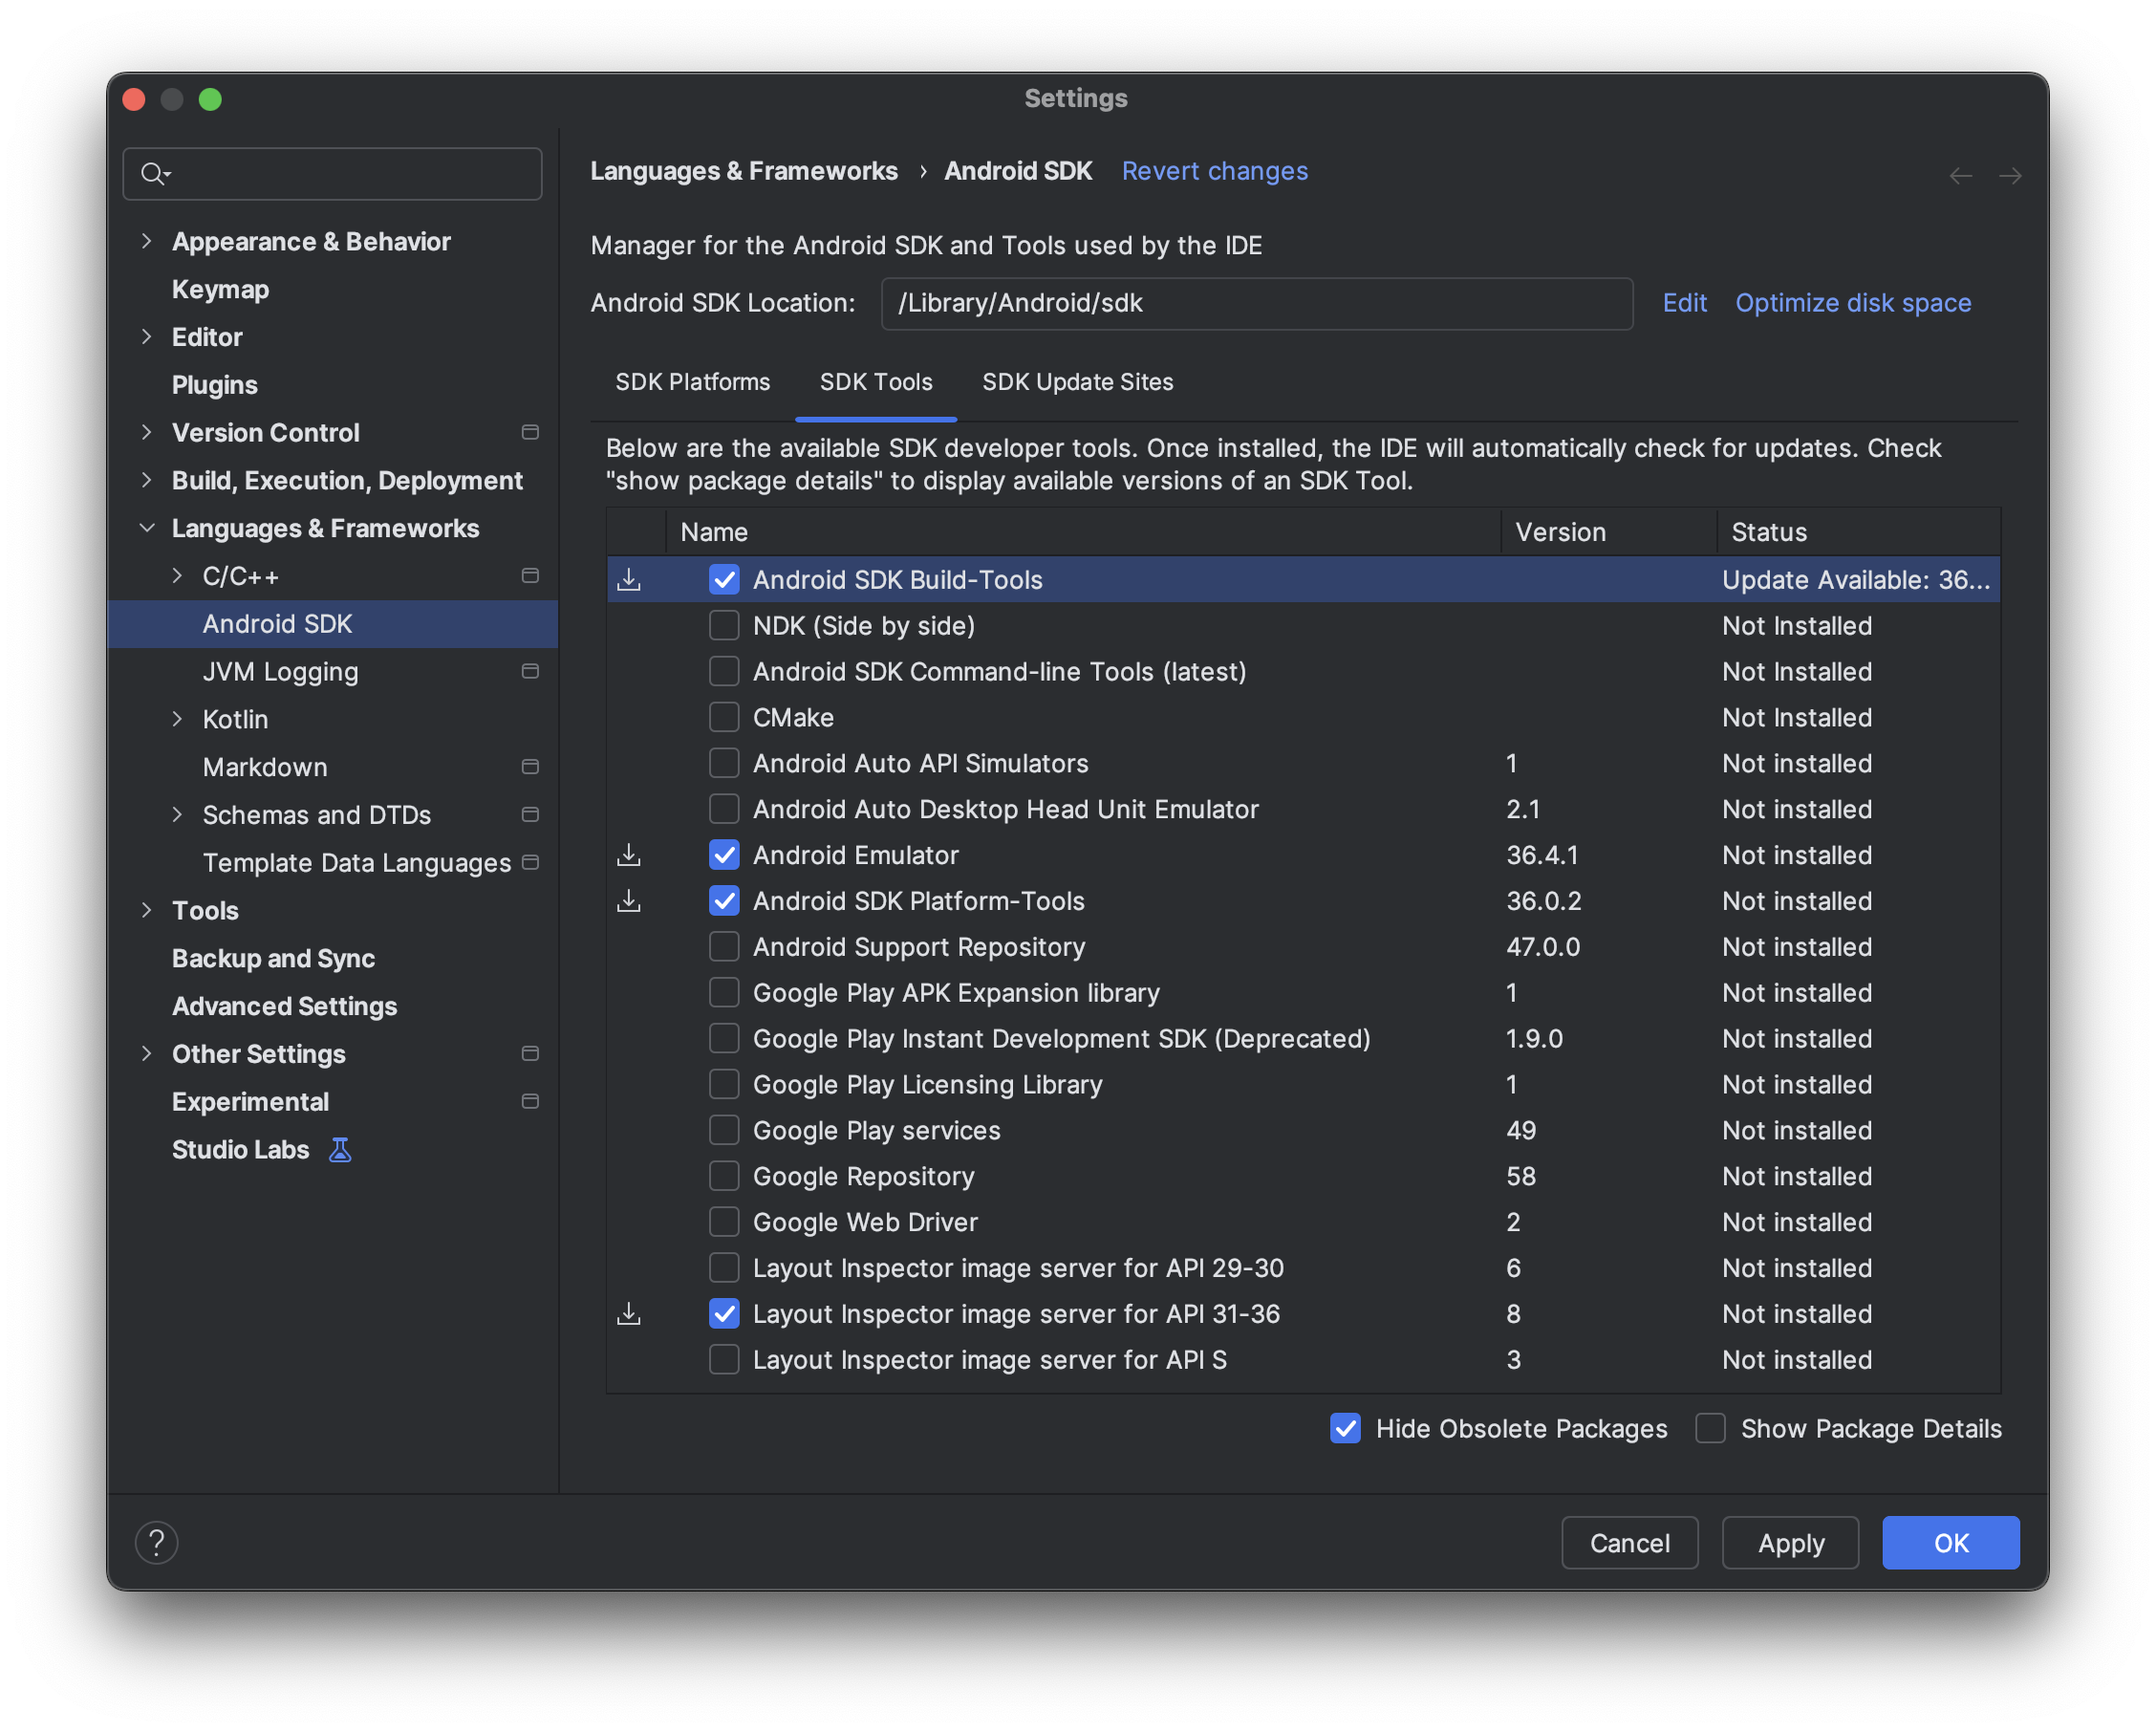
  5. In the Android SDK page, click the SDK Tools tab and select the following tools to install:

    • Android SDK Build-Tools
    • Android Emulator
    • Android SDK Platform-Tools
    • Layout Inspector for API 31 - 36

    Android studio sdk screen

  6. Under the SDK Platforms tab, do the following:

    1. Select the Show Package Details checkbox to see all the options.
    2. Select the Google Play XR ARM system image (macOS) or Google Play XR Intel x86_64 (Windows).

    Android studio sdk platform screen

  7. Click Apply to make the updates, and then click OK.

  8. Allow all the installation steps to complete, then click Finish.

Create an Android XR project

Follow these steps to create an Android XR project in Android Studio or extend an existing project to XR.

  1. In the Welcome to Android Studio window, do one of the following:

    1. If you're creating a new XR app, click New Project and go to the next step.
    2. If you're spatializing an existing app, click Open to select your project, then skip to the next step Create a new Android Virtual Device for the Android Emulator. (For help with spatializing your existing app for Android XR, read Bring your Android app into 3D with XR.)

    Android studio welcome screen

  2. In the XR category, select the Basic Headset Activity template and click Next.

    Android studio new project screen

  3. On the next screen you can choose a name for your project. You can leave the default settings in place. Then click Finish.

  4. Explore the code provided in the template. Check out our development guide and reference documentation.

Create a new Android Virtual Device for the Android Emulator

The Android XR Emulator is a specialized version of the Android emulator designed for XR app development. It lets you test and debug your Extended Reality (XR) applications within the familiar Android Studio environment.

To use the Android XR Emulator, you'll have to create a new virtual device. Follow these steps to do so:

  1. In Android Studio, click Tools > AVD Manager, and follow the instructions to create a new Android Virtual Device (AVD).

    Android studio device manager screen

  2. In the Add Device window, under Form Factor, select the XR option, then select XR Device in the Name list. Click Next.

    Android studio add device screen

  3. In the next tab (Configure Virtual Device), under System Image, select the most recent Android XR system image that is compatible with your system.

    Android studio configure android virtual device screen

  4. Click Finish.

  5. To start the emulator, click the Run button in Device Manager.

    Android studio device manager screen

    The emulator opens in a separate window.

    Android studio emulator screen

  6. To launch your app in the emulator, click the Run icon in Android Studio.

    Android studio run application UI

    For details on using the emulator and other new XR tools, read Android Studio Tools for XR.

Enable Usage Statistics to help improve Android Studio

Because this is a developer preview version of Android Studio, many of these features are still under development. Consider enabling usage statistics and sending feedback to help us improve these tools.

To enable Usage Statistics:

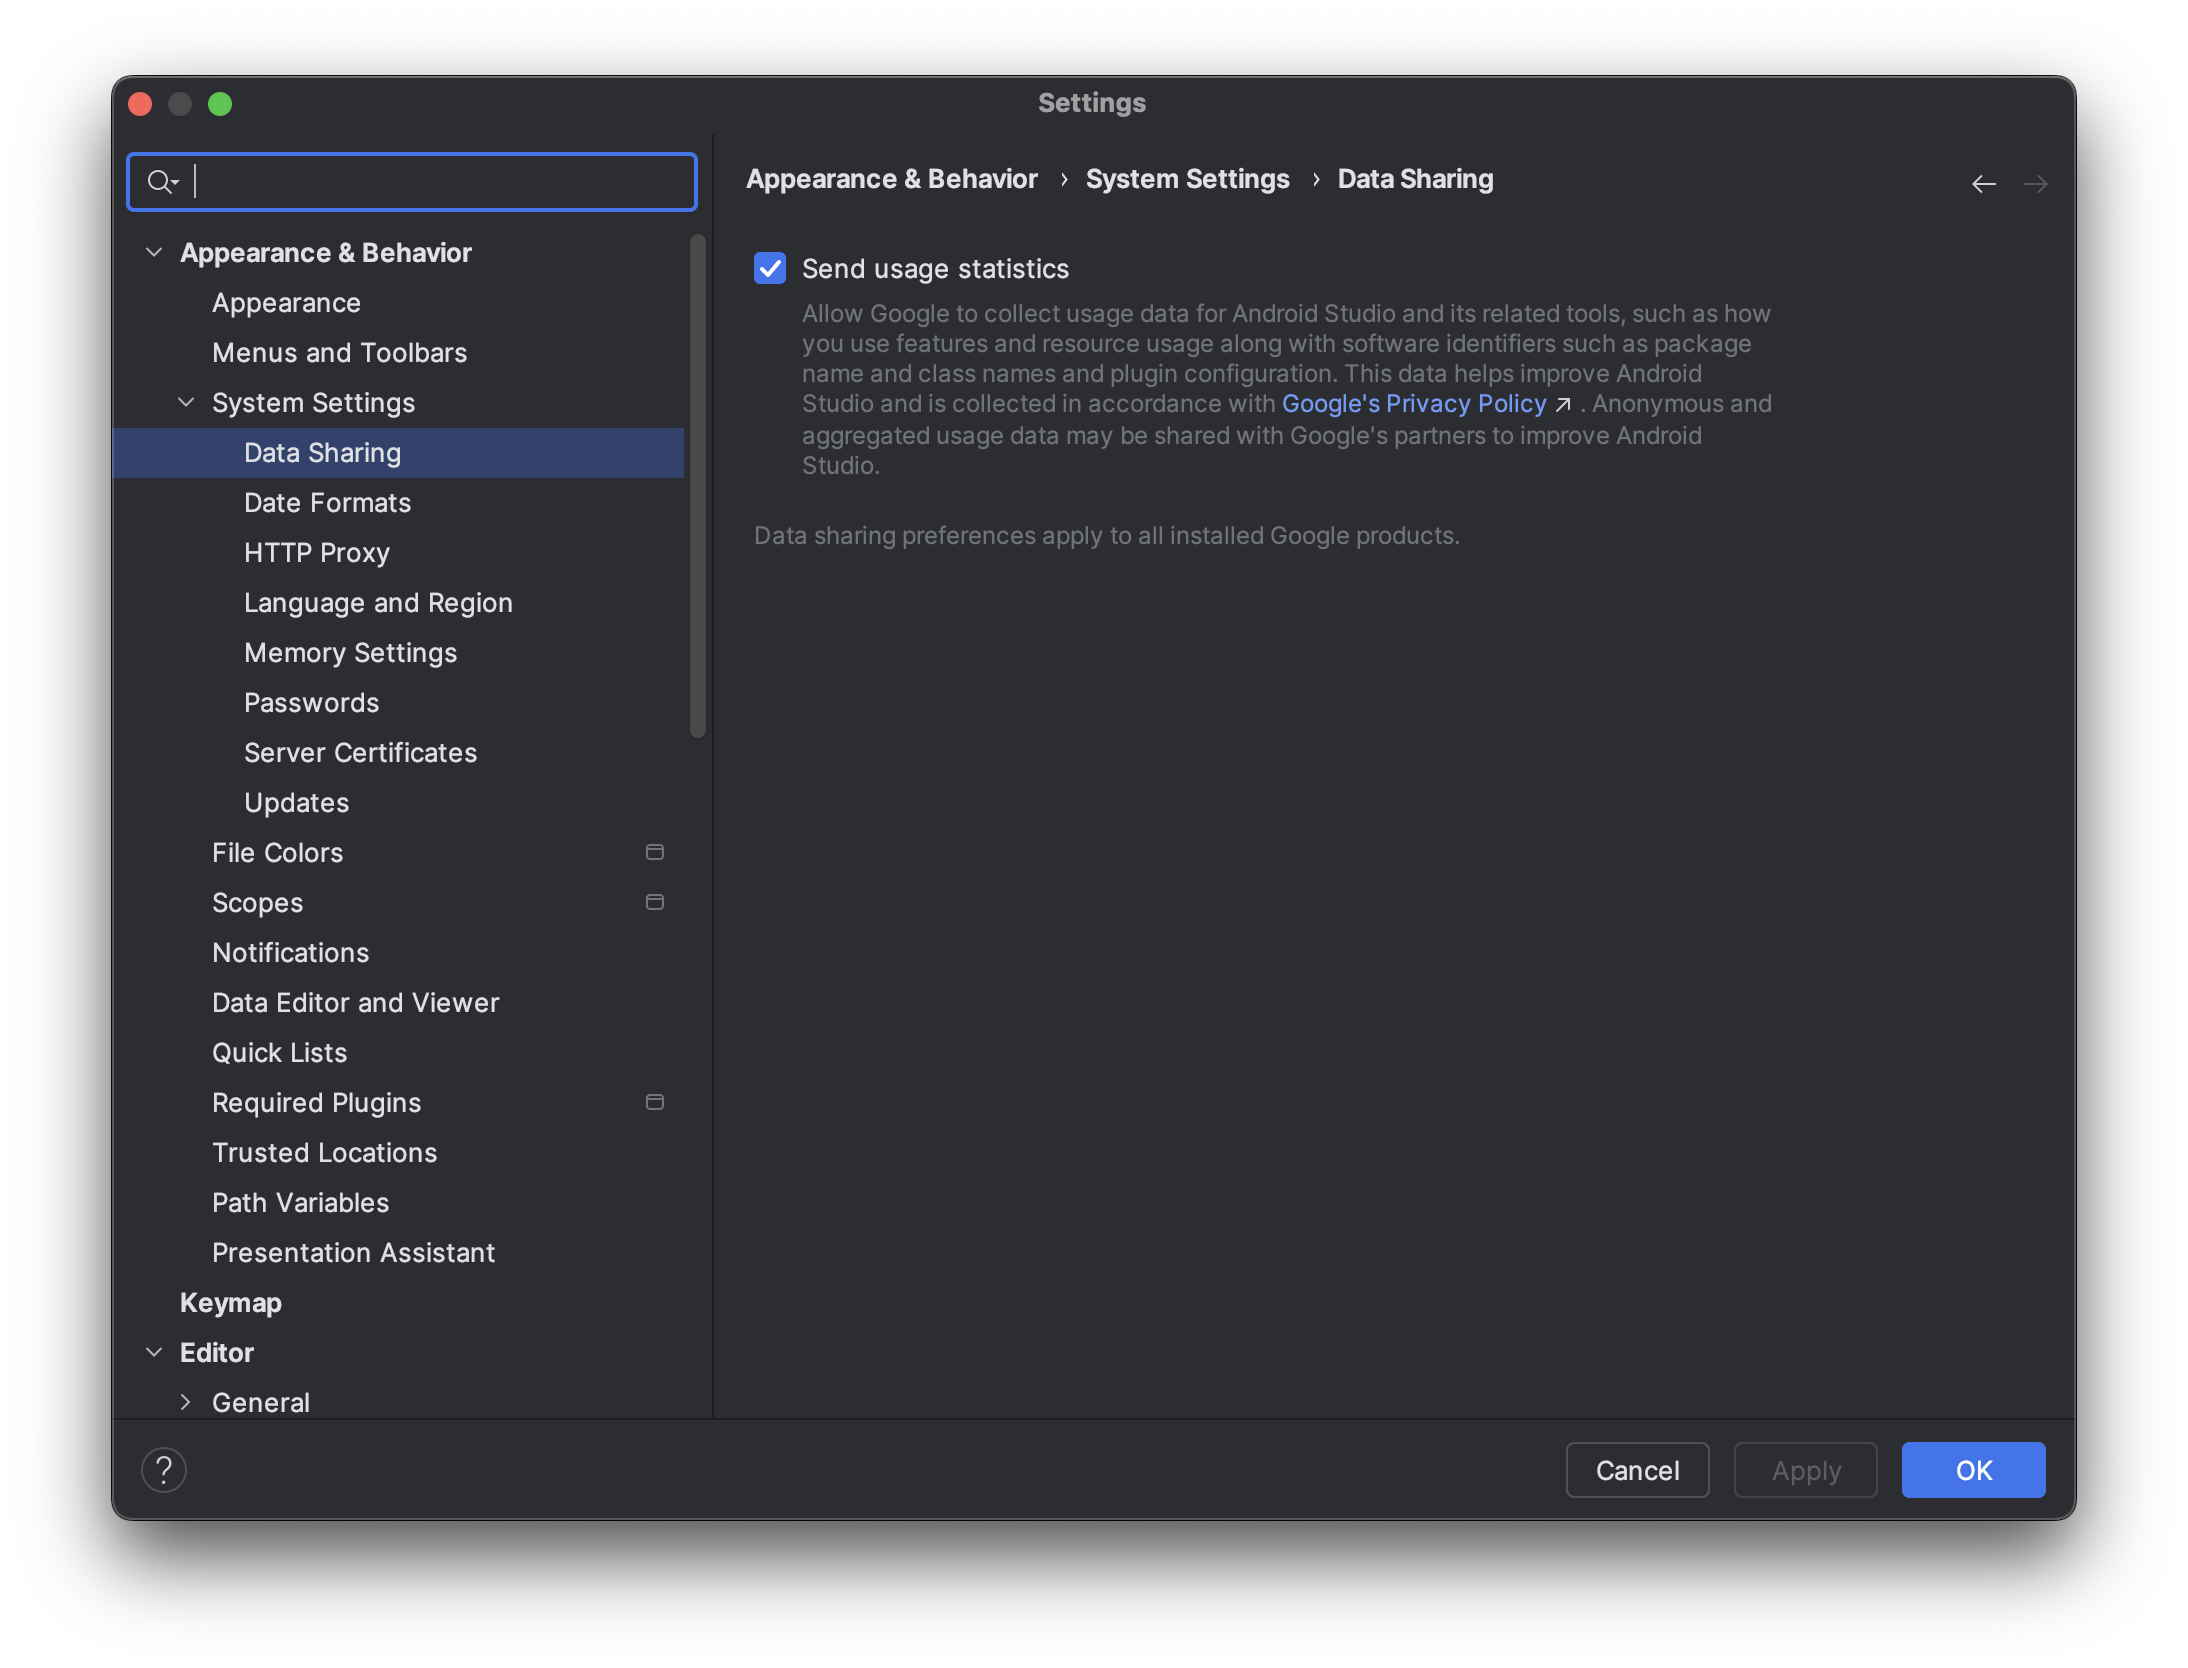
  1. Click Settings > Appearance & Behavior > System Settings > Data Sharing.
  2. Select Send usage statistics to google.

Android studio settings screen