تنظيم صفحاتك في مجموعات
يمكنك حفظ المحتوى وتصنيفه حسب إعداداتك المفضّلة.
تم تصميم ميزة Agent Mode ضمن "Gemini في استوديو Android" للتعامل مع مهام التطوير المعقّدة والمتعدّدة المراحل التي تتجاوز ما يمكنك تجربته من خلال الدردشة مع Gemini فقط. يمكنك وصف هدف رفيع المستوى، وسينشئ الوكيل خطة وينفّذها، ويستدعي الأدوات اللازمة، ويجري تغييرات على عدة ملفات، ويصلح الأخطاء بشكل متكرر. يتيح لك سير العمل هذا الذي يقدّمه وكيل
التغلّب على التحديات المعقّدة وتسريع عملية التطوير.
الشكل 1: Gemini في ميزة Agent Mode ضمن "استوديو Android".
البدء
للبدء في "وضع الوكيل" في Android Studio، اتّبِع الخطوات التالية:
انقر على Gemini
في شريط نافذة الأدوات. سجِّل الدخول وأكمِل عملية الإعداد إذا لزم الأمر.
انقر على علامة التبويب الوكيل.
قدِّم وصفًا للمَهمة التي تريد أن ينفّذها الوكيل.
راجِع أي تغييرات ووافِق عليها أثناء عمل الوكيل لإنجاز المهمة.
الشكل 2: ينتظرك "وضع الوكيل" للموافقة على التغيير أو رفضه.
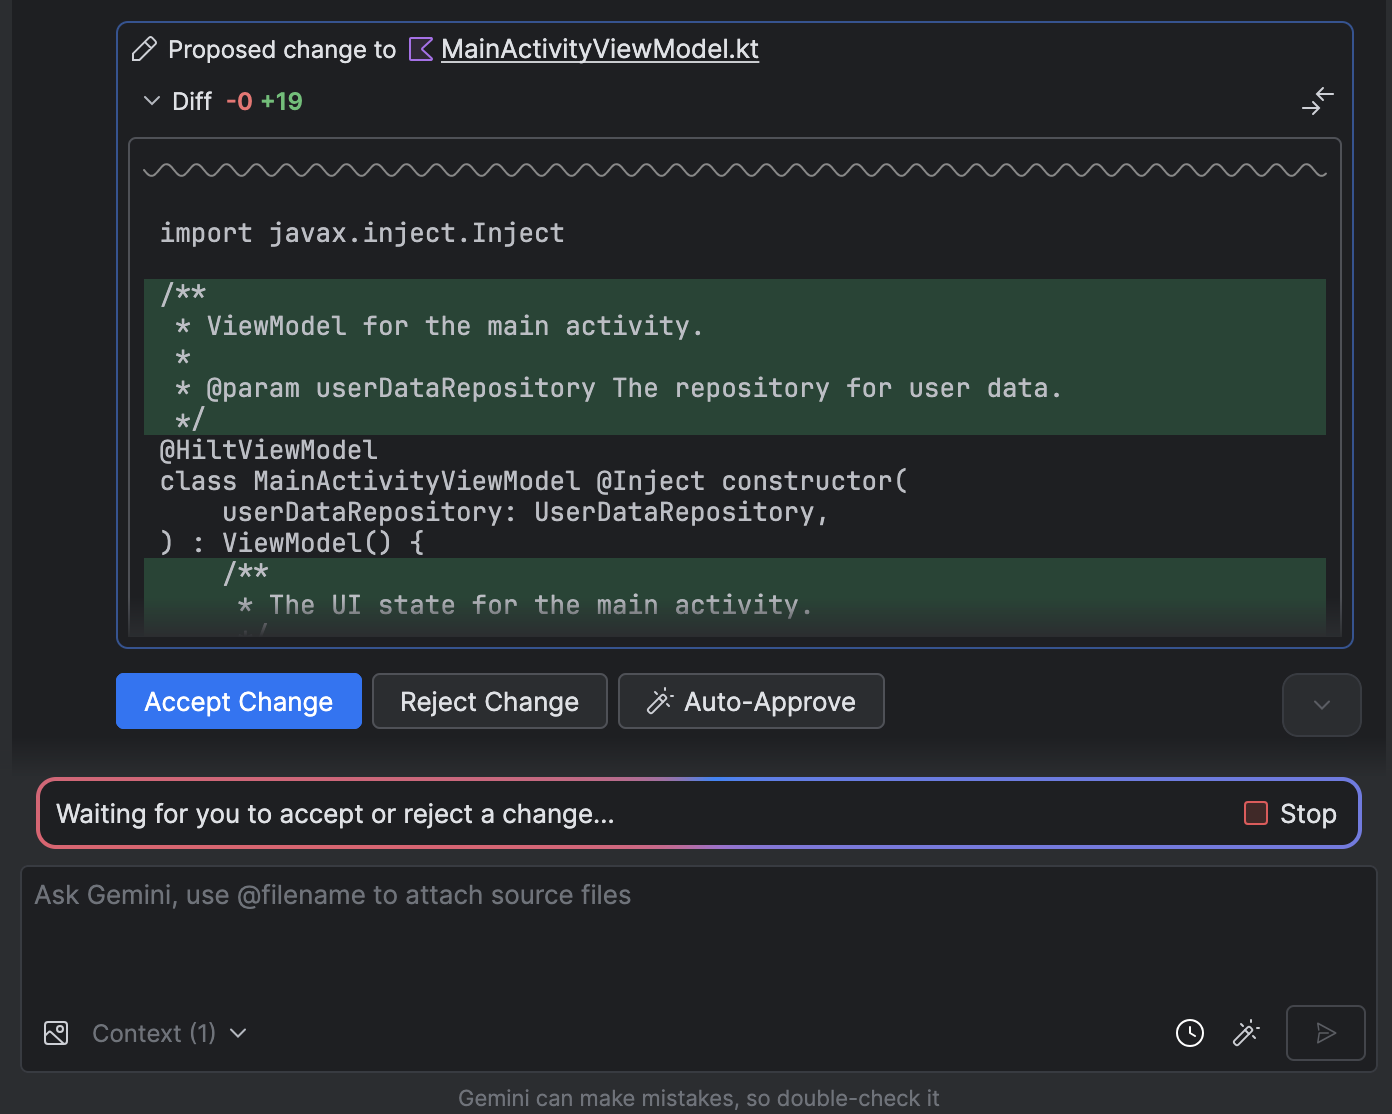
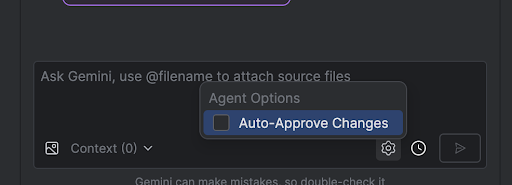
اختياري: للموافقة على التغييرات تلقائيًا، انقر على خيارات الوكيل
> الموافقة التلقائية على التغييرات.
الشكل 3: الموافقة تلقائيًا على التغييرات التي يقترحها البرنامج
حالات الاستخدام
في ما يلي بعض الأمثلة على حالات الاستخدام التي يمكن أن يساعدك فيها الوكيل:
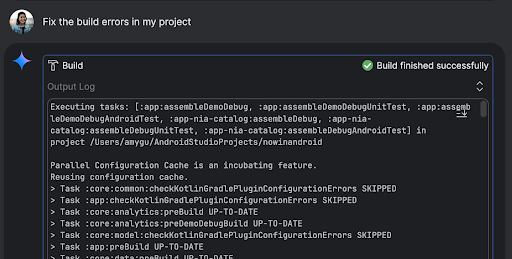
أصلِح أخطاء الإنشاء. عندما تطلب من الوكيل إصلاح خطأ في الإصدار باستخدام طلب مثل "إصلاح أخطاء الإصدار في مشروعي"، سيطبّق الوكيل إصلاحًا مقترَحًا، وينشئ المشروع للتحقّق من الحلّ، ويكرّر العملية إلى أن يتم حلّ المشكلة.
الشكل 4: ينشئ الوكيل مشروعك ويقيّم ما إذا كانت هناك أخطاء.
إضافة عناصر واجهة المستخدم أو تعديلها: يمكن للوكيل إضافة عناصر واجهة المستخدم أو تعديلها.
على سبيل المثال، يمكنك أن تطلب من الوكيل "ضبط المظهر الداكن كإعداد تلقائي في إعدادات المستخدم"، وسيبحث الوكيل عن الملفات ذات الصلة ويقترح تغييرات لإكمال المهمة. يمكنك معاينة تعديلات واجهة المستخدم على الفور في نافذة أداة
الأجهزة قيد التشغيل.
الشكل 5: الوكيل يعدّل عناصر واجهة المستخدم.
إنشاء بيانات وهمية عند إنشاء نماذج أولية واختبار تطبيقك، يمكنك أن تطلب من الوكيل إنشاء بيانات وهمية بدلاً من إنشائها يدويًا. على سبيل المثال، عندما يُطلب من الوكيل "إضافة جلستَين أخريَين إلى البيانات الوهمية"، يعثر الوكيل على الملف ذي الصلة ويضيف حدثَين آخرَين إلى قائمة mockSessions.
الشكل 6: الوكيل ينشئ بيانات وهمية.
إليك بعض الطلبات الأخرى التي يمكنك تجربتها:
"اكتب اختبارات وحدات لـ <class> في <module>"
"إنشاء مستندات للملف المفتوح"
"تغيير عنوان التطبيق من <الاسم الحالي> إلى <الاسم الجديد>"
"حلّ مشكلة استثناء المؤشر الفارغ"
أريد إعادة تصميم الرمز البرمجي من خلال نقل الدالة البرمجية القابلة للإنشاء <اسم الدالة البرمجية القابلة للإنشاء> إلى ملف جديد. التأكّد من تعديل جميع عمليات الاستيراد"
"أريد إضافة زر جديد إلى الشاشة الرئيسية للتطبيق باسم "متابعة" ينقلني إلى قائمة بالمواضيع".
"في العنصر القابل للإنشاء <composable name>، قلِّل مساحة الحشو الخاصة بالمعدِّل <modifier name>"
"إنشاء زر مشاركة على وسائل التواصل الاجتماعي"
طريقة عمل الوكيل
في "وضع الوكيل"، يتم إرسال طلبك إلى Gemini API مع قائمة بالأدوات المتاحة. يمكنك اعتبار الأدوات مهارات، فهي تشمل القدرة على البحث عن الملفات وقراءتها والبحث عن النص داخل الملفات واستخدام أي خوادم MCP تم إعدادها وغير ذلك.
عندما تمنح الوكيل مهمة، ينشئ خطة ويحدد الأدوات المطلوبة. قد تتطلّب منك بعض هذه الأدوات منح الإذن قبل أن يتمكّن الوكيل من استخدامها. بعد منح الإذن، يستخدم الوكيل الأداة لتنفيذ الإجراء اللازم وإرسال النتيجة إلى Gemini API. يعالج Gemini نتيجة الإجراء وينشئ ردًا آخر. وتستمر دورة العمل والتقييم هذه إلى أن تكتمل المهمة.
يخضع كل من المحتوى وعيّنات التعليمات البرمجية في هذه الصفحة للتراخيص الموضحّة في ترخيص استخدام المحتوى. إنّ Java وOpenJDK هما علامتان تجاريتان مسجَّلتان لشركة Oracle و/أو الشركات التابعة لها.
تاريخ التعديل الأخير: 2025-09-03 (حسب التوقيت العالمي المتفَّق عليه)
[[["يسهُل فهم المحتوى.","easyToUnderstand","thumb-up"],["ساعَدني المحتوى في حلّ مشكلتي.","solvedMyProblem","thumb-up"],["غير ذلك","otherUp","thumb-up"]],[["لا يحتوي على المعلومات التي أحتاج إليها.","missingTheInformationINeed","thumb-down"],["الخطوات معقدة للغاية / كثيرة جدًا.","tooComplicatedTooManySteps","thumb-down"],["المحتوى قديم.","outOfDate","thumb-down"],["ثمة مشكلة في الترجمة.","translationIssue","thumb-down"],["مشكلة في العيّنات / التعليمات البرمجية","samplesCodeIssue","thumb-down"],["غير ذلك","otherDown","thumb-down"]],["تاريخ التعديل الأخير: 2025-09-03 (حسب التوقيت العالمي المتفَّق عليه)"],[],[],null,["Gemini in Android Studio's Agent Mode is designed to handle complex, multi-stage\ndevelopment tasks that go beyond what you can experience by just chatting with\nGemini. You can describe a high-level goal, and the agent creates and\nexecutes a plan, invoking the necessary [tools](#how-it-works), making changes\nacross multiple files, and iteratively fixing bugs. This agent-assisted workflow\nlets you tackle intricate challenges, accelerating your development\nprocess.\n**Figure 1:** Gemini in Android Studio's Agent Mode.\n\nGet started\n\nTo get started in Agent Mode in Android Studio, follow these steps:\n\n1. Click **Gemini** in the tool window bar. Sign in and onboard if you need to.\n2. Select the **Agent** tab.\n3. Describe the task you want the agent to perform.\n4. Review and approve any changes as the agent works to accomplish the task.\n\n**Figure 2:** Agent Mode waits for you to accept or reject a change.\n\n1. Optional: To automatically approve changes, select **Agent options\n \\\u003e Auto-approve changes**.\n\n**Figure 3:** Auto-approve changes suggested by the agent.\n\nUse cases\n\nHere are some examples of use cases that the agent can help you with:\n\n- **Fix build errors.** When you ask the agent to fix a build error using a prompt like \"Fix build errors in my project,\" it applies a recommended fix, builds the project to verify the solution, and iterates until the issue is resolved.\n\n**Figure 4:** The agent builds your project and assesses if there are errors.\n\n- **Add or update UI elements.** The agent can add or update UI elements. For example, ask the agent to \"Make dark theme the default in user preferences\" and it searches for the relevant files and suggests changes to accomplish the task. You can immediately preview the UI updates in the **Running devices** tool window.\n\n**Figure 5:** The agent updating UI elements.\n\n- **Generate mock data.** When prototyping and testing your app, you can ask the agent to generate mock data instead of manually creating it. For example, when prompted to \"Add two more sessions to the fake data,\" the agent finds the relevant file and adds two more events to the `mockSessions` list.\n\n**Figure 6:** The agent generating mock data.\n\nSome other prompts to try:\n\n- \"Write unit tests for \\\u003cclass\\\u003e in \\\u003cmodule\\\u003e\"\n- \"Generate documentation for the open file\"\n- \"Change the app title from \\\u003ccurrent name\\\u003e to \\\u003cnew name\\\u003e\"\n- \"Resolve the null pointer exception\"\n- \"Refactor my code by moving the \\\u003ccomposable name\\\u003e composable to a new file. Verify that all imports are updated\"\n- \"Add a new button to the app's home screen called 'Follow' that takes you to a list of topics\"\n- \"In the \\\u003ccomposable name\\\u003e composable, reduce the padding of the \\\u003cmodifier name\\\u003e modifier\"\n- \"Create a share button to share to social media\"\n\nHow the agent works\n\nIn Agent Mode, your prompt is sent to the Gemini API with a list of *tools* that\nare available. You can think of tools as skills: they include the ability to\nsearch for files, read files, search the text within files, use any\n[MCP servers](/studio/gemini/add-mcp-server) you have configured, and more.\n\nWhen you give the agent a task, it creates a plan and determines which\ntools are needed. Some of these tools might need you to grant permission before\nthe agent can use them. Once you grant permission, the agent uses the tool to\nperform the necessary action and sends the result back to the Gemini API. Gemini\nprocesses the result of the action and generates another response. This cycle of\naction and evaluation continues until the task is complete."]]