Eclipse 설정(지원 중단됨)
컬렉션을 사용해 정리하기
내 환경설정을 기준으로 콘텐츠를 저장하고 분류하세요.
Eclipse ADT 플러그인은 더 이상 지원되지 않습니다. ndk-build 또는 CMake를 사용하여 앱의 네이티브 소스를 컴파일, 빌드, 패키징하려면 Android 스튜디오로 이전하는 것이 좋습니다. ndk-build와 호환되어 네이티브 프로젝트를 Eclipse에서 Android 스튜디오로 쉽게 이전할 수 있습니다. Android용 공식 IDE를 사용한 네이티브 개발에 관해 자세히 알아보려면 C 및 C++ 코드를 프로젝트에 추가를 참조하세요.
설치
NDK를 설치하고 구성하려면 다음 단계를 따르세요.
- Android SDK 명령줄 도구를 다운로드해 설치합니다.
- 사용 중인 개발 플랫폼에 맞는 버전을 확인하여 NDK를 다운로드합니다. 압축을 푼 디렉터리를 로컬 드라이브의 임의의 위치에 배치할 수 있습니다.
PATH
환경 변수를 NDK가 포함된 디렉터리의 위치로 업데이트합니다.
Eclipse는 앱을 빌드할 때 NDK를 사용하기 위해 NDK의 위치를 알아야 합니다. 다음 단계에 따라 NDK의 위치를 설정하세요.
- Android SDK의 일부로 설치된 Eclipse를 시작합니다.
- Window(창) > Preferences(환경설정)를 엽니다.
- Preferences(환경설정) 창에 있는 왼쪽 창에서 Android를 선택합니다.
Android 섹션이 확장되어 여러 하위 섹션이 표시됩니다.
- NDK를 선택합니다. Preferences(환경설정) 창에 있는 오른쪽 창에서 NDK가 포함된 디렉터리로 이동합니다.
- OK(확인)를 클릭하여 Package Explorer 화면으로 돌아갑니다.
인증
일식
NDK를 설치하고 올바르게 설정했는지, Eclipse를 제대로 구성했는지 확인하려면 다음 단계를 따르세요.
- 다른 Android 프로젝트에서와 마찬가지로
<ndk>/samples/
에서 hello-jni 샘플을 가져옵니다.
- Project Explorer 창에서 프로젝트 이름(HelloJni)을 마우스 오른쪽 버튼으로 클릭합니다. 컨텍스트 메뉴가 표시됩니다.
- 컨텍스트 메뉴에서 Android Tools(Android 도구) > Add Native Support(네이티브 지원 추가)를 선택합니다. Add Android Native Support(Android 네이티브 지원 추가) 창이 표시됩니다.
- 기본 라이브러리 이름('hello-jni')을 그대로 사용하고 Finish(마침)를 클릭합니다.
- 애플리케이션을 빌드하고 실행합니다.
명령줄
명령줄에서 빌드하려면 다음 단계를 따르세요.
- 프로젝트의 루트 디렉터리로 변경합니다.
- ndk-build를 실행하여 앱의 네이티브 구성요소를 빌드합니다. 명령 프롬프트에서
ndk-build
를 입력하면 됩니다.
- 자바로 작성된 일반 Android 앱의 경우처럼 프로젝트를 빌드하고 설치합니다. 자세한 내용은 빌드 구성 및 명령줄에서 Gradle 실행을 참조하세요.
NDK를 설치하고 구성했다면 타겟 기기의 화면이 그림 1과 같이 표시됩니다.
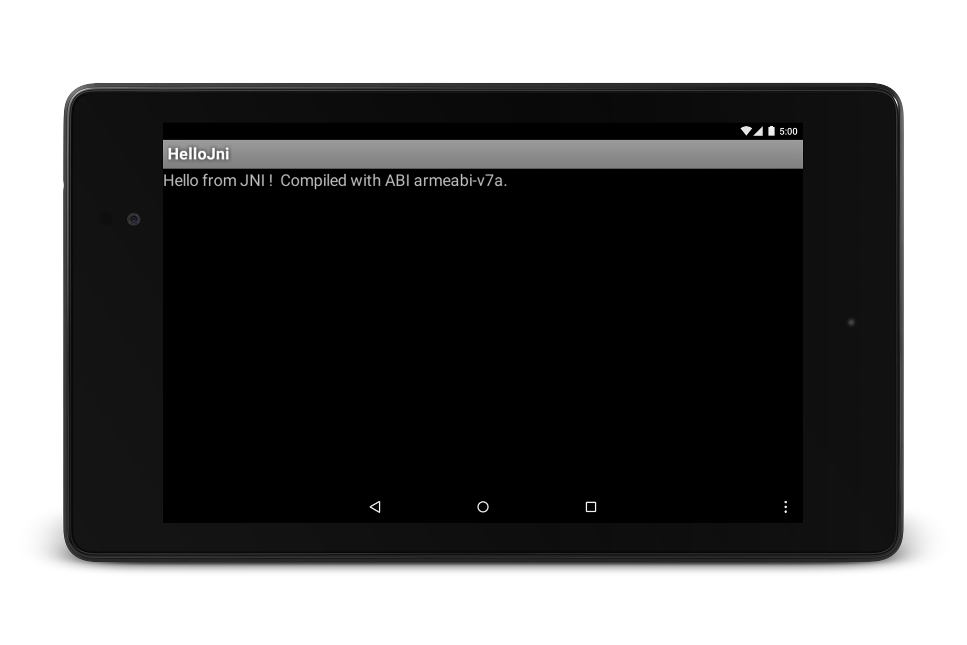
그림 1. 성공적으로 실행된 후 타겟 기기 화면입니다.
달리 명시되지 않는 한 이 페이지의 콘텐츠에는 Creative Commons Attribution 4.0 라이선스에 따라 라이선스가 부여되며, 코드 샘플에는 Apache 2.0 라이선스에 따라 라이선스가 부여됩니다. 자세한 내용은 Google Developers 사이트 정책을 참조하세요. 자바는 Oracle 및/또는 Oracle 계열사의 등록 상표입니다.
최종 업데이트: 2025-07-26(UTC)
[[["이해하기 쉬움","easyToUnderstand","thumb-up"],["문제가 해결됨","solvedMyProblem","thumb-up"],["기타","otherUp","thumb-up"]],[["필요한 정보가 없음","missingTheInformationINeed","thumb-down"],["너무 복잡함/단계 수가 너무 많음","tooComplicatedTooManySteps","thumb-down"],["오래됨","outOfDate","thumb-down"],["번역 문제","translationIssue","thumb-down"],["샘플/코드 문제","samplesCodeIssue","thumb-down"],["기타","otherDown","thumb-down"]],["최종 업데이트: 2025-07-26(UTC)"],[],[],null,["# Setup Eclipse (DEPRECATED)\n\n**The Eclipse ADT plugin is no longer supported** . We recommend [migrating to Android Studio](/studio/intro/migrate) to compile,\nbuild, and package your app's native sources using [ndk-build](/ndk/guides/ndk-build) or [CMake](https://cmake.org/). Compatibility with ndk-build makes it easy\nto migrate your native projects from Eclipse to Android Studio. To learn more\nabout native development with the official IDE for Android, read [Add C and C++ Code to Your\nProject](/studio/projects/add-native-code).\n\nInstallation\n------------\n\nTo install and configure the NDK, follow these steps:\n\n1. Get and install the [Android SDK command line tools](/studio#downloads).\n2. [Download the NDK](/ndk/downloads), making sure to download the correct version for your development platform. You may place the unzipped directory anywhere on your local drive.\n3. Update your `PATH` environment variable with the location of the directory that contains the NDK.\n\nConfiguring Eclipse\n-------------------\n\nEclipse must know where the NDK is in order to use it when building your app. Follow these steps\nto set the location of the NDK.\n\n1. Launch Eclipse, which is installed as part of the Android SDK.\n2. Open **Window** \\\u003e **Preferences**.\n3. In the pane on the left side of the *Preferences* window, select *Android* . The *Android* section expands, revealing a number of subsections.\n4. Select **NDK** . In the pane on the right side of the *Preferences* window, browse to the directory that contains the NDK.\n5. Click **OK** to return to the *Package Explorer* display.\n\nVerification\n------------\n\n### Eclipse\n\nTo confirm that you have installed the NDK, set it up correctly, and properly configured Eclipse,\nfollow these steps:\n\n1. Import the hello-jni sample from `\u003cndk\u003e/samples/`, as you would any other Android project.\n2. In the *Project Explorer* pane, right-click the project name (*HelloJni*). A context menu appears.\n3. From the context menu, select **Android Tools** \\\u003e **Add Native Support** . The *Add Android Native Support* window appears.\n4. Accept the default library name (\"hello-jni\"), and click **Finish**.\n5. Build and execute the application.\n\n### Command line\n\nFollow these steps to build from the command line:\n\n1. Change to the root directory of your project.\n2. Execute ndk-build to build the native component of your app. do this by typing `ndk-build` at the command prompt.\n3. Build and install your project as you would a regular Android app written in Java. For more information, see [Configure Your Build](/studio/build) and [Run Gradle from the Command Line](/studio/build/building-cmdline).\n\nIf you have successfully installed and configured the NDK, the screen on your target device looks\nas shown in Figure 1.\n\n\n**Figure 1.** Target-device screen after successful launch."]]