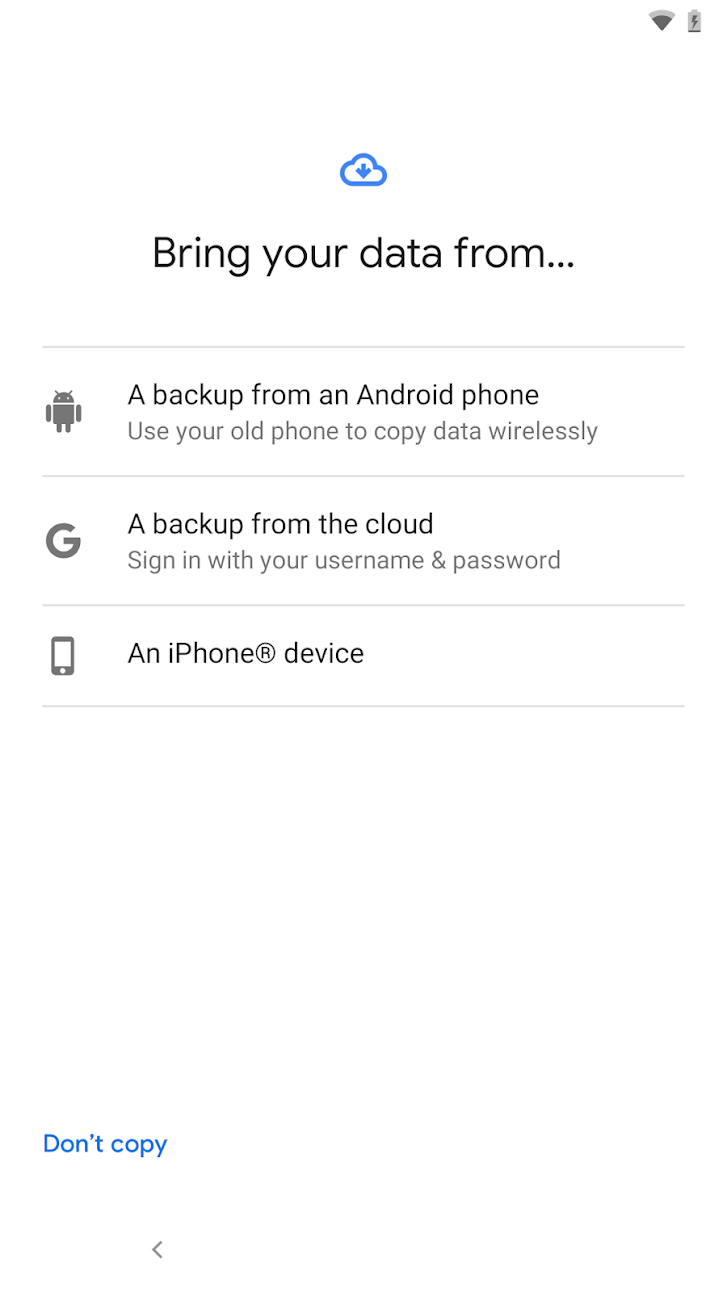
部分原始设备制造商 (OEM) 会构建自定义的设备到设备恢复流程。由于这是我们验证用户身份的方式,因此 Block Store 仅适用于包含 Google 账号转移功能的恢复流程。所有搭载 Google Play 服务的 Android 设备均支持 Google 账号转移,并且可以通过本文档中所述的流程访问此功能。
Google 数据线恢复
Google 数据线恢复功能在 Pixel 设备(以及更新型号的 Motorola 和 Sharp 设备)上受支持。在 Android 设置期间,点按下方屏幕中的“下一步”:
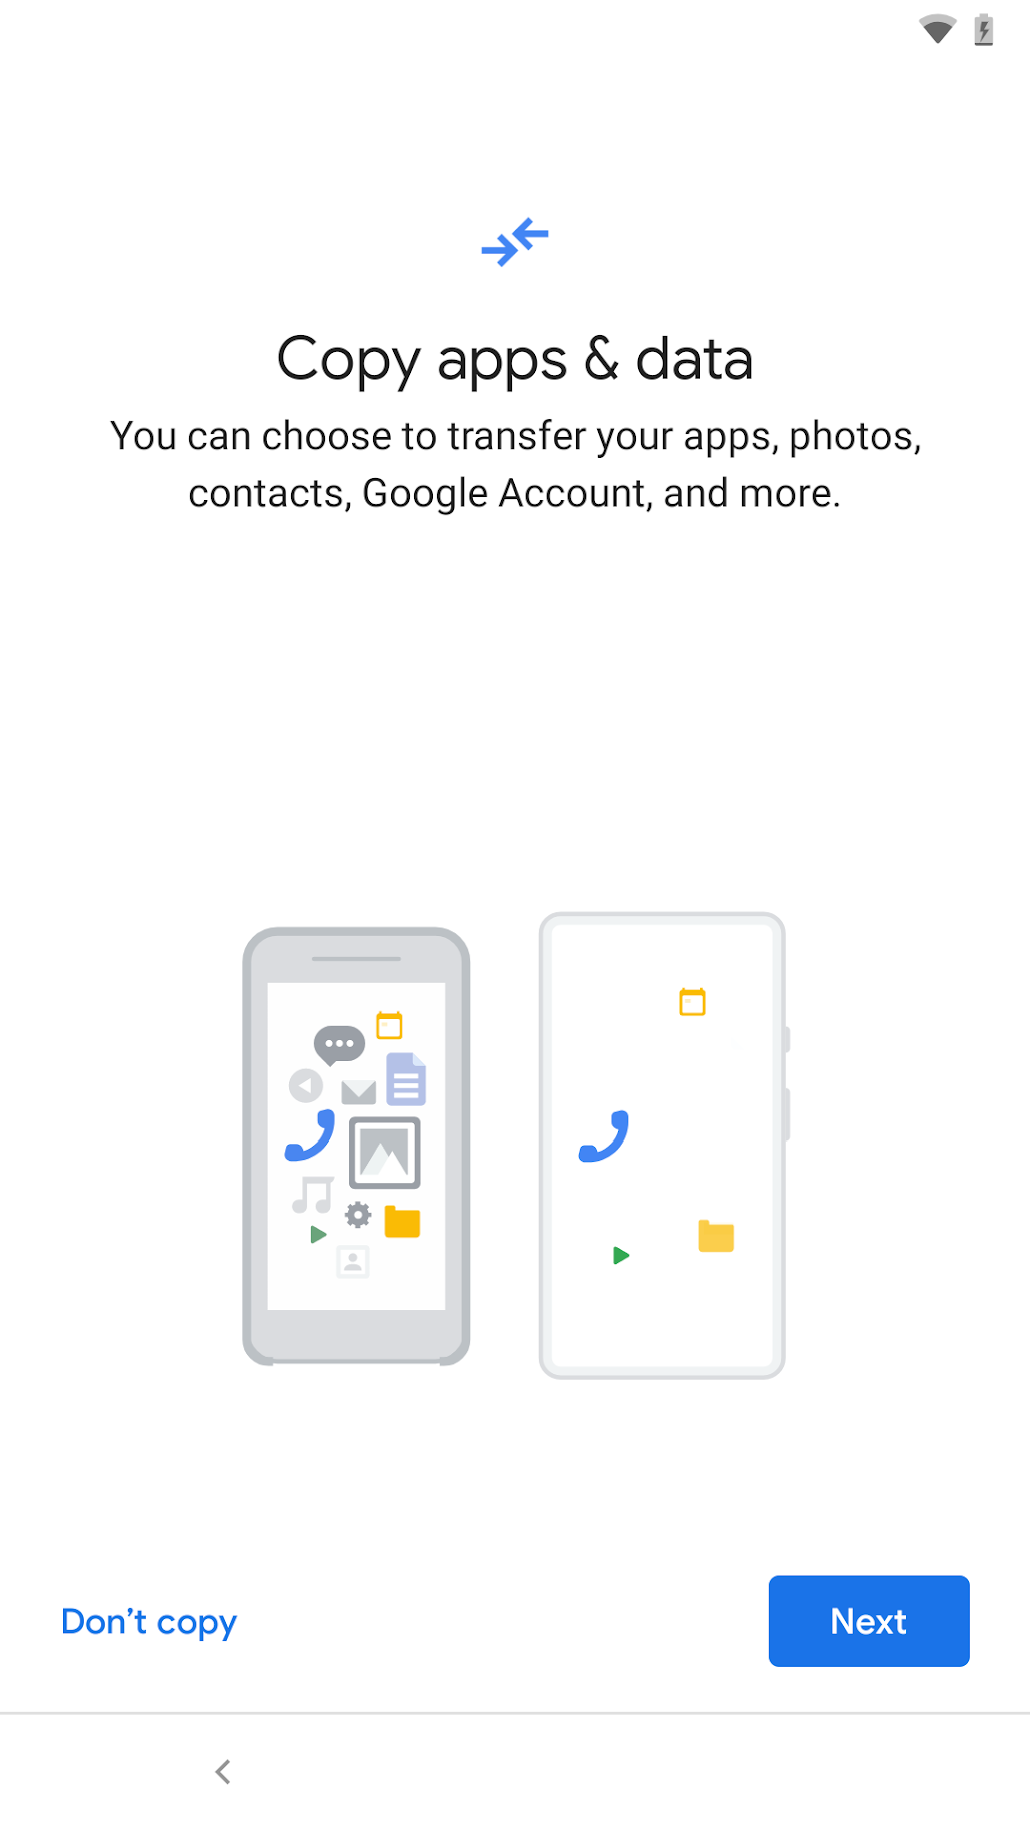
图 1. 数据线恢复流程期间的初始界面。
按照提示将数据线连接到源设备和目标设备,然后继续进行恢复。请务必同意屏幕上显示的复制 Google 账号的请求:
与 Google 数据线传输一样,请务必同意 Google 账号转移。否则,Block Store 数据将不会转移。
如需从设置之外启动该流程,请找到“智能开关”应用,并在两部设备上直接启动该应用(如果源设备不是 Samsung 设备,您必须从 Play 商店在该设备上安装“智能开关”应用)。
Block Store 数据会作为账号数据的一部分进行转移,因此您需要在“智能开关”流程期间确保在“选择要转移的数据”界面上选择“账号”:
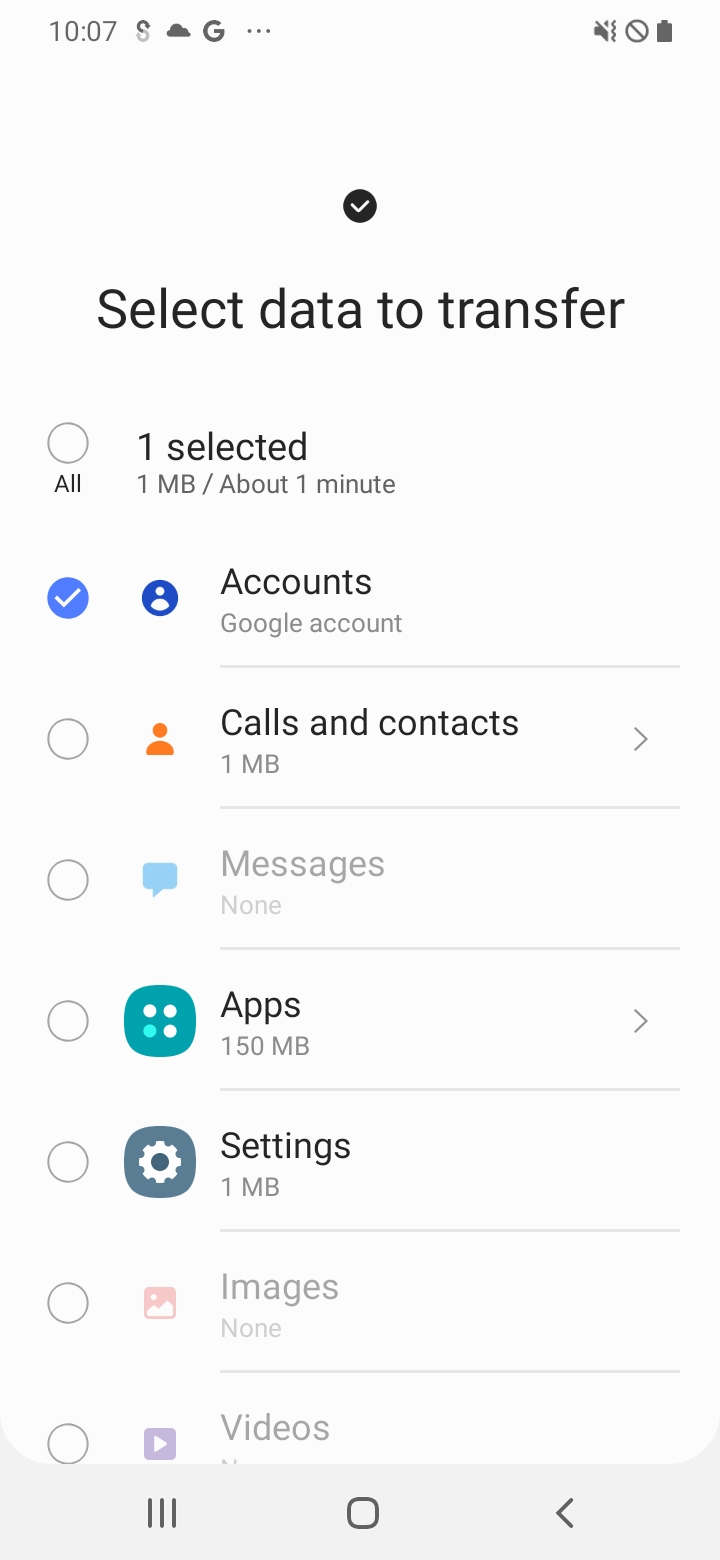
图 2. 选择要转移的数据。
如果您在测试时多次运行智能开关,则在后续转移中可能无法在该界面中选择“账号”(该选项会灰显)。这是因为目标设备上已包含源设备上的所有账号。一种解决方法是在源设备上使用 2 个 Google 账号:一个已加入 Block Store 计划的账号(请参阅前提条件),以及另一个账号。在开始新的智能开关迁移之前,请移除目标设备上的第二个账号(从设置 > 账号和备份 > 账号)。然后,您应该能够在“选择要转移的数据”界面中选择“账号”。
Android 无线恢复
对于不支持 Google 数据线流程的非 Samsung OEM,请在显示的界面上点按“下一步”:
图 1. 无线恢复流程期间的初始界面。
然后,您应该会看到如下所示的界面:
图 2. 选择要备份的设备。
选择“Android 手机上的备份内容”。按照说明完成恢复流程。与其他流程一样,请确保您同意 Google 账号转移。
支持的云端恢复流程
以下是在设备设置期间执行 Google Cloud 恢复的步骤。
Google Cloud 恢复
在 Android 设置期间,点按屏幕上显示的“下一步”:
图 1. 云端恢复流程中的初始界面。
在下一个界面(如图所示)中,点按“无法使用旧手机”以触发云端恢复流程。按照提示完成云端恢复,包括登录您的 Google 账号(该账号必须与源设备中的备份账号相同)、选择要从中恢复的源设备等。
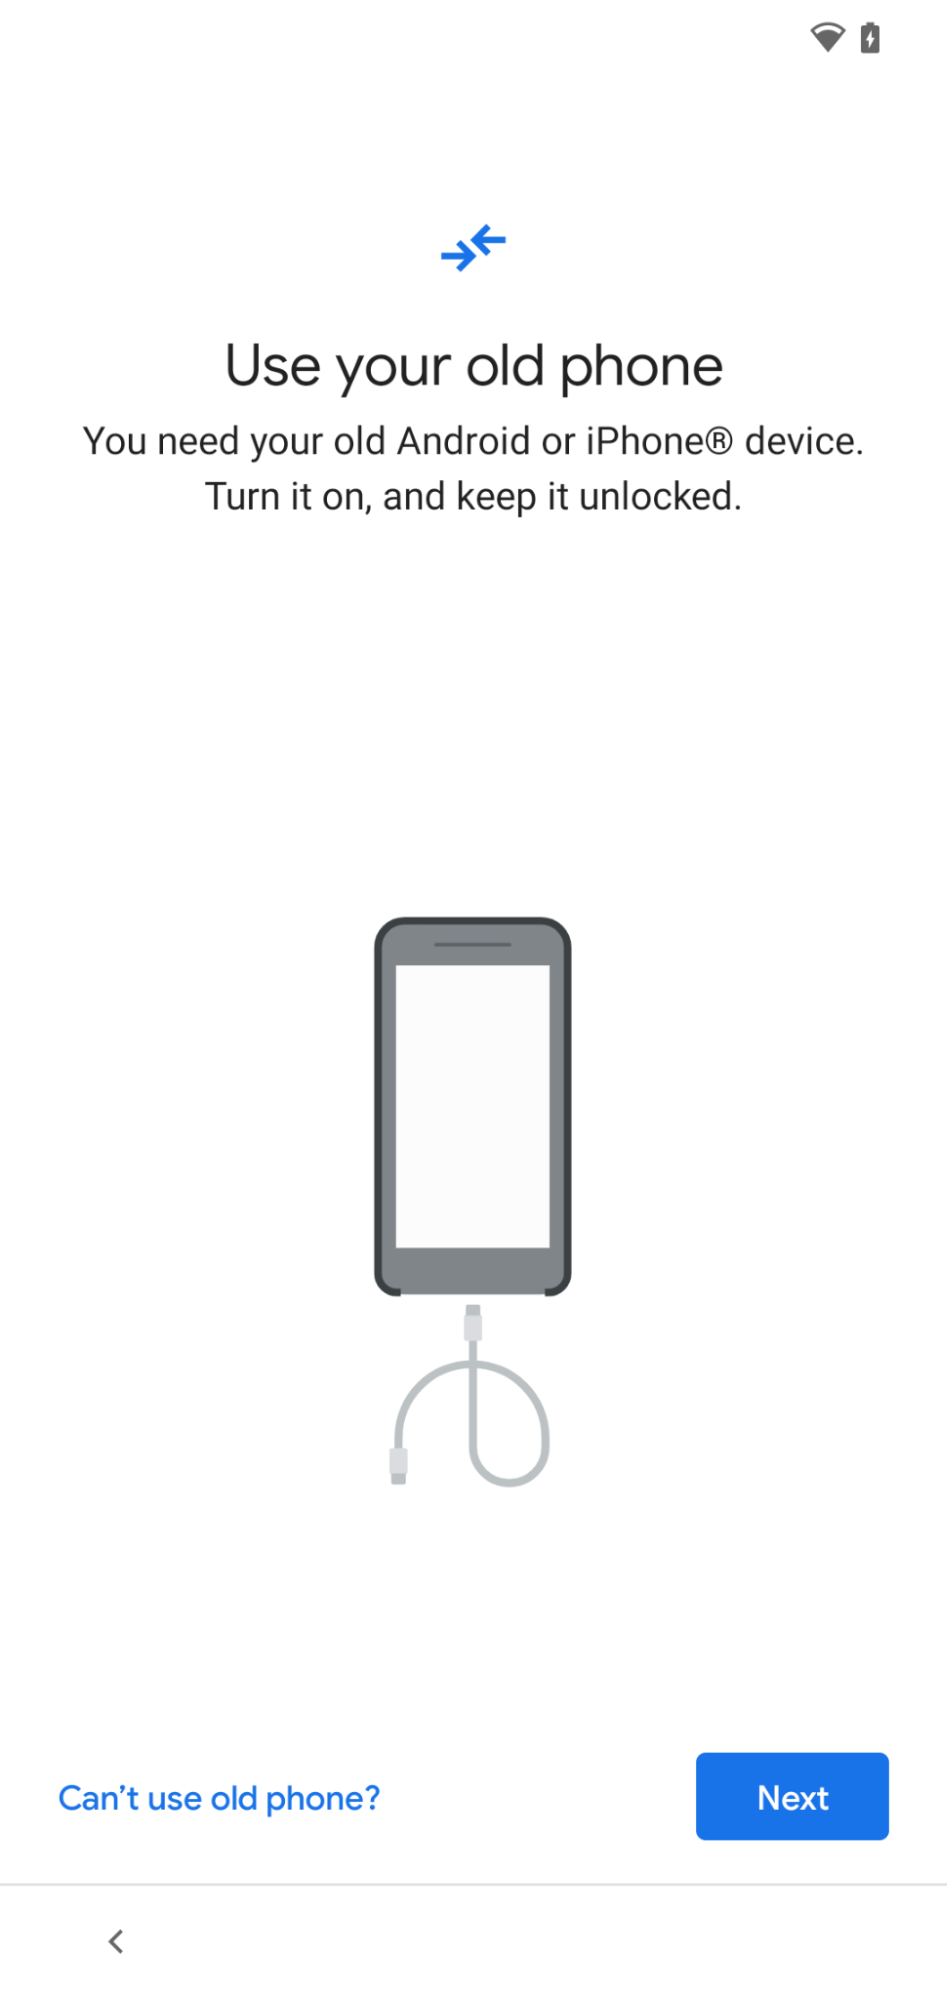
图 2. 启动云端恢复流程。
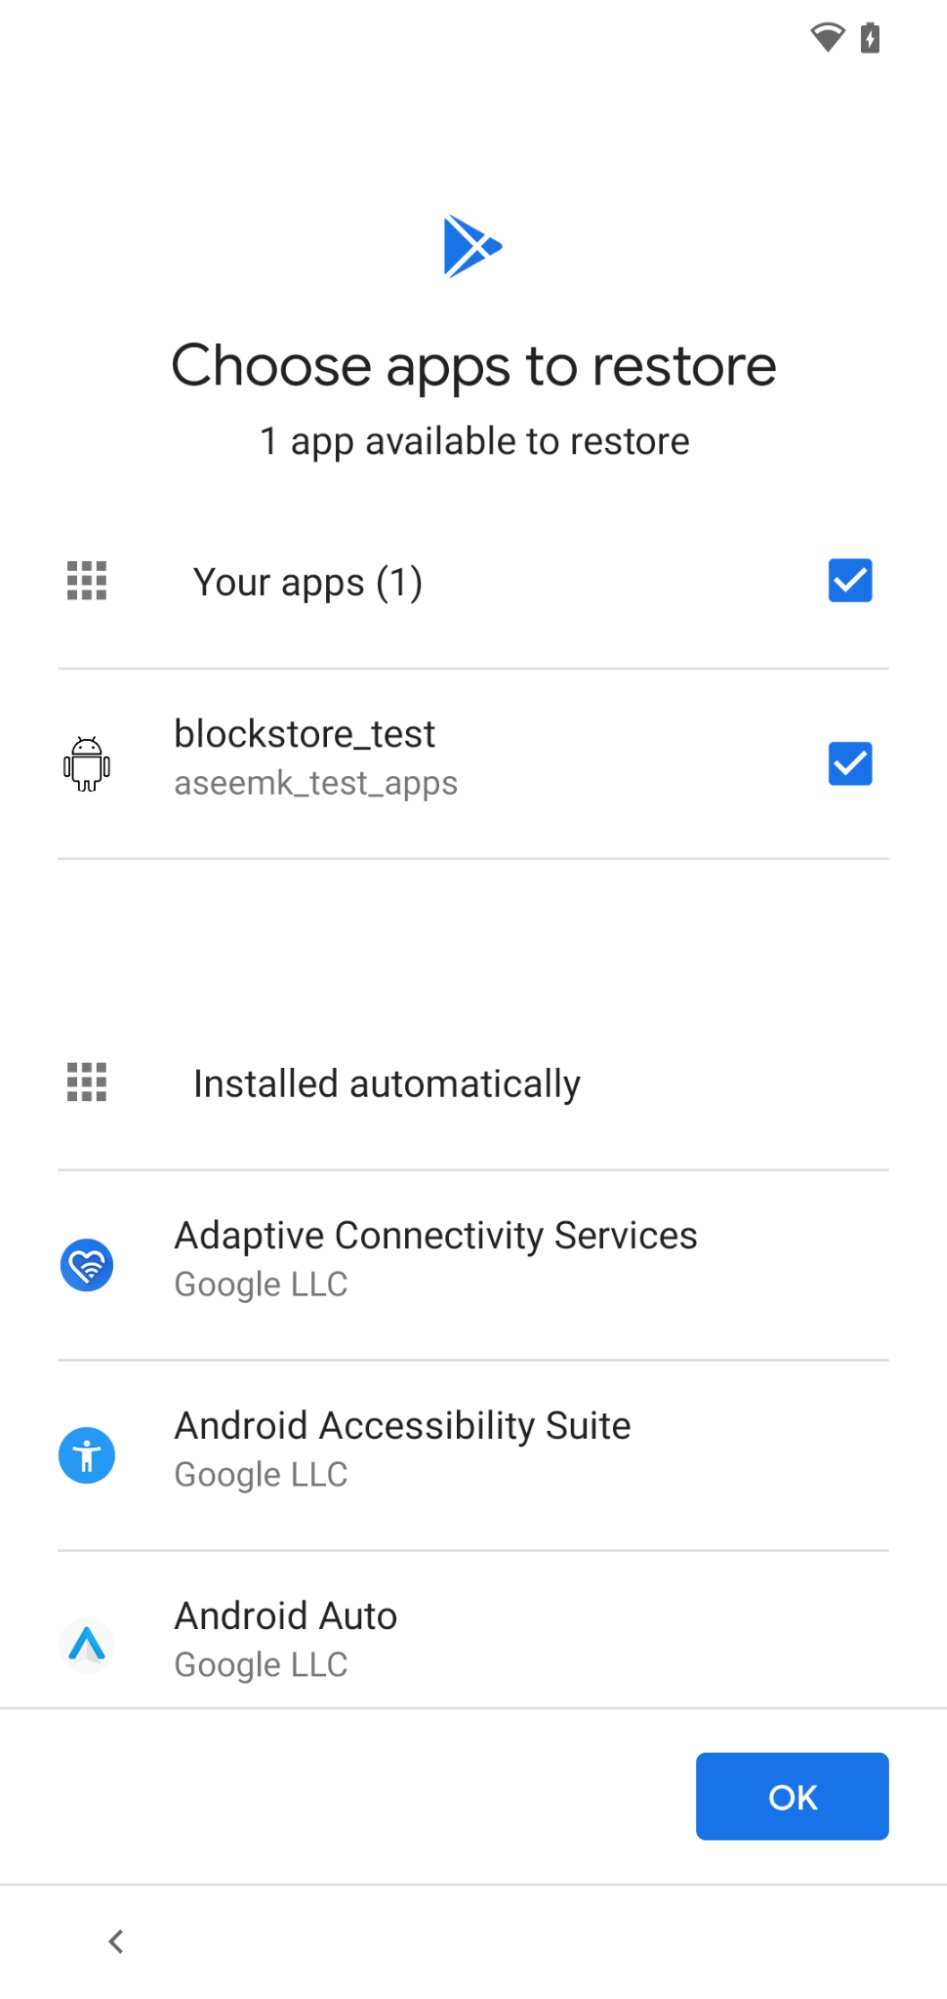
在恢复流程中,确保已选择要恢复的应用(如屏幕所示)。
图 3. 选择要恢复的应用。
其他说明
包含 Google 账号转移的恢复流程始终优先于任何自定义 OEM 恢复流程。如果不确定,请选择可用的第一个设备到设备恢复流程。
[[["易于理解","easyToUnderstand","thumb-up"],["解决了我的问题","solvedMyProblem","thumb-up"],["其他","otherUp","thumb-up"]],[["没有我需要的信息","missingTheInformationINeed","thumb-down"],["太复杂/步骤太多","tooComplicatedTooManySteps","thumb-down"],["内容需要更新","outOfDate","thumb-down"],["翻译问题","translationIssue","thumb-down"],["示例/代码问题","samplesCodeIssue","thumb-down"],["其他","otherDown","thumb-down"]],["最后更新时间 (UTC):2025-07-27。"],[],[],null,["# Testing restore flows\n\nSupported device-to-device restore flows\n----------------------------------------\n\nSome OEMs build custom device-to-device restore flows. Block Store only works\nfor restore flows that include Google's account transfer functionality, since\nthis is how we verify the user's identity. Google Account transfer is available\non all Android devices with Google Play services, and can be accessed through\nthe flows described in this document.\n\n### Google cable restore\n\nThe Google cable restore is supported on Pixel (and newer models of Motorola and\nSharp) devices. During Android setup, tap \"Next\" on the screen below:\n**Figure 1.** Initial screen during a cable restore flow.\n\nFollow the prompts to connect the cable between the source and target devices,\nand proceed to restore. Make sure you consent to the screen shown to copy your\nGoogle Account:\n**Figure 2.** Copy data to your new phone.\n\nIf the Google Account is not transferred, neither will the Block Store data.\n\n### Samsung Smart Switch\n\nIf the target device is a Samsung Galaxy, there are two ways to enter the\nrestore flow: 1) from initial setup or 2) by launching Smart Switch outside of\nsetup.\n\nIn order to launch the flow from setup, tap \"Next\" on the screen shown and\nfollow the instructions to complete the device-to-device restore:\n**Figure 1.** Samsung Smart Switch app.\n\nAs with the Google cable flow, make sure you consent to the Google Account\ntransfer. Otherwise, Block Store data will not be transferred.\n\nIn order to launch the flow from outside the setup, find the Smart Switch app and\nlaunch it directly on both devices (if your source device is not a Samsung\ndevice, you'll have to install the Smart Switch app on that device from the\n[Play Store](https://play.google.com/store/apps/details?id=com.sec.android.easyMover)).\nThe Block Store data is transferred as part of the account data, so you need to\nmake sure \"Accounts\" is selected on the \"Select data to transfer\" screen during\nthe Smart Switch flow:\n**Figure 2.** Select data to transfer.\n\nIf you run Smart Switch more than once as you test, you might not be able to\nselect \"Accounts\" in that screen on subsequent transfers (the option is grayed\nout). That's because the target device will already have all the accounts\npresent on the source device. One workaround is to have 2 Google Accounts on the\nsource device: the account enrolled in the Block Store program (see\nprerequisites) and another account. Before starting a new Smart Switch transfer,\nremove the second account on the target device (from **Settings \\\u003e Accounts and\nbackup \\\u003e Accounts**). You should then be able to select \"Accounts\" in the\n\"Select data to transfer\" screen.\n\n### Android wireless restore\n\nFor non-Samsung OEMs that don't support the Google cable flow, tap \"Next\" on the\nscreen shown:\n**Figure 1.** Initial screen during a wireless restore flow.\n\nYou should then see the screen shown below:\n**Figure 2.** Select which device to backup from.\n\nSelect \"A backup from an Android phone\". Follow the instructions to complete the\nrestore flow. As with the other flows, make sure you consent to the Google\naccount transfer.\n\nSupported cloud restore flow\n----------------------------\n\nThe following are the steps to perform Google cloud restore during\ndevice setup.\n\n### Google cloud restore\n\nDuring Android setup, tap \"Next\" on the screen shown:\n**Figure 1.** Initial screen during cloud restore flow.\n\nOn the next screen(as shown), tap \"Can't use old phone\" to trigger cloud restore\nflow. Follow the prompts to go through the cloud restore, including signing to\nyour Google Account (**it needs to be the same as the backup account in your\nsource device**), select the source device to restore from, etc.\n**Figure 2.** Initiate cloud restore flow.\n\nMake sure your app is selected for restore (in the screen shown) during the\nrestore flow.\n**Figure 3.** Select your app to restore.\n\nAdditional notes\n----------------\n\n- The restore flow that includes Google's account transfer will always come first before any custom OEM restore flows. When in doubt, choose the first device-to-device restore flow available to you.\n- There may be variation in the screens depending on the OEM and Android version."]]