Jetpack XR SDK에는 일부 하위 버전의 Android 스튜디오와 호환되지 않는 기능과 변경사항이 포함되어 있습니다. Android XR용으로 개발할 때 최적의 개발 환경을 위해 Android 스튜디오의 최신 Canary 빌드를 사용하세요. 다른 버전에는 Android XR 도구가 포함되지 않을 수 있습니다. 여러 버전을 함께 설치할 수 있으므로 이미 설치되어 있는 기존 버전의 Android 스튜디오를 그대로 유지할 수 있습니다.
Android 스튜디오 설치
다음 단계에 따라 Android XR용 Android 스튜디오를 다운로드하고 구성하세요.
이미 설치된 Android 스튜디오 버전을 모두 닫습니다.
Android 스튜디오의 최신 Canary 빌드를 다운로드하고 원하는 위치에 추출한 후 애플리케이션을 실행합니다.
마법사의 설치 안내를 따릅니다.
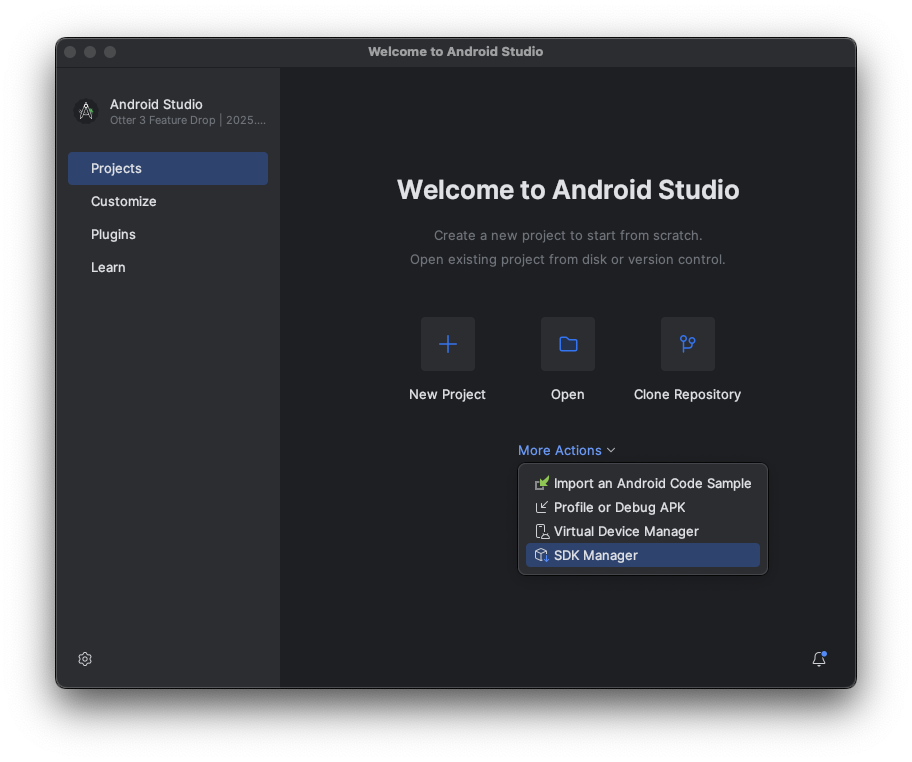
Welcome to Android 스튜디오 대화상자에서 More Actions를 클릭한 다음 SDK Manager를 선택합니다.
Android SDK 설정에서 SDK 도구 탭을 클릭한 후 다음 도구의 최신 버전을 선택합니다.
- Android SDK 빌드 도구
- Android Emulator
- Android SDK 플랫폼 도구
- API 31~36용 Layout Inspector

Android XR Emulator에서 실행할 가상 기기 만들기
다양한 유형의 XR 기기에서 앱의 환경이 어떻게 표시되고 작동하는지 확인하려면 Android XR 에뮬레이터의 가상 XR 기기에서 앱을 실행하면 됩니다. 다양한 유형의 가상 XR 기기용 에뮬레이터를 설정하는 방법에 관한 자세한 내용은 다음 페이지를 참고하세요.
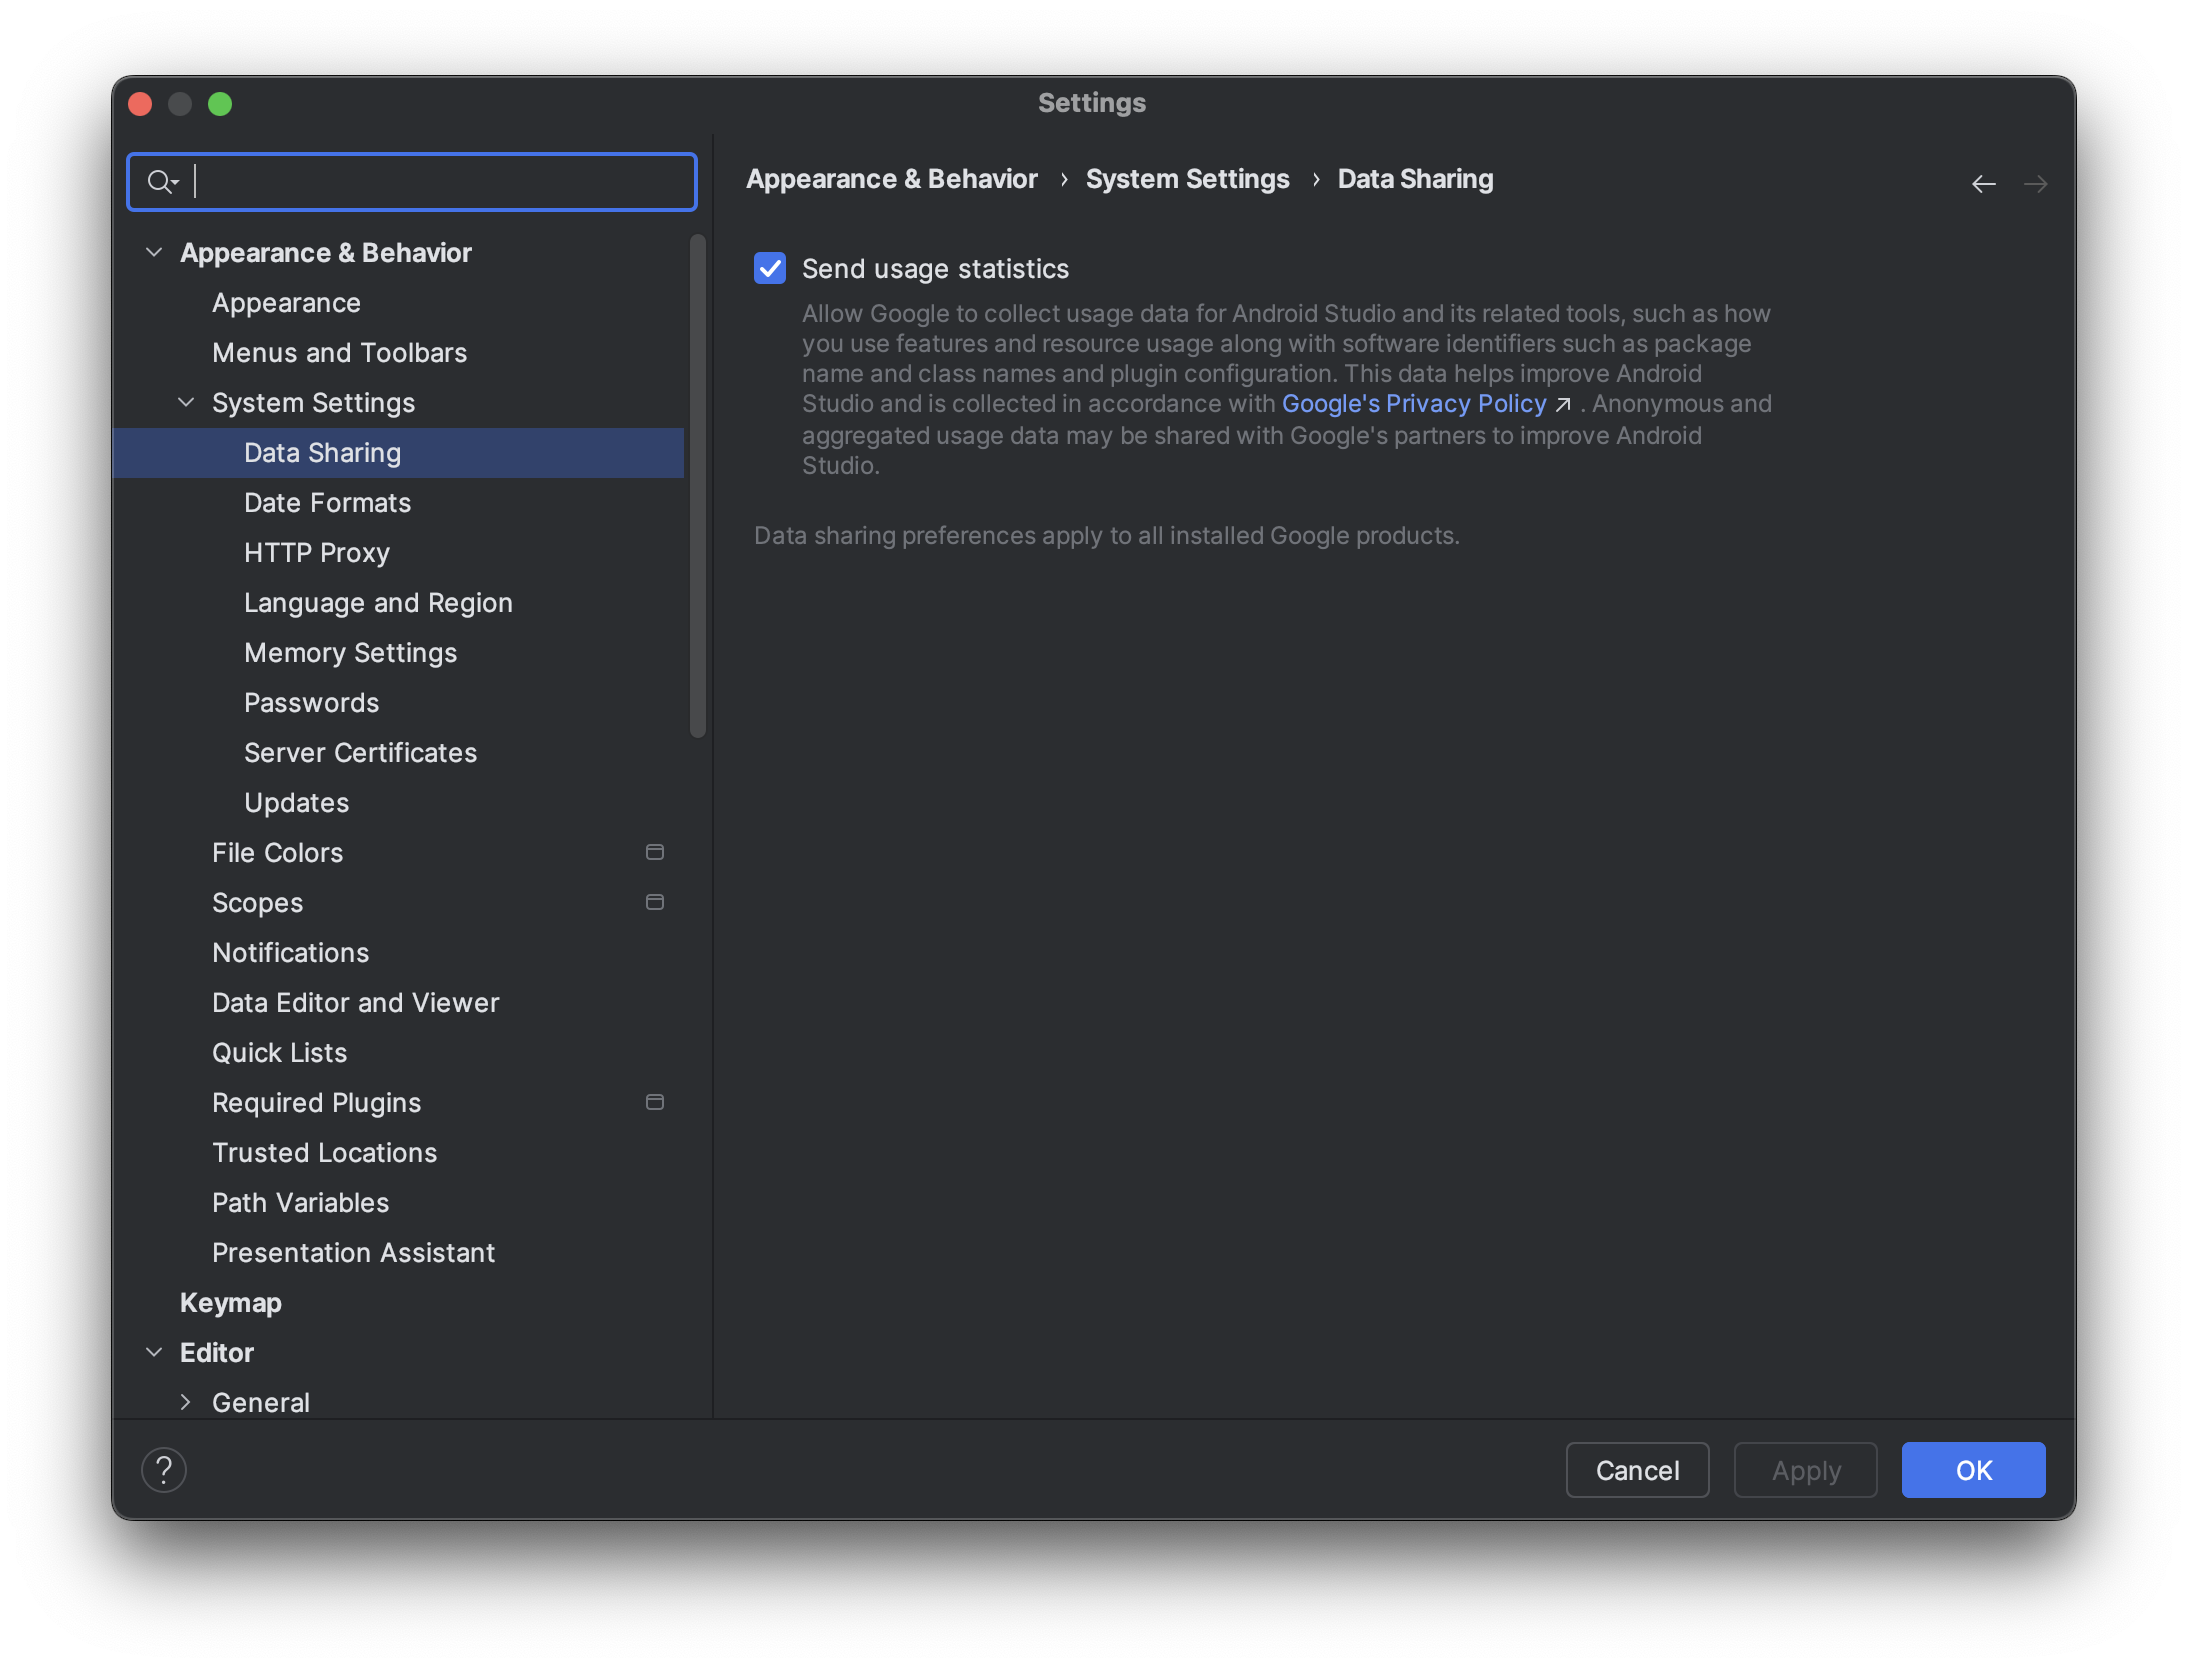
사용 통계를 사용 설정하여 XR용 Android 스튜디오 개선 (선택사항)
이 버전은 Android 스튜디오의 Canary 빌드이므로 많은 기능이 아직 개발 중입니다. 이러한 도구를 개선할 수 있도록 사용 통계를 사용 설정하고 의견을 보내주세요.
사용 통계를 사용 설정하려면 다음 단계를 따르세요.
- 설정 > 모양 및 동작 > 시스템 설정 > 데이터 공유를 클릭합니다.
사용 통계 보내기를 선택합니다.