
Trình quản lý thông tin xác thực là API Jetpack được đề xuất để trao đổi thông tin xác thực trong các ứng dụng Android. API Trình quản lý thông tin xác thực đơn giản hoá việc trao đổi thông tin xác thực trên nhiều kiểu dáng cho các trường hợp sử dụng trải rộng trên hoạt động xác thực và uỷ quyền. Bạn cũng có thể dùng Trình quản lý thông tin xác thực để xử lý thông tin xác thực kỹ thuật số và khôi phục thông tin xác thực của người dùng trên các thiết bị Android mới.
Các tính năng của Trình quản lý thông tin xác thực
Trình quản lý thông tin xác thực giúp đơn giản hoá quy trình đăng nhập và tăng cường bảo mật bằng cách cung cấp một bộ tính năng mạnh mẽ, bao gồm:
- Hỗ trợ nhiều cơ chế xác thực: Cho phép người dùng đăng ký hoặc đăng nhập vào ứng dụng của bạn bằng cách sử dụng:
- Khoá truy cập
- Đăng nhập bằng Google và các cơ chế đăng nhập liên kết khác
- Mật khẩu
- Thông tin đăng nhập kỹ thuật số
- Khôi phục thông tin đăng nhập trên nhiều thiết bị: Cung cấp khả năng tích hợp với Restore Credentials (Khôi phục thông tin đăng nhập), cho phép người dùng bắt đầu sử dụng ứng dụng của bạn một cách liền mạch trên một thiết bị mới.
- Tích hợp liền mạch với nhà cung cấp thông tin xác thực: Hỗ trợ nhà cung cấp thông tin xác thực, bao gồm cả trình quản lý mật khẩu như Trình quản lý mật khẩu của Google.
- Quản lý thông tin đăng nhập: Cho phép cập nhật siêu dữ liệu cho thông tin đăng nhập của người dùng, giúp duy trì tính nhất quán của thông tin đăng nhập trên ứng dụng và nhà cung cấp thông tin đăng nhập.
- Khả năng tương thích với WebView: Hoạt động với các ứng dụng sử dụng WebView.
- Tích hợp tính năng tự động điền: Tích hợp với tính năng tự động điền để hiển thị thông tin đăng nhập trong giao diện người dùng tự động điền.
Lợi ích của việc sử dụng Credential Manager
Việc áp dụng Trình quản lý thông tin xác thực mang lại một số lợi ích chính cho cả ứng dụng và người dùng của bạn:
- Tăng cường bảo mật: Khoá truy cập tăng cường bảo mật và bảo vệ người dùng khỏi các cuộc tấn công giả mạo.
- Hỗ trợ nhiều kiểu dáng thiết bị: Các API này hoạt động trên nhiều kiểu dáng thiết bị Android, bao gồm cả thiết bị di động, Android XR và Wear OS.
- Đơn giản hoá quy trình xác thực trong nhiều trường hợp sử dụng: Thông tin đăng nhập kỹ thuật số, chẳng hạn như giấy phép lái xe kỹ thuật số, thẻ căn cước công ty và thẻ căn cước quốc gia, cho phép xác thực trong nhiều trường hợp sử dụng, kể cả những trường hợp yêu cầu xác minh số điện thoại.
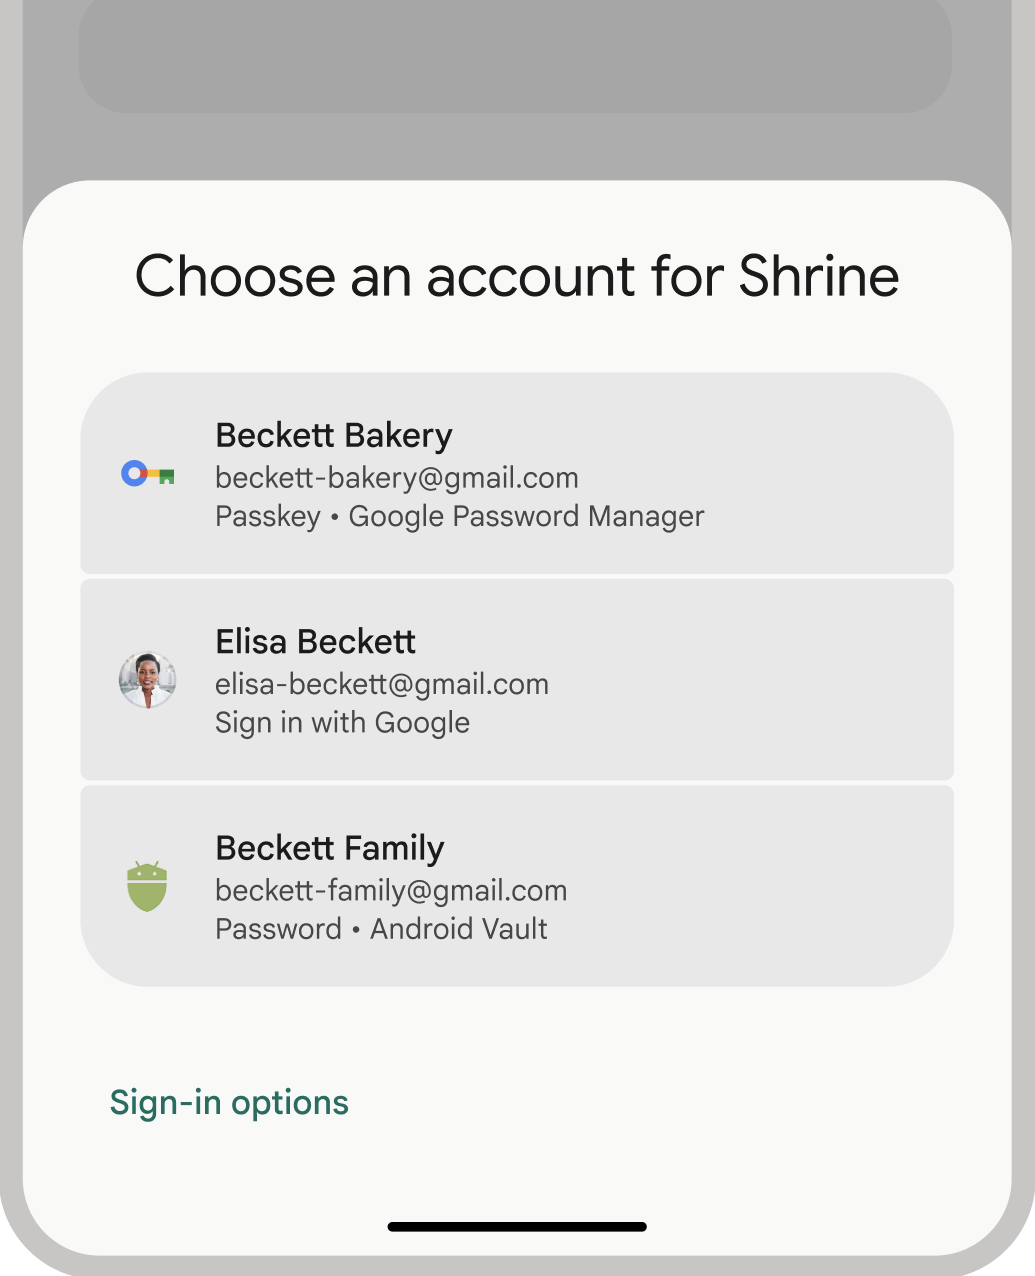
- Cải thiện trải nghiệm người dùng: Giao diện hợp nhất của Trình quản lý thông tin xác thực mang đến cho người dùng trải nghiệm quen thuộc và nhất quán, đồng thời cải thiện tốc độ đăng ký và đăng nhập. Giao diện người dùng của bảng dưới cùng xuất hiện cùng với nội dung của ứng dụng, vì vậy, người dùng vẫn ở trong bối cảnh của ứng dụng trong quá trình đăng nhập. Hình ảnh sau đây cho thấy giao diện người dùng tích hợp của Trình quản lý thông tin xác thực:
Thuật ngữ xác thực
Một thực thể yêu cầu người dùng xác thực được gọi là bên tin cậy. Quy trình xác thực thường bao gồm các thành phần sau:
- Ứng dụng khách của bên thứ ba: Ứng dụng khách (trong trường hợp này là ứng dụng Android của bạn) xử lý giao diện người dùng để tạo và sử dụng khoá truy cập.
- Máy chủ bên tin cậy: Một máy chủ ứng dụng giúp tạo, lưu trữ và xác minh khoá truy cập.
- Nhà cung cấp thông tin xác thực: Một thành phần lưu trữ và cung cấp thông tin xác thực của người dùng, chẳng hạn như Trình quản lý mật khẩu của Google. Xin lưu ý rằng tài liệu FIDO gọi trình cung cấp thông tin xác thực là trình quản lý thông tin xác thực.
Vùng lưu trữ thông tin xác thực
Nhà cung cấp thông tin xác thực, chẳng hạn như Trình quản lý mật khẩu của Google, cung cấp một vị trí tập trung và an toàn để người dùng quản lý thông tin xác thực trên các thiết bị của họ, giúp đơn giản hoá hơn nữa quy trình xác thực. Để tích hợp với Trình quản lý thông tin xác thực dưới dạng một trình cung cấp thông tin xác thực, hãy xem phần Triển khai quy trình xác thực dưới dạng một trình cung cấp thông tin xác thực.
Để biết thêm thông tin về cách Trình quản lý mật khẩu của Google bảo mật thông tin đăng nhập của bạn, hãy xem phần Độ bảo mật của khoá truy cập trong Trình quản lý mật khẩu của Google.
Di chuyển sang Trình quản lý thông tin xác thực
Trình quản lý thông tin xác thực được thiết kế để thay thế các API xác thực cũ của Android và thông tin xác thực FIDO2 cục bộ. Để biết thêm thông tin về việc di chuyển sang Trình quản lý thông tin xác thực, hãy xem các hướng dẫn sau: