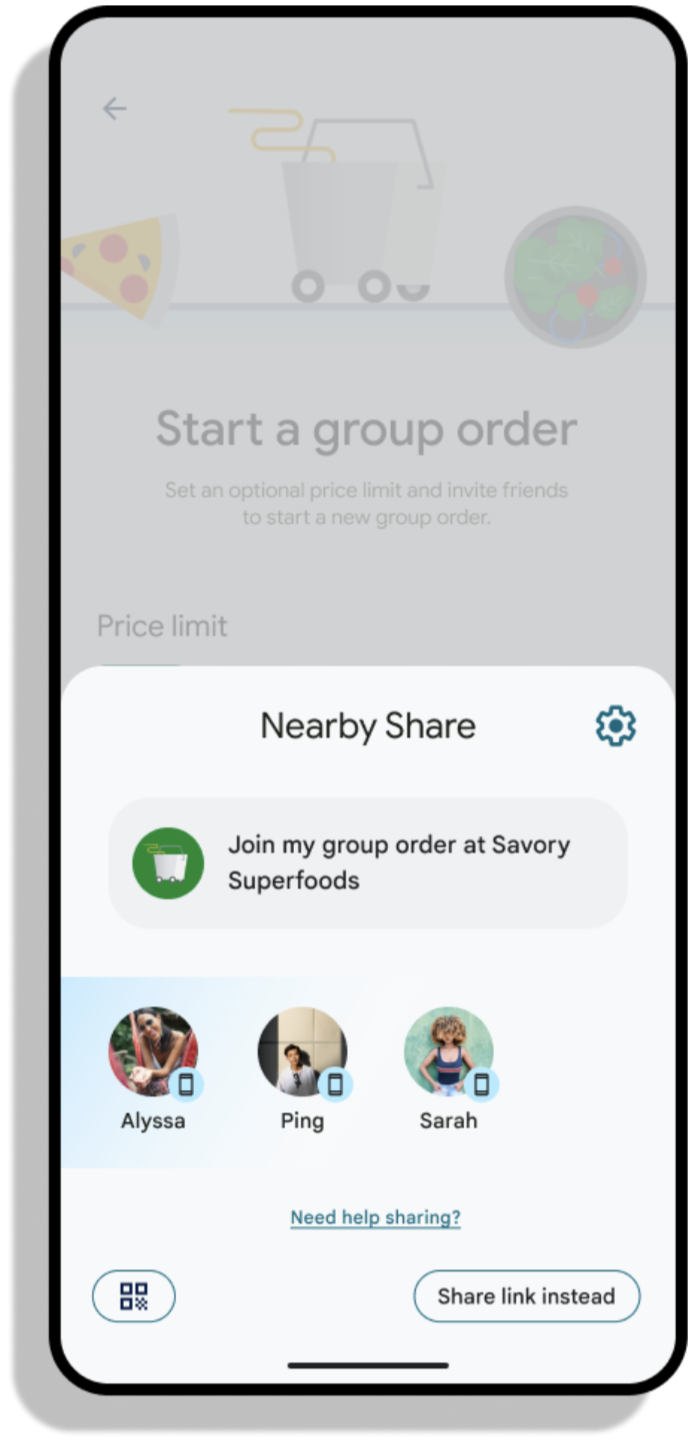
거의 모든 멀티스크린 환경은 사용 가능한 기기를 찾는 것으로 시작합니다. 받는사람 Google은 Device Discovery API를 제공합니다.
 <ph type="x-smartling-placeholder">
기기 선택 대화상자 실행
기기 검색은 시스템 대화상자를 사용하여 사용자가 대상 기기를 선택할 수 있도록 합니다. 받는사람
기기 선택 대화상자 시작, 먼저 기기 검색을 가져와야 함
결과 수신자를 등록합니다. 참고:
registerForActivityResult, 이 수신자는 무조건
일부에 호출될 수 있습니다.
Kotlin
override fun onCreate(savedInstanceState: Bundle?) {
  super.onCreate(savedInstanceState)
  devicePickerLauncher = Discovery.create(this).registerForResult(this, handleDevices)
}
자바
@Override
public void onCreate(@Nullable Bundle savedInstanceState) {
  super.onCreate(savedInstanceState);
  devicePickerLauncher = Discovery.create(this).registerForResult(this, handleDevices);
}
위의 코드 스니펫에는 정의되지 않은 handleDevices 객체가 있습니다. 후(After)
사용자가 연결할 기기를 선택하고 SDK가 성공적으로
다른 기기에 연결되면 이 콜백은 Participants 목록을 수신합니다.
선택합니다.
Kotlin
handleDevices = OnDevicePickerResultListener { participants -> participants.forEach {
    // Use participant info
  }
}
자바
handleDevices = participants -> {
   for (Participant participant : participants) {
      // Use participant info
   }
}
기기 선택 도구가 등록되면 devicePickerLauncher를 사용하여 실행합니다.
인스턴스를 만들 수 있습니다 DevicePickerLauncher.launchDevicePicker는
기기 필터 (아래 섹션 참고) 및 startComponentRequest의 목록. 이
startComponentRequest는 시작되어야 하는 활동을 나타내는 데 사용됩니다.
수신 기기, 사용자에게 표시된 요청 이유
Kotlin
devicePickerLauncher.launchDevicePicker(
  listOf(),
  startComponentRequest {
    action = "com.example.crossdevice.MAIN"
    reason = "I want to say hello to you"
  },
)
자바
devicePickerLauncher.launchDevicePickerFuture(
    Collections.emptyList(),
    new StartComponentRequest.Builder()
        .setAction("com.example.crossdevice.MAIN")
        .setReason("I want to say hello to you")
        .build());
연결 요청 수락
사용자가 기기 선택 도구에서 기기를 선택하면
연결 수락을 요청합니다. 승인되면
타겟 활동이 실행되며 이는 onCreate에서 처리할 수 있습니다.
onNewIntent
Kotlin
override fun onCreate(savedInstanceState: Bundle?) {
  super.onCreate(savedInstanceState)
  handleIntent(getIntent())
}

override fun onNewIntent(intent: Intent) {
  super.onNewIntent(intent)
  handleIntent(intent)
}

private fun handleIntent(intent: Intent) {
  val participant = Discovery.create(this).getParticipantFromIntent(intent)
  // Accept connection from participant (see below)
}
자바
@Override
public void onCreate(@Nullable Bundle savedInstanceState) {
  super.onCreate(savedInstanceState);
  handleIntent(getIntent());
}

@Override
public void onNewIntent(Intent intent) {
  super.onNewIntent(intent);
  handleIntent(intent);
}

private void handleIntent(Intent intent) {
  Participant participant = Discovery.create(this).getParticipantFromIntent(intent);
  // Accept connection from participant (see below)
}
기기 필터
기기를 검색할 때 일반적으로 이러한 기기는 현재 사용 사례와 관련된 것을 보여줍니다. 예를 들면 다음과 같습니다.
- QR 코드를 스캔하는 데 도움이 되도록 카메라가 있는 기기로만 필터링
- 대형 화면 시청 환경을 위해 TV로만 필터링
이 개발자 프리뷰에서는 먼저 동일한 사용자가 소유한 기기입니다.
DeviceFilter 클래스를 사용하여 기기 필터를 지정할 수 있습니다.
Kotlin
val deviceFilters = listOf(DeviceFilter.trustRelationshipFilter(MY_DEVICES_ONLY))
자바
List<DeviceFilter> deviceFilters =
    Arrays.asList(DeviceFilter.trustRelationshipFilter(MY_DEVICES_ONLY));
기기 필터를 정의하고 나면 기기 검색을 시작할 수 있습니다.
Kotlin
devicePickerLauncher.launchDevicePicker(deviceFilters, startComponentRequest)
자바
Futures.addCallback(
    devicePickerLauncher.launchDevicePickerFuture(deviceFilters, startComponentRequest),
    new FutureCallback<Void>() {
      @Override
      public void onSuccess(Void result) {
        // do nothing, result will be returned to handleDevices callback
      }

      @Override
      public void onFailure(Throwable t) {
        // handle error
      }
    },
    mainExecutor);
launchDevicePicker는
suspend 키워드
