Android XR SDK 現已在開發人員預覽版中推出。敬請提供意見回饋!請前往
支援頁面與我們聯絡。
Unity 適用的 Android XR Extensions 快速入門
透過集合功能整理內容
你可以依據偏好儲存及分類內容。
每項功能都包含範例,方便您使用程式碼和場景設定進行操作。本快速入門會逐步引導您匯入 Unity 套件的 Android XR 擴充功能,然後設定臉部追蹤範例。
必要條件
完成這些步驟之前,請先確認您已完成「Unity 專案設定」一文所述的步驟。
匯入套件
如要從 Git 網址載入 Unity Package Manager 套件,請按照下列步驟操作:
- 在「Window」中開啟「Package Manager」。
- 開啟「Package Manager」工具列中的新增選單。
- 在新增套件的選項中,按一下「+」 (加號) 按鈕。
在下拉式清單中,按一下「從 Git 網址安裝套件」。
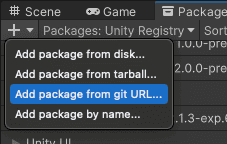
輸入下列網址:
https://github.com/android/android-xr-unity-package.git
選取「安裝」。
設定臉部追蹤範例
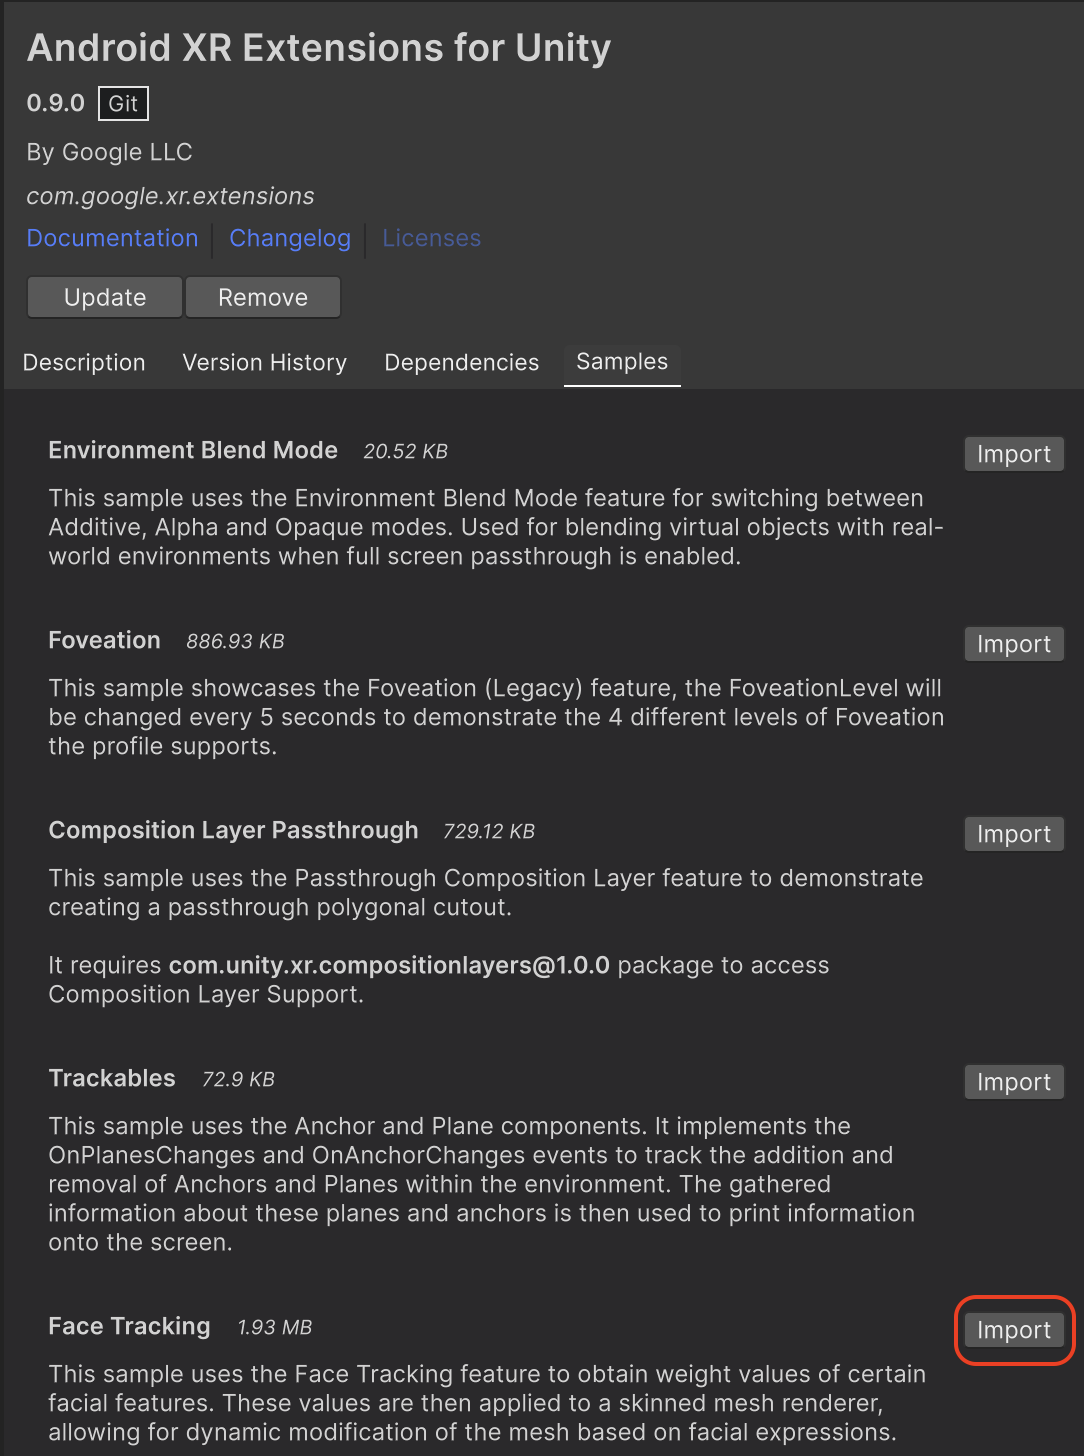
所有範例 (包括這個範例) 都包含 README 檔案,其中包含如何設定及設定專案的操作說明。
如要匯入及設定範例,請按照下列步驟操作:
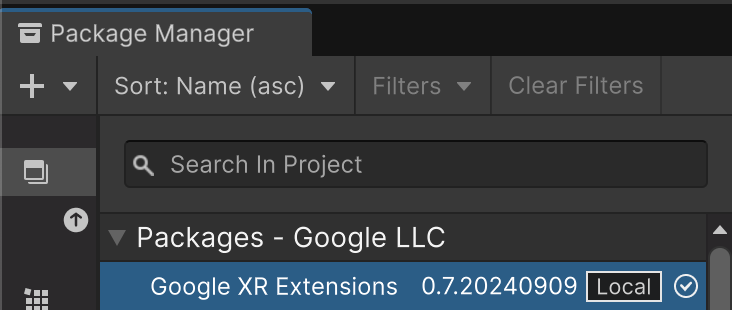
依序前往「Package Manager」 >「In Project」 >「Android XR Extensions for Unity」。
選取「範例」分頁標籤。找出「Face Tracking」範例,然後按一下「Import」。
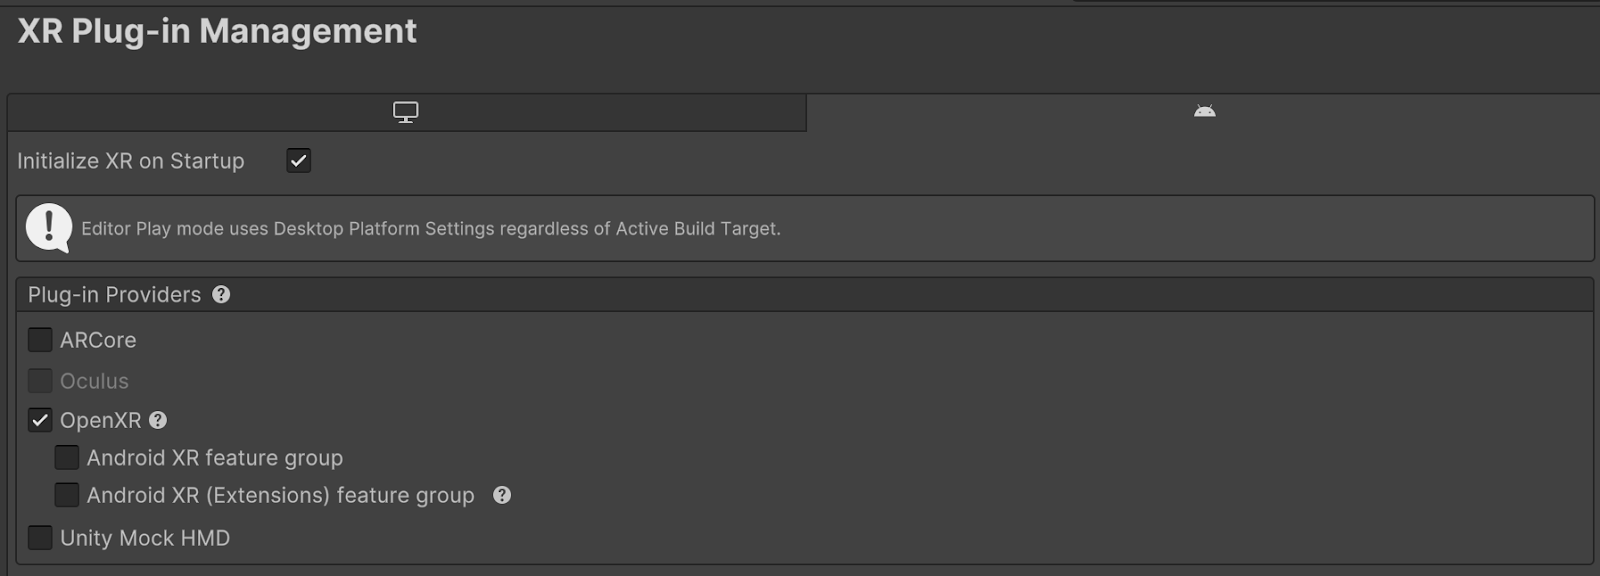
依序前往「編輯」>「專案設定」>「XR 外掛程式管理」。
在「Android」分頁中,點選「外掛程式供應器」下方的「OpenXR」,啟用該選項。
接著,啟用 Android XR (擴充功能) 功能群組。
依序前往「編輯」>「專案設定」>「XR 外掛程式管理」>「OpenXR」。
啟用「Android XR:臉部追蹤」。

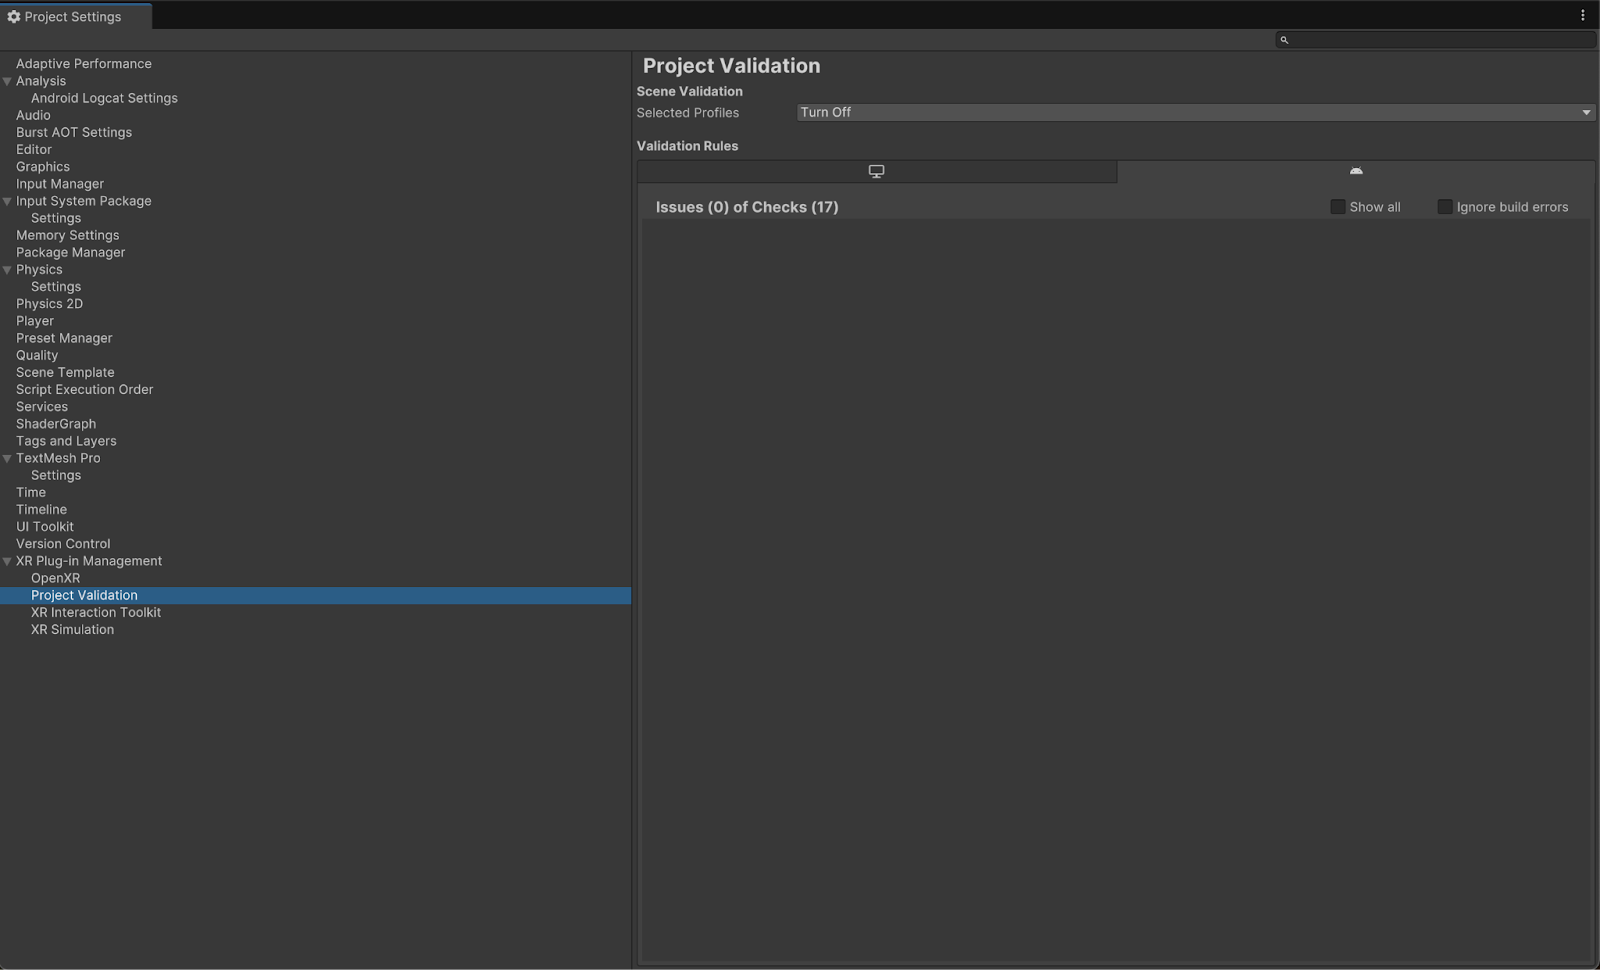
在「XR 外掛程式管理」>「專案驗證」下方,修正所有 OpenXR 相關問題。這有助於設定 Player 設定。
在「Project」中,開啟「FaceTracking」場景,位於「Assets」>「Samples」>「Android XR Extensions for Unity」>「version」>「Face Tracking」。

OpenXR™ 和 OpenXR 標誌是 The Khronos Group Inc. 擁有的商標,並已在中國、歐盟、日本和英國註冊為商標。
這個頁面中的內容和程式碼範例均受《內容授權》中的授權所規範。Java 與 OpenJDK 是 Oracle 和/或其關係企業的商標或註冊商標。
上次更新時間:2025-07-27 (世界標準時間)。
[[["容易理解","easyToUnderstand","thumb-up"],["確實解決了我的問題","solvedMyProblem","thumb-up"],["其他","otherUp","thumb-up"]],[["缺少我需要的資訊","missingTheInformationINeed","thumb-down"],["過於複雜/步驟過多","tooComplicatedTooManySteps","thumb-down"],["過時","outOfDate","thumb-down"],["翻譯問題","translationIssue","thumb-down"],["示例/程式碼問題","samplesCodeIssue","thumb-down"],["其他","otherDown","thumb-down"]],["上次更新時間:2025-07-27 (世界標準時間)。"],[],[],null,["# Android XR Extensions for Unity quickstart\n\nEach feature includes a sample for you to use and play with code and scene\nsetups. This quickstart walks you through importing the Android XR Extensions\nfor Unity package and then configuring the face tracking sample.\n\nPrerequisites\n-------------\n\nBefore completing these steps, make sure you've completed the steps described in\n[Unity project setup](/develop/xr/unity/setup).\n\nImport packages\n---------------\n\nTo load a Unity Package Manager package from a Git URL:\n\n1. In **Window** , open the **Package Manager**.\n2. Open the add menu in the **Package Manager** toolbar.\n3. In the options for adding packages, click the **+** (plus) button.\n4. In the drop-down list, click **Install package from git URL**.\n\n5. Enter the following URL:\n\n https://github.com/android/android-xr-unity-package.git\n\n6. Select **Install**.\n\nConfigure the face tracking sample\n----------------------------------\n\nAll samples, including this one, include a README file containing\ninstructions on how to configure and set up the project.\n\nTo import and configure the sample:\n\n1. Go to **Package Manager** \\\u003e **In Project** \\\u003e **Android XR Extensions for Unity**.\n\n2. Select the **Samples** tab. Find the **Face Tracking** sample and click **Import**.\n\n3. Go to **Edit \\\u003e Project Settings \\\u003e XR Plug-in Management**.\n\n4. In the **Android** tab, under **Plug-in Providers** , enable **OpenXR**.\n\n Then, enable the **Android XR (Extensions) feature group** .\n5. Go to **Edit \\\u003e Project Settings \\\u003e XR Plug-in Management \\\u003e OpenXR**.\n\n6. Enable **Android XR: Face Tracking**.\n\n7. Under **XR Plug-in Management \\\u003e Project Validation**, fix all OpenXR-related\n issues. This helps configure your Player Settings.\n\n8. In your **Project** , open the **FaceTracking** scene, located in **Assets \\\u003e Samples \\\u003e Android XR Extensions for Unity \\\u003e *version* \\\u003e Face Tracking**.\n\n*** ** * ** ***\n\nOpenXR™ and the OpenXR logo are trademarks owned\nby The Khronos Group Inc. and are registered as a trademark in China,\nthe European Union, Japan and the United Kingdom."]]
