تتضمّن حزمة Jetpack XR SDK بعض الميزات والتغييرات غير المتوافقة مع بعض الإصدارات الأقدم من "استوديو Android". للحصول على أفضل تجربة تطوير لتطبيقات Android XR، استخدِم أحدث إصدار Canary من Android "استوديو". قد لا تتضمّن الإصدارات الأخرى أدوات Android XR. يُرجى العِلم أنّه يمكنك الاحتفاظ بالإصدار الحالي من "استوديو Android" مثبّتًا، إذ يمكنك تثبيت إصدارات متعدّدة جنبًا إلى جنب.
تثبيت "استوديو Android"
يُرجى إكمال الخطوات التالية لتنزيل "استوديو Android" وضبطه من أجل Android XR:
أغلِق أي إصدارات من "استوديو Android" مثبّتة حاليًا.
نزِّل أحدث إصدار Canary من "استوديو Android"، واستخرِجه في الموقع المفضّل لديك، وشغِّل التطبيق.
اتّبِع تعليمات التثبيت في المعالج.
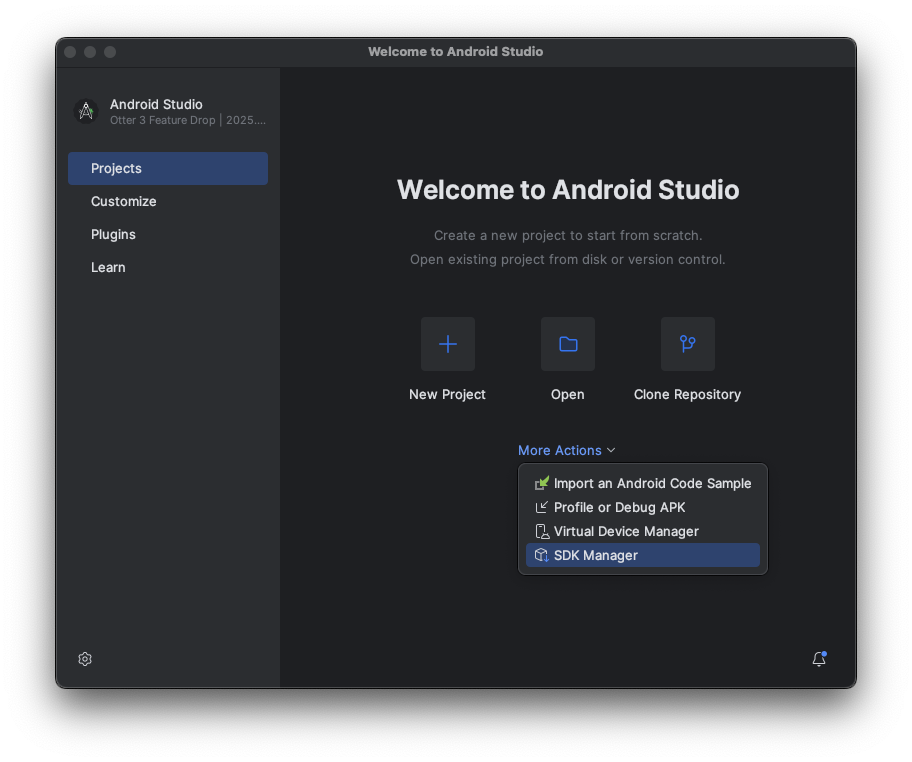
في مربّع الحوار Welcome to استوديو Android ، انقر على More Actions ، و ثمّ على SDK Manager.
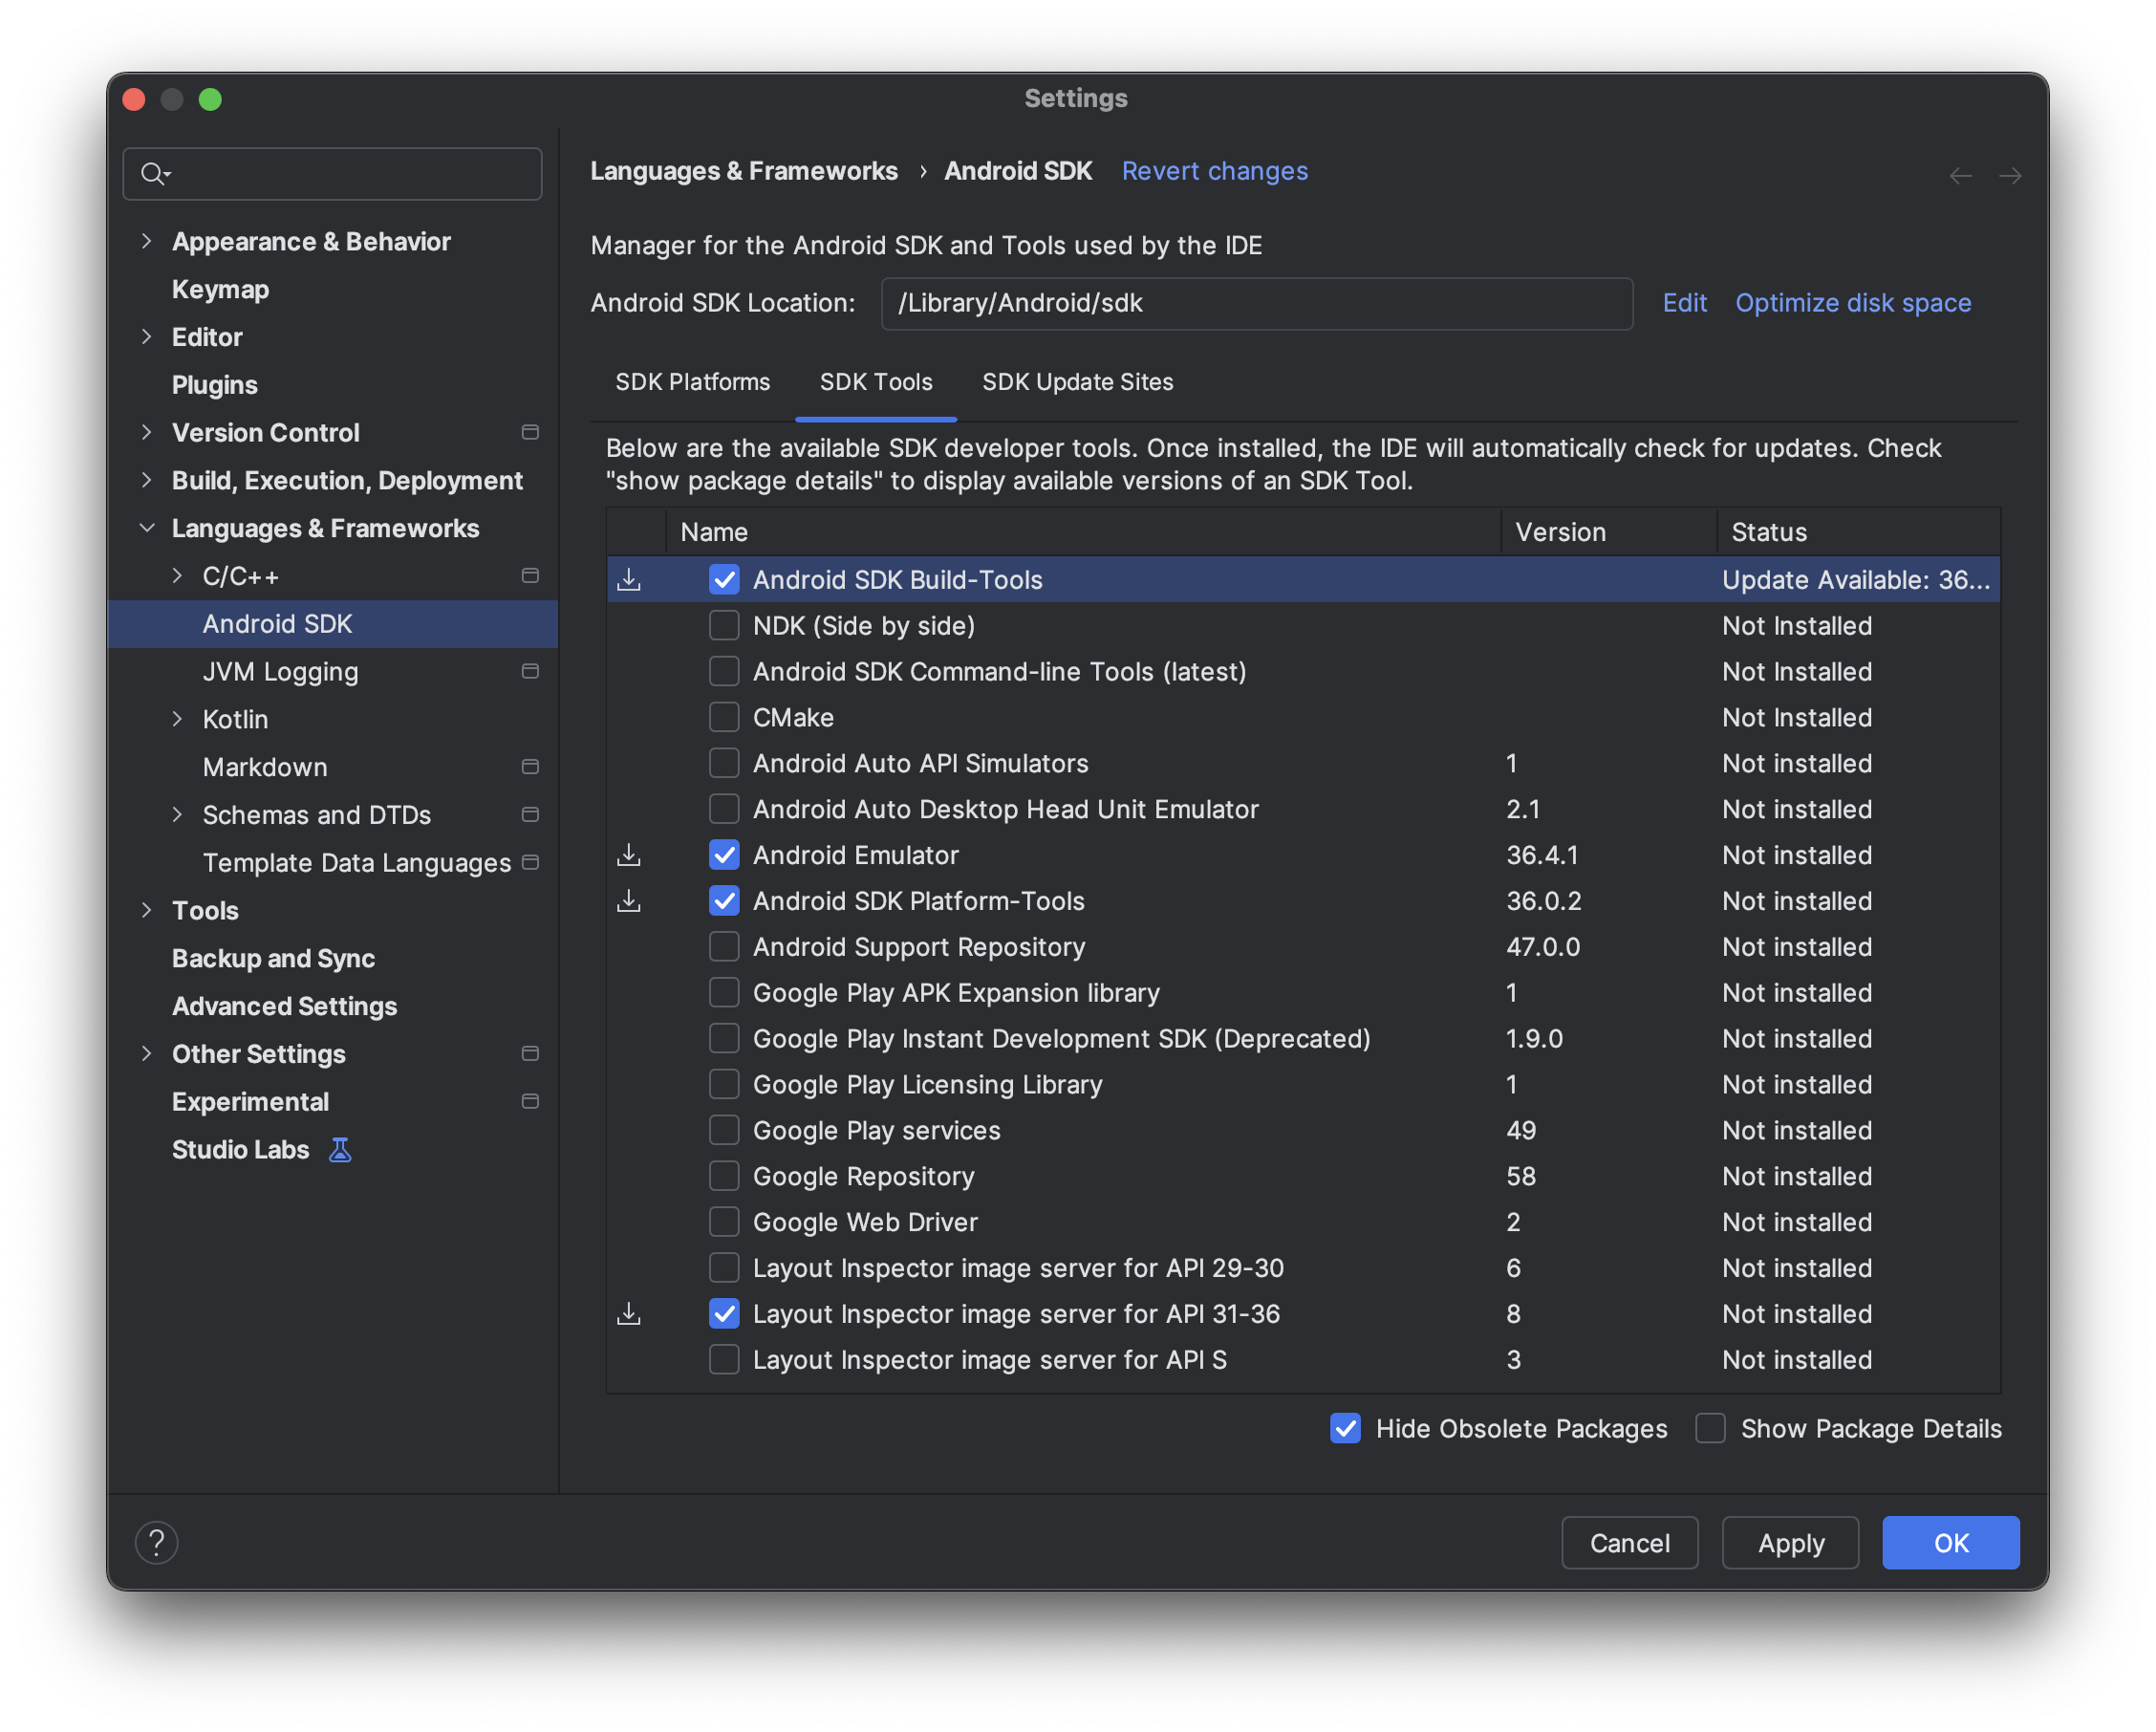
في إعدادات Android SDK ، انقر على علامة التبويب SDK Tools ، ثمّ اختَر أحدث إصدارات الأدوات التالية:
- Android SDK Build-Tools
- Android Emulator
- Android SDK Platform-Tools
- أداة فحص التنسيق لإصدارات واجهة برمجة التطبيقات من 31 إلى 36
إنشاء أجهزة افتراضية لتشغيلها على Android XR Emulator
لمعرفة كيف تبدو تجارب تطبيقك وكيفية عملها على أنواع مختلفة من أجهزة XR، يمكنك تشغيل تطبيقك على أجهزة XR افتراضية على Android XR Emulator. راجِع الصفحات التالية للحصول على معلومات حول إعداد المحاكي لأنواع مختلفة من أجهزة XR الافتراضية:
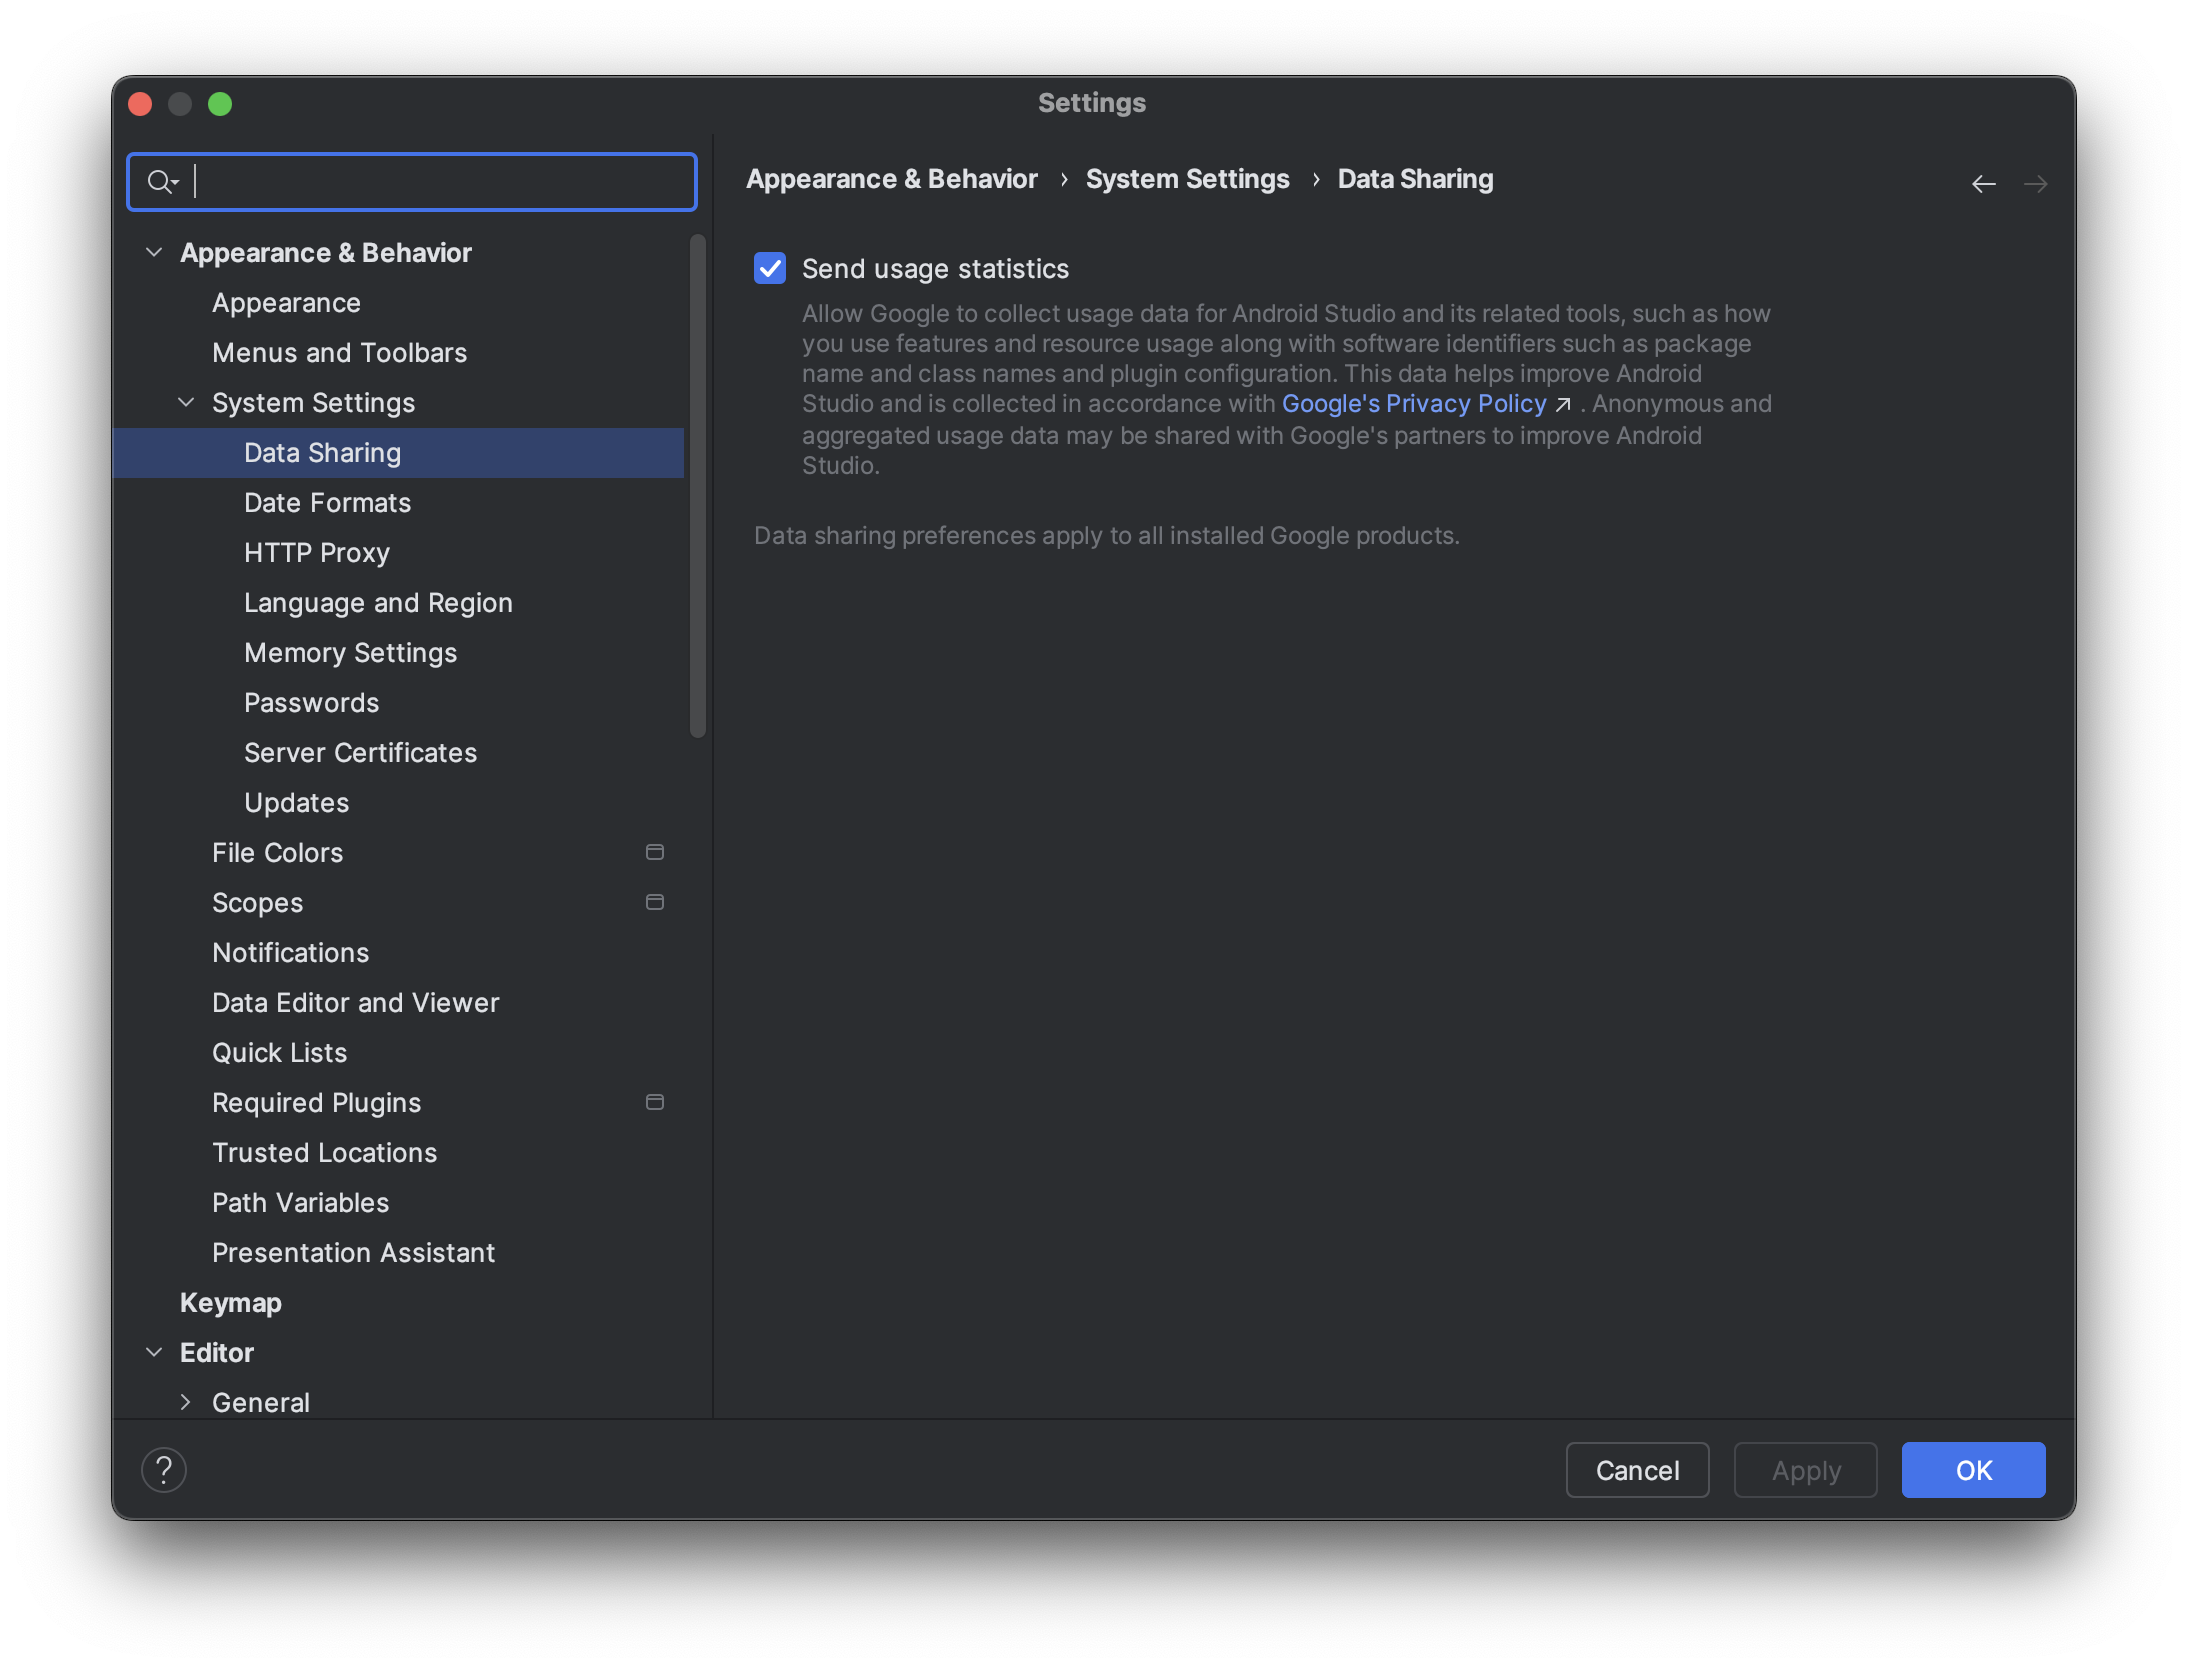
تفعيل إحصاءات الاستخدام للمساعدة في تحسين "استوديو Android" من أجل XR (اختياري)
بما أنّ هذا الإصدار هو إصدار Canary من "استوديو Android"، لا تزال العديد من الميزات قيد التطوير. ننصحك بتفعيل إحصاءات الاستخدام وإرسال ملاحظاتك لمساعدتنا في تحسين هذه الأدوات.
لتفعيل إحصاءات الاستخدام:
- انقر على الإعدادات > المظهر والسلوك > إعدادات النظام > مشاركة البيانات.
انقر على إرسال إحصاءات الاستخدام.