You can use a global action to create a common action that multiple destinations can use. For example, you might want buttons in different destinations to navigate to the same main app screen.
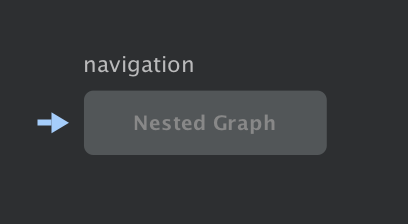
A global action is represented in the Navigation Editor by a small arrow that points to the associated destination, as shown in figure 1.

Create a global action
To create a global action, do the following:
- From the Graph Editor, click on a destination to highlight it.
- Right-click on the destination to display the context menu.
- Select Add Action > Global. An arrow
(
 )
appears to the left of the destination.
 Click the Text tab to navigate to the XML text view. The XML for the global action looks similar to the following:
<?xml version="1.0" encoding="utf-8"?>
<navigation xmlns:app="http://schemas.android.com/apk/res-auto"
            xmlns:tools="http://schemas.android.com/tools"
            xmlns:android="http://schemas.android.com/apk/res/android"
            android:id="@+id/main_nav"
            app:startDestination="@id/mainFragment">

  ...

  <action android:id="@+id/action_global_mainFragment"
          app:destination="@id/mainFragment"/>

</navigation>
Use a global action
To use a global action in your code, pass the resource ID of the global action
to the navigate()
method for each UI element, as shown in the following example:
Kotlin
viewTransactionButton.setOnClickListener { view ->
    view.findNavController().navigate(R.id.action_global_mainFragment)
}
Java
viewTransactionsButton.setOnClickListener(new View.OnClickListener() {
   @Override
   public void onClick(View view) {
       Navigation.findNavController(view).navigate(R.id.action_global_mainFragment);
   }
});
Use Safe Args with a global action
For information on using Safe Args with global actions, see Pass data between destinations.
Additional resources
To learn more about navigation, consult the following additional resources.
