ML Kit is a mobile SDK that brings Google's machine learning expertise to Android and Android apps in a powerful yet easy-to-use package. Whether you're new or experienced in machine learning, you can easily implement the functionality you need in just a few lines of code. There's no need to have deep knowledge of neural networks or model optimization to get started.
How does it work?
ML Kit makes it easy to apply ML techniques in your apps by bringing Google's ML technologies, such as Mobile Vision, and TensorFlow Lite, together in a single SDK. Whether you need the power of real-time capabilities of Mobile Vision's on-device models, or the flexibility of custom TensorFlow Lite models, ML Kit makes it possible with just a few lines of code.
This codelab will walk you through simple steps to add Text Recognition, Language Identification and Translation from real-time camera feed into your existing Android app. This codelab will also highlight best practices around using CameraX with ML Kit APIs.
What you will build
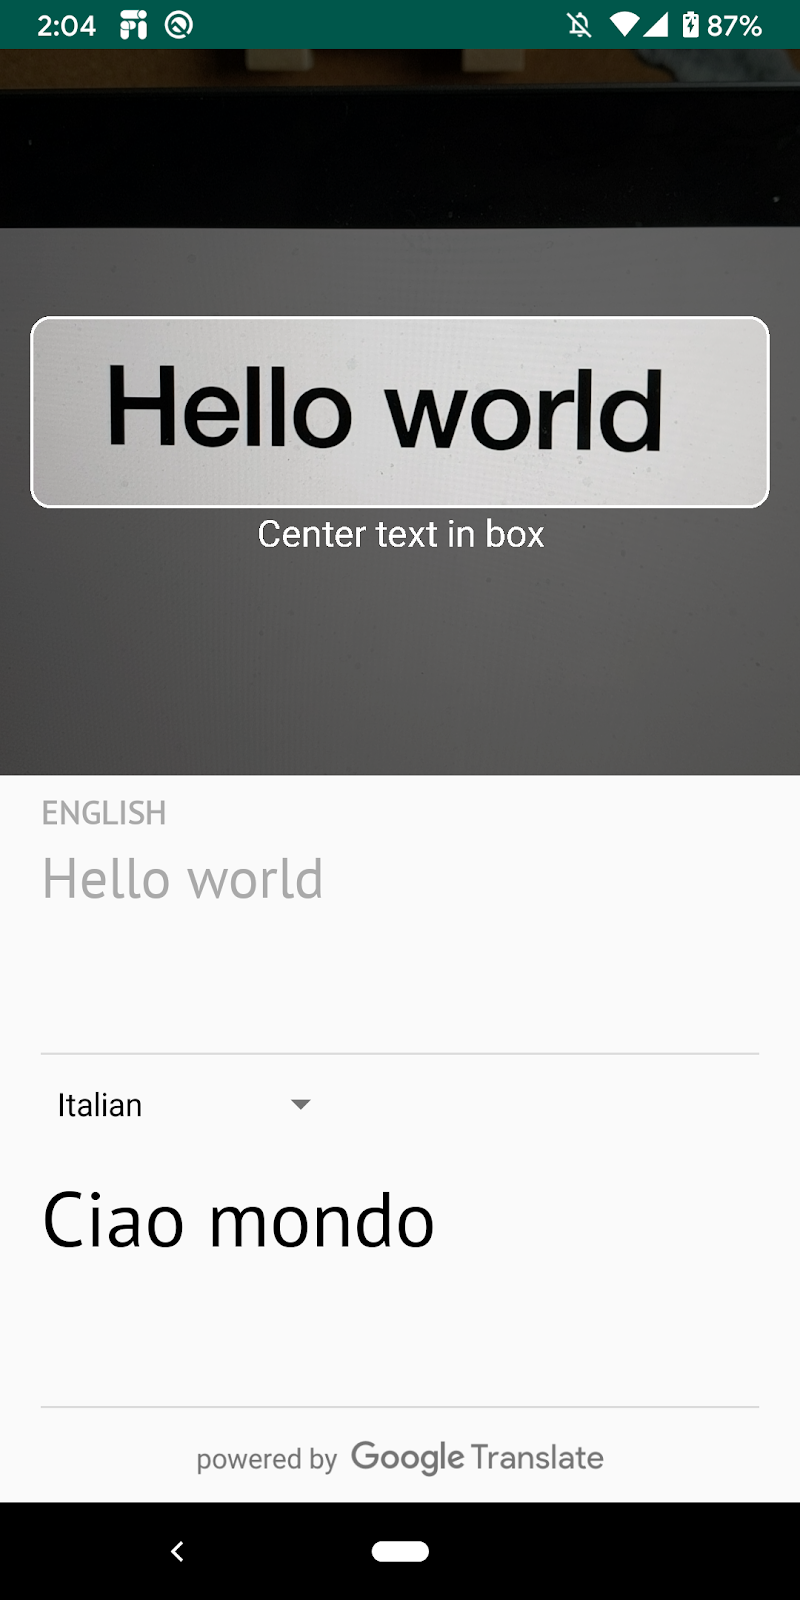
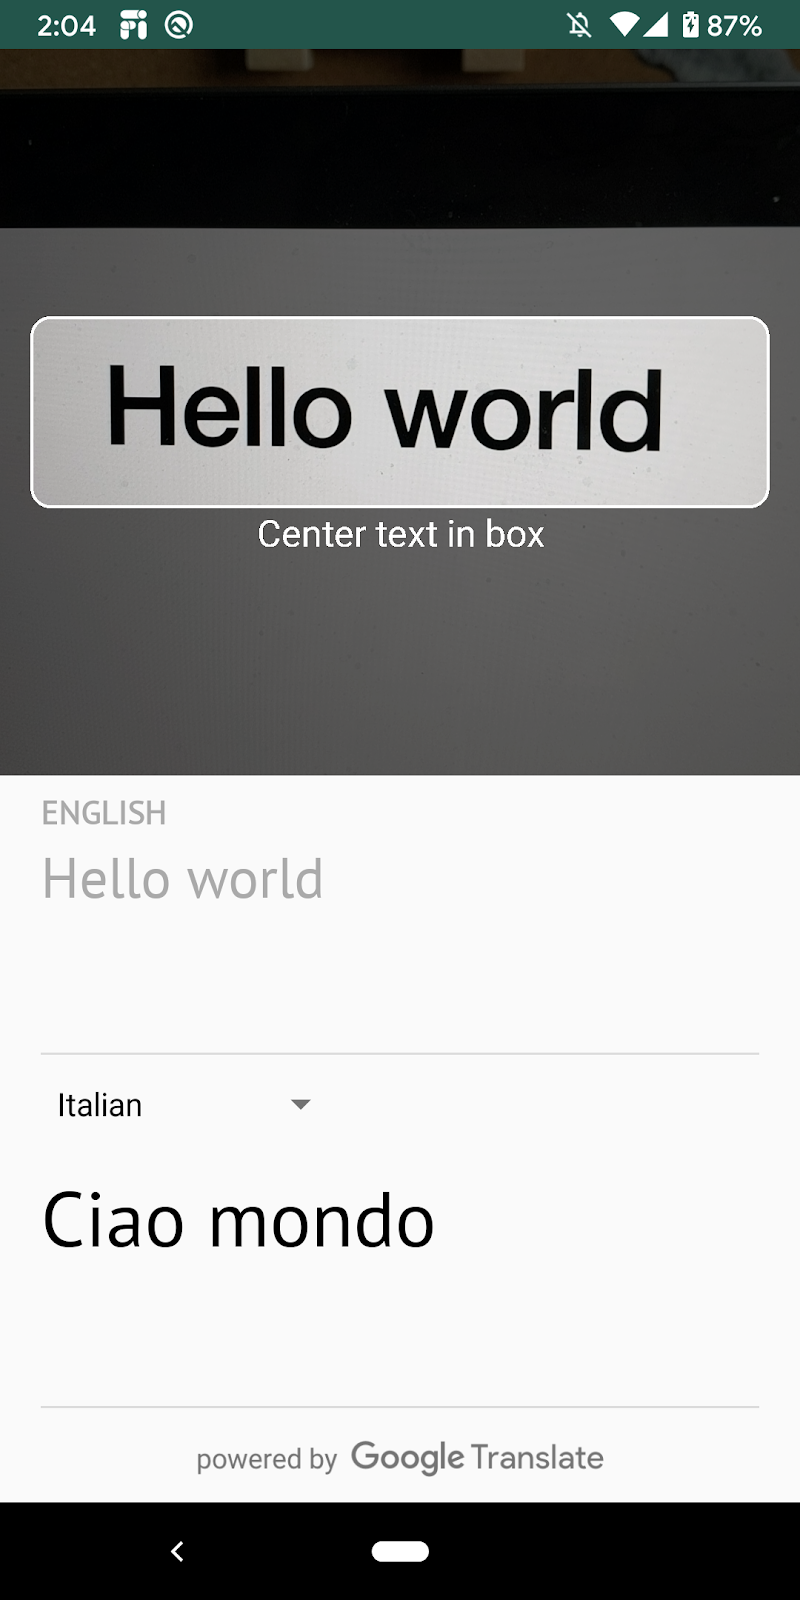
In this codelab, you're going to build an Android app with ML Kit. Your app will use the ML Kit Text Recognition on-device API to recognize text from real-time camera feed. It'll use ML Kit Language Identification API to identify language of the recognized text. Lastly, your app will translate this text to any chosen language out of 59 options, using the ML Kit Translation API.
In the end, you should see something similar to the image below.

What you'll learn
- How to use the ML Kit SDK to easily add Machine Learning capabilities to any Android app.
- ML Kit Text Recognition, Language Identification, Translation APIs and their capabilities.
- How to use the CameraX library with ML Kit APIs.
What you'll need
- A recent version of Android Studio (v4.0+)
- A physical Android device
- The sample code
- Basic knowledge of Android development in Kotlin
This codelab is focused on ML Kit. Non-relevant concepts and code blocks are already provided and implemented for you.
Download the Code
Click the following link to download all the code for this codelab:
Unpack the downloaded zip file. This will unpack a root folder (mlkit-android) with all of the resources you will need. For this codelab, you will only need the resources in the translate subdirectory.
The translate subdirectory in the mlkit-android repository contains the following directory:
 starter—Starting code that you build upon in this codelab.
In the app/build.gradle file, verify that the necessary ML Kit and CameraX dependencies are included:
// CameraX dependencies
def camerax_version = "1.0.0-beta05"
implementation "androidx.camera:camera-core:${camerax_version}"
implementation "androidx.camera:camera-camera2:${camerax_version}"
implementation "androidx.camera:camera-lifecycle:$camerax_version"
implementation "androidx.camera:camera-view:1.0.0-alpha12"

// ML Kit dependencies
implementation 'com.google.android.gms:play-services-mlkit-text-recognition:16.0.0'
implementation 'com.google.mlkit:language-id:16.0.0'
implementation 'com.google.mlkit:translate:16.0.0'
Now that you have imported the project into Android Studio and checked for the ML Kit dependencies, you are ready to run the app for the first time! Start the Android Studio emulator, and click Run ( ) in the Android Studio toolbar.
The app should launch on your device and you can point the camera at various text to see a live feed, but the text recognition functionality has not been implemented yet.

In this step, we will add functionality to your app to recognize text from the video camera.
Instantiate the ML Kit Text Detector
Add the following field to the top of TextAnalyzer.kt. This is how you get a handle to the text recognizer to use in later steps.
TextAnalyzer.kt
private val detector = TextRecognition.getClient()Run on-device text recognition on a Vision Image ( created with buffer from camera)
The CameraX library provides a stream of images from the camera ready for image analysis. Replace the recognizeTextOnDevice() method in the TextAnalyzer class to use ML Kit text recognition on each image frame.
TextAnalyzer.kt
private fun recognizeTextOnDevice(
   image: InputImage
): Task<Text> {
   // Pass image to an ML Kit Vision API
   return detector.process(image)
       .addOnSuccessListener { visionText ->
           // Task completed successfully
           result.value = visionText.text
       }
       .addOnFailureListener { exception ->
           // Task failed with an exception
           Log.e(TAG, "Text recognition error", exception)
           val message = getErrorMessage(exception)
           message?.let {
               Toast.makeText(context, message, Toast.LENGTH_SHORT).show()
           }
       }
}
The following line shows how we call the above method to start performing text recognition. Add the following line at the end of the analyze() method. Note that you have to call imageProxy.close once the analysis is complete on the image, otherwise the live camera feed will not be able to process further images for analysis.
TextAnalyzer.kt
recognizeTextOnDevice(InputImage.fromBitmap(croppedBitmap, 0)).addOnCompleteListener {
   imageProxy.close()
}
Run the app on your device
Now click Run ( ) in the Android Studio toolbar. Once the app loads, it should start recognizing text from camera in real-time. Point your camera to any text to confirm.
Instantiate the ML Kit Language Identifier
Add the following field to MainViewModel.kt. This is how you get a handle to the language identifier to use in the following step.
MainViewModel.kt
private val languageIdentification = LanguageIdentification.getClient()Run on-device language identification on the detected text
Use the ML Kit Language Identifier to get the language of the detected text from the image.
Replace the TODO in the sourceLang field definition in MainViewModel.kt with the following code. This snippet calls the language identification method and assigns the result if it is not undefined ("und").
MainViewModel.kt
languageIdentification.identifyLanguage(text)
   .addOnSuccessListener {
       if (it != "und")
           result.value = Language(it)
   }
Run the app on your device
Now click Run ( ) in the Android Studio toolbar. Once the app loads, it should start recognizing text from camera and identifying the text's language in real-time. Point your camera to any text to confirm.
Replace the translate() function in MainViewModel.kt with the following code. This function takes the source language value, target language value, and the source text and performs the translation. Note how if the chosen target language model has not yet been downloaded onto the device, we call downloadModelIfNeeded() to do so, and then proceed with the translation.
MainViewModel.kt
private fun translate(): Task<String> {
   val text = sourceText.value
   val source = sourceLang.value
   val target = targetLang.value
   if (modelDownloading.value != false || translating.value != false) {
       return Tasks.forCanceled()
   }
   if (source == null || target == null || text == null || text.isEmpty()) {
       return Tasks.forResult("")
   }
   val sourceLangCode = TranslateLanguage.fromLanguageTag(source.code)
   val targetLangCode = TranslateLanguage.fromLanguageTag(target.code)
   if (sourceLangCode == null || targetLangCode == null) {
       return Tasks.forCanceled()
   }
   val options = TranslatorOptions.Builder()
       .setSourceLanguage(sourceLangCode)
       .setTargetLanguage(targetLangCode)
       .build()
   val translator = translators[options]
   modelDownloading.setValue(true)

   // Register watchdog to unblock long running downloads
   Handler().postDelayed({ modelDownloading.setValue(false) }, 15000)
   modelDownloadTask = translator.downloadModelIfNeeded().addOnCompleteListener {
       modelDownloading.setValue(false)
   }
   translating.value = true
   return modelDownloadTask.onSuccessTask {
       translator.translate(text)
   }.addOnCompleteListener {
       translating.value = false
   }
}
Run the app on the simulator
Now click Run ( ) in the Android Studio toolbar. Once the app loads, it should now look like the moving image below, showing the text recognition and identified language results and the translated text into the chosen language. You can choose any of the 59 languages.

Congratulations, you have just added on-device text recognition, language identification, and translation to your app using ML Kit! Now you can recognize text and its language from the live camera feed and translate this text to a language you choose all in real-time.
What we've covered
- How to add ML Kit to your Android app
- How to use on-device text recognition in ML Kit to recognize text in images
- How to use on-device language identification in ML Kit to identify language of text
- How to use on-device translation in ML Kit to translate text dynamically to 59 languages
- How to use CameraX in conjunction with ML Kit APIs
Next Steps
- Use ML Kit and CameraX in your own Android app!
