
1. Before you begin
A stylus is a pen-shaped tool that helps users perform precise tasks. In this codelab, you learn how to implement organic stylus experiences with the android.os and androidx libraries. You also learn how to use the MotionEvent class to support pressure, tilt, and orientation, and palm rejection to prevent unwanted touches. In addition, you learn how to reduce stylus latency with motion prediction and low-latency graphics with OpenGL and the SurfaceView class.
Prerequisites
- Experience with Kotlin and lambdas.
- Basic knowledge of how to use Android Studio.
- Basic knowledge of Jetpack Compose.
- Basic understanding of OpenGL for low-latency graphics.
What you'll learn
- How to use the
MotionEventclass for stylus. - How to implement stylus capabilities, including support for pressure, tilt, and orientation.
- How to draw on the
Canvasclass. - How to implement motion prediction.
- How to render low-latency graphics with OpenGL and the
SurfaceViewclass.
What you'll need
- The latest version of Android Studio.
- Experience with Kotlin syntax, including lambdas.
- Basic experience with Compose. If you're unfamiliar with Compose, complete the Jetpack Compose basics codelab.
- A device with stylus support.
- An active stylus.
- Git.
2. Get the starter code
To get the code that contains the starter app's theming and basic setup, follow these steps:
- Clone this GitHub repository:
git clone https://github.com/android/large-screen-codelabs
- Open the
advanced-stylusfolder. Thestartfolder contains the starter code and theendfolder contains the solution code.
3. Implement a basic drawing app
First, you build the necessary layout for a basic drawing app that lets users draw, and shows stylus attributes on the screen with the Canvas Composable function. It looks like the following image:
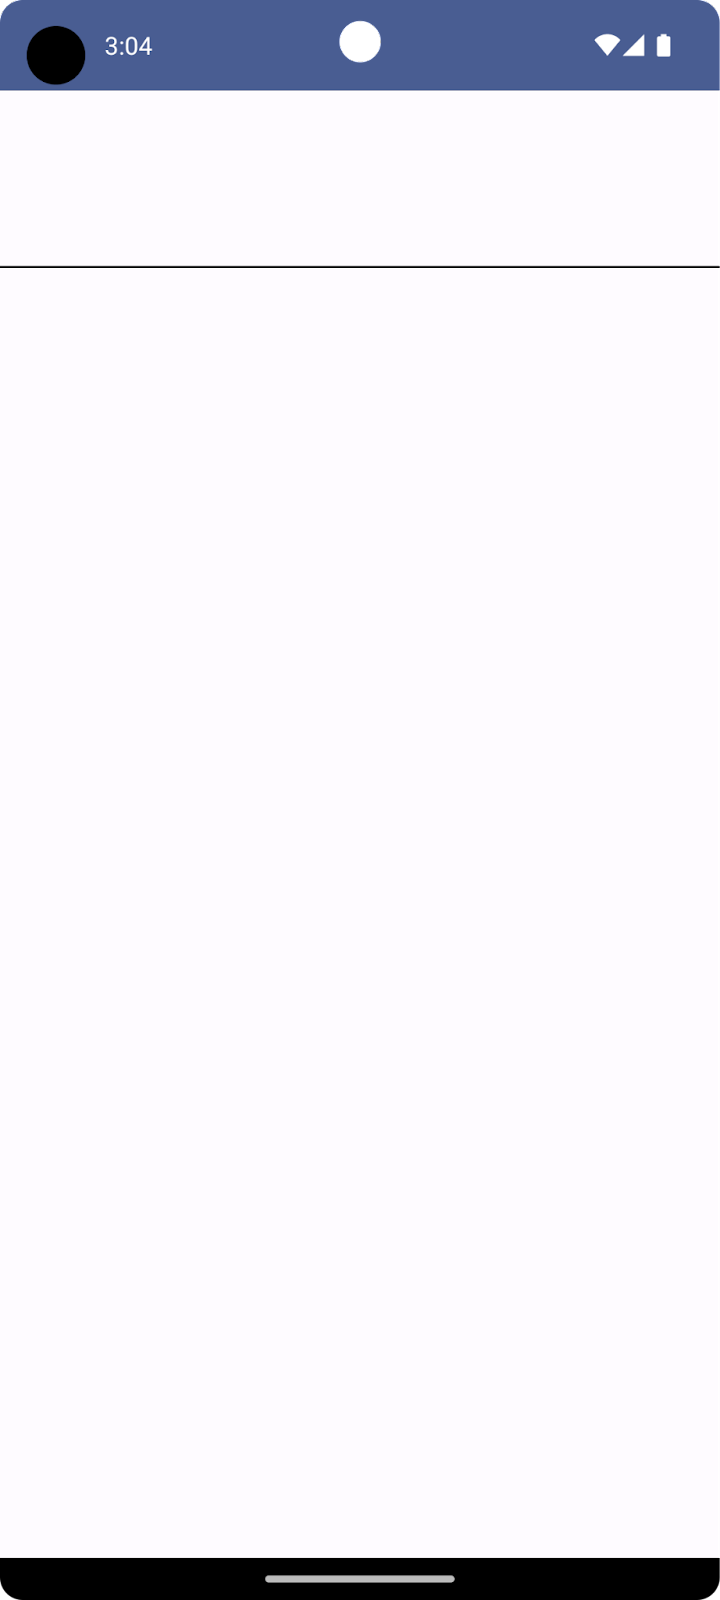
The upper part is a Canvas Composable function where you draw the stylus visualization, and show the different attributes of the stylus, such as orientation, tilt, and pressure. The lower part is another Canvas Composable function that receives stylus input and draws simple strokes.
To implement the basic layout of the drawing app, follow these steps:
- In Android Studio, open the cloned repository.
- Click
app>java>com.example.stylus, and then double-clickMainActivity. TheMainActivity.ktfile opens. - In the
MainActivityclass, notice theStylusVisualizationandDrawAreaComposablefunctions. You focus on theDrawAreaComposablefunction in this section.
Create a StylusState class
- In the same
uidirectory, , click File > New > Kotlin/Class file. - In the text box, replace the Name placeholder with
StylusState.kt, and then pressEnter(orreturnon macOS). - In the
StylusState.ktfile, create theStylusStatedata class, and then add the variables from the following table:
Variable | Type | Default value | Description |
|
| A value that ranges from 0 to 1.0. | |
|
| A radian value that ranges from -pi to pi. | |
|
| A radian value that ranges from 0 to pi/2. | |
|
| Stores lines rendered by the |
StylusState.kt
package com.example.stylus.ui
import androidx.compose.ui.graphics.Path

data class StylusState(
   var pressure: Float = 0F,
   var orientation: Float = 0F,
   var tilt: Float = 0F,
   var path: Path = Path(),
)
- In the
MainActivity.ktfile, find theMainActivityclass, and then add the stylus state with themutableStateOf()function:
MainActivity.kt
import androidx.compose.runtime.setValue
import androidx.compose.runtime.getValue
import androidx.compose.runtime.mutableStateOf
import com.example.stylus.ui.StylusState

class MainActivity : ComponentActivity() {
    private var stylusState: StylusState by mutableStateOf(StylusState())
The DrawPoint class
The DrawPoint class stores data about each point drawn on the screen; when you link these points, you create lines. It mimics how the Path object works.
The DrawPoint class extends the PointF class. It contains the following data:
Parameters | Type | Description |
|
| Coordinate |
|
| Coordinate |
|
| Type of point |
There are two types of DrawPoint objects, which are described by the DrawPointType enum:
Type | Description |
| Moves the start of a line to a position. |
| Traces a line from the previous point. |
DrawPoint.kt
import android.graphics.PointF
class DrawPoint(x: Float, y: Float, val type: DrawPointType): PointF(x, y)
Render the data points into a path
For this app, the StylusViewModel class holds data of the line, prepares data for rendering, and performs some operations on the Path object for palm rejection.
- To hold the lines' data, in the
StylusViewModelclass, create a mutable list ofDrawPointobjects:
StylusViewModel.kt
import androidx.lifecycle.ViewModel
import com.example.stylus.data.DrawPoint

class StylusViewModel : ViewModel() {private var currentPath = mutableListOf<DrawPoint>()
To render the data points into a path, follow these steps:
- In the
StylusViewModel.ktfile'sStylusViewModelclass, add acreatePathfunction. - Create a
pathvariable of typePathwithPath()constructor. - Create a
forloop in which you iterate through each data point in thecurrentPathvariable. - If the data point is of type
START, call themoveTomethod to start a line at the specifiedxandycoordinates. - Otherwise, call the
lineTomethod with thexandycoordinates of the data point to link to the previous point. - Return the
pathobject.
StylusViewModel.kt
import androidx.compose.ui.graphics.Path
import com.example.stylus.data.DrawPoint
import com.example.stylus.data.DrawPointType


class StylusViewModel : ViewModel() {
   private var currentPath = mutableListOf<DrawPoint>()

   private fun createPath(): Path {
      val path = Path()

      for (point in currentPath) {
          if (point.type == DrawPointType.START) {
              path.moveTo(point.x, point.y)
          } else {
              path.lineTo(point.x, point.y)
          }
      }
      return path
   }

private fun cancelLastStroke() {
}
Process MotionEvent objects
Stylus events come through MotionEvent objects, which provide information about the action performed and the data associated with it, like the position of the pointer and the pressure. The following table contains some of the MotionEvent object's constants and their data, which you can use to identify what the user does on the screen:
Constant | Data |
| The pointer touches the screen. It's the start of a line at the position reported by the |
| The pointer moves on the screen. It's the line that's drawn. |
| The pointer stops touching the screen. It's the end of the line. |
| Unwanted touch detected. Cancels the last stroke. |
When the app receives a new MotionEvent object, the screen should render to reflect the new user input.
- To process
MotionEventobjects in theStylusViewModelclass, create a function that gathers the line coordinates:
StylusViewModel.kt
import android.view.MotionEvent

class StylusViewModel : ViewModel() {
   private var currentPath = mutableListOf<DrawPoint>()

   ...

   fun processMotionEvent(motionEvent: MotionEvent): Boolean {
      when (motionEvent.actionMasked) {
          MotionEvent.ACTION_DOWN -> {
              currentPath.add(
                  DrawPoint(motionEvent.x, motionEvent.y, DrawPointType.START)
              )
          }
          MotionEvent.ACTION_MOVE -> {
              currentPath.add(DrawPoint(motionEvent.x, motionEvent.y, DrawPointType.LINE))
          }
          MotionEvent.ACTION_UP -> {
              currentPath.add(DrawPoint(motionEvent.x, motionEvent.y, DrawPointType.LINE))
          }
          MotionEvent.ACTION_CANCEL -> {
              // Unwanted touch detected.
              cancelLastStroke()
          }
          else -> return false
      }

      return true
   }
Send data to the UI
To update the StylusViewModel class so that the UI can collect changes in the StylusState data class, follow these steps:
- In the
StylusViewModelclass, create a_stylusStatevariable of aMutableStateFlowtype of theStylusStateclass, and astylusStatevariable of aStateFlowtype of theStylusStateclass. The_stylusStatevariable is modified whenever the stylus state is changed in theStylusViewModelclass and thestylusStatevariable is consumed by the UI in theMainActivityclass.
StylusViewModel.kt
import com.example.stylus.ui.StylusState
import kotlinx.coroutines.flow.MutableStateFlow
import kotlinx.coroutines.flow.StateFlow

class StylusViewModel : ViewModel() {

   private var _stylusState = MutableStateFlow(StylusState())
   val stylusState: StateFlow<StylusState> = _stylusState
- Create a
requestRenderingfunction that accepts aStylusStateobject parameter:
StylusViewModel.kt
import kotlinx.coroutines.flow.update

...

class StylusViewModel : ViewModel() {
   private var _stylusState = MutableStateFlow(StylusState())
   val stylusState: StateFlow<StylusState> = _stylusState

   ...

    private fun requestRendering(stylusState: StylusState) {
      // Updates the stylusState, which triggers a flow.
      _stylusState.update {
          return@update stylusState
      }
   }
- At the end of the
processMotionEventfunction, add arequestRenderingfunction call with aStylusStateparameter. - In the
StylusStateparameter, retrieve the tilt, pressure, and orientation values from themotionEventvariable, and then create the path with acreatePath()function. This triggers a flow event, which you connect in the UI later.
StylusViewModel.kt
...

class StylusViewModel : ViewModel() {

   ...

   fun processMotionEvent(motionEvent: MotionEvent): Boolean {

      ...
         else -> return false
      }


      requestRendering(
         StylusState(
             tilt = motionEvent.getAxisValue(MotionEvent.AXIS_TILT),
             pressure = motionEvent.pressure,
             orientation = motionEvent.orientation,
             path = createPath()
         )
      )
Link the UI with the StylusViewModel class
- In the
MainActivityclass, find theonCreatefunction'ssuper.onCreatefunction, and then add the state collection. To learn more about state collection, see Collecting flows in a lifecycle-aware manner.
MainActivity.kt
import androidx.lifecycle.lifecycleScope
import kotlinx.coroutines.launch
import androidx.lifecycle.repeatOnLifecycle
import kotlinx.coroutines.flow.onEach
import androidx.lifecycle.Lifecycle
import kotlinx.coroutines.flow.collect

...
class MainActivity : ComponentActivity() {
   override fun onCreate(savedInstanceState: Bundle?) {
      super.onCreate(savedInstanceState)

      lifecycleScope.launch {
          lifecycle.repeatOnLifecycle(Lifecycle.State.STARTED) {
              viewModel.stylusState
                  .onEach {
                      stylusState = it
                  }
                  .collect()
          }
      }
Now, whenever the StylusViewModel class posts a new StylusState state, the activity receives it, and the new StylusState object updates the local MainActivity class' stylusState variable.
- In the body of the
DrawAreaComposablefunction, add thepointerInteropFiltermodifier to theCanvasComposablefunction to provideMotionEventobjects.
- Send the
MotionEventobject to the StylusViewModel'sprocessMotionEventfunction for processing:
MainActivity.kt
import androidx.compose.ui.ExperimentalComposeUiApi
import androidx.compose.ui.input.pointer.pointerInteropFilter

...
class MainActivity : ComponentActivity() {

   ...

@Composable
@OptIn(ExperimentalComposeUiApi::class)
fun DrawArea(modifier: Modifier = Modifier) {
   Canvas(modifier = modifier
       .clipToBounds()

 .pointerInteropFilter {
              viewModel.processMotionEvent(it)
          }

   ) {

   }
}
- Call the
drawPathfunction with thestylusStatepathattribute, and then provide a color and stroke style.
MainActivity.kt
class MainActivity : ComponentActivity() {

...

   @Composable
   @OptIn(ExperimentalComposeUiApi::class)
   fun DrawArea(modifier: Modifier = Modifier) {
      Canvas(modifier = modifier
          .clipToBounds()
          .pointerInteropFilter {
              viewModel.processMotionEvent(it)
          }
      ) {
          with(stylusState) {
              drawPath(
                  path = this.path,
                  color = Color.Gray,
                  style = strokeStyle
              )
          }
      }
   }
- Run the app, and then notice that you can draw on the screen.
4. Implement support for pressure, orientation, and tilt
In the previous section, you saw how to retrieve stylus information from MotionEvent objects, such as pressure, orientation, and tilt.
StylusViewModel.kt
tilt = motionEvent.getAxisValue(MotionEvent.AXIS_TILT),
pressure = motionEvent.pressure,
orientation = motionEvent.orientation,
However, this shortcut only works for the first pointer. When multi-touch is detected, multiple pointers are detected and this shortcut only returns the value for the first pointer—or the first pointer on the screen. To request data about a specific pointer, you can use the pointerIndex parameter:
StylusViewModel.kt
tilt = motionEvent.getAxisValue(MotionEvent.AXIS_TILT, pointerIndex),
pressure = motionEvent.getPressure(pointerIndex),
orientation = motionEvent.getOrientation(pointerIndex)
To learn more about pointers and multi-touch, see Handle multi-touch gestures.
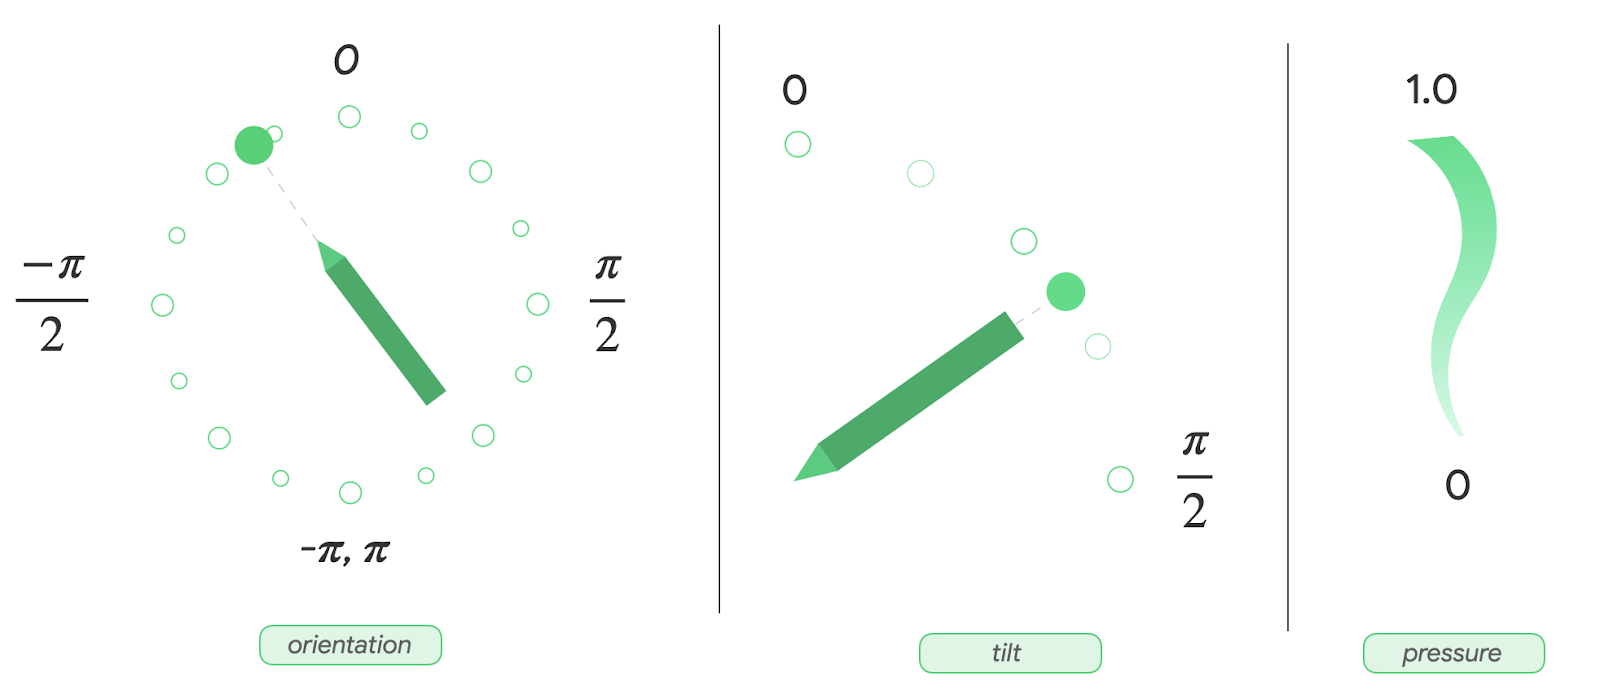
Add visualization for pressure, orientation, and tilt
- In the
MainActivity.ktfile, find theStylusVisualizationComposablefunction, and then use the information for theStylusStateflow object to render the visualization:
MainActivity.kt
import StylusVisualization.drawOrientation
import StylusVisualization.drawPressure
import StylusVisualization.drawTilt
...
class MainActivity : ComponentActivity() {

   ...

   @Composable
   fun StylusVisualization(modifier: Modifier = Modifier) {
      Canvas(
          modifier = modifier
      ) {
          with(stylusState) {
              drawOrientation(this.orientation)
              drawTilt(this.tilt)
              drawPressure(this.pressure)
          }
      }
   }
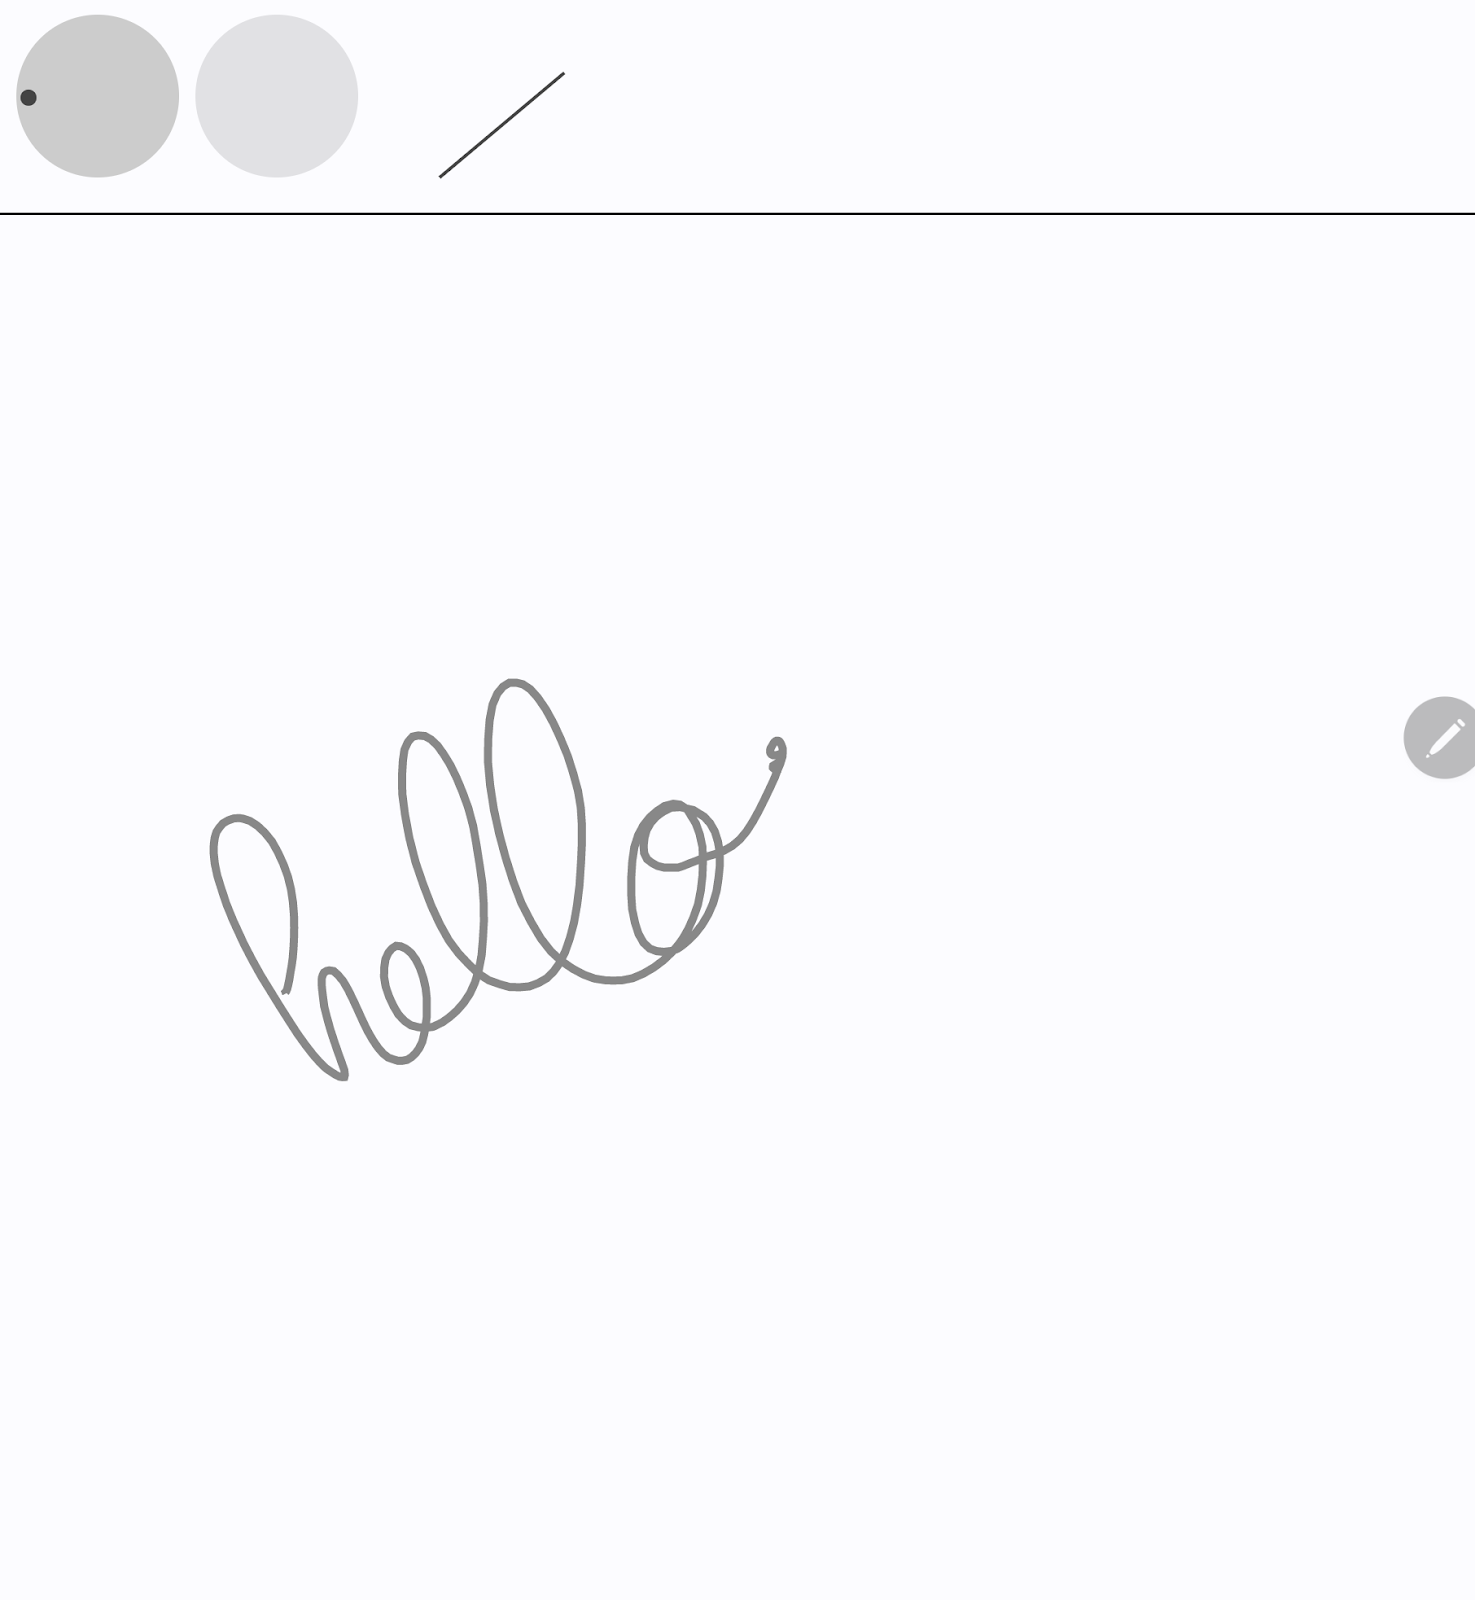
- Run the app. You see three indicators at the top of the screen that indicate orientation, pressure, and tilt.
- Scribble on the screen with your stylus, and then observe how each visualization reacts with your inputs.
- Inspect the
StylusVisualization.ktfile to understand how each visualization is constructed.
5. Implement palm rejection
The screen can register unwanted touches. For example, it happens when a user naturally rests their hand on the screen for support while handwriting.
Palm rejection is a mechanism that detects this behavior and notifies the developer to cancel the last set of MotionEvent objects. A set of MotionEvent objects starts with the ACTION_DOWN constant.
This means that you must maintain a history of the inputs so that you can remove unwanted touches from the screen and re-render the legitimate user inputs. Thankfully, you already have the history stored in the StylusViewModel class in the currentPath variable.
Android provides the ACTION_CANCEL constant from the MotionEvent object to inform the developer about unwanted touch. Since Android 13, the MotionEvent object provides the FLAG_CANCELED constant that should be checked on the ACTION_POINTER_UP constant.
Implement the cancelLastStroke function
- To remove a data point from the last
STARTdata point, go back to theStylusViewModelclass, and then create acancelLastStrokefunction that finds the index of the lastSTARTdata point and only keeps the data from the first data point until the index minus one:
StylusViewModel.kt
...
class StylusViewModel : ViewModel() {
    ...

   private fun cancelLastStroke() {
      // Find the last START event.
      val lastIndex = currentPath.findLastIndex {
          it.type == DrawPointType.START
      }

      // If found, keep the element from 0 until the very last event before the last MOVE event.
      if (lastIndex > 0) {
          currentPath = currentPath.subList(0, lastIndex - 1)
      }
   }
Add the ACTION_CANCEL and FLAG_CANCELED constants
- In the
StylusViewModel.ktfile, find theprocessMotionEventfunction. - In the
ACTION_UPconstant, create acanceledvariable that checks whether the current SDK version is Android 13 or higher, and whether theFLAG_CANCELEDconstant is activated. - On the next line, create a conditional that checks whether the
canceledvariable is true. If so, call thecancelLastStrokefunction to remove the last set ofMotionEventobjects. If not, call thecurrentPath.addmethod to add the last set ofMotionEventobjects.
StylusViewModel.kt
import android.os.Build
...
class StylusViewModel : ViewModel() {
    ...
    fun processMotionEvent(motionEvent: MotionEvent): Boolean {
    ...
        MotionEvent.ACTION_POINTER_UP,
        MotionEvent.ACTION_UP -> {
           val canceled = Build.VERSION.SDK_INT >= Build.VERSION_CODES.TIRAMISU &&
           (motionEvent.flags and MotionEvent.FLAG_CANCELED) == MotionEvent.FLAG_CANCELED

           if(canceled) {
               cancelLastStroke()
           } else {
               currentPath.add(DrawPoint(motionEvent.x, motionEvent.y, DrawPointType.LINE))
           }
        }
- In the
ACTION_CANCELconstant, notice thecancelLastStrokefunction:
StylusViewModel.kt
...
class StylusViewModel : ViewModel() {
    ...
    fun processMotionEvent(motionEvent: MotionEvent): Boolean {
        ...
        MotionEvent.ACTION_CANCEL -> {
           // unwanted touch detected
           cancelLastStroke()
        }
Palm rejection is implemented! You can find the working code in the palm-rejection folder.
6. Implement low latency
In this section, you reduce the latency between user input and screen rendering to improve performance. The latency has multiple causes and one of them is the long graphic pipeline. You reduce the graphic pipeline with front buffer rendering. Front buffer rendering gives developers direct access to the screen buffer, which provides great results for handwriting and sketching.
The GLFrontBufferedRenderer class provided by the androidx.graphics library takes care of the front and doubled buffer rendering. It optimizes a SurfaceView object for fast rendering with the onDrawFrontBufferedLayer callback function and normal rendering with the onDrawDoubleBufferedLayer callback function. The GLFrontBufferedRenderer class and GLFrontBufferedRenderer.Callback interface work with a user-provided data type. In this codelab, you use the Segment class.
To get started, follow these steps:
- In Android Studio, open the
low-latencyfolder so that you get all the required files: - Notice the following new files in the project:
- In the
build.gradlefile, theandroidx.graphicslibrary has been imported into with theimplementation "androidx.graphics:graphics-core:1.0.0-alpha03"declaration. - The
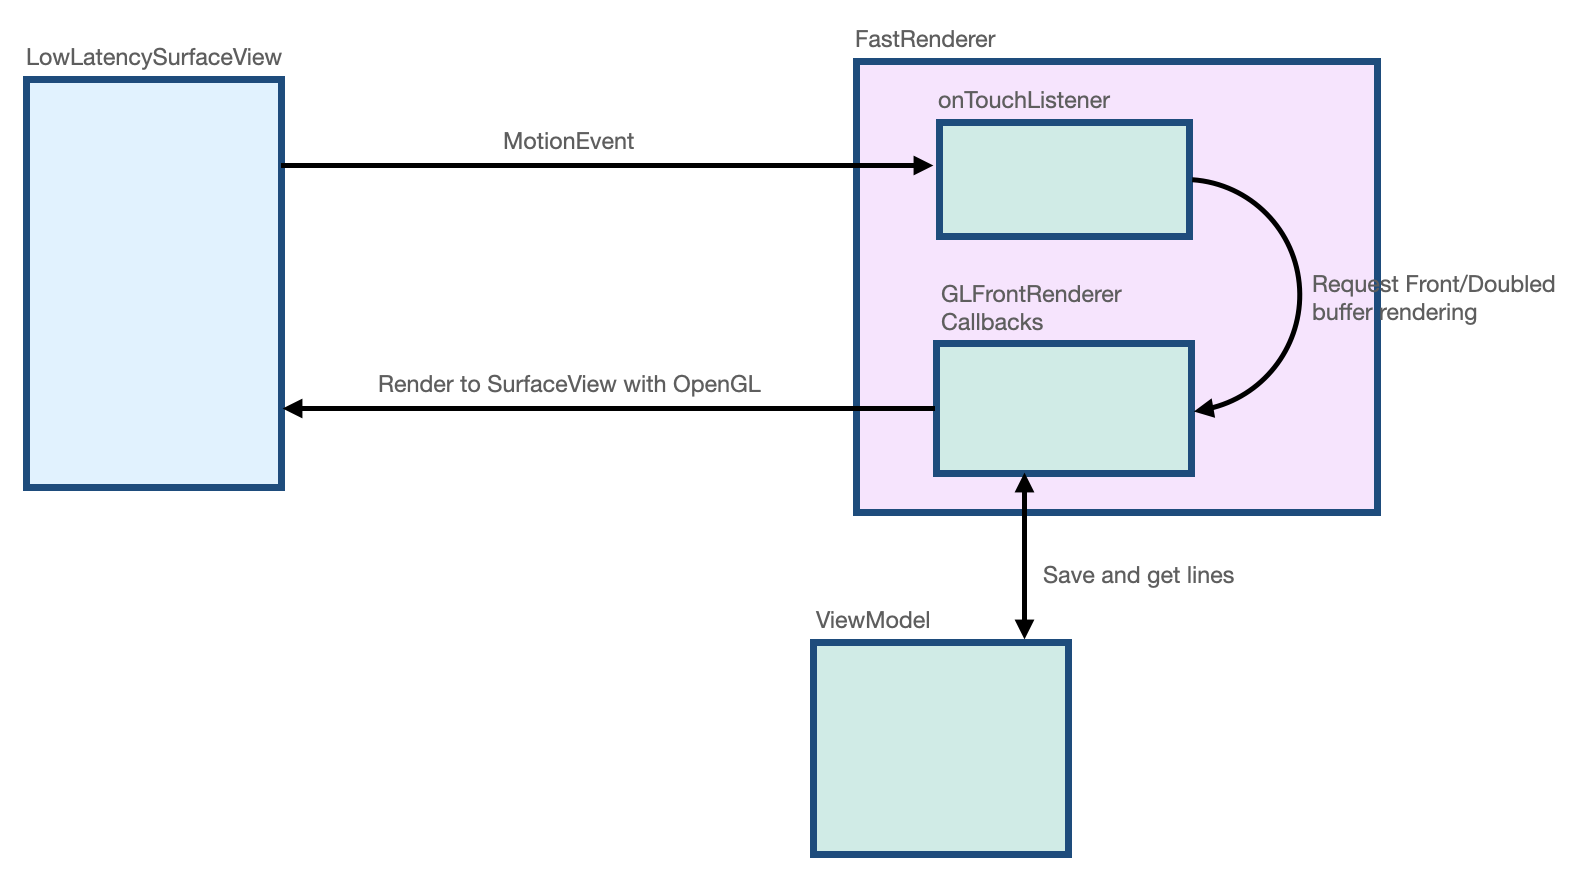
LowLatencySurfaceViewclass extends theSurfaceViewclass to render OpenGL code on the screen. - The
LineRendererclass holds OpenGL code to render a line on the screen. - The
FastRendererclass allows fast rendering and implements theGLFrontBufferedRenderer.Callbackinterface. It also interceptsMotionEventobjects. - The
StylusViewModelclass holds the data points with aLineManagerinterface. - The
Segmentclass defines a segment as follows: x1,y1: coordinates of the first pointx2,y2: coordinates of the second point
The following images shows how the data moves between each class:
Create a low-latency surface and layout
- In the
MainActivity.ktfile, find theMainActivityclass'sonCreatefunction. - In the body of the
onCreatefunction, create aFastRendererobject, and then pass in aviewModelobject:
MainActivity.kt
class MainActivity : ComponentActivity() {
   ...
   override fun onCreate(savedInstanceState: Bundle?) {
      super.onCreate(savedInstanceState)

      fastRendering = FastRenderer(viewModel)

      lifecycleScope.launch {
      ...
- In the same file, create a
DrawAreaLowLatencyComposablefunction. - In the function's body, use the
AndroidViewAPI to wrap theLowLatencySurfaceViewview and then provide thefastRenderingobject:
MainActivity.kt
import androidx.compose.ui.viewinterop.AndroidView
import com.example.stylus.gl.LowLatencySurfaceView
class MainActivity : ComponentActivity() {
...
@Composable
fun DrawAreaLowLatency(modifier: Modifier = Modifier) {
AndroidView(factory = { context ->
LowLatencySurfaceView(context, fastRenderer = fastRendering)
}, modifier = modifier)
}
- In the
onCreatefunction after theDividerComposablefunction, add theDrawAreaLowLatencyComposablefunction to the layout:
MainActivity.kt
class MainActivity : ComponentActivity() {
   ...
   override fun onCreate(savedInstanceState: Bundle?) {
   ...
   Surface(
      modifier = Modifier
          .fillMaxSize(),
      color = MaterialTheme.colorScheme.background
   ) {
      Column {
          StylusVisualization(
              modifier = Modifier
                  .fillMaxWidth()
                  .height(100.dp)
          )
          Divider(
              thickness = 1.dp,
              color = Color.Black,
          )
          DrawAreaLowLatency()
      }
   }
- In the
gldirectory, open theLowLatencySurfaceView.ktfile, and then notice the following in theLowLatencySurfaceViewclass:
- The
LowLatencySurfaceViewclass extends theSurfaceViewclass. It uses thefastRendererobject'sonTouchListenermethod. - The
GLFrontBufferedRenderer.Callbackinterface through thefastRendererclass needs to be attached to theSurfaceViewobject when theonAttachedToWindowfunction is called so that the callbacks can render to theSurfaceViewview. - The
GLFrontBufferedRenderer.Callbackinterface through thefastRendererclass needs to be released when theonDetachedFromWindowfunction is called.
LowLatencySurfaceView.kt
class LowLatencySurfaceView(context: Context, private val fastRenderer: FastRenderer) :
   SurfaceView(context) {

   init {
       setOnTouchListener(fastRenderer.onTouchListener)
   }

   override fun onAttachedToWindow() {
       super.onAttachedToWindow()
       fastRenderer.attachSurfaceView(this)
   }

   override fun onDetachedFromWindow() {
       fastRenderer.release()
       super.onDetachedFromWindow()
   }
}
Handle MotionEvent objects with the onTouchListener interface
To handle MotionEvent objects when the ACTION_DOWN constant is detected, follow these steps:
- In the
gldirectory, open theFastRenderer.ktfile. - In the body of the
ACTION_DOWNconstant, create acurrentXvariable that stores theMotionEventobject'sxcoordinate and acurrentYvariable that stores itsycoordinate. - Create a
Segmentvariable that stores aSegmentobject that accepts two instances of thecurrentXparameter and two instances of thecurrentYparameter because it's the start of the line. - Call the
renderFrontBufferedLayermethod with asegmentparameter to trigger a callback on theonDrawFrontBufferedLayerfunction.
FastRenderer.kt
class FastRenderer ( ... ) {
   ...
   val onTouchListener = View.OnTouchListener { view, event ->
   ...
   MotionEvent.ACTION_DOWN -> {
      // Ask that the input system not batch MotionEvent objects,
      // but instead deliver them as soon as they're available.
      view.requestUnbufferedDispatch(event)

      currentX = event.x
      currentY = event.y

      // Create a single point.
      val segment = Segment(currentX, currentY, currentX, currentY)

      frontBufferRenderer?.renderFrontBufferedLayer(segment)
   }
To handle MotionEvent objects when the ACTION_MOVE constant is detected, follow these steps:
- In the body of the
ACTION_MOVEconstant, create apreviousXvariable that stores thecurrentXvariable and apreviousYvariable that stores thecurrentYvariable. - Create a
currentXvariable that saves theMotionEventobject's currentxcoordinate and acurrentYvariable that saves its currentycoordinate. - Create a
Segmentvariable that stores aSegmentobject that accepts apreviousX,previousY,currentX, andcurrentYparameters. - Call the
renderFrontBufferedLayermethod with asegmentparameter to trigger a callback on theonDrawFrontBufferedLayerfunction and execute OpenGL code.
FastRenderer.kt
class FastRenderer ( ... ) {
   ...
   val onTouchListener = View.OnTouchListener { view, event ->
   ...
   MotionEvent.ACTION_MOVE -> {
      previousX = currentX
      previousY = currentY
      currentX = event.x
      currentY = event.y

      val segment = Segment(previousX, previousY, currentX, currentY)

      // Send the short line to front buffered layer: fast rendering
      frontBufferRenderer?.renderFrontBufferedLayer(segment)
   }
- To handle
MotionEventobjects when theACTION_UPconstant is detected, call thecommitmethod to trigger a call on theonDrawDoubleBufferedLayerfunction and execute OpenGL code:
FastRenderer.kt
class FastRenderer ( ... ) {
   ...
   val onTouchListener = View.OnTouchListener { view, event ->
   ...
   MotionEvent.ACTION_UP -> {
      frontBufferRenderer?.commit()
   }
Implement the GLFrontBufferedRenderer callback functions
In the FastRenderer.kt file, the onDrawFrontBufferedLayer and onDrawDoubleBufferedLayer callback functions execute OpenGL code. At the beginning of each callback function, the following OpenGL functions map Android data to the OpenGL workspace:
- The
GLES20.glViewportfunction defines the size of the rectangle in which you render the scene. - The
Matrix.orthoMfunction computes theModelViewProjectionmatrix. - The
Matrix.multiplyMMfunction performs matrix multiplication to transform the Android data to OpenGL reference, and provides the setup for theprojectionmatrix.
FastRenderer.kt
class FastRenderer( ... ) {
    ...
    override fun onDraw[Front/Double]BufferedLayer(
       eglManager: EGLManager,
       bufferInfo: BufferInfo,
       transform: FloatArray,
       params: Collection<Segment>
    ) {
        val bufferWidth = bufferInfo.width
        val bufferHeight = bufferInfo.height

        GLES20.glViewport(0, 0, bufferWidth, bufferHeight)
        // Map Android coordinates to OpenGL coordinates.
        Matrix.orthoM(
           mvpMatrix,
           0,
           0f,
           bufferWidth.toFloat(),
           0f,
           bufferHeight.toFloat(),
           -1f,
           1f
        )

        Matrix.multiplyMM(projection, 0, mvpMatrix, 0, transform, 0)
With that part of the code set up for you, you can focus on the code that does the actual rendering. The onDrawFrontBufferedLayer callback function renders a small area of the screen. It provides a param value of Segment type so that you can render a single segment fast. The LineRenderer class is an openGL renderer for the brush that applies the color and size of the line.
To implement the onDrawFrontBufferedLayer callback function, follow these steps:
- In the
FastRenderer.ktfile, find theonDrawFrontBufferedLayercallback function. - In the
onDrawFrontBufferedLayercallback function's body, call theobtainRendererfunction to get theLineRendererinstance. - Call the
LineRendererfunction'sdrawLinemethod with the following parameters:
- The
projectionmatrix previously calculated. - A list of
Segmentobjects, which is a single segment in this case. - The
colorof the line.
FastRenderer.kt
import android.graphics.Color
import androidx.core.graphics.toColor

class FastRenderer( ... ) {
...
override fun onDrawFrontBufferedLayer(
   eglManager: EGLManager,
   bufferInfo: BufferInfo,
   transform: FloatArray,
   params: Collection<Segment>
) {
   ...

   Matrix.multiplyMM(projection, 0, mvpMatrix, 0, transform, 0)

   obtainRenderer().drawLine(projection, listOf(param), Color.GRAY.toColor())
}
- Run the app, and then notice that you can draw on the screen with minimum latency. However, the app won't persist the line because you still need to implement the
onDrawDoubleBufferedLayercallback function.
The onDrawDoubleBufferedLayer callback function is called after the commit function to allow persistence of the line. The callback provides params values, which contain a collection of Segment objects. All the segments on the front buffer are replayed in the double buffer for persistence.
To implement the onDrawDoubleBufferedLayer callback function, follow these steps:
- In the
StylusViewModel.ktfile, find theStylusViewModelclass, and then create anopenGlLinesvariable that stores a mutable list ofSegmentobjects:
StylusViewModel.kt
import com.example.stylus.data.Segment

class StylusViewModel : ViewModel() {
    private var _stylusState = MutableStateFlow(StylusState())
    val stylusState: StateFlow<StylusState> = _stylusState

    val openGlLines = mutableListOf<List<Segment>>()

    private fun requestRendering(stylusState: StylusState) {
- In the
FastRenderer.ktfile, find theFastRendererclass'sonDrawDoubleBufferedLayercallback function. - In the body of the
onDrawDoubleBufferedLayercallback function, clear the screen with theGLES20.glClearColorandGLES20.glClearmethods so that the scene can be rendered from scratch, and add the lines to theviewModelobject to persist them:
FastRenderer.kt
class FastRenderer( ... ) {
   ...
   override fun onDrawDoubleBufferedLayer(
      eglManager: EGLManager,
      bufferInfo: BufferInfo,
      transform: FloatArray,
      params: Collection<Segment>
   ) {
      ...
      // Clear the screen with black.
      GLES20.glClearColor(0.0f, 0.0f, 0.0f, 1.0f)
      GLES20.glClear(GLES20.GL_COLOR_BUFFER_BIT)

      viewModel.openGlLines.add(params.toList())
- Create a
forloop that iterates through and renders each line from theviewModelobject:
FastRenderer.kt
class FastRenderer( ... ) {
   ...
   override fun onDrawDoubleBufferedLayer(
      eglManager: EGLManager,
      bufferInfo: BufferInfo,
      transform: FloatArray,
      params: Collection<Segment>
   ) {
      ...
      // Clear the screen with black.
      GLES20.glClearColor(0.0f, 0.0f, 0.0f, 1.0f)
      GLES20.glClear(GLES20.GL_COLOR_BUFFER_BIT)

      viewModel.openGlLines.add(params.toList())

      // Render the entire scene (all lines).
      for (line in viewModel.openGlLines) {
         obtainRenderer().drawLine(projection, line, Color.GRAY.toColor())
      }
   }
- Run the app, and then notice that you can draw on the screen, and the line is preserved after the
ACTION_UPconstant is triggered.
7. Implement motion prediction
You can further improve latency with the androidx.input library, which analyzes the course of the stylus, and predicts the next point's location and inserts it for rendering.
To set up motion prediction, follow these steps:
- In the
app/build.gradlefile, import the library in the dependencies section:
app/build.gradle
...
dependencies {
    ...
    implementation"androidx.input:input-motionprediction:1.0.0-beta01"
- Click File > Sync project with Gradle files.
- In the
FastRendering.ktfile'sFastRenderingclass, declare themotionEventPredictorobject as an attribute:
FastRenderer.kt
import androidx.input.motionprediction.MotionEventPredictor

class FastRenderer( ... ) {
   ...
   private var frontBufferRenderer: GLFrontBufferedRenderer<Segment>? = null
   private var motionEventPredictor: MotionEventPredictor? = null
- In the
attachSurfaceViewfunction, initialize themotionEventPredictorvariable:
FastRenderer.kt
class FastRenderer( ... ) {
   ...
   fun attachSurfaceView(surfaceView: SurfaceView) {
      frontBufferRenderer = GLFrontBufferedRenderer(surfaceView, this)
      motionEventPredictor = MotionEventPredictor.newInstance(surfaceView)
   }
- In the
onTouchListenervariable, call themotionEventPredictor?.recordmethod so that themotionEventPredictorobject gets motion data:
FastRendering.kt
class FastRenderer( ... ) {
   ...
   val onTouchListener = View.OnTouchListener { view, event ->
      motionEventPredictor?.record(event)
      ...
      when (event?.action) {
The next step is to predict a MotionEvent object with the predict function. We recommend predicting when an ACTION_MOVE constant is received and after the MotionEvent object is recorded. In other words, you should predict when a stroke is underway.
- Predict an artificial
MotionEventobject with thepredictmethod. - Create a
Segmentobject that uses the current and predicted x and y coordinates. - Request fast rendering of the predicted segment with the
frontBufferRenderer?.renderFrontBufferedLayer(predictedSegment)method.
FastRendering.kt
class FastRenderer( ... ) {
   ...
   val onTouchListener = View.OnTouchListener { view, event ->
       motionEventPredictor?.record(event)
       ...
       when (event?.action) {
          ...
          MotionEvent.ACTION_MOVE -> {
              ...
              frontBufferRenderer?.renderFrontBufferedLayer(segment)

              val motionEventPredicted = motionEventPredictor?.predict()
              if(motionEventPredicted != null) {
                 val predictedSegment = Segment(currentX, currentY,
       motionEventPredicted.x, motionEventPredicted.y)
                 frontBufferRenderer?.renderFrontBufferedLayer(predictedSegment)
              }

          }
          ...
       }
Predicted events are inserted to render, which improves latency.
- Run the app, and then notice the improved latency.
Improving latency will give stylus users a more natural stylus experience.
8. Congratulations
Congratulations! You know how to handle stylus like a pro!
You learned how to process MotionEvent objects to extract the information about pressure, orientation and tilt. You also learned how to improve the latency by implementing both androidx.graphics library and androidx.input library. These enhancements implemented together, offer a more organic stylus experience.