
1. Before you begin
What this isn't
- A guide on how to create media (audio - e.g. music, radio, podcasts) apps for Android Auto and Android Automotive OS. See Build media apps for cars for details on how to build such apps.
What you'll need
- The latest Android Studio.
- Experience with basic Kotlin.
- Experience creating Android Virtual Devices and running them in the Android Emulator.
- Basic knowledge of Jetpack Compose.
- An understanding of Side-effects
- Basic familiarity with window insets.
What you'll build
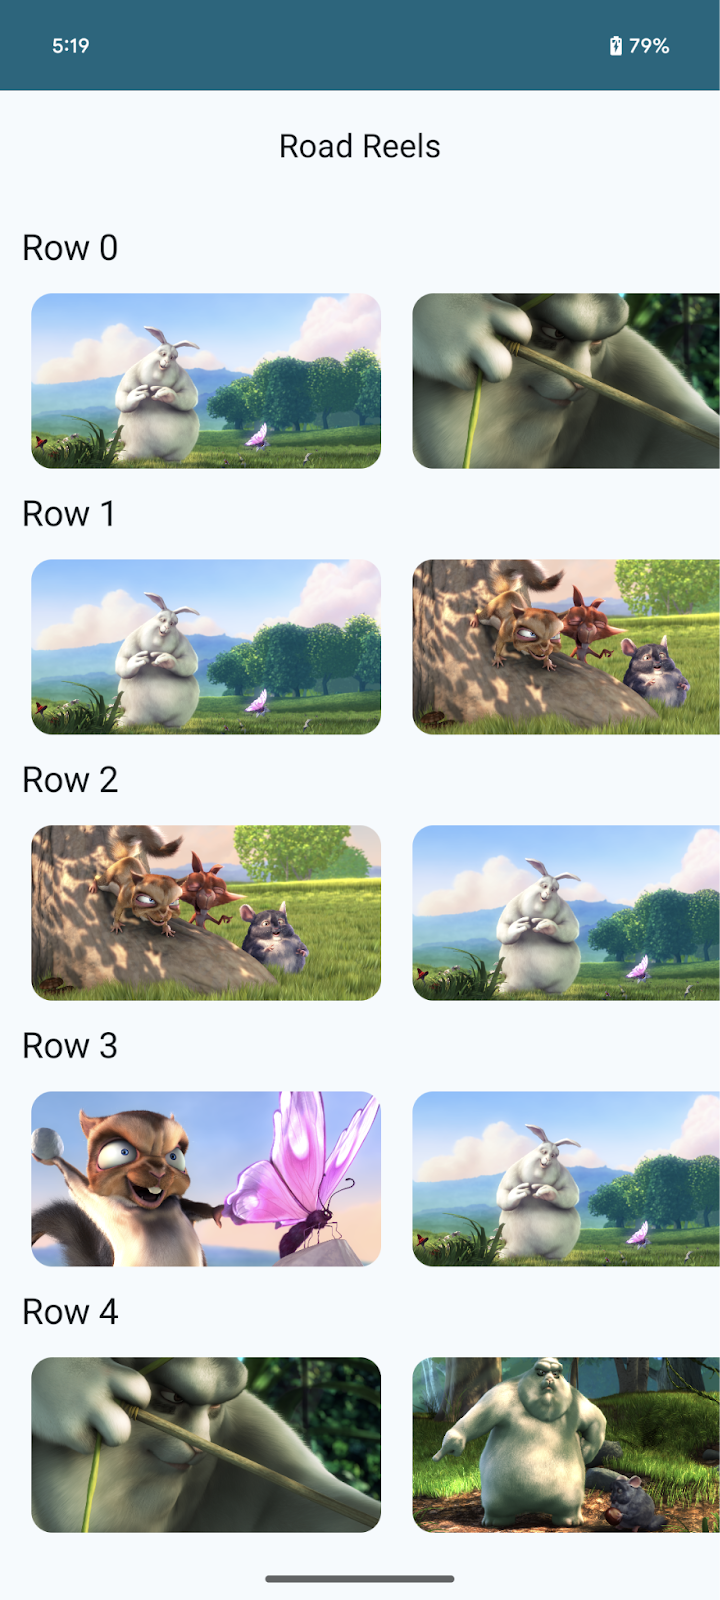
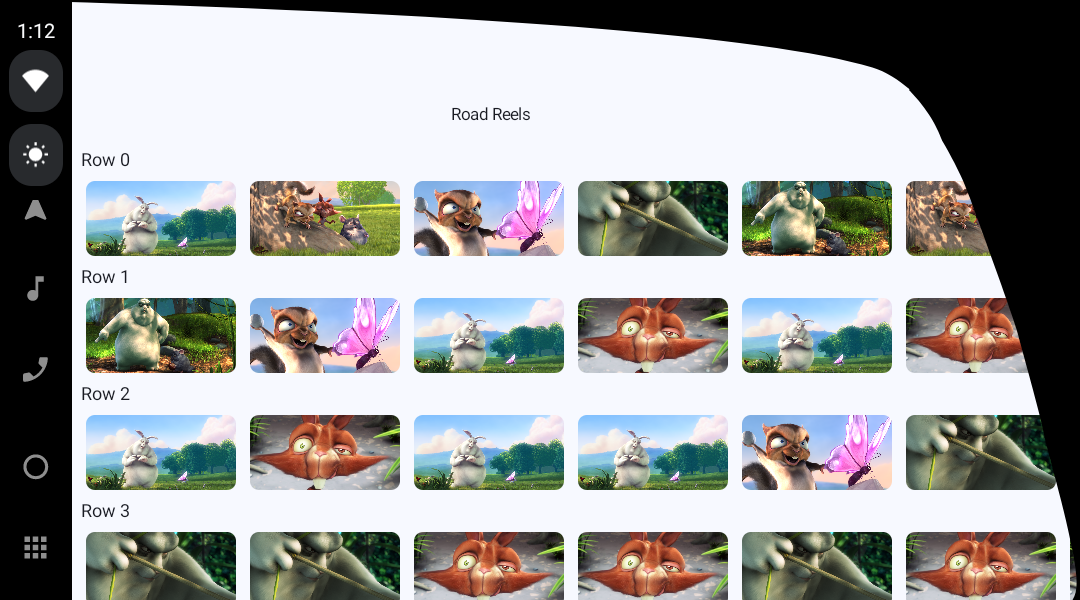
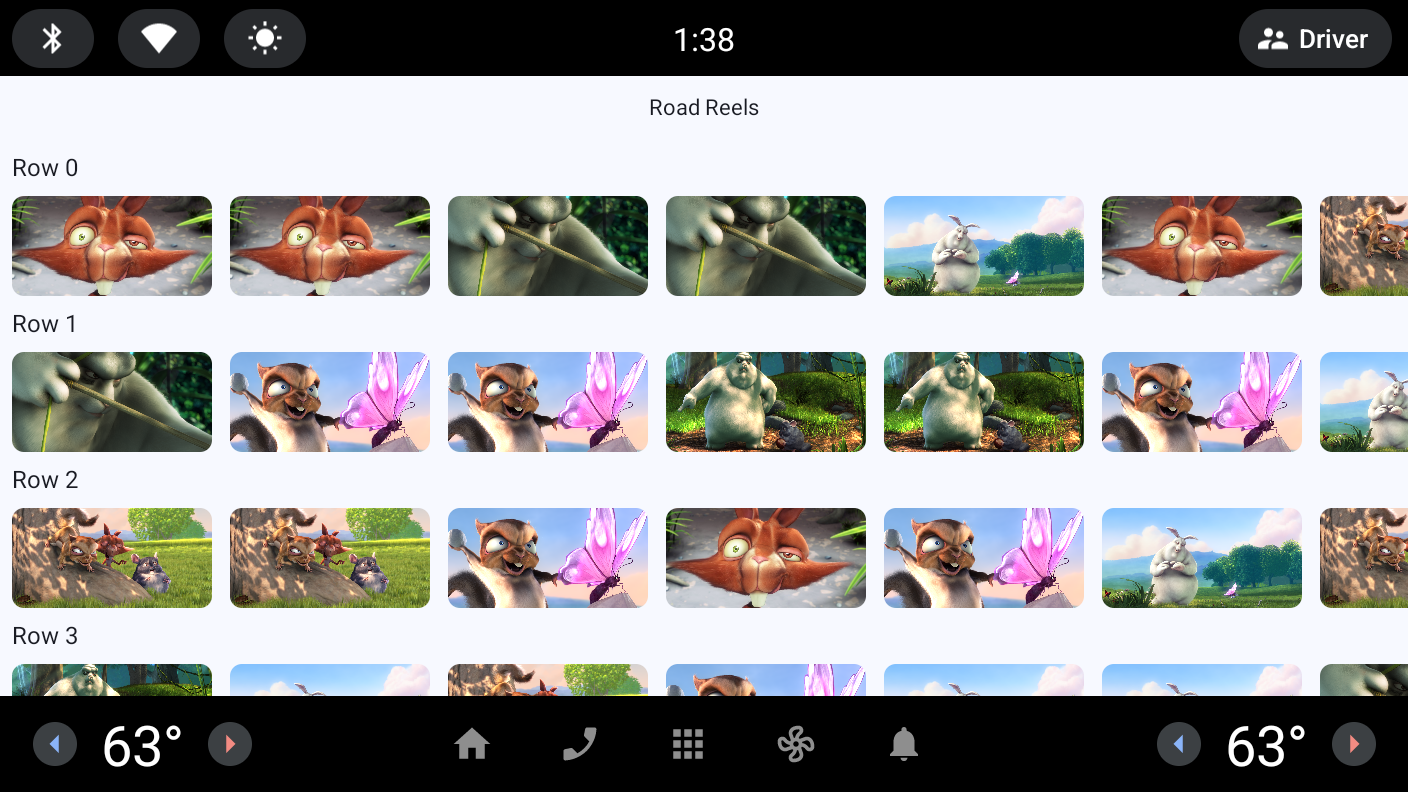
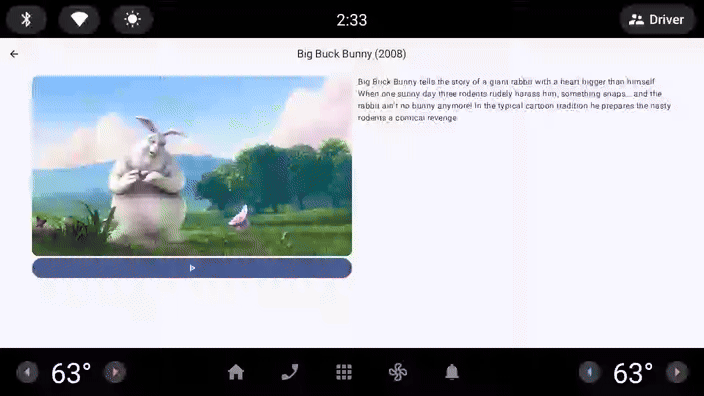
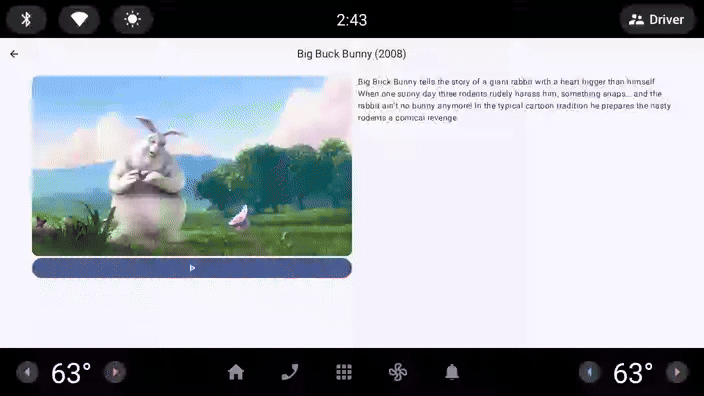
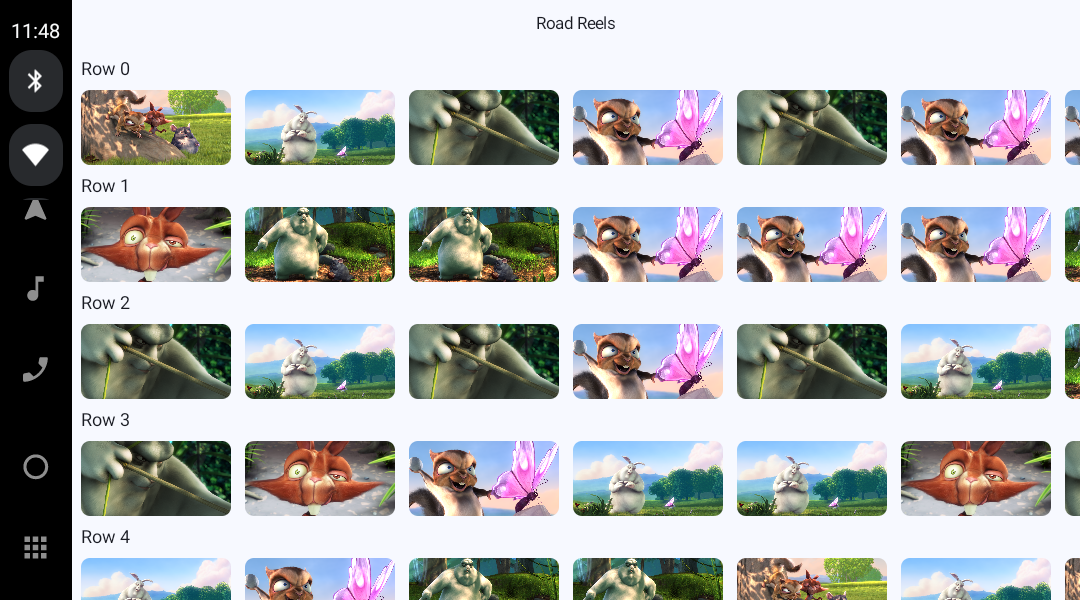
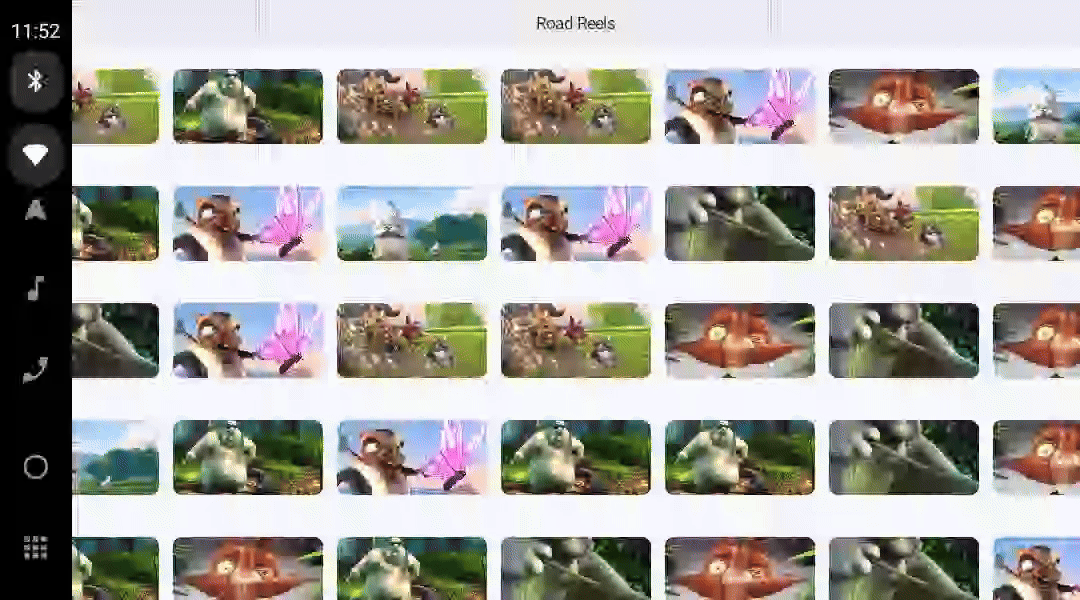
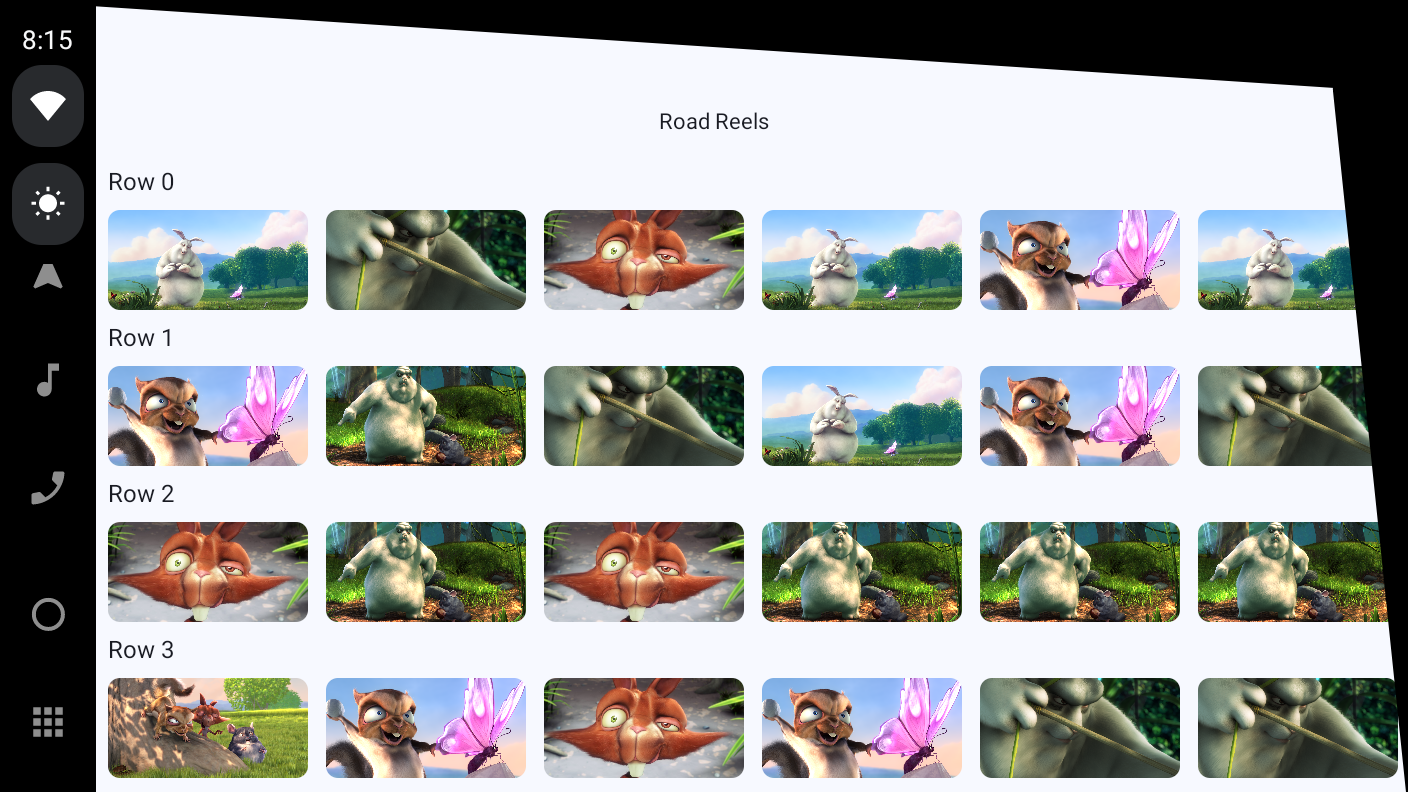
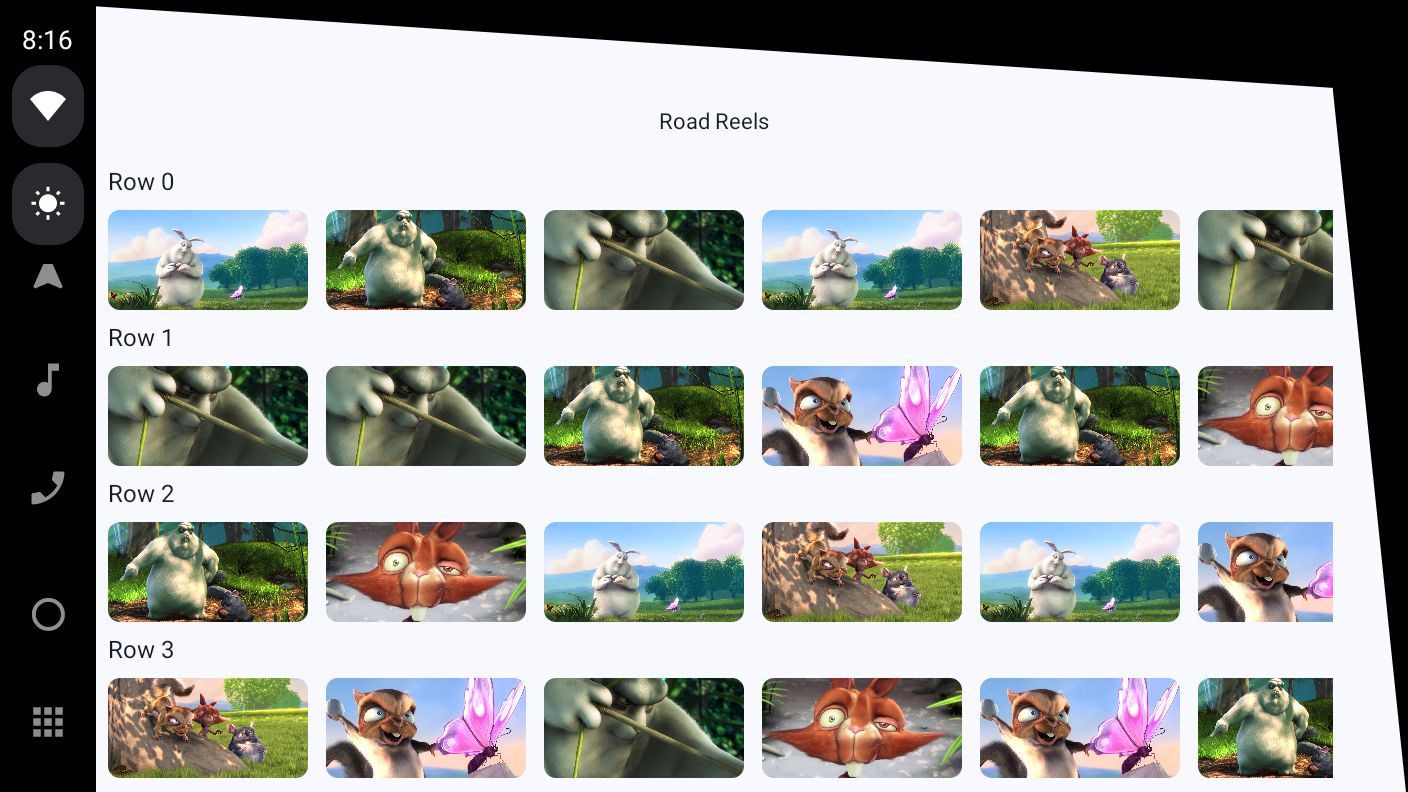
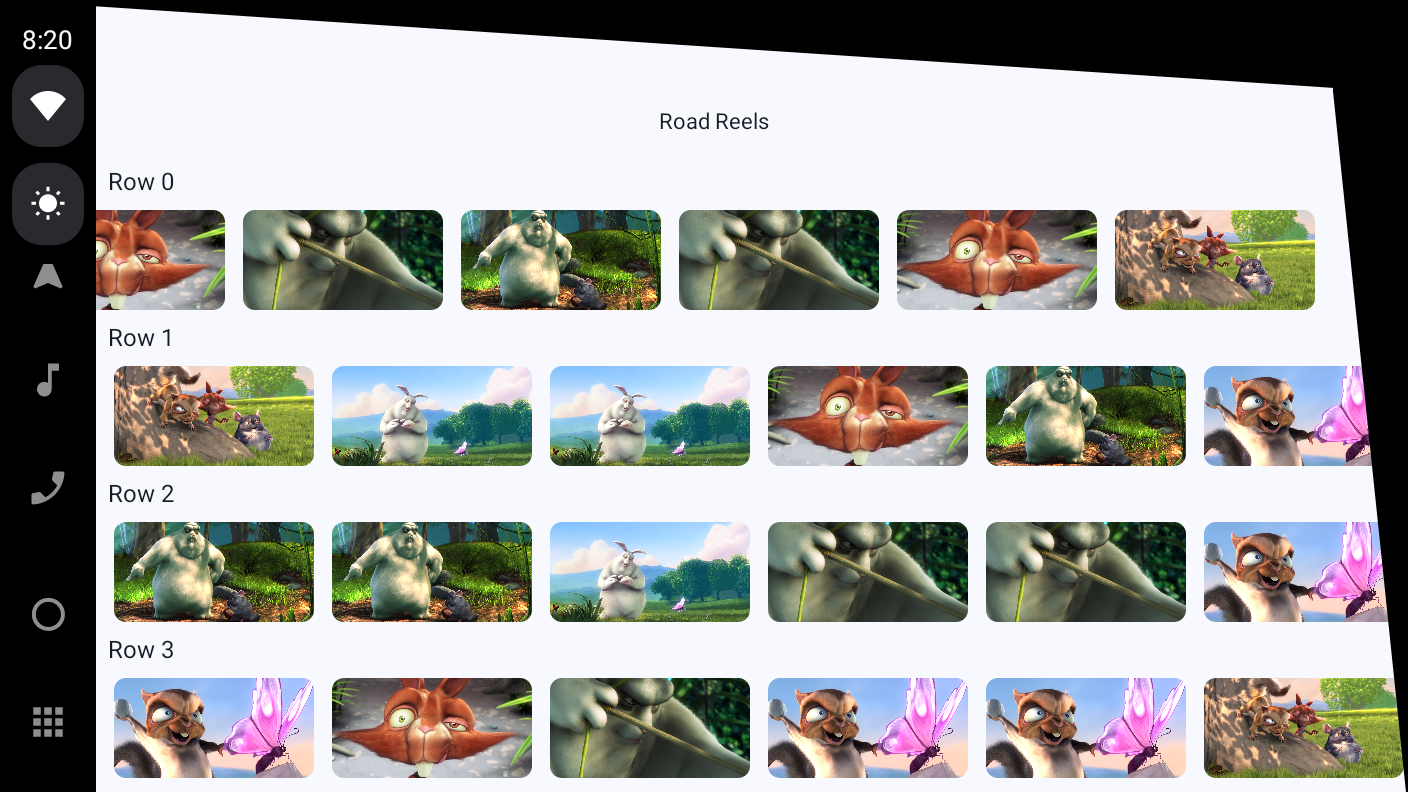
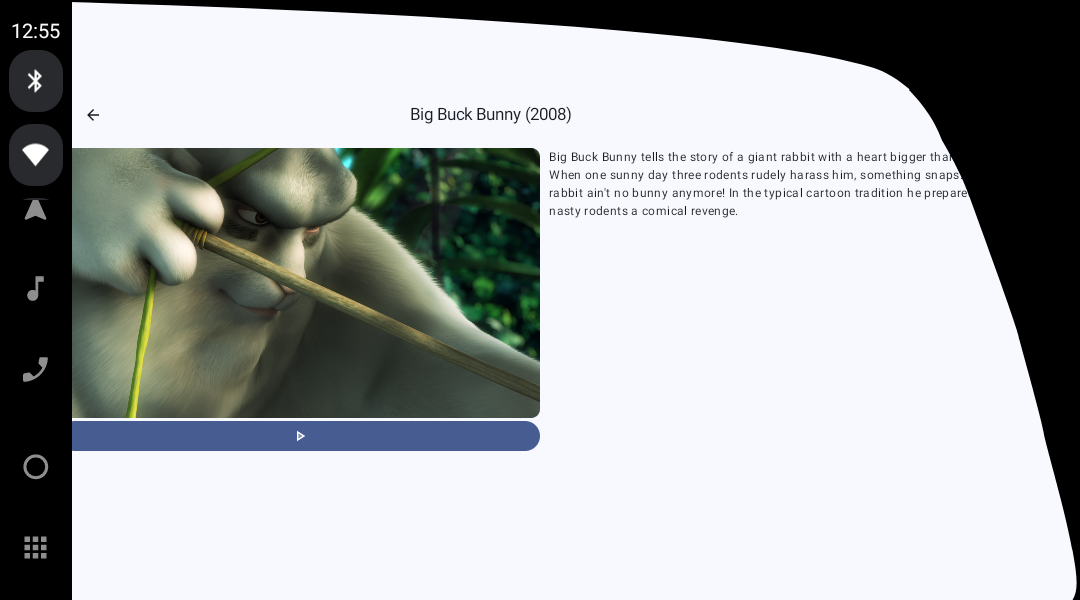
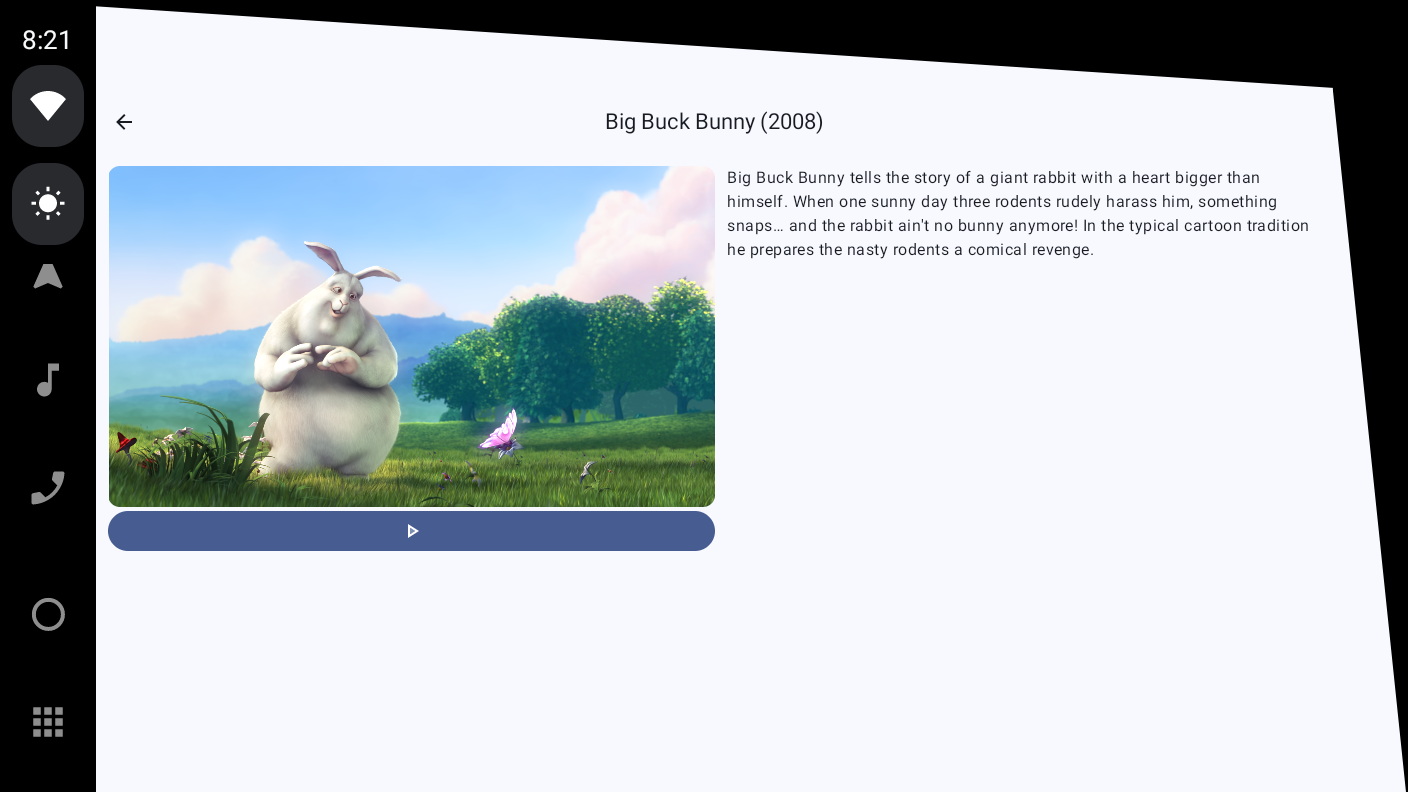
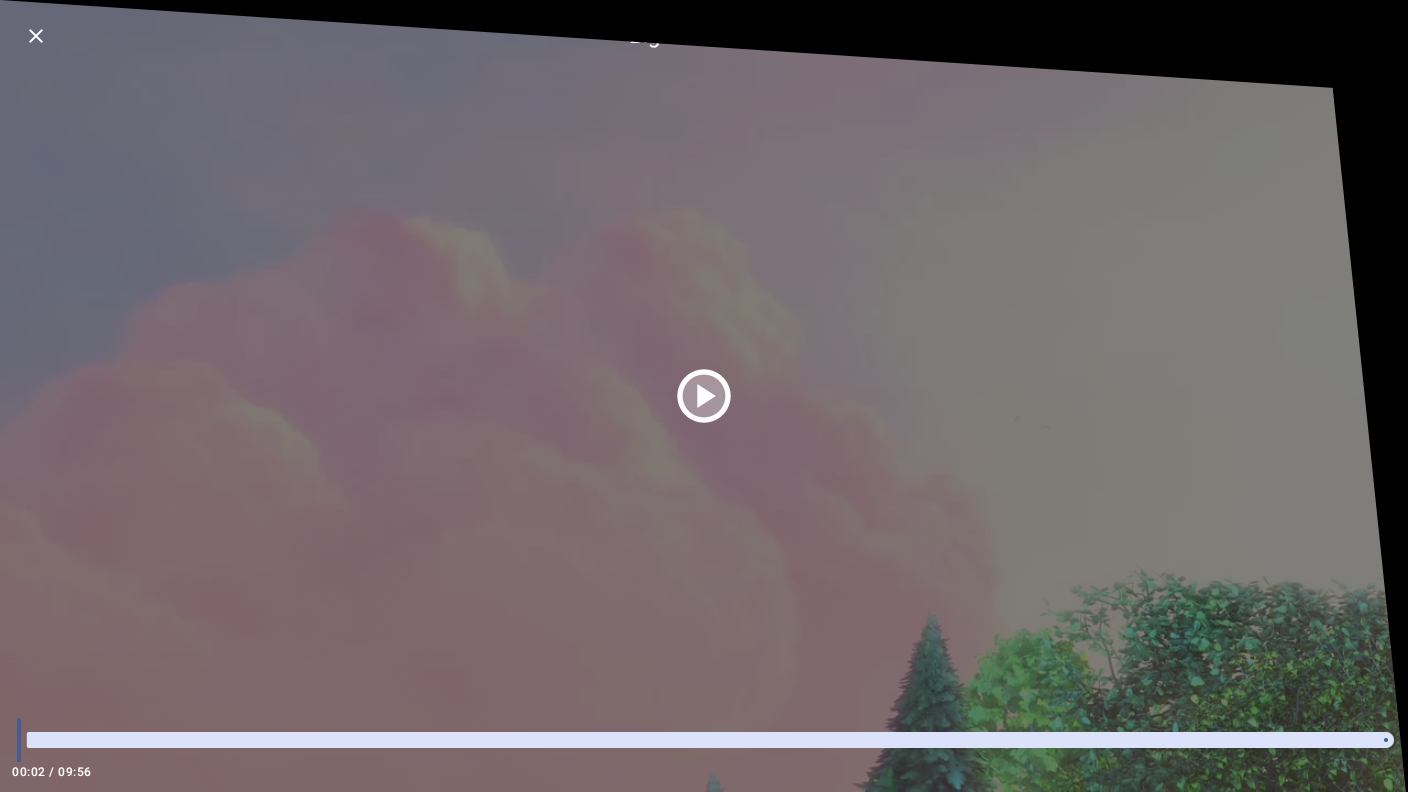
In this codelab, you'll learn how to migrate an existing video streaming mobile app, Road Reels, to Android Automotive OS.
|
|
The starting point version of the app running on a phone | The completed version of the app running on an Android Automotive OS emulator with a display cutout. |
What you'll learn
- How to use the Android Automotive OS emulator.
- How to make the changes required to create an Android Automotive OS build.
- Common assumptions made when developing apps for mobile that may be broken when an app runs on Android Automotive OS.
- The different quality tiers for apps in cars.
- How to use a media session to enable other apps to control your app's playback.
- How system UI and window insets may differ on Android Automotive OS devices as compared to mobile devices.
2. Get set up
Get the code
- The code for this codelab can be found in the
build-a-parked-appdirectory within thecar-codelabsGitHub repository. To clone it, run the following command:
git clone https://github.com/android/car-codelabs.git
- Alternatively, you can download the repository as a ZIP file:
Open the project
- After starting Android Studio, import the project, selecting just the
build-a-parked-app/startdirectory. Thebuild-a-parked-app/enddirectory contains the solution code, which you can reference at any point if you get stuck or just want to see the full project.
Familiarize yourself with the code
- After opening the project in Android studio, take some time to look through the starting code.
3. Learn about parked apps for Android Automotive OS
Parked apps make up a subset of the app categories supported by Android Automotive OS. At the time of writing, they consist of video streaming apps, web browsers, and games. These apps are a great fit in cars given the hardware present in vehicles with Google built-in and the increasing prevalence of electric vehicles, in which charging time represents a great opportunity for drivers and passengers to engage with these types of apps.
In many ways, cars are similar to other large screen devices like tablets and foldables. They have touchscreens with similar sizes, resolutions, and aspect ratios and which may be in either portrait or landscape orientation (though, unlike tablets, their orientation is fixed). They are also connected devices which may come in and out of network connection. With all that in mind, it's not surprising that apps which are already adaptive often require a minimal amount of work to bring a great user experience to cars.
Similar to large screens, there are also app quality tiers for apps in cars:
- Tier 3 - Car ready: Your app is large screen compatible and can be used while the car is parked. While it may not have any car-optimized features, users can experience the app just as they would on any other large screen Android device. Mobile apps that meet these requirements are eligible to be distributed to cars as-is through the Car ready mobile apps program.
- Tier 2 - Car optimized: Your app provides a great experience on the car's center stack display. To accomplish this, your app will have some car-specific engineering to include capabilities that can be used across driving or parked modes, depending on your app's category.
- Tier 1- Car differentiated: Your app is built to work across the variety of hardware in cars and can adapt its experience across driving and parked modes. It provides the best user experience designed for the different screens in cars such as the center console, instrument cluster, and additional screens - like panoramic displays seen in many premium cars.
4. Run the app in the Android Automotive OS emulator
Install the Automotive with Play Store System images
- First, open the SDK Manager in Android Studio and select the SDK Platforms tab if it is not already selected. In the bottom-right corner of the SDK Manager window, make sure that the Show package details box is checked.
- Install the API 33 Android Automotive with Google APIs emulator image listed in Add generic system images. Images can only run on machines with the same architecture (x86/ARM) as themselves.
Create an Android Automotive OS Android Virtual Device
- After opening the Device Manager, select Automotive under the Category column on the left side of the window. Then, select the Automotive (1408p landscape) bundled hardware profile from the list and click Next.
- On the next page, select the system image from the previous step. Click Next and select any advanced options you want before finally creating the AVD by clicking Finish. Note: if you chose the API 30 image, it may be under a tab other than the Recommended tab.
Run the app
Run the app on the emulator you just created using the existing app run configuration. Play around with the app to go through the different screens and compare how it behaves compared to running the app on a phone or tablet emulator.
5. Update the manifest to declare Android Automotive OS support
Though the app "just works", there are a few small changes that need to be made for it to work well on Android Automotive OS and meet the requirements to be publishable on the Play Store. These changes can be made in such a way that the same APK or App Bundle can support both mobile and Android Automotive OS devices. The first set of changes is to update the AndroidManifest.xml file to indicate that the app supports Android Automotive OS devices and is a video app.
Declare the automotive hardware feature
To indicate that your app supports Android Automotive OS devices, add the following <uses-feature> element in the AndroidManifest.xml file:
AndroidManifest.xml
<manifest xmlns:android="http://schemas.android.com/apk/res/android">
    ...
    <uses-feature
        android:name="android.hardware.type.automotive"
        android:required="false" />
    ...
</manifest>
Using a value of false for the android:required attribute makes it possible for the generated APK or App Bundle to be distributed both to Android Automotive OS devices and to mobile devices. See Choose a track type for Android Automotive OS for more information.
Mark the app as a video app
The other piece of metadata that needs to be set is the android:appCategory attribute of the <application> element. This is used to declare the category of your app within the context of Android for Cars, and is independent of the category you select for your app in the Play Console.
AndroidManifest.xml
<manifest ...>
    <application
        ...
        android:appCategory="video">
        ...
    </application>
</manifest>
With that, you've made all of the changes necessary to declare Android Automotive OS support.
6. Meet the Android Automotive OS quality requirements: Navigability
Though declaring Android Automotive OS support is one part of bringing your app to cars, making sure the app is usable and safe to use is still necessary.
Add navigation affordances
While running the app in the Android Automotive OS emulator, you may have noticed that it wasn't possible to return from the detail screen to the main screen or from the player screen to the detail screen. Unlike other form factors, which may require a back button or a touch gesture to enable back navigation, there is no such requirement for Android Automotive OS devices. As such, apps must provide navigation affordances in their UI to ensure that users are able to navigate without getting stuck on a screen within the app. This requirement is codified as the AN-1 quality guideline.
To support back navigation from the detail screen to the main screen, add an additional navigationIcon parameter for the detail screen's CenterAlignedTopAppBar as follows:
RoadReelsApp.kt
import androidx.compose.material.icons.Icons
import androidx.compose.material.icons.automirrored.filled.ArrowBack
import androidx.compose.material3.Icon
import androidx.compose.material3.IconButton

...

} else if (route?.startsWith(Screen.Detail.name) == true) {
    CenterAlignedTopAppBar(
        title = { Text(stringResource(R.string.bbb_title)) },
        navigationIcon = {
            IconButton(onClick = { navController.popBackStack() }) {
                Icon(
                    Icons.AutoMirrored.Filled.ArrowBack,
                    contentDescription = null
                )
            }
        }
    )
}
To support back navigation from the player screen to the main screen:
- Update the
TopControlscomposable to take a callback parameter calledonCloseand add anIconButtonthat calls it when clicked.
PlayerControls.kt
import androidx.compose.material.icons.twotone.Close

...

@Composable
fun TopControls(
    title: String?,
    onClose: () -> Unit,
    modifier: Modifier = Modifier
) {
    Box(modifier) {
        IconButton(
            modifier = Modifier
                .align(Alignment.TopStart),
            onClick = onClose
        ) {
            Icon(
                Icons.TwoTone.Close,
                contentDescription = "Close player",
                tint = Color.White
            )
        }

        if (title != null) { ... }
    }
}
- Update the
PlayerControlscomposable to take also take aonClosecallback parameter and pass it on to theTopControls
PlayerControls.kt
fun PlayerControls(
    uiState: PlayerUiState,
    onClose: () -> Unit,
    onPlayPause: () -> Unit,
    onSeek: (seekToMillis: Long) -> Unit,
    modifier: Modifier = Modifier,
) {
    AnimatedVisibility(
        visible = uiState.isShowingControls,
        enter = fadeIn(),
        exit = fadeOut()
    ) {
        Box(modifier = modifier.background(Color.Black.copy(alpha = .5f))) {
            TopControls(
                modifier = Modifier
                    .fillMaxWidth()
                    .padding(dimensionResource(R.dimen.screen_edge_padding))
                    .align(Alignment.TopCenter),
                title = uiState.mediaMetadata.title?.toString(),
                onClose = onClose
            )
            ...
        }
    }
}
- Next, update the
PlayerScreencomposable to take the same parameter, and pass it down to itsPlayerControls.
PlayerScreen.kt
@Composable
fun PlayerScreen(
    onClose: () -> Unit,
    modifier: Modifier = Modifier,
    viewModel: PlayerViewModel = viewModel()
) {
    ...

    PlayerControls(
        modifier = Modifier
            .fillMaxSize(),
        uiState = playerUiState,
        onClose = onClose,
        onPlayPause = { if (playerUiState.isPlaying) viewModel.pause() else viewModel.play() },
        onSeek = viewModel::seekTo
    )
}
- Finally, in the
RoadReelsNavHost, provide the implementation that gets passed to thePlayerScreen:
RoadReelsNavHost.kt
composable(route = Screen.Player.name, ...) {
    PlayerScreen(onClose = { navController.popBackStack() })
}
Now the user can move between screens without running into any dead-ends. And, the user experience may even be better on other form factors as well – for example, on a tall phone when the user's hand is already near the top of the screen, they can more easily navigate through the app without needing to move their device in their hand.

Adapt to screen orientation support
Unlike the vast majority of mobile devices, most cars are fixed orientation. That is, they support either landscape or portrait, but not both, since their screens cannot be rotated. Because of this, apps should avoid assuming that both orientations are supported.
In Create an Android Automotive OS manifest, you added two <uses-feature> elements for the android.hardware.screen.portrait and android.hardware.screen.landscape features with the required attribute set to false. Doing that ensures that no implicit feature dependency on either screen orientation can prevent the app from being distributed to cars. However, those manifest elements don't change the behavior of the app, just how it's distributed.
Currently, the app has a helpful feature where it automatically sets the orientation of the activity to landscape when the video player opens, making it so that phone users don't have to fiddle with their device to change its orientation if it's not already landscape.
Unfortunately, that same behavior can result in a flickering loop or letterboxing on devices that are fixed portrait orientation, which includes many cars on the road today.
To fix this, you can add a check based on the screen orientations that the current device supports.
- To simplify the implementation, first add the following in
Extensions.kt:
Extensions.kt
import android.content.Context
import android.content.pm.PackageManager

...

enum class SupportedOrientation {
    Landscape,
    Portrait,
}

fun Context.supportedOrientations(): List<SupportedOrientation> {
    return when (Pair(
        packageManager.hasSystemFeature(PackageManager.FEATURE_SCREEN_LANDSCAPE),
        packageManager.hasSystemFeature(PackageManager.FEATURE_SCREEN_PORTRAIT)
    )) {
        Pair(true, false) -> listOf(SupportedOrientation.Landscape)
        Pair(false, true) -> listOf(SupportedOrientation.Portrait)
        // For backwards compat, if neither feature is declared, both can be assumed to be supported
        //
        else -> listOf(SupportedOrientation.Landscape, SupportedOrientation.Portrait)
    }
}
- Then, guard the call to set the requested orientation. Since apps can run into a similar issue in multi-window mode on mobile devices, you can also include a check to not dynamically set the orientation in that case either.
PlayerScreen.kt
import com.example.android.cars.roadreels.SupportedOrientation
import com.example.android.cars.roadreels.supportedOrientations

...

DisposableEffect(Unit) {
    ...

    // Only automatically set the orientation to landscape if the device supports landscape.
    // On devices that are portrait only, the activity may enter a compat mode and won't get to
    // use the full window available if so. The same applies if the app's window is portrait
    // in multi-window mode.
    if (activity.supportedOrientations().contains(SupportedOrientation.Landscape)
        && !activity.isInMultiWindowMode
    ) {
        activity.requestedOrientation = ActivityInfo.SCREEN_ORIENTATION_SENSOR_LANDSCAPE
    }

    ...
}
|
|
|
The player screen enters a flickering loop on the Polestar 2 emulator before adding the check (when the activity does not handle | The player screen is letterboxed on the Polestar 2 emulator before adding the check (when the activity handles | The player screen is not letterboxed on the Polestar 2 emulator after adding the check |
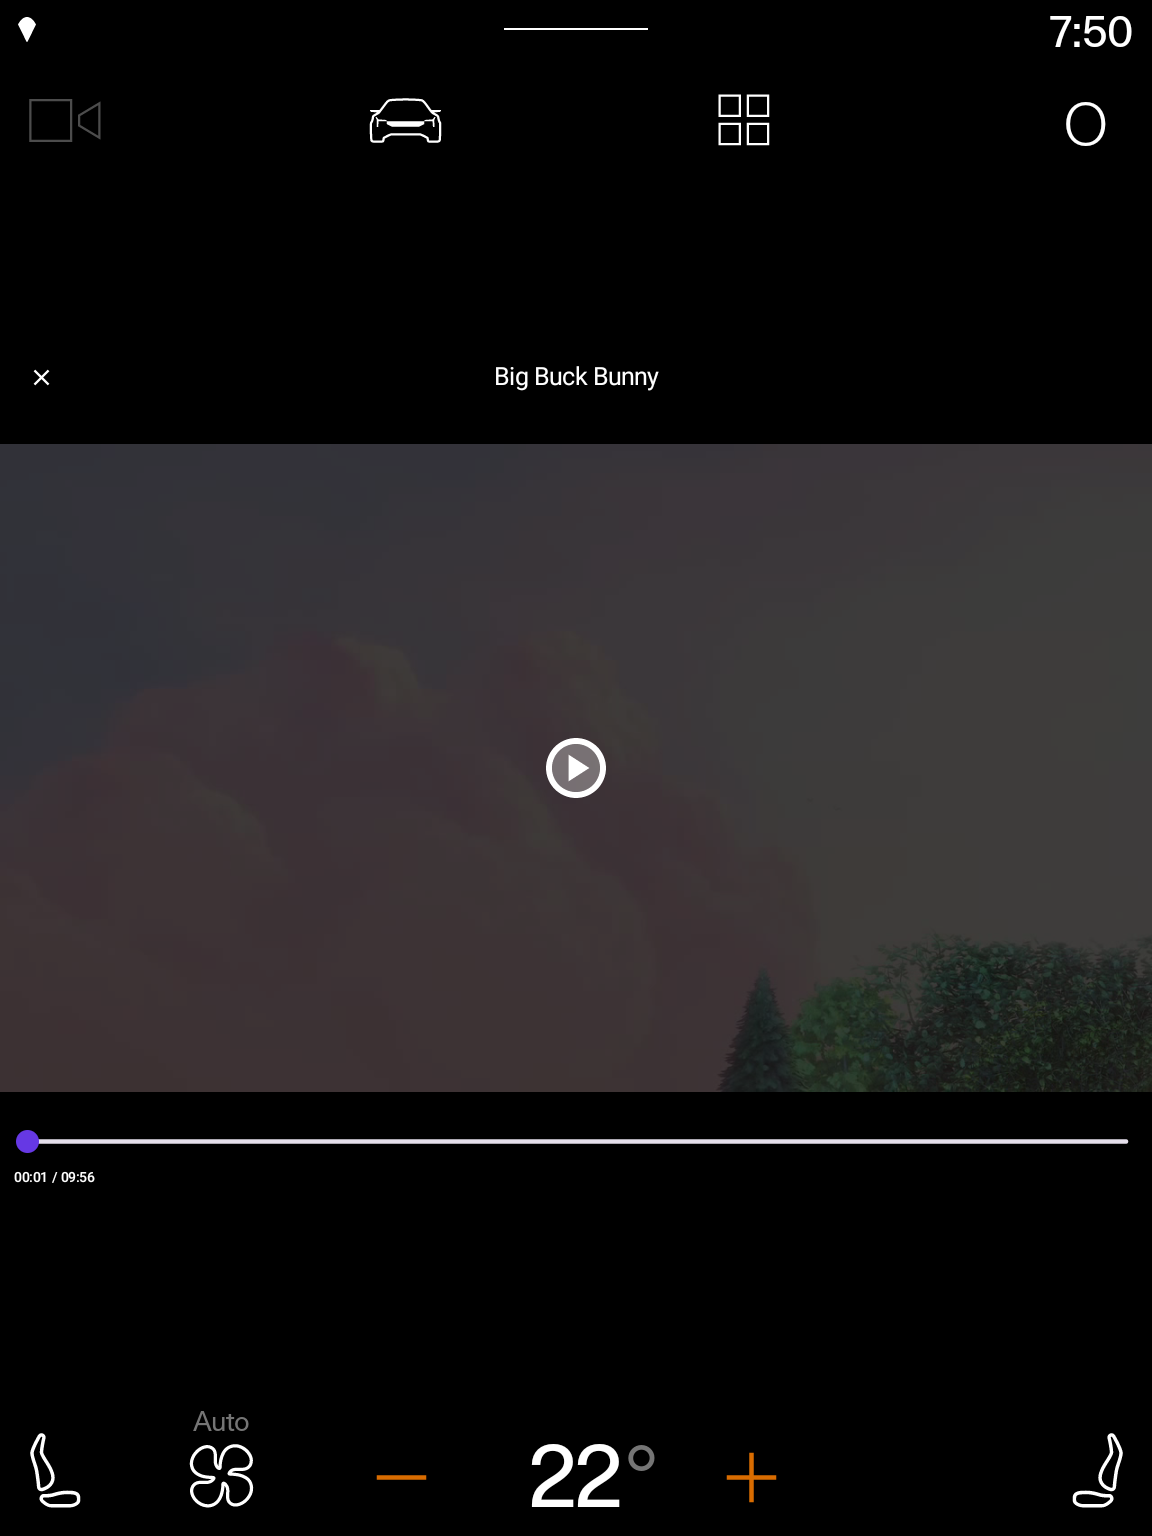
Since this is the only location in the app that sets the screen orientation, the app now avoids letterboxing! In your own app, check for any screenOrientation attributes or setRequestedOrientation calls that are for landscape or portrait orientations only (including the sensor, reverse, and user variants of each) and remove or guard them as necessary to limit letterboxing. For more details, see Device compatibility mode.
Adapt to system bar controllability
Unfortunately, although the previous change ensures the app doesn't enter a flickering loop or get letterboxed, it also exposes another assumption that's been broken – namely, that system bars can always be hidden! Because users have different needs when using their car (as compared to using their phone or tablet), OEMs have the option of preventing apps from hiding the system bars to ensure that vehicle controls, such as climate controls, are always accessible on screen.
As a result, there's the potential for apps to render behind the system bars when they are rendering in immersive mode and assume that the bars can be hidden. You can see this in the previous step, as the top and bottom player controls are no longer visible when the app is not letterboxed. In this specific instance, the app is no longer navigable as the button to close the player is obscured and its functionality is impeded since the seek bar cannot be used.
The easiest fix would be to apply the systemBars window insets padding to the player as follows:
PlayerScreen.kt
import androidx.compose.foundation.layout.WindowInsets
import androidx.compose.foundation.layout.systemBars
import androidx.compose.foundation.layout.windowInsetsPadding

...

Box(
    modifier = Modifier
        .fillMaxSize()
        .windowInsetsPadding(WindowInsets.systemBars)
) {
    PlayerView(...)
    PlayerControls(...)
}
However, this solution isn't ideal as it causes the UI elements to jump around as the system bars animate away.
To improve the user experience, you can update the app to keep track of which insets can be controlled and apply padding only for the insets that can't be controlled.
- Since other screens within the app could be interested in controlling window insets, it makes sense to pass the controllable insets as a
CompositionLocal. Create a new file,LocalControllableInsets.kt, in thecom.example.android.cars.roadreelspackage and add the following:
LocalControllableInsets.kt
import androidx.compose.runtime.compositionLocalOf

// Assume that no insets can be controlled by default
const val DEFAULT_CONTROLLABLE_INSETS = 0
val LocalControllableInsets = compositionLocalOf { DEFAULT_CONTROLLABLE_INSETS }
- Set up an
OnControllableInsetsChangedListenerto listen for changes.
MainActivity.kt
import androidx.compose.runtime.getValue
import androidx.compose.runtime.mutableIntStateOf
import androidx.compose.runtime.remember
import androidx.compose.runtime.setValue
import androidx.core.view.WindowCompat
import androidx.core.view.WindowInsetsControllerCompat.OnControllableInsetsChangedListener

...

class MainActivity : ComponentActivity() {
    private lateinit var onControllableInsetsChangedListener: OnControllableInsetsChangedListener

    @OptIn(ExperimentalMaterial3WindowSizeClassApi::class)
    override fun onCreate(savedInstanceState: Bundle?) {
        super.onCreate(savedInstanceState)

        enableEdgeToEdge()

        setContent {
            var controllableInsetsTypeMask by remember { mutableIntStateOf(DEFAULT_CONTROLLABLE_INSETS) }

            onControllableInsetsChangedListener =
                OnControllableInsetsChangedListener { _, typeMask ->
                    if (controllableInsetsTypeMask != typeMask) {
                        controllableInsetsTypeMask = typeMask
                    }
                }

            WindowCompat.getInsetsController(window, window.decorView)
                .addOnControllableInsetsChangedListener(onControllableInsetsChangedListener)

            RoadReelsTheme {
                RoadReelsApp(calculateWindowSizeClass(this))
            }
        }
    }

    override fun onDestroy() {
        super.onDestroy()

        WindowCompat.getInsetsController(window, window.decorView)
            .removeOnControllableInsetsChangedListener(onControllableInsetsChangedListener)
    }
}
- Add a top level
CompositionLocalProviderthat contains the theme and app composables and which binds values toLocalControllableInsets.
MainActivity.kt
import androidx.compose.runtime.CompositionLocalProvider

...

CompositionLocalProvider(LocalControllableInsets provides controllableInsetsTypeMask) {
    RoadReelsTheme {
        RoadReelsApp(calculateWindowSizeClass(this))
    }
}
- In the player, read the current value and use it to determine the insets to hide and to be used for padding.
PlayerScreen.kt
import androidx.compose.foundation.layout.navigationBars
import androidx.compose.foundation.layout.statusBars
import androidx.compose.foundation.layout.union
import androidx.compose.foundation.layout.WindowInsets
import androidx.compose.foundation.layout.navigationBars
import androidx.compose.foundation.layout.statusBars
import androidx.compose.foundation.layout.windowInsetsPadding
import androidx.compose.runtime.rememberUpdatedState
import androidx.compose.ui.unit.dp
import com.example.android.cars.roadreels.LocalControllableInsets

...

val controllableInsetsTypeMask by rememberUpdatedState(LocalControllableInsets.current)

DisposableEffect(Unit) {
    ...
    windowInsetsController.hide(WindowInsetsCompat.Type.systemBars().and(controllableInsetsTypeMask))
    ...
}

...

// When the system bars can be hidden, ignore them when applying padding to the player and
// controls so they don't jump around as the system bars disappear. If they can't be hidden
// include them so nothing renders behind the system bars
var windowInsetsForPadding = WindowInsets(0.dp)
if (controllableInsetsTypeMask.and(WindowInsetsCompat.Type.statusBars()) == 0) {
    windowInsetsForPadding = windowInsetsForPadding.union(WindowInsets.statusBars)
}
if (controllableInsetsTypeMask.and(WindowInsetsCompat.Type.navigationBars()) == 0) {
    windowInsetsForPadding = windowInsetsForPadding.union(WindowInsets.navigationBars)
}

Box(
    modifier = Modifier
        .fillMaxSize()
        .windowInsetsPadding(windowInsetsForPadding)
) {
    PlayerView(...)
    PlayerControls(...)
}
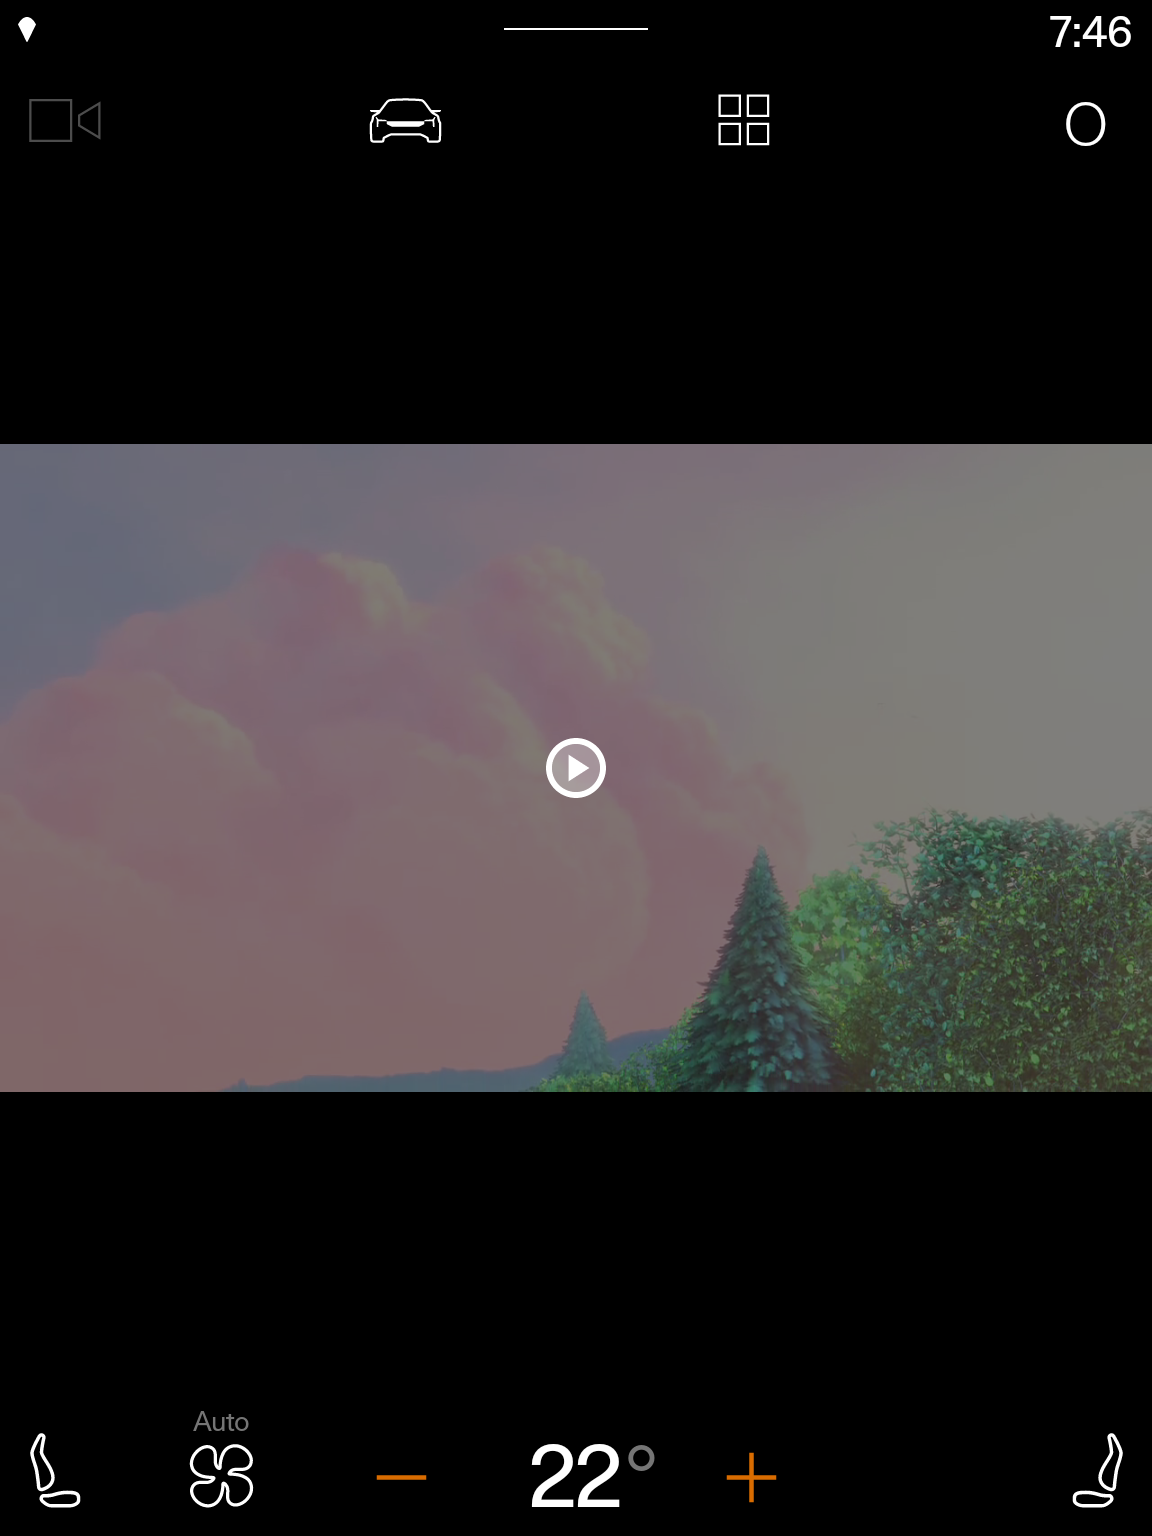
|
|
The content doesn't jump around when the system bars can be hidden | The content remains visible when the system bars can't be hidden |
Much better – the content doesn't jump around, and at the same time, the controls are fully visible even on cars where the system bars can't be controlled.
7. Meet the Android Automotive OS quality requirements: Driver distraction
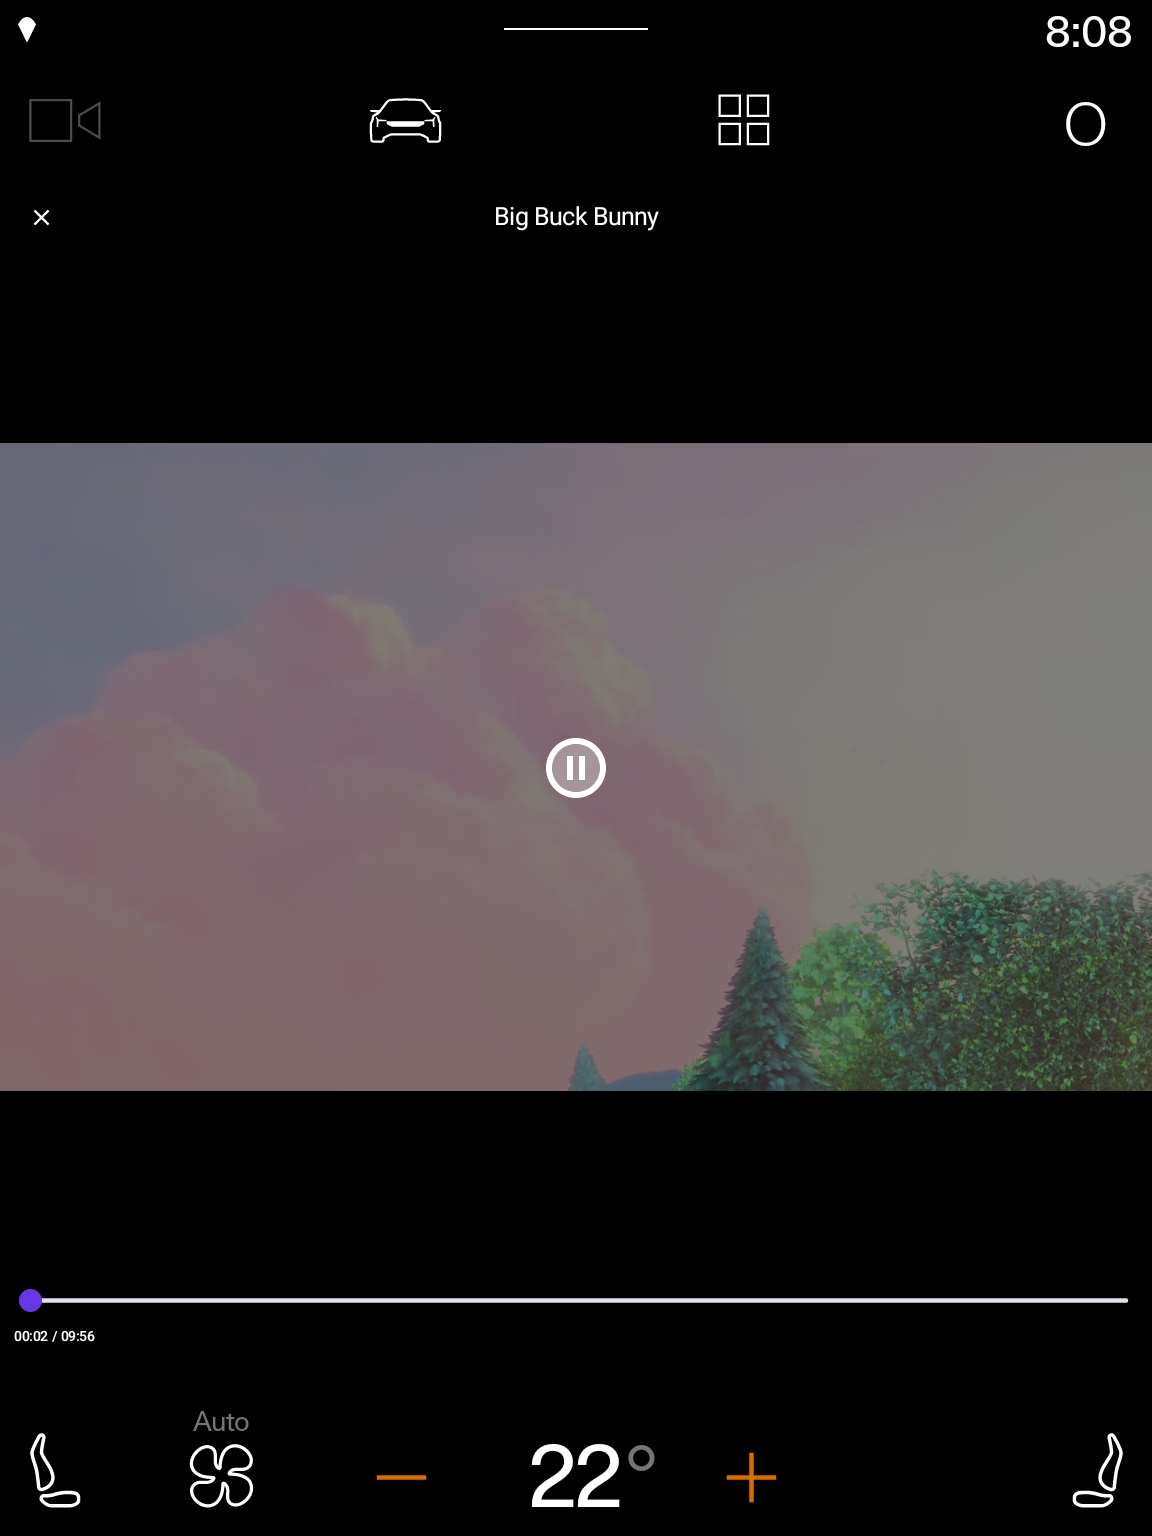
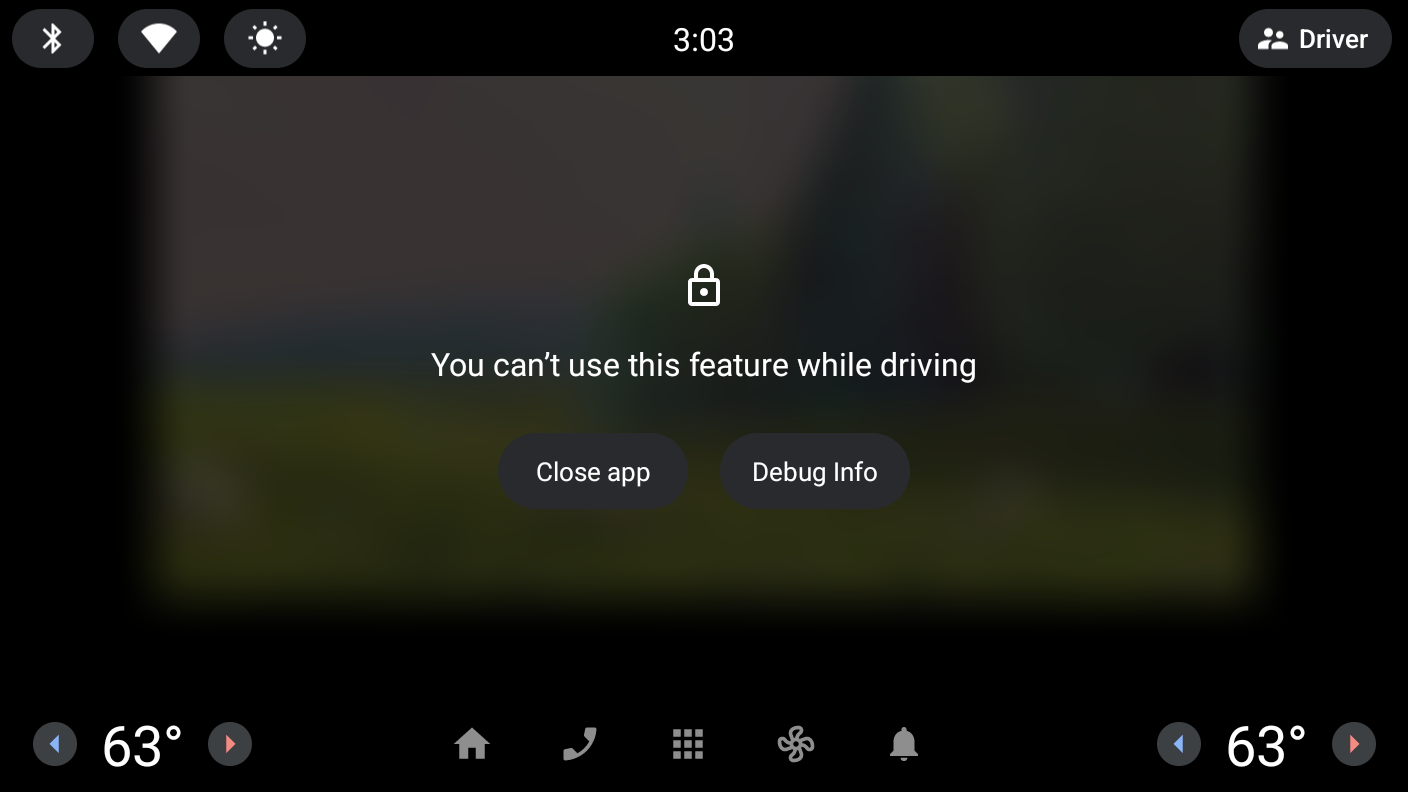
Finally, there's one major difference between cars and other form factors – they're used for driving! As such, limiting distractions while driving is very important. All parked apps for Android Automotive OS must pause playback when user experience restrictions become active and prevent playback resumption while user experience restrictions are active. A system overlay appears when user experience restrictions become active and in turn, the onPause lifecycle event is called for the app being overlaid. It is during this call that apps should pause playback.
Simulate driving
Navigate to the player view in the emulator and begin playing content. Then, follow the steps to simulate driving and notice that, while the app's UI is obscured by the system, playback does not pause. This is in violation of the DD-2 car app quality guideline.
Pause playback when driving begins
- Add a dependency on the
androidx.lifecycle:lifecycle-runtime-composeartifact, which contains theLifecycleEventEffectthat helps run code on lifecycle events.
libs.version.toml
androidx-lifecycle-runtime-compose = { group = "androidx.lifecycle", name = "lifecycle-runtime-compose", version.ref = "lifecycle" }
build.gradle.kts (Module :app)
implementation(libs.androidx.lifecycle.runtime.compose)
- After syncing the project to download the dependency, add a
LifecycleEventEffectthat runs on theON_PAUSEevent to pause playback (and optionally on theON_RESUMEevent to resume playback).
PlayerScreen.kt
import androidx.lifecycle.Lifecycle
import androidx.lifecycle.compose.LifecycleEventEffect

...

@Composable
fun PlayerScreen(...) {
    ...
    LifecycleEventEffect(Lifecycle.Event.ON_PAUSE) {
        viewModel.pause()
    }

    LifecycleEventEffect(Lifecycle.Event.ON_RESUME) {
        viewModel.play()
    }
    ...
}
With the fix implemented, follow the same steps you did earlier to simulate driving during active playback and notice that the playback stops, meeting the DD-2 requirement.
8. Test the app in the distant display emulator
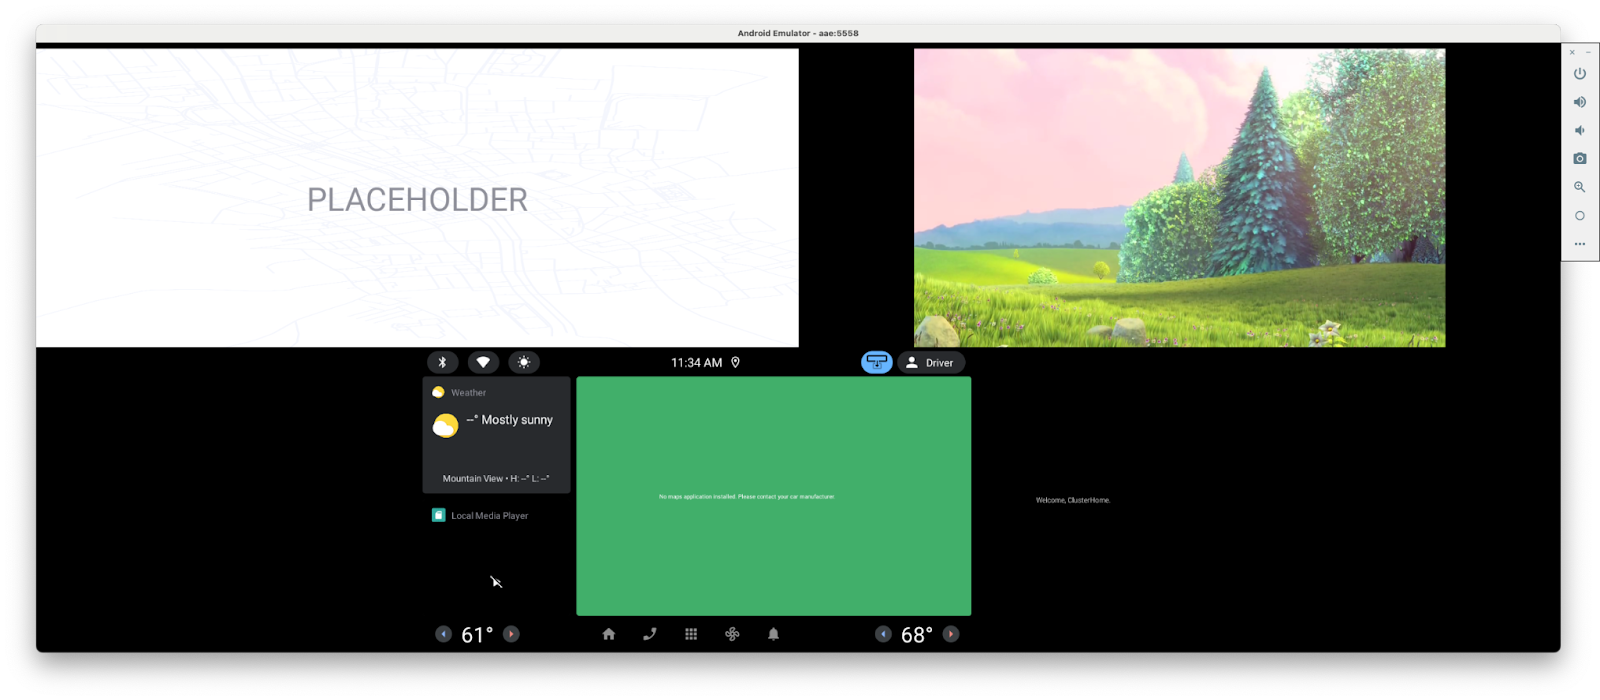
A new configuration that's beginning to appear in cars is a two screen set up with a primary screen in the center console and a secondary screen high up on the dashboard near the windshield. Apps can be moved from the center screen to the secondary screen and back to give drivers and passengers more options.
Install the Automotive Distant Display image
- First, open the SDK Manager in Android Studio Preview and select the SDK Platforms tab if it is not already selected. In the bottom-right corner of the SDK Manager window, make sure that the Show package details box is checked.
- Install the API 33 Automotive Distant Display with Google Play emulator image for your computer's architecture (x86/ARM).
Create an Android Automotive OS Android Virtual Device
- After opening the Device Manager, select Automotive under the Category column on the left side of the window. Then, select the Automotive Distant Display with Google Play bundled hardware profile from the list and click Next.
- On the next page, select the system image from the previous step. Click Next and select any advanced options you want before finally creating the AVD by clicking Finish.
Run the app
Run the app on the emulator you just created using the existing app run configuration. Follow the instructions in Use the distant display emulator to move the app to and from the distant display. Test moving the app both when it's on the main/detail screen and when it's on the player screen and trying to interact with the app on both screens.
9. Improve the app experience on the distant display
As you used the app on the distant display, you may have noticed two things:
- Playback stutters when the app is moved to and from the distant display.
- You can't interact with the app while it's on the distant display, including changing the playback state.
Improve app continuity
The playback stutters are caused by the activity being recreated due to a configuration change. Because the app is written using Compose and the configuration that's changing is size-related, it's straightforward to let Compose handle configuration changes for you by restricting activity recreation for size-based configuration changes. This makes the transition between displays seamless, with no stop in playback or reloading due to activity recreation.
AndroidManifest.xml
<activity
    android:name="com.example.android.cars.roadreels.MainActivity"
    ...
    android:configChanges="screenSize|smallestScreenSize|orientation|screenLayout|density">
        ...
</activity>
Implement playback controls
To fix the issue where the app can't be controlled while it's on the distant display, you can implement MediaSession. Media sessions provide a universal way of interacting with an audio or video player. For more information, see Control and advertise playback using a MediaSession.
- Add a dependency on the
androidx.media3:media3-sessionartifact
libs.version.toml
androidx-media3-mediasession = { group = "androidx.media3", name = "media3-session", version.ref = "media3" }
build.gradle.kts (Module :app)
implementation(libs.androidx.media3.mediasession)
- In the
PlayerViewModel, add a variable to hold the media session and create aMediaSessionusing its builder.
PlayverViewModel.kt
import androidx.media3.session.MediaSession
...

class PlayerViewModel(...) {
    ...

    private var mediaSession: MediaSession? = null

    init {
        viewModelScope.launch {
            _player.onEach { player ->
                playerUiStateUpdateJob?.cancel()
                mediaSession?.release()

                if (player != null) {
                    initializePlayer(player)
                    mediaSession = MediaSession.Builder(application, player).build()
                    playerUiStateUpdateJob = viewModelScope.launch {... }
                }
            }.collect()
        }
    }
}
- Then, add an additional line in the
onClearedmethod to release theMediaSessionwhen thePlayerViewModelis no longer needed.
PlayerViewModel.kt
override fun onCleared() {
    super.onCleared()
    mediaSession?.release()
    _player.value?.release()
}
- Finally, when on the player screen (with the app on either the main or distant display), you can test the media controls using the
adb shell cmd media_session dispatchcommand
# To play content
adb shell cmd media_session dispatch play

# To pause content
adb shell cmd media_session dispatch pause

# To toggle the playing state
adb shell cmd media_session dispatch play-pause
Constrain playback resumption
Although supporting MediaSession makes it possible to control playback while the app is on the distant display, it does introduce one new issue. Namely, it makes it possible for playback to be resumed while user experience restrictions are in place, which violates the DD-2 quality guideline (again!). To test this for yourself:
- Begin playback
- Simulate driving
- Use the
media_session dispatchcommand. Notice that the playback resumes even though the app is obscured.
To fix this, you can listen to the device's user experience restrictions and only allow playback resumption while they are active. This can even be done in a way where the same logic can be used for both mobile and Android Automotive OS.
- In the
appmodule'sbuild.gradlefile, add the following to include the Android Automotive Library and do a Gradle sync afterwards:
build.gradle.kts
android {
    ...
    useLibrary("android.car")
}
- Right click on the
com.example.android.cars.roadreelspackage and select New > Kotlin Class/File. EnterRoadReelsPlayeras the name and click the Class type. - In the file that you just created, add the following starter implementation of the class. By extending
ForwardingSimpleBasePlayer, it's simple to modify supported commands and interactions for a wrapped player by overriding thegetState()method.
RoadReelsPlayer.kt
import android.content.Context
import androidx.media3.common.ForwardingSimpleBasePlayer
import androidx.media3.common.util.UnstableApi
import androidx.media3.exoplayer.ExoPlayer

@UnstableApi
class RoadReelsPlayer(context: Context) :
    ForwardingSimpleBasePlayer(ExoPlayer.Builder(context).build()) {
    private var shouldPreventPlay = false

    override fun getState(): State {
        val state = super.getState()

        return state.buildUpon()
            .setAvailableCommands(
                state.availableCommands.buildUpon().removeIf(COMMAND_PLAY_PAUSE, shouldPreventPlay)
                    .build()
            ).build()
    }
}
- In
PlayerViewModel.kt, update the declaration of the player variable to use an instance ofRoadReelsPlayerinstead ofExoPlayer. At this time, the behavior will be exactly the same as before sinceshouldPreventPlayis never updated from its default value offalse.
PlayerViewModel.kt
init {
    ...
    _player.update { RoadReelsPlayer(application) }
}
- To start tracking the user experience restrictions, add the following
initblock andhandleReleaseimplementation:
RoadReelsPlayer.kt
import android.car.Car
import android.car.drivingstate.CarUxRestrictions
import android.car.drivingstate.CarUxRestrictionsManager
import android.content.pm.PackageManager
import com.google.common.util.concurrent.ListenableFuture

...

@UnstableApi
class RoadReelsPlayer(context: Context) :
    ForwardingSimpleBasePlayer(ExoPlayer.Builder(context).build()) {
    ...
    private var pausedByUxRestrictions = false
    private lateinit var carUxRestrictionsManager: CarUxRestrictionsManager

   init {
        with(context) {
            // Only listen to UX restrictions if the device is running Android Automotive OS
            if (packageManager.hasSystemFeature(PackageManager.FEATURE_AUTOMOTIVE)) {
                val car = Car.createCar(context)
                carUxRestrictionsManager =
                    car.getCarManager(Car.CAR_UX_RESTRICTION_SERVICE) as CarUxRestrictionsManager

                // Get the initial UX restrictions and update the player state
                shouldPreventPlay =
                    carUxRestrictionsManager.currentCarUxRestrictions.isRequiresDistractionOptimization
                invalidateState()

                // Register a listener to update the player state as the UX restrictions change
                carUxRestrictionsManager.registerListener { carUxRestrictions: CarUxRestrictions ->
                    shouldPreventPlay = carUxRestrictions.isRequiresDistractionOptimization

                    if (!shouldPreventPlay && pausedByUxRestrictions) {
                        handleSetPlayWhenReady(true)
                        invalidateState()
                    } else if (shouldPreventPlay && isPlaying) {
                        pausedByUxRestrictions = true
                        handleSetPlayWhenReady(false)
                        invalidateState()
                    }
                }
            }

            addListener(object : Player.Listener {
                override fun onEvents(player: Player, events: Player.Events) {
                    if (events.contains(EVENT_IS_PLAYING_CHANGED) && isPlaying) {
                        pausedByUxRestrictions = false
                    }
                }
            })
        }
    }

    ...

    override fun handleRelease(): ListenableFuture<*> {
        if (::carUxRestrictionsManager.isInitialized) {
            carUxRestrictionsManager.unregisterListener()
        }
        return super.handleRelease()
    }
}
There are a few things of note here:
- The
CarUxRestrictionsManageris stored as alateinitvariable since it isn't instantiated or used on non-Android Automotive OS devices, but should have its listener cleaned up when the player is released. - Only the
isRequiresDistractionOptimizationvalue is referenced when determining UX restriction state. Though theCarUxRestrictionsclass contains additional details about which restrictions are active, there's no need to reference them as they are only intended for distraction optimized apps (such as navigation apps) to use, as those apps continue to be visible while restrictions are active. - After any update to the
shouldPreventPlayvariable,invalidateState()is called to inform consumers of the player's state of the change. - In the listener itself, playback is automatically paused or resumed by calling
handleSetPlayWhenReadywith the appropriate value.
- Now, test resuming playback while simulating driving as described at the start of this section and notice that it doesn't resume!
- Finally, since pausing playback when user experience restrictions become active is handled by
RoadReelsPlayer, there's no need to have theLifecycleEventEffectpause the player duringON_PAUSE. Instead, this can be changed toON_STOP, so playback stops when the user leaves the app to go to the launcher or open another app.
PlayerScreen.kt
LifecycleEventEffect(Lifecycle.Event.ON_START) {
    viewModel.play()
}
LifecycleEventEffect(Lifecycle.Event.ON_STOP) {
    viewModel.pause()
}
Recap
With that, the app works much better in cars, both with and without distant displays! But more than that, it also works better on other form factors! On devices that can rotate their screen or allow users to resize an app's window, the app now seamlessly adapts in those situations as well.
Plus, thanks to the media session integration, the app's playback can be controlled not only by hardware and software controls in cars but also by other sources, such as a Google Assistant query or a pause button on a pair of headphones, giving users more options to control the app across form factors.
10. Test the app under different system configurations
With the app working well on the main display and distant display, the last thing to check is how the app handles different system bar configurations and display cutouts. As described in Work with window insets and display cutouts, Android Automotive OS devices may come in configurations that break assumptions that generally hold true on mobile form factors.
In this section, you'll learn how to configure the emulator to have a left system bar, and test the app in that configuration.
Configure a side system bar
As detailed in Test using the configurable emulator, there are a variety of options to emulate different system configurations present in cars.
For the purposes of this codelab, the com.android.systemui.rro.left can be used to test a different system bar configuration. To enable it, use the following command:
adb shell cmd overlay enable --user 0 com.android.systemui.rro.left
Because the app is using the systemBars modifier as the contentWindowInsets in the Scaffold, the content is already being drawn in an area safe of the system bars. To see what would happen if the app assumed that system bars only appeared on the top and bottom of the screen, change that parameter to be the following:
RoadReelsApp.kt
contentWindowInsets = if (route?.equals(Screen.Player.name) == true) WindowInsets(0.dp) else WindowInsets.systemBars.only(WindowInsetsSides.Vertical)
Uh-oh! The list and detail screen renders behind the system bar. Thanks to the earlier work, the player screen would be OK, even if the system bars weren't controllable since.
Before moving on to the next section, be sure to revert the change you just made to the windowContentPadding parameter!
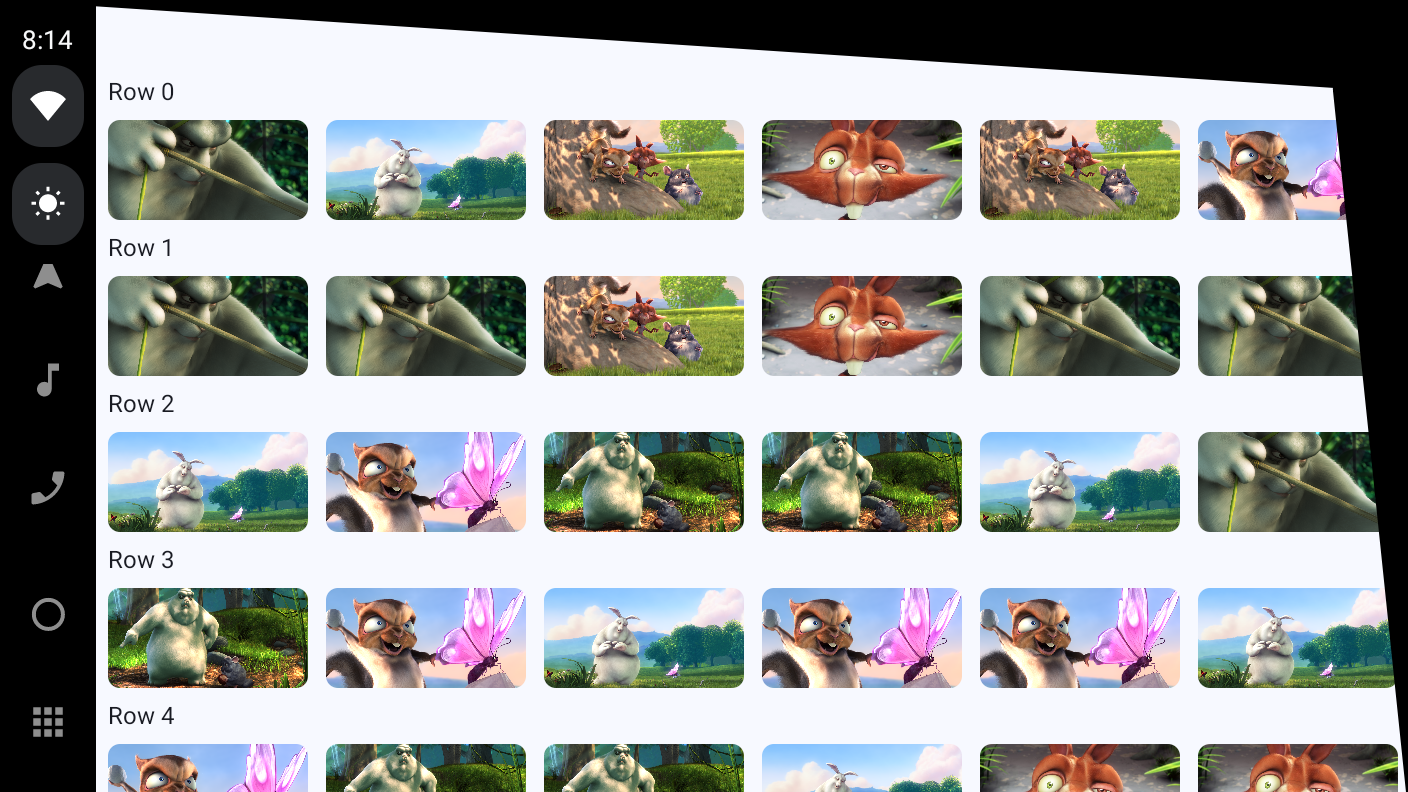
11. Work with display cutouts
Finally, some cars have screens with display cutouts that are very different when compared to those seen on mobile devices. Instead of the notches or pinhole camera cutouts, some Android Automotive OS vehicles have curved screens that make the screen non-rectangular.
To see how the app behaves when such a display cutout is present, first enable the display cutout using the following command:
adb shell cmd overlay enable --user 0 com.android.internal.display.cutout.emulation.top_and_right
To really test how well the app behaves, also enable the left system bar used in the last section, if it isn't already:
adb shell cmd overlay enable --user 0 com.android.systemui.rro.left
As is, the app does not render into the display cutout (the exact shape of the cutout is difficult to tell currently, but will become clear in the next step). This is perfectly OK and a better experience than an app that does render into cutouts, but does not carefully adapt to them.
Render into the display cutout
To give your users the most immersive experience possible, you can make use of much more screen real estate by rendering into the display cutout.
- To render into the display cutout, create an
integers.xmlfile to hold the override specific to cars. To do this, use the UI mode qualifier with the value Car Dock (the name is a holdover from when only Android Auto existed, but it also is used by Android Automotive OS). Additionally, because the value you will use,LAYOUT_IN_DISPLAY_CUTOUT_MODE_ALWAYS, was introduced in Android R, also add the Android Version qualifier with the value 30. See Use alternate resources for more details.
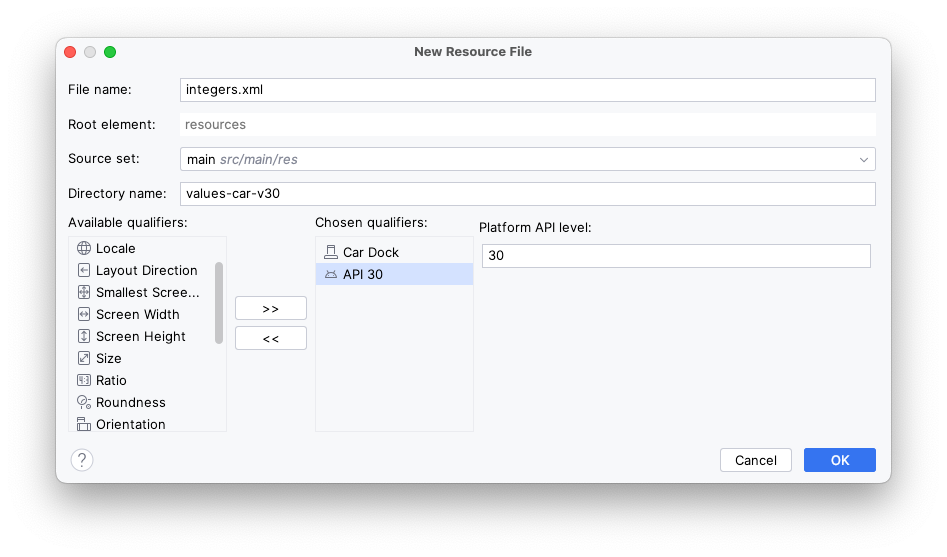
- Within the file you just created (
res/values-car-v30/integers.xml), add the following:
integers.xml
<?xml version="1.0" encoding="utf-8"?>
<resources>
    <integer name="windowLayoutInDisplayCutoutMode">3</integer>
</resources>
The integer value 3 corresponds to LAYOUT_IN_DISPLAY_CUTOUT_MODE_ALWAYS and overrides the default value of 0 from res/values/integers.xml, which corresponds to LAYOUT_IN_DISPLAY_CUTOUT_MODE_DEFAULT. This integer value is already referenced in the MainActivity.kt to override the mode set by enableEdgeToEdge(). For more information on this attribute, see the reference documentation.
Now, when you run the app, notice that the content extends into the cutout and looks very immersive! However, the top app bar and some of the content is partially obscured by the display cutout, causing an issue similar to what happened when the app assumed system bars would only appear on the top and bottom.
Fix the top app bars
To fix the top app bars, you can add the following windowInsets parameter to the CenterAlignedTopAppBar Composables:
RoadReelsApp.kt
import androidx.compose.foundation.layout.WindowInsetsSides
import androidx.compose.foundation.layout.only
import androidx.compose.foundation.layout.safeDrawing

...

windowInsets = WindowInsets.safeDrawing.only(WindowInsetsSides.Horizontal + WindowInsetsSides.Top)
Since safeDrawing consists of both the displayCutout and systemBars insets, this improves upon the default windowInsets parameter, which only uses the systemBars when positioning the top app bar.
Additionally, because the top app bar is positioned at the top of the window, you should not include the bottom component of the safeDrawing insets – doing so could potentially add unnecessary padding.
Fix the main screen
One option to fix the content on the main and detail screens would be to use safeDrawing instead of systemBars for the contentWindowInsets of the Scaffold. However, the app looks decidedly less immersive using that option, with content abruptly being cut off where the display cutout begins – not much better than if the app didn't render into the display cutout at all.
For a more immersive user interface, you can handle the insets on each component within the screen.
- Update the
contentWindowInsetsof theScaffoldto constantly be 0dp (instead of just for thePlayerScreen). This allows each screen and/or component within a screen to determine how it behaves with regards to insets.
RoadReelsApp.kt
Scaffold(
    ...,
    contentWindowInsets = WindowInsets(0.dp)
) { ... }
- Set the
windowInsetsPaddingof the row headerTextcomposables to use the horizontal components of thesafeDrawinginsets. The top component of these insets is handled by the top app bar and the bottom component will be handled later.
MainScreen.kt
import androidx.compose.foundation.layout.WindowInsets
import androidx.compose.foundation.layout.WindowInsetsSides
import androidx.compose.foundation.layout.only
import androidx.compose.foundation.layout.safeDrawing
import androidx.compose.foundation.layout.windowInsetsPadding

...

LazyColumn(
    contentPadding = PaddingValues(bottom = dimensionResource(R.dimen.screen_edge_padding))
) {
    items(NUM_ROWS) { rowIndex: Int ->
        Text(
            "Row $rowIndex",
            style = MaterialTheme.typography.headlineSmall,
            modifier = Modifier
                .padding(
                    horizontal = dimensionResource(R.dimen.screen_edge_padding),
                    vertical = dimensionResource(R.dimen.row_header_vertical_padding)
                )
                .windowInsetsPadding(WindowInsets.safeDrawing.only(WindowInsetsSides.Horizontal))
        )
    ...
}
- Remove the
contentPaddingparameter of theLazyRow. Then, at the start and end of eachLazyRow, add aSpacerthe width of the correspondingsafeDrawingcomponent to make sure all of the thumbnails can be fully viewed. Use thewidthInmodifier to ensure these spacers are at least as wide as the content padding had been. Without these elements, items at the beginning and ends of the row might be occluded behind the system bars and/or display cutout, even when swiped fully to the beginning/end of the row.
MainScreen.kt
import androidx.compose.foundation.layout.Spacer
import androidx.compose.foundation.layout.widthIn
import androidx.compose.foundation.layout.windowInsetsEndWidth
import androidx.compose.foundation.layout.windowInsetsStartWidth

...

LazyRow(
    horizontalArrangement = Arrangement.spacedBy(dimensionResource(R.dimen.list_item_spacing)),
) {
    item {
        Spacer(
            Modifier
                .windowInsetsStartWidth(WindowInsets.safeDrawing)
                .widthIn(min = dimensionResource(R.dimen.screen_edge_padding))
        )
    }
    items(NUM_ITEMS_PER_ROW) { ... }
    item {
        Spacer(
            Modifier
                .windowInsetsEndWidth(WindowInsets.safeDrawing)
                .widthIn(min = dimensionResource(R.dimen.screen_edge_padding))
        )
    }
}
- Finally, add a
Spacerto the end of theLazyColumnto account for any potential system bars or display cutout insets at the bottom of the screen. There's no need for an equivalent spacer at the top of theLazyColumnbecause the top app bar handles those. If the app used a bottom app bar instead of a top app bar, you would add aSpacerat the start of the list using thewindowInsetsTopHeightmodifier. And if the app used both a top and bottom app bar, neither spacer would be needed.
MainScreen.kt
import androidx.compose.foundation.layout.windowInsetsBottomHeight

...

LazyColumn(...){
    items(NUM_ROWS) { ... }
    item {
        Spacer(Modifier.windowInsetsBottomHeight(WindowInsets.safeDrawing))
    }
}
The top app bars are entirely visible and, when you scroll to the end of a row, you can now see all of the thumbnails in their entirety.
Fix the detail screen
The detail screen isn't quite as bad, but content is still being cut off.
Since the detail screen doesn't have any scrollable content, all it takes to fix it is adding a windowInsetsPadding modifier on the top level Box.
DetailScreen.kt
import androidx.compose.foundation.layout.WindowInsets
import androidx.compose.foundation.layout.safeDrawing
import androidx.compose.foundation.layout.windowInsetsPadding

...

Box(
    modifier = modifier
        .padding(dimensionResource(R.dimen.screen_edge_padding))
        .windowInsetsPadding(WindowInsets.safeDrawing)
) { ... }
Fix the player screen
Although the PlayerScreen already applies padding for some or all of the system bar window insets from back in Meet the Android Automotive OS quality requirements: Navigability, that's not enough to make sure it's not obscured now that the app is rendering into display cutouts. On mobile devices, display cutouts are almost always entirely contained within the system bars. In cars, however, display cutouts may extend far beyond the system bars, breaking assumptions.
To fix this, just change the initial value of the windowInsetsForPadding variable from a zero value to displayCutout:
PlayerScreen.kt
import androidx.compose.foundation.layout.displayCutout

...

var windowInsetsForPadding = WindowInsets(WindowInsets.displayCutout)

Sweet, the app really makes the most of the screen while also remaining usable!
And, if you run the app on a mobile device, it's more immersive there as well! List items render all the way to the edges of the screen, including behind the navigation bar.
12. Congratulations
You successfully migrated and optimized your first parked app. Now it's time to take what you learned and apply it to your own app!
Things to try out
- Override some of the dimension resource values to increase the size of elements when running on a car
- Try even more configurations of the configurable emulator
- Test the app using some of the available OEM emulator images
Further reading
- Build parked apps for Android Automotive OS
- Build video apps for Android Automotive OS
- Build games for Android Automotive OS
- Build browsers for Android Automotive OS
- The Android app quality for cars page describes the criteria that your app must meet in order to create a great user experience and pass Play Store review. Make sure to filter for your app's category.