
Chromebook에서 Android 앱을 실행하면 사용자는 광범위한 Android 생태계에 액세스할 수 있으며 Android 개발자는 ChromeOS 사용자에게 다가갈 수 있습니다.
ChromeOS는 Android 개발자에게 Chromebook에서 앱을 배포하고 테스트할 수 있는 도구를 제공합니다. 사용자 환경을 개선하려면 다양한 폼 팩터에서 앱을 확인하세요.
ChromeOS에서 직접 Android 앱을 배포하든 (Chromebook에서 Android 스튜디오 사용) 다른 기기에서 Android 앱을 배포하든 Android 디버그 브리지를 사용하여 앱을 배포하고 Chromebook과의 다양한 상호작용을 디버깅할 수 있습니다.
ADB 디버깅 사용 설정
이전에는 Chromebook에서 ADB를 사용하는 것이 개발자 모드에서만 가능했습니다. Chrome 81부터 개발자는 개발자 모드가 아닌 상태로 기기를 유지하면서도 개발한 앱을 ChromeOS에서 바로 배포할 수 있습니다. 방법은 다음과 같습니다.
아직 설정으로 이동하여 Linux를 사용 설정하지 않은 경우 사용 설정합니다.
그림 1. ChromeOS 설정에서 Linux를 사용 설정합니다. Linux를 사용할 수 있게 되면 Linux 설정을 엽니다.
Android 앱 개발 옵션을 엽니다.
ADB 디버깅 사용 설정을 전환합니다. Chromebook이 다시 시작됩니다.
그림 2. Linux 설정에서 ADB 디버깅을 사용 설정합니다. Chromebook이 다시 시작되면 기기에 앱 스토어에서 다운로드하지 않은 애플리케이션이 있을 수 있음을 알려주는 메시지가 표시됩니다.

그림 3. ADB를 사용 설정한 후 Play 스토어 이외의 앱에 관한 알림 이제 ADB를 사용하여 Chromebook에 앱을 배포하고 디버깅 명령어를 실행하며 기기와 직접 상호작용할 수 있습니다.
다양한 Chromebook 기기 및 사용 가능한 폼 팩터에서 Android 앱이 원활하게 작동하는지 확인하려면 다음 기기에서 앱을 테스트하는 것이 좋습니다.
- ARM 기반 Chromebook
- x86 기반 Chromebook
- 터치스크린이 있는 기기와 터치스크린이 없는 기기
- 노트북과 태블릿 사이에서 전환할 수 있는 컨버터블 기기
- 스타일러스가 있는 기기
ChromeOS에서 배포
ADB 디버깅을 사용 설정한 후에는 Android 스튜디오를 사용하여 Android 앱을 ChromeOS 기기에 직접 로드할 수 있습니다. Android 패키지 키트 (APK)가 있는 경우 터미널을 사용하여 로드할 수 있습니다.
Android 스튜디오를 사용하여 배포
Android 스튜디오 및 ADB를 설정한 후에는 Android 스튜디오에서 바로 Chromebook의 Android 컨테이너로 앱을 푸시할 수 있습니다. Chromebook이 기기 메뉴에 옵션으로 표시됩니다.

Chromebook에 앱을 푸시하면 ADB 승인 대화상자가 표시됩니다. 승인하면 애플리케이션이 새 창에서 실행됩니다.
이제 앱을 Chromebook에 배포하고 테스트 및 디버깅할 수 있습니다.
터미널을 사용하여 배포
터미널을 사용하여 Chromebook에 앱을 배포하려면 다음 단계를 따르세요.
필요한 경우 다음 명령어를 사용하여 ADB를 설치합니다.
sudo apt install adb다음 명령어를 사용하여 기기에 연결합니다.
adb connect arcUSB 디버깅을 위한 승인 대화상자가 표시됩니다. 승인을 부여합니다.
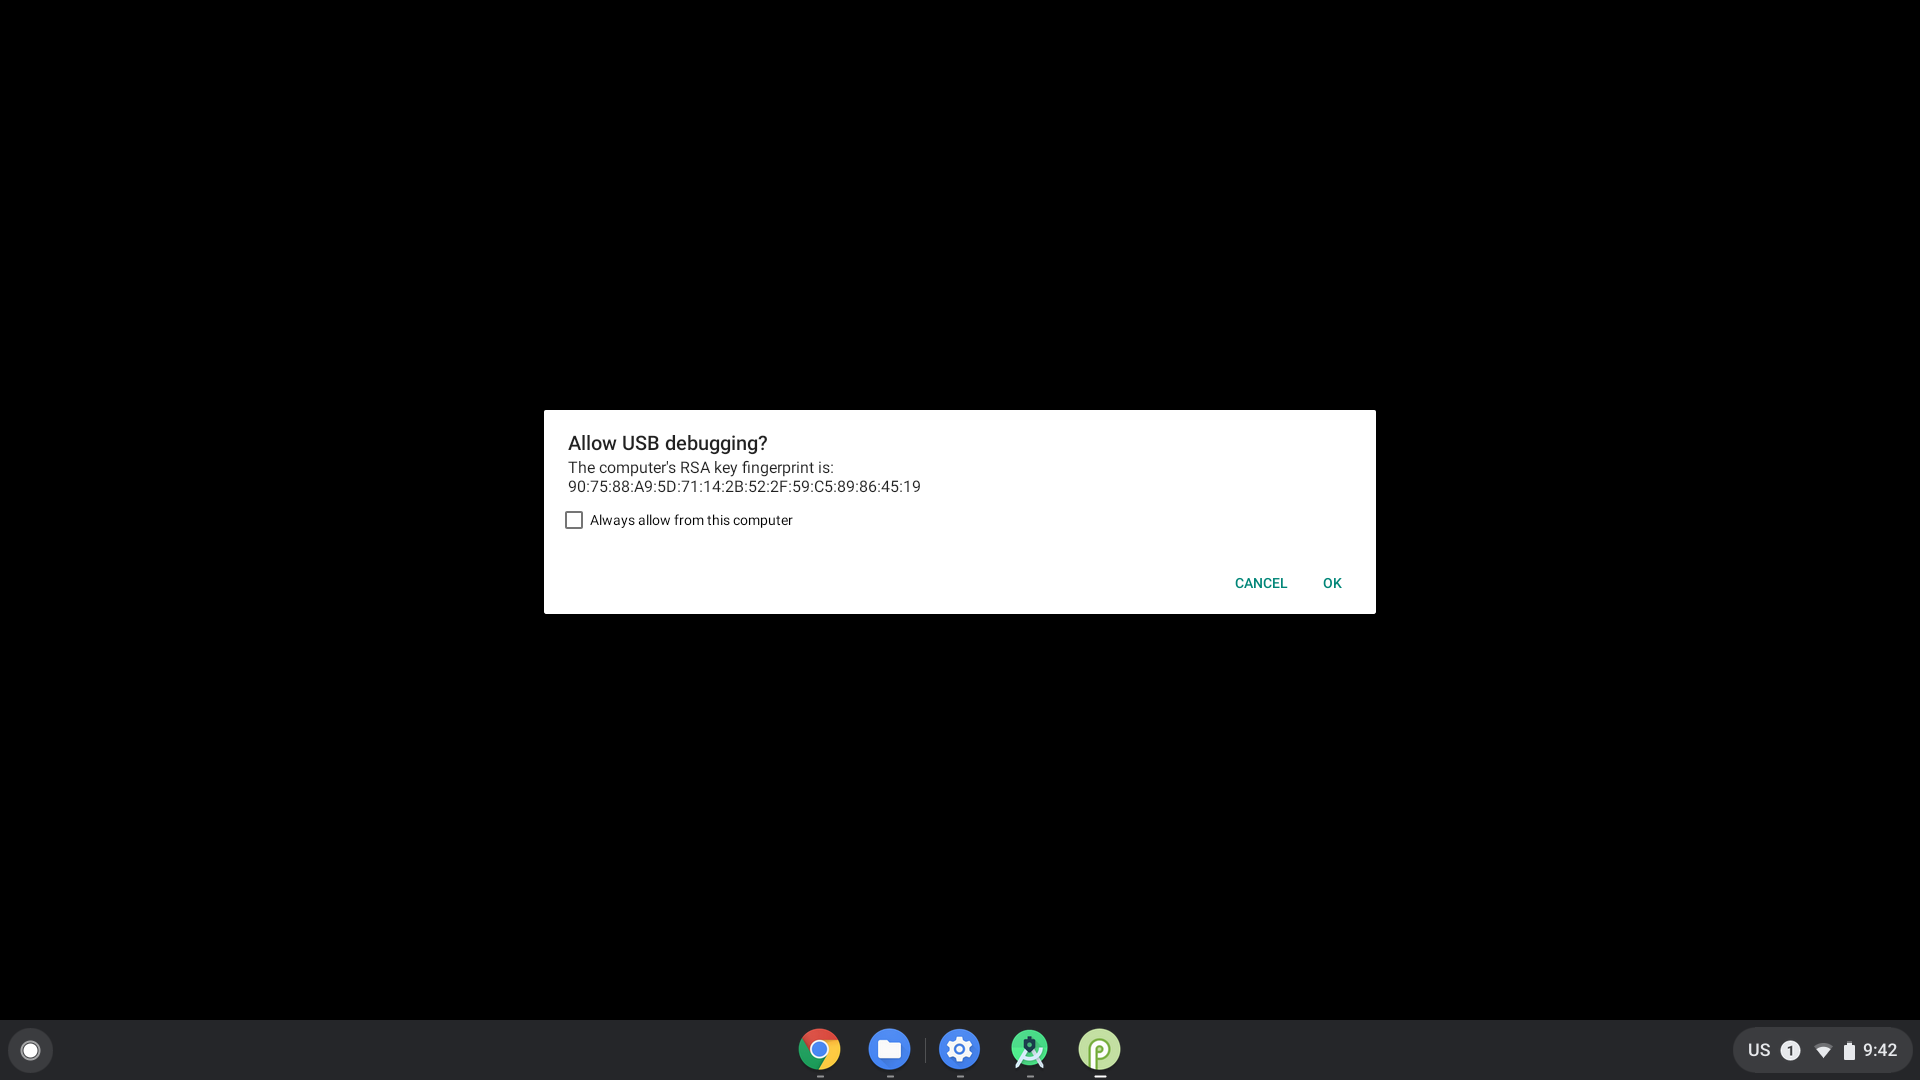
그림 6. USB 디버깅 승인 대화상자입니다. 다음 명령어를 사용하여 터미널에서 앱을 설치합니다.
adb install [path to your APK]
다른 기기에서 배포
위의 방법을 사용할 수 없는데 다른 기기에서 앱을 푸시해야 한다면 USB 연결 또는 네트워크 주소를 사용하여 기기를 ADB에 연결할 수 있습니다.
네트워크를 통해 ADB에 연결
네트워크를 통해 ADB에 연결하려면 다음 단계를 따르세요.
ADB 디버깅을 사용 설정했는지 확인합니다.
다음 단계에 따라 Chromebook의 IP 주소를 가져옵니다.
- 화면의 오른쪽 하단에 있는 시계를 클릭합니다.
- 톱니바퀴 아이콘을 클릭합니다.
- 연결되어 있는 네트워크 유형(예: Wi-Fi 또는 모바일 데이터)을 클릭한 다음 네트워크의 이름을 클릭합니다.
- IP 주소를 메모해 둡니다.
Chromebook에 연결합니다.
개발 머신으로 돌아가서 ADB를 사용하여 IP 주소로 Chromebook에 연결합니다.
adb connect <ip_address>Chromebook에서 디버거를 허용하라는 메시지가 표시되면 허용을 클릭합니다. ADB 세션이 설정됩니다.
네트워크를 통해 ADB 디버깅 문제 해결
모든 항목이 제대로 연결되어 있는데 ADB 기기가 오프라인 상태로 표시될 때가 있습니다. 이 경우 문제를 해결하려면 다음 단계를 완료하세요.
- 개발자 옵션에서 ADB 디버깅을 비활성화합니다.
- 터미널 창에서
adb kill-server를 실행합니다. - ADB 디버깅 옵션을 재활성화합니다.
- 터미널 창에서
adb connect를 실행해 봅니다. - 디버깅을 허용할지 묻는 메시지가 표시되면 허용을 클릭합니다. ADB 세션이 설정됩니다.