
Testing for accessibility lets you experience your app from the user's perspective and find usability issues that you might miss. Accessibility testing can reveal opportunities to make your app more powerful and versatile for all users, including those with disabilities.
For the best results, use all of the approaches described in this document:
- Manual testing: interact with your app using Android accessibility services.
- Testing using analysis tools: use tools to discover opportunities to improve your app's accessibility.
- Automated testing: use Compose testing APIs to automate UI tests.
- User testing: get feedback from people who interact with your app.
Manual testing
Manual testing puts you in the shoes of your user. Android
AccessibilityService
objects change the way your app's content is presented to the user and how the
user interacts with the content. By interacting with your app using
accessibility services, you can experience your app as your users do.
For more information on testing in Compose, see Testing and Test your Compose layout.
TalkBack
TalkBack is Android's built-in screen reader. When TalkBack is on, users can interact with their Android-powered device without seeing the screen. Users with visual impairments might rely on TalkBack to use your app.
Turn on TalkBack
- Open your device's Settings app.
- Navigate to Accessibility and select TalkBack.
- At the top of the TalkBack screen, press On/Off to turn on TalkBack.
- In the confirmation dialog, select OK to confirm permissions.
Explore your app with TalkBack
Once TalkBack is on, there are two common ways to navigate:
- Linear navigation: quickly swipe right or left to navigate through screen elements in sequence. Double-tap anywhere to select the current screen element.
- Explore by tapping: drag your finger over the screen to hear what's under your finger. Double-tap anywhere to select the current element.
To explore your app with TalkBack, complete these steps:
- Open your app.
- Swipe through each element in sequence.
As you navigate, look for the following issues:
- Does the spoken feedback for each element convey its content or purpose
appropriately? Learn how to write meaningful
labels.
- Are announcements succinct, or are they needlessly verbose?
- Can you complete the main workflows easily?
- Can you reach every element by swiping?
- If alerts or other temporary messages appear, are they read aloud?
- Does the spoken feedback for each element convey its content or purpose
appropriately? Learn how to write meaningful
labels.
For more information and tips, refer to the TalkBack user documentation.
Optional: TalkBack developer settings
TalkBack developer settings make it easier for you to test your app with TalkBack.
To view or change developer settings, complete these steps:
- Open your device's Settings app.
- Navigate to Accessibility and select TalkBack.
Select Settings > Advanced settings > Developer settings:
- Log output level: select VERBOSE.
- Display speech output: turn on this setting to view TalkBack speech output on the screen.
Switch Access
Switch Access lets users interact with Android-powered devices using a switch instead of the touch screen. There are several kinds of switches: assistive technology devices such as those sold by AbleNet, Enabling Devices, RJ Cooper, or Tecla*; external keyboard keys; or buttons. This service can be helpful for users with motor impairments.
* Google doesn't endorse these companies or their products.
Turn on Switch Access
One way to configure Switch Access is with two switches. One switch is designated as the "Next" switch and moves focus around the screen, and a second "Select" switch selects the focused element. To use this two-switch method, you can use any pair of hardware keys.
To set up Switch Access using the volume down key as the "Next" switch and the volume up key as the "Select" switch, complete the following steps:
- Make sure TalkBack is turned off.
- Open your device's Settings app.
- Navigate to Accessibility and select Switch Access, then select Settings.
- On the Switch Access Preferences screen, make sure Auto-scan is off.
Use the volume down key as your "Next" switch:
- Tap Assign Keys for Scanning > Next.
- When the dialog opens, press the volume down key. The dialog shows KEYCODE_VOLUME_DOWN.
- Tap OK to confirm and exit the dialog.
Use the volume up key as your "Select" switch:
- Tap Select.
- When the dialog opens, press the volume up key. The dialog shows KEYCODE_VOLUME_UP.
- Tap OK to confirm and exit the dialog.
Return to Switch Access Preferences by tapping the back button.
Optional: If you're using TalkBack 5.1 or later, you can select Spoken feedback to turn on spoken feedback.
Return to the main Switch Access screen by tapping the back button.
At the top of the Switch Access screen, press On/Off to turn on Switch Access.
In the confirmation dialog, select OK to confirm permissions.
Explore your app using Switch Access
To explore your app with Switch Access, complete these steps:
- Open your app.
- Start scanning by pressing your "Next" key (the volume down button).
- Continue pressing "Next" until you reach the item you want to select.
- Select the highlighted item by pressing your "Select" key (the volume up button).
As you navigate, look for the following issues:
- Can you complete the main workflows easily?
- If you have text or other inputs, can you add and edit content easily?
- Are items highlighted only if you can perform an action with them?
- Is each item highlighted only once?
- Is all functionality that's available through touch screen gestures also available as selectable controls or custom actions within Switch Access?
- If you're using TalkBack 5.1 or later and you've turned on spoken feedback, does the spoken feedback for each element convey its content or purpose appropriately? Learn how to write meaningful labels.
Optional: Use group selection to see all scannable items
Group selection is a Switch Access navigation method that lets you see all scannable items at once. This option lets you perform a quick check to see whether the correct elements on the screen are highlighted.
To turn on group selection, complete these steps:
- Open your device's Settings app.
- Navigate to Accessibility and select Switch Access, then select Settings.
- On the Switch Access Preferences screen, make sure Auto-scan is off.
- Select Scanning method > Group selection.
- Tap Assign switches for scanning.
- Make sure the text under Group selection switch 1 and Group selection switch 2 shows that a switch is assigned to each. If you follow the steps in this document to turn on Switch Access, the volume buttons are already assigned.
To explore your app with Switch Access using group selection, complete these steps:
Press the "Select" key (the volume up button) to highlight all actionable items on the current screen. Look for the following issues:
- Are only actionable items highlighted?
- Are all actionable items highlighted?
- Does the density of highlighted items make sense?
Navigate to a different screen to clear the highlight.
To learn more about how users can navigate with group selection, see Tips for using Switch Access.
Voice Access
Voice Access lets users control an Android-powered device with spoken commands. Voice Access is available on devices running Android 5.0 (API level 21) and higher. To test your app with Voice Access, learn how to get started with Voice Access.
Testing using analysis tools
Analysis tools can uncover opportunities to improve accessibility that you might miss with manual testing.
Compose UI Check
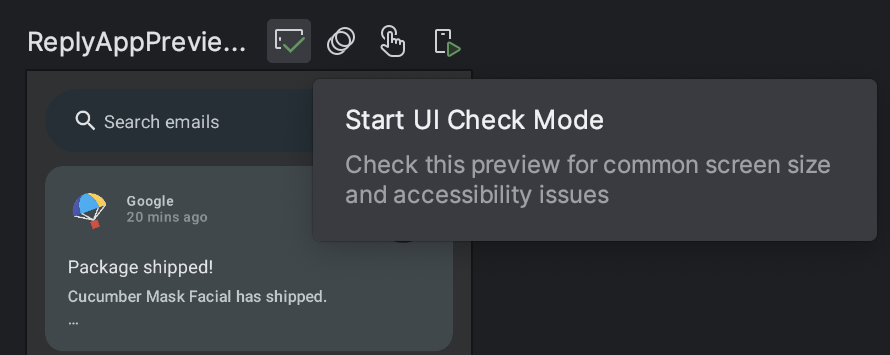
Activate Compose UI Check mode
![]() on a Compose Preview to enable Android Studio to automatically audit your
Compose UI for accessibility issues. Android Studio checks that your UI works
across different screen sizes by highlighting issues such as text stretched on
large screens or low color contrast in the problems panel.
on a Compose Preview to enable Android Studio to automatically audit your
Compose UI for accessibility issues. Android Studio checks that your UI works
across different screen sizes by highlighting issues such as text stretched on
large screens or low color contrast in the problems panel.
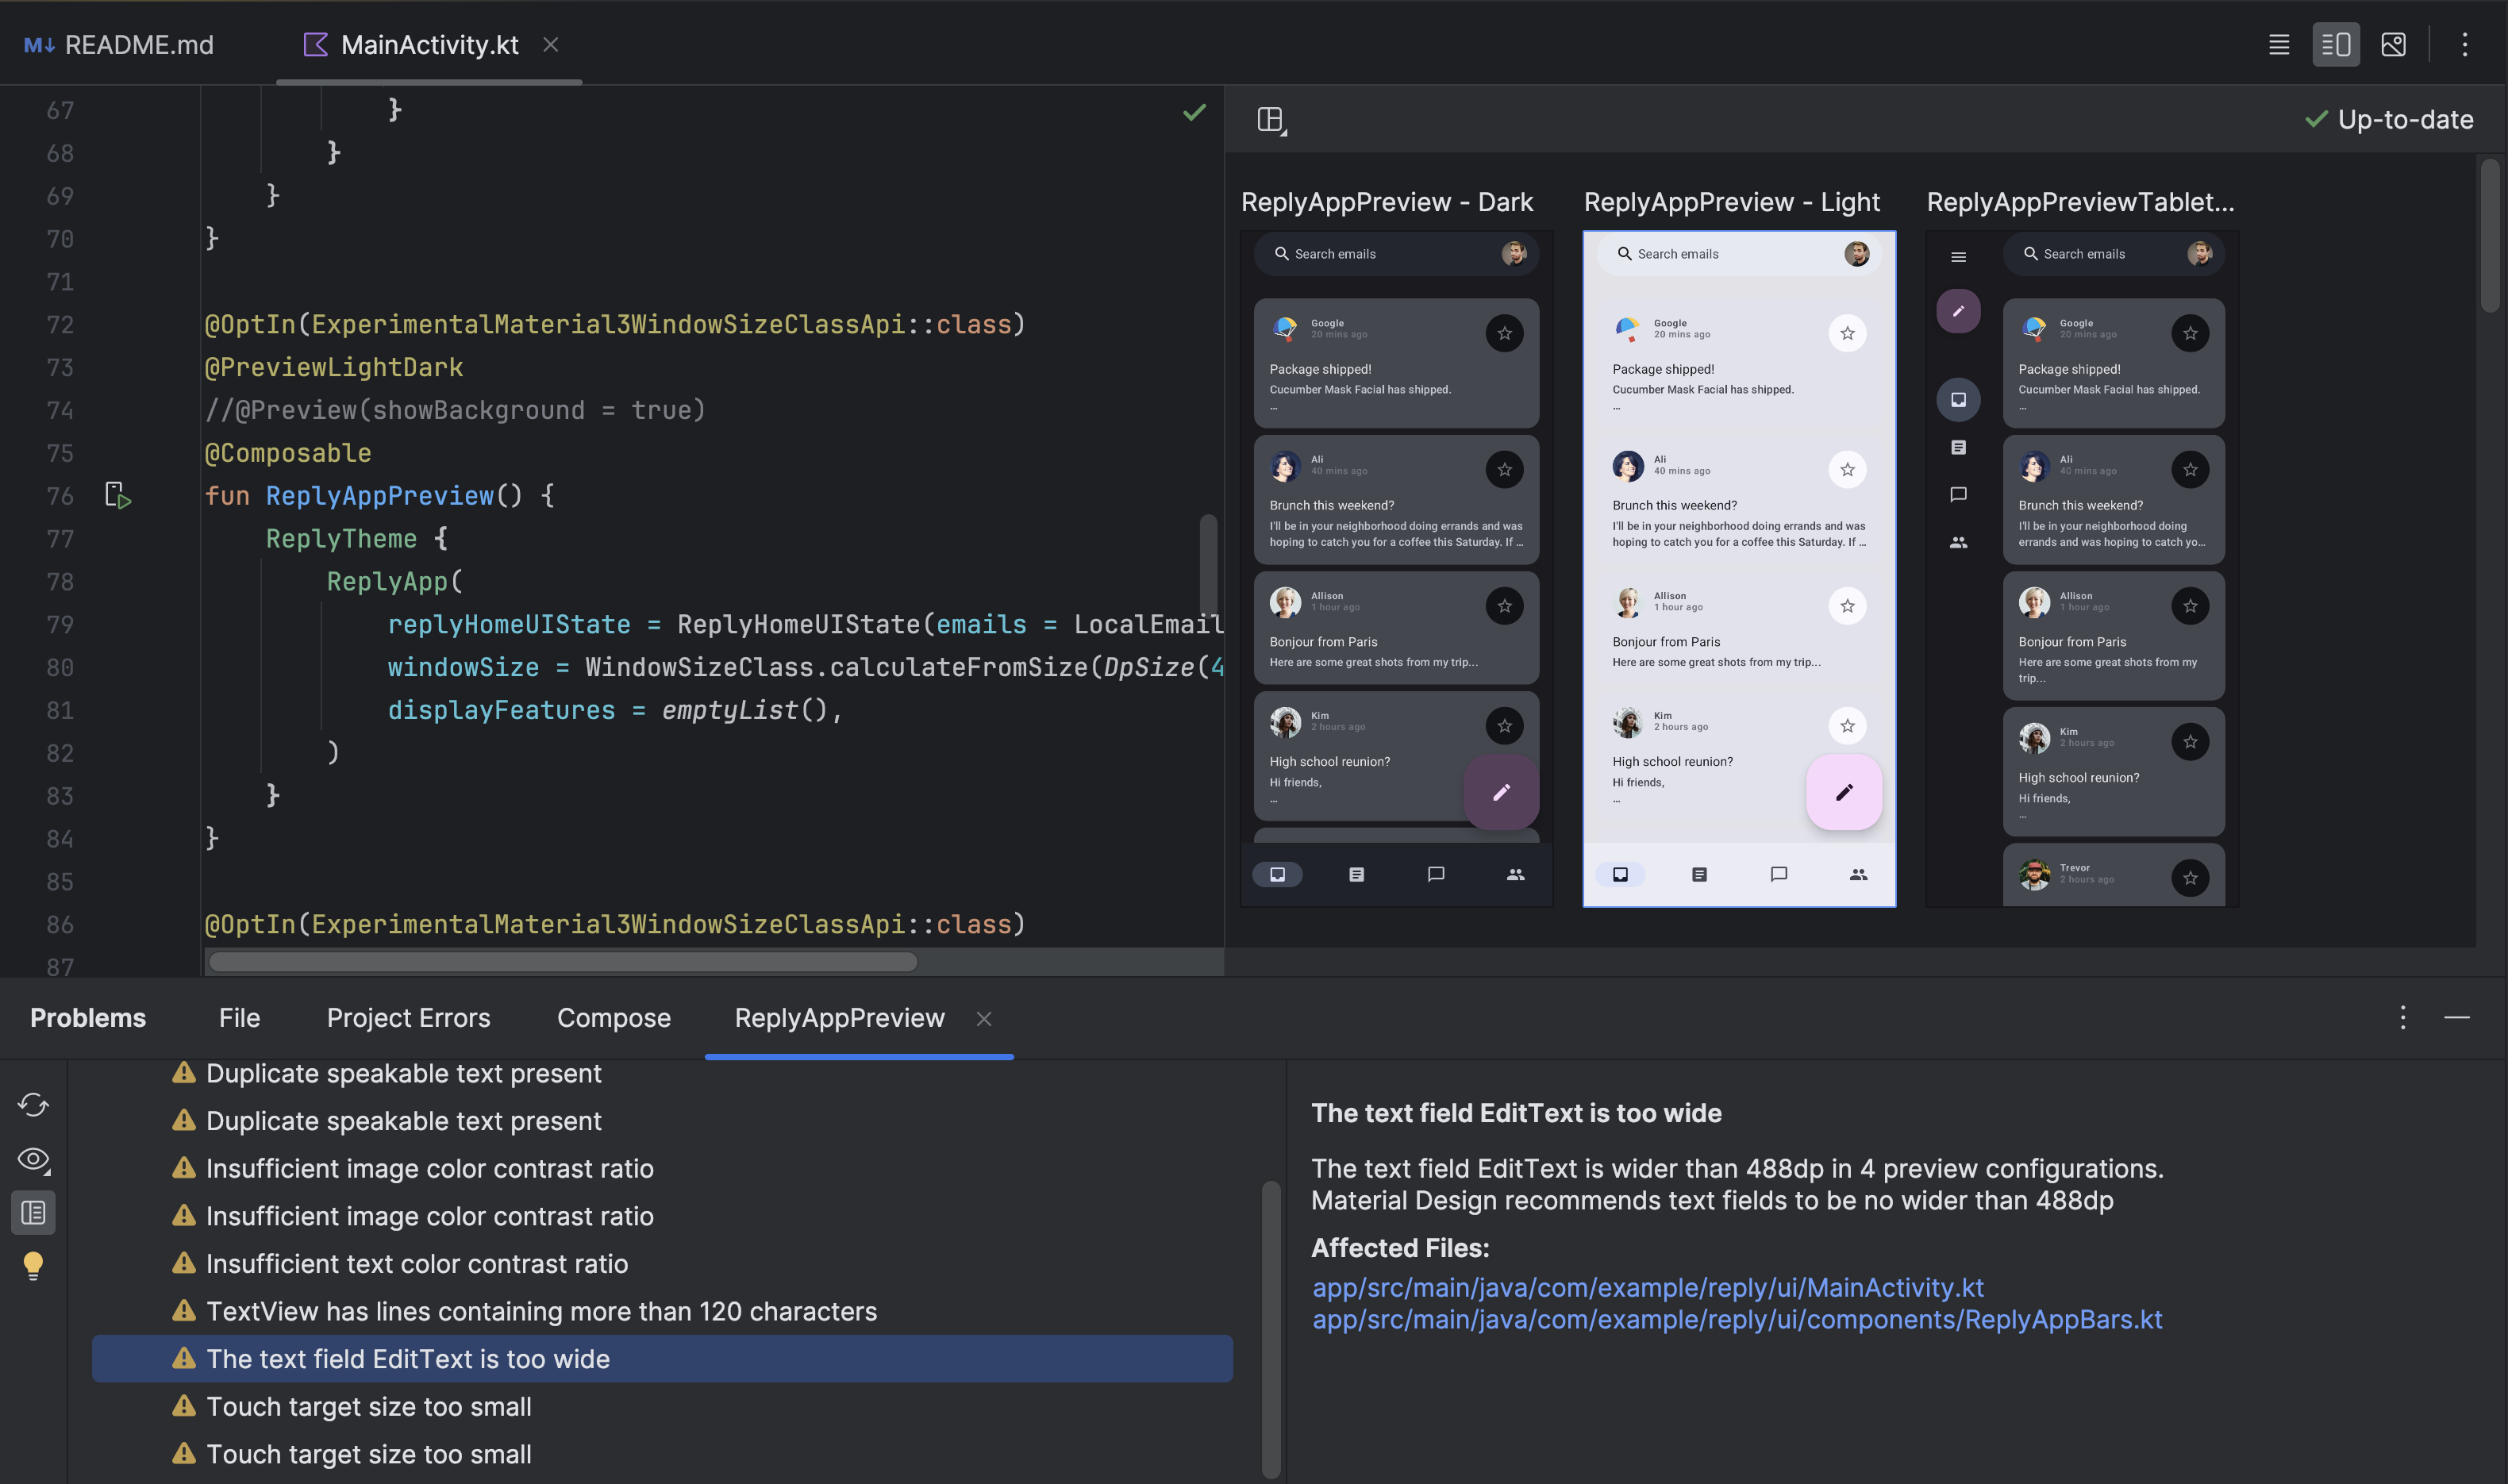
When UI Check Mode is activated, the problems panel shows details about the detected accessibility issues, as shown in Figure 2.
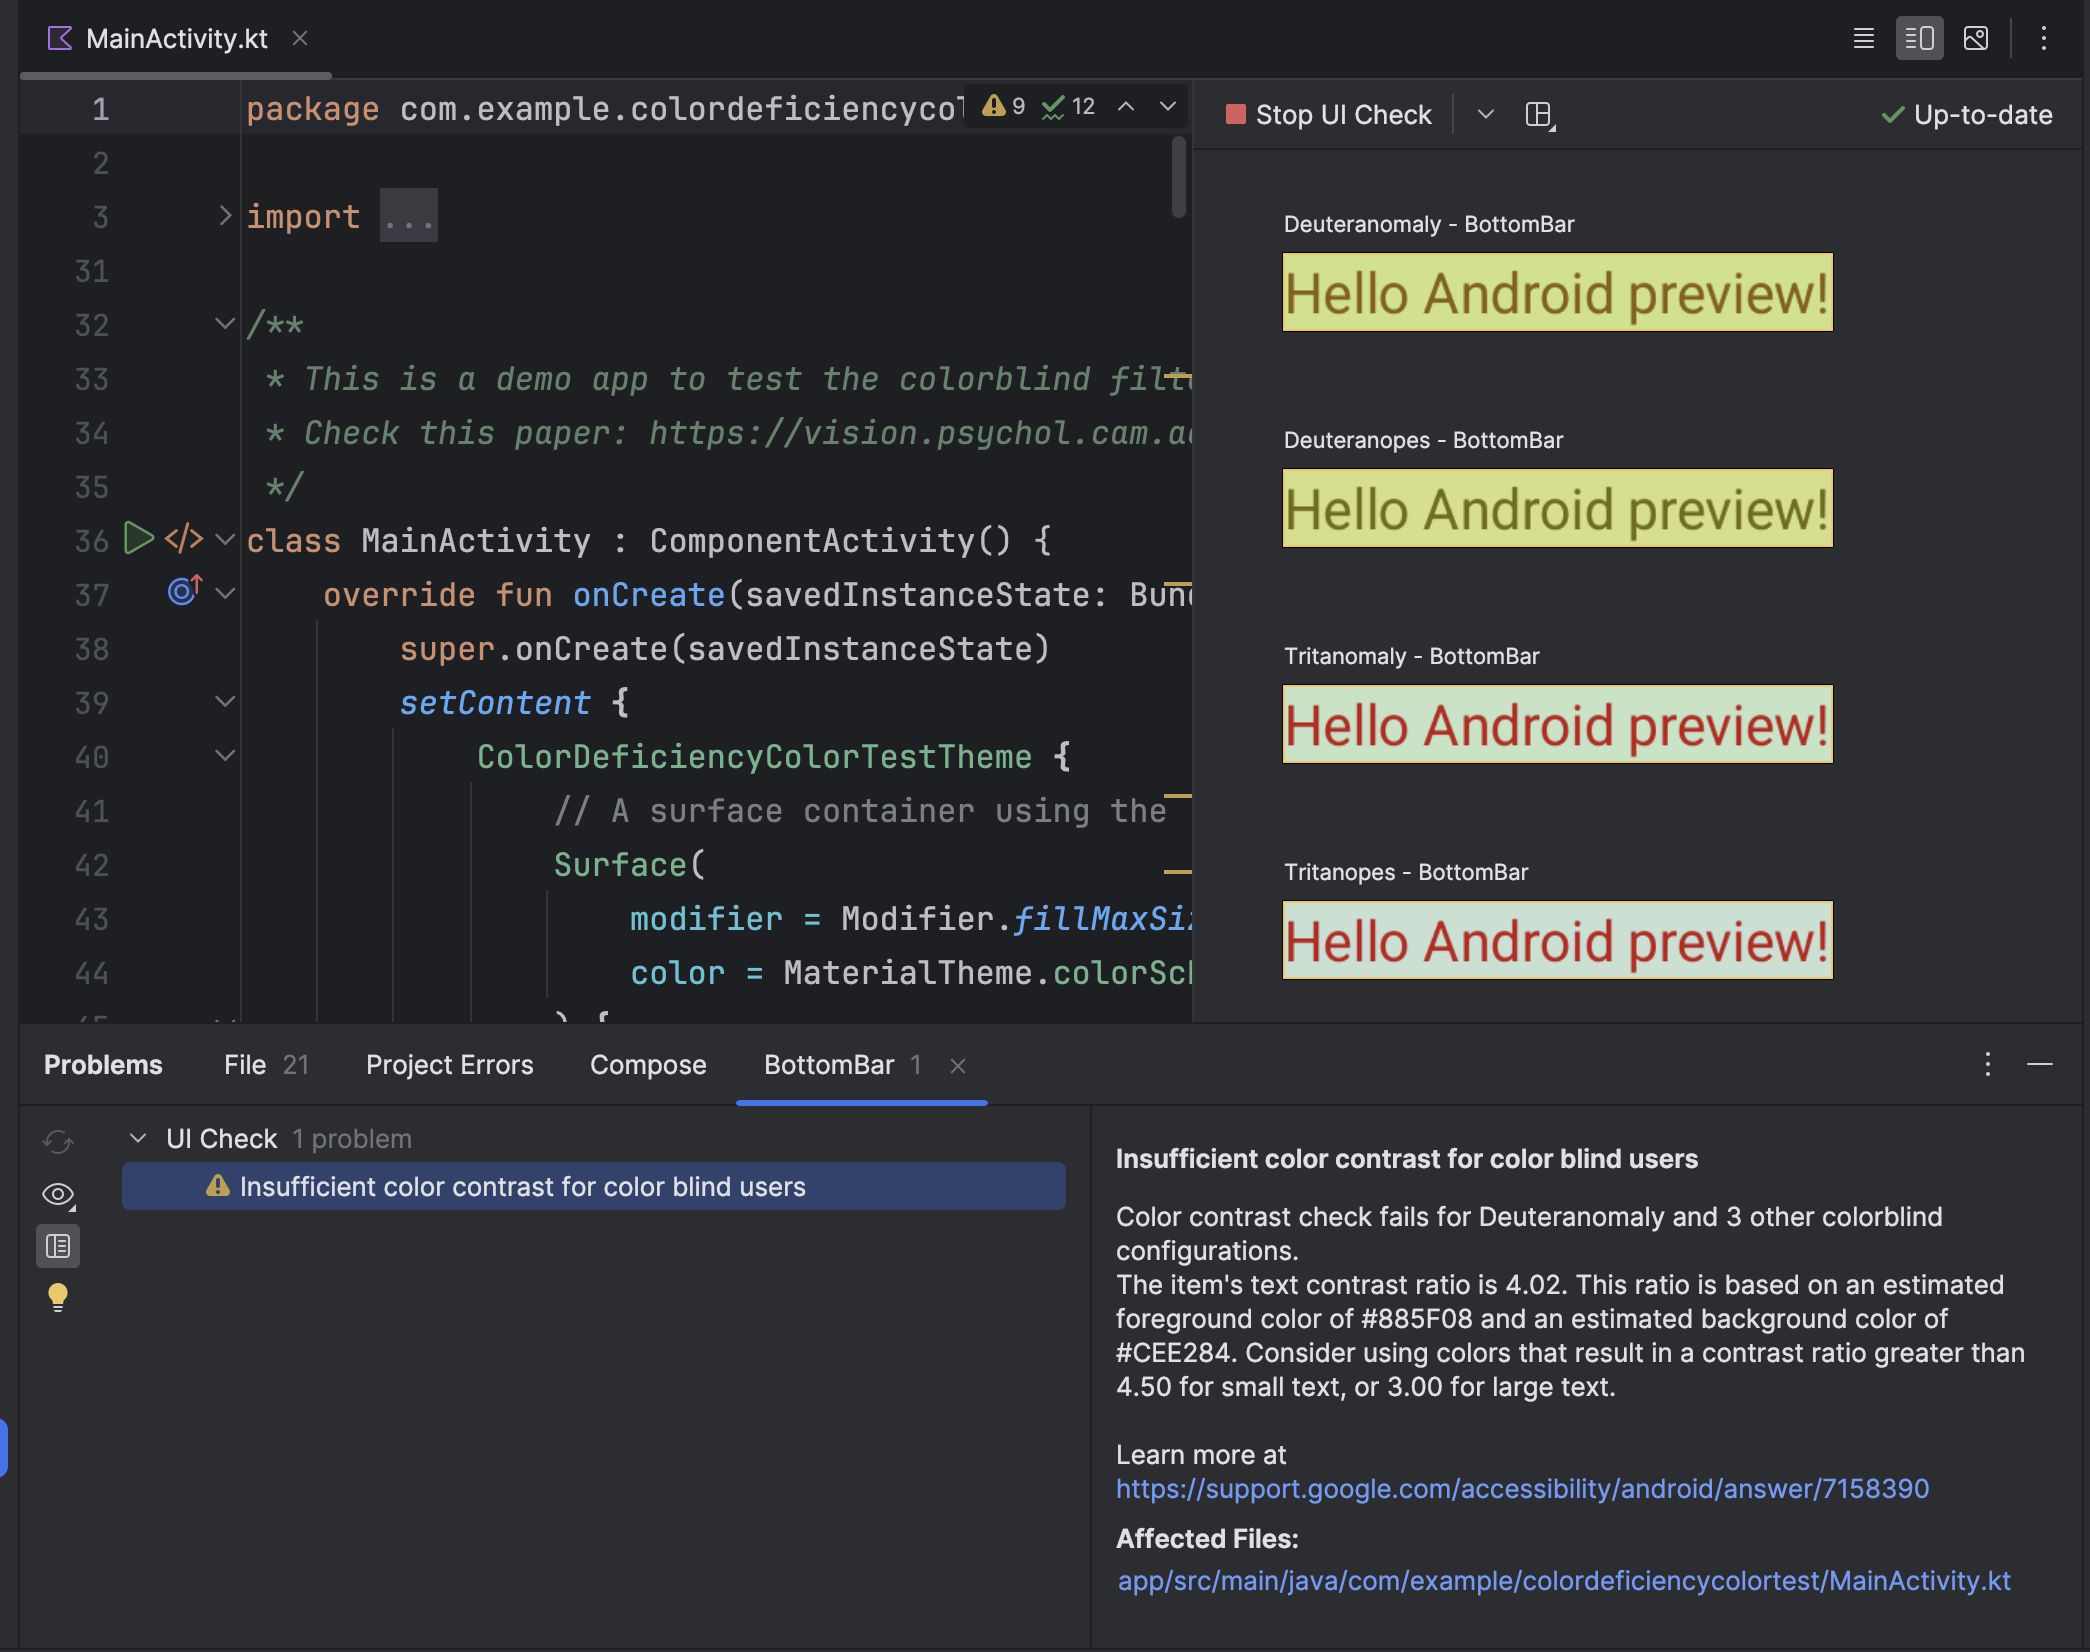
For example, UI Check Mode can show recommendations for how to fix insufficient color contrast. It also lets you preview how the UI might look for users with different types of color vision deficiencies, as shown in Figure 3.
Accessibility Scanner
The Accessibility Scanner app scans your screen and suggests ways to improve the accessibility of your app. Accessibility Scanner uses the Accessibility Test Framework and provides specific suggestions after looking at content labels, clickable items, contrast, and more.
To learn more, refer to the following resources:
Pre-launch report on Google Play
If you distribute your app on Google Play, you have access to a pre-launch report for your app. Google Play generates this report shortly after you upload an app to a release channel using the Google Play Console. The pre-launch report, which is also available in the Google Play Console, displays the results of tests that Google Play performs on your app.
In particular, Google Play runs accessibility tests using the Accessibility Test Framework. . The results of these tests appear in a table on the Accessibility tab of your app's pre-launch report.
The table organizes opportunities for improvement into the following categories:
- Touch target size
- Interactive elements in your app that have a focusable area, or touch target size, that is smaller than recommended.
- Low contrast
- Instances where the pair of colors used for a text element and the background behind that element has a lower color contrast ratio than recommended.
- Content labeling
- UI elements that don't have a label that describes the elements' purpose.
- Implementation
- Attributes assigned to UI elements that make it more difficult for the system's accessibility services to interpret the elements correctly—for example, using an element traversal order that doesn't match the elements' logical arrangement.
Following the table, the pre-launch report shows snapshots of your app. These snapshots represent the top opportunities to improve your app's accessibility in each category. Select a screenshot to view more details, including a suggested improvement and a more complete list of places in your app where you can apply the same improvement.
Figure 4 shows an example of the table that appears on the Accessibility tab of a pre-launch report within Google Play. This figure also includes one of the app's snapshots, showing that the Next button has a touch target size that is smaller than recommended.

UI Automator Viewer
The uiautomatorviewer tool provides a convenient GUI to scan and analyze the
UI components currently displayed on an Android-powered device. You can use UI
Automator to inspect the semantics tree, which represents the accessibility
properties of your composables. This information
lets you create more fine-grained tests, for example by creating a UI selector
that matches a specific visible property. The tool is located in the tools
directory of the Android SDK.
In accessibility testing, this tool is useful for debugging issues found using other testing methods. For example, if manual testing reveals that a UI element doesn't have the speakable text it requires or an element receives focus when it must not, you can use the tool to help locate the source of the issue.
To learn more about UI Automator Viewer, see Write automated tests with UI Automator and Interoperability with UiAutomator.
Automated testing
Evaluate the accessibility of your app's layout by creating and running automated tests using the Compose testing APIs. The APIs support finding elements, verifying their attributes, and performing user actions, as well as advanced features such as time manipulation.
Compose testing relies on the semantics tree, which provides the same semantics information that accessibility services use to read UI descriptions. This means your accessibility tests can more accurately reflect real-world accessibility use cases.
For more information about automated testing in Compose and the Compose testing APIs, see Test your Compose layout.
User testing
Along with the other testing methods in this guide, user testing can provide specific and valuable insights about the usability of your app.
To find users who can test your app, use methods such as the following:
- Reach out to local organizations, colleges, or universities that provide training for people with disabilities.
- Ask your social circle. There might be people with disabilities who are willing to help.
- Ask a user testing service, such as usertesting.com, if they can test your app and include users with disabilities.
For more tips, watch the user testing section of the following video, from 31:10 to 44:51: Behind the scenes: What's new in Android accessibility - Google I/O 2016.
Additional resources
For more information about accessibility testing, see the following resources: