
A default phone application lets the Android Telecom framework inform your application of the calling state by using the role manager and in-call service to create a replacement for the default phone app on an Android device, implement the InCallService API. Your implementation must meet the following requirements:
It must not have any calling capability, and must consist solely of the user interface for calling. It must handle all calls that the Telecom framework is aware of, and not make assumptions about the nature of the calls. For example, it must not assume calls are SIM-based telephony calls, nor implement calling restrictions that are based on any one ConnectionService, such as enforcement of telephony restrictions for video calls.
A calling app allows users to receive or place audio or video calls on their device. Calling apps use their own user interface for the calls instead of using the default Phone app interface, as shown in the following screenshot.
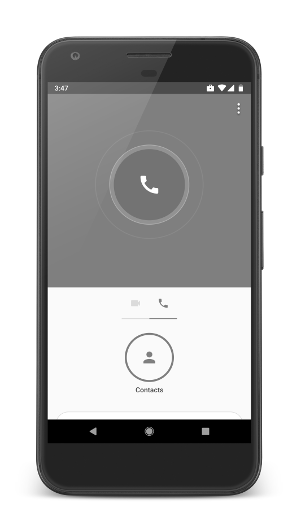
An example of a calling app using its own user interface
The Android framework includes the android.telecom package, which
contains classes that help you build a calling app according to the telecom
framework. Building your app according to the telecom framework provides the
following benefits:
- Your app interoperates correctly with the native telecom subsystem in the device.
- Your app interoperates correctly with other calling apps that also adhere to the framework.
- The framework helps your app manage audio and video routing.
- The framework helps your app determine whether its calls have focus.
Manifest declarations and permissions
In your app manifest, declare that your app uses the
MANAGE_OWN_CALLS
permission, as shown in the following example:
<manifest … >
    <uses-permission android:name="android.permission.MANAGE_OWN_CALLS"/>
</manifest>
For more information about declaring app permissions, see Permissions.
You must declare a service that specifies the class that implements the
ConnectionService class in your app. The telecom
subsystem requires that the service declares the BIND_TELECOM_CONNECTION_SERVICE permission to be
able to bind to it. The following example shows how to declare the service in
your app manifest:
<service android:name="com.example.MyConnectionService"
    android:permission="android.permission.BIND_TELECOM_CONNECTION_SERVICE">
    <intent-filter>
        <action android:name="android.telecom.ConnectionService" />
    </intent-filter>
</service>
For more information about declaring app components, including services, see App Components.
Implement the connection service
Your calling app must provide an implementation of the ConnectionService class that the telecom subsystem can bind to.
Your ConnectionService implementation should override
the following methods:
onCreateOutgoingConnection(PhoneAccountHandle, ConnectionRequest)The telecom subsystem calls this method in response to your app calling
placeCall(Uri, Bundle)to create a new outgoing call. Your app returns a new instance of yourConnectionclass implementation (for more information, see Implement the connection) to represent the new outgoing call. You can further customize the outgoing connection by performing the following actions:- Your app should call the
setConnectionProperties(int)method with thePROPERTY_SELF_MANAGEDconstant as the argument to indicate that the connection originated from a calling app. - If your app supports putting calls on hold, call the
setConnectionCapabilities(int)method and set the argument to the bit mask value of theCAPABILITY_HOLDandCAPABILITY_SUPPORT_HOLDconstants. - To set the name of the caller, use the
setCallerDisplayName(String, int)method passing thePRESENTATION_ALLOWEDconstant as theintparameter to indicate that the caller's name should be shown. - To ensure that the outgoing call has the appropriate video state, call the
setVideoState(int)method of theConnectionobject and send the value returned by thegetVideoState()method of theConnectionRequestobject.
- Your app should call the
onCreateOutgoingConnectionFailed(PhoneAccountHandle, ConnectionRequest)The telecom subsystem calls this method when your app calls the
placeCall(Uri, Bundle)method and the outgoing call cannot be placed. In response to this situation, your app should inform the user (for example, using an alert box or toast) that the outgoing call could not be placed. Your app may not be able to place a call if there is an ongoing emergency call, or if there is an ongoing call in another app which cannot be put on hold before placing your call.onCreateIncomingConnection(PhoneAccountHandle, ConnectionRequest)The telecom subsystem calls this method when your app calls the
addNewIncomingCall(PhoneAccountHandle, Bundle)method to inform the system of a new incoming call in your app. Your app returns a new instance of yourConnectionimplementation (for more information, see Implement the connection) to represent the new incoming call. You can further customize the incoming connection by performing the following actions:- Your app should call the
setConnectionProperties(int)method with thePROPERTY_SELF_MANAGEDconstant as the argument to indicate that the connection originated from a calling app. - If your app supports putting calls on hold, call the
setConnectionCapabilities(int)method and set the argument to the bit mask value of theCAPABILITY_HOLDandCAPABILITY_SUPPORT_HOLDconstants. - To set the name of the caller, use the
setCallerDisplayName(String, int)method passing thePRESENTATION_ALLOWEDconstant as theintparameter to indicate that the caller's name should be shown. - To specify the phone number or address of the incoming call, use the
setAddress(Uri, int)method of theConnectionobject. - To ensure that the outgoing call has the appropriate video state, call the
setVideoState(int)method of theConnectionobject and send the value returned by thegetVideoState()method of theConnectionRequestobject.
- Your app should call the
onCreateIncomingConnectionFailed(PhoneAccountHandle, ConnectionRequest)The telecom subsystem calls this method when your app calls the
addNewIncomingCall(PhoneAccountHandle, Bundle)method to inform Telecom of a new incoming call, but the incoming call isn't permitted (for more information, see calling constraints). Your app should silently reject the incoming call, optionally posting a notification to inform the user of the missed call.
Implement the connection
Your app should create a subclass of Connection to
represent the calls in your app. You should override the following methods in
your implementation:
onShowIncomingCallUi()The telecom subsystem calls this method when you add a new incoming call and your app should show its incoming call UI.
onCallAudioStateChanged(CallAudioState)The telecom subsystem calls this method to inform your app that the current audio route or mode has changed. This is called in response to your app changing the audio mode using the
setAudioRoute(int)method. This method may also be called if the system changes the audio route (for example, when a Bluetooth headset disconnects).onHold()The telecom subsystem calls this method when it wants to put a call on hold. In response to this request, your app should hold the call and then invoke the
setOnHold()method to inform the system that the call is being held. The telecom subsystem may call this method when an in-call service, such as Android Auto, that is showing your call wants to relay a user request to put the call on hold. The telecom subsystem also calls this method if the user makes a call active in another app. For more information about in-call services, seeInCallService.onUnhold()The telecom subsystem calls this method when it wants to resume a call that has been put on hold. Once your app has resumed the call, it should invoke the
setActive()method to inform the system that the call is no longer on hold. The telecom subsystem may call this method when an in-call service, such as Android Auto, that is showing your call wants to relay a request to resume the call. For more information about in-call services, seeInCallService.onAnswer()The telecom subsystem calls this method to inform your app that an incoming call should be answered. Once your app has answered the call, it should invoke the
setActive()method to inform the system that the call has been answered. The telecom subsystem may call this method when your app adds a new incoming call and there is already an ongoing call in another app which cannot be put on hold. The telecom subsystem displays the incoming call UI on behalf of your app in these instances. The framework provides an overloaded method that provides support to specify the video state in which to answer the call. For more information, seeonAnswer(int).onReject()The telecom subsystem calls this method when it wants to reject an incoming call. Once your app has rejected the call, it should call the
setDisconnected(DisconnectCause)and specifyREJECTEDas the parameter. Your app should then call thedestroy()method to inform the system that the app has processed the call. The telecom subsystem calls this method when the user has rejected an incoming call from your app.onDisconnect()The telecom subsystem calls this method when it wants to disconnect a call. Once the call has ended, your app should call the
setDisconnected(DisconnectCause)method and specifyLOCALas the parameter to indicate that a user request caused the call to be disconnected. Your app should then call thedestroy()method to inform the telecom subsystem that the app has processed the call. The system may call this method when the user has disconnected a call through another in-call service such as Android Auto. The system also calls this method when your call must be disconnected to allow other call to be placed, for example, if the user wants to place an emergency call. For more information about in-call services, seeInCallService.
Handle common calling scenarios
Making use of the ConnectionService API in your call
flow involves interacting with the other classes in the android.telecom
package. The following sections describe common calling scenarios and how your
app should use the APIs to handle them.
Answer incoming calls
The flow to handle incoming calls changes whether there are calls in other apps or not. The reason for the difference in the flows is that the telecom framework must establish some constraints when there are active calls in other apps to ensure a stable environment for all calling apps on the device. For more information, see Calling constraints.
No active calls in other apps
To answer incoming calls when there are no active calls in other apps, follow these steps:
- Your app receives a new incoming call using its usual mechanisms.
- Use the
addNewIncomingCall(PhoneAccountHandle, Bundle)method to inform the telecom subsystem about the new incoming call. - The telecom subsystem binds to your app's
ConnectionServiceimplementation and requests a new instance of theConnectionclass representing the new incoming call using theonCreateIncomingConnection(PhoneAccountHandle, ConnectionRequest)method. - The telecom subsystem informs your app that it should show its incoming call
user interface using the
onShowIncomingCallUi()method. - Your app shows its incoming UI using a notification with an associated
full-screen intent. For more information, see
onShowIncomingCallUi(). - Call the
setActive()method if the user accepts the incoming call, orsetDisconnected(DisconnectCause)specifyingREJECTEDas the parameter followed by a call to thedestroy()method if the user rejects the incoming call.
Active calls in other apps which cannot be put on hold
To answer incoming calls when there are active calls in other apps which can't be put on hold, follow these steps:
- Your app receives a new incoming call using its usual mechanisms.
- Use the
addNewIncomingCall(PhoneAccountHandle, Bundle)method to inform the telecom subsystem about the new incoming call. - The telecom subsystem binds to your app's
ConnectionServiceimplementation and requests a new instance of theConnectionobject representing the new incoming call using theonCreateIncomingConnection(PhoneAccountHandle, ConnectionRequest)method. - The telecom subsystem displays the incoming call UI for your incoming call.
- If the user accepts the call, the telecom subsystem calls the
onAnswer()method. You should call thesetActive()method to indicate to the telecom subsystem that the call is now connected. - If the user rejects the call, the telecom subsystem calls the
onReject()method. You should call thesetDisconnected(DisconnectCause)method specifyingREJECTEDas the parameter followed by a call to thedestroy()method.
Place outgoing calls
The flow for placing an outgoing call involves handling the possibility that the call cannot be placed because of constraints imposed by the telecom framework. For more information, see Calling constraints.
To place an outgoing call, follow these steps:
- The user initiates an outgoing call within your app.
- Use the
placeCall(Uri, Bundle)method to inform the telecom subsystem about the new outgoing call. Take the following considerations for the method parameters:- The
Uriparameter represents the address where the call is being placed to. For regular phone numbers, use thetel:URI scheme. - The
Bundleparameter allows you to provide information about your calling app by adding thePhoneAccountHandleobject of your app to theEXTRA_PHONE_ACCOUNT_HANDLEextra. Your app must provide thePhoneAccountHandleobject to every outgoing call. - The
Bundleparameter also allows you to specify if the outgoing call includes video by specifying theSTATE_BIDIRECTIONALvalue in theEXTRA_START_CALL_WITH_VIDEO_STATEextra. Consider that by default, the telecom subsystem routes video calls to the speakerphone.
- The
- The telecom subsystem binds to your app's
ConnectionServiceimplementation. - If your app isn't able to place an outgoing call, the telecom subsystem calls
the
onCreateOutgoingConnectionFailed(PhoneAccountHandle, ConnectionRequest)method to inform your app that the call cannot be placed at the current time. Your app should inform the user that the call cannot be placed. - If your app is able to place the outgoing call, the telecom subsystem calls
the
onCreateOutgoingConnection(PhoneAccountHandle, ConnectionRequest)method. Your app should return an instance of yourConnectionclass to represent the new outgoing call. For more information about the properties that you should set in the connection, see Implement the connection service. - When the outgoing call has been connected, call the
setActive()method to inform the telecom subsystem that the call is active.
End a call
To end a call, follow these steps:
- Call the
setDisconnected(DisconnectCause)sendingLOCALas the parameter if the user terminated the call, or sendREMOTEas the parameter if the other party terminated the call. - Call the
destroy()method.
Calling constraints
To ensure a consistent and simple calling experience for your users, the telecom
framework enforces some constraints for managing calls on the device. For
example, consider that the user has installed two calling apps which implement
the self-managed ConnectionService API, FooTalk and
BarTalk. In this case, the following constraints apply:
On devices running on API level 27 or lower, only one app can maintain an ongoing call at any given time. This constraint means that while a user has an ongoing call using the FooTalk app, the BarTalk app can't initiate or receive a new call.
On devices running on API level 28 or higher, if both FooTalk and BarTalk declare
CAPABILITY_SUPPORT_HOLDandCAPABILITY_HOLDpermissions, then the user can maintain more than one ongoing call by switching between the apps to initiate or answer another call.If the user is engaged in regular managed calls (for example, using the built-in Phone or Dialer app), the user cannot be in calls originated from calling apps. This means that if the user is in a regular call using their mobile carrier, they cannot also be in a FooTalk or BarTalk call concurrently.
The telecom subsystem disconnects your app's calls if the user dials an emergency call.
Your app cannot receive or place calls while the user is in an emergency call.
If there is an ongoing call in the another calling app when your app receives an incoming call, answering the incoming call ends any ongoing calls in the other app. You app should not display its usual incoming call user interface. The telecom framework displays the incoming call user interface and informs the user that answering the new call will end their ongoing call(s). This means if the user is in a FooTalk call and the BarTalk app receives an incoming call, the telecom framework informs the user that they have a new incoming BarTalk call and that answering the BarTalk call will end their FooTalk call.
Becoming the Default Phone App
The default dialer/phone app is one which provides the in-call user interface while the device is
in a call. It also provides the user with a means to initiate calls and see a history of calls
on their device. A device is bundled with a system provided default dialer/phone app. The user
may choose a single app to take over this role from the system app. An app which wishes to
fulfill this role uses the RoleManager to request that they fill the
RoleManager.ROLE_DIALER role.
The default phone app provides a user interface while the device is in a call, and the device is
not in car mode (i.e. UiModeManager#getCurrentModeType() is not
Configuration.UI_MODE_TYPE_CAR).
In order to fill the RoleManager.ROLE_DIALER role, an app must meet a
number of requirements:
- It must handle the
Intent#ACTION_DIALintent. This means the app must provide a dial pad UI for the user to initiate outgoing calls. - It must fully implement the
InCallServiceAPI and provide both an incoming call UI, as well as an ongoing call UI.
Note: If the app filling the RoleManager.ROLE_DIALER returns a
null InCallService during binding, the Telecom framework will automatically fall
back to using the dialer app preloaded on the device. The system will display a notification to
the user to let them know that their call was continued using the preloaded dialer app. Your
app should never return a null binding; doing so means it does not fulfil the
requirements of RoleManager.ROLE_DIALER.
Note: If your app fills RoleManager.ROLE_DIALER and makes changes at
runtime which cause it to no longer fulfil the requirements of this role,
RoleManager will automatically remove your app from the role and close
your app. For example, if you use
PackageManager.setComponentEnabledSetting(ComponentName, int, int) to
programmatically disable the InCallService your app declares in its manifest, your app
will no longer fulfil the requirements expected of
RoleManager.ROLE_DIALER.
The preloaded dialer will ALWAYS be used when the user places an emergency call, even if your
app fills the RoleManager.ROLE_DIALER role. To ensure an optimal
experience when placing an emergency call, the default dialer should ALWAYS use
TelecomManager.placeCall(Uri, Bundle) to place calls (including
emergency calls). This ensures that the platform is able to verify that the request came from
the default dialer. If a non-preloaded dialer app uses Intent#ACTION_CALL to place an
emergency call, it will be raised to the preloaded dialer app using Intent#ACTION_DIAL
for confirmation; this is a suboptimal user experience.
Below is an example manifest registration for an InCallService. The meta-data
TelecomManager#METADATA_IN_CALL_SERVICE_UI indicates that this particular
InCallService implementation intends to replace the built-in in-call UI.
The meta-data TelecomManager#METADATA_IN_CALL_SERVICE_RINGING indicates that this
InCallService will play the ringtone for incoming calls. See
below for more information on showing the incoming call
UI and playing the ringtone in your app.
 <service android:name="your.package.YourInCallServiceImplementation"
          android:permission="android.permission.BIND_INCALL_SERVICE"
          android:exported="true">
      <meta-data android:name="android.telecom.IN_CALL_SERVICE_UI" android:value="true" />
      <meta-data android:name="android.telecom.IN_CALL_SERVICE_RINGING"
          android:value="true" />
      <intent-filter>
          <action android:name="android.telecom.InCallService"/>
      </intent-filter>
 </service>
Note: You should NOT mark your InCallService with the attribute
android:exported="false"; doing so can result in a failure to bind to your implementation
during calls.
In addition to implementing the InCallService API, you must also declare an activity in
your manifest which handles the Intent#ACTION_DIAL intent. The example below illustrates
how this is done:
 <activity android:name="your.package.YourDialerActivity"
           android:label="@string/yourDialerActivityLabel">
      <intent-filter>
           <action android:name="android.intent.action.DIAL" />
           <category android:name="android.intent.category.DEFAULT" />
      </intent-filter>
      <intent-filter>
           <action android:name="android.intent.action.DIAL" />
           <category android:name="android.intent.category.DEFAULT" />
           <data android:scheme="tel" />
      </intent-filter>
 </activity>
When a user installs your application and runs it for the first time, you should use the
RoleManager to prompt the user to see if they would like your app to
be the new default phone app.
The code below shows how your app can request to become the default phone/dialer app:
 private static final int REQUEST_ID = 1;

 public void requestRole() {
     RoleManager roleManager = (RoleManager) getSystemService(ROLE_SERVICE);
     Intent intent = roleManager.createRequestRoleIntent(RoleManager.ROLE_DIALER);
     startActivityForResult(intent, REQUEST_ID);
 }

 public void onActivityResult(int requestCode, int resultCode, Intent data) {
     if (requestCode == REQUEST_ID) {
         if (resultCode == android.app.Activity.RESULT_OK) {
             // Your app is now the default dialer app
         } else {
             // Your app is not the default dialer app
         }
     }
 }
Access to InCallService for Wearable Devices
-
If your app is a third-party companion app and wants to access InCallService APIs, what your
app could do are:
- Declare MANAGE_ONGOING_CALLS permission in your manifest
- Associate with a physical wearable device via the
CompanionDeviceManagerAPI as a companion app. See: https://developer.android.com/guide/topics/connectivity/companion-device-pairing - Implement this InCallService with BIND_INCALL_SERVICE permission
Showing the Incoming Call Notification
When your app receives a new incoming call viaInCallService#onCallAdded(Call), it is
responsible for displaying an incoming call UI for the incoming call. It should do this using
NotificationManager APIs to post a new incoming call notification.
Where your app declares the meta-data TelecomManager#METADATA_IN_CALL_SERVICE_RINGING, it
is responsible for playing the ringtone for incoming calls. Your app should create a
NotificationChannel which specifies the desired ringtone. For example:
 NotificationChannel channel = new NotificationChannel(YOUR_CHANNEL_ID, "Incoming Calls",
          NotificationManager.IMPORTANCE_MAX);
 // other channel setup stuff goes here.

 // We'll use the default system ringtone for our incoming call notification channel.  You can
 // use your own audio resource here.
 Uri ringtoneUri = RingtoneManager.getDefaultUri(RingtoneManager.TYPE_RINGTONE);
 channel.setSound(ringtoneUri, new AudioAttributes.Builder()
          // Setting the AudioAttributes is important as it identifies the purpose of your
          // notification sound.
          .setUsage(AudioAttributes.USAGE_NOTIFICATION_RINGTONE)
          .setContentType(AudioAttributes.CONTENT_TYPE_SONIFICATION)
      .build());

 NotificationManager mgr = getSystemService(NotificationManager.class);
 mgr.createNotificationChannel(channel);
When your app receives a new incoming call, it creates a Notification for the
incoming call and associates it with your incoming call notification channel. You can specify a
PendingIntent on the notification which will launch your full screen
incoming call UI. The notification manager framework will display your notification as a
heads-up notification if the user is actively using the phone. When the user is not using the
phone, your full-screen incoming call UI is used instead.
For example:
 // Create an intent which triggers your fullscreen incoming call user interface.
 Intent intent = new Intent(Intent.ACTION_MAIN, null);
 intent.setFlags(Intent.FLAG_ACTIVITY_NO_USER_ACTION | Intent.FLAG_ACTIVITY_NEW_TASK);
 intent.setClass(context, YourIncomingCallActivity.class);
 PendingIntent pendingIntent = PendingIntent.getActivity(context, 1, intent, PendingIntent.FLAG_MUTABLE_UNAUDITED);
 // Build the notification as an ongoing high priority item; this ensures it will show as
 // a heads up notification which slides down over top of the current content.
 final Notification.Builder builder = new Notification.Builder(context);
 builder.setOngoing(true);
 builder.setPriority(Notification.PRIORITY_HIGH);
 // Set notification content intent to take user to the fullscreen UI if user taps on the
 // notification body.
 builder.setContentIntent(pendingIntent);
 // Set full screen intent to trigger display of the fullscreen UI when the notification
 // manager deems it appropriate.
 builder.setFullScreenIntent(pendingIntent, true);
 // Setup notification content.
 builder.setSmallIcon( yourIconResourceId );
 builder.setContentTitle("Your notification title");
 builder.setContentText("Your notification content.");
 // Use builder.addAction(..) to add buttons to answer or reject the call.
 NotificationManager notificationManager = mContext.getSystemService(
     NotificationManager.class);
 notificationManager.notify(YOUR_CHANNEL_ID, YOUR_TAG, YOUR_ID, builder.build());
```