
1. Introduction
Large displays enable you to create app layouts and UIs that enhance the user experience and increase user productivity. But if your app is designed for the small displays of nonfoldable phones, it probably doesn't take advantage of the extra display space offered by tablets, foldables, and ChromeOS devices.
Updating an app to make the most of large displays can be time consuming and costly, especially for legacy apps based on multiple activities.
Activity embedding, introduced in Android 12L (API level 32), enables activity-based apps to display multiple activities simultaneously on large screens to create two-pane layouts such as list-detail. No Kotlin or Java re-coding required. You add some dependencies, create an XML configuration file, implement an initializer, and make a few additions to your app manifest. Or, if you prefer working in code, just add a few Jetpack WindowManager API calls to the onCreate() method of your app's main activity.
Prerequisites
To complete this codelab, you'll need experience in the following:
- Building Android apps
- Working with activities
- Writing XML
- Working in Android Studio, including virtual device setup
What you'll build
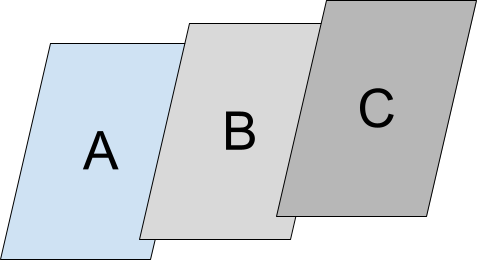
In this codelab, you'll update an activity-based app to support a dynamic two-pane layout that's similar to SlidingPaneLayout. On small screens, the app overlays (stacks) activities on top of one another in the task window.
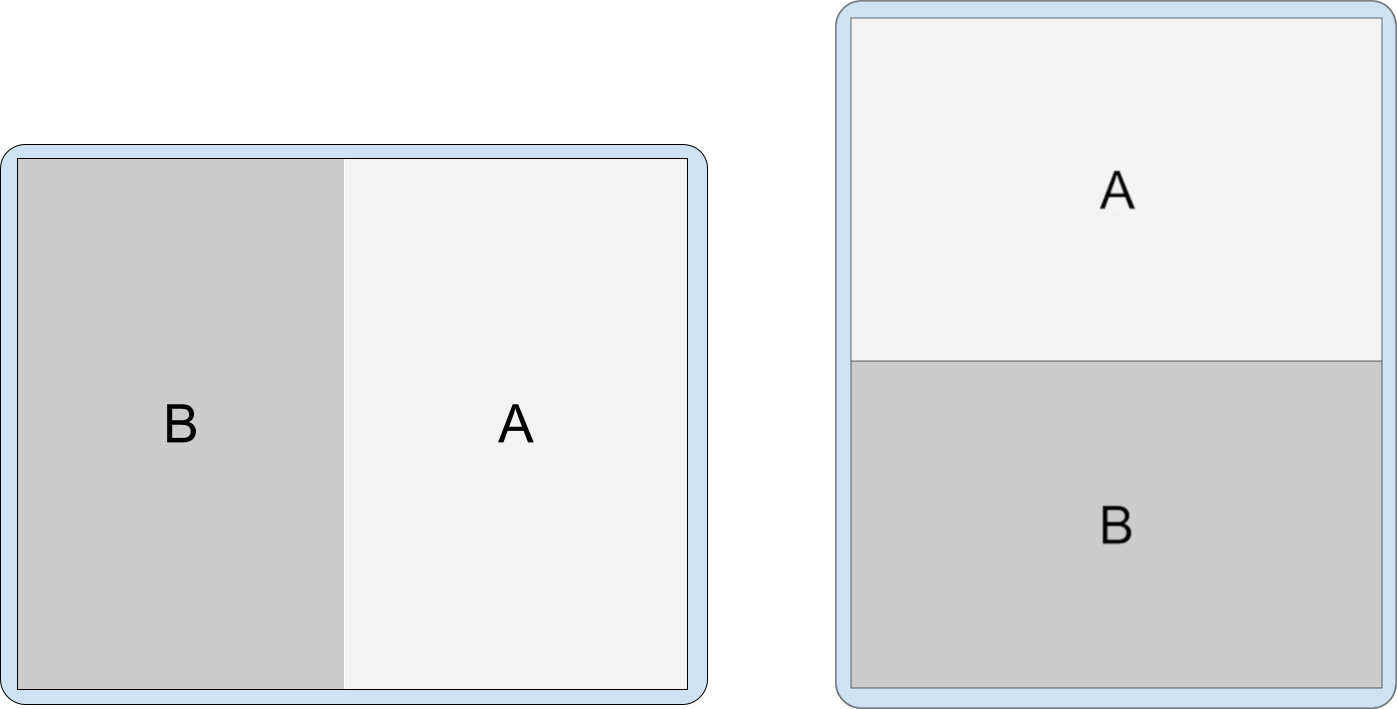
On large screens, the app displays two activities on screen simultaneously, either side by side or top and bottom based on your specifications.
What you'll learn
How to implement activity embedding two ways:
- With an XML configuration file
- Using Jetpack WindowManager API calls
What you'll need
- Recent version of Android Studio
- Android phone or emulator
- Android small tablet or emulator
- Android large tablet or emulator
2. Setup
Get the sample app
Step 1: Clone the repo
Clone the large screen codelabs Git repository:
git clone https://github.com/android/large-screen-codelabs
or download and unarchive the large screen codelabs zip file:
Step 2: Inspect the codelab source files
Navigate to the activity-embedding folder.
Step 3: Open the codelab project
In Android Studio, open the Kotlin or Java project.
The activity-embedding folder in the repo and zip file contains two Android Studio projects: one in Kotlin, one in Java. Open the project of your choice. Codelab snippets are provided in both languages.
Create virtual devices
If you do not have an Android phone, small tablet, or large tablet at API level 32 or higher, open Device Manager in Android Studio and create any of the following virtual devices you require:
- Phone — Pixel 6, API level 32 or higher
- Small tablet — 7 WSVGA (Tablet), API level 32 or higher
- Large tablet — Pixel C, API level 32 or higher
3. Run the app
The sample app displays a list of items. When the user selects an item, the app displays information about the item.
The app consists of three activities:
ListActivity— Contains a list of items in aRecyclerView.AnItemAdapterclass creates a list of items for theRecyclerView.DetailActivity— Displays information about a list item when the item is selected from the list.SummaryActivity— Displays a summary of information when the Summary list item is selected.
Behavior without activity embedding
Run the sample app to see how it behaves without activity embedding:
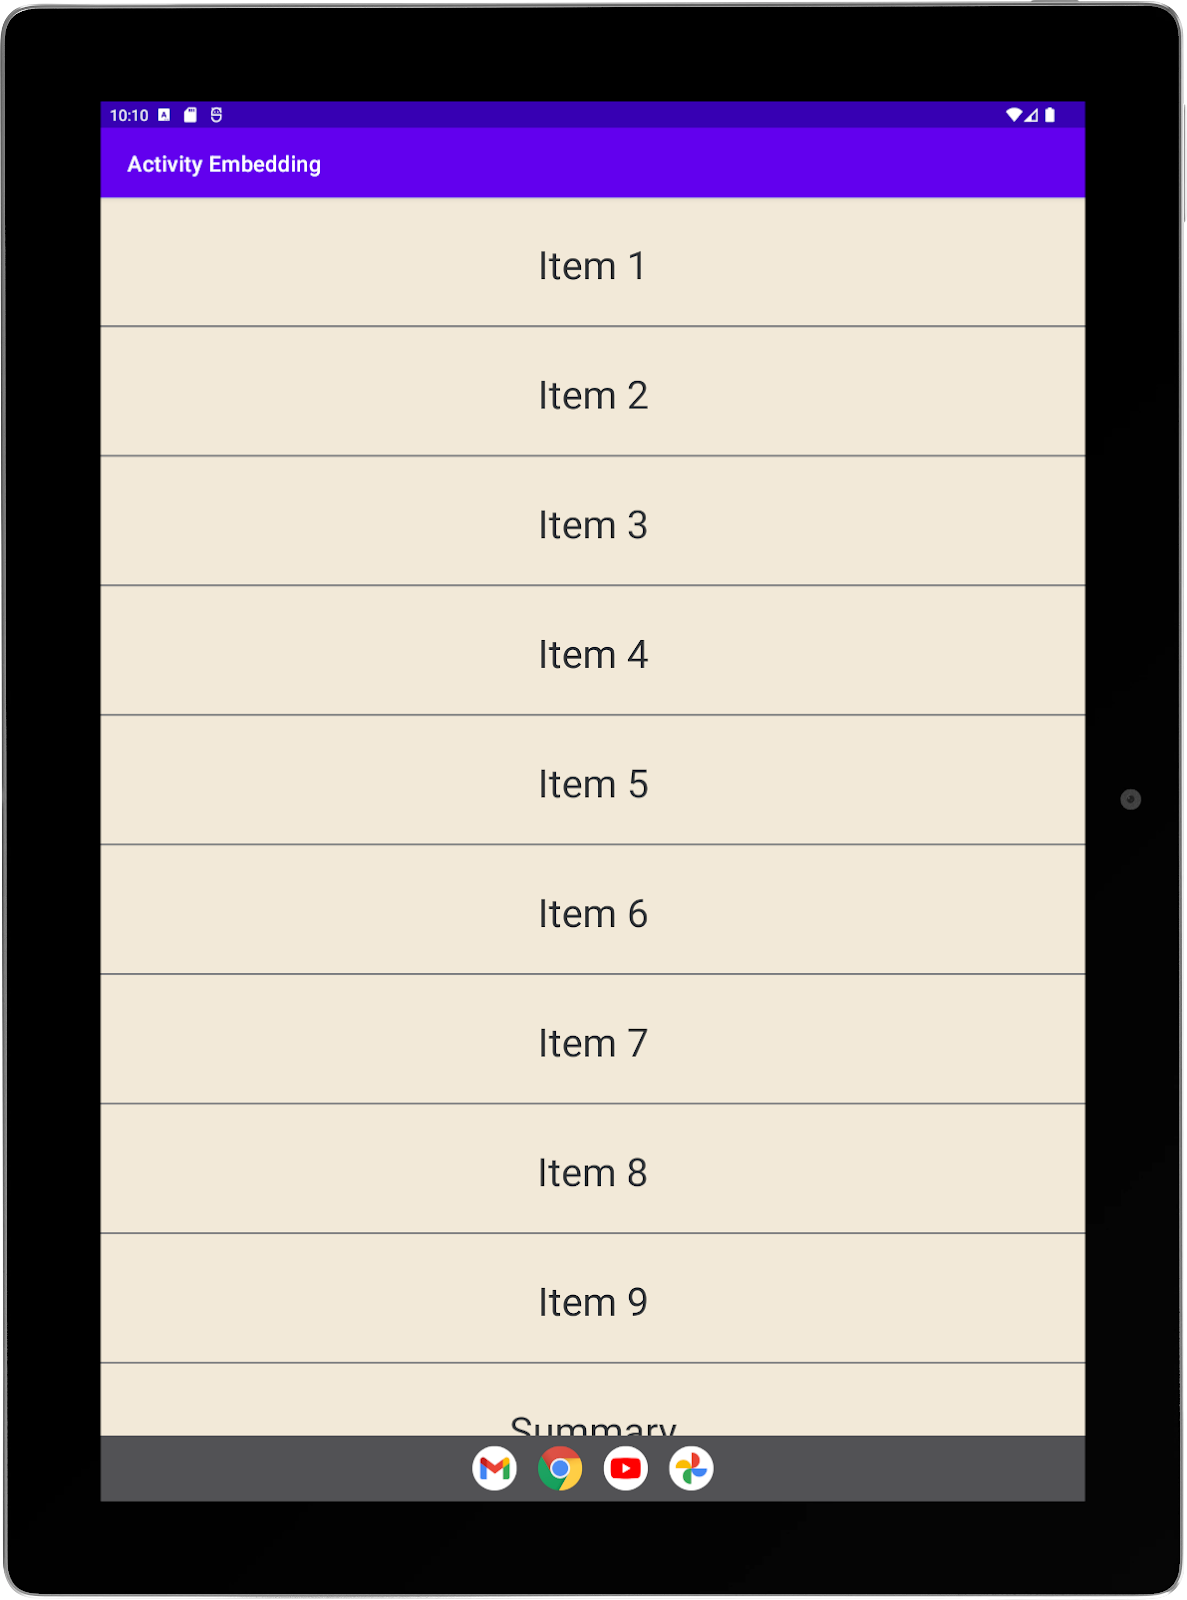
- Run the sample app on your large tablet or Pixel C emulator. The main (list) activity appears:
- Select a list item to launch a secondary (detail) activity. The detail activity overlays the list activity:
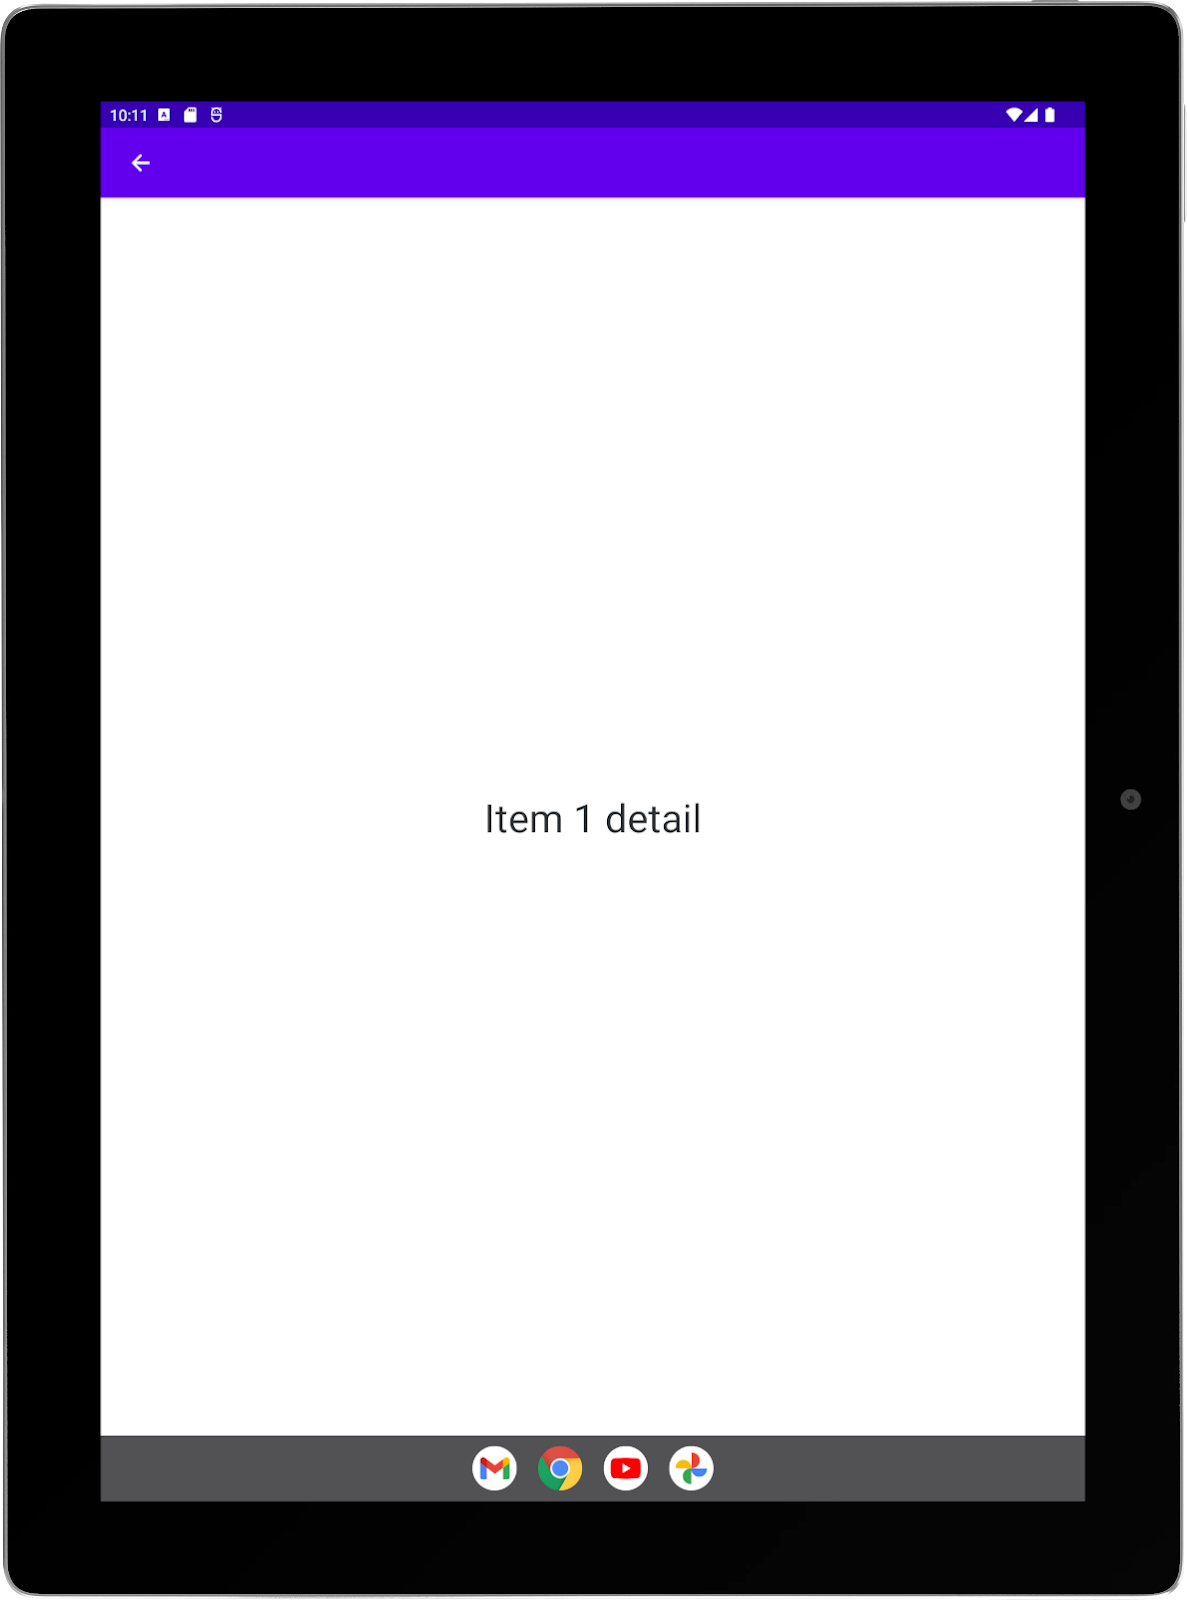
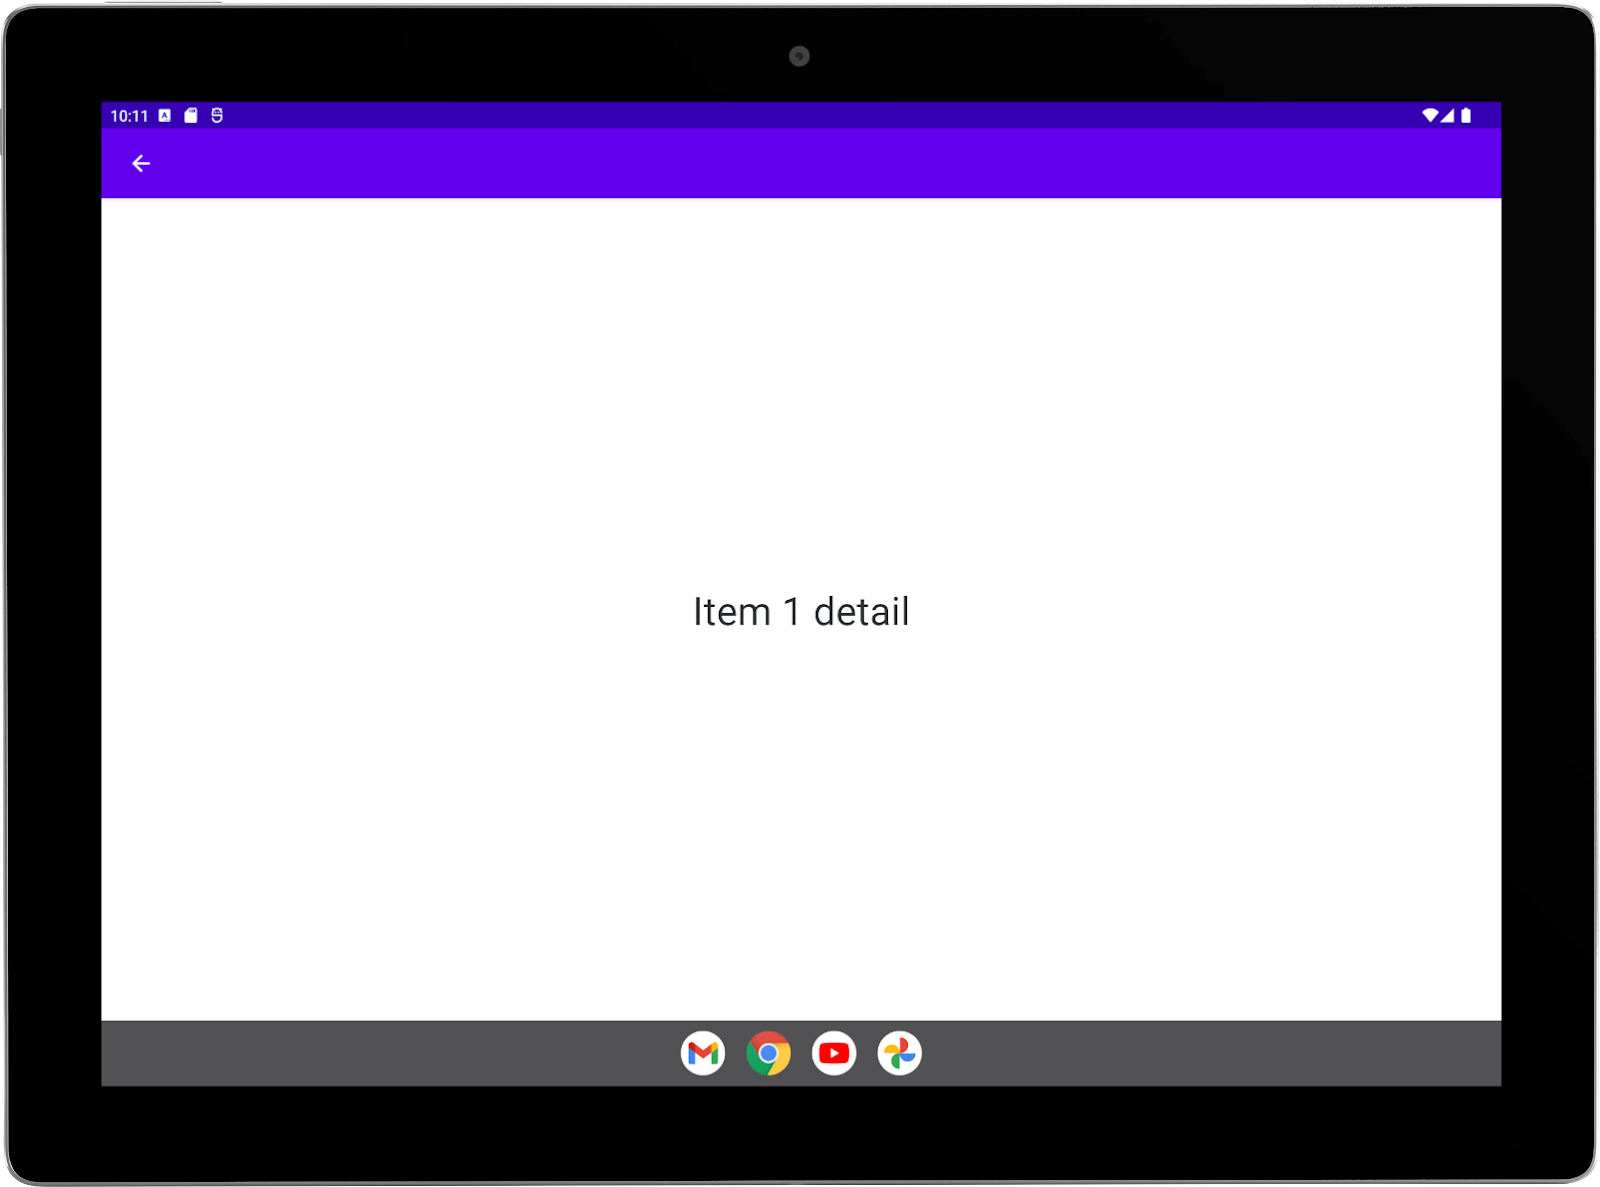
- Rotate the tablet to landscape orientation. The secondary activity still overlays the main activity and occupies the entire display:
- Select the back control (left-facing arrow in the app bar) to return to the list.
- Rotate the device to portrait orientation.
- Select the last item in the list, Summary, to launch a summary activity as a secondary activity. The summary activity overlays the list activity:

- Rotate the tablet to landscape orientation. The secondary activity still overlays the main activity and occupies the entire display:

Behavior with activity embedding
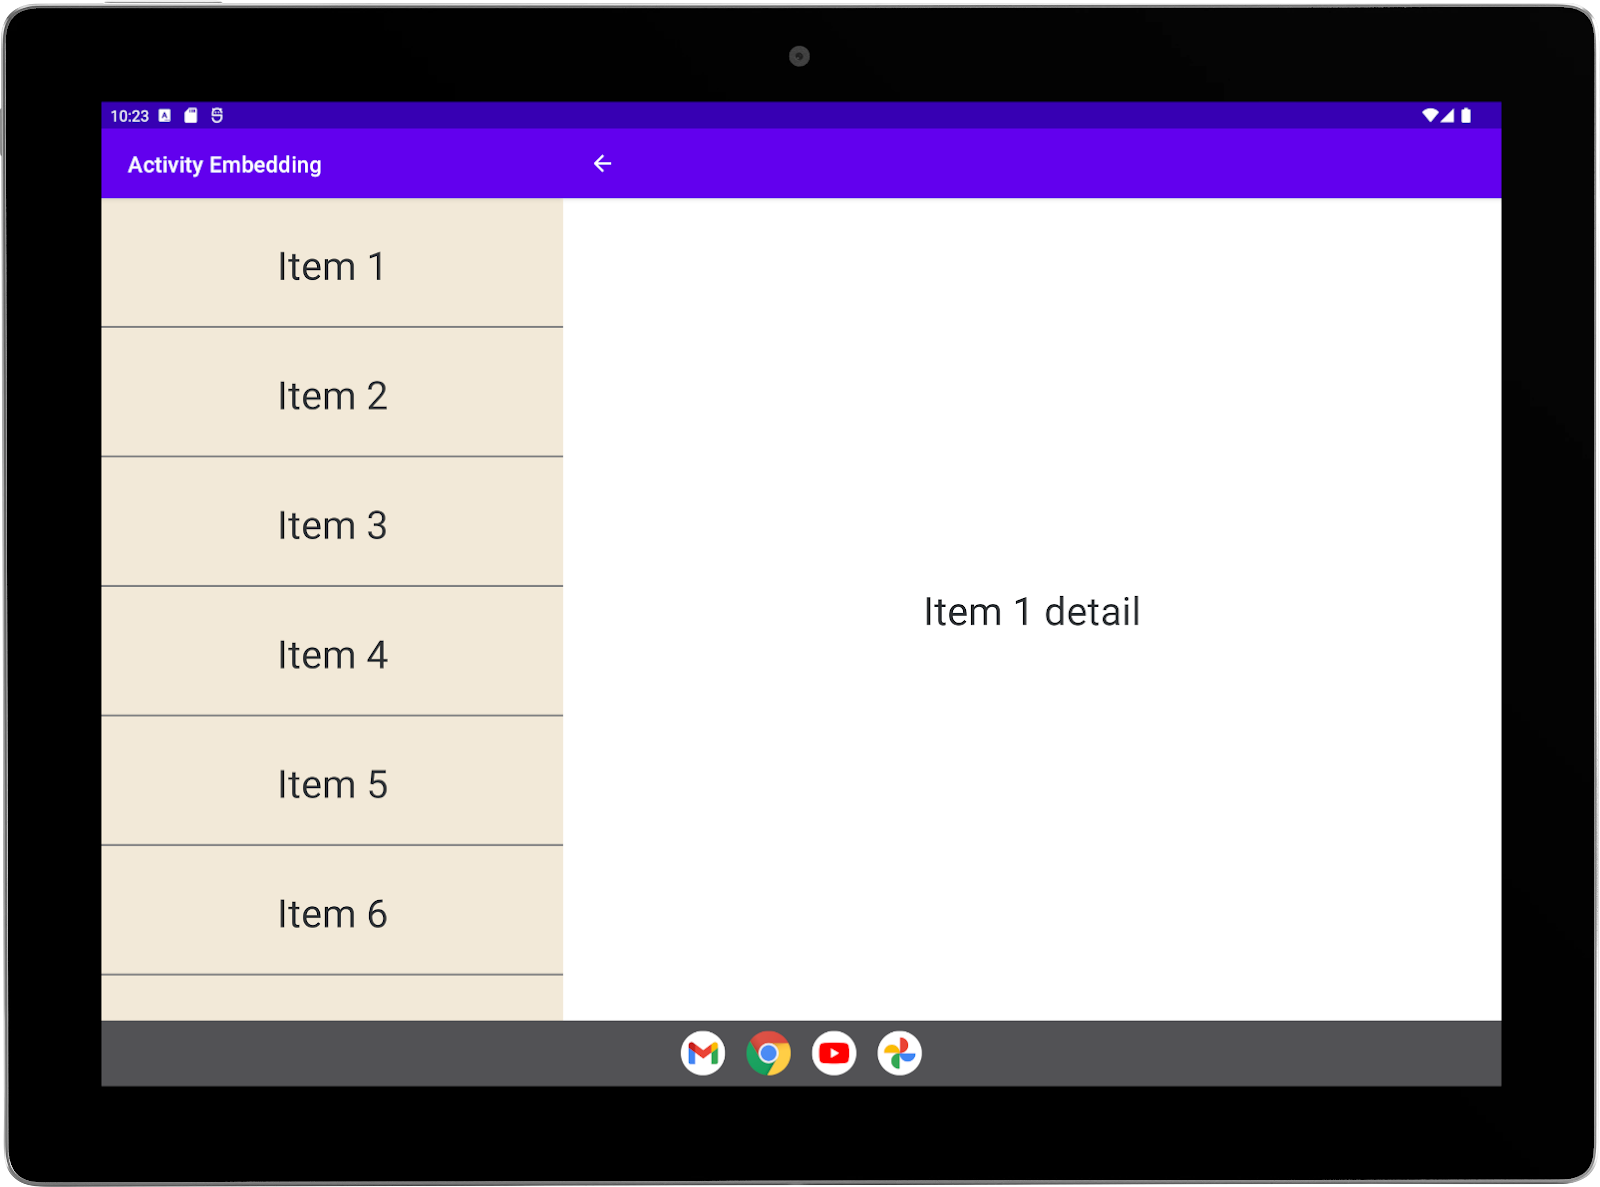
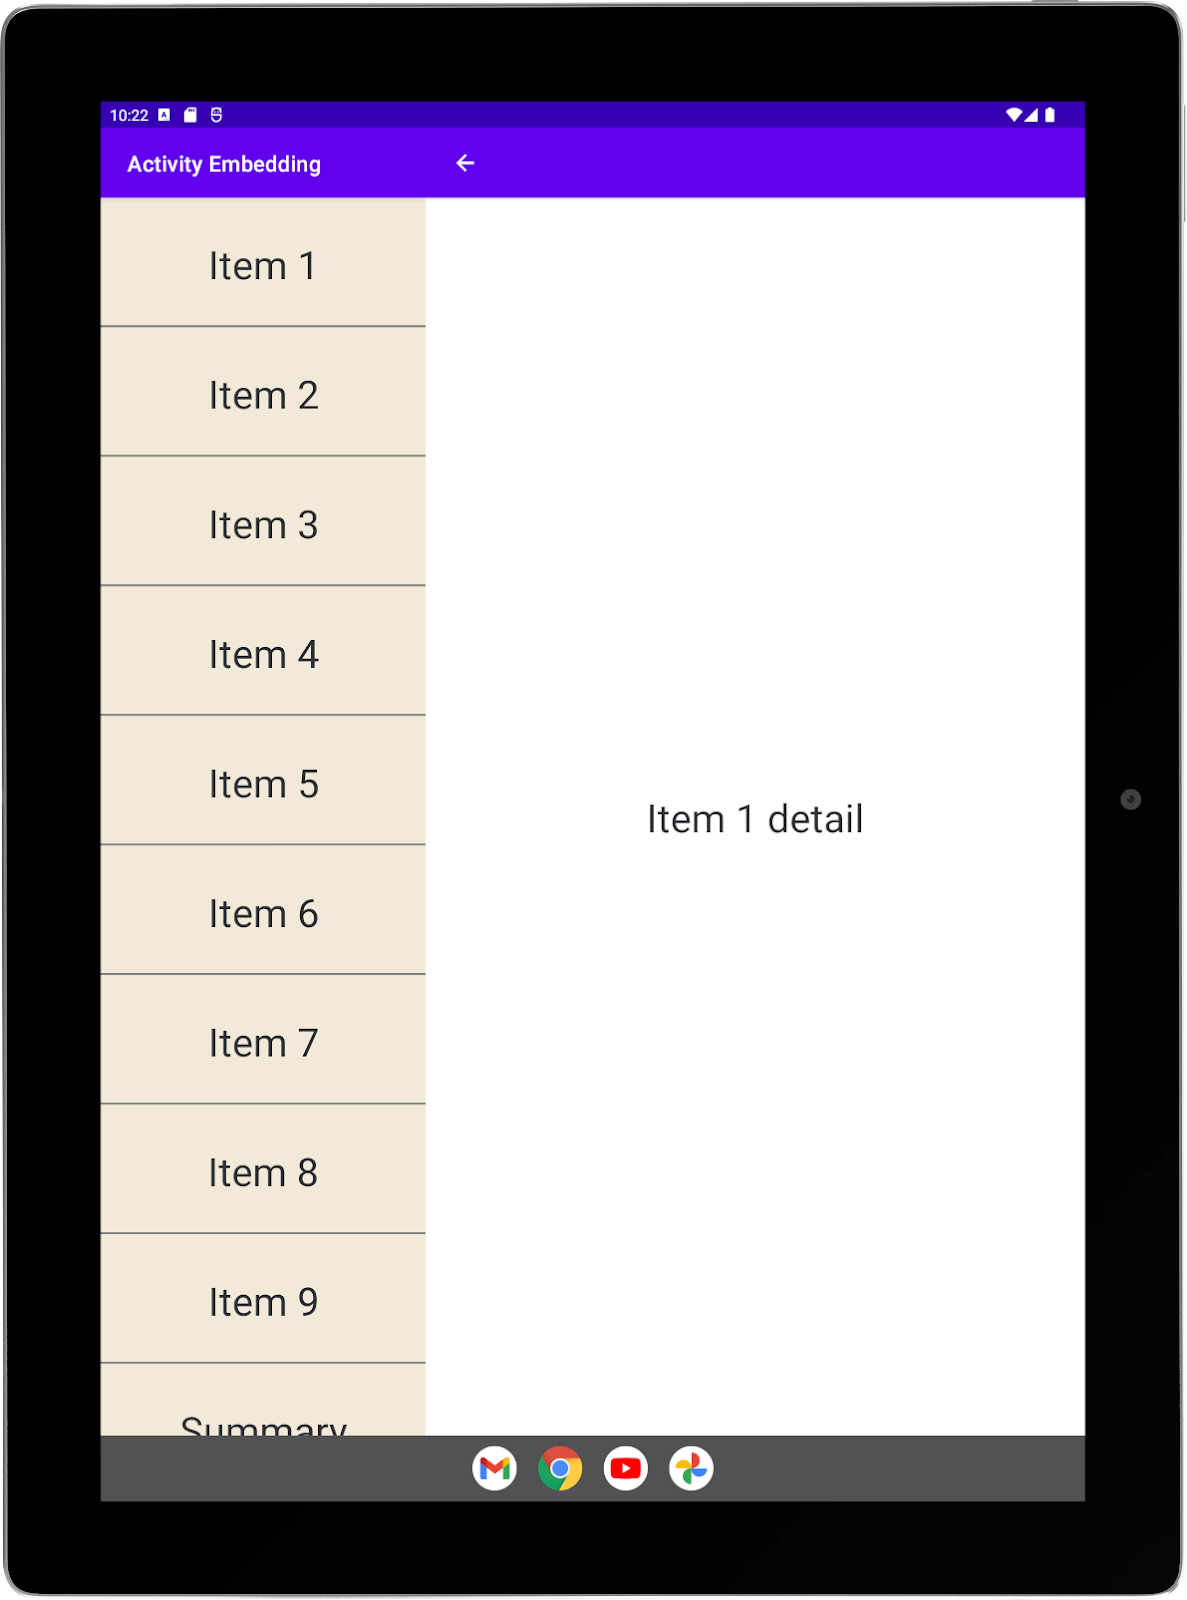
When you've completed this codelab, landscape orientation will display the list and detail activities side by side in a list-detail layout:
However, you'll configure the summary to display full screen, even though the activity is launched from within a split. The summary will overlay the split:

4. Background
Activity embedding splits the app task window into two containers: primary and secondary. Any activity can initiate a split by launching another activity. The initiating activity occupies the primary container; the launched activity, the secondary.
The primary activity can launch additional activities in the secondary container. Activities in both containers can then launch activities in their respective containers. Each container can contain a stack of activities. For more information, see the Activity embedding developer guide.
You configure your app to support activity embedding by creating an XML configuration file or by making Jetpack WindowManager API calls. We'll start with the XML configuration approach.
5. XML configuration
Activity embedding containers and splits are created and managed by the Jetpack WindowManager library based on split rules that you create in an XML configuration file.
Add the WindowManager dependency
Enable the sample app to access the WindowManager library by adding the library dependency to the app's module-level build.gradle file, for example:
build.gradle
implementation 'androidx.window:window:1.3.0'
Inform the system
Let the system know your app has implemented activity embedding.
Add the android.window.PROPERTY_ACTIVITY_EMBEDDING_SPLITS_ENABLED property to the <application> element of the app manifest file, and set the value to true:
AndroidManifest.xml
<manifest xmlns:android="http://schemas.android.com/apk/res/android">
    <application>
        <property
            android:name="android.window.PROPERTY_ACTIVITY_EMBEDDING_SPLITS_ENABLED"
            android:value="true" />
    </application>
</manifest>
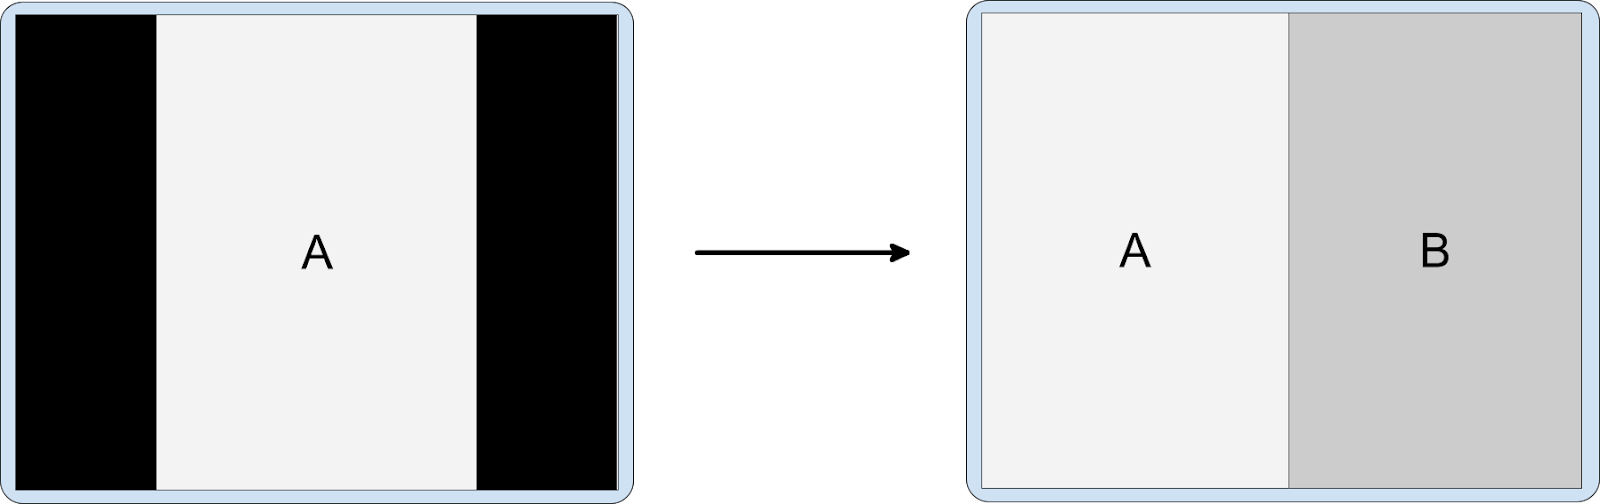
Device manufacturers (OEMs) use the setting to enable custom capabilities for apps that support activity embedding. For example, devices can letterbox portrait-only activities (see android:screenOrientation) on landscape displays to orient the activities for a smooth transition to an activity embedding two-pane layout:
Create a configuration file
Create an XML resource file named main_split_config.xml in your app's res/xml folder with resources as the root element.
Change the XML namespace to:
main_split_config.xml
xmlns:window="http://schemas.android.com/apk/res-auto"
Split pair rule
Add the following split rule to the configuration file:
main_split_config.xml
<!-- Define a split for the named activity pair. -->
<SplitPairRule
    window:splitRatio="0.33"
    window:splitMinWidthDp="840"
    window:finishPrimaryWithSecondary="never"
    window:finishSecondaryWithPrimary="always">
  <SplitPairFilter
      window:primaryActivityName=".ListActivity"
      window:secondaryActivityName=".DetailActivity"/>
</SplitPairRule>
The rule does the following:
- Configures split options for activities that share a split:
splitRatio— Specifies how much of the task window is occupied by the primary activity (33%), leaving the remaining space for the secondary activity.splitMinWidthDp— Specifies the minimum display width (840) required for both activities to be on screen simultaneously. Units are display-independent pixels (dp).
finishPrimaryWithSecondary— Specifies whether activities in the primary split container finish (never) when all activities in the secondary container finish.finishSecondaryWithPrimary— Specifies whether activities in the secondary split container finish (always) when all activities in the primary container activity finish.- Includes a split filter that defines the activities that share a task window split. The primary activity is
ListActivity; the secondary isDetailActivity.
Placeholder rule
A placeholder activity occupies the secondary container of an activity split when no content is available for that container, for example, when a list-detail split opens but a list item has not yet been selected. (For more information, see Placeholders in the Activity embedding developer guide.)
Add the following placeholder rule to the configuration file:
main_split_config.xml
<!-- Automatically launch a placeholder for the detail activity. -->
<SplitPlaceholderRule
    window:placeholderActivityName=".PlaceholderActivity"
    window:splitRatio="0.33"
    window:splitMinWidthDp="840"
    window:finishPrimaryWithPlaceholder="always"
    window:stickyPlaceholder="false">
  <ActivityFilter
      window:activityName=".ListActivity"/>
</SplitPlaceholderRule>
The rule does the following:
- Identifies the placeholder activity,
PlaceholderActivity(you'll create this activity in the next step) - Configures options for the placeholder:
splitRatio— Specifies how much of the task window is occupied by the primary activity (33%), leaving the remaining space for the placeholder. Typically, this value should match the split ratio of the split pair rule with which the placeholder is associated.splitMinWidthDp— Specifies the minimum display width (840) required for the placeholder to appear on screen with the primary activity. Typically, this value should match the minimum width of the split pair rule with which the placeholder is associated. Units are display-independent pixels (dp).finishPrimaryWithPlaceholder— Specifies whether activities in the primary split container finish (always) when the placeholder finishes.stickyPlaceholder— Indicates whether the placeholder should remain on screen (false) as the top activity when the display is resized down to a single-pane display from a two-pane display, for example, when a foldable device is folded.- Includes an activity filter that specifies the activity (
ListActivity) with which the placeholder shares a task window split.
The placeholder stands in for the secondary activity of the split pair rule whose primary activity is the same as the activity in the placeholder activity filter (see "Split pair rule" in the "XML configuration" section of this codelab).
Activity rule
Activity rules are general-purpose rules. Activities that you want to occupy the entire task window—that is, never be part of a split—can be specified with an activity rule. (For more information, see Full-window modal in the Activity embedding developer guide.)
We'll make the summary activity fill the entire task window, overlaying the split. Back navigation will return to the split.
Add the following activity rule to the configuration file:
main_split_config.xml
<!-- Activities that should never be in a split. -->
<ActivityRule
    window:alwaysExpand="true">
  <ActivityFilter
      window:activityName=".SummaryActivity"/>
</ActivityRule>
The rule does the following:
- Identifies the activity that should be displayed full window (
SummaryActivity). - Configures options for the activity:
alwaysExpand— Specifies whether or not the activity should expand to fill all available display space.
Source file
Your finished XML configuration file should look like this:
main_split_config.xml
<?xml version="1.0" encoding="utf-8"?>
<resources xmlns:window="http://schemas.android.com/apk/res-auto">

    <!-- Define a split for the named activity pair. -->
    <SplitPairRule
        window:splitRatio="0.33"
        window:splitMinWidthDp="840"
        window:finishPrimaryWithSecondary="never"
        window:finishSecondaryWithPrimary="always">
      <SplitPairFilter
          window:primaryActivityName=".ListActivity"
          window:secondaryActivityName=".DetailActivity"/>
    </SplitPairRule>

    <!-- Automatically launch a placeholder for the detail activity. -->
    <SplitPlaceholderRule
        window:placeholderActivityName=".PlaceholderActivity"
        window:splitRatio="0.33"
        window:splitMinWidthDp="840"
        window:finishPrimaryWithPlaceholder="always"
        window:stickyPlaceholder="false">
      <ActivityFilter
          window:activityName=".ListActivity"/>
    </SplitPlaceholderRule>

    <!-- Activities that should never be in a split. -->
    <ActivityRule
        window:alwaysExpand="true">
      <ActivityFilter
          window:activityName=".SummaryActivity"/>
    </ActivityRule>

</resources>
Create a placeholder activity
You need to create a new activity to serve as the placeholder specified in the XML configuration file. The activity can be very simple—just something to indicate to users that content will appear here eventually.
Create the activity in the sample app's main source folder.
In Android Studio, do the following:
- Right-click (secondary button–click) the sample app source folder,
com.example.activity_embedding - Select New > Activity > Empty Views Activity
- Name the activity PlaceholderActivity
- Set the source language to either Kotlin or Java
- Select Finish
Android Studio creates the activity in the sample app package, adds the activity to the app manifest file, and creates a layout resource file named activity_placeholder.xml in the res/layout folder.
- Remove the call to
enableEdgeToEdge()if your file is a Kotlin class orEdgeToEdge.enable(this);if your file is a Java class. (The other activities in the app—DetailActivityin particular—are not edge to edge.)
Your finished class file should look as follows:
PlaceholderActivity.kt
package com.example.activity_embedding

import android.os.Bundle
import androidx.appcompat.app.AppCompatActivity
import androidx.core.view.ViewCompat
import androidx.core.view.WindowInsetsCompat

class PlaceholderActivity : AppCompatActivity() {
  override fun onCreate(savedInstanceState: Bundle?) {
    super.onCreate(savedInstanceState)
    setContentView(R.layout.activity_placeholder)
    ViewCompat.setOnApplyWindowInsetsListener(findViewById(R.id.main)) {
      v, insets ->
        val systemBars = insets.getInsets(WindowInsetsCompat.Type.systemBars())
        v.setPadding(systemBars.left,
                     systemBars.top,
                     systemBars.right,
                     systemBars.bottom)
        insets
    }
  }
}
PlaceholderActivity.java
package com.example.activity_embedding;

import android.os.Bundle;

import androidx.appcompat.app.AppCompatActivity;
import androidx.core.graphics.Insets;
import androidx.core.view.ViewCompat;
import androidx.core.view.WindowInsetsCompat;

public class PlaceholderActivity extends AppCompatActivity {

  @Override
  protected void onCreate(Bundle savedInstanceState) {
    super.onCreate(savedInstanceState);
    setContentView(R.layout.activity_placeholder);
    ViewCompat.setOnApplyWindowInsetsListener(findViewById(R.id.main),
      (v, insets) -> {
        Insets systemBars = insets.getInsets(WindowInsetsCompat.Type.systemBars());
        v.setPadding(systemBars.left,
                     systemBars.top,
                     systemBars.right,
                     systemBars.bottom);
      return insets;
    });
  }
}
- In the sample app's
AndroidManifest.xmlfile, set the label for the placeholder activity to an empty string:
AndroidManifest.xml
<activity
    android:name=".PlaceholderActivity"
    android:exported="false"
    android:label="" />
- Replace the contents of the
activity_placeholder.xmllayout file in theres/layoutfolder with the following:
activity_placeholder.xml
<?xml version="1.0" encoding="utf-8"?>
<androidx.constraintlayout.widget.ConstraintLayout
    xmlns:android="http://schemas.android.com/apk/res/android"
    xmlns:app="http://schemas.android.com/apk/res-auto"
    xmlns:tools="http://schemas.android.com/tools"
    android:id="@+id/main"
    android:background="@color/gray"
    android:layout_width="match_parent"
    android:layout_height="match_parent"
    tools:context=".PlaceholderActivity">

  <TextView
      android:id="@+id/textViewPlaceholder"
      android:layout_width="wrap_content"
      android:layout_height="wrap_content"
      android:text="@string/placeholder_text"
      android:textSize="36sp"
      android:textColor="@color/obsidian"
      app:layout_constraintBottom_toBottomOf="parent"
      app:layout_constraintEnd_toEndOf="parent"
      app:layout_constraintStart_toStartOf="parent"
      app:layout_constraintTop_toTopOf="parent" />

</androidx.constraintlayout.widget.ConstraintLayout>
- Finally, add the following string resource to the
strings.xmlresource file in theres/valuesfolder:
strings.xml
<string name="placeholder_text">Placeholder</string>
Create an initializer
The WindowManager RuleController component parses the rules defined in the XML configuration file and makes the rules available to the system.
A Jetpack Startup library Initializer enables RuleController to access the configuration file.
The Startup library performs component initialization at app startup. Initialization must occur before any activities start so that RuleController has access to the split rules and can apply them if necessary.
Add the Startup library dependency
To enable startup functionality, add the Startup library dependency to the sample app's module-level build.gradle file, for example:
build.gradle
implementation 'androidx.startup:startup-runtime:1.2.0'
Implement an initializer for RuleController
Create an implementation of the Startup Initializer interface.
In Android Studio, do the following:
- Right-click (secondary button–click) the sample app source folder,
com.example.activity_embedding - Select New > Kotlin Class/File or New > Java Class
- Name the class SplitInitializer
- Press Enter — Android Studio creates the class in the sample app package
- Replace the contents of the class file with the following:
SplitInitializer.kt
package com.example.activity_embedding

import android.content.Context
import androidx.startup.Initializer
import androidx.window.embedding.RuleController

class SplitInitializer : Initializer<RuleController> {

  override fun create(context: Context): RuleController {
    return RuleController.getInstance(context).apply {
      setRules(RuleController.parseRules(context, R.xml.main_split_config))
    }
  }

  override fun dependencies(): List<Class<out Initializer<*>>> {
    return emptyList()
  }
}
SplitInitializer.java
package com.example.activity_embedding;

import android.content.Context;
import androidx.annotation.NonNull;
import androidx.startup.Initializer;
import androidx.window.embedding.RuleController;
import java.util.Collections;
import java.util.List;

public class SplitInitializer implements Initializer<RuleController> {

   @NonNull
   @Override
   public RuleController create(@NonNull Context context) {
      RuleController ruleController = RuleController.getInstance(context);
      ruleController.setRules(
          RuleController.parseRules(context, R.xml.main_split_config)
      );
      return ruleController;
   }

   @NonNull
   @Override
   public List<Class<? extends Initializer<?>>> dependencies() {
       return Collections.emptyList();
   }
}
The initializer makes the split rules available to the RuleController component by passing the ID of the XML resource file that contains the definitions (main_split_config) to the parseRules() method of the component. The setRules() method adds the parsed rules to RuleController.
Create an initialization provider
A provider invokes the split rules initialization process.
Add androidx.startup.InitializationProvider to the <application> element of the sample app's manifest file as a provider, and reference SplitInitializer:
AndroidManifest.xml
<provider android:name="androidx.startup.InitializationProvider"
    android:authorities="${applicationId}.androidx-startup"
    android:exported="false">
    <!-- Make SplitInitializer discoverable by InitializationProvider. -->
    <meta-data android:name="${applicationId}.SplitInitializer"
        android:value="androidx.startup" />
</provider>
InitializationProvider initializes SplitInitializer, which in turn invokes the RuleController methods that parse the XML configuration file (main_split_config.xml) and add the rules to RuleController (see "Implement an initializer for RuleController" above).
InitializationProvider discovers and initializes SplitInitializer before the app's onCreate() method executes; and so, the split rules are in effect when the main app activity starts.
Source file
Here's the completed app manifest:
AndroidManifest.xml
<?xml version="1.0" encoding="utf-8"?>
<manifest xmlns:android="http://schemas.android.com/apk/res/android">

  <application
      android:allowBackup="true"
      android:dataExtractionRules="@xml/data_extraction_rules"
      android:fullBackupContent="@xml/backup_rules"
      android:icon="@mipmap/ic_launcher"
      android:label="@string/app_name"
      android:roundIcon="@mipmap/ic_launcher_round"
      android:supportsRtl="true"
      android:theme="@style/Theme.Activity_Embedding">
    <activity
        android:name=".ListActivity"
        android:exported="true">
      <intent-filter>
        <action android:name="android.intent.action.MAIN" />
        <category android:name="android.intent.category.LAUNCHER" />
      </intent-filter>
    </activity>
    <activity
        android:name=".DetailActivity"
        android:exported="false"
        android:label="" />
    <activity
        android:name=".SummaryActivity"
        android:exported="false"
        android:label="" />
    <activity
        android:name=".PlaceholderActivity"
        android:exported="false"
        android:label="" />
    <property
        android:name="android.window.PROPERTY_ACTIVITY_EMBEDDING_SPLITS_ENABLED"
        android:value="true" />
    <provider
        android:name="androidx.startup.InitializationProvider"
        android:authorities="${applicationId}.androidx-startup"
        android:exported="false">
      <!-- Make SplitInitializer discoverable by InitializationProvider. -->
      <meta-data
          android:name="${applicationId}.SplitInitializer"
          android:value="androidx.startup" />
    </provider>
  </application>

</manifest>
Initialization shortcut
If you're comfortable mixing XML configuration with WindowManager APIs, you can eliminate the Startup library initializer and the manifest provider for a much simpler implementation.
Once you've created your XML configuration file, do the following:
Step 1: Create a subclass of Application
Your application subclass will be the first class instantiated when the process for your app is created. You'll add the split rules to RuleController in the onCreate() method of your subclass to ensure the rules are in effect before any activities launch.
In Android Studio, do the following:
- Right-click (secondary button–click) the sample app source folder,
com.example.activity_embedding - Select New > Kotlin Class/File or New > Java Class
- Name the class SampleApplication
- Press Enter — Android Studio creates the class in the sample app package
- Extend the class from the
Applicationsupertype
SampleApplication.kt
package com.example.activity_embedding

import android.app.Application

/**
 * Initializer for activity embedding split rules.
 */
class SampleApplication : Application() {

}
SampleApplication.java
package com.example.activity_embedding;

import android.app.Application;

/**
 * Initializer for activity embedding split rules.
 */
public class SampleApplication extends Application {

}
Step 2: Initialize RuleController
Add the split rules from the XML configuration file to RuleController in the onCreate() method of your application subclass.
To add the rules to RuleController, do the following:
- Get a singleton instance of
RuleController - Use the Java static or Kotlin companion
parseRules()method ofRuleControllerto parse the XML file - Add the parsed rules to
RuleControllerwith thesetRules()method
SampleApplication.kt
override fun onCreate() {
  super.onCreate()
  RuleController.getInstance(this)
    .setRules(RuleController.parseRules(this, R.xml.main_split_config))
}
SampleApplication.java
@Override
public void onCreate() {
  super.onCreate();
  RuleController.getInstance(this)
    .setRules(RuleController.parseRules(this, R.xml.main_split_config));
}
Step 3: Add your subclass name to the manifest
Add the name of your subclass to the <application> element of the app manifest:
AndroidManifest.xml
<application
    android:name=".SampleApplication"
    . . .
Run it!
Build and run the sample app.
On a nonfoldable phone, the activities are always stacked—even in landscape orientation:
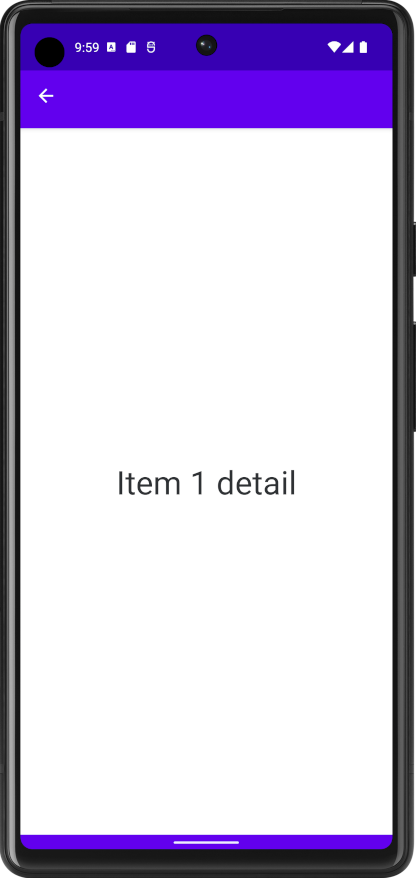
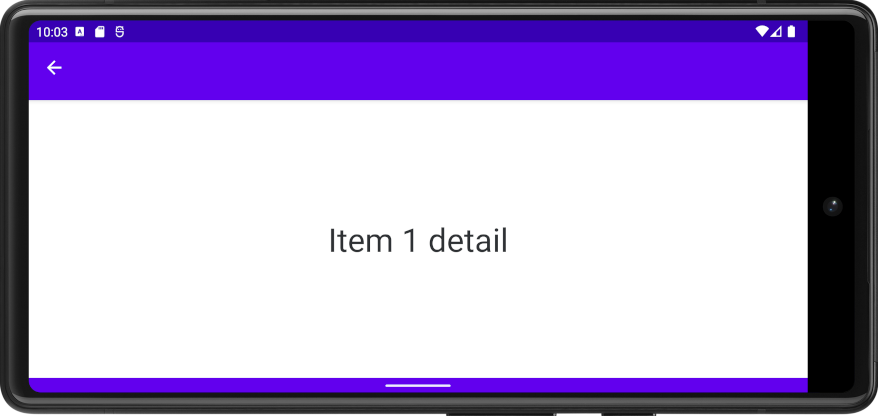
On Android 13 (API level 33) and lower, activity embedding is not enabled on nonfoldable phones regardless of split minimum width specifications.
Support for activity embedding for nonfoldable phones on higher API levels is dependent on whether the device manufacturer has enabled activity embedding.
On a small tablet or the 7 WSVGA (Tablet) emulator, the two activities are stacked in portrait orientation, but they appear side by side in landscape orientation:
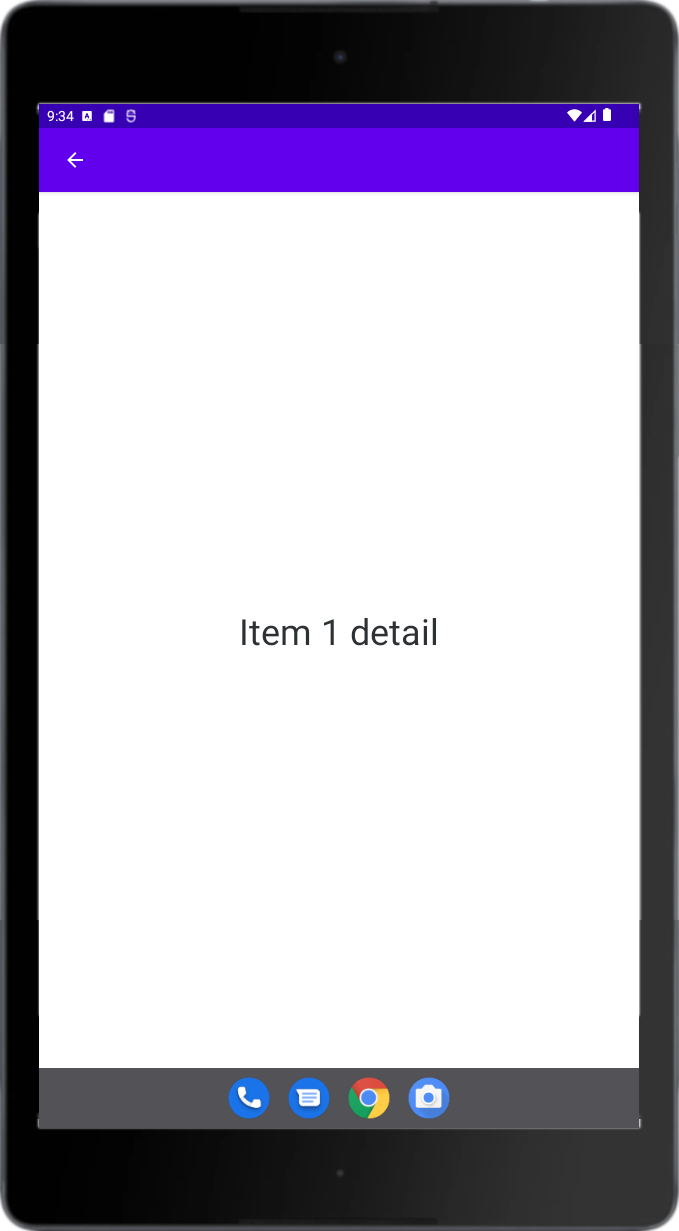
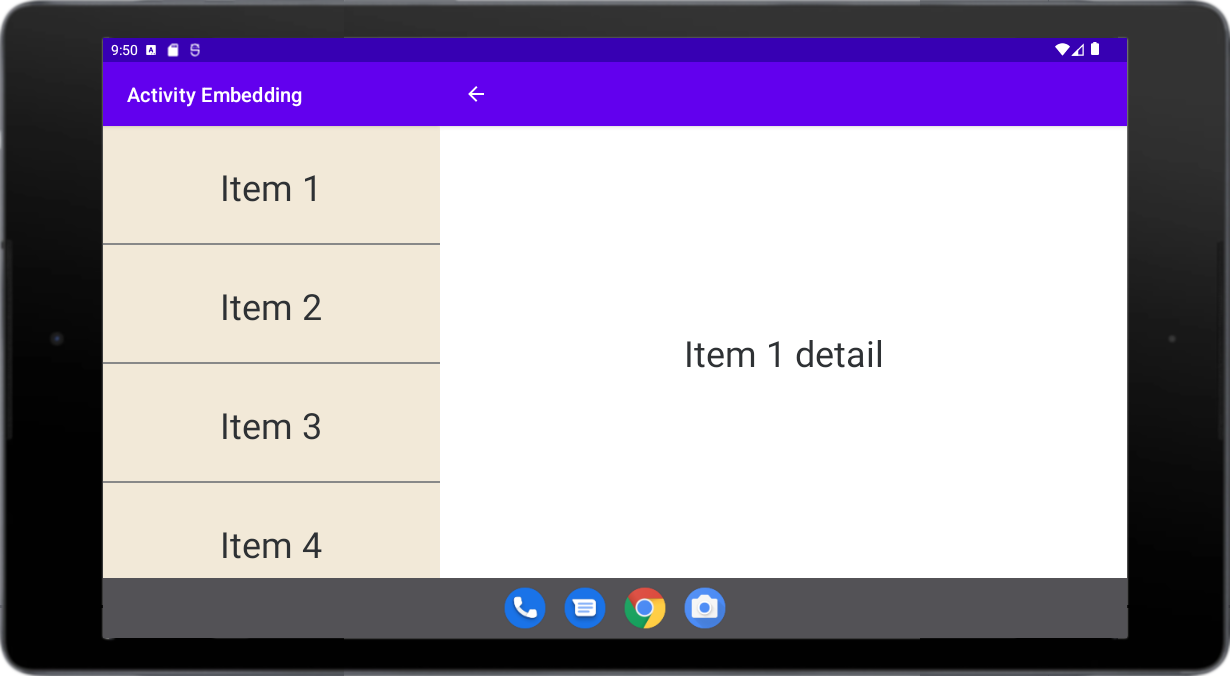
On a large tablet or the Pixel C emulator, the activities are stacked in portrait orientation (see "Aspect ratio" below), but appear side by side in landscape orientation:
The summary displays full screen in landscape even though it's launched from within a split:
Aspect ratio
The activity splits are controlled by display aspect ratio in addition to split minimum width. The splitMaxAspectRatioInPortrait and splitMaxAspectRatioInLandscape attributes specify the maximum display aspect ratio (height:width) for which activity splits are displayed. The attributes represent the maxAspectRatioInPortrait and maxAspectRatioInLandscape properties of SplitRule.
If the aspect ratio of a display exceeds the value in either orientation, splits are disabled regardless of the width of the display. The default value for portrait orientation is 1.4 (height / width, see SPLIT_MAX_ASPECT_RATIO_PORTRAIT_DEFAULT), which prevents tall, narrow displays from including splits. By default, splits are always allowed in landscape orientation (see SPLIT_MAX_ASPECT_RATIO_LANDSCAPE_DEFAULT).
The PIxel C emulator has a portrait display width of 900dp, which is wider than the splitMinWidthDp setting in the sample app XML configuration file, so the emulator should show an activity split. But the aspect ratio of the Pixel C in portrait is greater than 1.4, which prevents activity splits from displaying in portrait orientation.
You can set the maximum aspect ratio for portrait and landscape displays in the XML configuration file in the SplitPairRule and SplitPlaceholderRule elements, for example:
main_split_config.xml
<?xml version="1.0" encoding="utf-8"?>
<resources xmlns:window="http://schemas.android.com/apk/res/android">

  <!-- Define a split for the named activity pair. -->
  <SplitPairRule
      . . .
      window:splitMaxAspectRatioInPortrait="alwaysAllow"
      window:splitMaxAspectRatioInLandscape="alwaysDisallow"
      . . .
 </SplitPairRule>

  <SplitPlaceholderRule
      . . .
      window:splitMaxAspectRatioInPortrait="alwaysAllow"
      window:splitMaxAspectRatioInLandscape="alwaysDisallow"
      . . .
  </SplitPlaceholderRule>

</resources>
On a large tablet with portrait display width greater than or equal to 840dp or the Pixel C emulator, the activities are side by side in portrait orientation, but stacked in landscape orientation:
Extra credit
Try setting the aspect ratio in the sample app as shown above for portrait and landscape orientations. Test the settings with your large tablet (if the portrait width is 840dp or greater) or the Pixel C emulator. You should see an activity split in portrait orientation but not in landscape.
Determine the portrait aspect ratio of your large tablet (the aspect ratio of the Pixel C is slightly greater than 1.4). Set splitMaxAspectRatioInPortrait to values higher and lower than the aspect ratio. Run the app, and see what results you get.
6. WindowManager API
You can enable activity embedding entirely in code with a single method called from within the onCreate() method of the activity that initiates the split. If you prefer working in code rather than XML, this is the way to go.
Add the WindowManager dependency
Your app needs access to the WindowManager library whether you're creating an XML-based implementation or using API calls. See the "XML configuration" section of this codelab for how to add the WindowManager dependency to your app.
Inform the system
Regardless of whether you use an XML configuration file or WindowManager API calls, your app must notify the system that the app has implemented activity embedding. See the "XML configuration" section of this codelab for how to inform the system of your implementation.
Create a class to manage splits
In this section of the codelab, you'll implement an activity split entirely within a single static or companion object method which you'll call from the sample app's main activity, ListActivity.
Create a class named SplitManager with a method named createSplit that includes a context parameter (some of the API calls require the parameter):
SplitManager.kt
import android.content.Context

class SplitManager {

    companion object {

        fun createSplit(context: Context) {
        }
    }
}
SplitManager.java
import android.content.Context

class SplitManager {

    static void createSplit(Context context) {
    }
}
Call the method in the onCreate() method of a subclass of the Application class.
For details on why and how to subclass Application, see "Initialization shortcut" in the "XML configuration" section of this codelab.
SampleApplication.kt
package com.example.activity_embedding

import android.app.Application

/**
 * Initializer for activity embedding split rules.
 */
class SampleApplication : Application() {

  override fun onCreate() {
    super.onCreate()
    SplitManager.createSplit(this)
  }
}
SampleApplication.java
package com.example.activity_embedding;

import android.app.Application;

/**
 * Initializer for activity embedding split rules.
 */
public class SampleApplication extends Application {

  @Override
  public void onCreate() {
    super.onCreate();
    SplitManager.createSplit(this);
  }
}
Create a split rule
Required APIs:
SplitPairRule defines a split rule for a pair of activities.
SplitPairRule.Builder creates a SplitPairRule. The builder takes a set of SplitPairFilter objects as an argument. The filters specify when to apply the rule.
You register the rule with a singleton instance of the RuleController component, which makes the split rules available to the system.
To create a split rule, do the following:
- Create a split pair filter that identifies
ListActivityandDetailActivityas the activities that share a split:
SplitManager.kt / createSplit()
val splitPairFilter = SplitPairFilter(
    ComponentName(context, ListActivity::class.java),
    ComponentName(context, DetailActivity::class.java),
    null
)
SplitManager.java / createSplit()
SplitPairFilter splitPairFilter = new SplitPairFilter(
    new ComponentName(context, ListActivity.class),
    new ComponentName(context, DetailActivity.class),
    null
);
The filter can include an intent action (third parameter) for the secondary activity launch. If you include an intent action, the filter checks for the action along with the activity name. For activities in your own app, you probably won't filter on intent action, so the argument can be null.
- Add the filter to a filter set:
SplitManager.kt / createSplit()
val filterSet = setOf(splitPairFilter)
SplitManager.java / createSplit()
Set<SplitPairFilter> filterSet = new HashSet<>();
filterSet.add(splitPairFilter);
- Create layout attributes for the split:
SplitManager.kt / createSplit()
val splitAttributes: SplitAttributes = SplitAttributes.Builder()
      .setSplitType(SplitAttributes.SplitType.ratio(0.33f))
      .setLayoutDirection(SplitAttributes.LayoutDirection.LEFT_TO_RIGHT)
      .build()
SplitManager.java / createSplit()
SplitAttributes splitAttributes = new SplitAttributes.Builder()
  .setSplitType(SplitAttributes.SplitType.ratio(0.33f))
  .setLayoutDirection(SplitAttributes.LayoutDirection.LEFT_TO_RIGHT)
  .build();
SplitAttributes.Builder creates an object containing layout attributes:
setSplitType: Defines how the available display area is allocated to each activity container. The ratio split type specifies the proportion of the display occupied by the primary container; the secondary container occupies the remaining display area.setLayoutDirection: Specifies how the activity containers are laid out relative to one another, primary container first.
- Build a split pair rule:
SplitManager.kt / createSplit()
val splitPairRule = SplitPairRule.Builder(filterSet)
      .setDefaultSplitAttributes(splitAttributes)
      .setMinWidthDp(840)
      .setMinSmallestWidthDp(600)
      .setFinishPrimaryWithSecondary(SplitRule.FinishBehavior.NEVER)
      .setFinishSecondaryWithPrimary(SplitRule.FinishBehavior.ALWAYS)
      .setClearTop(false)
      .build()
SplitManager.java / createSplit()
SplitPairRule splitPairRule = new SplitPairRule.Builder(filterSet)
  .setDefaultSplitAttributes(splitAttributes)
  .setMinWidthDp(840)
  .setMinSmallestWidthDp(600)
  .setFinishPrimaryWithSecondary(SplitRule.FinishBehavior.NEVER)
  .setFinishSecondaryWithPrimary(SplitRule.FinishBehavior.ALWAYS)
  .setClearTop(false)
  .build();
SplitPairRule.Builder creates and configures the rule:
filterSet: Contains split pair filters that determine when to apply the rule by identifying activities that share a split. In the sample app,ListActivityandDetailActivityare specified in a split pair filter (see preceding steps).setDefaultSplitAttributes: Applies layout attributes to the rule.setMinWidthDp: Sets the minimum display width (in density-independent pixels, dp) that allows a split.setMinSmallestWidthDp: Sets the minimum value (in dp) that the smaller of the two display dimensions must have to allow a split, regardless of the device orientation.setFinishPrimaryWithSecondary: Sets how finishing all activities in the secondary container affects the activities in the primary container.NEVERindicates the system should not finish the primary activities when all activities in the secondary container finish. (See Finish activities.)setFinishSecondaryWithPrimary: Sets how finishing all activities in the primary container affects the activities in the secondary container.ALWAYSindicates the system should always finish the activities in the secondary container when all activities in the primary container finish. (See Finish activities.)setClearTop: Specifies whether all activities in the secondary container are finished when a new activity is launched in the container. False specifies that new activities are stacked on top of activities already in the secondary container.
- Get the singleton instance of the WindowManager
RuleControllerand add the rule:
SplitManager.kt / createSplit()
val ruleController = RuleController.getInstance(context)
ruleController.addRule(splitPairRule)
SplitManager.java / createSplit()
RuleController ruleController = RuleController.getInstance(context);
ruleController.addRule(splitPairRule);
Create a placeholder rule
Required APIs:
SplitPlaceholderRule defines a rule for an activity that occupies the secondary container when no content is available for that container. To create a placeholder activity, see "Create a placeholder activity" in the "XML configuration" section of this codelab. (For more information, see Placeholders in the Activity embedding developer guide.)
SplitPlaceholderRule.Builder creates a SplitPlaceholderRule. The builder takes a set of ActivityFilter objects as an argument. The objects specify activities with which the placeholder rule is associated. If the filter matches a started activity, the system applies the placeholder rule.
You register the rule with the RuleController component.
To create a split placeholder rule, do the following:
- Create an
ActivityFilter:
SplitManager.kt / createSplit()
val placeholderActivityFilter = ActivityFilter(
    ComponentName(context, ListActivity::class.java),
    null
)
SplitManager.java / createSplit()
ActivityFilter placeholderActivityFilter = new ActivityFilter(
    new ComponentName(context, ListActivity.class),
    null
);
The filter associates the rule with the sample app's main activity, ListActivity. So, when no detail content is available in the list-detail layout, the placeholder fills the detail area.
The filter can include an intent action (second parameter) for the associated activity launch (ListActivity launch). If you include an intent action, the filter checks for the action along with the activity name. For activities in your own app, you probably won't filter on intent action, so the argument can be null.
- Add the filter to a filter set:
SplitManager.kt / createSplit()
val placeholderActivityFilterSet = setOf(placeholderActivityFilter)
SplitManager.java / createSplit()
Set<ActivityFilter> placeholderActivityFilterSet = new HashSet<>();
placeholderActivityFilterSet.add(placeholderActivityFilter);
- Create a
SplitPlaceholderRule:
SplitManager.kt / createSplit()
val splitPlaceholderRule = SplitPlaceholderRule.Builder(
      placeholderActivityFilterSet,
      Intent(context, PlaceholderActivity::class.java)
    ).setDefaultSplitAttributes(splitAttributes)
     .setMinWidthDp(840)
     .setMinSmallestWidthDp(600)
     .setFinishPrimaryWithPlaceholder(SplitRule.FinishBehavior.ALWAYS)
     .build()
SplitManager.java / createSplit()
SplitPlaceholderRule splitPlaceholderRule = new SplitPlaceholderRule.Builder(
  placeholderActivityFilterSet,
  new Intent(context, PlaceholderActivity.class)
).setDefaultSplitAttributes(splitAttributes)
 .setMinWidthDp(840)
 .setMinSmallestWidthDp(600)
 .setFinishPrimaryWithPlaceholder(SplitRule.FinishBehavior.ALWAYS)
 .build();
SplitPlaceholderRule.Builder creates and configures the rule:
placeholderActivityFilterSet: Contains activity filters that determine when to apply the rule by identifying activities with which the placeholder activity is associated.Intent: Specifies launch of placeholder activity.setDefaultSplitAttributes: Applies layout attributes to the rule.setMinWidthDp: Sets the minimum display width (in density-independent pixels, dp) that allows a split.setMinSmallestWidthDp: Sets the minimum value (in dp) that the smaller of the two display dimensions must have to allow a split, regardless of the device orientation.setFinishPrimaryWithPlaceholder: Sets how finishing the placeholder activity affects the activities in the primary container.ALWAYSindicates the system should always finish the activities in the primary container when the placeholder finishes. (See Finish activities.)
- Add the rule to the WindowManager
RuleController:
SplitManager.kt / createSplit()
ruleController.addRule(splitPlaceholderRule)
SplitManager.java / createSplit()
ruleController.addRule(splitPlaceholderRule);
Create an activity rule
Required APIs:
ActivityRule can be used to define a rule for an activity that occupies the entire task window, such as a modal dialog. (For more information, see Full-window modal in the Activity embedding developer guide.
ActivityRule.Builder creates an ActivityRule. The builder takes a set of ActivityFilter objects as an argument. The objects specify activities with which the activity rule is associated. If the filter matches a started activity, the system applies the activity rule.
You register the rule with the RuleController component.
To create an activity rule, do the following:
- Create an
ActivityFilter:
SplitManager.kt / createSplit()
val summaryActivityFilter = ActivityFilter(
    ComponentName(context, SummaryActivity::class.java),
    null
)
SplitManager.java / createSplit()
ActivityFilter summaryActivityFilter = new ActivityFilter(
    new ComponentName(context, SummaryActivity.class),
    null
);
The filter specifies the activity for which the rule applies, SummaryActivity.
The filter can include an intent action (second parameter) for the associated activity launch (SummaryActivity launch). If you include an intent action, the filter checks for the action along with the activity name. For activities in your own app, you probably won't filter on intent action, so the argument can be null.
- Add the filter to a filter set:
SplitManager.kt / createSplit()
val summaryActivityFilterSet = setOf(summaryActivityFilter)
SplitManager.java / createSplit()
Set<ActivityFilter> summaryActivityFilterSet = new HashSet<>();
summaryActivityFilterSet.add(summaryActivityFilter);
- Create an
ActivityRule:
SplitManager.kt / createSplit()
val activityRule = ActivityRule.Builder(summaryActivityFilterSet)
      .setAlwaysExpand(true)
      .build()
SplitManager.java / createSplit()
ActivityRule activityRule = new ActivityRule.Builder(
    summaryActivityFilterSet
).setAlwaysExpand(true)
 .build();
ActivityRule.Builder creates and configures the rule:
summaryActivityFilterSet: Contains activity filters that determine when to apply the rule by identifying activities that you want to exclude from splits.setAlwaysExpand: Specifies whether or not the activity should expand to fill all available display space.
- Add the rule to the WindowManager
RuleController:
SplitManager.kt / createSplit()
ruleController.addRule(activityRule)
SplitManager.java / createSplit()
ruleController.addRule(activityRule);
Source file
Here's the completed split manager file:
SplitManager.kt
package com.example.activity_embedding

import android.content.ComponentName
import android.content.Context
import android.content.Intent
import androidx.window.embedding.ActivityFilter
import androidx.window.embedding.ActivityRule
import androidx.window.embedding.EmbeddingAspectRatio
import androidx.window.embedding.RuleController
import androidx.window.embedding.SplitAttributes
import androidx.window.embedding.SplitPairFilter
import androidx.window.embedding.SplitPairRule
import androidx.window.embedding.SplitPlaceholderRule
import androidx.window.embedding.SplitRule

/**
 * Creates activity embedding splits.
 */
class SplitManager {

    companion object {

        fun createSplit(context: Context) {
            val splitPairFilter = SplitPairFilter(
                ComponentName(context, ListActivity::class.java),
                ComponentName(context, DetailActivity::class.java),
                null
            )
            val filterSet = setOf(splitPairFilter)
            val splitAttributes: SplitAttributes = SplitAttributes.Builder()
                  .setSplitType(SplitAttributes.SplitType.ratio(0.33f))
                  .setLayoutDirection(SplitAttributes.LayoutDirection.LEFT_TO_RIGHT)
                  .build()
            val splitPairRule = SplitPairRule.Builder(filterSet)
                  .setDefaultSplitAttributes(splitAttributes)
                  .setMinWidthDp(840)
                  .setMinSmallestWidthDp(600)
                  .setFinishPrimaryWithSecondary(SplitRule.FinishBehavior.NEVER)
                  .setFinishSecondaryWithPrimary(SplitRule.FinishBehavior.ALWAYS)
                  .setClearTop(false)
                  .build()
            val ruleController = RuleController.getInstance(context)
            ruleController.addRule(splitPairRule)
            val placeholderActivityFilter = ActivityFilter(
                ComponentName(context, ListActivity::class.java),
                null
            )
            val placeholderActivityFilterSet = setOf(placeholderActivityFilter)
            val splitPlaceholderRule = SplitPlaceholderRule.Builder(
                  placeholderActivityFilterSet,
                  Intent(context, PlaceholderActivity::class.java)
                ).setDefaultSplitAttributes(splitAttributes)
                 .setMinWidthDp(840)
                 .setMinSmallestWidthDp(600)
                 .setFinishPrimaryWithPlaceholder(SplitRule.FinishBehavior.ALWAYS)
                 .build()
            ruleController.addRule(splitPlaceholderRule)
            val summaryActivityFilter = ActivityFilter(
                ComponentName(context, SummaryActivity::class.java),
                null
            )
            val summaryActivityFilterSet = setOf(summaryActivityFilter)
            val activityRule = ActivityRule.Builder(summaryActivityFilterSet)
                  .setAlwaysExpand(true)
                  .build()
            ruleController.addRule(activityRule)
        }
    }

}
SplitManager.java
package com.example.activity_embedding;

import android.content.ComponentName;
import android.content.Context;import android.content.Intent;
import androidx.window.embedding.ActivityFilter;
import androidx.window.embedding.ActivityRule;
import androidx.window.embedding.RuleController;
import androidx.window.embedding.SplitAttributes;
import androidx.window.embedding.SplitPairFilter;
import androidx.window.embedding.SplitPairRule;
import androidx.window.embedding.SplitPlaceholderRule;
import androidx.window.embedding.SplitRule;
import java.util.*;

/**
 * Creates activity embedding splits.
 */
class SplitManager   {
    static void createSplit(Context context) {
        SplitPairFilter splitPairFilter = new SplitPairFilter(
            new ComponentName(context, ListActivity.class),
            new ComponentName(context, DetailActivity.class),
            null
        );
        Set<SplitPairFilter> filterSet = new HashSet<>();
        filterSet.add(splitPairFilter);
        SplitAttributes splitAttributes = new SplitAttributes.Builder()
          .setSplitType(SplitAttributes.SplitType.ratio(0.33f))
          .setLayoutDirection(SplitAttributes.LayoutDirection.LEFT_TO_RIGHT)
          .build();
        SplitPairRule splitPairRule = new SplitPairRule.Builder(filterSet)
          .setDefaultSplitAttributes(splitAttributes)
          .setMinWidthDp(840)
          .setMinSmallestWidthDp(600)
          .setFinishPrimaryWithSecondary(SplitRule.FinishBehavior.NEVER)
          .setFinishSecondaryWithPrimary(SplitRule.FinishBehavior.ALWAYS)
          .setClearTop(false)
          .build();
        RuleController ruleController = RuleController.getInstance(context);
        ruleController.addRule(splitPairRule);
        ActivityFilter placeholderActivityFilter = new ActivityFilter(
            new ComponentName(context, ListActivity.class),
            null
        );
        Set<ActivityFilter> placeholderActivityFilterSet = new HashSet<>();
        placeholderActivityFilterSet.add(placeholderActivityFilter);
        SplitPlaceholderRule splitPlaceholderRule = new SplitPlaceholderRule.Builder(
          placeholderActivityFilterSet,
          new Intent(context, PlaceholderActivity.class)
        ).setDefaultSplitAttributes(splitAttributes)
         .setMinWidthDp(840)
         .setMinSmallestWidthDp(600)
         .setFinishPrimaryWithPlaceholder(SplitRule.FinishBehavior.ALWAYS)
         .build();
        ruleController.addRule(splitPlaceholderRule);
        ActivityFilter summaryActivityFilter = new ActivityFilter(
            new ComponentName(context, SummaryActivity.class),
            null
        );
        Set<ActivityFilter> summaryActivityFilterSet = new HashSet<>();
        summaryActivityFilterSet.add(summaryActivityFilter);
        ActivityRule activityRule = new ActivityRule.Builder(
            summaryActivityFilterSet
        ).setAlwaysExpand(true)
         .build();
        ruleController.addRule(activityRule);
    }

}
Run it!
Build and run the sample app.
The app should behave the same as it does when customized using an XML configuration file.
See "Run it!" in the "XML configuration" section of this codelab.
Extra credit
Try setting the aspect ratio in the sample app using the setMaxAspectRatioInPortrait and setMaxAspectRatioInLandscape methods of SplitPairRule.Builder and SplitPlaceholderRule.Builder. Specify values with the properties and methods of the EmbeddingAspectRatio class, for example:
SplitPairRule.Builder(filterSet)
  . . .
  .setMaxAspectRatioInPortrait(EmbeddingAspectRatio.ratio(1.5f))
  . . .
.build()
Test the settings with your large tablet or the Pixel C emulator.
Determine the portrait aspect ratio of your large tablet (the aspect ratio of the Pixel C is a little greater than 1.4). Set the maximum aspect ratio in portrait to values higher and lower than the aspect ratio of your tablet or the Pixel C. Try the ALWAYS_ALLOW and ALWAYS_DISALLOW properties.
Run the app, and see what results you get.
For more information see "Aspect ratio" in the "XML configuration" section of this codelab.
7. Material Design navigation
Material Design guidelines specify different navigation components for different screen sizes—a navigation rail for screens wider than or equal to 840dp, a bottom navigation bar for screens less than 840dp.
With activity embedding, you can't use the WindowManager methods getCurrentWindowMetrics() and getMaximumWindowMetrics() to determine screen width because the window metrics returned by the methods describe the display pane that contains the embedded activity that called the methods.
To get accurate dimensions of your activity embedding app, use a split attributes calculator and SplitAttributesCalculatorParams.
Delete the following lines if you added them in a previous section.
main_split_config.xml
<SplitPairRule
    . . .
    window:splitMaxAspectRatioInPortrait="alwaysAllow" // Delete this line.
    window:splitMaxAspectRatioInLandscape="alwaysDisallow" // Delete this line.
    . . .>
</SplitPairRule>

<SplitPlaceholderRule
    . . .

    window:splitMaxAspectRatioInPortrait="alwaysAllow" // Delete this line.
    window:splitMaxAspectRatioInLandscape="alwaysDisallow" // Delete this line.
    . . .>
<SplitPlaceholderRule/>
Flexible navigation
To dynamically switch navigation components based on screen size, use a SplitAttributes calculator. The calculator detects changes in device orientation and window size and recalculates the display dimensions accordingly. We'll integrate a calculator with a SplitController to trigger navigation component changes in response to screen size updates.
Create navigation layout
First, create a menu that we'll use to populate the navigation rail and navigation bar.
In Android Studio, do the following:
- Right-click (secondary button–click) the sample app resource folder,
res - Select New > Android Resource File
- Name the class nav_menu
- Set Resource type to Menu
- Make sure Directory name is menu
- Click OK — Android Studio creates the menu file in the menu folder
- Replace the contents of the menu file with the following:
nav_menu.xml
<?xml version="1.0" encoding="utf-8"?>
<menu xmlns:android="http://schemas.android.com/apk/res/android">
    <item
        android:id="@+id/navigation_home"
        android:title="Home" />
    <item
        android:id="@+id/navigation_dashboard"
        android:title="Dashboard" />
    <item
        android:id="@+id/navigation_settings"
        android:title="Settings" />
</menu>
Next, add a navigation bar and navigation rail to your layout. Set their visibility to gone so they are initially hidden. We'll make them visible based on layout dimensions later.
activity_list.xml
<com.google.android.material.navigationrail.NavigationRailView
     android:id="@+id/navigationRailView"
     android:layout_width="wrap_content"
     android:layout_height="match_parent"
     app:layout_constraintStart_toStartOf="parent"
     app:layout_constraintTop_toTopOf="parent"
     app:menu="@menu/nav_menu"
     android:visibility="gone" />

<com.google.android.material.bottomnavigation.BottomNavigationView
   android:id="@+id/bottomNavigationView"
   android:layout_width="0dp"
   android:layout_height="wrap_content"
   app:menu="@menu/nav_menu"
   app:layout_constraintBottom_toBottomOf="parent"
   app:layout_constraintStart_toStartOf="parent"
   app:layout_constraintEnd_toEndOf="parent"
   android:visibility="gone" />
Write a function to handle the switch between the navigation bar and navigation rail.
ListActivity.kt / setWiderScreenNavigation()
private fun setWiderScreenNavigation(useNavRail: Boolean) {
   val navRail: NavigationRailView  = findViewById(R.id.navigationRailView)
   val bottomNav: BottomNavigationView = findViewById(R.id.bottomNavigationView)

   if (useNavRail) {
       navRail.visibility = View.VISIBLE
       bottomNav.visibility = View.GONE
   } else {
       navRail.visibility = View.GONE
       bottomNav.visibility = View.VISIBLE
   }
}
ListActivity.java / setWiderScreenNavigation()
private void setWiderScreenNavigation(boolean useNavRail) {
   NavigationRailView navRail = findViewById(R.id.navigationRailView);
   BottomNavigationView bottomNav = findViewById(R.id.bottomNavigationView);
   if (useNavRail) {
       navRail.setVisibility(View.VISIBLE);
       bottomNav.setVisibility(View.GONE);
   } else {
       navRail.setVisibility(View.GONE);
       bottomNav.setVisibility(View.VISIBLE);
   }
}
Split attributes calculator
SplitController gets information about the currently active activity splits and provides interaction points to customize the splits and form new splits.
In previous sections, we set the default attributes for splits by specifying splitRatio and other attributes in the <SplitPairRule> and <SplitPlaceHolderRule> tags in XML files or by using the SplitPairRule.Builder#setDefaultSplitAttributes() and SplitPlaceholderRule.Builder#setDefaultSplitAttributes() APIs.
The default split attributes are applied if the parent container's WindowMetrics satisfy the SplitRule dimension requirements, which are minWidthDp, minHeightDp and minSmallestWidthDp.
We'll set a split attributes calculator to replace the default split attributes. The calculator updates existing split pairs after a change in the window or device state, such as orientation changes or folding state changes.
This allows developers to learn device or window states and set different split attributes in different scenarios, including portrait and landscape orientation and tabletop posture.
When creating a split attributes calculator, the platform passes a SplitAttributesCalculatorParams object to the setSplitAttributesCalculator() function. The parentWindowMetrics property provides application window metrics.
In the following code, the activity checks whether the default constraints are satisfied, that is, width > 840dp and smallest width > 600dp. When the conditions are satisfied, the activities are embedded in a dual-pane layout and the app uses a navigation rail instead of a bottom navigation bar. Otherwise, the activities are displayed full screen with a bottom navigation bar.
ListActivity.kt / onCreate()
if (WindowSdkExtensions.getInstance().extensionVersion >= 2) {
    SplitController.getInstance(this).setSplitAttributesCalculator {
        params ->
            if (params.areDefaultConstraintsSatisfied) {
                // When default constraints are satisfied, use the navigation rail.
                setWiderScreenNavigation(true)
                return@setSplitAttributesCalculator params.defaultSplitAttributes
            } else {
                // Use the bottom navigation bar in other cases.
                setWiderScreenNavigation(false)
                // Expand containers if the device is in portrait or the width is
                // less than 840 dp.
                SplitAttributes.Builder()
                    .setSplitType(SPLIT_TYPE_EXPAND)
                    .build()
            }
    }
}
ListActivity.java / onCreate()
if (WindowSdkExtensions.getInstance().getExtensionVersion() >= 2) {
    SplitController.getInstance(this).setSplitAttributesCalculator(params -> {
       if (params.areDefaultConstraintsSatisfied()) {
           // When default constraints are satisfied, use the navigation rail.
           setWiderScreenNavigation(true);
           return params.getDefaultSplitAttributes();
       } else {
           // Use the bottom navigation bar in other cases.
           setWiderScreenNavigation(false);
           // Expand containers if the device is in portrait or the width is less
           // than 840 dp.
           return new SplitAttributes.Builder()
                          .setSplitType(SplitType.SPLIT_TYPE_EXPAND)
                          .build();
       }
    });
}
Run it!
Good job, your activity embedding app now follows Material Design navigation guidelines!
8. Congratulations!
Well done! You optimized an activity-based app to a list-detail layout on large screens and added Material Design navigation.
You learned two ways of implementing activity embedding:
- Using an XML configuration file
- Making Jetpack API calls
- Implement flexible navigation with Activity Embedding
And you didn't rewrite any of the app's Kotlin or Java source code.
You're ready to optimize your production apps for large screens with activity embedding!
9. Learn more
- Developer guide — Activity embedding
- Reference documentation — androidx.window.embedding
- Codelab — Advanced activity embedding
- Sample code — Activity embedding