1. Introduction
This codelab teaches advanced WorkManager concepts. It builds on the basic material covered in the Background Work with WorkManager codelab.
Other resources available to get familiar with WorkManager are:
- WorkManager Guide
- Blog series: Introducing WorkManager
- ADS 2019 WorkManager talk: WorkManager: Beyond the Basics
- WorkManager - MAD Skills Series
What you'll build
In this codelab you'll be working on Blur-O-Matic, an app that blurs photos and images and saves the result to a file. If you have already completed the Background Work with WorkManager codelab, this is a similar sample app (the one difference is that this sample app allows you to select your own image from the photos gallery to blur). Here you will add some features to the code:
- Custom configuration
- Use the Progress API to update the UI while your work is executed
- Test your Workers
What you'll need
To do this codelab, you'll need the latest Android Studio stable version.
You should also be familiar with LiveData, ViewModel and View Binding. If you're new to these classes, check out the Android Lifecycle-aware components Codelab (specifically for ViewModel and LiveData) or Room with a View Codelab (an introduction to Architecture Components).
If you get stuck at any point
If you get stuck with this codelab at any point, or if you want to look at the final state of the code, you can
Or, if you prefer, you can clone the completed WorkManager codelab from GitHub:
$ git clone -b advanced https://github.com/googlecodelabs/android-workmanager
2. Getting set up
Step 1 - Download the Code
Click the following link to download the version of the code to follow along this codelab:
Or if you prefer, you can clone the codelab from GitHub:
$ git clone -b advanced_start https://github.com/googlecodelabs/android-workmanager
Step 2 - Run the app
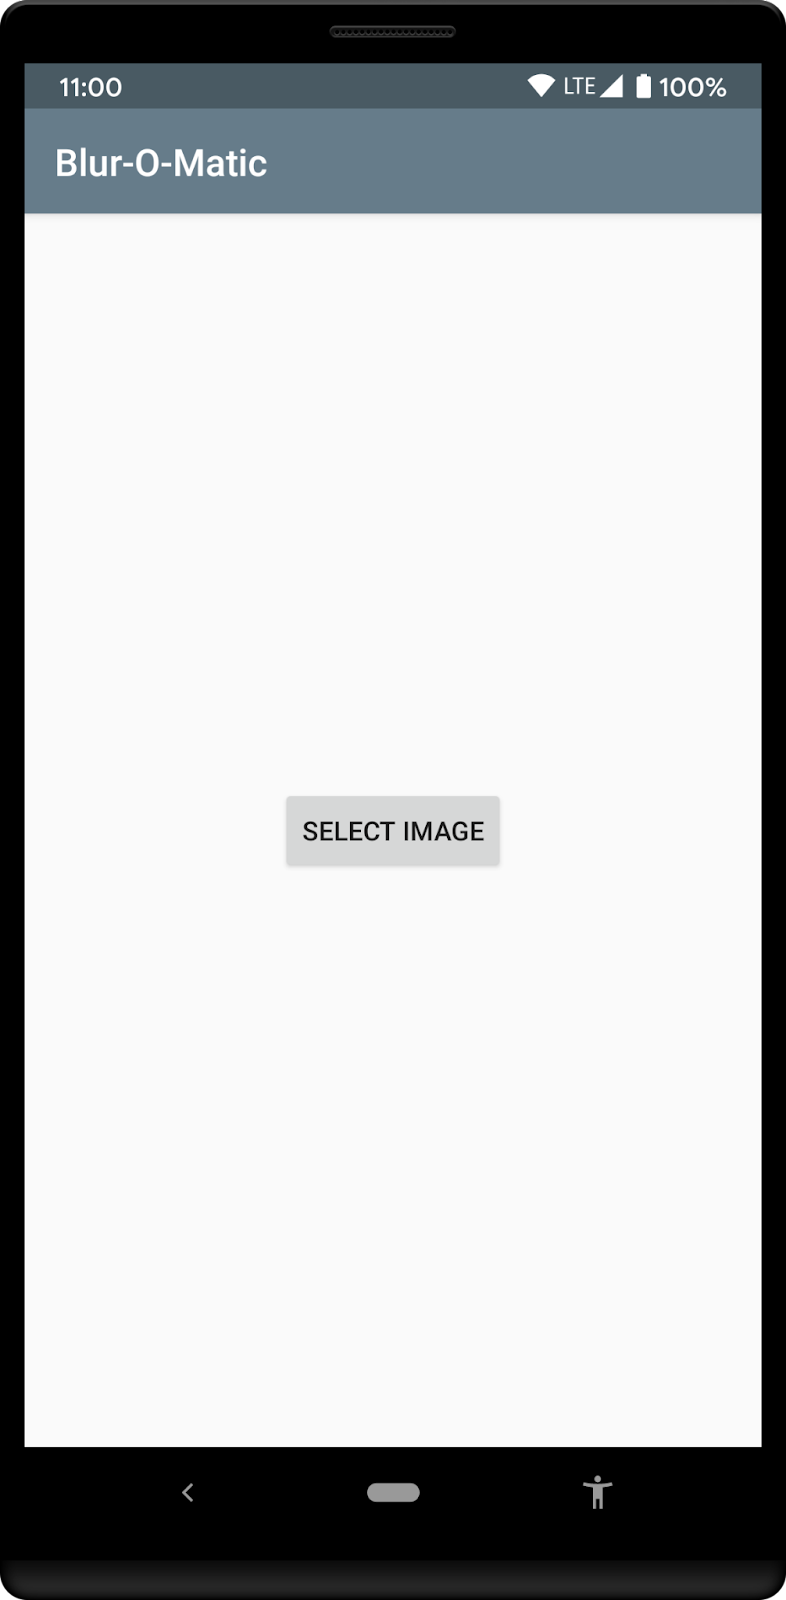
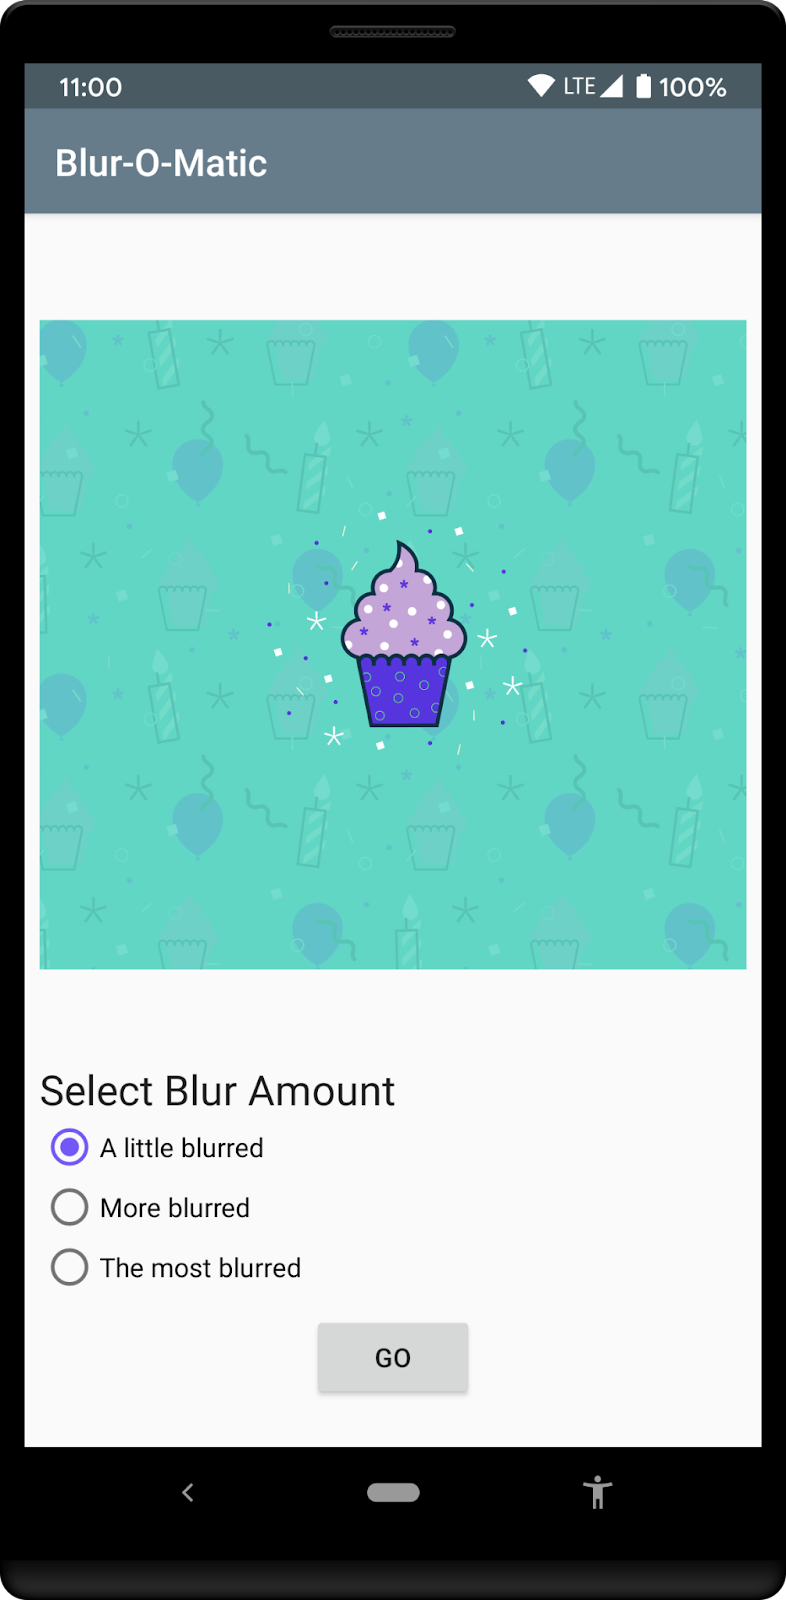
Run the app. You should see the following screens. Make sure to grant the app permission to access your photos when prompted.
|
|
You can select an image and get to the next screen, which has radio buttons where you can select how blurry you'd like your image to be. Pressing the Go button will blur and save the image. During the blurring the app shows a Cancel button to let you end the work.
The starting code contains:
WorkerUtils: This class contains the code for actually blurring, and a few convenience methods which you'll use later to displayNotificationsand slow down the app.BlurApplication: The application class with a simpleonCreate()method to initialize the Timber logging system for debug builds.BlurActivity: The activity which shows the image and includes radio buttons for selecting blur level.BlurViewModel: This view model stores all of the data needed to display theBlurActivity. It will also be the class where you start the background work using WorkManager.Workers/CleanupWorker: This Worker always deletes the temporary files if they exist.Workers/BlurWorker: This Worker blurs the image passed as input data with a URI and returns the URI of the temporary file.Workers/SaveImageToFileWorker: This Worker takes as input the URI of the temporary image and returns the URI of the final file.Constants: A static class with some constants you'll use during the codelab.SelectImageActivity: The first activity which allows you to select an image.res/activity_blur.xmlandres/activity_select.xml: The layout files for each activity.
You'll be making code changes in the following classes: BlurApplication, BlurActivity, BlurViewModel, and BlurWorker.
3. Add WorkManager to your app
WorkManager requires the gradle dependency below. These have been already included in the files:
app/build.gradle
dependencies {
    implementation "androidx.work:work-runtime-ktx:$versions.work"
}
You should get the most current version of work-runtime from the WorkManager release page and put a version for the latest stable release in, or use the one below:
build.gradle
versions.work = "2.7.1"
Make sure to click on Sync Now to sync your project with the changed Gradle files.
4. Add a WorkManager's custom configuration
In this step you will add a custom configuration to the app to modify WorkManager's logging level for debug builds.
Step 1 - Disable the default initialization
As described in the Custom WorkManager configuration and initialization documentation, you have to disable the default initialization in your AndroidManifest.xml file, by removing the node that is merged automatically from the WorkManager library by default.
To remove this node, you can add a new provider node to your AndroidManifest.xml, as shown below:
AndroidManifest.xml
<application

...

    <provider
        android:name="androidx.work.impl.WorkManagerInitializer"
        android:authorities="${applicationId}.workmanager-init"
        tools:node="remove" />
</application>
You'll also need to add the tools namespace to the manifest. The complete file with these changes will be:
AndroidManifest.xml
<?xml version="1.0" encoding="utf-8"?>
<!-- Copyright 2020 Google LLC.
   SPDX-License-Identifier: Apache-2.0 -->

<manifest package="com.example.background"
    xmlns:android="http://schemas.android.com/apk/res/android"
    xmlns:tools="http://schemas.android.com/tools">

    <uses-permission android:name="android.permission.INTERNET" />
    <uses-permission android:name="android.permission.READ_EXTERNAL_STORAGE" />
    <uses-permission android:name="android.permission.WRITE_EXTERNAL_STORAGE" />

    <application
        android:name=".BlurApplication"
        android:allowBackup="true"
        android:icon="@mipmap/ic_launcher"
        android:label="@string/app_name"
        android:roundIcon="@mipmap/ic_launcher_round"
        android:supportsRtl="true"
        android:theme="@style/AppTheme">

        <activity android:name=".SelectImageActivity">
            <intent-filter>
                <action android:name="android.intent.action.MAIN" />
                <category android:name="android.intent.category.LAUNCHER" />
            </intent-filter>
        </activity>

        <activity android:name=".BlurActivity" />

        <!-- ADD THE FOLLOWING NODE -->
        <provider
            android:name="androidx.work.impl.WorkManagerInitializer"
            android:authorities="${applicationId}.workmanager-init"
            tools:node="remove" />
    </application>
</manifest>
Step 2 - Add a Configuration.Provider to the Application class
You can use an on-demand initialization by implementing WorkManager's Configuration.Provider interface in your Application class. The first time your application gets the WorkManager's instance using getInstance(context), WorkManager initializes itself using the configuration returned by getWorkManagerConfiguration().
BlurApplication.kt
class BlurApplication : Application(), Configuration.Provider {

    override fun getWorkManagerConfiguration(): Configuration =

        Configuration.Builder()
                     .setMinimumLoggingLevel(android.util.Log.DEBUG)
                     .build()
...
}
With this change, WorkManager runs with logging set to DEBUG.
A better option is probably to set up WorkManager in this way only for debug builds of your app, using something like:
BlurApplication.kt
class BlurApplication() : Application(), Configuration.Provider {

    override fun getWorkManagerConfiguration(): Configuration {
        return if (BuildConfig.DEBUG) {
            Configuration.Builder()
                    .setMinimumLoggingLevel(android.util.Log.DEBUG)
                    .build()
        } else {
            Configuration.Builder()
                    .setMinimumLoggingLevel(android.util.Log.ERROR)
                    .build()
        }
    }

...
}
The complete BlurApplication.kt then becomes:
BlurApplication.kt
/* Copyright 2020 Google LLC.
   SPDX-License-Identifier: Apache-2.0 */

package com.example.background

import android.app.Application
import androidx.work.Configuration
import timber.log.Timber
import timber.log.Timber.DebugTree

class BlurApplication() : Application(), Configuration.Provider {

    override fun getWorkManagerConfiguration(): Configuration {
        return if (BuildConfig.DEBUG) {
            Configuration.Builder()
                    .setMinimumLoggingLevel(android.util.Log.DEBUG)
                    .build()
        } else {
            Configuration.Builder()
                    .setMinimumLoggingLevel(android.util.Log.ERROR)
                    .build()
        }
    }

    override fun onCreate() {
        super.onCreate()
        if (BuildConfig.DEBUG) {
            Timber.plant(DebugTree())
        }
    }
}
Step 3 - Run the app in debug mode
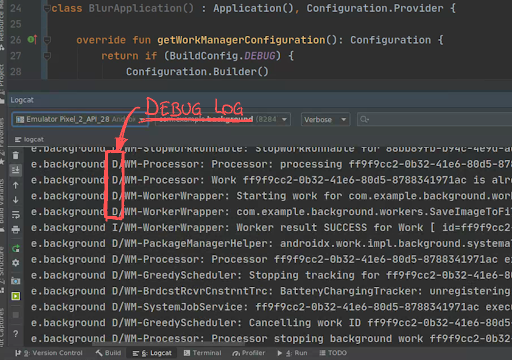
WorkManager is now configured in such a way that your debug builds log all the messages coming from the library.
Running the app, you can see the logs in Android Studio's logcat tab:
Step 4 - What can you configure?
The full list of parameters is in WorkManager's reference guide for the Configuration.Builder. Pay attention to two additional parameters:
WorkerFactoryJobIdrange
Modifying the WorkerFactory allows adding other parameters to your Worker's constructor. You can find more information about how to implement a custom WorkerFactory in this Customizing WorkManager article. If you are using WorkManager as well as the JobScheduler API in your app, it's a good idea to customize the JobId range to avoid that same JobId range being used by the two APIs.
Sharing WorkManager's Progress
WorkManager v2.3 added the functionality to share progress information from your Worker to your app using the setProgressAsync() (or setProgress() when used from a CoroutineWorker). This information can be observed through a WorkInfo, and is intended to be used to provide feedback in the UI to the user. The progress data is then cancelled when the worker reaches a final state (SUCCEEDED, FAILED, or CANCELLED). To know more about how to publish and listen for progress, read Observing intermediate Worker progress.
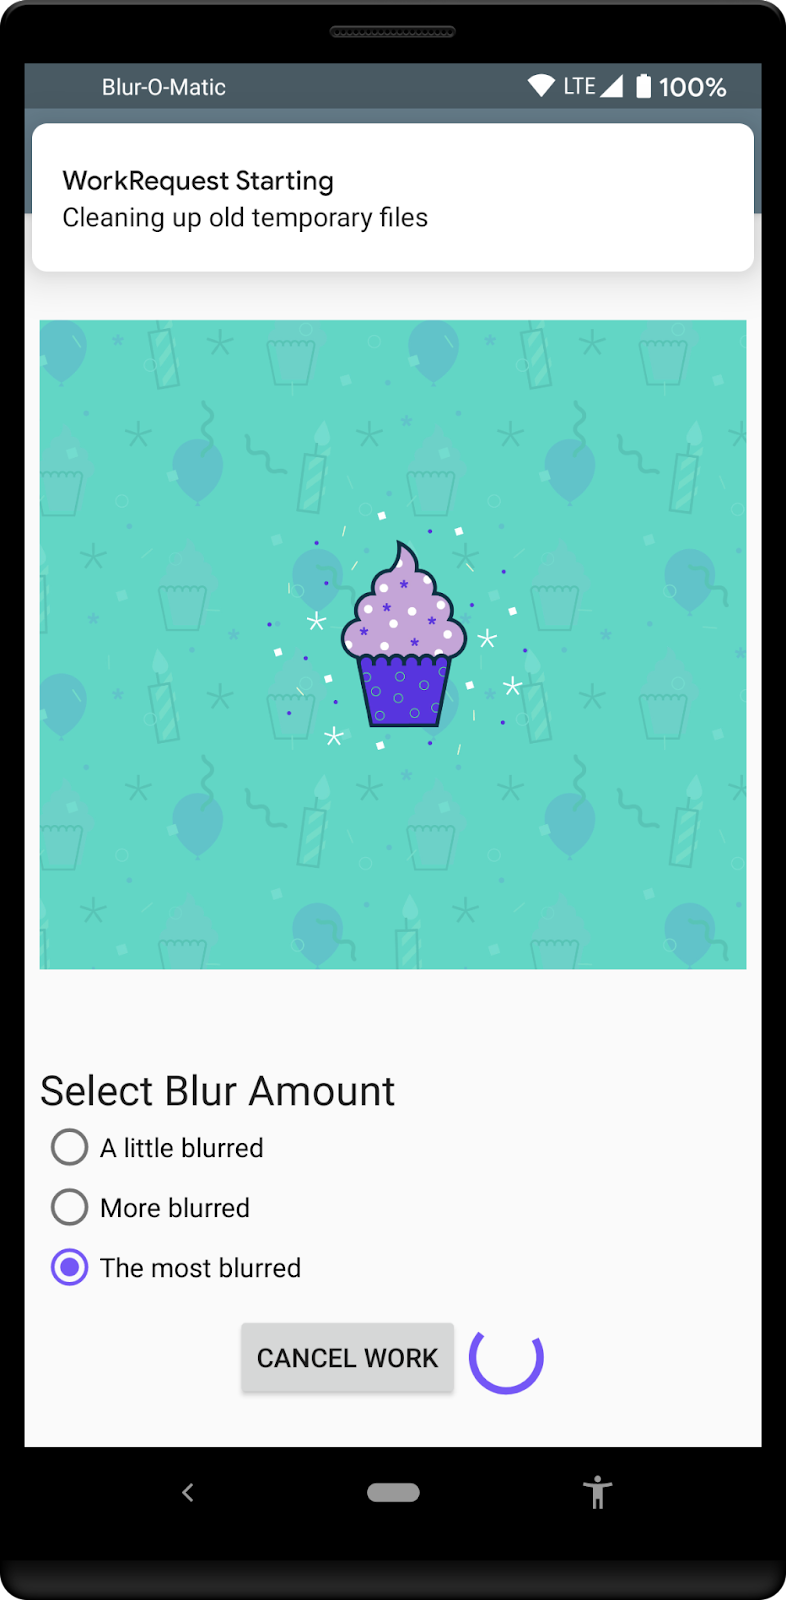
What you are going to do now is to add a progress bar in the UI so that, if the app is in foreground, the user can see how the blurring is proceeding. The end result will be like:
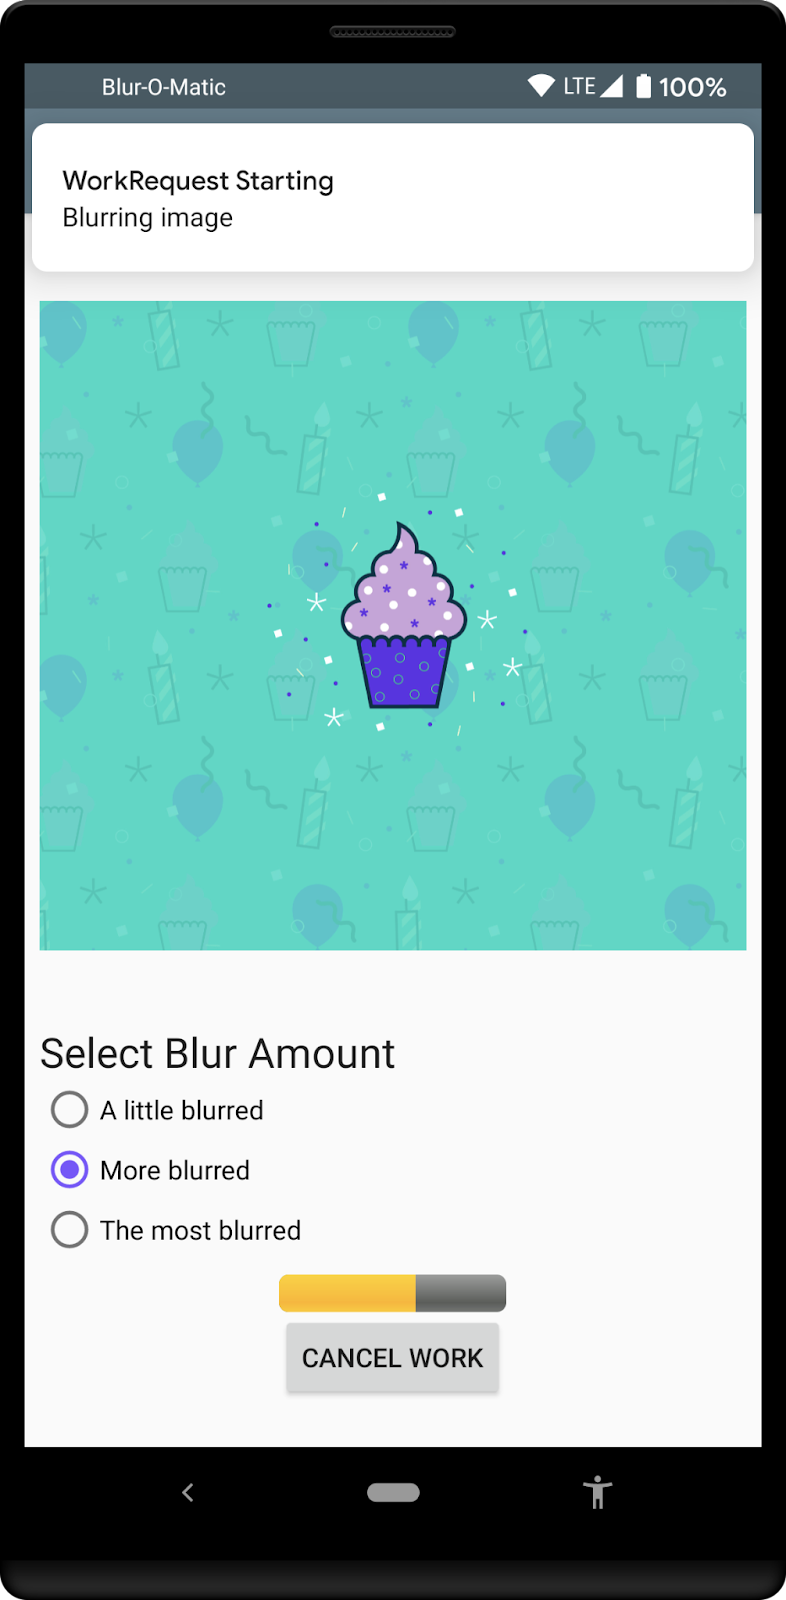
Step 1 - Modify the ProgressBar
To modify the ProgressBar in the layout you need to delete the android:indeterminate="true" parameter, add the style style="@android:style/Widget.ProgressBar.Horizontal", and set an initial value with android:progress="0". You also need to set the LinearLayout orientation to "vertical":
app/src/main/res/layout/activity_blur.xml
<LinearLayout
    android:layout_width="wrap_content"
    android:layout_height="wrap_content"
    android:orientation="vertical">
    <ProgressBar
        android:id="@+id/progress_bar"
        style="@android:style/Widget.ProgressBar.Horizontal"
        android:layout_width="match_parent"
        android:layout_height="wrap_content"
        android:progress="0"
        android:visibility="gone"
        android:layout_gravity="center_horizontal"
        />

    <Button
        android:id="@+id/cancel_button"
        android:layout_width="wrap_content"
        android:layout_height="wrap_content"
        android:text="@string/cancel_work"
        android:visibility="gone"
        />
</LinearLayout>
The other needed change is to be sure that the ProgressBar does restart at the initial position. You can do this by updating the showWorkFinished() function in the BlurActivity.kt file:
app/src/main/java/com/example/background/BlurActivity.kt
/**
 * Shows and hides views for when the Activity is done processing an image
 */
private fun showWorkFinished() {
    with(binding) {
        progressBar.visibility = View.GONE
        cancelButton.visibility = View.GONE
        goButton.visibility = View.VISIBLE
        progressBar.progress = 0 // <-- ADD THIS LINE
    }
}
Step 2 - Observe the progress information in the ViewModel
There is already an observer in the BlurViewModel file that checks when your chain is completed. Add a new one that observes the progress posted by BlurWorker.
First, add a couple of constants to track this at the end of the Constants.kt file:
app/src/main/java/com/example/background/Constants.kt
// Progress Data Key
const val PROGRESS = "PROGRESS"
const val TAG_PROGRESS = "TAG_PROGRESS"
The next step is to add this tag to the BlurWorker's WorkRequest in the BlurViewModel.kt file so that you can retrieve its WorkInfo. From that WorkInfo, you can retrieve the worker's progress information:
app/src/main/java/com/example/background/BlurViewModel.kt
// Add WorkRequests to blur the image the number of times requested
for (i in 0 until blurLevel) {
    val blurBuilder = OneTimeWorkRequestBuilder<BlurWorker>()

    // Input the Uri if this is the first blur operation
    // After the first blur operation the input will be the output of previous
    // blur operations.
    if (i == 0) {
        blurBuilder.setInputData(createInputDataForUri())
    }

    blurBuilder.addTag(TAG_PROGRESS) // <-- ADD THIS
    continuation = continuation.then(blurBuilder.build())
}
Add a new LiveData to the BlurViewModel.kt file that tracks this WorkRequest, and initialize the LiveData in the init block:
app/src/main/java/com/example/background/BlurViewModel.kt
class BlurViewModel(application: Application) : AndroidViewModel(application) {

    internal var imageUri: Uri? = null
    internal var outputUri: Uri? = null
    internal val outputWorkInfoItems: LiveData<List<WorkInfo>>
    internal val progressWorkInfoItems: LiveData<List<WorkInfo>> // <-- ADD THIS
    private val workManager: WorkManager = WorkManager.getInstance(application)

    init {
        // This transformation makes sure that whenever the current work Id changes the WorkStatus
        // the UI is listening to changes
        outputWorkInfoItems = workManager.getWorkInfosByTagLiveData(TAG_OUTPUT)
        progressWorkInfoItems = workManager.getWorkInfosByTagLiveData(TAG_PROGRESS) // <-- ADD THIS
    }

...
}
Step 3 - Observe the LiveData in the Activity
You can now use this LiveData in BlurActivity to observe all the published progress. First register a new LiveData observer at the end of the onCreate() method:
app/src/main/java/com/example/background/BlurActivity.kt
// Show work status
viewModel.outputWorkInfoItems.observe(this, outputObserver())

// ADD THE FOLLOWING LINES
// Show work progress
viewModel.progressWorkInfoItems.observe(this, progressObserver())
Now you can check the WorkInfo received in the observer to see if there is any progress information, and update the ProgressBar accordingly:
app/src/main/java/com/example/background/BlurActivity.kt
private fun progressObserver(): Observer<List<WorkInfo>> {
    return Observer { listOfWorkInfo ->
        if (listOfWorkInfo.isNullOrEmpty()) {
            return@Observer
        }

        listOfWorkInfo.forEach { workInfo ->
            if (WorkInfo.State.RUNNING == workInfo.state) {
                val progress = workInfo.progress.getInt(PROGRESS, 0)
                binding.progressBar.progress = progress
            }
        }

    }
}
Step 4 - Publish Progress from BlurWorker
All the pieces needed to display the progress information are now in place. It's time to add the actual publishing of the progress information to BlurWorker.
This example simply simulates some lengthy process in our doWork() function so that it can publish progress information over a defined amount of time.
The change here is to swap a single delay with 10 smaller ones, setting a new progress at each iteration:
app/src/main/java/com/example/background/workers/BlurWorker.kt
override fun doWork(): Result {
    val appContext = applicationContext

    val resourceUri = inputData.getString(KEY_IMAGE_URI)

    makeStatusNotification("Blurring image", appContext)
    // sleep()
    (0..100 step 10).forEach {
        setProgressAsync(workDataOf(PROGRESS to it))
        sleep()
    }

...
}
As the original delay was 3 seconds, it is probably a good idea to also reduce it by a factor of ten to 0.3 seconds:
app/src/main/java/com/example/background/Constants.kt
// const val DELAY_TIME_MILLIS: Long = 3000
const val DELAY_TIME_MILLIS: Long = 300
Step 5 - Run
Running the application at this point it should show the ProgressBar populated with the messages coming from BlurWorker.
5. Testing WorkManager
Testing is an important component of every application and, when introducing a library like WorkManager, it's important to provide the tools to easily test your code.
With WorkManager, we also made some helpers available to easily test your Workers. To know more about how to create tests for your workers you can refer to WorkManager documentation on testing.
In this section of the codelab we're going to introduce some tests for our Worker classes showing some of the common use cases.
First, we want to provide an easy way to setup our tests, to do this we can create a TestRule that setup WorkManager:
- Add Dependencies
- Create
WorkManagerTestRuleandTestUtils - Create Test for
CleanupWorker - Create Test for
BlurWorker
Assuming that you already created the AndroidTest folder in your project, we need to add some dependencies to use in our tests:
app/build.gradle
androidTestImplementation "androidx.arch.core:core-testing:2.1.0"
androidTestImplementation "androidx.test.ext:junit:1.1.3"
androidTestImplementation "androidx.test:rules:1.4.0"
androidTestImplementation "androidx.test:runner:1.4.0"
androidTestImplementation "androidx.work:work-testing:$versions.work"
We can now start putting together the pieces with a TestRule that we can use in our tests:
app/src/androidTest/java/com/example/background/workers/WorkManagerTestRule.kt
/* Copyright 2020 Google LLC.
   SPDX-License-Identifier: Apache-2.0 */

package com.example.background.workers

import android.content.Context
import android.util.Log
import androidx.test.platform.app.InstrumentationRegistry
import androidx.work.Configuration
import androidx.work.WorkManager
import androidx.work.testing.SynchronousExecutor
import androidx.work.testing.WorkManagerTestInitHelper
import org.junit.rules.TestWatcher
import org.junit.runner.Description

class WorkManagerTestRule : TestWatcher() {
    lateinit var targetContext: Context
    lateinit var testContext: Context
    lateinit var configuration: Configuration
    lateinit var workManager: WorkManager

    override fun starting(description: Description?) {
        targetContext = InstrumentationRegistry.getInstrumentation().targetContext
        testContext = InstrumentationRegistry.getInstrumentation().context
        configuration = Configuration.Builder()
                // Set log level to Log.DEBUG to make it easier to debug
                .setMinimumLoggingLevel(Log.DEBUG)
                // Use a SynchronousExecutor here to make it easier to write tests
                .setExecutor(SynchronousExecutor())
                .build()

        // Initialize WorkManager for instrumentation tests.
        WorkManagerTestInitHelper.initializeTestWorkManager(targetContext, configuration)
        workManager = WorkManager.getInstance(targetContext)
    }
}
As we will need this test image on the device (where the tests are going to be run) we can create a couple of helper functions to use in our tests:
app/src/androidTest/java/com/example/background/workers/TestUtils.kt
/* Copyright 2020 Google LLC.
   SPDX-License-Identifier: Apache-2.0 */

package com.example.background.workers

import android.content.Context
import android.graphics.BitmapFactory
import android.net.Uri
import com.example.background.OUTPUT_PATH
import java.io.BufferedInputStream
import java.io.BufferedOutputStream
import java.io.File
import java.io.FileNotFoundException
import java.io.FileOutputStream
import java.util.UUID

/**
 * Copy a file from the asset folder in the testContext to the OUTPUT_PATH in the target context.
 * @param testCtx android test context
 * @param targetCtx target context
 * @param filename source asset file
 * @return Uri for temp file
 */
@Throws(Exception::class)
fun copyFileFromTestToTargetCtx(testCtx: Context, targetCtx: Context, filename: String): Uri {
    // Create test image
    val destinationFilename = String.format("blur-test-%s.png", UUID.randomUUID().toString())
    val outputDir = File(targetCtx.filesDir, OUTPUT_PATH)
    if (!outputDir.exists()) {
        outputDir.mkdirs()
    }
    val outputFile = File(outputDir, destinationFilename)

    val bis = BufferedInputStream(testCtx.assets.open(filename))
    val bos = BufferedOutputStream(FileOutputStream(outputFile))
    val buf = ByteArray(1024)
    bis.read(buf)
    do {
        bos.write(buf)
    } while (bis.read(buf) != -1)
    bis.close()
    bos.close()

    return Uri.fromFile(outputFile)
}

/**
 * Check if a file exists in the given context.
 * @param testCtx android test context
 * @param uri for the file
 * @return true if file exist, false if the file does not exist of the Uri is not valid
 */
fun uriFileExists(targetCtx: Context, uri: String?): Boolean {
    if (uri.isNullOrEmpty()) {
        return false
    }

    val resolver = targetCtx.contentResolver

    // Create a bitmap
    try {
        BitmapFactory.decodeStream(
                resolver.openInputStream(Uri.parse(uri)))
    } catch (e: FileNotFoundException) {
        return false
    }
    return true
}
Once we have down this work, we can start writing our tests.
First we test our CleanupWorker, to check that it actually deletes our files. To do this,copy the test image on the device in the test, and then check if it's there after the CleanupWorker has been executed:
app/src/androidTest/java/com/example/background/workers/CleanupWorkerTest.kt
/* Copyright 2020 Google LLC.
   SPDX-License-Identifier: Apache-2.0 */

package com.example.background.workers

import androidx.arch.core.executor.testing.InstantTaskExecutorRule
import androidx.work.OneTimeWorkRequestBuilder
import androidx.work.WorkInfo
import org.hamcrest.CoreMatchers.`is`
import org.junit.Assert.assertThat
import org.junit.Rule
import org.junit.Test

class CleanupWorkerTest {

    @get:Rule
    var instantTaskExecutorRule = InstantTaskExecutorRule()
    @get:Rule
    var wmRule = WorkManagerTestRule()

    @Test
    fun testCleanupWork() {
        val testUri = copyFileFromTestToTargetCtx(
                wmRule.testContext, wmRule.targetContext, "test_image.png")
        assertThat(uriFileExists(wmRule.targetContext, testUri.toString()), `is`(true))

        // Create request
        val request = OneTimeWorkRequestBuilder<CleanupWorker>().build()

        // Enqueue and wait for result. This also runs the Worker synchronously
        // because we are using a SynchronousExecutor.
        wmRule.workManager.enqueue(request).result.get()
        // Get WorkInfo
        val workInfo = wmRule.workManager.getWorkInfoById(request.id).get()

        // Assert
        assertThat(uriFileExists(wmRule.targetContext, testUri.toString()), `is`(false))
        assertThat(workInfo.state, `is`(WorkInfo.State.SUCCEEDED))
    }
}
You can now run this test from Android Studio from the Run menu, or using the green rectangle on the left side of your test class:
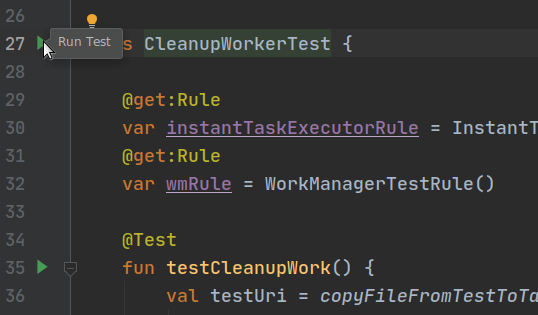
You can also run your tests from the command line using the command ./gradlew cAT from the root folder of your project.
You should see that your tests executes correctly.
Next we can test our BlurWorker. This worker expects an input data with the URI of the image to process, so we can build a couple of tests:one that checks that the worker fails if there's no input URI, and one that actually processes the input image.
app/src/androidTest/java/com/example/background/workers/BlurWorkerTest.kt
/* Copyright 2020 Google LLC.
   SPDX-License-Identifier: Apache-2.0 */

package com.example.background.workers

import androidx.arch.core.executor.testing.InstantTaskExecutorRule
import androidx.work.OneTimeWorkRequestBuilder
import androidx.work.WorkInfo
import androidx.work.workDataOf
import org.hamcrest.CoreMatchers.`is`
import org.junit.Assert.assertThat
import org.junit.Rule
import com.example.background.KEY_IMAGE_URI
import org.junit.Test

class BlurWorkerTest {

    @get:Rule
    var instantTaskExecutorRule = InstantTaskExecutorRule()
    @get:Rule
    var wmRule = WorkManagerTestRule()

    @Test
    fun testFailsIfNoInput() {
        // Define input data

        // Create request
        val request = OneTimeWorkRequestBuilder<BlurWorker>().build()

        // Enqueue and wait for result. This also runs the Worker synchronously
        // because we are using a SynchronousExecutor.
        wmRule.workManager.enqueue(request).result.get()
        // Get WorkInfo
        val workInfo = wmRule.workManager.getWorkInfoById(request.id).get()

        // Assert
        assertThat(workInfo.state, `is`(WorkInfo.State.FAILED))
    }

    @Test
    @Throws(Exception::class)
    fun testAppliesBlur() {
        // Define input data
        val inputDataUri = copyFileFromTestToTargetCtx(
                wmRule.testContext,
                wmRule.targetContext,
                "test_image.png")
        val inputData = workDataOf(KEY_IMAGE_URI to inputDataUri.toString())

        // Create request
        val request = OneTimeWorkRequestBuilder<BlurWorker>()
                .setInputData(inputData)
                .build()

        // Enqueue and wait for result. This also runs the Worker synchronously
        // because we are using a SynchronousExecutor.
        wmRule.workManager.enqueue(request).result.get()
        // Get WorkInfo
        val workInfo = wmRule.workManager.getWorkInfoById(request.id).get()
        val outputUri = workInfo.outputData.getString(KEY_IMAGE_URI)

        // Assert
        assertThat(uriFileExists(wmRule.targetContext, outputUri), `is`(true))
        assertThat(workInfo.state, `is`(WorkInfo.State.SUCCEEDED))
    }
}
If you run these tests, they should both succeed.
6. Congratulations
Congratulations! You've finished the Blur-O-Matic app, and in the process you learned how to:
- Create a custom configuration
- Publish progress from your Worker
- Display work progress in the UI
- Write tests for your Workers
Excellent "work"! To see the end state of the code and all the changes, check out:
Or if you prefer, you can clone the WorkManager's codelab from GitHub:
$ git clone -b advanced https://github.com/googlecodelabs/android-workmanager
WorkManager supports a lot more than we could cover in this codelab. To learn more, head over to the WorkManager documentation.

