
1. Introduction
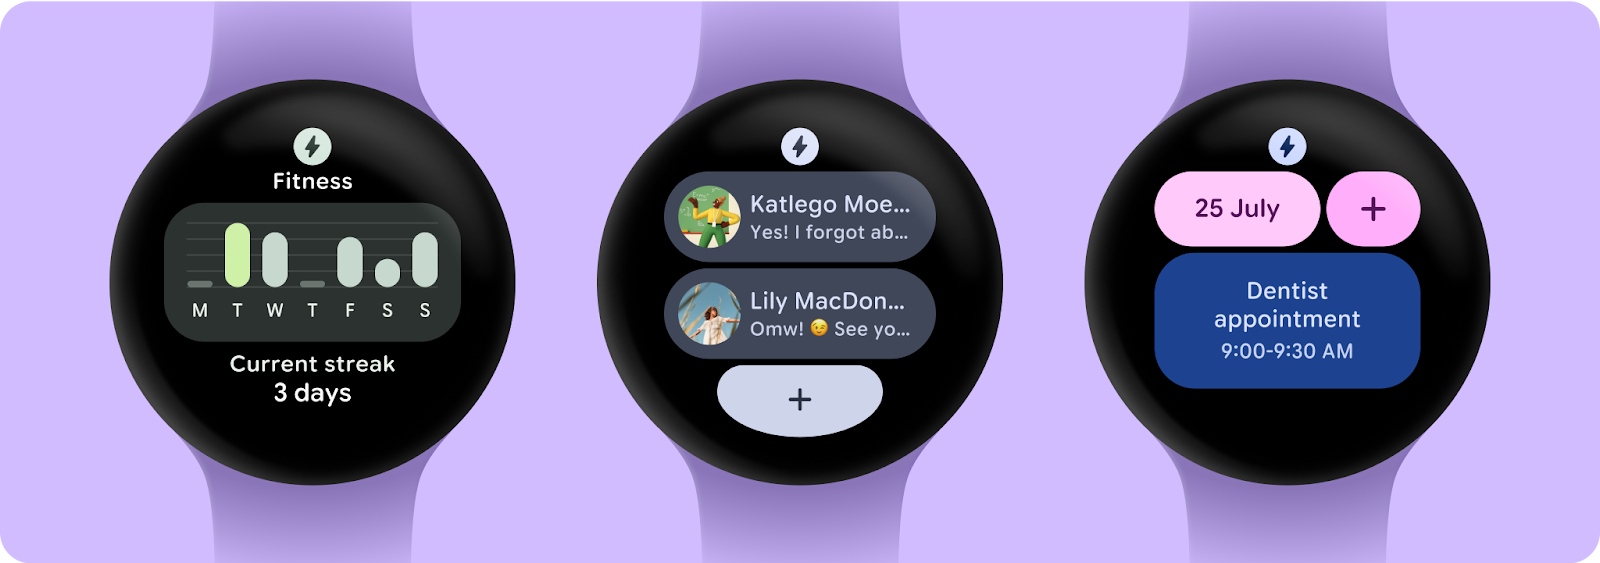
Wear OS Tiles provide easy access to the information and actions users need in order to get things done. With a simple swipe from the watch face, a user can find out the latest forecast or start a timer.
A tile runs as a part of the system UI instead of running in its own application container. We use a Service to describe the layout and content of the tile. The system UI will then render the tile when needed.
What you'll do
You'll build a tile for a messaging app, which shows recent conversations. From this surface, the user can jump into three common tasks:
- Open a conversation
- Compose a new message
What you'll learn
In this codelab, you will learn how to write your own Wear OS Tile, including how to:
- Create a
TileService - Test a tile on a device
- Preview UI for a tile in Android Studio
- Develop UI for a tile
- Add images
- Handle interactions
Prerequisites
- Basic understanding of Kotlin
2. Getting set up
In this step, you will set up your environment and download a starter project.
What you will need
- Android Studio Koala Feature Drop | 2024.1.2 Canary 1 or later
- Wear OS device or emulator
If you're unfamiliar with using Wear OS, reading this quick guide before starting will be helpful. It includes instructions for setting up a Wear OS emulator, and describes how to navigate around the system.
Download code
If you have git installed, you can simply run the command below to clone the code from this repo.
git clone https://github.com/android/codelab-wear-tiles.git
cd codelab-wear-tiles
If you do not have git, you can click the following button to download all the code for this codelab:
Open project in Android Studio
On the "Welcome to Android Studio" window, select  Open an Existing Project or File > Open and select the folder [Download Location].
3. Create a basic tile
The entry point for a tile is the tile service. In this step, you'll register a tile service and define a layout for the tile.
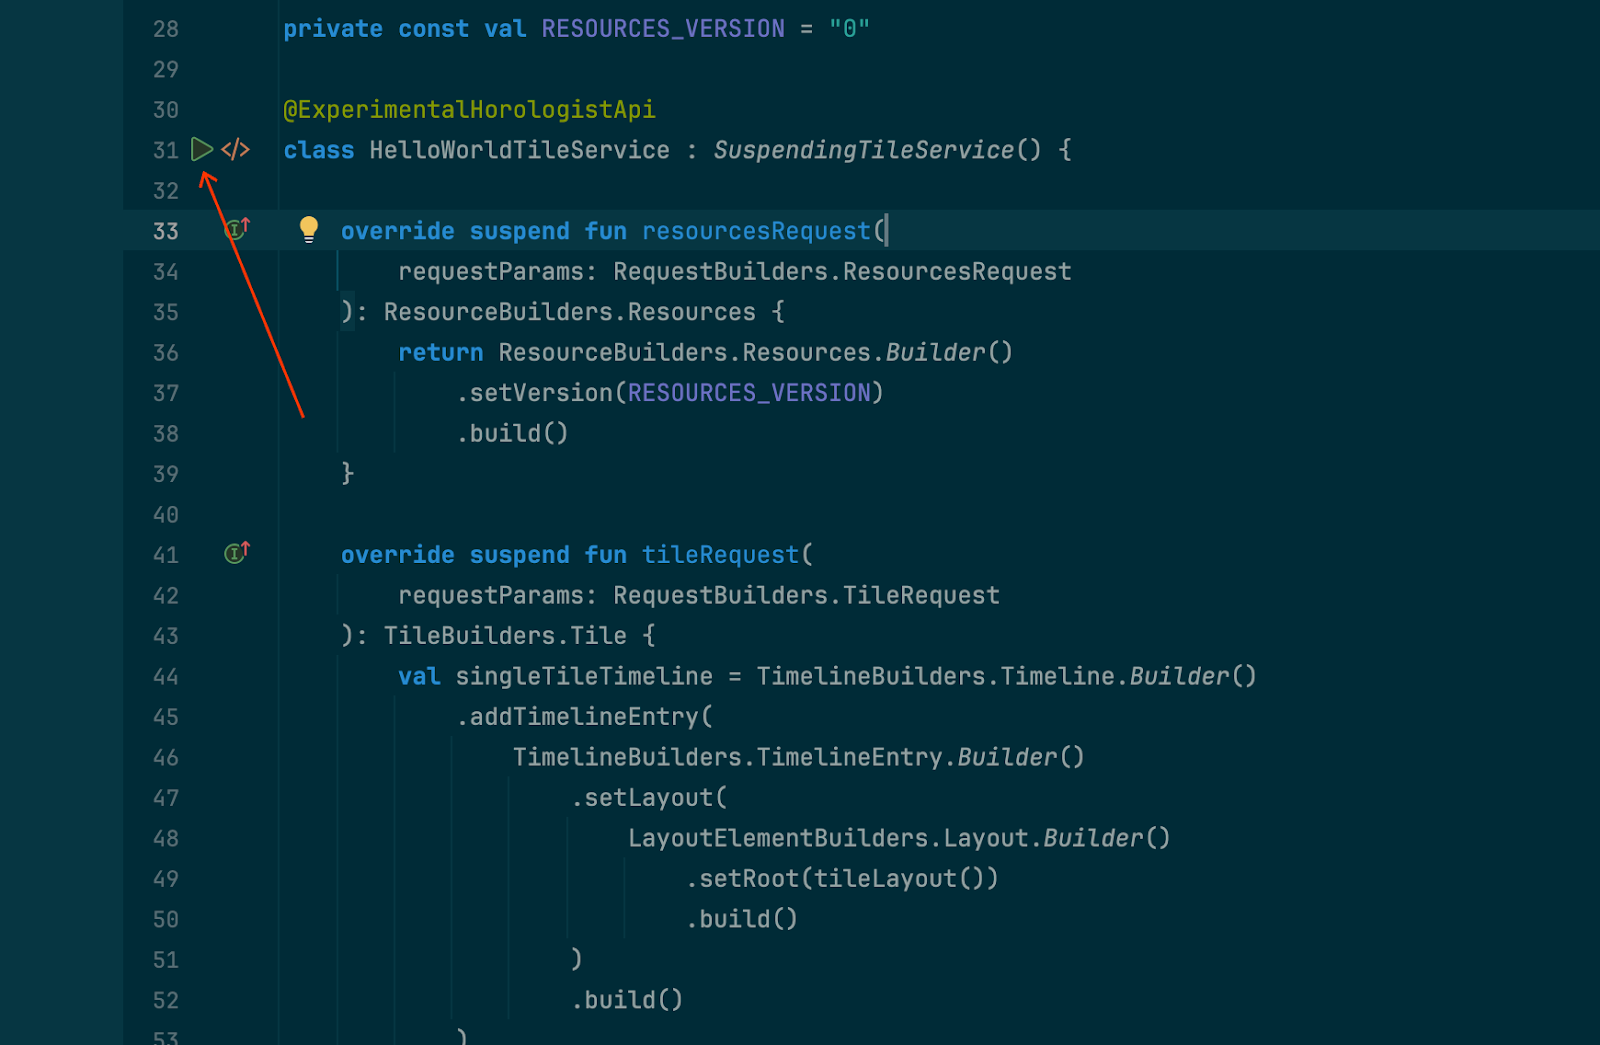
HelloWorldTileService
A class implementing TileService needs to specify two methods:
onTileResourcesRequest(requestParams: ResourcesRequest): ListenableFuture<Resources>onTileRequest(requestParams: TileRequest): ListenableFuture<Tile>
The first method returns a Resources object that maps string IDs to the image resources we'll use in our tile.
The second returns a description of a tile, including its layout. This is where we define the layout of a tile, and how data is bound to it.
Open HelloWorldTileService.kt from the start module. All of the changes you'll make will be in this module. There is also a finished module if you want to have a look at the result of this codelab.
HelloWorldTileService extends SuspendingTileService, a Kotlin coroutine-friendly wrapper from the Horologist Tiles library. Horologist is a group of libraries from Google, that aim to supplement Wear OS developers with features that are commonly required by developers but not yet available in Jetpack.
SuspendingTileService provides two suspending functions, which are coroutine equivalents of the functions from TileService:
suspend resourcesRequest(requestParams: ResourcesRequest): Resourcessuspend tileRequest(requestParams: TileRequest): Tile
To learn more about coroutines, check out the documentation for Kotlin coroutines on Android.
HelloWorldTileService isn't complete yet. We need to register the service in our manifest and we also need to provide an implementation for tileLayout.
Register the tile service
Once the tile service is registered in the manifest, it'll show up in the list of available tiles for the user to add.
Add the <service> inside the <application> element:
start/src/main/AndroidManifest.xml
<service
    android:name="com.example.wear.tiles.hello.HelloWorldTileService"
    android:icon="@drawable/ic_waving_hand_24"
    android:label="@string/hello_tile_label"
    android:description="@string/hello_tile_description"
    android:exported="true"
    android:permission="com.google.android.wearable.permission.BIND_TILE_PROVIDER">

    <intent-filter>
        <action android:name="androidx.wear.tiles.action.BIND_TILE_PROVIDER" />
    </intent-filter>

    <!-- The tile preview shown when configuring tiles on your phone -->
    <meta-data
        android:name="androidx.wear.tiles.PREVIEW"
        android:resource="@drawable/tile_hello" />
</service>
The icon and label are used (as a placeholder) when the tile loads for the first time, or if there's an error loading the tile. The meta-data at the end defines a preview image that's shown in the carousel when the user is adding a tile.
Define a layout for the tile
HelloWorldTileService has a function called tileLayout with a TODO() as the body. Let's now replace that with an implementation where we define the layout for our tile:
start/src/main/java/com/example/wear/tiles/hello/HelloWorldTileService.kt
fun tileLayout(
    context: Context,
    deviceConfiguration: DeviceParametersBuilders.DeviceParameters,
    message: String,
) =
    materialScope(
        context = context,
        deviceConfiguration = deviceConfiguration,
        allowDynamicTheme = false,
    ) {
        primaryLayout(mainSlot = { text(message.layoutString) })
    }
And that's your first Wear OS Tile created! Let's install this tile and see what it looks like.
4. Test your tile on a device
With the start module selected in the run configuration dropdown, you could install the app (the start module) on your device or emulator and manually install the tile, just as a user would.
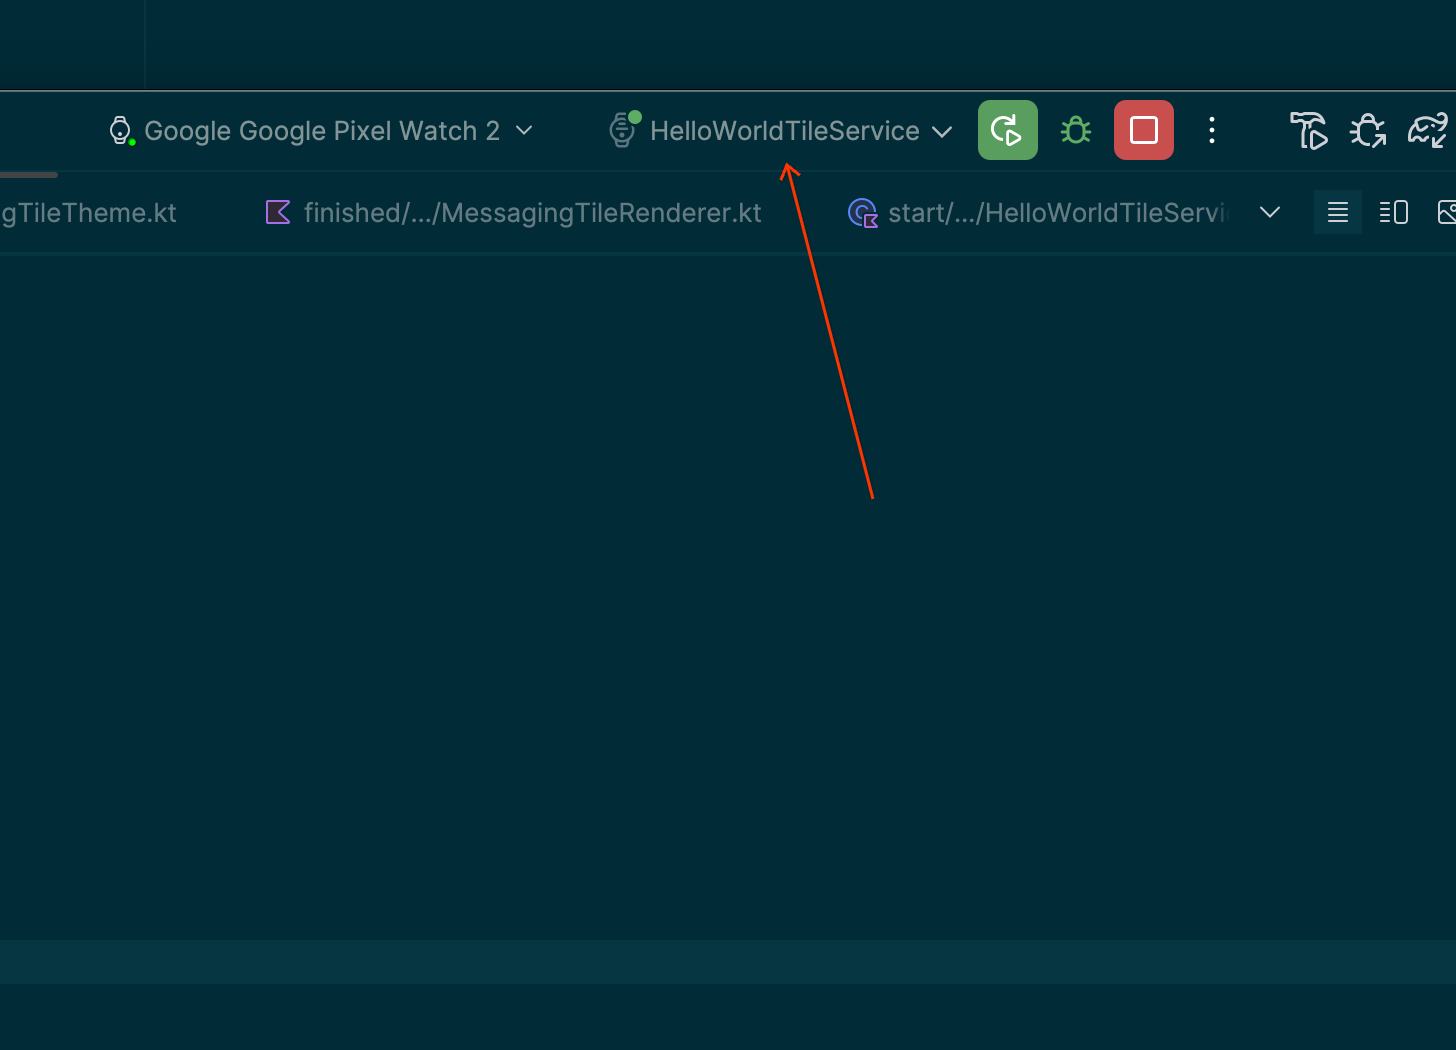
However, Android Studio has a shortcut for doing this: by tapping the "run service" icon (▷) in the gutter, and then selecting "Run ‘HelloWorldTileService'", it will install and launch the tile on a connected device.
Select "Run ‘HelloWorldTileService'" to build and run your tile on a connected device. It should look like the screenshot below.
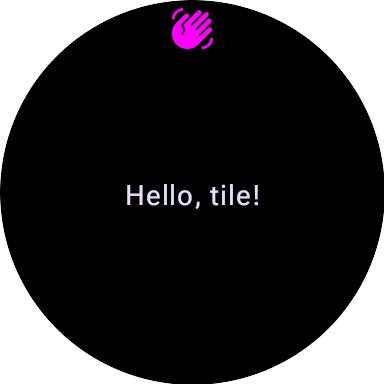
The "waving hand" icon that appears at the top of the display is provided by the system. To change it, modify the android:icon property of the tile's <service> element in the manifest.
As a convenience, this process will also create a "HelloWorldTileService" "run configuration" for future use.
5. Add preview functions
We can preview tile UI in Android Studio. This shortens the feedback loop when developing UI, increasing development velocity.
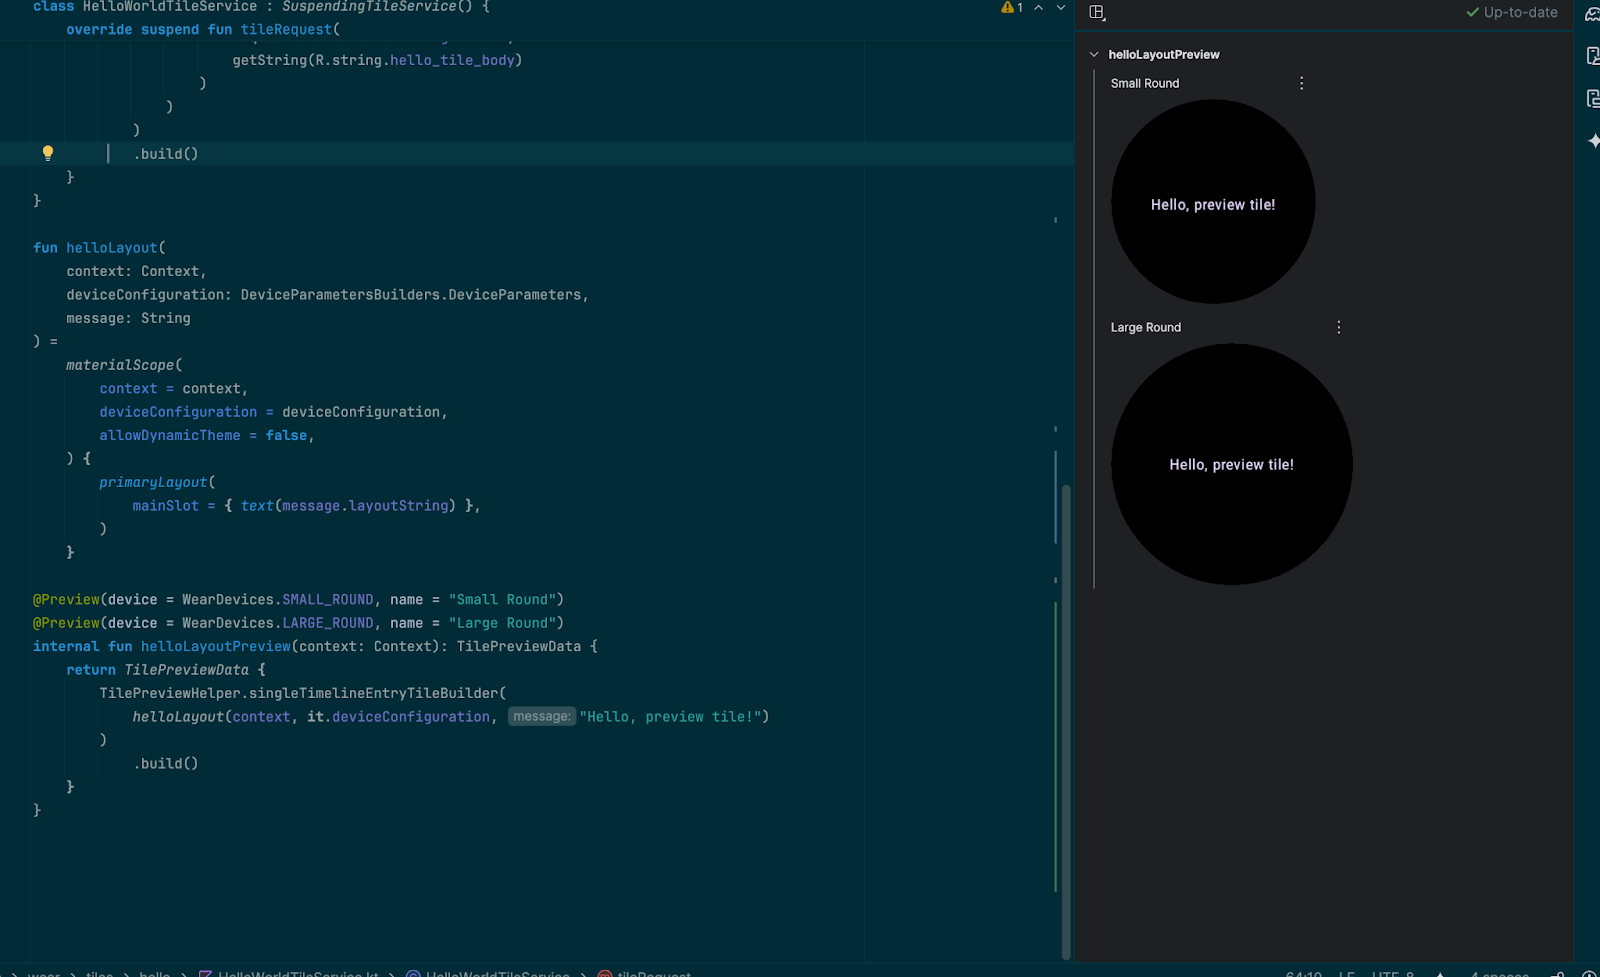
Add a tile preview for the HelloWorldTileService at the end of the HelloWorldTileService.kt file.
start/src/main/java/com/example/wear/tiles/hello/HelloWorldTileService.kt
@Preview(device = WearDevices.SMALL_ROUND, name = "Small Round")
@Preview(device = WearDevices.LARGE_ROUND, name = "Large Round")
internal fun helloLayoutPreview(context: Context): TilePreviewData {
    return TilePreviewData {
        TilePreviewHelper.singleTimelineEntryTileBuilder(
            helloLayout(context, it.deviceConfiguration, "Hello, preview tile!")
        )
            .build()
    }
}
Use the "Split" editor mode to see a preview of the tile:
Note that the @Composable annotation is not used—although Tiles uses the same preview UI as Composable functions, Tiles do not make use of Compose, and are not composable.
6. Build a messaging tile
The messaging tile we're about to build is more typical of a real-world tile. Unlike the HelloWorld example, this one demonstrates the Material 3 Expressive components, displays images, and handles interactions to open the app.
For this tile, we'll work with a new service ( MessagingTileService) that extends the SuspendingTileService we saw earlier, and provides the layouts and resources to the system.
7. Add UI Components
The ProtoLayout library provides pre-built components and layouts, allowing you to create tiles that embrace the latest Material 3 Expressive design for Wear OS.
Add the Tiles Material dependency to your build.gradle file:
start/build.gradle
implementation "androidx.wear.protolayout:protolayout-material3:$protoLayoutVersion"
Add the layout code to the tileLayout() function, as the body of the materialScope() function. This creates a layout consisting of two rows (with two buttons each), and an edge button.
Find the line "TODO() // Add primaryLayout()" and replace it with the code below.
start/src/main/java/com/example/wear/tiles/messaging/tile/Layout.kt
primaryLayout(
    mainSlot = {
        // This layout code assumes "contacts" contains at least 4 elements, for sample code
        // that can handle an arbitrary number of contacts, and also shows different numbers
        // of contacts based on the physical screen size, see
        // <https://github.com/android/wear-os-samples/tree/main/WearTilesKotlin>.
        Column.Builder()
            .apply {
                setWidth(expand())
                setHeight(expand())
                addContent(
                    buttonGroup {
                        buttonGroupItem { contactButton(contacts[0]) }
                        buttonGroupItem { contactButton(contacts[1]) }
                    }
                )
                addContent(DEFAULT_SPACER_BETWEEN_BUTTON_GROUPS)
                addContent(
                    buttonGroup {
                        buttonGroupItem { contactButton(contacts[2]) }
                        buttonGroupItem { contactButton(contacts[3]) }
                    }
                )
            }
            .build()
    },
    bottomSlot = {
        textEdgeButton(
            onClick = clickable(), // TODO: Launch new conversation activity
            labelContent = { text("New".layoutString) },
        )
    },
)
The contactButton() function in the same file creates the individual contact buttons. If the contact has an associated image, that appears on the button. Otherwise, the initials of the contact are used.
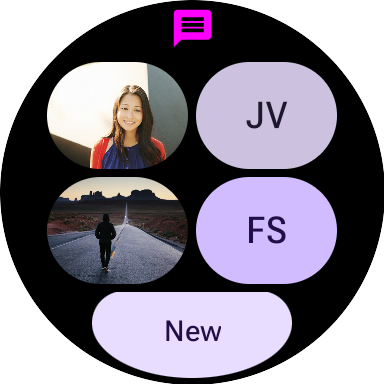
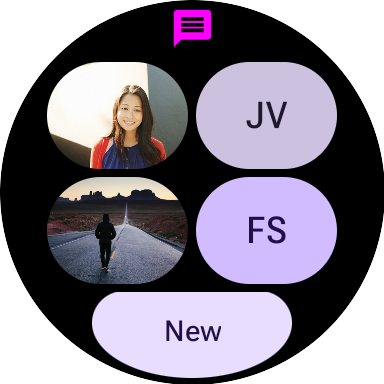
You may notice at this point that although the general layout is correct, the images are missing:
You'll see the same thing if you deploy the tile to a device:
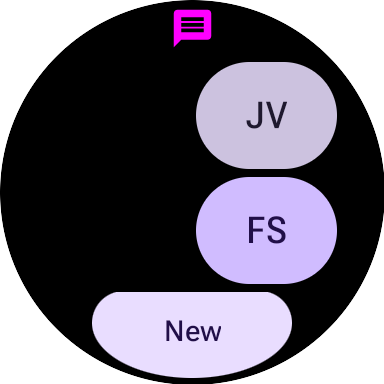
In the next step, we'll fix the missing images.
8. Add images
At a high level, Tiles consist of two things: a layout (which references resources by string ids) and the resources themselves (which can be images).
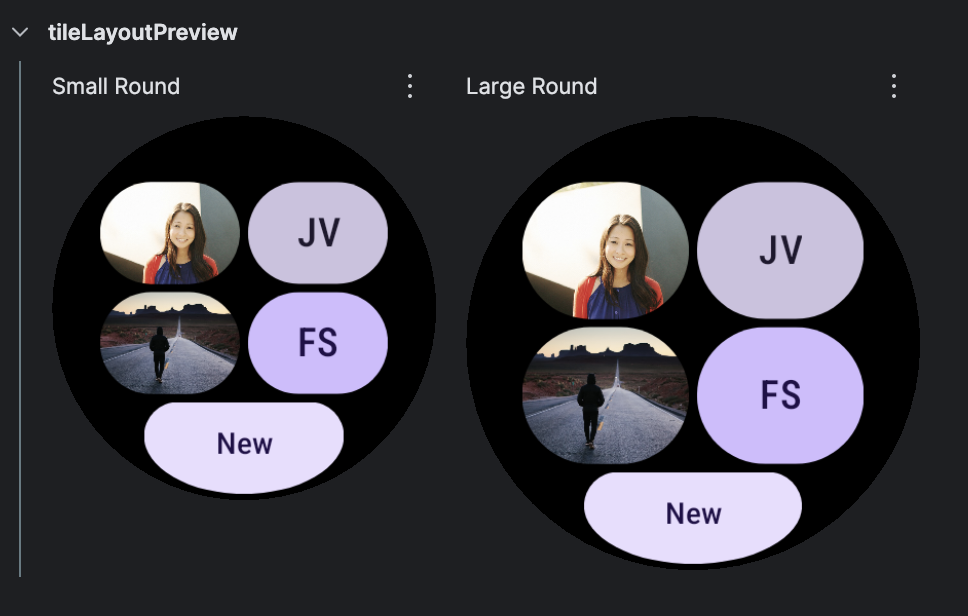
At the moment our code is providing the layout, but not the resources themselves. To fix the preview, we need to provide the image "resources". To do this, find "TODO: Add onTileResourceRequest" and add the code below as an additional named argument to TilePreviewData():
start/src/main/java/com/example/wear/tiles/messaging/tile/Layout.kt
// Additional named argument to TilePreviewData
onTileResourceRequest = { resourcesRequest ->
    Resources.Builder()
        .setVersion(resourcesRequest.version)
        .apply {
            contacts.forEach {
                if (it.avatarSource is AvatarSource.Resource) {
                    addIdToImageMapping(
                        it.imageResourceId(),
                        it.avatarSource.resourceId
                    )
                }
            }
        }
        .build()
}
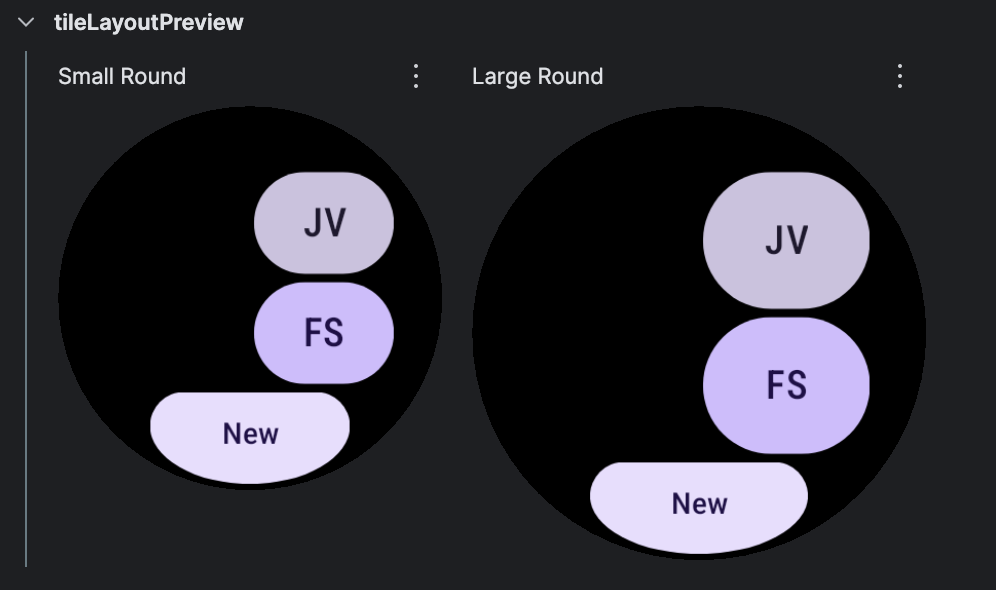
The images should now appear in the preview:
However, if the tile is deployed to a device, the images will be missing. To fix this, replace the resourcesRequest() function in Service.kt with the following:
start/src/main/java/com/example/wear/tiles/messaging/tile/Service.kt
override suspend fun resourcesRequest(
    requestParams: ResourcesRequest
): Resources {
    // resourceIds is a list of the ids we need to provide images for. If we're passed an empty
    // list, set resourceIds to all resources.
    val resourceIds =
        requestParams.resourceIds.ifEmpty {
            contacts.map { it.imageResourceId() }
        }

    // resourceMap maps (tile) resource ids to (Android) resource ids.
    val resourceMap =
        contacts
            .mapNotNull {
                when (it.avatarSource) {
                    is AvatarSource.Resource ->
                        it.imageResourceId() to
                            it.avatarSource.resourceId
                    else -> null
                }
            }
            .toMap()
            .filterKeys {
                it in resourceIds
            } // filter to only the resources we need

    // Add images in the resourceMap to the Resources object, and return the result.
    return Resources.Builder()
        .setVersion(requestParams.version)
        .apply {
            resourceMap.forEach { (id, imageResource) ->
                addIdToImageMapping(id, imageResource)
            }
        }
        .build()
}
Now images are also displayed when the tile is deployed to a device:
In the next step, we'll handle clicks on each of the elements.
9. Handle interactions
One of the most useful things we can do with a tile is provide shortcuts to critical user journeys. This is different from the app launcher which just opens the app - here, we have space to provide contextual shortcuts into a specific screen in your app.
So far, we've been using a dummy action provided by the no-argument clickable() for the chip and each of the buttons. This is fine for previews, which aren't interactive, but let's take a look at how to add actions for the elements.
LaunchAction
LaunchAction can be used to launch an activity. Let's modify Layout so that tapping on the "New" button to initiate the "new conversation" user journey.
Find the line "TODO: Launch new conversation activity" and replace clickable() with:
start/src/main/java/com/example/wear/tiles/messaging/tile/Layout.kt
clickable(
    id = "new_button",
    action =
        launchAction(
            ComponentName(
                "com.example.wear.tiles",
                "com.example.wear.tiles.messaging.MainActivity",
            ),
            mapOf(
                MainActivity.EXTRA_JOURNEY to
                    ActionBuilders.stringExtra(
                        MainActivity.EXTRA_JOURNEY_NEW
                    )
            ),
        ),
)
Redeploy the tile. Now, instead of doing nothing, tapping on "New" will launch MainActivity and start the "new conversation" user journey::

Similarly, modify Layout so that tapping on a contact button initiates a conversation with a specific user.
Find the line "Launch open conversation activity" and replace clickable() with:
start/src/main/java/com/example/wear/tiles/messaging/tile/Layout.kt
clickable(
    id = contact.id.toString(),
    action =
        launchAction(
            ComponentName(
                "com.example.wear.tiles",
                "com.example.wear.tiles.messaging.MainActivity",
            ),
            mapOf(
                MainActivity.EXTRA_JOURNEY to
                    ActionBuilders.stringExtra(
                        MainActivity
                            .EXTRA_JOURNEY_CONVERSATION
                    ),
                MainActivity.EXTRA_CONVERSATION_CONTACT to
                    ActionBuilders.stringExtra(
                        contact.name
                    ),
            ),
        ),
)
Redeploy the tile. Now, instead of doing nothing, tapping on a contact will start a conversation with them:

10. Congratulations
Congratulations! You learned how to build a tile for Wear OS!
What's next?
For more information, check out the Golden Tiles implementations on GitHub, the Wear OS Tiles guide and the design guidelines.