
1. Before you begin
Many of the apps you use store data directly on the device. The Clock app stores your recurring alarms, the Google Maps app saves a list of your recent searches, and the Contacts app lets you add, edit, and remove your contacts' information.
Data persistence—storing or persisting data on the device—is a big part of Android development. Persistent data ensures user-generated content isn't lost when the app is closed, or data downloaded from the internet is saved so it doesn't need to be redownloaded later.
SQLite is a common way provided by the Android SDK for Android apps to persist data. SQLite provides a relational database that allows you to represent data in a similar way to how you structure data with Kotlin classes. This codelab teaches the fundamentals of SQL—Structured Query Language—which, while not an actual programming language, provides a simple and flexible way to read and modify a SQLite database with just a few lines of code.
After you gain a fundamental knowledge of SQL, you'll be prepared to use the Room library to add persistence to your apps later in this unit.
2. Key concepts of relational databases
What is a database?
If you are familiar with a spreadsheet program like Google Sheets, you are already familiar with a basic analogy for a database.
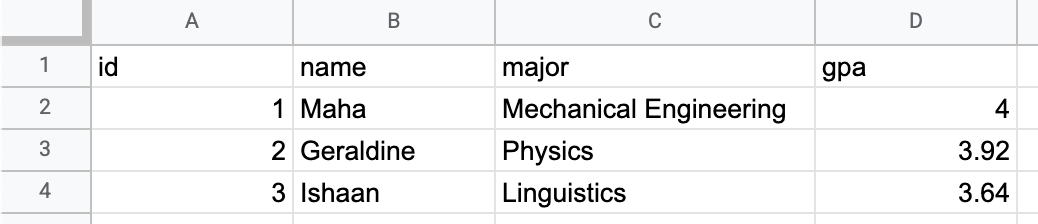
A spreadsheet consists of separate data tables, or individual spreadsheets in the same workbook.

Each table consists of columns that define what the data represents and rows that represent individual items with values for each column. For example, you might define columns for a student's ID, name, major, and grade.

Each row contains data for a single student, with values for each of the columns.
A relational database works the same way.
- Tables define high-level groupings of data you want to represent, such as students and professors.
- Columns define the data that each row in the table contains.
- Rows contain the actual data that consist of values for each column in the table.
The structure of a relational database also mirrors what you already know about classes and objects in Kotlin.
data class Student(
    id: Int,
    name: String,
    major: String,
    gpa: Double
)
- Classes, like tables, model the data you want to represent in your app.
- Properties, like columns, define the specific pieces of data that every instance of the class should contain.
- Objects, like rows, are the actual data. Objects contain values for each property defined in the class, just as rows contain values for each column defined in the data table.
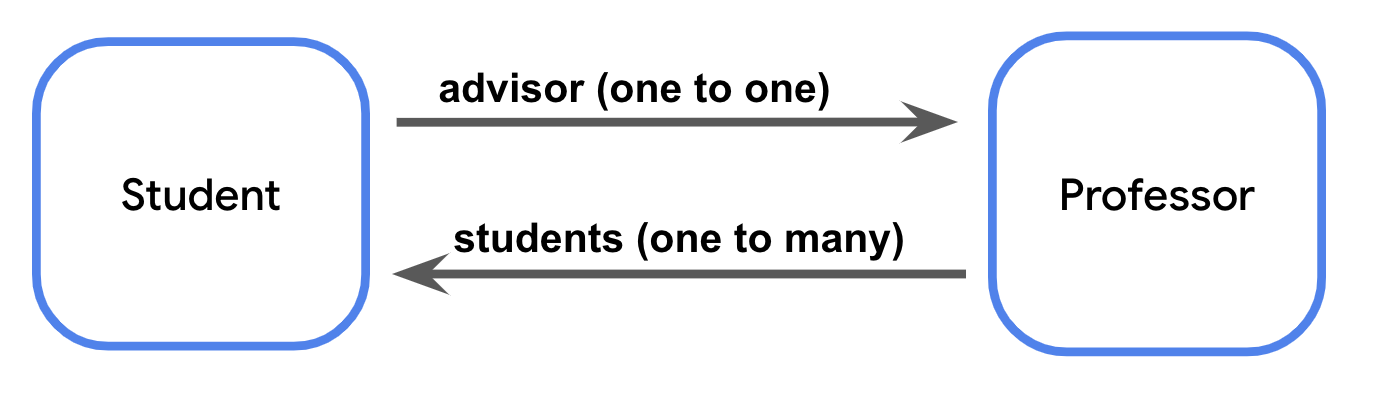
Just as a spreadsheet can contain multiple sheets and an app can contain multiple classes, a database can contain multiple tables. A database is called a relational database when it can model relationships between tables. For example, a graduate student might have a single professor as a doctoral advisor whereas that professor is the doctoral advisor for multiple students.
Every table in a relational database contains a unique identifier for rows, such as a column where the value in each row is an automatically incremented integer. This identifier is known as the primary key.
When a table references the primary key of another table, it is known as a foreign key. The presence of a foreign key means there's a relationship between the tables.
What is SQLite?
SQLite is a commonly used relational database. Specifically, SQLite refers to a lightweight C library for relational database management with Structured Query Language, known as SQL and sometimes pronounced as "sequel" for short.
You won't have to learn C or any entirely new programming language to work with a relational database. SQL is simply a way to add and retrieve data from a relational database with a few lines of code.
Representing data with SQLite
In Kotlin, you're familiar with data types like Int and Boolean. SQLite databases use data types too! Data table columns must have a specific data type. The following table maps common Kotlin data types to their SQLite equivalents.
Kotlin data type | SQLite data type |
| INTEGER |
| VARCHAR or TEXT |
| BOOLEAN |
| REAL |
The tables in a database and the columns in each table are collectively known as the schema. In the next section, you download the starter data set and learn more about its schema.
3. Download the starter data set
The database for this codelab is for a hypothetical email app. This codelab uses familiar examples, such as sorting and filtering mail, or searching by subject text or sender, to demonstrate all the powerful things you can do with SQL. This example also ensures you have experience with the types of scenarios you might find in an app before you work with Room in the next pathway.
Download the starter project from the compose branch of the SQL Basics GitHub repository here.
Use the Database Inspector
To use Database Inspector, perform the following steps:
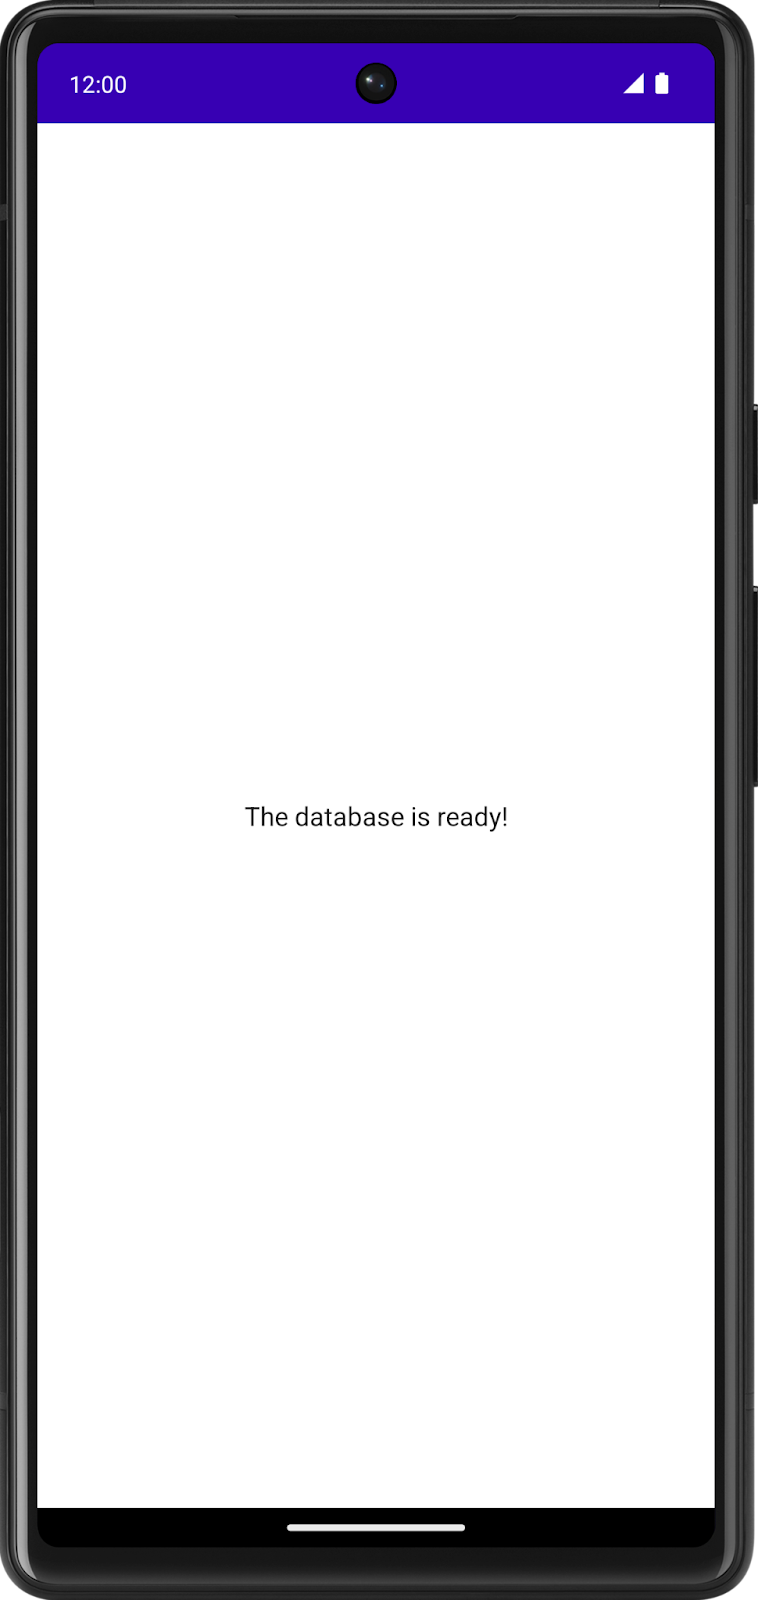
- Run the SQL Basics app in Android Studio. When the app launches, you see the following screen.
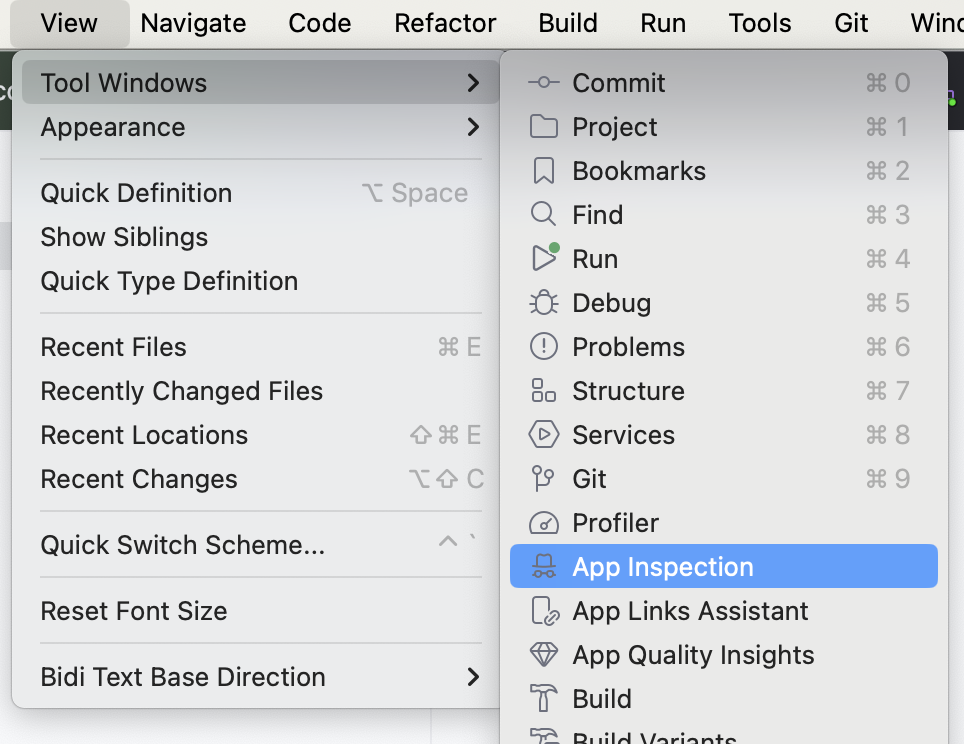
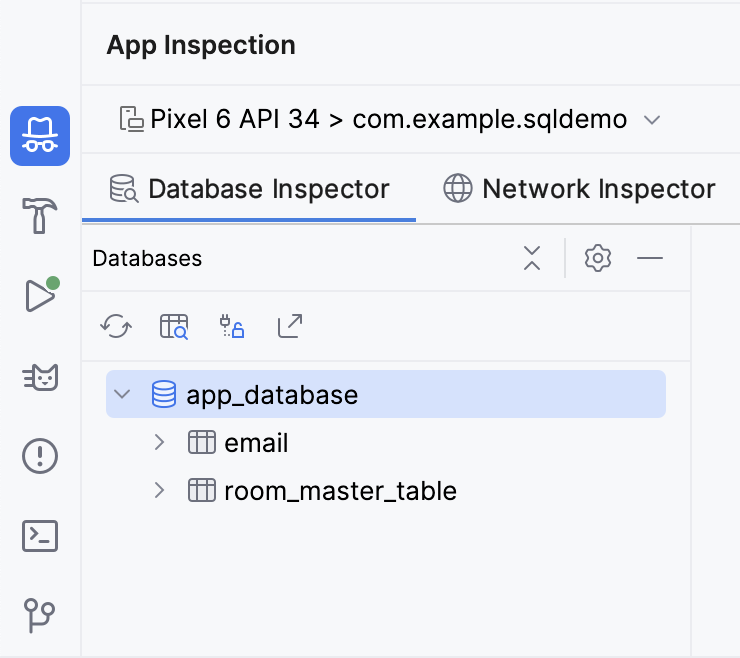
- In Android Studio, click View > Tool Windows > App Inspection.
You now see a new tab at the bottom labeled App Inspection with the Database Inspector tab selected. There are two additional tabs, but you don't need to use those. It might take a few seconds to load, but you then see a list on the left with the data tables, which you can select to run queries against.
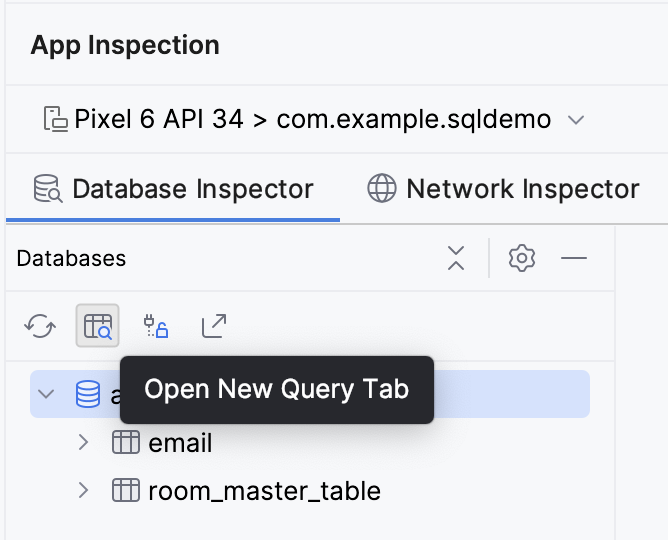
- Click the Open New Query Tab button to open a pane to run a query against the database.
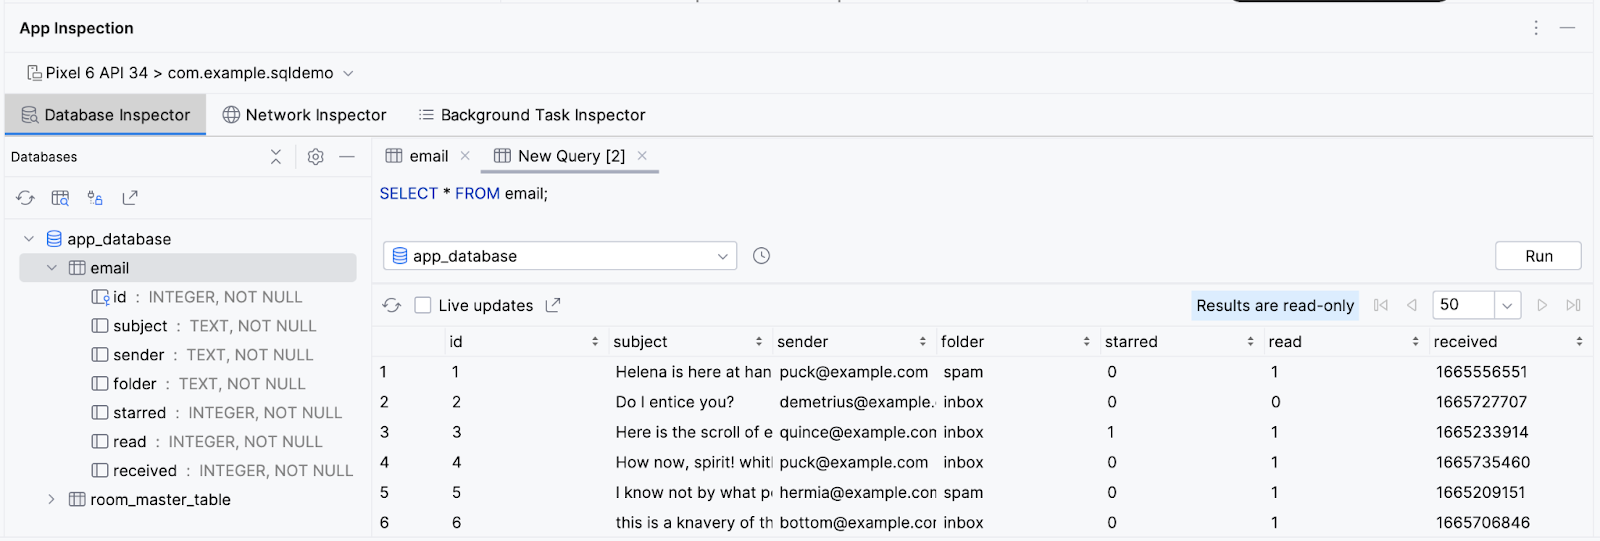
The email table has 7 columns:
id: The primary key.subject: The subject line of the email.sender: The email address from which the email originated.folder: The folder where the message can be found, such as Inbox or Spam.starred: Whether or not the user starred the email.read: Whether or not the user read the email.received: The timestamp when the email was received.
4. Read data with a SELECT statement
SQL SELECT statement
A SQL statement—sometimes called a query—is used to read or manipulate a database.
You read data from a SQLite database with a SELECT statement. A simple SELECT statement consists of the SELECT keyword, followed by the column name, followed by the FROM keyword, followed by the table name. Every SQL statement ends with a semicolon (;).

A SELECT statement can also return data from multiple columns. You must separate column names with a comma.

If you want to select every column from the table, you use the wildcard character (*) in place of the column names.

In either case, a simple SELECT statement like this returns every row in the table. You just need to specify the column names you want it to return.
Read email data using a SELECT statement
One of the primary things an email app needs to do is display a list of messages. With a SQL database, you can get this information with a SELECT statement.
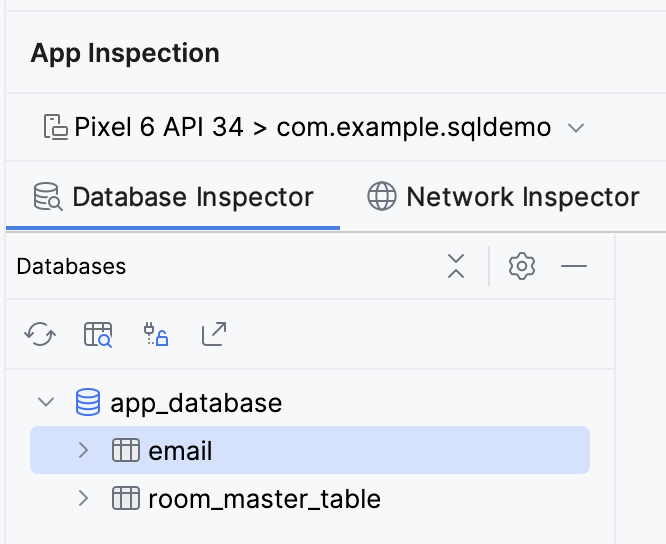
- Make sure the email table is selected in the Database Inspector.
- First, try to select every column from every row in the
emailtable.
SELECT * FROM email;
- Click the Run button in the bottom right corner of the text box. Observe that the entire
emailtable is returned.
- Now, try to select just the subject for every row.
SELECT subject FROM email;
- Notice that, once again, the query returns every row but only for that single column.

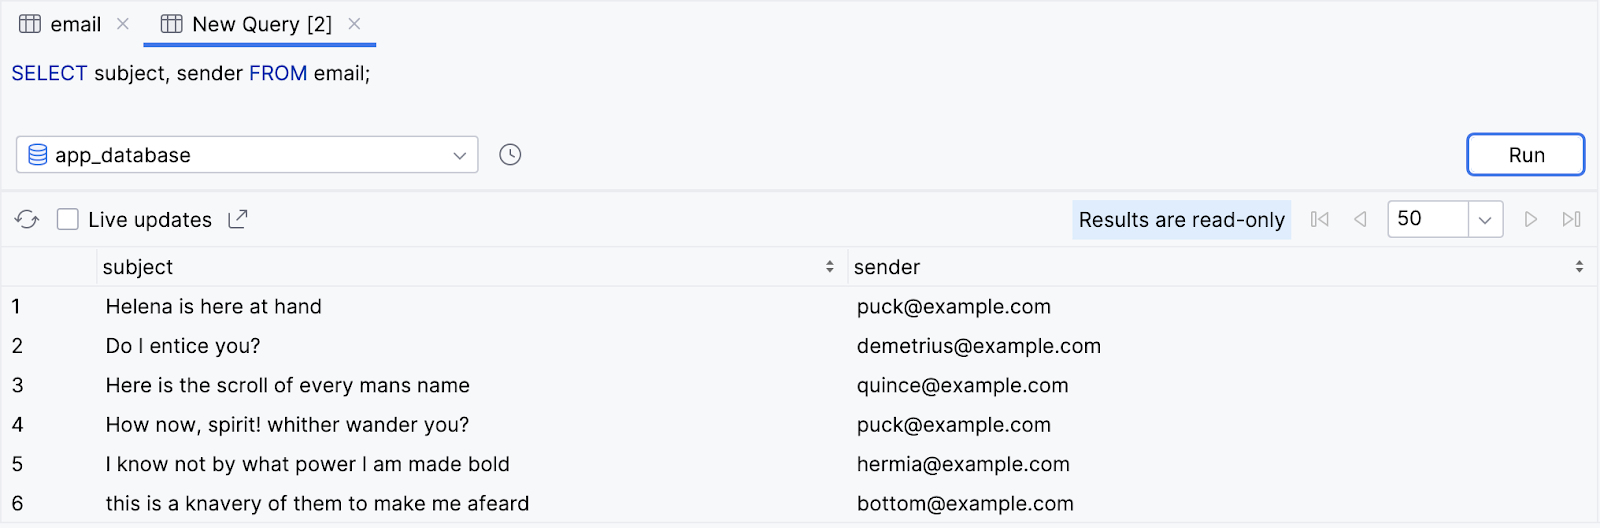
- You can also select multiple columns. Try selecting the subject and the sender.
SELECT subject, sender FROM email;
- Observe that the query returns every row in the
emailtable, but only the values of the subject and sender column.
Congratulations! You just executed your first query. Not bad, but consider it just the beginning; the "hello world" of SQL, if you will.
You can be much more specific with SELECT statements by adding clauses to specify a subset of the data and even change how the output is formatted. In the following sections, you learn about the commonly used clauses of SELECT statements and how to format data.
5. Use SELECT statements with aggregate functions and distinct values
Reduce columns with aggregate functions
SQL statements aren't limited to returning rows. SQL offers a variety of functions that can perform an operation or calculation on a specific column, such as finding the maximum value, or counting the number of unique possible values for a particular column. These functions are called aggregate functions. Instead of returning all the data of a specific column, you can return a single value from a specific column.
Examples of SQL aggregate functions include the following:
COUNT(): Returns the total number of rows that match the query.SUM(): Returns the sum of the values for all rows in the selected column.AVG(): Returns the mean value—average—of all the values in the selected column.MIN(): Returns the smallest value in the selected column.MAX(): Returns the largest value in the selected column.
Instead of a column name, you can call an aggregate function and pass in a column name as an argument between the parentheses.

Instead of returning that column's value for every row in the table, a single value is returned from calling the aggregate function.
Aggregate functions can be an efficient way to perform calculations on a value when you don't need to read all the data in a database. For example, you might want to find the average of the values in a column without loading your entire database into a List and doing it manually.
Let's see some of the aggregate functions in action with the email table:
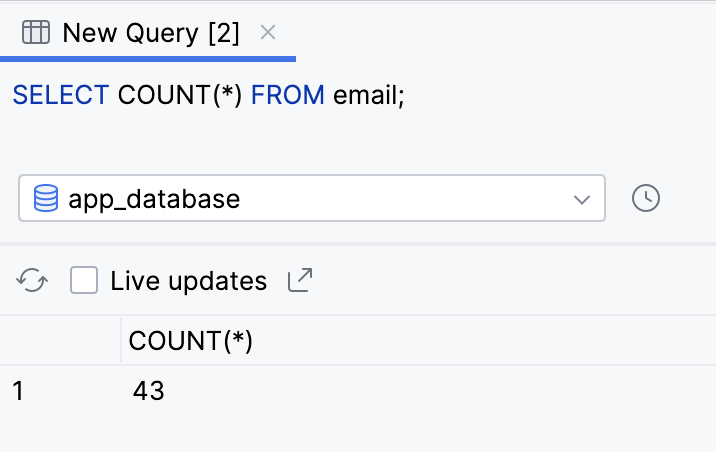
- An app might want to get the total number of emails received. You can do this by using the
COUNT()function and the wildcard character (*).
SELECT COUNT(*) FROM email;
- The query returns a single value. You can do this entirely with a SQL query, without any Kotlin code to count the rows manually.
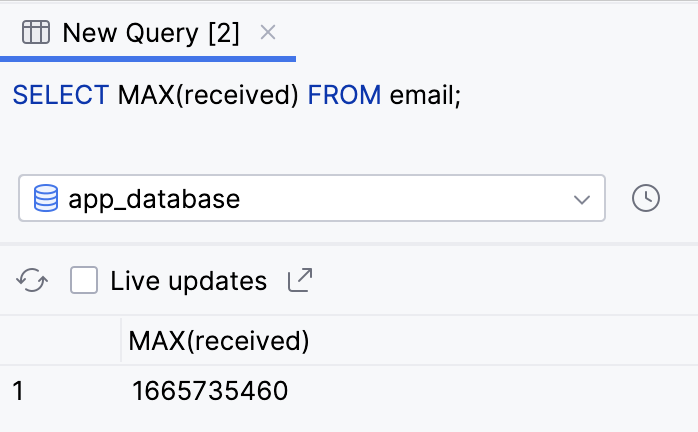
- To get the time of the most recent message, you can use the
MAX()function on the received column because the most recent Unix timestamp is the highest number.
SELECT MAX(received) FROM email;
- The query returns a single result, the highest—most recent—timestamp in the received column.
Filter duplicate results with DISTINCT
When you select a column, you can precede it with the DISTINCT keyword. This approach can be useful if you want to remove duplicates from the query result.

As an example, many email apps have an autocomplete feature for addresses. You might want to include all addresses you receive an email from and display them in a list.
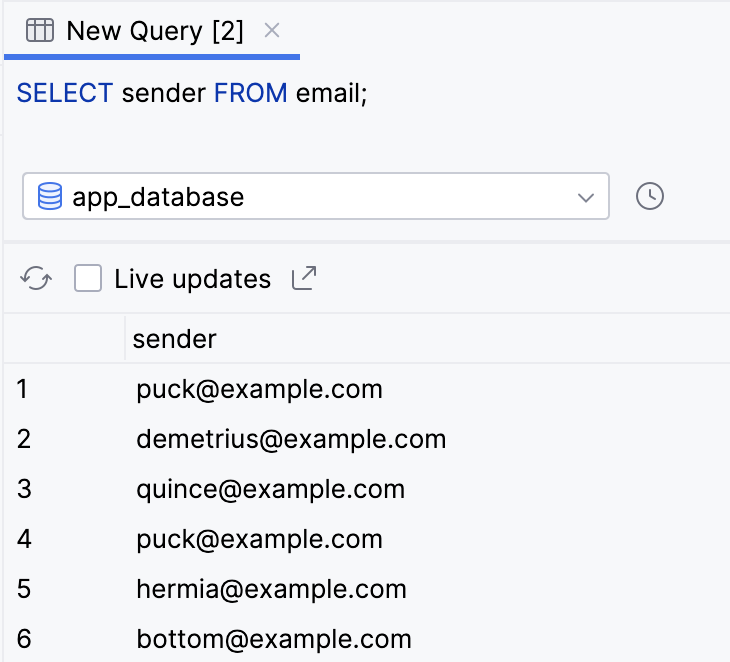
- Run the following query to return the
sendercolumn for every row.
SELECT sender FROM email;
- Observe that the result contains many duplicates. This definitely isn't an ideal experience!
- Add the
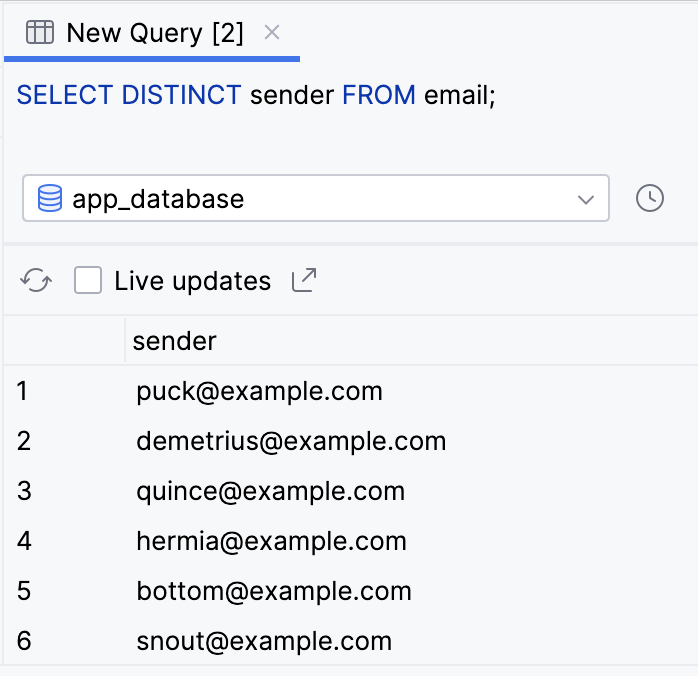
DISTINCTkeyword before the sender column and rerun the query.
SELECT DISTINCT sender FROM email;
- Notice that the result is now much smaller and every value is unique.
You can also precede the column name in an aggregate function with the DISTINCT keyword.

Say you want to know the number of unique senders in the database. You can count the number of unique senders with the COUNT() aggregate function and with the DISTINCT keyword on the sender column.
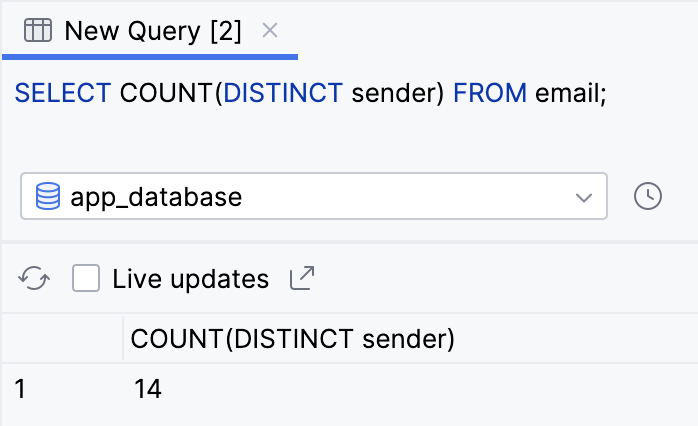
- Perform a
SELECTstatement, passing inDISTINCT senderto theCOUNT()function.
SELECT COUNT(DISTINCT sender) FROM email;
- Observe that the query tells us that there are 14 unique senders.
6. Filter queries with a WHERE clause
Many email apps offer the feature to filter the messages shown based on certain criteria, such as data, search term, folder, sender, etc. For these types of use cases, you can add a WHERE clause to your SELECT query.
After the table name, on a new line, you can add the WHERE keyword followed by an expression. When writing more complex SQL queries, it's common to put each clause on a new line for readability.

This query performs a boolean check for each selected row; if the check returns true, it includes the row in the result of the query. Rows for which the query returns false are not included in the result.
For example, an email app might have filters for spam, trash, drafts, or user-created filters. The following instructions do this with a WHERE clause:
- Run a
SELECTstatement to return all columns (*) from theemailtable, including aWHEREclause to check the conditionfolder = 'inbox'. No, that's not a typo: you use a single equals sign to check equality in SQL, and single rather than double quotes to represent a string value.
SELECT * FROM email
WHERE folder = 'inbox';
- The result only returns rows for messages in the user's inbox.

Logical operators with WHERE clauses
SQL WHERE clauses aren't limited to a single expression. You can use the AND keyword, equivalent to the Kotlin and operator (&&), to only include results that satisfy both conditions.

Alternatively, you can use the OR keyword, equivalent to the Kotlin or operator (||), to include rows in the results that satisfy either condition.

For readability, you can also negate an expression using the NOT keyword.

Many email apps allow multiple filters, for example, only showing unread emails.
Try out the following more complicated WHERE clauses on the email table:
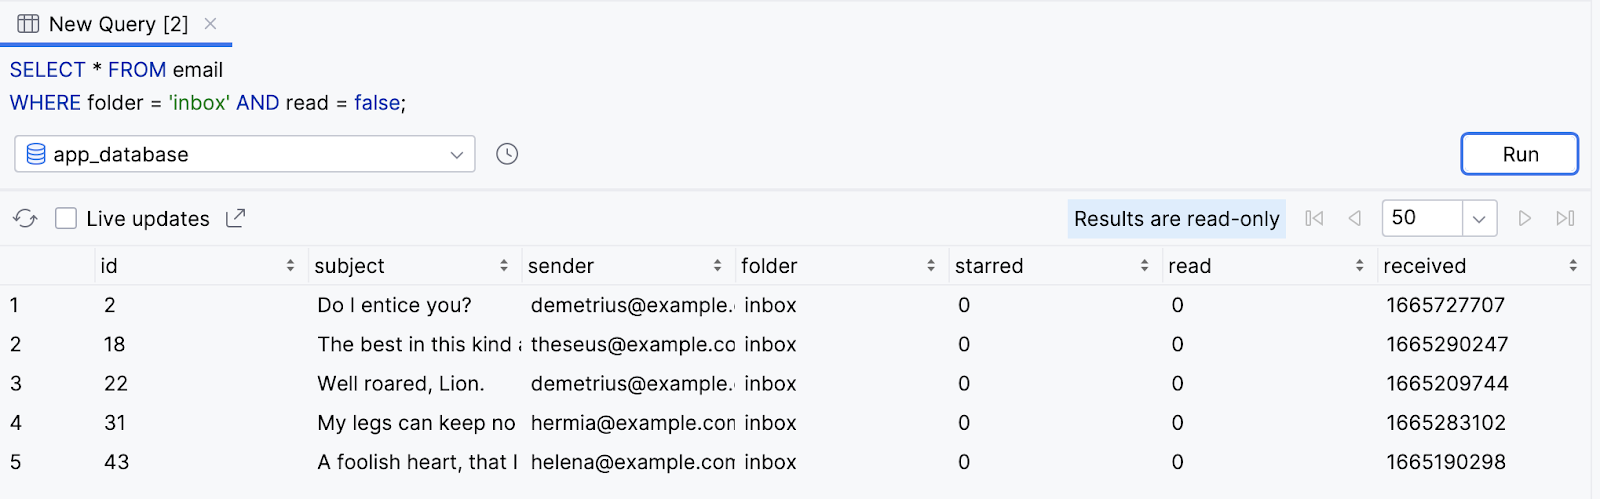
- In addition to only returning messages in the user's inbox, try also limiting the results to unread messages—where the value of the read column is false.
SELECT * FROM email
WHERE folder = 'inbox' AND read = false;
- Observe that after running the query, the results only contain unread emails in the user's inbox.
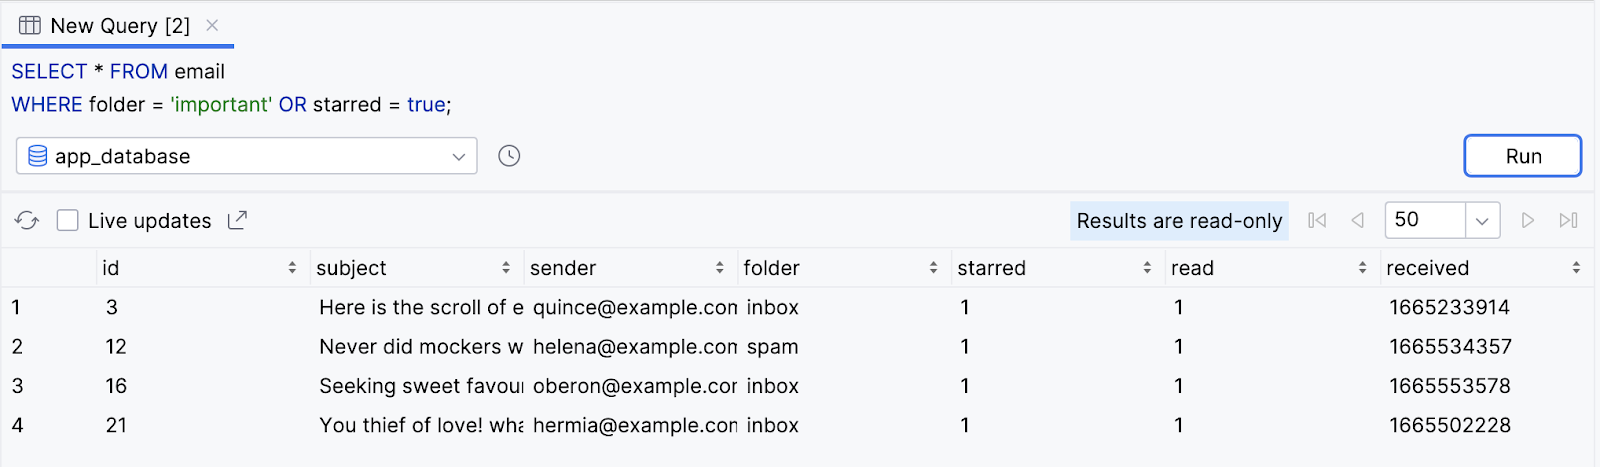
- Return all emails that are in the important folder
ORare starred (starred = true). This means the result includes emails in different folders as long as they're starred.
SELECT * FROM email
WHERE folder = 'important' OR starred = true;
- Observe the result.
Search for text using LIKE
One super useful thing you can do with a WHERE clause is to search for text in a specific column. You achieve this result when you specify a column name, followed by the LIKE keyword, followed by a search string.

The search string starts with the percent symbol (%), followed by the text to search for (Search term), followed by the percent symbol (%) again.

If you're searching for a prefix—results that begin with the specified text—omit the first percent symbol (%).

Alternatively, if you're searching for a suffix, omit the last percent symbol (%).

There are many use cases where an app can use text search, such as searching for emails that contain particular text in the subject line or updating autocomplete suggestions as the user is typing.
The following instructions let you use text search when querying the email table.
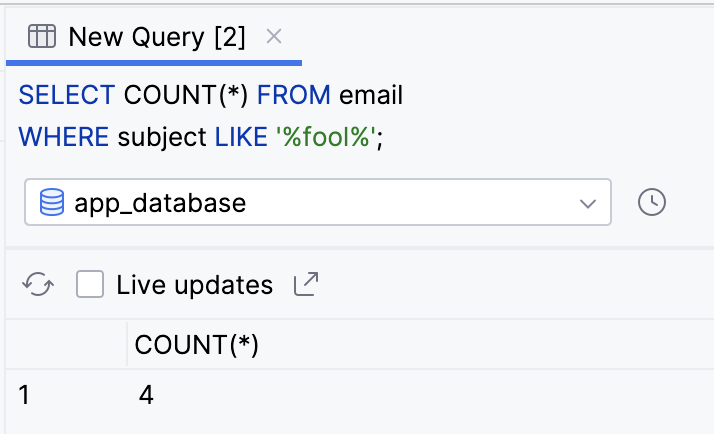
- Shakespeare characters, like the ones in our database, loved to talk about fools. Run the following query to get the total number of emails with the text "fool" in the subject line.
SELECT COUNT(*) FROM email
WHERE subject LIKE '%fool%';
- Observe the result.
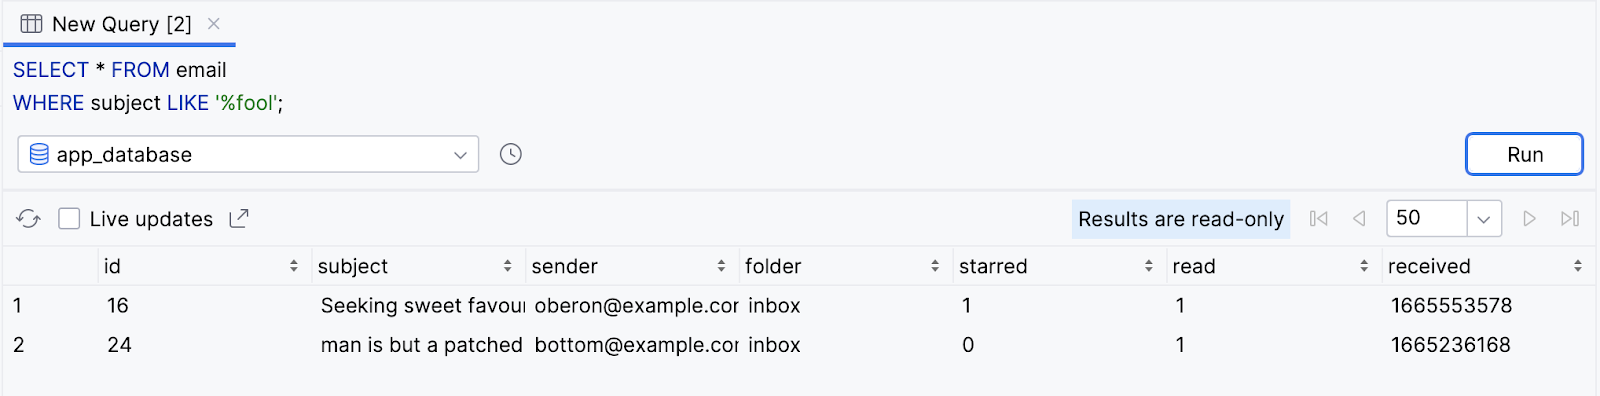
- Run the following query to return all columns from all rows where the subject ends with the word fool.
SELECT * FROM email
WHERE subject LIKE '%fool';
- Observe that two rows are returned.
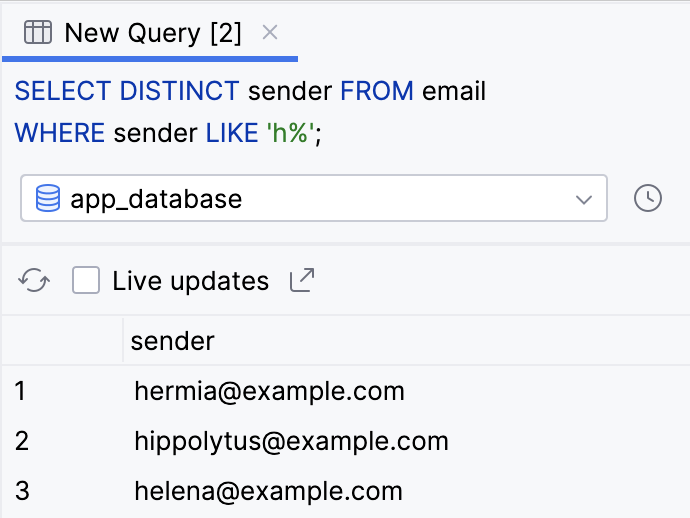
- Run the following query to return distinct values of the
sendercolumn that begin with the letterh.
SELECT DISTINCT sender FROM email
WHERE sender LIKE 'h%';
- Observe that the query returns three values:
helena@example.com,hyppolytus@example.com, andhermia@example.com.
7. Group, order, and limit results
Group results with GROUP BY
You just saw how to use aggregate functions and the WHERE clause to filter and reduce results. SQL offers several other clauses that can help you format the results of your query. Among these clauses are grouping, ordering, and limiting results.
You can use a GROUP BY clause to group results so that all rows that have the same value for a given column are grouped next to each other in the results. This clause doesn't change the results, but only the order in which they're returned.
To add a GROUP BY clause to a SELECT statement, add the GROUP BY keyword followed by the column name you want to group results by.

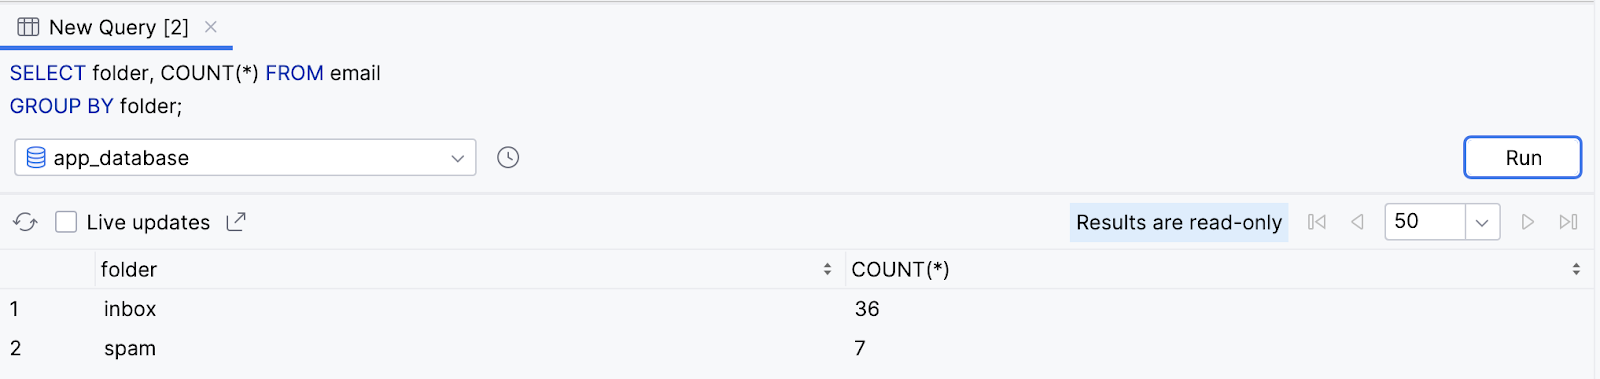
A common use case is to couple a GROUP BY clause with an aggregate function to partition the result of the aggregate function across different buckets, such as values of a column. Here's an example. Pretend you want to get the number of emails in each folder: 'inbox', 'spam', etc. You can select both the folder column and the COUNT() aggregate function, and specify the folder column in the GROUP BY clause.
- Perform the following query to select the folder column, and the result of
COUNT()aggregate function. Use aGROUP BYclause to bucket the results by the value in thefoldercolumn.
SELECT folder, COUNT(*) FROM email
GROUP BY folder;
- Observe the results. The query returns the total number of emails for each folder.
Sort results with ORDER BY
You can also change the order of query results when you sort them with the ORDER BY clause. Add the ORDER BY keyword, followed by a column name, followed by the sort direction.

By default, the sort direction is ascending order, which you can omit from the ORDER BY clause. If you want the results sorted in descending order, add DESC after the column name.
Chances are you expect an email app to show the most recent emails first. The following instructions let you do this with an ORDER BY clause.
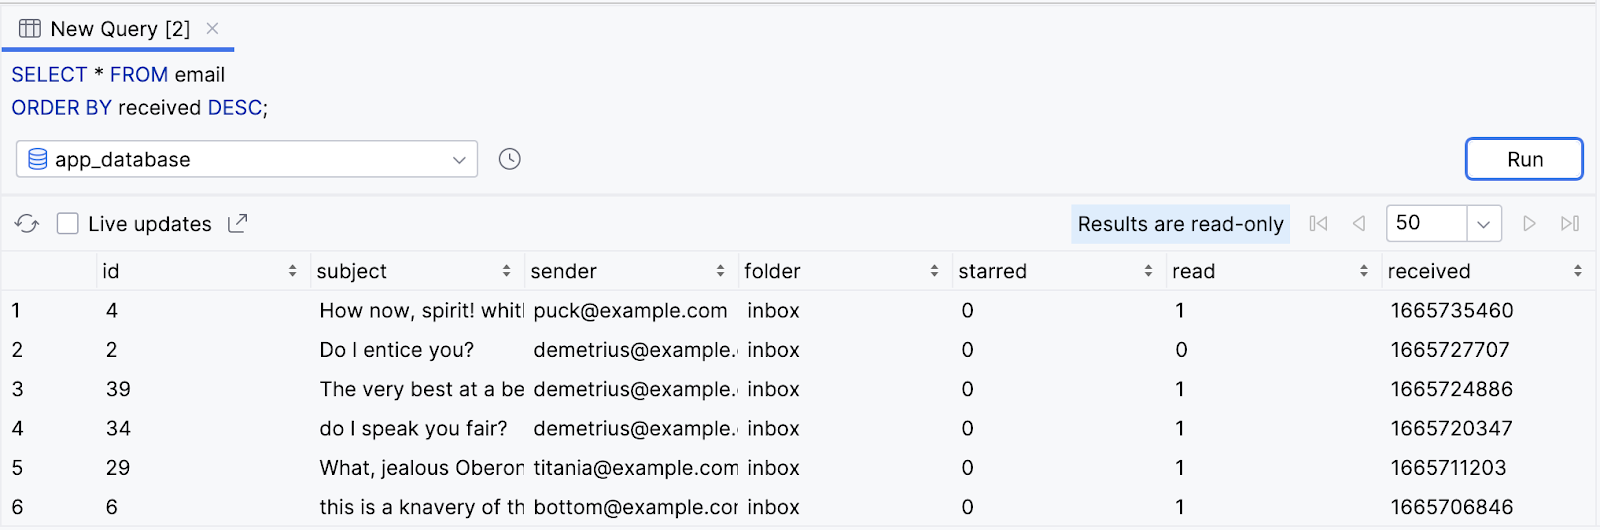
- Add an
ORDER BYclause to sort unread emails, based on thereceivedcolumn. Because ascending order—lowest or the oldest first—is the default, you need to use theDESCkeyword.
SELECT * FROM email
ORDER BY received DESC;
- Observe the result.
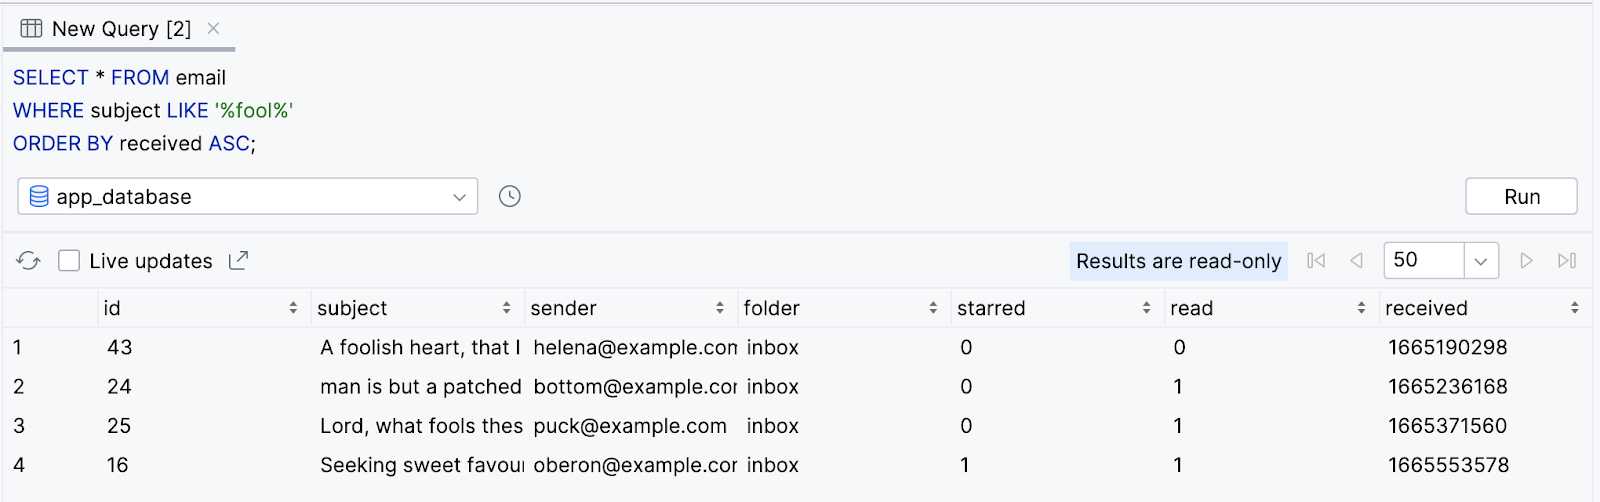
You can use an ORDER BY clause with a WHERE clause. Say a user wants to search for old emails containing the text fool. They can sort the results to show the oldest emails first, in ascending order.
- Select all emails where the subject contains the text "fool" and sort the results in ascending order. Because the order is ascending, which is the default order when none is specified, using the
ASCkeyword with theORDER BYclause is optional.
SELECT * FROM email
WHERE subject LIKE '%fool%'
ORDER BY received ASC;
- Observe that the filtered results are returned with the oldest—lowest value in the received column—shown first.
Restrict the number of results with LIMIT
So far, all the examples return every single result from the database that matches the query. In many cases, you only need to display a limited number of rows from your database. You can add a LIMIT clause to your query to only return a specific number of results. Add the LIMIT keyword followed by the maximum number of rows you want to return. If applicable, the LIMIT clause comes after the ORDER BY clause.

Optionally, you can include the OFFSET keyword followed by another number for the number of rows to "skip". For example, if you want the next ten results, after the first ten, but don't want to return all twenty results, you can use LIMIT 10 OFFSET 10.

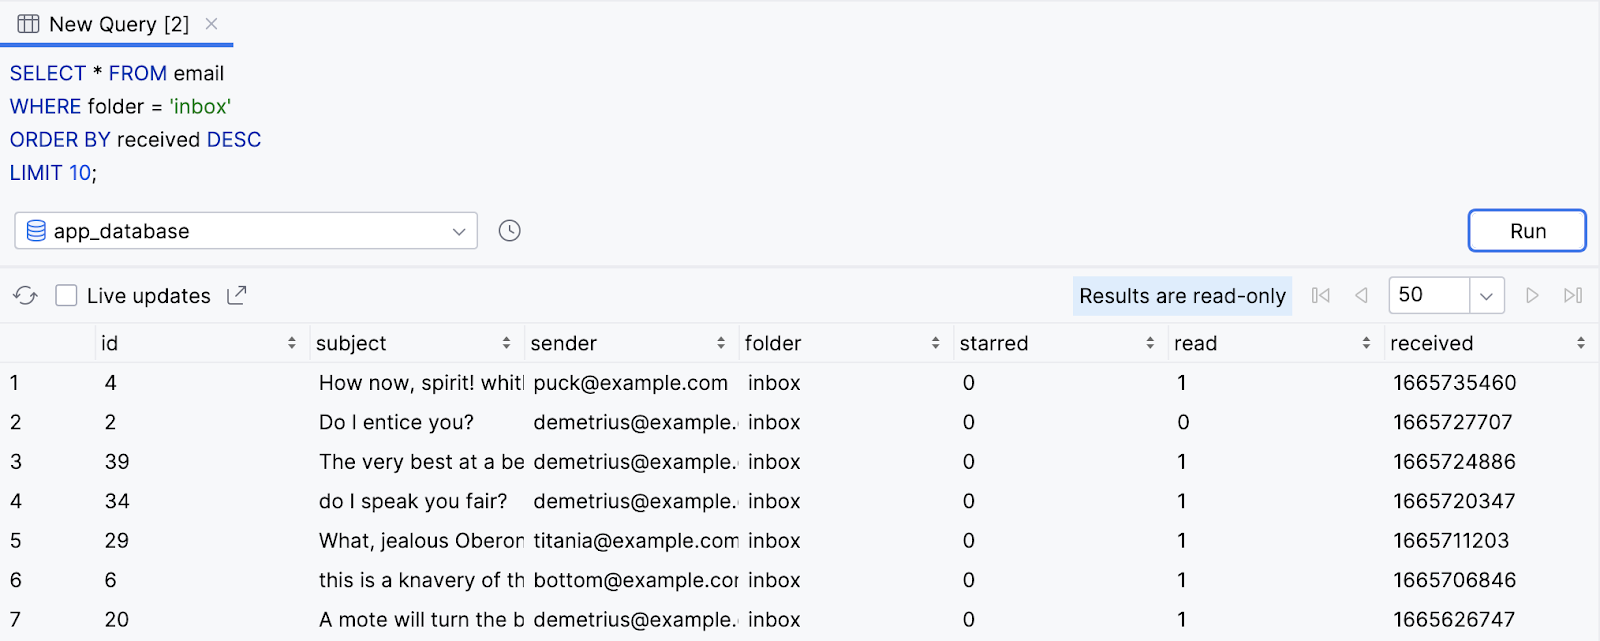
In an app, you might want to load emails more quickly by only returning the first ten emails in the user's inbox. Users can then scroll to view subsequent pages of emails. The following instructions use a LIMIT clause to achieve this behavior.
- Perform the following
SELECTstatement to get all emails in the user's inbox in descending order and limited to the first ten results.
SELECT * FROM email
WHERE folder = 'inbox'
ORDER BY received DESC
LIMIT 10;
- Observe that only ten results are returned.
- Modify and re-run the query to include the
OFFSETkeyword with a value of10.
SELECT * FROM email
WHERE folder = 'inbox'
ORDER BY received DESC
LIMIT 10 OFFSET 10;
- The query returns ten results in decreasing order. However, the query skips the first set of ten results.

8. Insert, update, and delete data in a database
Insert data into a database
In addition to reading from a database, there are different SQL statements for writing to a database. The data needs a way to get in there in the first place, right?
You can add a new row to a database with an INSERT statement. An INSERT statement starts with INSERT INTO followed by the table name in which you want to insert a new row. The VALUES keyword appears on a new line followed by a set of parentheses that contain a comma separated list of values. You need to list the values in the same order of the database columns.

Pretend the user receives a new email, and we need to store it in our app's database. We can use an INSERT statement to add a new row to the email table.
- Perform an
INSERTstatement with the following data for a new email. Because the email is new, it is unread and initially appears in the inboxfolder. A value ofNULLis provided for theidcolumn, which means theidwill be automatically generated with the next available autoincremented integer..
INSERT INTO email
VALUES (
    NULL, 'Lorem ipsum dolor sit amet', 'sender@example.com', 'inbox', false, false, CURRENT_TIMESTAMP
);
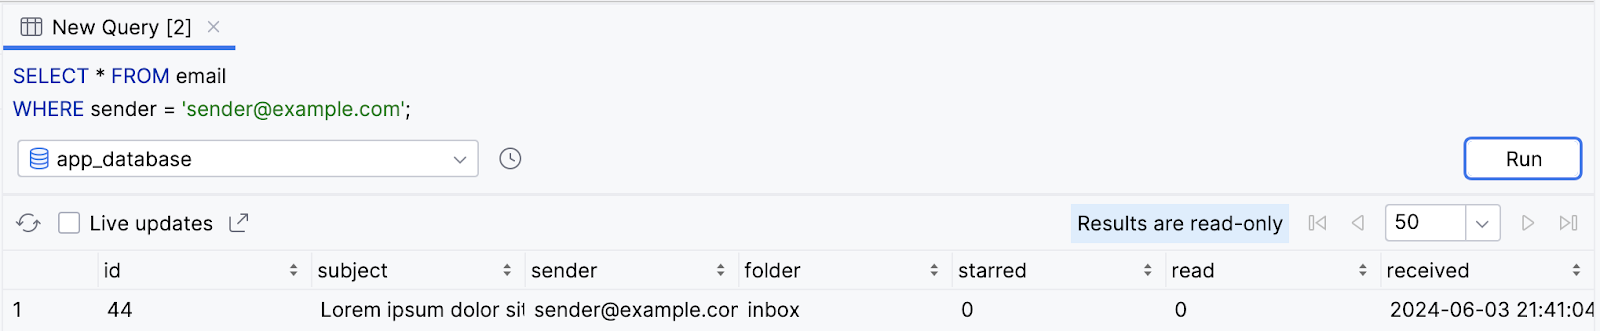
- Observe that the result is inserted into the database with an
idof44.
SELECT * FROM email
WHERE sender = 'sender@example.com';
Update existing data in a database
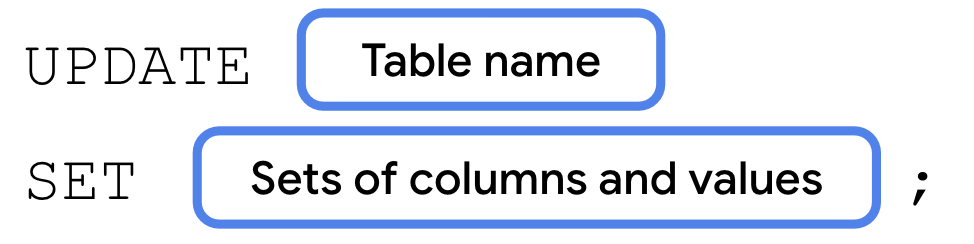
After you've inserted data into a table, you can still change it later. You can update the value of one or more columns using an UPDATE statement. An UPDATE statement starts with the UPDATE keyword, followed by the table name, followed by a SET clause.
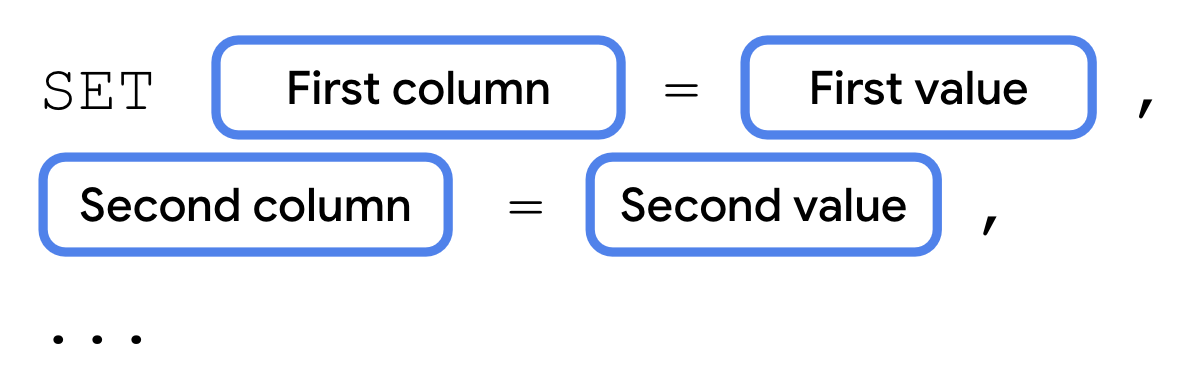
A SET clause consists of the SET keyword, followed by the name of the column you want to update.
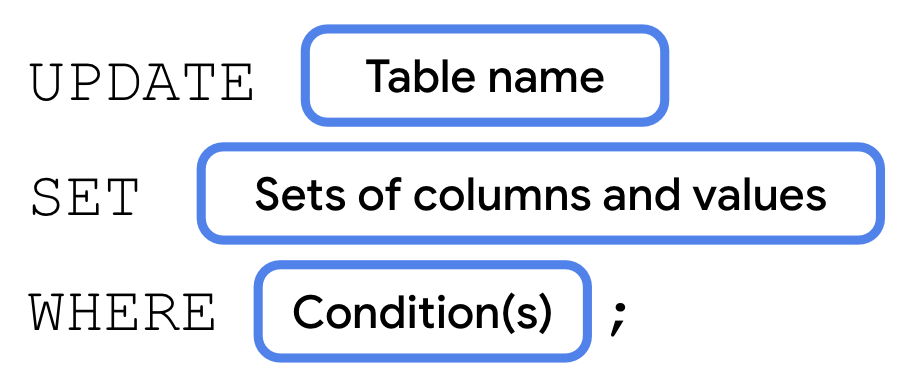
An UPDATE statement often includes a WHERE clause to specify the single row or multiple rows that you want to update with the specified column-value pair.
If the user wants to mark an email as read, for example, you use an UPDATE statement to update the database. The following instructions let you mark the email inserted in the previous step as read.
- Perform the following
UPDATEstatement to set the row with anidof44so that the value of thereadcolumn istrue.
UPDATE email
SET read = true
WHERE id = 44;
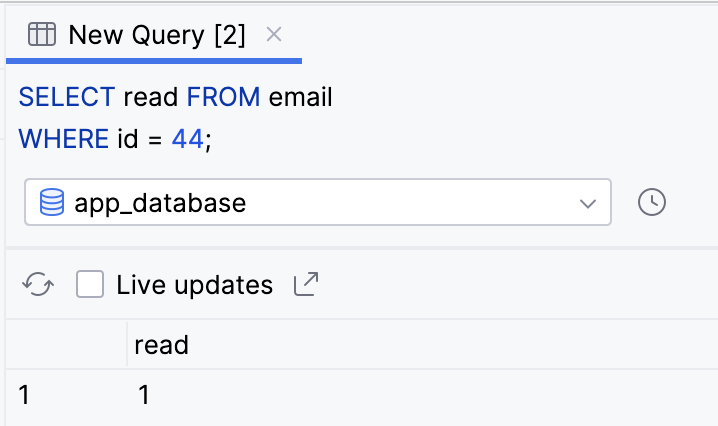
- Run a
SELECTstatement for that specific row to validate the result.
SELECT read FROM email
WHERE id = 44;
- Observe that the value of the read column is now
1for a "true" value as opposed to0for "false"..
Delete a row from a database
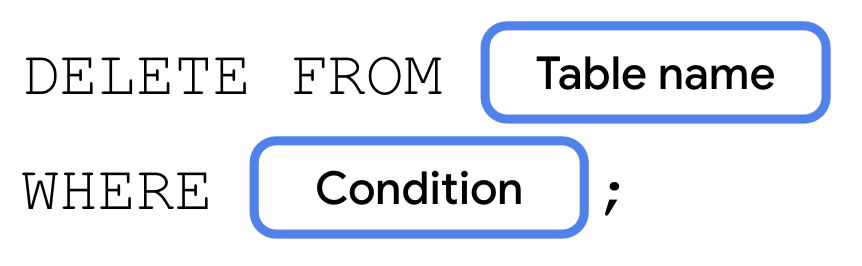
Finally, you can use a SQL DELETE statement to delete one or more rows from a table. A DELETE statement starts with the DELETE keyword, followed by the FROM keyword, followed by the table name, followed by a WHERE clause to specify which row or rows you want to delete.
The following instructions use a DELETE statement to delete the previously inserted and subsequently updated row from the database.
- Perform the following
DELETEstatement to delete the row with anidof44from the database.
DELETE FROM email
WHERE id = 44;
- Validate your changes using a
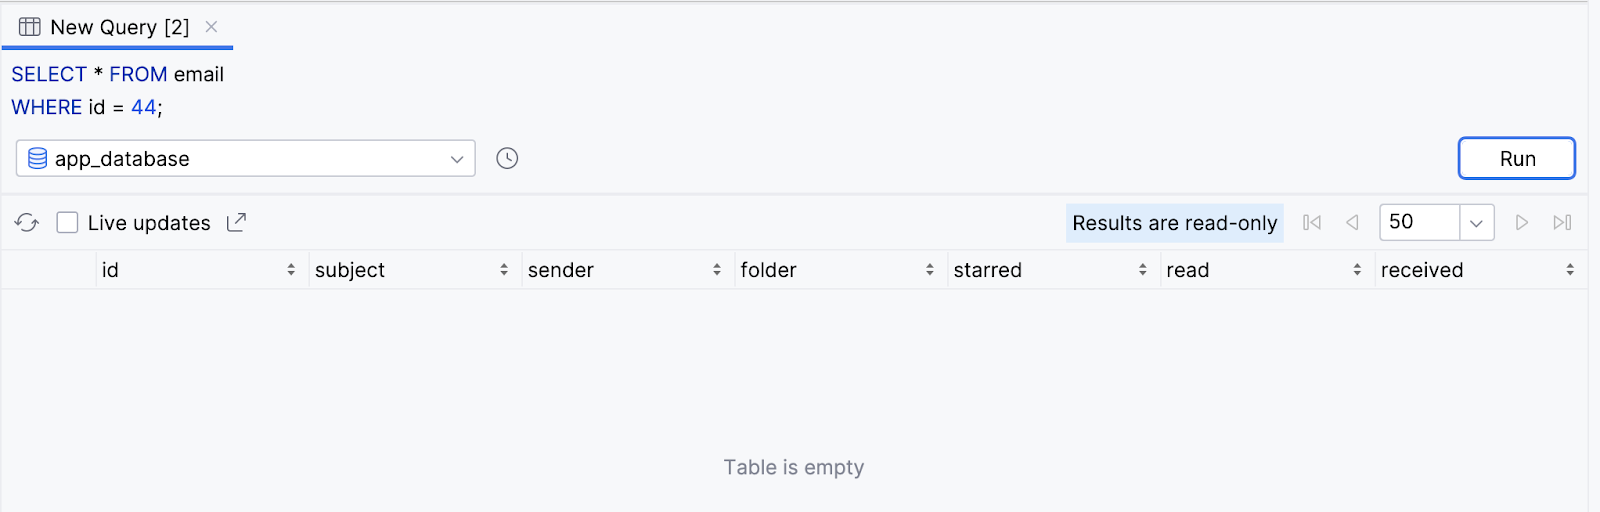
SELECTstatement.
SELECT * FROM email
WHERE id = 44;
- Observe that a row with an
idof44no longer exists.
9. Summary
Congratulations! You learned a lot! You can now read from a database using SELECT statements, including WHERE, GROUP BY, ORDER BY, and LIMIT clauses to filter results. You also learned about frequently used aggregate functions, the DISTINCT keyword to specify unique results, and the LIKE keyword to perform a text search on the values in a column. Finally, you learned how to INSERT, UPDATE, and DELETE rows in a data table.
These skills will translate directly to Room, and with your knowledge of SQL, you'll be more than prepared to take on data persistence in your future apps.
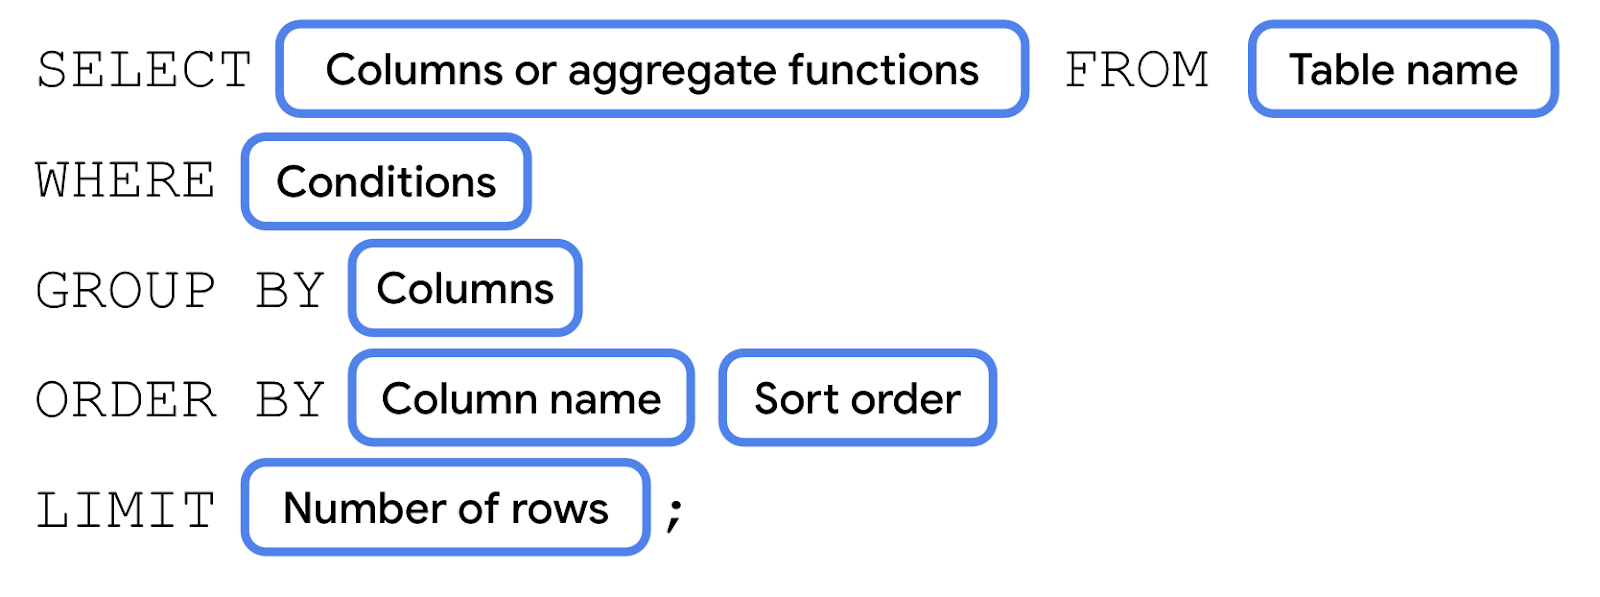
SELECT statement syntax:
10. Learn more
While we've focused on the basics of SQL and some common use cases for Android development, there's a lot more that SQL can do. Refer to the following resources as an additional reference for what you've learned or to learn even more about the topic.