1. Before you begin
Congratulations! You built your first app in Jetpack Compose with navigation between multiple screens. Now you're ready to put what you learned into practice.
This exercise focuses on the creation of the components necessary to add navigation to an app with multiple screen composables. The material expands upon what you learned in the Navigate between screens with Compose codelab, and lets you apply that knowledge to add navigation to an existing app.
The solution code is available at the end, but try to solve the exercises before you check the answers. Consider the solution as one way to implement the app.
Prerequisites
- The Android Basics in Compose coursework through the Navigate between screens with Compose codelab
What you'll need
- A computer with internet access and Android Studio installed
- The starter code for the Lunch Tray app
What you'll build
In these practice problems, you will complete the Lunch Tray app by adding navigation. The Lunch Tray app is an interactive lunch ordering app with three screens. Each screen represents one of the three types of menu items from which you can select: an entree, a side dish, and an accompaniment.
The practice problems are split into sections, where you will do the following:
- Create a reference for each screen that the user navigates.
- Initialize a navigation controller.
- Create a top bar that displays the screen title and navigation buttons, if appropriate.
- Configure a navigation host that determines the routing from one screen to the next.
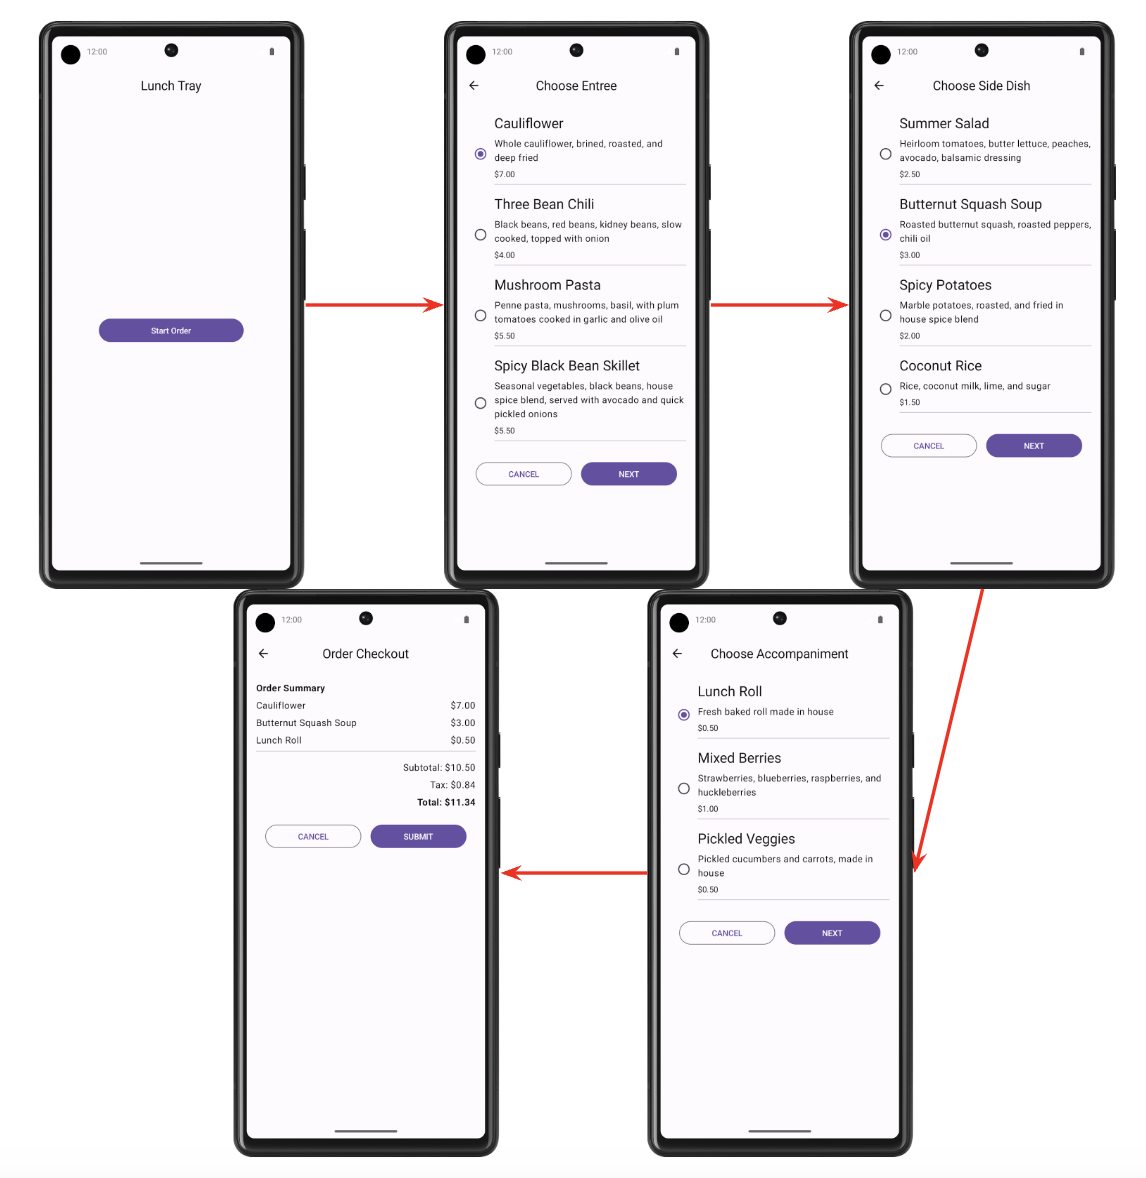
The final app flow will look like this:
2. Get set up
Download the starter code
- In Android Studio, open the
basic-android-kotlin-compose-training-lunch-trayfolder. - Open the Lunch Tray app code in Android Studio.
3. Screen enum
In this section, you create an enum class to hold constants for each of the following Lunch Tray app screens:
- Start
- Entree menu
- Side dish menu
- Accompaniment menu
- Checkout
Each screen should have an associated title in the form of a string. The strings are available in the starter code as resources.
4. Navigation controller and initialization
In this section, you create the navigation controller. You also initialize the backstack entry and name of the current screen.
The name of the current screen should be either the name of the initial screen or the name of the destination screen if it currently exists.
5. AppBar
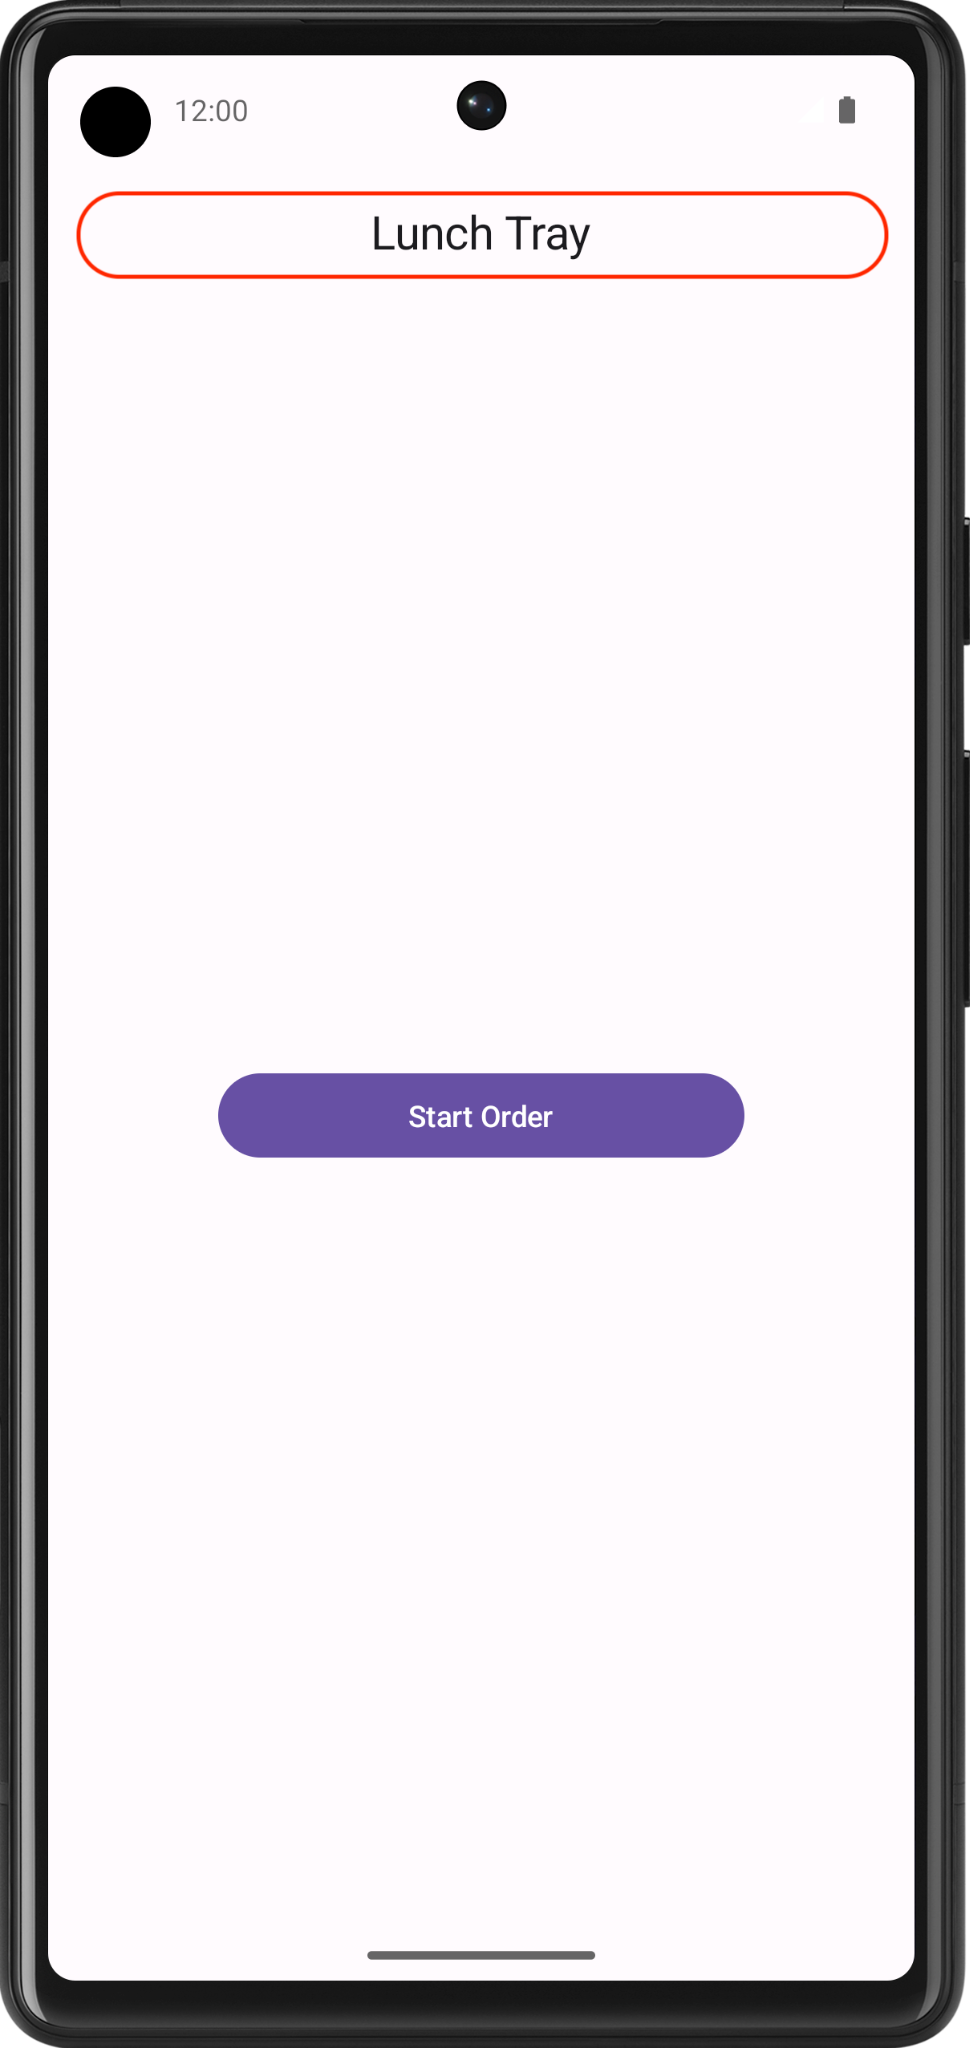
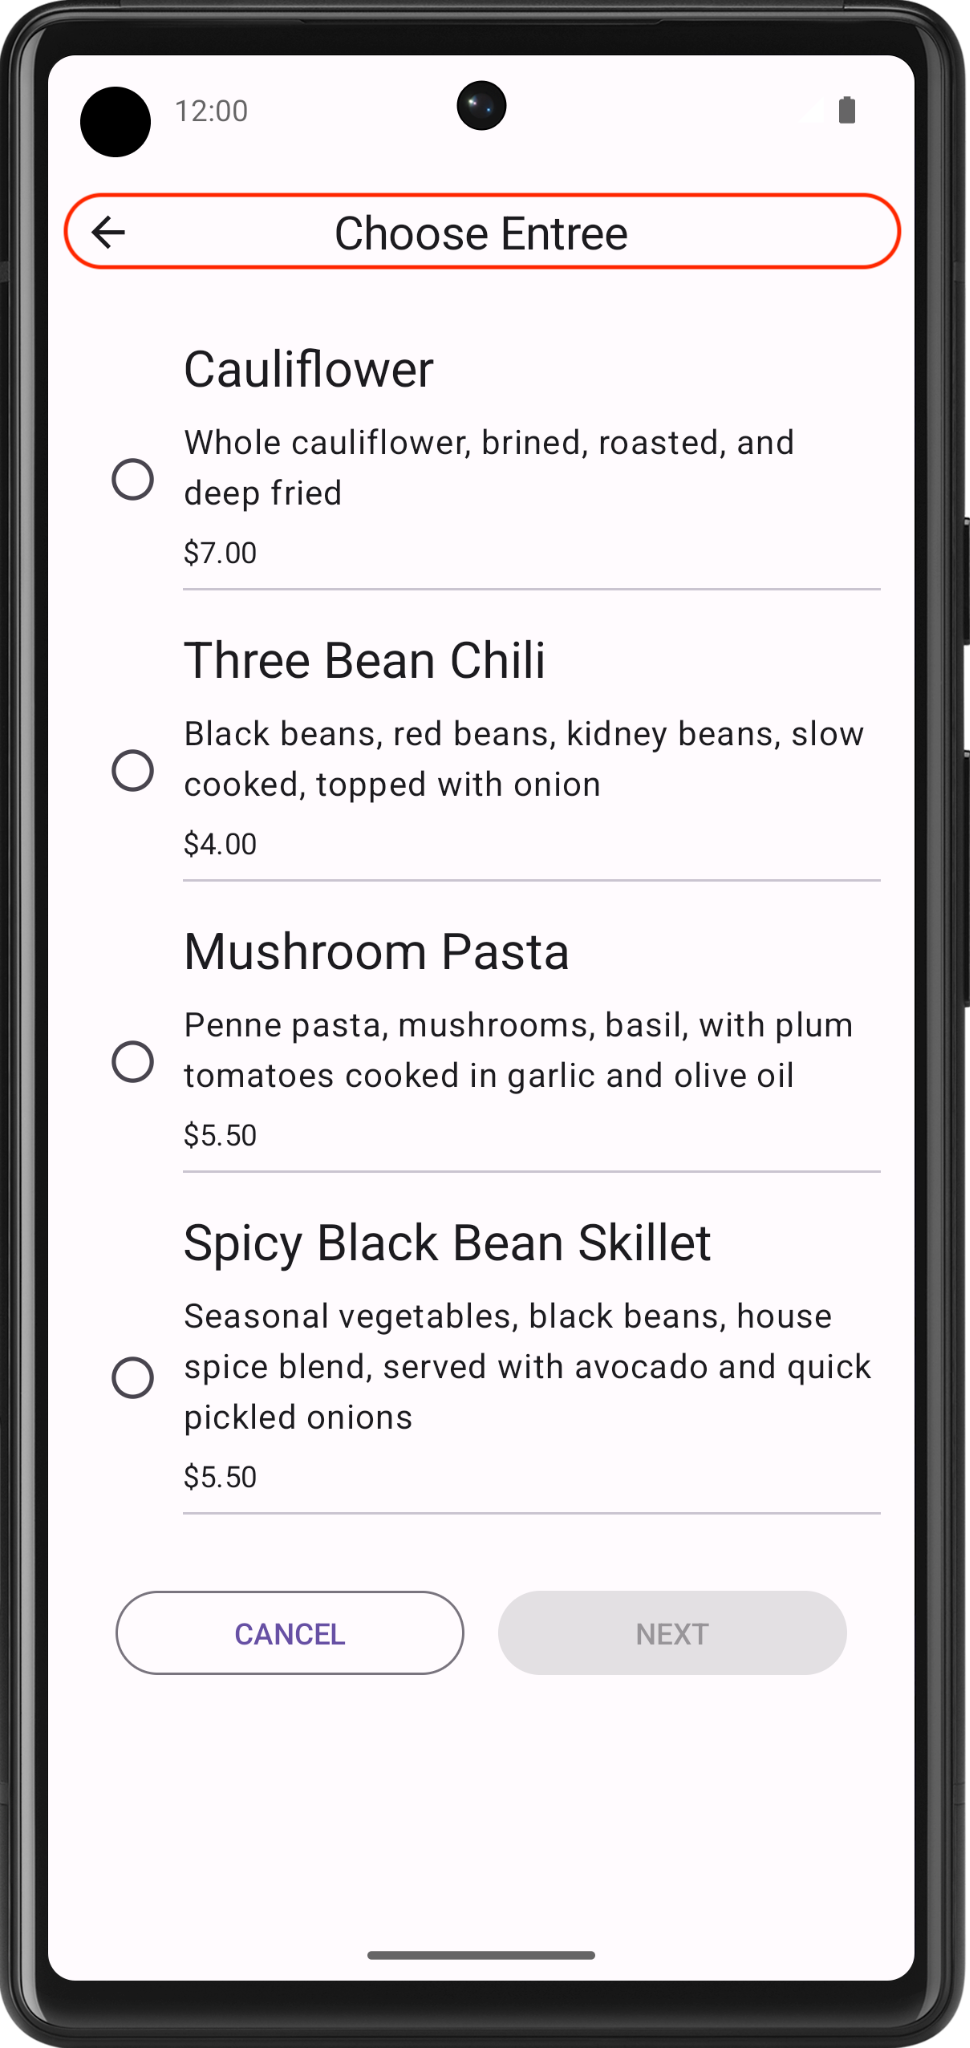
Create a composable for the AppBar of the Scaffold composable. The AppBar should display the title of the current screen. The appropriate backward-navigation button also should appear on a screen if backward navigation is possible. Backward navigation should not be available from the Start screen.
Final screenshot
The following screenshots show two examples of the AppBar: one without the up button and the other with the button.
UI specifications
Use the Icons.Filled.ArrowBack icon for the backward-navigation button.
6. Navigation host
In this exercise, you build the navigational routing for the Lunch Tray app by using the navigation host.
The following diagram shows the navigational flow for the Lunch Tray app:
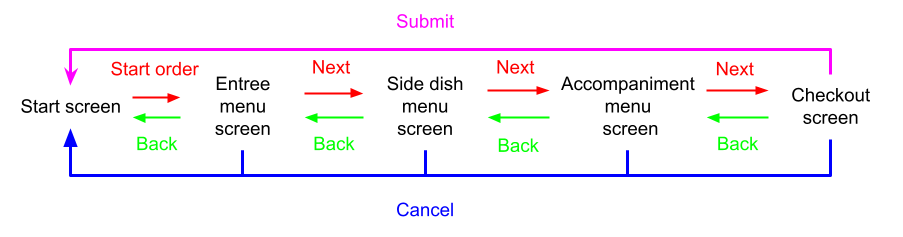
- The Start Order button on the Start screen navigates to the Entree menu screen.
- The Next button on the Entree menu screen navigates to the Side dish menu screen.
- The Next button on the Side dish menu screen navigates to the Accompaniment menu screen.
- The Next button on the Accompaniment menu screen navigates to the Checkout screen.
- The Submit button on the Checkout screen navigates to the Start screen.
- The Cancel button on any screen navigates back to the Start screen.
Final result
After you finish the implementation, your app navigation flow should look like this: