
1. Before you begin
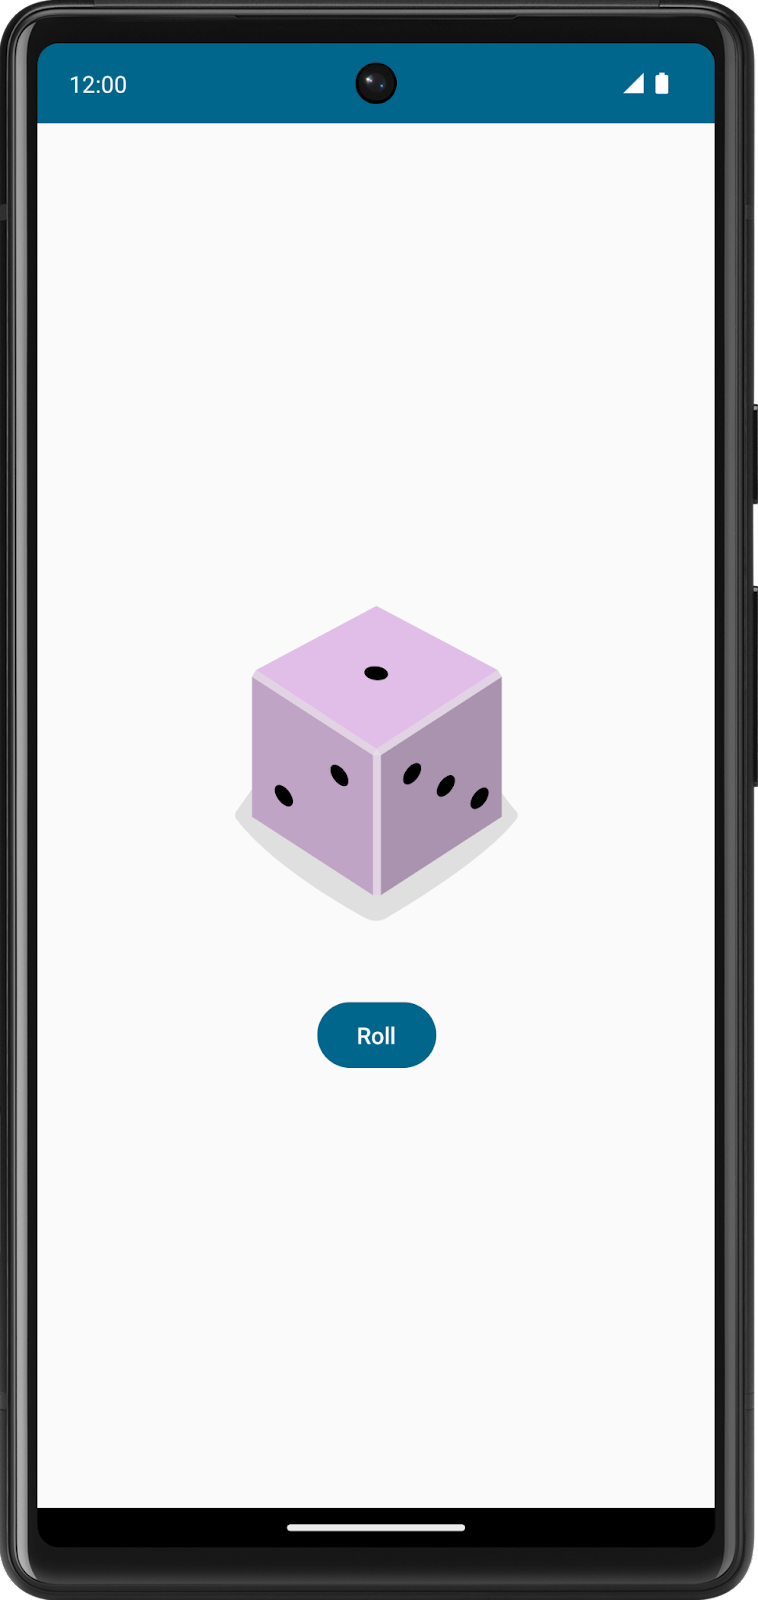
In this codelab, you create an interactive Dice Roller app that lets users tap a Button composable to roll a dice. The outcome of the roll is shown with an Image composable on the screen.
You use Jetpack Compose with Kotlin to build your app layout and then write business logic to handle what happens when the Button composable is tapped.
Prerequisites
- Ability to create and run a basic Compose app in Android Studio.
- Familiarity with how to use the
Textcomposable in an app. - Knowledge of how to extract text into a string resource to make it easier to translate your app and reuse strings.
- Knowledge of Kotlin programming basics.
What you'll learn
- How to add a
Buttoncomposable to an Android app with Compose. - How to add behavior to a
Buttoncomposable in an Android app with Compose. - How to open and modify the
Activitycode of an Android app.
What you'll build
- An interactive Android app called Dice Roller that lets users roll a dice and shows them the result of the roll.
What you'll need
- A computer with Android Studio installed.
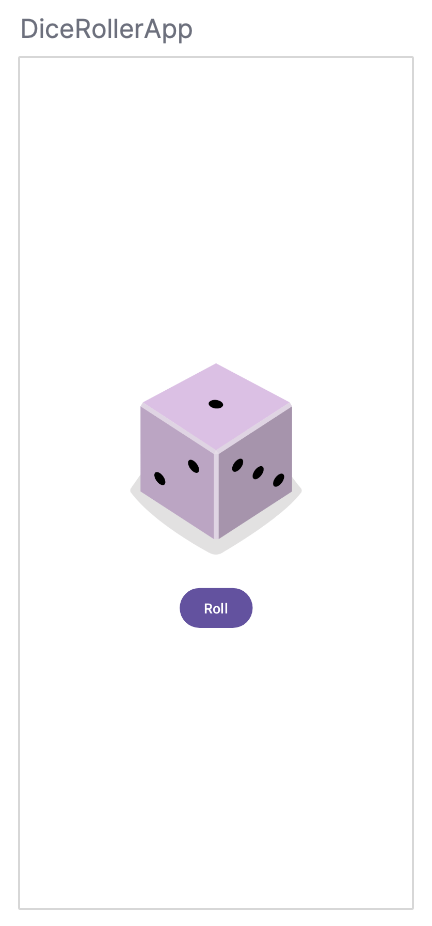
Here's what the app look likes when you complete this codelab:
2. Establish a baseline
Create a project
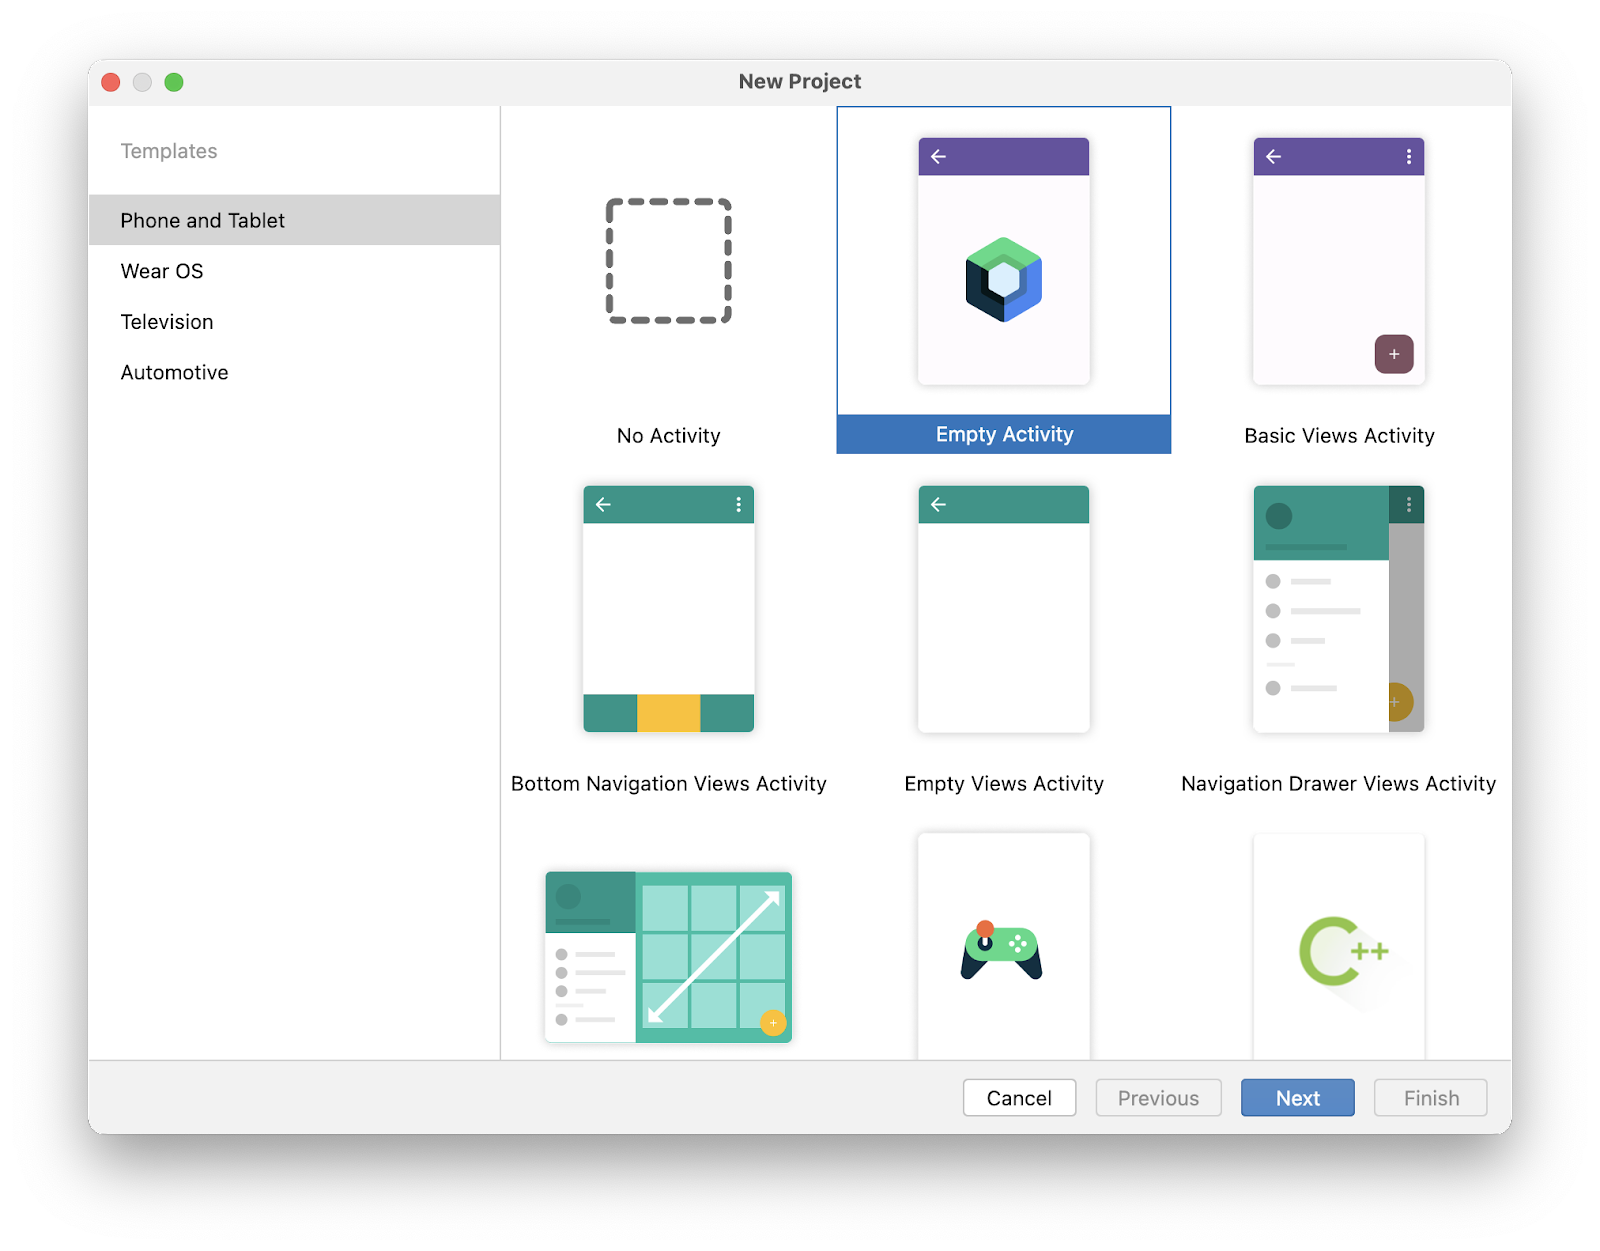
- In Android Studio, click File > New > New Project.
- In the New Project dialog, select Empty Activity and then click Next.
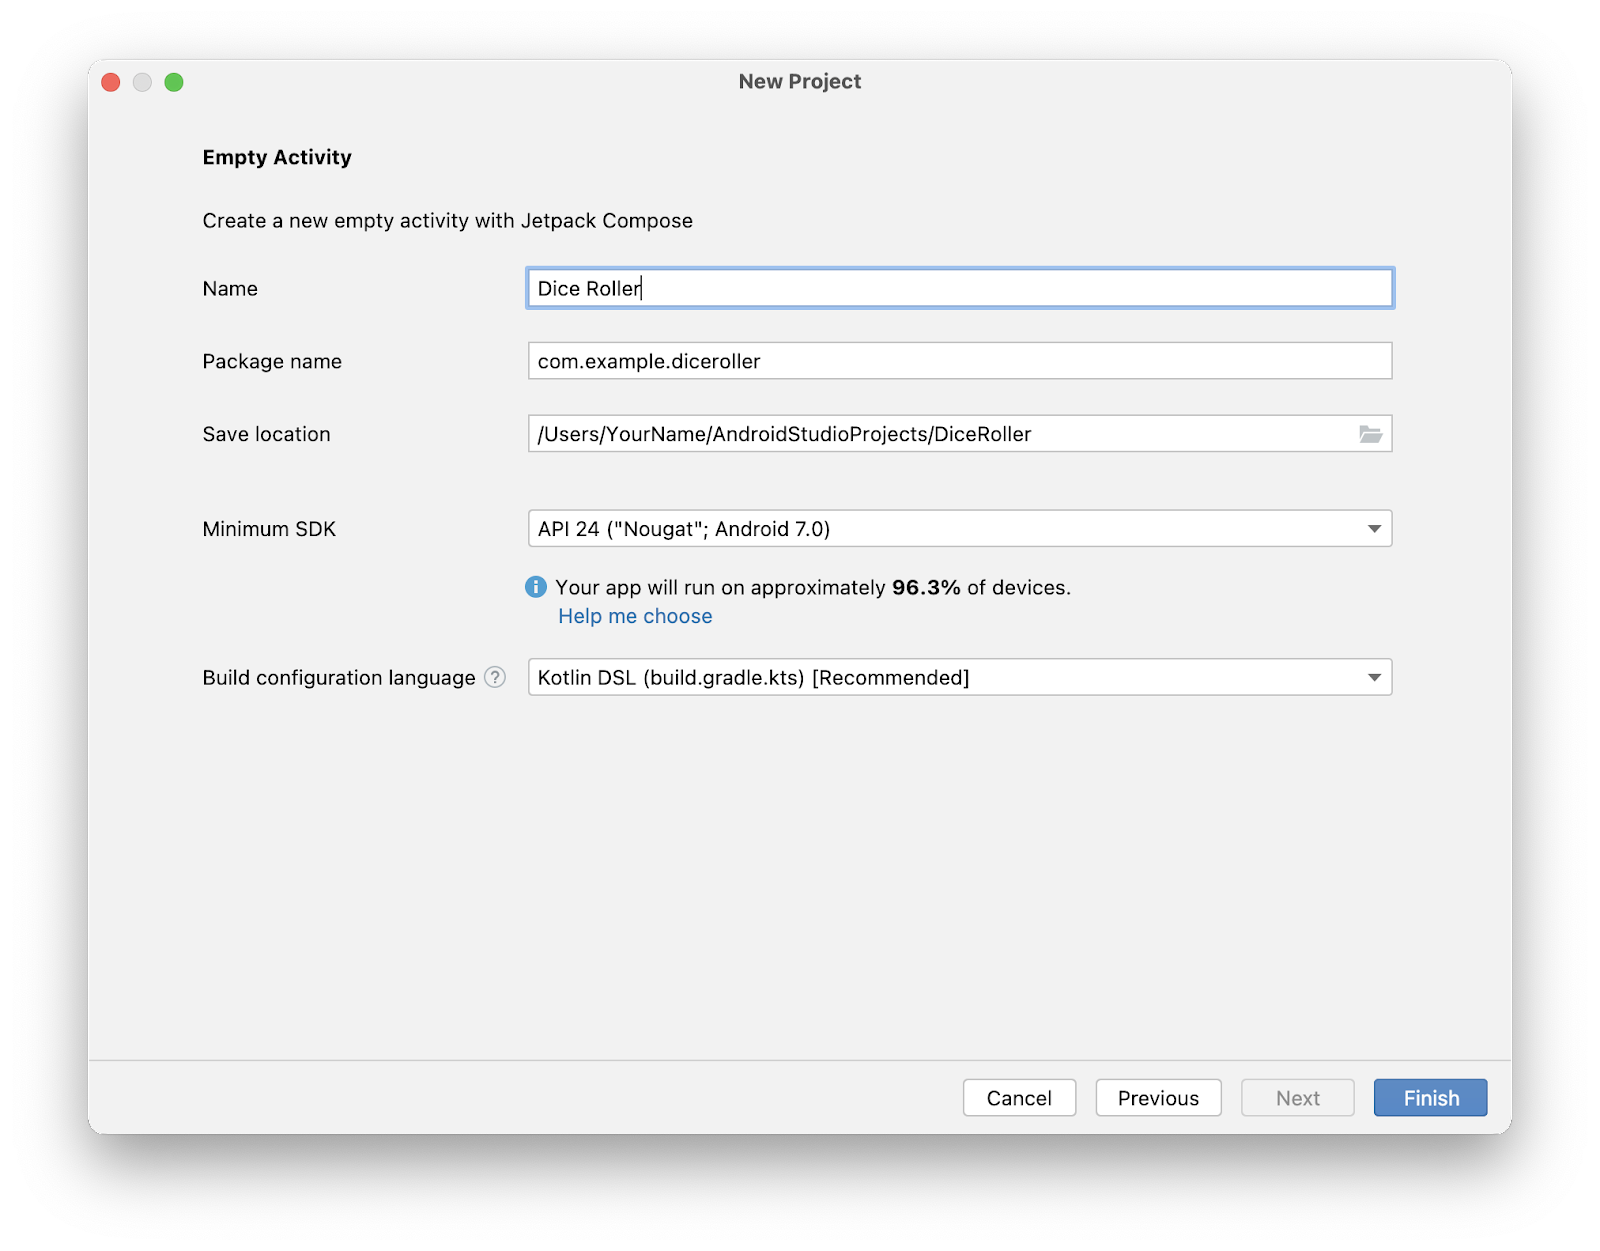
- In the Name field, enter
Dice Roller. - In the Minimum SDK field, select a minimum API level of 24 (Nougat) from the menu and then click Finish.
3. Create the layout infrastructure
Preview the project
To preview the project:
- Click Build & Refresh in the Split or Design pane.

Now you should see a preview in the Design pane. If it looks small, don't worry because it changes when you modify the layout.

Restructure the sample code
You need to change some of the generated code to more closely resemble the theme of a dice roller app.
As you saw in the screenshot of the final app, there's an image of a dice and a button to roll it. You will structure the composable functions to reflect this architecture.
To restructure the sample code:
- Remove the
GreetingPreview()function. - Create a
DiceWithButtonAndImage()function with the@Composableannotation.
This composable function represents the UI components of the layout and also holds the button-click and image-display logic.
- Remove the
Greeting(name: String, modifier: Modifier = Modifier)function. - Create a
DiceRollerApp()function with the@Previewand@Composableannotations.
Because this app only consists of a button and an image, think of this composable function as the app itself. That's why it's called the DiceRollerApp() function.
MainActivity.kt
@Preview
@Composable
fun DiceRollerApp() {

}

@Composable
fun DiceWithButtonAndImage() {

}
Because you removed the Greeting() function, the call to Greeting("Android") in the DiceRollerTheme() lambda body is highlighted red. That's because the compiler can't find a reference to that function anymore.
- Delete all of the code inside the
setContent{}lambda found in theonCreate()method. - In the
setContent{}lambda body, call theDiceRollerTheme{}lambda and then inside theDiceRollerTheme{}lambda, call theDiceRollerApp()function.
MainActivity.kt
override fun onCreate(savedInstanceState: Bundle?) {
    super.onCreate(savedInstanceState)
    setContent {
        DiceRollerTheme {
            DiceRollerApp()
        }
    }
}
- In the
DiceRollerApp()function, call theDiceWithButtonAndImage()function.
MainActivity.kt
@Preview
@Composable
fun DiceRollerApp() {
    DiceWithButtonAndImage()
}
Add a modifier
Compose uses a Modifier object, which is a collection of elements that decorate or modify the behavior of Compose UI elements. You use this to style the UI components of the Dice Roller app's components.
To add a modifier:
- Modify the
DiceWithButtonAndImage()function to accept amodifierargument of typeModifierand assign it a default value ofModifier.
MainActivity.kt
@Composable
fun DiceWithButtonAndImage(modifier: Modifier = Modifier) {
}
The previous code snippet may confuse you, so let's break it down. The function allows a modifier parameter to be passed in. The default value of the modifier parameter is a Modifier object, hence the = Modifier piece of the method signature. The default value of a parameter lets anyone who calls this method in the future decide whether to pass a value for the parameter. If they pass their own Modifier object, they can customize the behavior and decoration of the UI. If they choose not to pass a Modifier object, it assumes the value of the default, which is the plain Modifier object. You can apply this practice to any parameter. For more information about default arguments, see Default arguments.
- Now that the
DiceWithButtonAndImage()composable has a modifier parameter, pass a modifier when the composable is called. Because the method signature for theDiceWithButtonAndImage()function changed, aModifierobject with the desired decorations should be passed in when it's called. TheModifierclass is responsible for the decoration of, or the addition of behavior to, a composable in theDiceRollerApp()function. In this case, there are some important decorations to add to theModifierobject that's passed to theDiceWithButtonAndImage()function.
You might wonder why you should bother to pass a Modifier argument at all when there's a default. The reason is because composables can undergo recomposition, which essentially means that the block of code in the @Composable method executes again. If a Modifier object is created in a block of code, it could potentially be recreated and that isn't efficient. Recomposition is covered later in this codelab.
MainActivity.kt
DiceWithButtonAndImage(modifier = Modifier)
- Chain a
fillMaxSize()method onto theModifierobject so that the layout fills the entire screen.
This method specifies that the components should fill the space available. Earlier in this codelab, you saw a screenshot of the final UI of the Dice Roller app. A notable feature is that the dice and button are centered on the screen. The wrapContentSize() method specifies that the available space should at least be as large as the components inside of it. However, because the fillMaxSize() method is used, if the components inside of the layout are smaller than the available space, an Alignment object can be passed to wrapContentSize() method that specifies how the components should align within the available space.
MainActivity.kt
DiceWithButtonAndImage(modifier = Modifier
    .fillMaxSize()
)
- Chain the
wrapContentSize()method onto theModifierobject and then passAlignment.Centeras an argument to center the components.Alignment.Centerspecifies that a component centers both vertically and horizontally.
MainActivity.kt
DiceWithButtonAndImage(modifier = Modifier
    .fillMaxSize()
    .wrapContentSize(Alignment.Center)
)
4. Create a vertical layout
In Compose, vertical layouts are created with the Column() function.
The Column() function is a composable layout that places its children in a vertical sequence. In the expected app design, you can see that the dice image displays vertically above the roll button:

To create a vertical layout:
- In the
DiceWithButtonAndImage()function, add aColumn()function.
- Pass the
modifierargument from theDiceWithButtonAndImage()method signature to theColumn()'s modifier argument.
The modifier argument ensures that the composables in the Column() function adhere to the constraints called on the modifier instance.
- Pass a
horizontalAlignmentargument to theColumn()function and then set it to a value ofAlignment.CenterHorizontally.
This ensures that the children within the column are centered on the device screen with respect to the width.
MainActivity.kt
fun DiceWithButtonAndImage(modifier: Modifier = Modifier) {
    Column (
        modifier = modifier,
        horizontalAlignment = Alignment.CenterHorizontally
    ) {}
}
5. Add a button
- In the
strings.xmlfile, add a string and set it to aRollvalue.
res/values/strings.xml
<string name="roll">Roll</string>
- In the
Column()'s lambda body, add aButton()function.
- In the
MainActivity.ktfile, add aText()function to theButton()in the lambda body of the function. - Pass the string resource ID of the
rollstring to thestringResource()function and pass the result to theTextcomposable.
MainActivity.kt
Column(
    modifier = modifier,
    horizontalAlignment = Alignment.CenterHorizontally
) {
    Button(onClick = { /*TODO*/ }) {
        Text(stringResource(R.string.roll))
    }
}
6. Add an image
Another essential component of the app is the dice image, which displays the result when the user taps the Roll button. You add the image with an Image composable, but it requires an image resource, so first you need to download some images provided for this app.
Download the dice images
- Open this URL to download a zip file of dice images to your computer and then wait for the download to complete.
Locate the file on your computer. It's likely in your Downloads folder.
- Unpack the zip file to create a new
dice_imagesfolder that contains six dice image files with dice values from 1 to 6.
Add the dice images to your app
- In Android Studio, click View > Tool Windows > Resource Manager.
- Click + > Import Drawables to open a file browser.

- Find and select the six dice image folder and proceed to upload them.
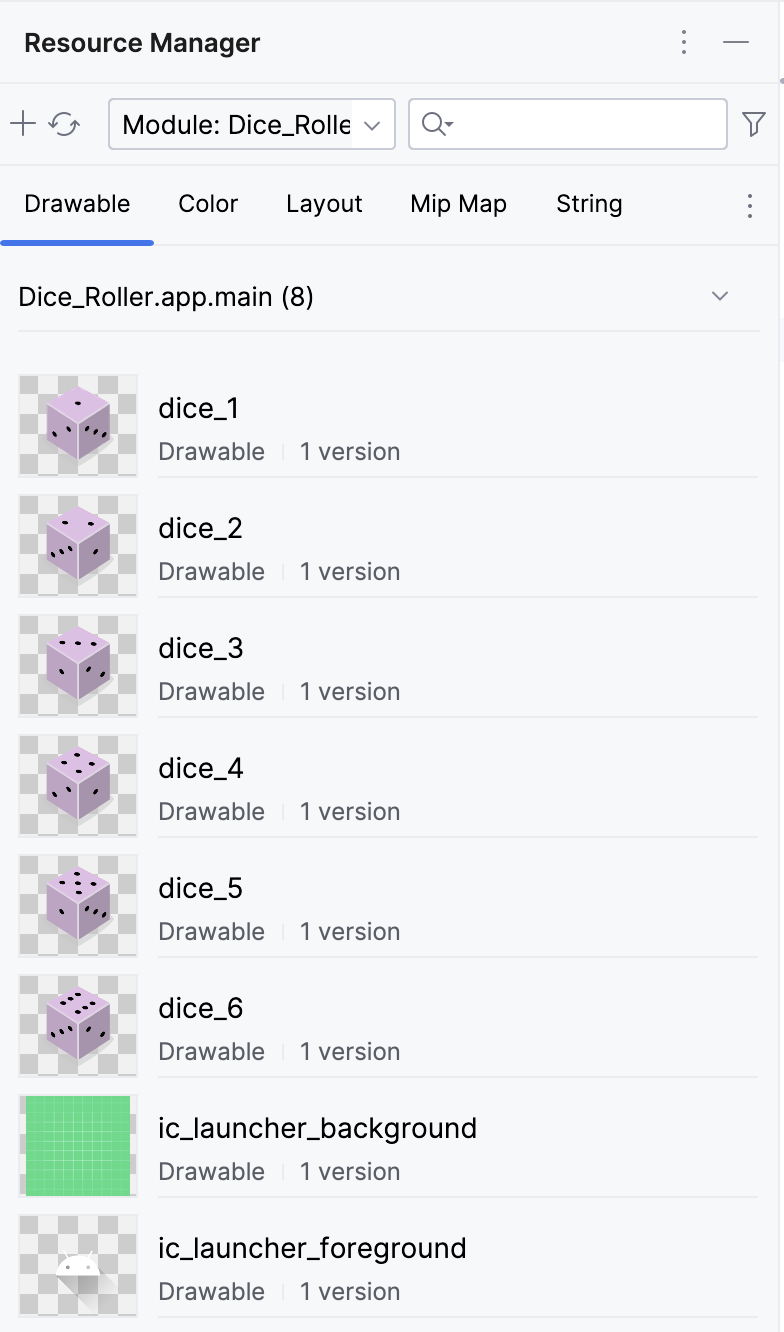
The uploaded images will appear as follows.

- Click Next.
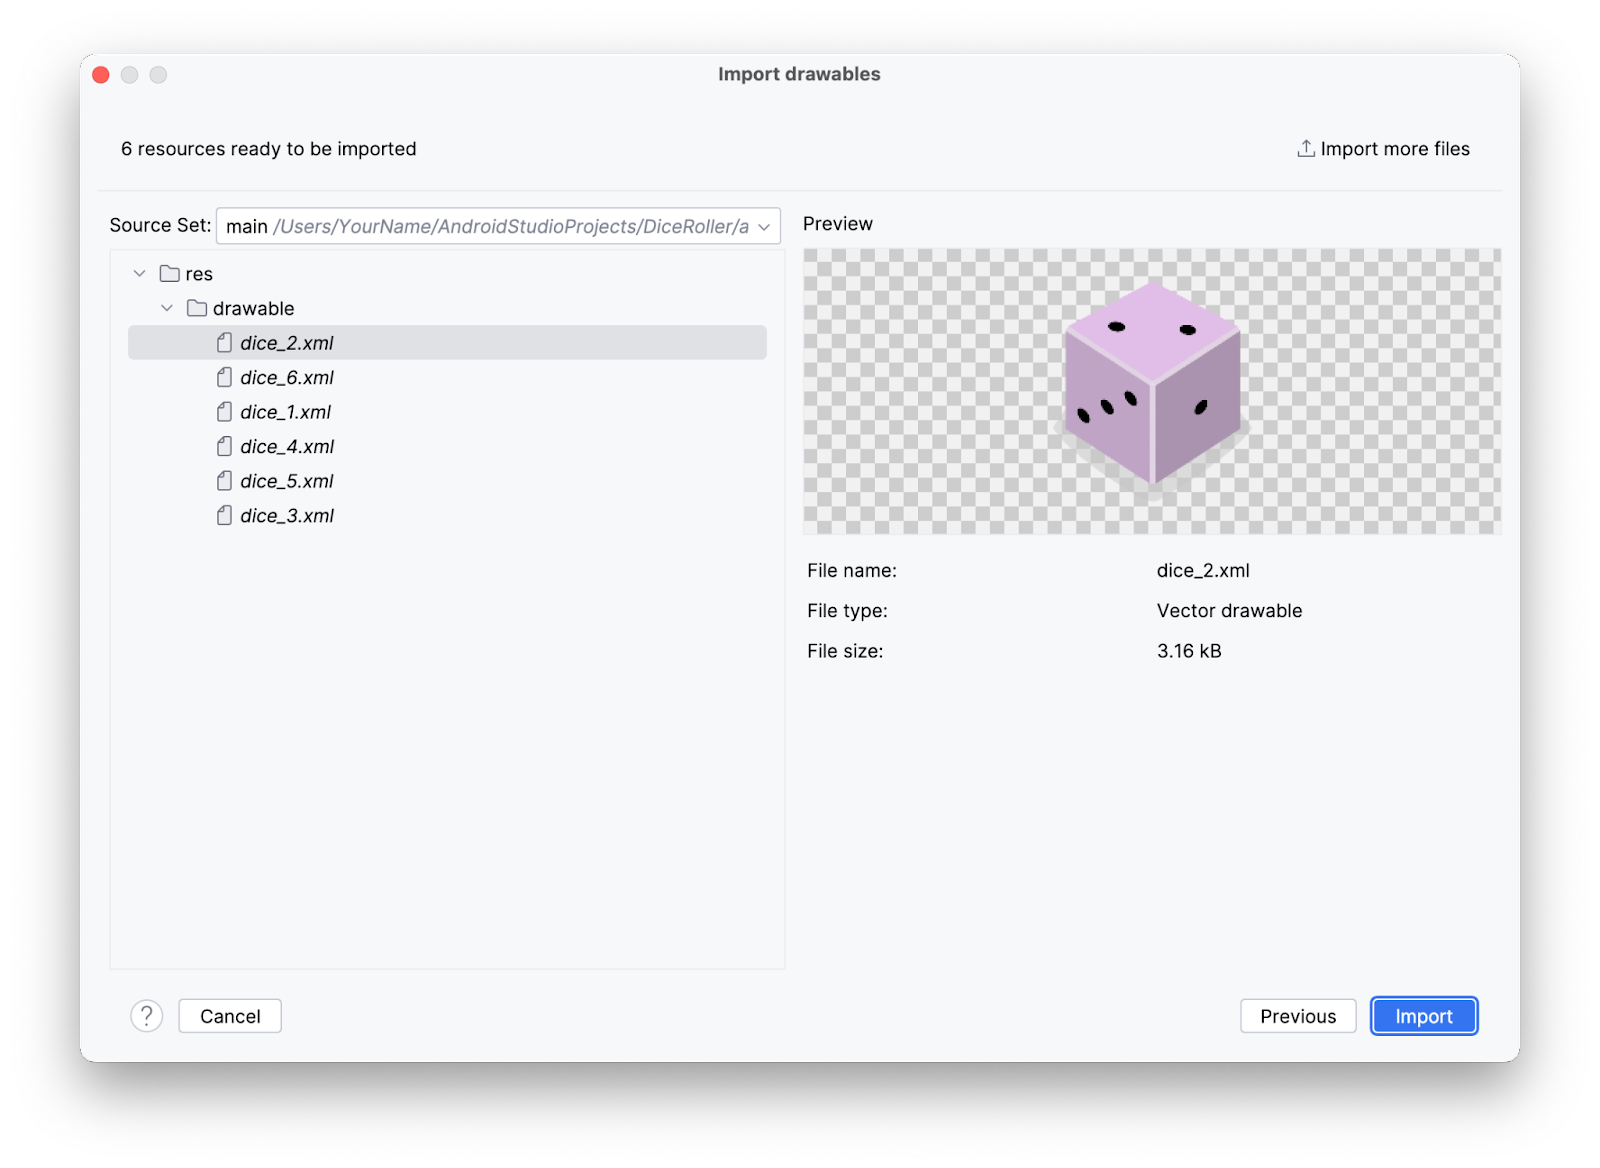
The Import Drawables dialog appears and shows where the resource files go in the file structure.
- Click Import to confirm that you want to import the six images.
The images should appear in the Resource Manager pane.
Nice work! In the next task, you use these images in your app.
Add an Image composable
The dice image should appear above the Roll button. Compose inherently places UI components sequentially. In other words, whichever composable is declared first displays first. This could mean that the first declaration displays above, or before, the composable declared after it. Composables inside of a Column composable will appear above / below each other on the device. In this app, you use a Column to stack Composables vertically, therefore, whichever Composable is declared first inside the Column() function displays before the composable declared after it in the same Column() function.
To add an Image composable:
- In the
Column()function body, create anImage()function before theButton()function.
MainActivity.kt
Column(
    modifier = modifier,
    horizontalAlignment = Alignment.CenterHorizontally
) {
    Image()
    Button(onClick = { /*TODO*/ }) {
      Text(stringResource(R.string.roll))
    }
}
- Pass the
Image()function apainterargument, and then assign it apainterResourcevalue that accepts a drawable resource id argument. For now, pass the following resource id:R.drawable.dice_1argument.
MainActivity.kt
Image(
    painter = painterResource(R.drawable.dice_1)
)
- Any time you create an Image in your app, you should provide what is called a "content description." Content descriptions are an important part of Android development. They attach descriptions to their respective UI components to increase accessibility. For more information about content descriptions, see Describe each UI element. You can pass a content description to the image as a parameter.
MainActivity.kt
Image(
    painter = painterResource(R.drawable.dice_1),
    contentDescription = "1"
)
Now all the necessary UI components are present. But the Button and the Image are crowding each other a bit.
- To fix that, add a
Spacercomposable between theImageand theButtoncomposables. ASpacertakes aModifieras a parameter. In this case, theImageis above theButton, so there needs to be a vertical space between them. Therefore, theModifier's height can be set to apply to theSpacer. Try setting the height to16.dp. Typically, dp dimensions are changed in increments of4.dp.
MainActivity.kt
Spacer(modifier = Modifier.height(16.dp))
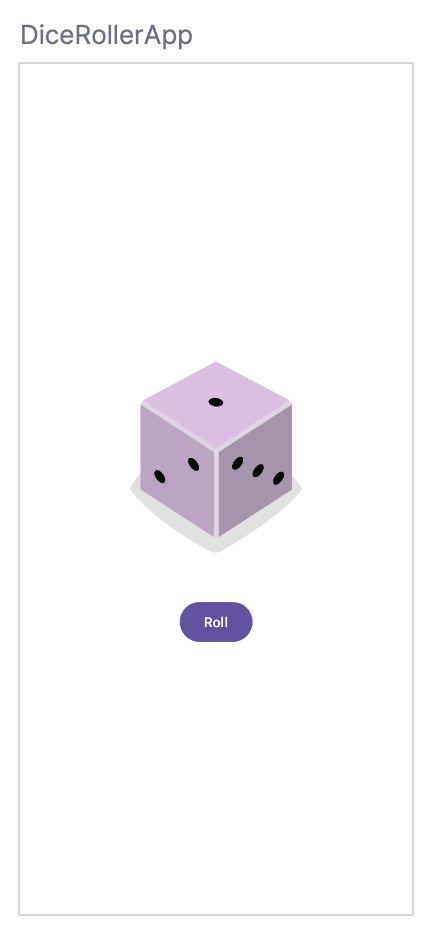
- In the Preview pane, click Build & Refresh.
You should see something similar to this image:
7. Build the dice-roll logic
Now that all the necessary composables are present, you modify the app so that a tap of the button rolls the dice.
Make the button interactive
- In the
DiceWithButtonAndImage()function before theColumn()function, create aresultvariable and set it equal to a1value. - Take a look at the
Buttoncomposable. You will notice that it is being passed anonClickparameter which is set to a pair of curly braces with the comment/*TODO*/inside the braces. The braces, in this case, represent what is known as a lambda, the area inside of the braces being the lambda body. When a function is passed as an argument, it can also be referred to as a " callback".
MainActivity.kt
Button(onClick = { /*TODO*/ })
A lambda is a function literal, which is a function like any other, but instead of being declared separately with the fun keyword, it is written inline and passed as an expression. The Button composable is expecting a function to be passed as the onClick parameter. This is the perfect place to use a lambda, and you will be writing the lambda body in this section.
- In the
Button()function, remove the/*TODO*/comment from the value of the lambda body of theonClickparameter. - A dice roll is random. To reflect that in code, you need to use the correct syntax to generate a random number. In Kotlin, you can use the
random()method on a number range. In theonClicklambda body, set theresultvariable to a range between 1 to 6 and then call therandom()method on that range. Remember that, in Kotlin, ranges are designated by two periods between the first number in the range and the last number in the range.
MainActivity.kt
fun DiceWithButtonAndImage(modifier: Modifier = Modifier) {
    var result = 1
    Column(
        modifier = modifier,
        horizontalAlignment = Alignment.CenterHorizontally
    ) {
        Image(
            painter = painterResource(R.drawable.dice_1),
            contentDescription = "1"
        )
        Spacer(modifier = Modifier.height(16.dp))
        Button(onClick = { result = (1..6).random() }) {
            Text(stringResource(R.string.roll))
        }
    }
}
Now the button is tappable, but a tap of the button won't cause any visual change yet because you still need to build that functionality.
Add a conditional to the dice roller app
In the previous section, you created a result variable and hard-coded it to a 1 value. Ultimately, the value of the result variable is reset when the Roll button is tapped and it should determine which image is shown.
Composables are stateless by default, which means that they don't hold a value and can be recomposed any time by the system, which results in the value being reset. However, Compose provides a convenient way to avoid this. Composable functions can store an object in memory using the remember composable.
- Make the
resultvariable aremembercomposable.
The remember composable requires a function to be passed.
- In the
remembercomposable body, pass in amutableStateOf()function and then pass the function a1argument.
The mutableStateOf() function returns an observable. You learn more about observables later, but for now this basically means that when the value of the result variable changes, a recomposition is triggered, the value of the result is reflected, and the UI refreshes.
MainActivity.kt
var result by remember { mutableStateOf(1) }
Now, when the button is tapped, the result variable is updated with a random number value.
The result variable can now be used to determine which image to show.
- Underneath the instantiation of the
resultvariable, create an immutableimageResourcevariable set to awhenexpression that accepts aresultvariable and then set each possible result to its drawable.
MainActivity.kt
val imageResource = when (result) {
    1 -> R.drawable.dice_1
    2 -> R.drawable.dice_2
    3 -> R.drawable.dice_3
    4 -> R.drawable.dice_4
    5 -> R.drawable.dice_5
    else -> R.drawable.dice_6
}
- Change the ID passed to the
painterResourceparameter of theImagecomposable from theR.drawable.dice_1drawable to theimageResourcevariable. - Change the
contentDescriptionparameter of theImagecomposable to reflect the value ofresultvariable by converting theresultvariable to a string withtoString()and passing it as thecontentDescription.
MainActivity.kt
Image(
   painter = painterResource(imageResource),
   contentDescription = result.toString()
)
- Run your app.
Your Dice Roller app should fully work now!
8. Get the solution code
To download the code for the finished codelab, you can use this git command:
$ git clone https://github.com/google-developer-training/basic-android-kotlin-compose-training-dice-roller.git
Alternatively, you can download the repository as a zip file, unzip it, and open it in Android Studio.
If you want to see the solution code, view it on GitHub.
- Navigate to the provided GitHub repository page for the project.
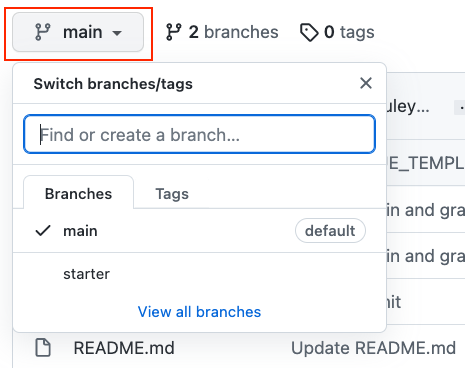
- Verify that the branch name matches the branch name specified in the codelab. For example, in the following screenshot the branch name is main.
- On the GitHub page for the project, click the Code button, which brings up a popup.

- In the popup, click the Download ZIP button to save the project to your computer. Wait for the download to complete.
- Locate the file on your computer (likely in the Downloads folder).
- Double-click the ZIP file to unpack it. This creates a new folder that contains the project files.
Open the project in Android Studio
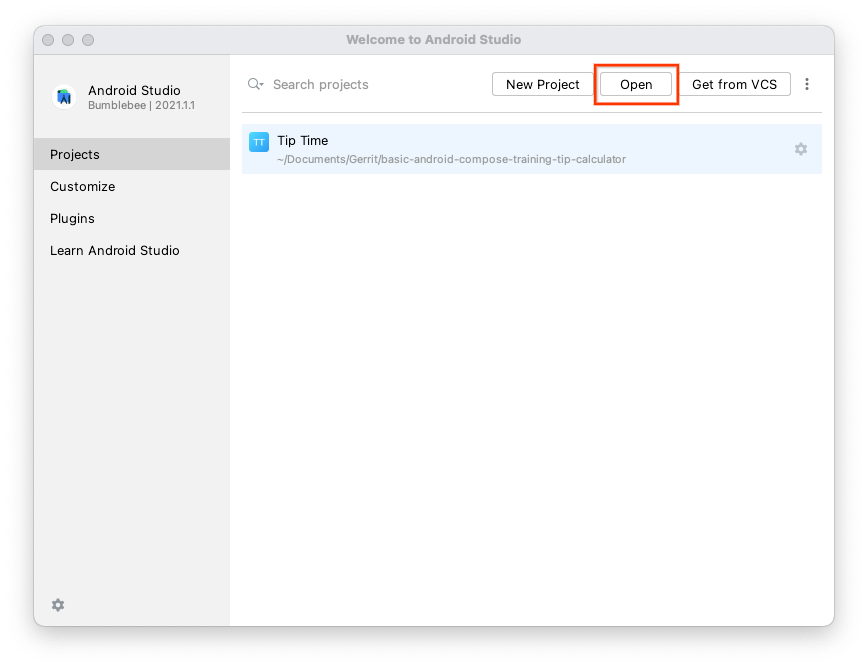
- Start Android Studio.
- In the Welcome to Android Studio window, click Open.
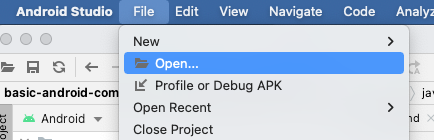
Note: If Android Studio is already open, instead, select the File > Open menu option.
- In the file browser, navigate to where the unzipped project folder is located (likely in your Downloads folder).
- Double-click on that project folder.
- Wait for Android Studio to open the project.
- Click the Run button
 to build and run the app. Make sure it builds as expected.
9. Conclusion
You created an interactive Dice Roller app for Android with Compose!
Summary
- Define composable functions.
- Create layouts with Compositions.
- Create a button with the
Buttoncomposable. - Import
drawableresources. - Display an image with the
Imagecomposable. - Make an interactive UI with composables.
- Use the
remembercomposable to store objects in a Composition to memory. - Refresh the UI with the
mutableStateOf()function to make an observable.