
1. Introduction
What you'll learn
- What the main components of the paging library are.
- How to add the paging library to your project.
What you'll build
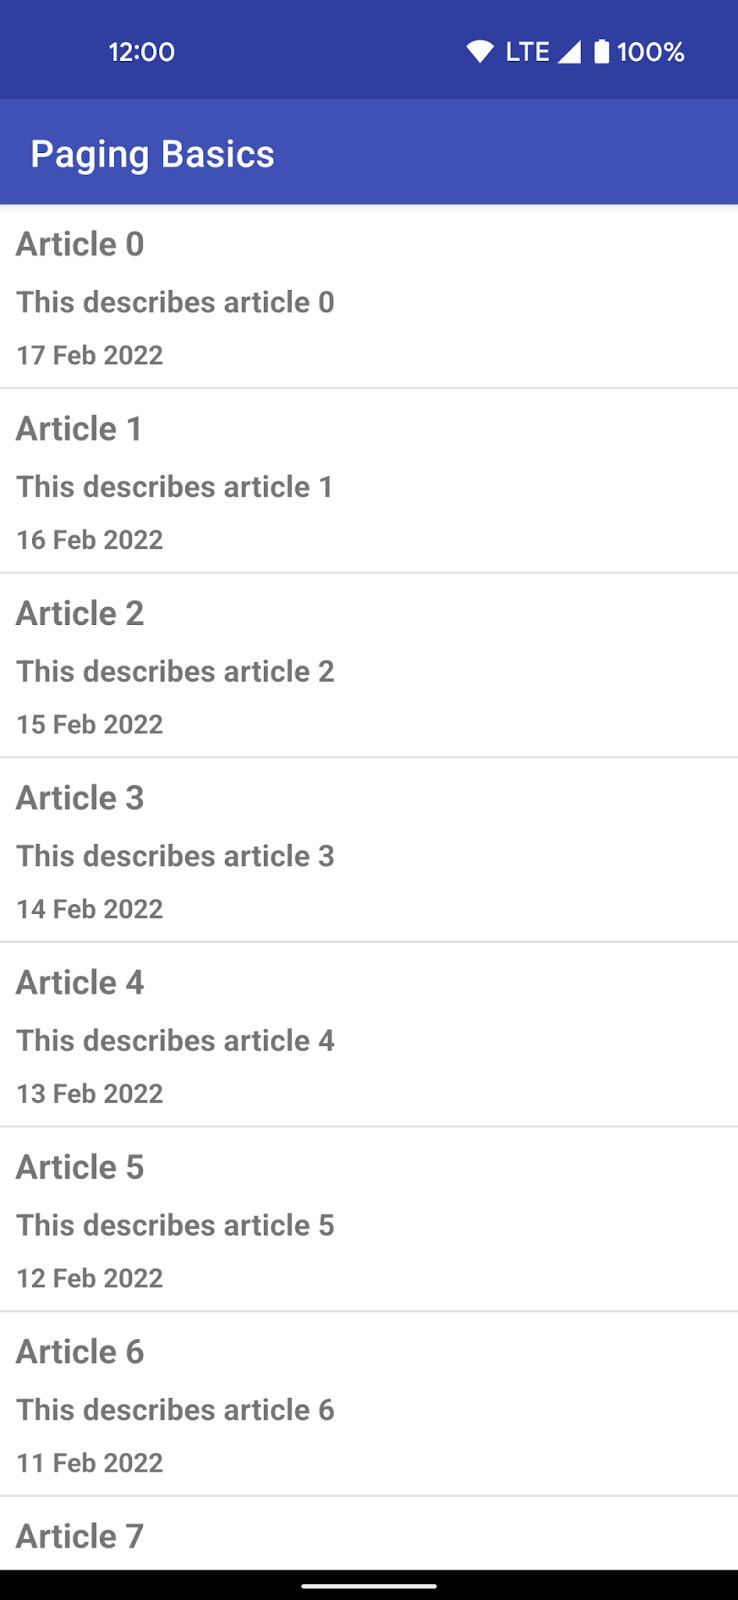
In this codelab, you start with a sample app that already displays a list of articles. The list is static, it has 500 articles, and all of them are kept in the phone's memory:
As you progress through the codelab, you will be:
- ...introduced to pagination as a concept.
- ...introduced to the core components of the Paging Library.
- ...shown how to implement pagination with the Paging library.
When you're done, you will have an app:
- ...that successfully implements pagination.
- ...that communicates effectively to the user when more data is being fetched.
Here's a quick preview of the UI we'll end up with:
What you'll need
Nice to have
- Familiarity with the following Architecture Components: ViewModel, View Binding, and the architecture suggested in the Guide to App Architecture. For an introduction to Architecture Components, check out the Room with a View codelab.
- Familiarity with coroutines and Kotlin Flow. For an introduction to Flow, check out the Advanced Coroutines with Kotlin Flow and LiveData codelab.
2. Setup Your Environment
In this step, you will download the code for the entire codelab and then run a simple example app.
To get you started as quickly as possible, we have prepared a starter project for you to build on.
If you have git installed, you can simply run the command below. To check whether git is installed, type git --version in the terminal or command line and verify that it executes correctly.
git clone https://github.com/googlecodelabs/android-paging
If you do not have git, you can click the following button to download all the code for this codelab:
The code is organized into two folders, basic and advanced. For this codelab, we're only concerned with the basic folder.
In the basic folder, there are also two more folders: start and end. We'll start working on the code in the start folder and at the end of the codelab, the code in the start folder should be identical to that in the end folder.
- Open the project in the
basic/startdirectory in Android Studio. - Run the
apprun configuration on a device or emulator.

We should see a list of articles! Scroll to the end to verify that the list is static—in other words, more items are not fetched when we reach the end of the list. Scroll back to the top to verify that we still have all our items.
3. An introduction to pagination
One of the most common ways of displaying information to users is with lists. However, sometimes these lists offer just a small window into all the content available to the user. As the user scrolls through the information that is available, there is often the expectation that more data is fetched to supplement the information that has already been seen. Each time data is fetched, it needs to be efficient and seamless so that incremental loads don't detract from the user experience. Incremental loads also offer a performance benefit, as the app does not need to hold large amounts of data in memory at once.
This process of fetching information incrementally is called pagination, where each page corresponds to a chunk of data to be fetched. To request a page, the data source being paged through often requires a query which defines the information required. The rest of this codelab will introduce the Paging library, and demonstrate how it helps you quickly and efficiently implement pagination in your app.
Core components of the Paging Library
The core components of the Paging library are as follows:
PagingSource- the base class for loading chunks of data for a specific page query. It is part of the data layer, and is typically exposed from aDataSourceclass and subsequently by theRepositoryfor use in theViewModel.PagingConfig- a class that defines the parameters that determine paging behavior. This includes page size, whether placeholders are enabled, and so on.Pager- a class responsible for producing thePagingDatastream. It depends on thePagingSourceto do this and should be created in theViewModel.PagingData- a container for paginated data. Each refresh of data will have a separate correspondingPagingDataemission backed by its ownPagingSource.PagingDataAdapter- aRecyclerView.Adaptersubclass that presentsPagingDatain aRecyclerView. ThePagingDataAdaptercan be connected to a KotlinFlow, aLiveData, an RxJavaFlowable, an RxJavaObservable, or even a static list using factory methods. ThePagingDataAdapterlistens to internalPagingDataloading events and efficiently updates the UI as pages are loaded.

In the following sections, you will implement examples of each of the components described above.
4. Project overview
The app in its current form displays a static list of articles. Each article has a title, description and date it was created. A static list works fine for a small number of items, but it doesn't scale well as datasets get larger. We'll fix that by implementing pagination using the Paging library, but first let's go over the components that are already in the app.
The app follows the architecture recommended in the guide to app architecture. Here's what you will find in each package:
Data layer:
ArticleRepository: Responsible for providing the list of articles and keeping them in memory.Article: A class representing the data model, a representation of the information pulled from the data layer.
UI layer:
- The
Activity,RecyclerView.Adapter, andRecyclerView.ViewHolder: Classes responsible for displaying the list in the UI. - The
ViewModel: The state holder responsible for creating the state the UI needs to display.
The repository exposes all its articles in a Flow with the articleStream field. This is in turn read by the ArticleViewModel in the UI layer which then prepares it for consumption by the UI in ArticleActivity with the state field, a StateFlow.
Exposing articles as a Flow from the repository gives the repository the ability to update the articles presented as they change over time. For example, if an article's title changed, that change can easily be communicated to collectors of articleStream. The use of a StateFlow for the UI state in the ViewModel ensures that even if we stop collecting the UI state—for example, when the Activity is recreated during a configuration change—we can pick up right where we left off the moment we start collecting it again.
As mentioned earlier, the current articleStream in the repository only presents news for the current day. While this might be enough for some users, others might want to view older articles when they've scrolled through all available articles for the current day. This expectation makes the displaying of articles a great candidate for pagination. Other reasons we should explore paging through the articles include the following:
- The
ViewModelkeeps all items loaded in memory in theitemsStateFlow. This is a major concern when the dataset gets really large as it can impact performance. - Updating one or more articles in the list when they've changed becomes more expensive the bigger the list of articles gets.
The Paging library helps solve all these problems while providing a consistent API for fetching data incrementally (pagination) in your apps.
5. Define the source of data
When implementing pagination, we want to be confident the following conditions are met:
- Properly handling requests for the data from the UI, ensuring that multiple requests aren't triggered at the same time for the same query.
- Keeping a manageable amount of retrieved data in memory.
- Triggering requests to fetch more data to supplement the data we've already fetched.
We can achieve all this with a PagingSource. A PagingSource defines the source of data by specifying how to retrieve data in incremental chunks. The PagingData object then pulls data from the PagingSource in response to loading hints that are generated as the user scrolls in a RecyclerView.
Our PagingSource will load articles. In data/Article.kt you will find the model defined as follows:
data class Article(
    val id: Int,
    val title: String,
    val description: String,
    val created: LocalDateTime,
)
To build the PagingSource you will need to define the following:
- The type of the paging key - The definition of the type of the page query we use to request more data. In our case, we fetch articles after or before a certain article ID since the IDs are guaranteed to be ordered and increasing.
- The type of data loaded - Each page returns a
Listof articles, so the type isArticle. - Where the data is retrieved from - Typically, this would be a database, network resource, or any other source of paginated data. In the case of this codelab however, we're using locally generated data.
In the data package, let's create a PagingSource implementation in a new file called ArticlePagingSource.kt:
package com.example.android.codelabs.paging.data

import androidx.paging.PagingSource
import androidx.paging.PagingState

class ArticlePagingSource : PagingSource<Int, Article>() {
    override suspend fun load(params: LoadParams<Int>): LoadResult<Int, Article> {
        TODO("Not yet implemented")
    }
   override fun getRefreshKey(state: PagingState<Int, Article>): Int? {
        TODO("Not yet implemented")
    }
}
PagingSource requires us to implement two functions: load() and getRefreshKey().
The load() function will be called by the Paging library to asynchronously fetch more data to be displayed as the user scrolls around. The LoadParams object keeps information related to the load operation, including the following:
- Key of the page to be loaded - If this is the first time that
load()is called,LoadParams.keywill benull. In this case, you will have to define the initial page key. For our project, we use the article ID as the key. Let's also add aSTARTING_KEYconstant of0to the top of theArticlePagingSourcefile for the initial page key. - Load size - the requested number of items to load.
The load() function returns a LoadResult. The LoadResult can be one of the following types:
LoadResult.Page, if the result was successful.LoadResult.Error, in case of error.LoadResult.Invalid, if thePagingSourceshould be invalidated because it can no longer guarantee the integrity of its results.
A LoadResult.Page has three required arguments:
data: AListof the items fetched.prevKey: The key used by theload()method if it needs to fetch items behind the current page.nextKey: The key used by theload()method if it needs to fetch items after the current page.
...and two optional ones:
itemsBefore: The number of placeholders to show before the loaded data.itemsAfter: The number of placeholders to show after the loaded data.
Our loading key is the Article.id field. We can use it as a key because the Article ID increases by one for each article; that is, article IDs are consecutive monotonically increasing integers.
The nextKey or prevKey is null if there is no more data to be loaded in the corresponding direction. In our case, for prevKey:
- If the
startKeyis the same asSTARTING_KEYwe return null since we can't load more items behind this key. - Otherwise, we take the first item in the list and load
LoadParams.loadSizebehind it making sure to never return a key less thanSTARTING_KEY. We do this by defining theensureValidKey()method.
Add the following function that checks if the paging key is valid:
class ArticlePagingSource : PagingSource<Int, Article>() {
   ...
   /**
     * Makes sure the paging key is never less than [STARTING_KEY]
     */
    private fun ensureValidKey(key: Int) = max(STARTING_KEY, key)
}
For nextKey:
- Since we support loading infinite items, we pass in
range.last + 1.
Also, because each article has a created field, we'll also need to generate a value for it. Add the following to the top of the file:
private val firstArticleCreatedTime = LocalDateTime.now()

class ArticlePagingSource : PagingSource<Int, Article>() {
   ...
}
With all of that code in place, we are now able to implement the load() function:
import kotlin.math.max
...

private val firstArticleCreatedTime = LocalDateTime.now()

class ArticlePagingSource : PagingSource<Int, Article>() {
   override suspend fun load(params: LoadParams<Int>): LoadResult<Int, Article> {
        // Start paging with the STARTING_KEY if this is the first load
        val start = params.key ?: STARTING_KEY
        // Load as many items as hinted by params.loadSize
        val range = start.until(start + params.loadSize)

        return LoadResult.Page(
            data = range.map { number ->
                Article(
                    // Generate consecutive increasing numbers as the article id
                    id = number,
                    title = "Article $number",
                    description = "This describes article $number",
                    created = firstArticleCreatedTime.minusDays(number.toLong())
                )
            },

            // Make sure we don't try to load items behind the STARTING_KEY
            prevKey = when (start) {
                STARTING_KEY -> null
                else -> ensureValidKey(key = range.first - params.loadSize)
            },
            nextKey = range.last + 1
        )
    }

    ...
}
Next we need to implement getRefreshKey(). This method is called when the Paging library needs to reload items for the UI because the data in its backing PagingSource has changed. This situation where the underlying data for a PagingSource has changed and needs to be updated in the UI is called invalidation. When invalidated, the Paging Library creates a new PagingSource to reload the data, and informs the UI by emitting new PagingData. We'll learn more about invalidation in a later section.
When loading from a new PagingSource, getRefreshKey() is called to provide the key the new PagingSource should start loading with to make sure the user does not lose their current place in the list after the refresh.
Invalidation in the paging library occurs for one of two reasons:
- You called
refresh()on thePagingAdapter. - You called
invalidate()on thePagingSource.
The key returned (in our case, an Int) will be passed to the next call of the load() method in the new PagingSource via the LoadParams argument. To prevent items from jumping around after invalidation, we need to make sure the key returned will load enough items to fill the screen. This increases the possibility that the new set of items includes items that were present in the invalidated data, which helps maintain the current scroll position. Let's look at the implementation in our app:
   // The refresh key is used for the initial load of the next PagingSource, after invalidation
   override fun getRefreshKey(state: PagingState<Int, Article>): Int? {
        // In our case we grab the item closest to the anchor position
        // then return its id - (state.config.pageSize / 2) as a buffer
        val anchorPosition = state.anchorPosition ?: return null
        val article = state.closestItemToPosition(anchorPosition) ?: return null
        return ensureValidKey(key = article.id - (state.config.pageSize / 2))
    }
In the snippet above, we make use of PagingState.anchorPosition. If you've wondered how the paging library knows to fetch more items, this is a clue! When the UI tries to read items from PagingData, it tries to read at a certain index. If data was read, then that data is displayed in the UI. If there is no data, however, then the paging library knows it needs to fetch data to fulfill the failed read request. The last index that successfully fetched data when read is the anchorPosition.
When we're refreshing, we grab the key of the Article closest to the anchorPosition to use as the load key. That way, when we start loading again from a new PagingSource, the set of fetched items includes items that were already loaded, which ensures a smooth and consistent user experience.
With that done, you've fully defined a PagingSource. The next step is connecting it to the UI.
6. Produce PagingData for the UI
In our current implementation, we use a Flow<List<Article>> in the ArticleRepository to expose the loaded data to the ViewModel. The ViewModel in turn maintains an always available state of the data with the stateIn operator for exposure to the UI.
With the Paging Library, we will instead expose a Flow<PagingData<Article>> from the ViewModel. PagingData is a type that wraps the data we've loaded and helps the Paging library decide when to fetch more data, and also make sure we don't request the same page twice.
To construct the PagingData, we'll use one of several different builder methods from the Pager class depending on which API we want to use to pass the PagingData to other layers of our app:
- Kotlin
Flow- usePager.flow. LiveData- usePager.liveData.- RxJava
Flowable- usePager.flowable. - RxJava
Observable- usePager.observable.
As we're already using Flow in our app, we'll continue with this approach; but instead of using Flow<List<Article>>, we'll use Flow<PagingData<Article>>.
No matter which PagingData builder you use, you'll have to pass the following parameters:
PagingConfig. This class sets options regarding how to load content from aPagingSourcesuch as how far ahead to load, the size request for the initial load, and others. The only required parameter you have to define is the page size—how many items should be loaded in each page. By default, Paging will keep all of the pages you load in memory. To ensure that you're not wasting memory as the user scrolls, set themaxSizeparameter inPagingConfig. By default, Paging will return null items as a placeholder for content that is not yet loaded if Paging can count the unloaded items and if theenablePlaceholdersconfig flag istrue. That way, you will be able to display a placeholder view in your adapter. To simplify the work in this codelab, let's disable the placeholders by passingenablePlaceholders = false.- A function that defines how to create the
PagingSource. In our case, we'll be creating anArticlePagingSource, so we need a function that tells the Paging library how to do that.
Let's modify our ArticleRepository!
Update ArticleRepository
- Delete the
articlesStreamfield . - Add a method called
articlePagingSource()that returns theArticlePagingSourcewe just created.
class ArticleRepository {

    fun articlePagingSource() = ArticlePagingSource()
}
Cleanup ArticleRepository
The Paging library does a lot of things for us:
- Handles in-memory cache.
- Requests data when the user is close to the end of the list.
This means that everything else in the ArticleRepository can be removed, except articlePagingSource(). Your ArticleRepository file should now look like this:
package com.example.android.codelabs.paging.data

import androidx.paging.PagingSource

class ArticleRepository {
    fun articlePagingSource() = ArticlePagingSource()
}
You should now have compile errors in the ArticleViewModel. Let's see what changes need to be made there!
7. Request and cache PagingData in the ViewModel
Before addressing the compile errors, let's review the ViewModel.
class ArticleViewModel(...) : ViewModel() {

    val items: StateFlow<List<Article>> = ...
}
To integrate the Paging library in the ViewModel, we will be changing the return type of items from StateFlow<List<Article>> to Flow<PagingData<Article>>. To do this, first add a private constant called ITEMS_PER_PAGE to the top of the file:
private const val ITEMS_PER_PAGE = 50

class ArticleViewModel {
    ...
}
Next, we update items to be the result of the output of a Pager instance. We do this by passing to the Pager two parameters:
- A
PagingConfigwith apageSizeofITEMS_PER_PAGEand placeholders disabled - A
PagingSourceFactorythat provides an instance of theArticlePagingSourcewe just created.
class ArticleViewModel(...) : ViewModel() {

   val items: Flow<PagingData<Article>> = Pager(
        config = PagingConfig(pageSize = ITEMS_PER_PAGE, enablePlaceholders = false),
        pagingSourceFactory = { repository.articlePagingSource() }
    )
        .flow
        ...
}
Next, to maintain paging state through configuration or navigation changes, we use the cachedIn() method passing it the androidx.lifecycle.viewModelScope.
After we complete the above changes, our ViewModel should look like this:
package com.example.android.codelabs.paging.ui

import androidx.lifecycle.ViewModel
import androidx.lifecycle.viewModelScope
import androidx.paging.Pager
import androidx.paging.PagingConfig
import androidx.paging.PagingData
import androidx.paging.cachedIn
import com.example.android.codelabs.paging.data.Article
import com.example.android.codelabs.paging.data.ArticleRepository
import com.example.android.codelabs.paging.data.ITEMS_PER_PAGE
import kotlinx.coroutines.flow.Flow

private const val ITEMS_PER_PAGE = 50

class ArticleViewModel(
    private val repository: ArticleRepository,
) : ViewModel() {

    val items: Flow<PagingData<Article>> = Pager(
        config = PagingConfig(pageSize = ITEMS_PER_PAGE, enablePlaceholders = false),
        pagingSourceFactory = { repository.articlePagingSource() }
    )
        .flow
        .cachedIn(viewModelScope)
}
Another thing to note about PagingData is that it's a self-contained type that contains a mutable stream of updates to the data to be displayed in the RecyclerView. Each emission of PagingData is completely independent, and multiple PagingData instancesmay be emitted for a single query if the backing PagingSource is invalidated due to changes in the underlying dataset. As such, Flows of PagingData should be exposed independent of other Flows.
That's it! We now have paging functionality in the ViewModel!
8. Make the Adapter work with PagingData
To bind PagingData to a RecyclerView, use a PagingDataAdapter. The PagingDataAdapter gets notified whenever the PagingData content is loaded, and then it signals the RecyclerView to update.
Update the ArticleAdapter to work with a PagingData stream:
- Right now,
ArticleAdapterimplementsListAdapter. Make it implementPagingDataAdapterinstead. The rest of the class body remains unchanged:
import androidx.paging.PagingDataAdapter
...

class ArticleAdapter : PagingDataAdapter<Article, RepoViewHolder>(ARTICLE_DIFF_CALLBACK) {
// body is unchanged
}
We've been making a lot of changes so far, but now we're just one step away from being able to run the app—we just need to connect the UI!
9. Consume PagingData in the UI
In our current implementation, we have a method called binding.setupScrollListener() that calls on the ViewModel to load more data if certain conditions are met. The Paging library does all this automatically, so we can delete this method and its usages.
Next, since the ArticleAdapter is no longer a ListAdapter but a PagingDataAdapter, we make two small changes:
- We switch the terminal operator on the
Flowfrom theViewModeltocollectLatestinstead ofcollect. - We notify the
ArticleAdapterof changes withsubmitData()instead ofsubmitList().
We use collectLatest on the pagingData Flow so that collection on previous pagingData emissions is canceled when a new pagingData instance is emitted.
With those changes made the Activity should look like this:
import kotlinx.coroutines.flow.collectLatest


class ArticleActivity : AppCompatActivity() {

    override fun onCreate(savedInstanceState: Bundle?) {
        super.onCreate(savedInstanceState)
        val binding = ActivityArticlesBinding.inflate(layoutInflater)
        val view = binding.root
        setContentView(view)

        val viewModel by viewModels<ArticleViewModel>(
            factoryProducer = { Injection.provideViewModelFactory(owner = this) }
        )

        val items = viewModel.items
        val articleAdapter = ArticleAdapter()

        binding.bindAdapter(articleAdapter = articleAdapter)

        lifecycleScope.launch {
            repeatOnLifecycle(Lifecycle.State.STARTED) {
                items.collectLatest {
                    articleAdapter.submitData(it)
                }
            }
        }
    }
}

private fun ActivityArticlesBinding.bindAdapter(
    articleAdapter: ArticleAdapter
) {
    list.adapter = articleAdapter
    list.layoutManager = LinearLayoutManager(list.context)
    val decoration = DividerItemDecoration(list.context, DividerItemDecoration.VERTICAL)
    list.addItemDecoration(decoration)
}
The app should now compile and run. You've successfully migrated the app to the Paging library!
10. Display load states in the UI
When the Paging library is fetching more items to display in the UI, it is best practice to indicate to the user that more data is on the way. Fortunately, the Paging library offers a convenient way to access its loading status with the CombinedLoadStates type.
CombinedLoadStates instances describe the loading status of all components in the Paging library that load data. In our case, we're interested in the LoadState of just the ArticlePagingSource, so we will be working primarily with the LoadStates type in the CombinedLoadStates.source field. You can access CombinedLoadStates through the PagingDataAdapter via PagingDataAdapter.loadStateFlow.
CombinedLoadStates.source is a LoadStates type, with fields for three different types of LoadState:
LoadStates.append: For theLoadStateof items being fetched after the user's current position.LoadStates.prepend: For theLoadStateof items being fetched before the user's current position.LoadStates.refresh: For theLoadStateof the initial load.
Each LoadState itself can be one of the following:
LoadState.Loading: Items are being loaded.LoadState.NotLoading: Items are not being loaded.LoadState.Error: There was a loading error.
In our case, we only care if the LoadState is LoadState.Loading as our ArticlePagingSource does not include an error case.
The first thing we do is add progress bars to the top and bottom of the UI to indicate the loading status for fetches in either direction.
In activity_articles.xml, add two LinearProgressIndicator bars as follows:
<androidx.constraintlayout.widget.ConstraintLayout xmlns:android="http://schemas.android.com/apk/res/android"
    xmlns:app="http://schemas.android.com/apk/res-auto"
    xmlns:tools="http://schemas.android.com/tools"
    android:layout_width="match_parent"
    android:layout_height="match_parent"
    tools:context=".ui.ArticleActivity">

    <androidx.recyclerview.widget.RecyclerView
        android:id="@+id/list"
        android:layout_width="0dp"
        android:layout_height="0dp"
        android:scrollbars="vertical"
        app:layout_constraintBottom_toBottomOf="parent"
        app:layout_constraintEnd_toEndOf="parent"
        app:layout_constraintStart_toStartOf="parent"
        app:layout_constraintTop_toTopOf="parent" />

    <com.google.android.material.progressindicator.LinearProgressIndicator
        android:id="@+id/prepend_progress"
        android:layout_width="0dp"
        android:layout_height="wrap_content"
        android:indeterminate="true"
        app:layout_constraintEnd_toEndOf="parent"
        app:layout_constraintStart_toStartOf="parent"
        app:layout_constraintTop_toTopOf="parent" />

    <com.google.android.material.progressindicator.LinearProgressIndicator
        android:id="@+id/append_progress"
        android:layout_width="0dp"
        android:layout_height="wrap_content"
        android:indeterminate="true"
        app:layout_constraintBottom_toBottomOf="parent"
        app:layout_constraintEnd_toEndOf="parent"
        app:layout_constraintStart_toStartOf="parent" />

</androidx.constraintlayout.widget.ConstraintLayout>
Next, we react to the CombinedLoadState by collecting the LoadStatesFlow from the PagingDataAdapter. Collect the state in ArticleActivity.kt:
override fun onCreate(savedInstanceState: Bundle?) {
        super.onCreate(savedInstanceState)
        ...

        lifecycleScope.launch {
            repeatOnLifecycle(Lifecycle.State.STARTED) {
                articleAdapter.loadStateFlow.collect {
                    binding.prependProgress.isVisible = it.source.prepend is Loading
                    binding.appendProgress.isVisible = it.source.append is Loading
                }
            }
        }
        lifecycleScope.launch {
        ...
    }
Finally, we add a little delay in the ArticlePagingSource to simulate the load:
private const val LOAD_DELAY_MILLIS = 3_000L

class ArticlePagingSource : PagingSource<Int, Article>() {

    override suspend fun load(params: LoadParams<Int>): LoadResult<Int, Article> {
        val start = params.key ?: STARTING_KEY
        val range = startKey.until(startKey + params.loadSize)

        if (start != STARTING_KEY) delay(LOAD_DELAY_MILLIS)
        return ...

}
Give the app another run and scroll to the bottom of the list. You should see the bottom progress bar show up while the paging library fetches more items, and disappear when it's done!
11. Wrapping up
Let's do a quick recap of what we've covered. We...:
- ...explored an overview of pagination and why it is necessary.
- ...added pagination to our app by creating a
Pager, defining aPagingSource, and emittingPagingData. - ...cached
PagingDatain theViewModelusing thecachedInoperator. - ...consumed
PagingDatain the UI using aPagingDataAdapter. - ...reacted to
CombinedLoadStatesusingPagingDataAdapter.loadStateFlow.
That's it! To see more advanced paging concepts, check out the advanced Paging codelab!