1. Introduction
Last Updated: 2022-03-30
Library to remotely debug, auto-generate preference UIs, and Wizard-of-Oz prototypes
Sick of tweaking one value in your animation and having to wait minutes to compile and see your change? Ever want to hand someone a prototype, and let them try it with various options you can adjust on the fly? Do you get tingles when someone mentions "one-line solution"? Then Tweakr might be right for you!
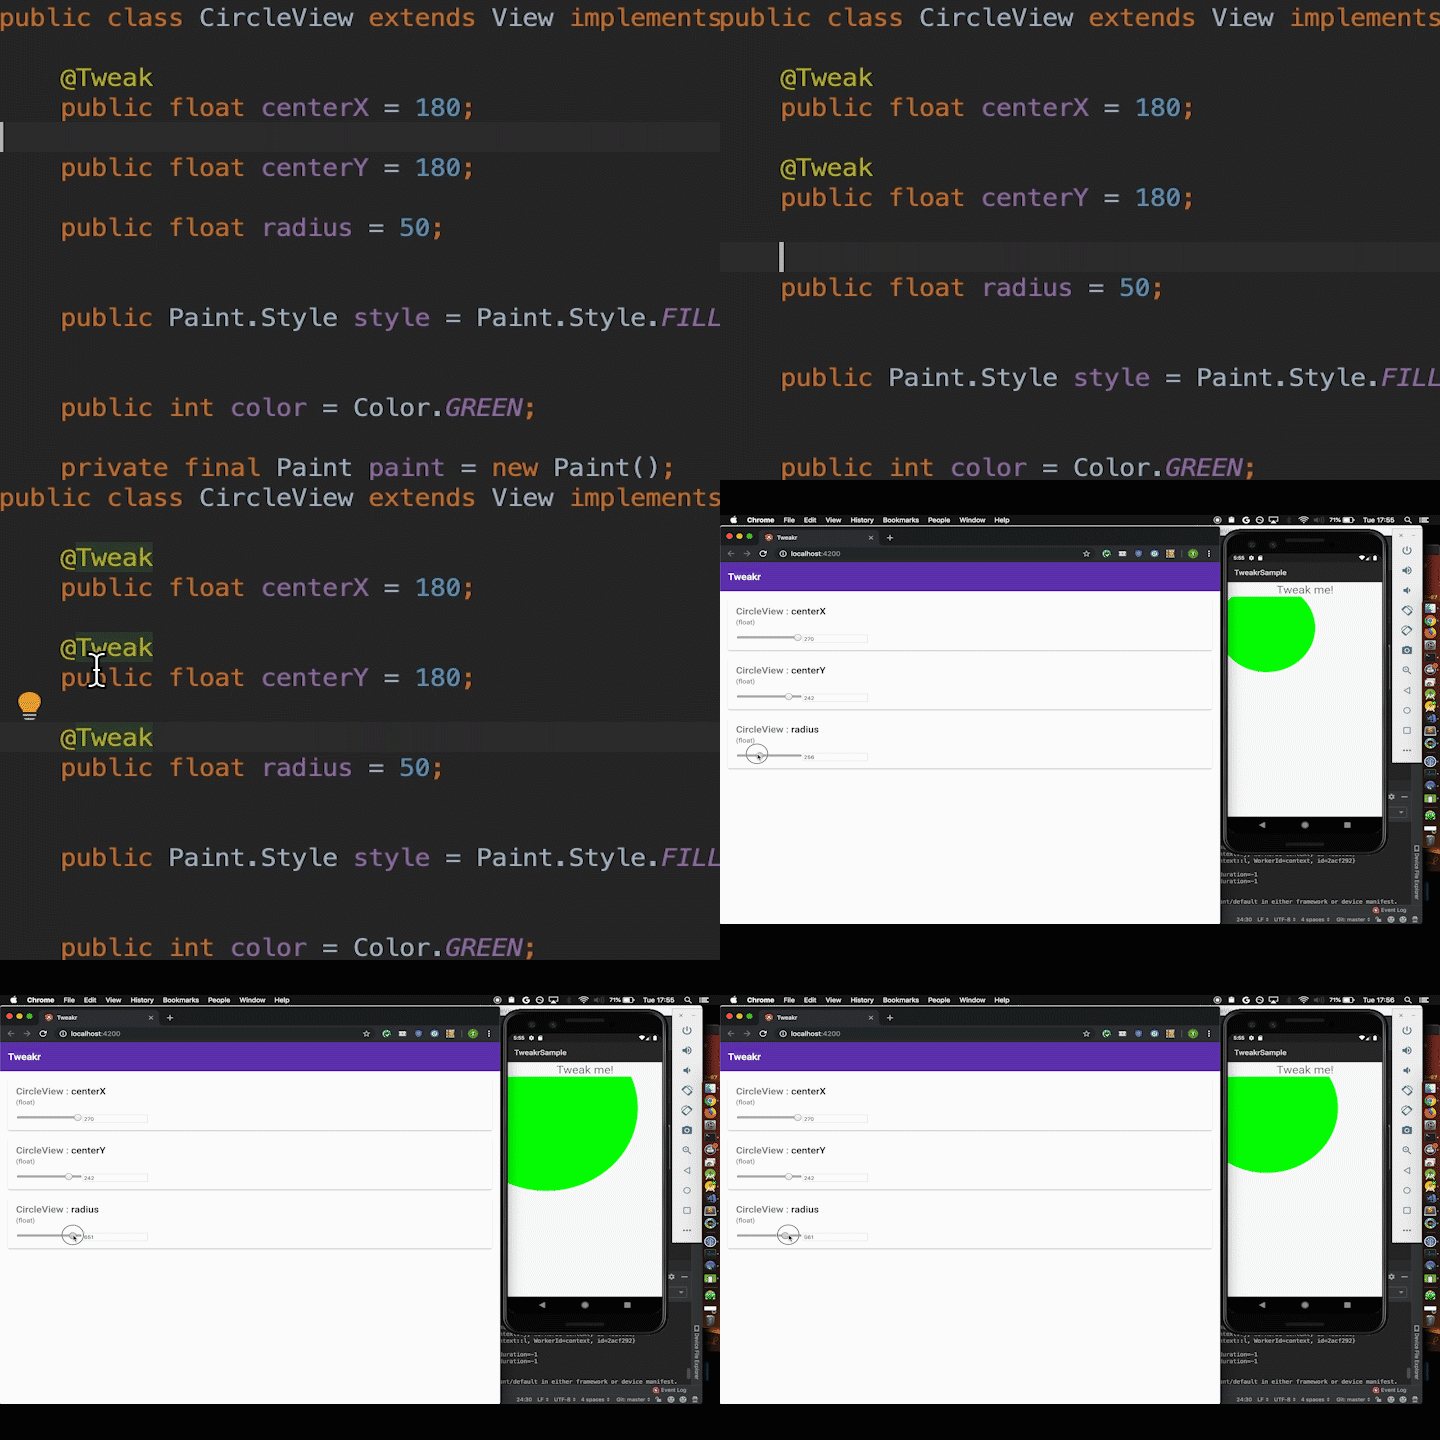
Tweakr is an Android library that lets you annotate fields and methods in your code, and then automatically generates a UI to change those elements locally or remotely. It can use Firebase and a web-based UI to alter values and change settings in your app on the fly, instantly. It can also autogenerate a Preferences UI screen using SharedPreferences local to the phone.
Literally, write one line of code: just annotate the thing you want to change with @Tweak, and it handles the rest!
What you'll build
In this codelab, you're going to build a simple Android app. Your app will:
- Draw some text and images to the screen.
- Annotate fields and methods in your app with the @Tweakr annotation.
- Connect to the Tweakr web UI using Firebase (the web UI is already built for you and ready to use).
- Use Tweakr to manipulate views and move them around on the screen.
What you'll learn
- How to set up Firebase for your Android app.
- How to annotate fields and methods in your app so Tweakr generates UI to control them.
This codelab focuses on using the Tweakr library. Non-relevant concepts and code blocks are glossed over, and are provided for you to simply copy and paste.
What you'll need
- A computer with Android Studio installed.
- Basic knowledge of Kotlin and Android Views.
2. Create and set up a Firebase project
Tweakr creates UIs that automatically hook up your Android app to a web UI using Firebase. First, you'll need to set up a Firebase project for Android.
Create a Firebase project
- Sign in to Firebase.
- In the Firebase console, click Add Project (or Create a project), then name your Firebase project
Tweakr-Codelab.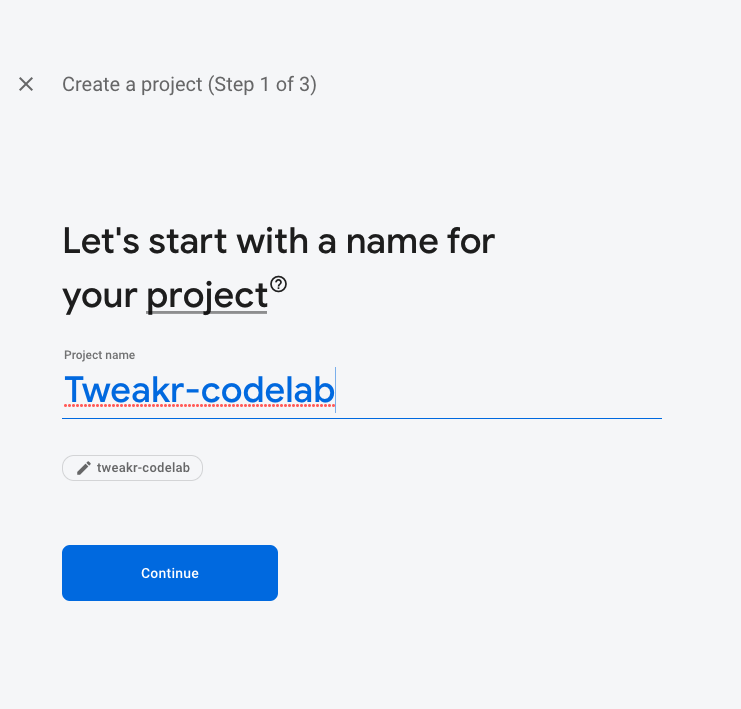
- Click through the project creation options. Accept the Firebase terms if prompted. Skip setting up Google Analytics, because you won't be using Analytics for this app.
To learn more about Firebase projects, see Understand Firebase projects.
Set up an Android app in Firebase
- In the Firebase console, add a new Android app using your own package name (e.g.,
com.[your-domain].tweakr.sample).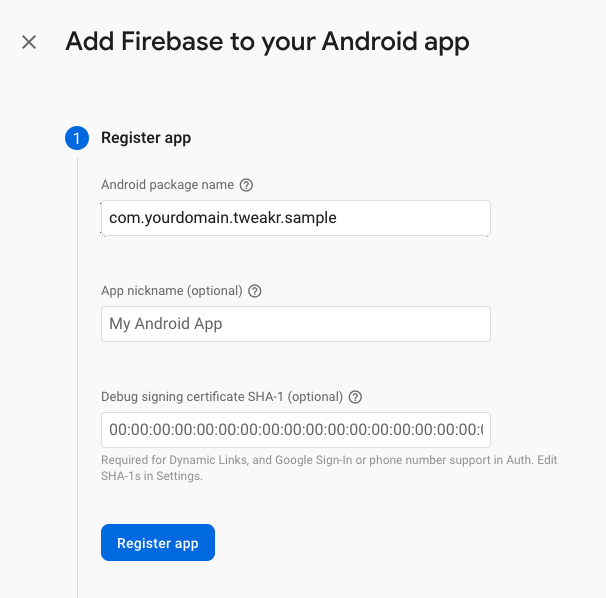
- Follow the instructions to download the
google-services.jsonfile. - Copy the
google-services.jsonfile into the Android app'sappmodule directory (e.g.,tweakr-codelab/app/). - Skip confirming the connection to Firebase. You'll do that later once you update the applicationId in the Android app.
- Click Gradle Sync as directed.
Enable Firebase products in the console
The app that you're building uses several Firebase products that are available for web apps:
- Firebase Authentication and Firebase UI to easily allow your users to sign in to your app.
- Realtime Database, which Tweakr uses to instantly sync data between your app and the web UI.
- Firebase Security Rules to secure your database.
Some of these products need special configuration or need to be enabled using the Firebase console.
Enable anonymous sign-in for Firebase Authentication
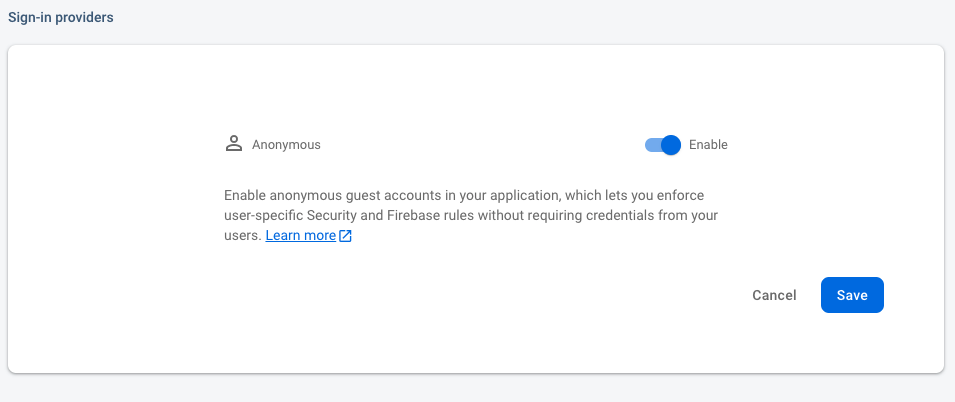
To let users sign in to the web app, you'll use the anonymous sign-in method for this codelab:
- In the Firebase console, click Authentication under Build in the left panel.
- Click Authentication, then click Get Started -> Sign-in method tab (or click here to go directly to the Sign-in method tab).
- Click Anonymous in the Sign-in providers list, set the Enable switch to the on position, and then click Save.
Enable Realtime Database
Tweakr uses Realtime database to sync state between your app and the web UI many times a second.
Enable Realtime Database:
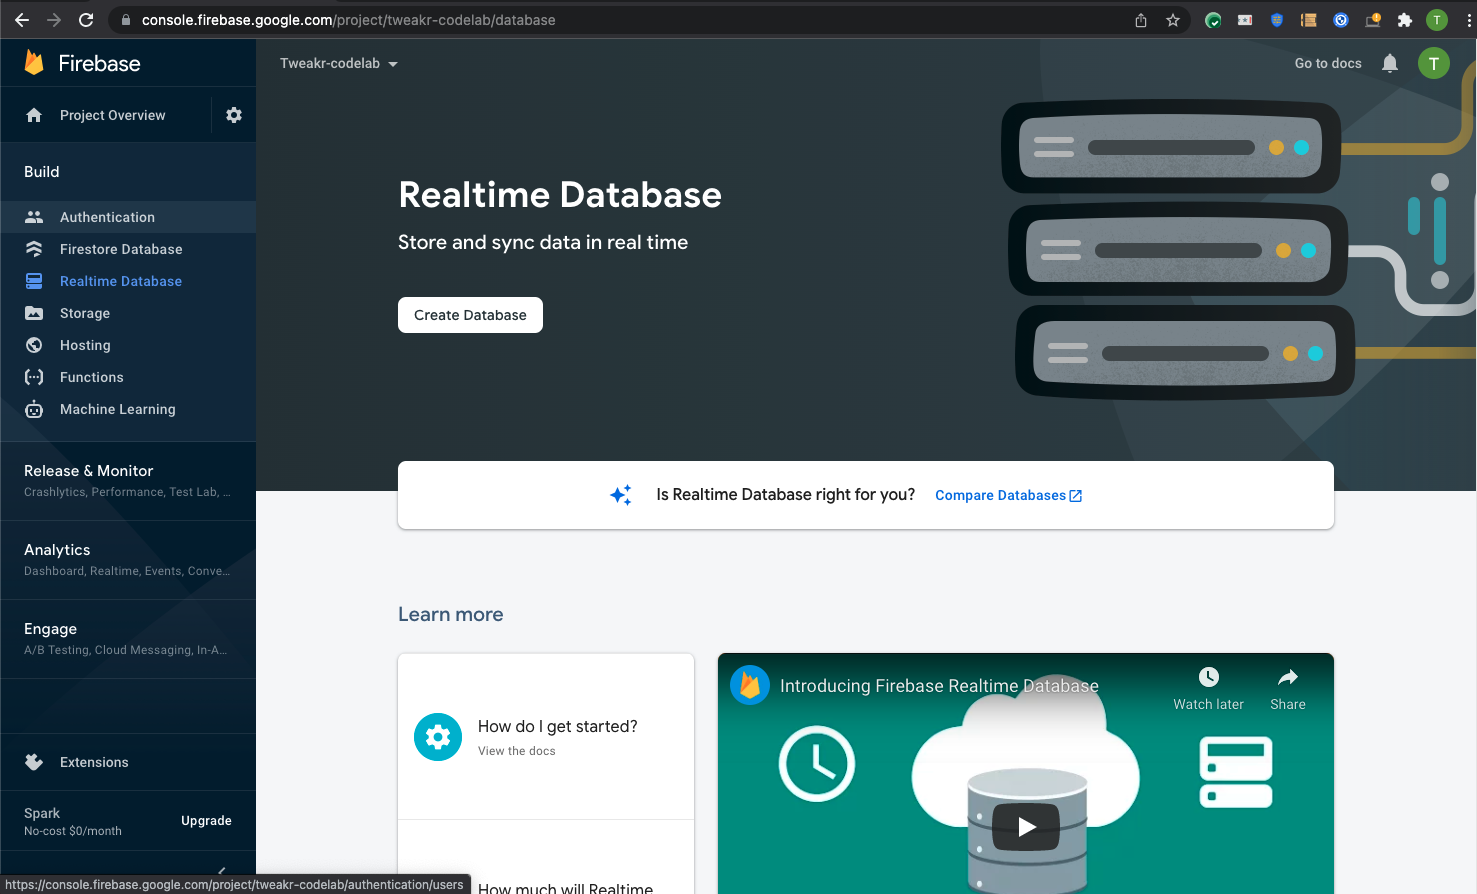
- In the Firebase console's Build section, click Realtime Database.
- Click Create database.
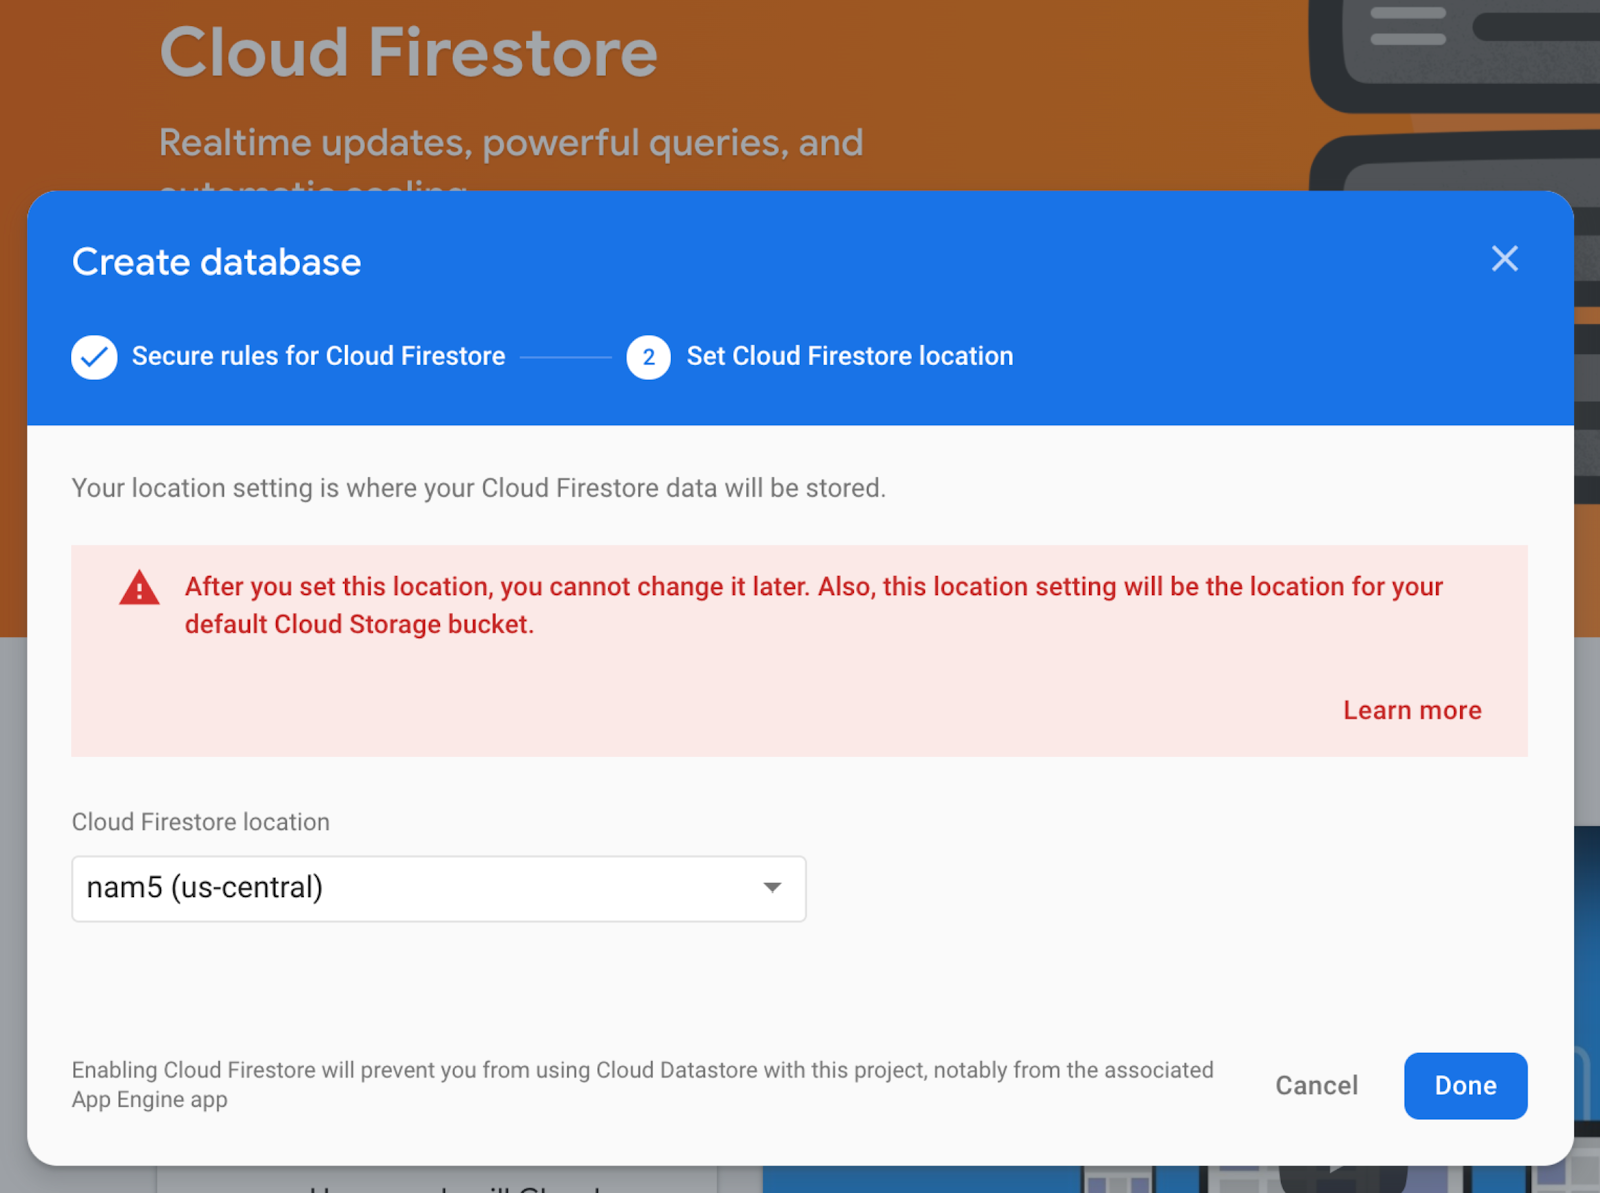
- Select the location for your database (you can just use the default). Note that this location can't be changed later.
- Select the Start in test mode option, which ensures that you can freely write to the database during development. Read the disclaimer about the security rules and then click Next.
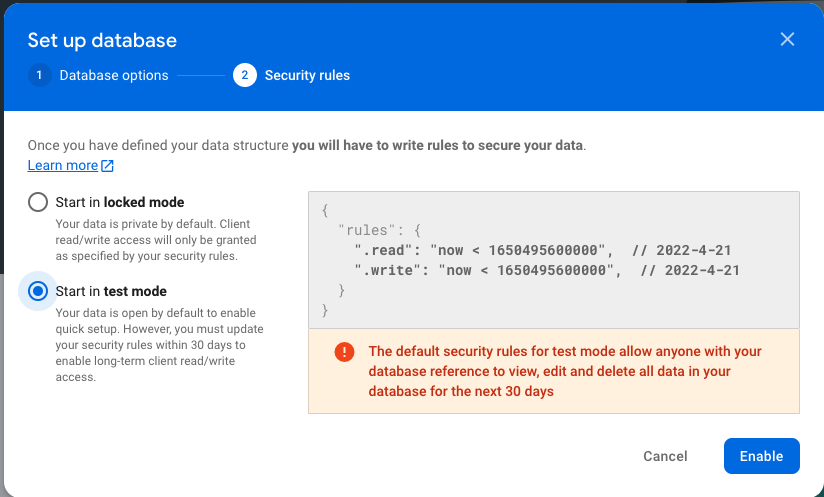
- Click Enable.
3. Build the Android sample app
Get the code
We've put everything you need for this project into a Git repo. To get started, you'll need to grab the code and open it in Android Studio.
Strongly Recommended: Use Android Studio to import the repo
- Open Android Studio and then choose File->New->Project from Version Control.
- Choose
Gitas the Version Control option. - Enter the URL
https://github.com/google/tweakr-codelab.git. - Click Clone.
Update ApplicationId
Since Firebase requires a unique ApplicationId for your Android app, you will need to rename the sample to your own ApplicationId:
- Open the
app/build.gradlefile of theTweakr_codelab.appmodule. - Change the line
applicationId "com.yourdomain.tweakr.sample"to the package name you specified in the Firebase setup. - Click Sync to sync your changes to the gradle file.
Run the app
- Click Run to compile and launch the app as is. If you're using the Android emulator, make sure you create an AVD image from the Google Play libraries, which are required for Firebase.
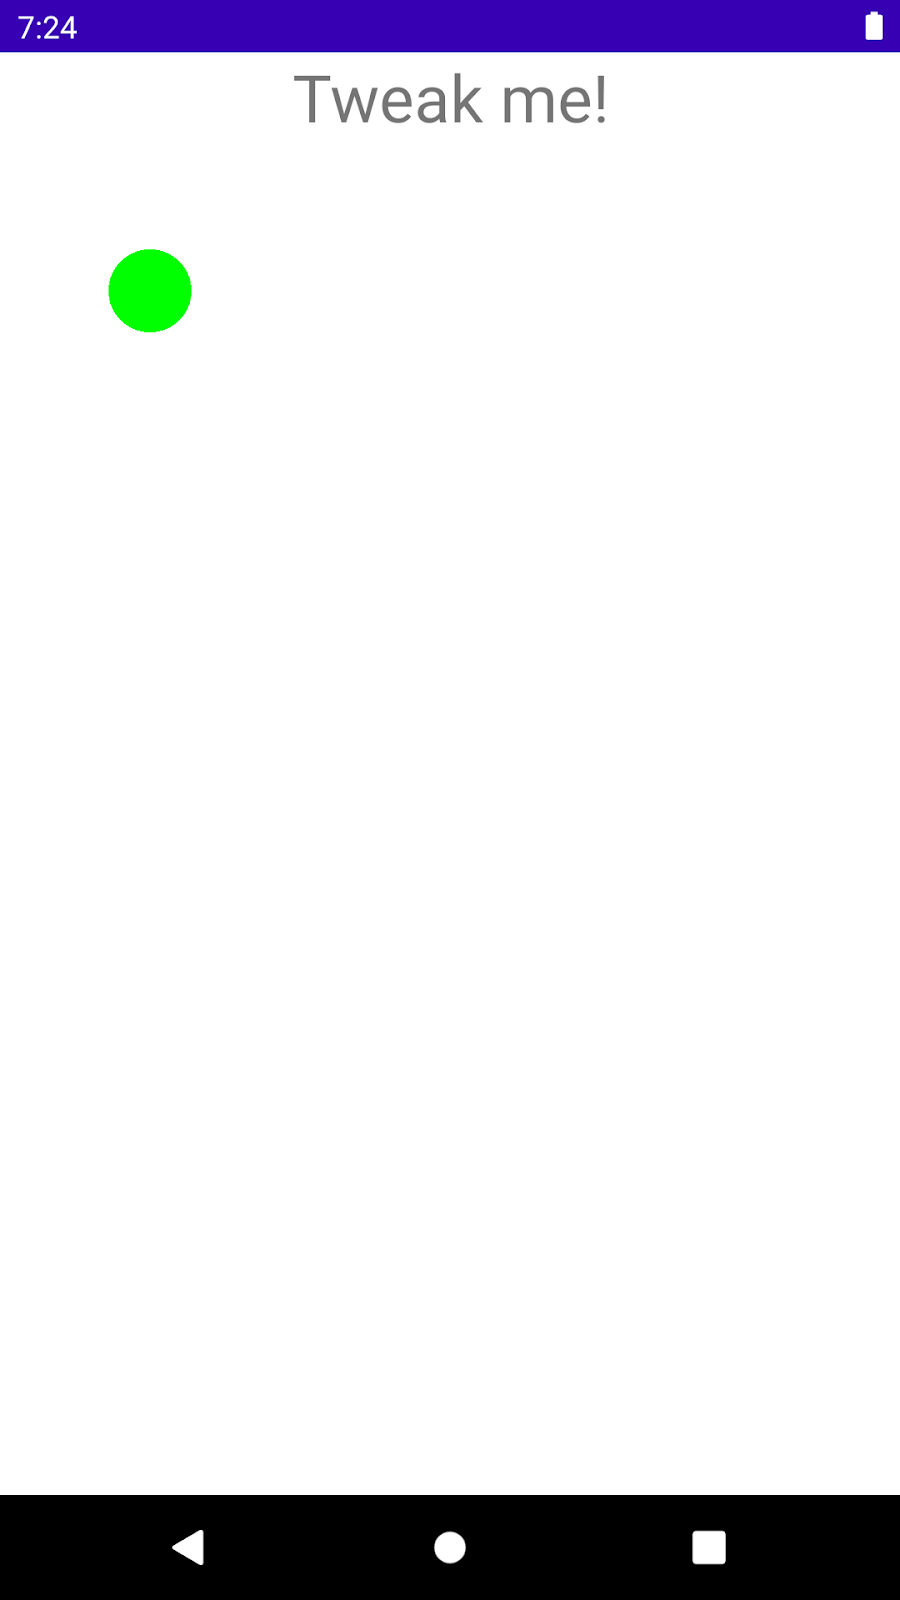
You should see a simple screen in the app with some text and a circle.
- Click the text to trigger an animation.
4. Let's get Tweakin'!
By the end of this section, you'll be able to remotely control the views in our app from the Tweakr website!
Add the Tweakr Library dependency
- Open the
settings.gradlefile, and add Jitpack to the repositories:
settings.gradle
dependencyResolutionManagement {
   repositoriesMode.set(RepositoriesMode.FAIL_ON_PROJECT_REPOS)
   repositories {
       google()
       mavenCentral()
       maven { url 'https://jitpack.io' }
   }
}
- Open the
app/build.gradlefile of theTweakr_codelab.appmodule, and add the Tweakr library dependencies:
app/build.gradle
dependencies {

...

   // Required for local SharedPreferences or Firebase
   implementation 'com.github.google.tweakr:core:2.2.2'

   // Include this if you want Firebase support.
   implementation 'com.github.google.tweakr:firebase:2.2.2'
}
- Click Sync Now to sync your gradle changes.
Initialize the Tweakr repo
First, you need to initialize the Tweakr repo in the SampleApplication's onCreate() method, so it knows to use Firebase:
- Open the
SampleApplication.ktfile. - Uncomment the line that says
Tweakr.setRepo(TweakrFirebaseRepo())
This tells Tweakr to use the TweakrFirebaseRepo to sync its values to the cloud. TweakrFirebaseRepo automatically uses the default Firebase instance, which is defined by the google-services.json file you added in the first section.
Add some tweaks
Now you're ready to start annotating parts of the app so that Tweakr can generate a web UI for them.
- In the
MainActivity.ktfile, above thefun animateText()line, add the annotation@Tweak. This tells Tweakr that you want to control this method remotely.
MainActivity.kt
@Tweak
fun animateText() {
 introText.animate()
...
}
- At the bottom of the
onCreate()function, add the lineTweakr.register(this). This tells Tweakr to parse all the annotations in the class and sync their values with the web server.
MainActivity.kt
override fun onCreate(savedInstanceState: Bundle?) {
 super.onCreate(savedInstanceState)
 setContentView(R.layout.activity_main)

 introText = findViewById(R.id.text)
 introText.setOnClickListener { animateText() }

 Tweakr.register(this)
}
- Now run the app again.
If everything has gone well, Tweakr has initialized in the background and synced our Tweaks with the Firebase server. You'll see the magic of what you've done in the next section.
5. Tweak values in the Web UI
Now that you've set up some Tweakable values in your app, you can open the Tweakr web UI to control them remotely over the internet. The easiest way to start tweaking values in your app is to use Tweakr's pre-built website called Easyserver. This website is hosted on Github, and connects to your Firebase database to sync the values and generate the web UI from your Android app.
Set up a web app in Firebase
First, you need to set up a web app in Firebase, and give Easyserver access to it.
- In the Firebase Console, click Project Overview.
- Click Add app and choose Web.

- Enter a nickname and click Register.
- In the Add Firebase SDK step, copy everything from
const firebaseConfigonward. You'll paste it into the Tweakr Easyserver in the next step.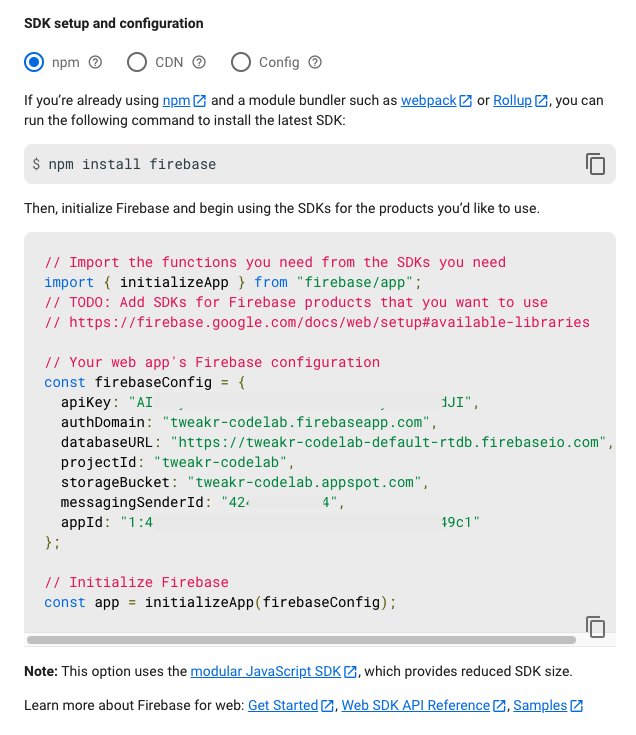
Start the Easyserver
- Go to https://google.github.io/tweakr/easyserver/ and follow these instructions to allow the Easyserver to access your Firebase:
- Paste in the
firebaseConfigcode that you copied in the previous step.
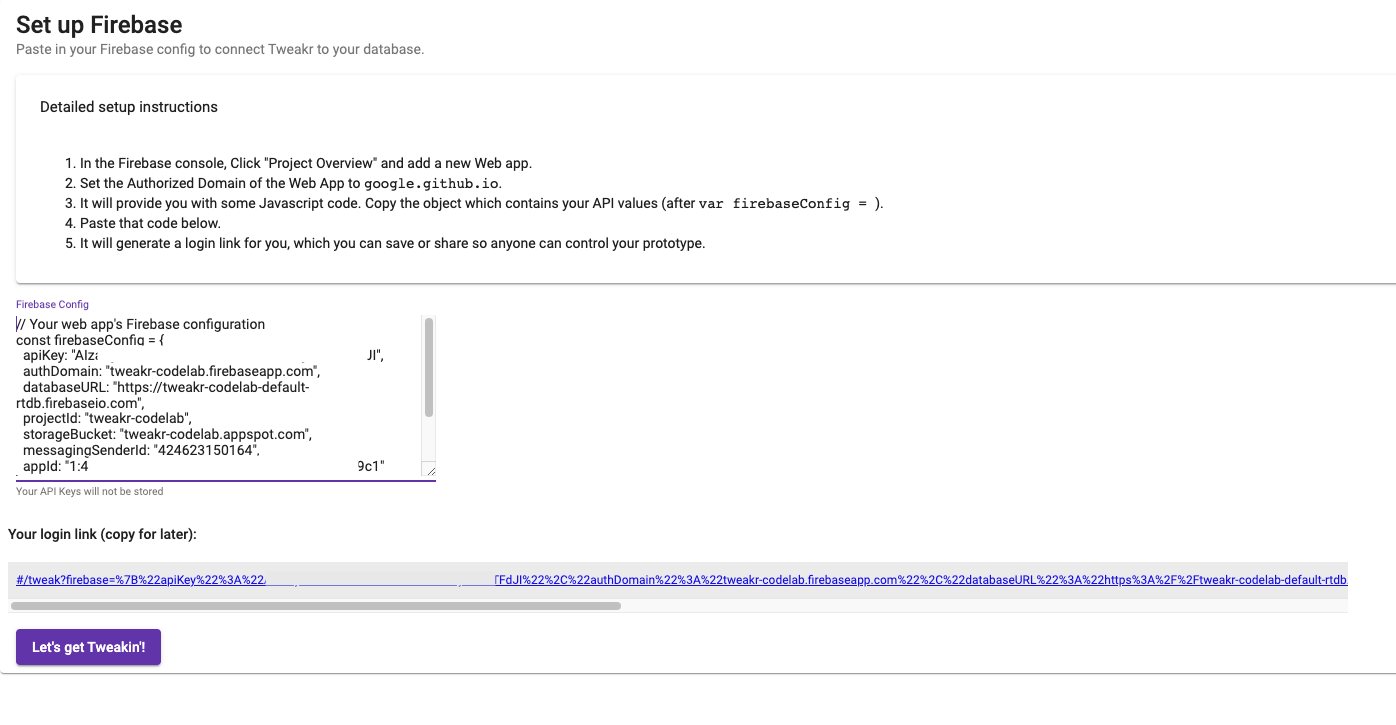
If you've pasted correctly, it should show you your unique login link and a Let's get Tweakin' button.
- Click Let's get Tweakin'.
You should see an animateText() button, named after the function you annotated earlier.
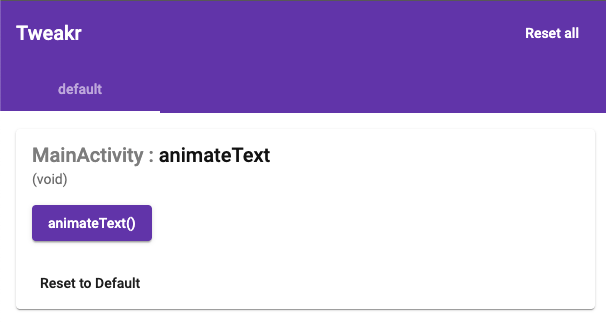
Finger on the button
With your Android app open, click the animateText() button in the Tweakr web UI and watch the phone's screen.
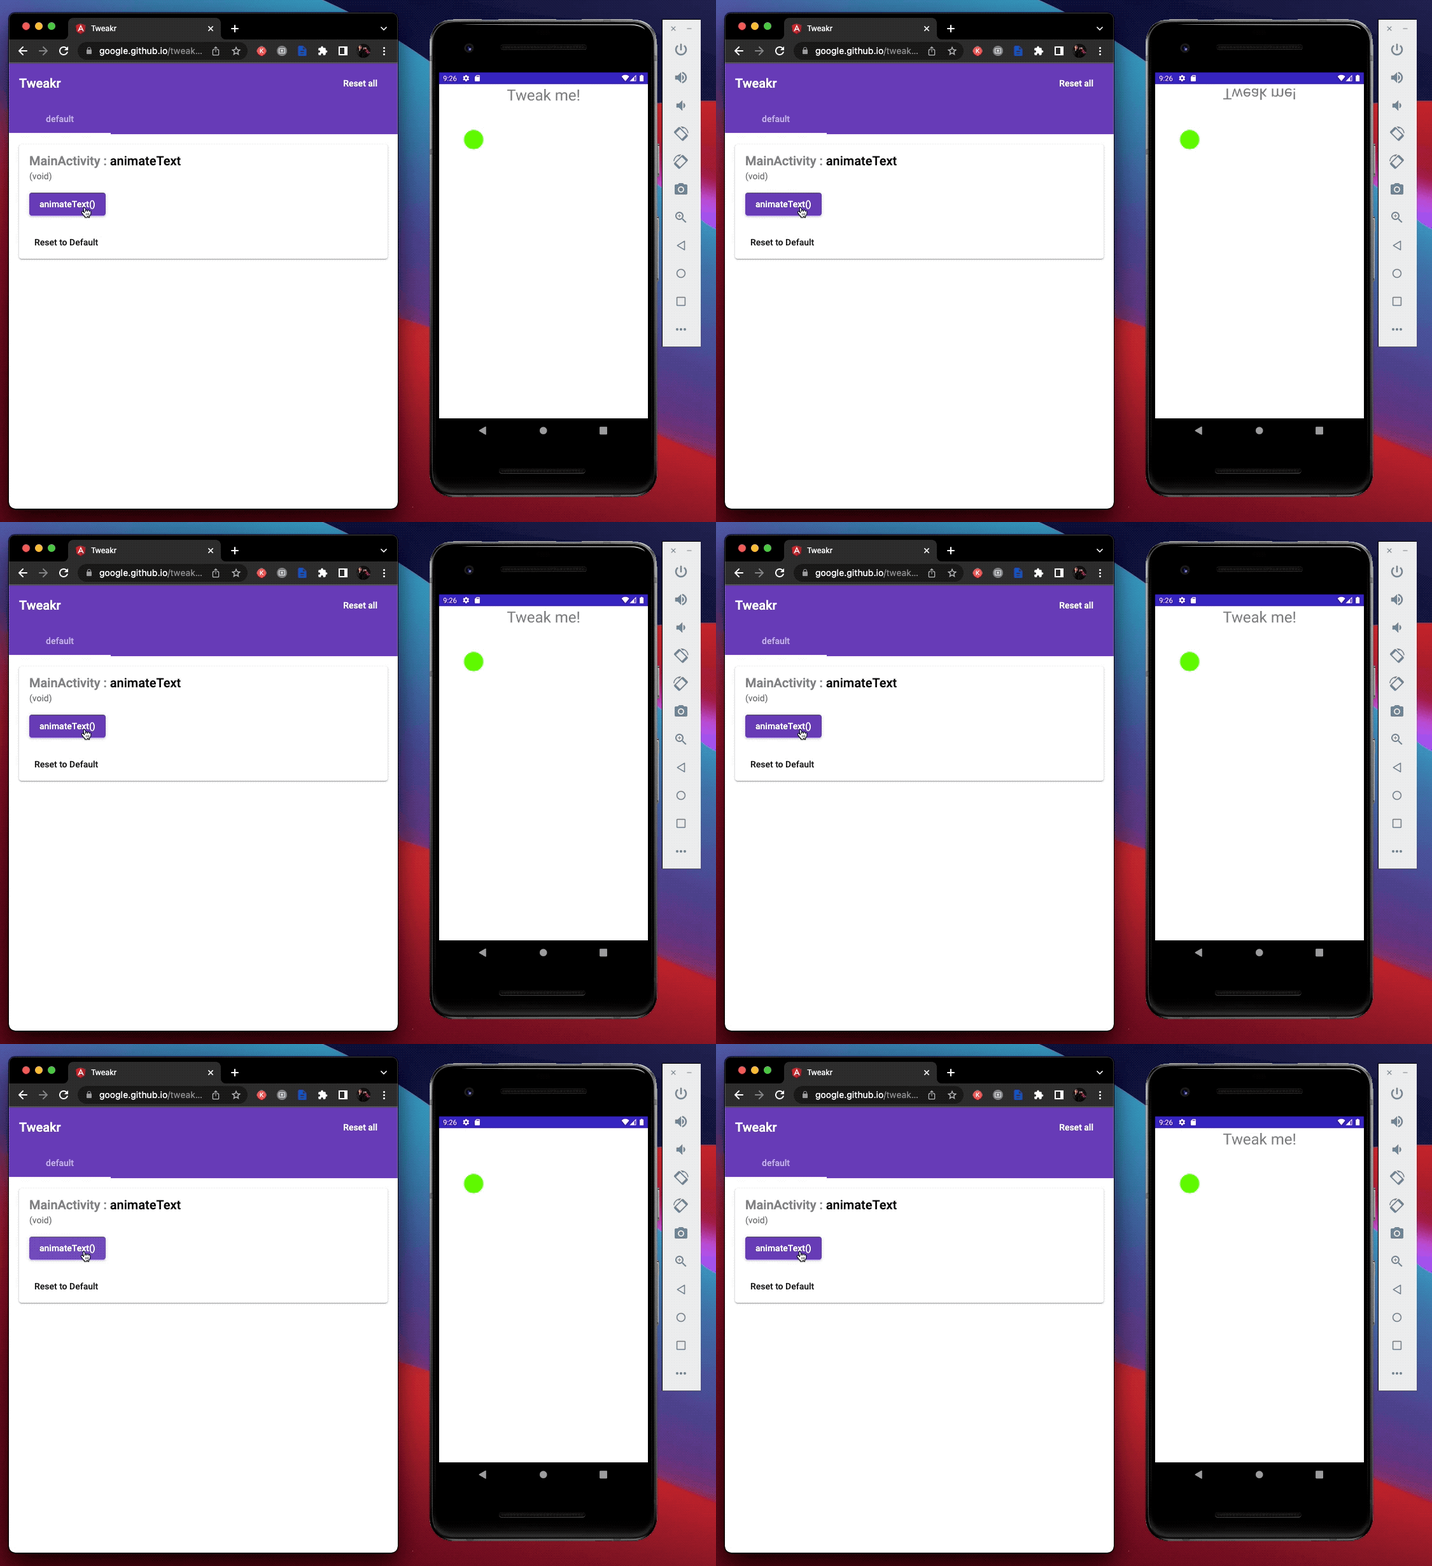
Wow, magic! You should see the text perform a little animation. How is this happening???
You may be asking, if it's a button for my no-parameter method, what happens if my method takes parameters? Check out the next section to find out.
6. Methods with parameters
Tweakr also works with methods with one parameter (methods with more than one parameter are not supported yet). Let's try it:
- In the MainActivity class, add a new method that changes the text in the TextView:
MainActivity.kt
class MainActivity : Activity() {
...

 @Tweak
 fun setMessage(text: String) {
   introText.text = text
 }

...
- Make sure to add the
@Tweakannotation to your new method. - Run the app again and watch the Tweakr Easyserver website update automatically with a text field to call your method.
- Type something in the text field and watch your app update in real-time!
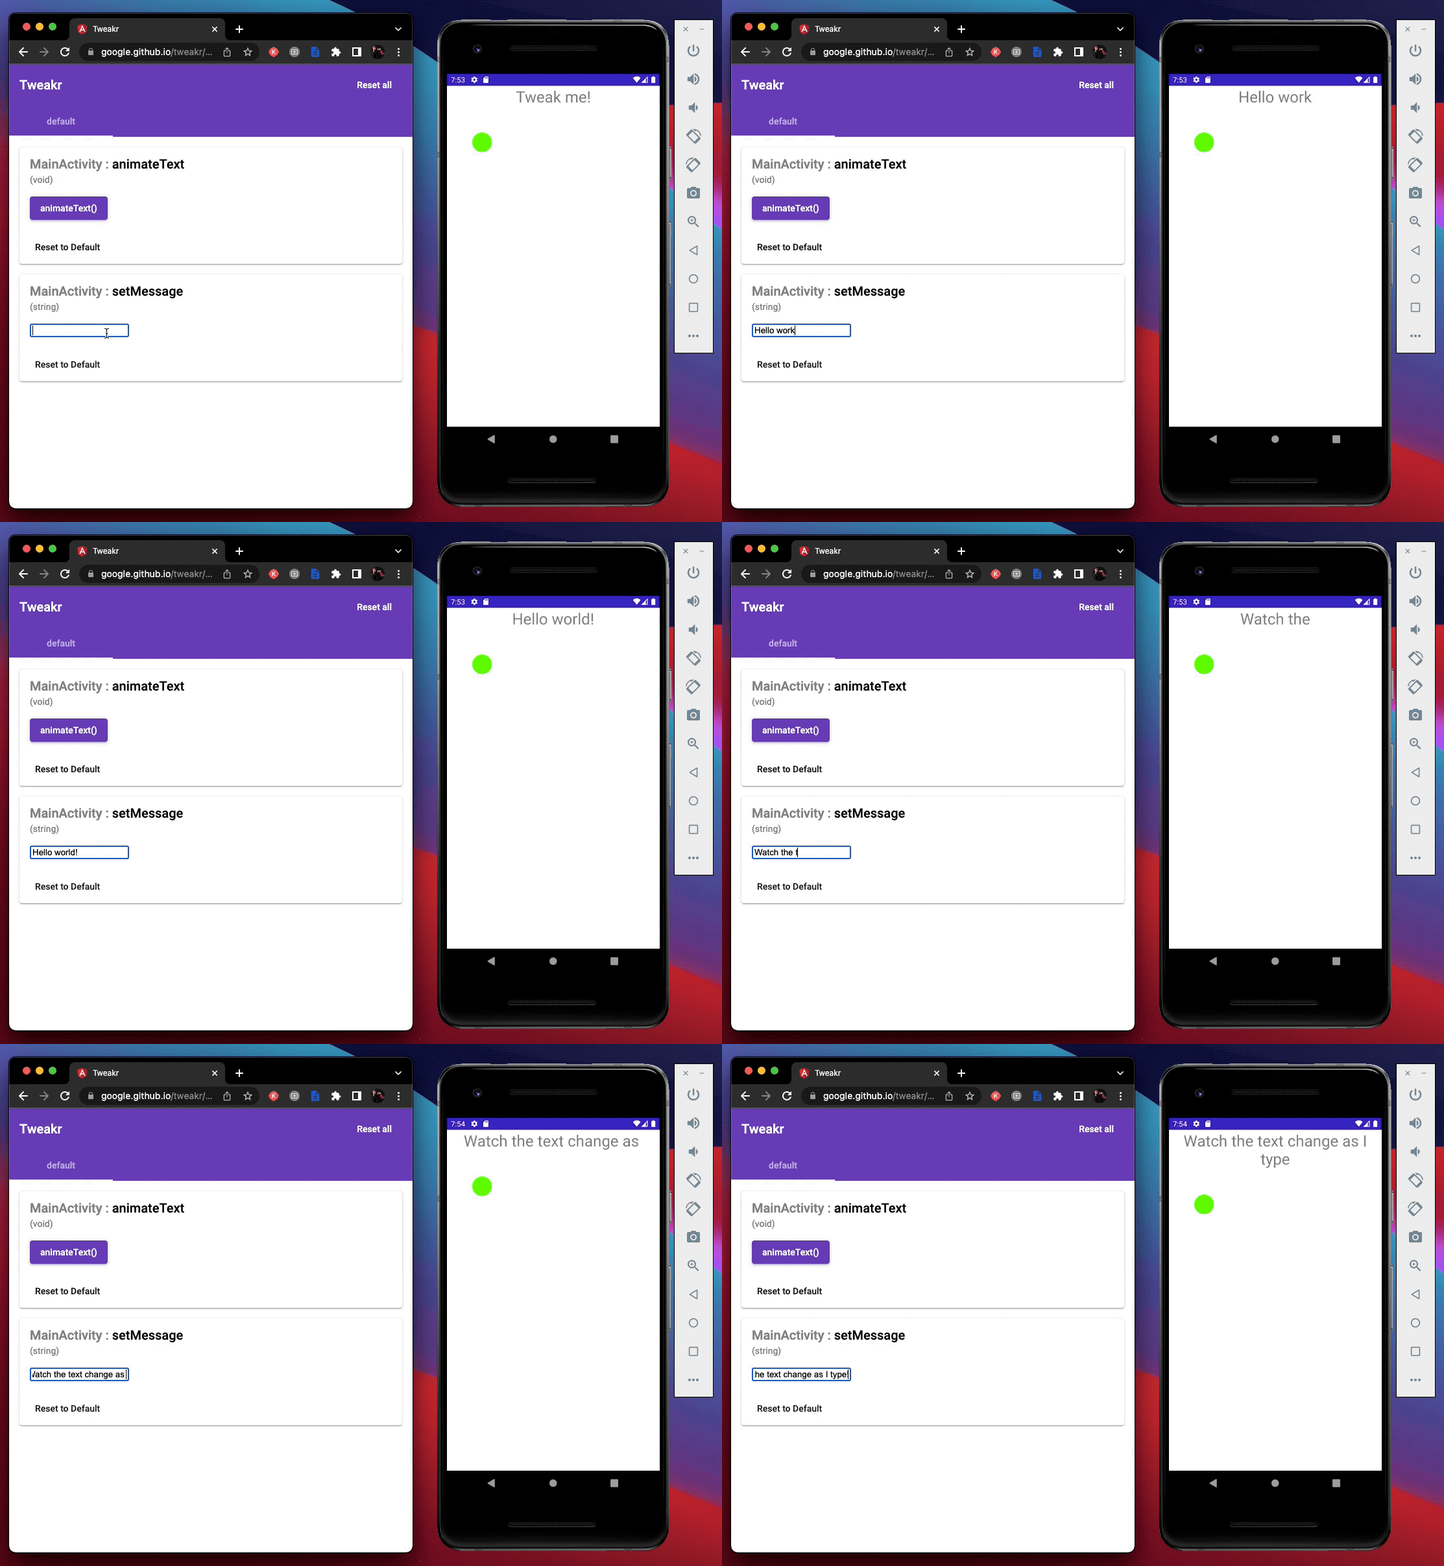
Controlling methods remotely is great, but the true power of Tweakr is changing values of fields in your code. See the next section for even more fun.
7. (Optional) Tweak Field Values
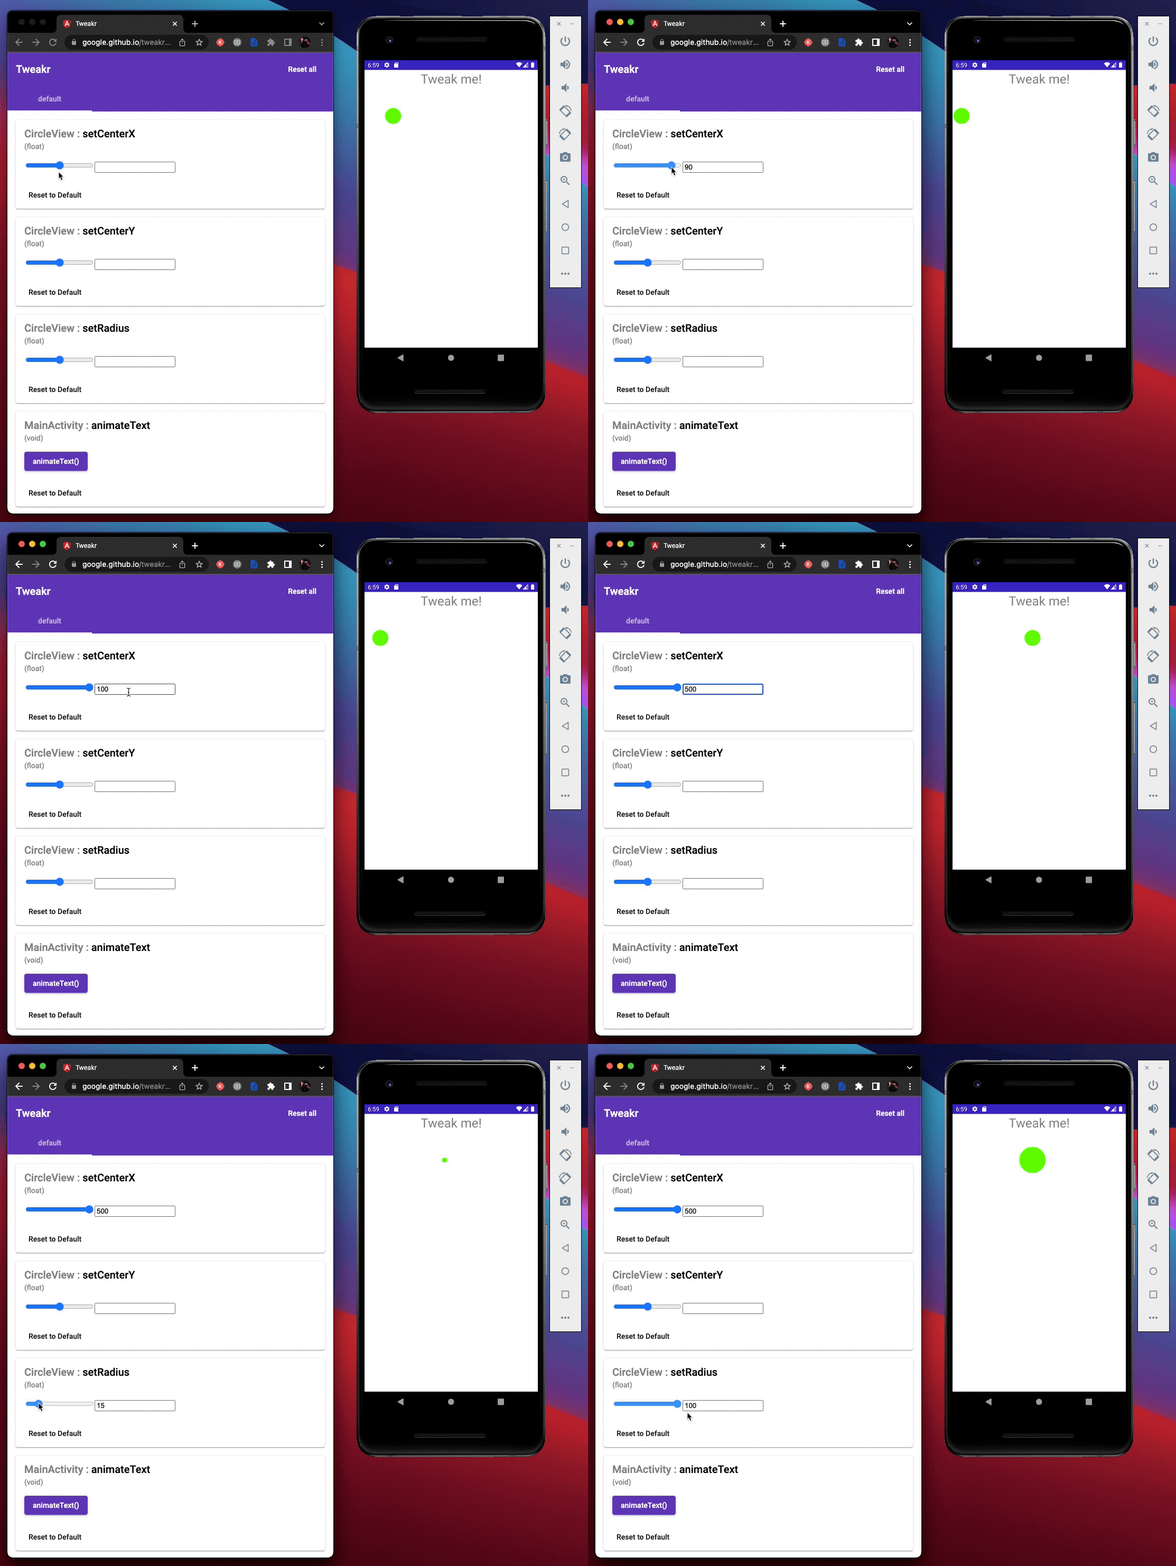
In Android Studio, open the CircleView.kt file. It looks like there are some fields at the top that control the size and position of the circle. Let's tweak them!
Add the annotations
- Add the
@Tweakannotation above thecenterX, centerY, andradiusfields. - You also need to call
Tweakr.register()when your object initializes, so add aninit()method as well. In the end, your code should look like this:
CircleView.kt
/** A View that draws a circle **/
class CircleView @JvmOverloads constructor(
 context: Context, attrs: AttributeSet? = null, defStyleAttr: Int = 0
) : View(context, attrs, defStyleAttr) {

 @Tweak
 var centerX = 180f

 @Tweak
 var centerY = 180f

 @Tweak
 var radius = 50f

 init {
  Tweakr.register(this)
 }

...
This lets Tweakr change the fields, but you're not done yet. Since this is a custom View that draws directly to the Canvas, when Tweakr changes the fields' values, the View won't automatically redraw with the new values. You have to tell the View to redraw whenever Tweakr syncs changes.
- Register a listener with Tweakr so it notifies you whenever a value of a field changes remotely.
To avoid memory leaks, you also need to remove the listener when the View isn't using it, using attachedToWindow events:
Listen for Tweakr value changes
Override the onAttachedToWindow() method with a call to Tweakr.addListener(this), and then remove the listener in onDetachedFromWindow():
CircleView.kt
/** A View that draws a circle **/
class CircleView @JvmOverloads constructor(
 context: Context, attrs: AttributeSet? = null, defStyleAttr: Int = 0
) : View(context, attrs, defStyleAttr), TweakrRepo.OnChangeListener
 {

...


  override fun onAttachedToWindow() {
   super.onAttachedToWindow()

   // Register onFieldChanged() to redraw when any value changes.
   Tweakr.addListener(this)
  }

  override fun onDetachedFromWindow() {
   Tweakr.removeListener(this)

   super.onDetachedFromWindow()
  }


  override fun onFieldChanged(name: String?, value: Any?) {
   // This is called whenever a field's value is changed in Tweakr's UI.
   // We could be granular here and check the name to match only the fields
   // we care about, but for this demo it's simple enough to just redraw
   // whenever *any* value changes.
   invalidate()
  }

...
(Since you are setting this as a listener, you also need to make sure our class extends/implements the TweakrRepo.OnChangeListener interface.)
Try it out
Now you're ready to try it out. Run the app, and watch the Tweakr Easyserver website automatically update with the new fields to Tweak.
8. Congratulations
Congratulations, you've successfully built your first app with Tweakr!
You learned how to annotate methods and fields with the @Tweak annotation, calling Tweakr.register() on the object containing the fields, and then more advanced usage to listen to Tweakr change events so you can redraw your View manually.
You can use these skills to speed up your prototyping workflow: changing animation values on-the-fly, controlling wizard-of-oz prototypes remotely during UX research, user studies, etc. A common use we've had on our team is to share a motion prototype APK with our motion designer, send them the Tweakr web UI link, and let them tweak the values of the animation to their liking. (Those motion designers like to be quite precise with their animation values!)
Our team has also created prototypes for microinteractions and gestures and haptics, and shared the Tweakr link with the team with various configurations and options for the design that they can toggle between. We then create a shared Doc and let people fill out their favorite Tweakr values, helping bring consensus on a design before implementing it in production.
What's next?
- Check out the Tweakr Documentation
- Demo video and sample code with color pickers, child methods, and more
Other things to try
- Wizard-of-oz remote control: try creating a method in your Activity that takes an Enum of screen names in your app. When Tweakr calls the method, load a new Fragment that corresponds to the screen name. That way you can just click on the screen you want in the Tweakr web UI, and everyone viewing the app on their phone will see the new Fragment. Great for user studies!
- Multiple users: by default, the Tweakr web UI syncs changes to every person using the app, simultaneously. But sometimes, if you have multiple concurrent users, you want each user to have their own session, so any Tweaks they make in the UI only affect their phone and not other users'. See the TweakrFirebaseRepoMultiuser documentation on how to create multiple sessions with
getUserKey(). - Local PreferenceScreen: Tweakr doesn't have to use Firebase. It can also autogenerate an Android Preference UI so you can change settings locally on your phone. See the sample code and documentation.
