1. 시작하기 전에
인터넷에 액세스하지 않고도 휴대기기를 사용하여 그룹 프로젝트에서 공동작업을 하거나 동영상을 공유하고 콘텐츠를 스트리밍하거나 멀티플레이어 게임을 할 수 있다면 정말 멋지지 않을까요? 실제로 가능합니다. 이 Codelab에서는 이를 진행하는 방법에 관해 알아봅니다.
작업을 단순화하기 위해 여기서는 인터넷 없이도 작동하는 멀티플레이어 가위바위보 게임을 만들어 보겠습니다. 이 Codelab에서는 Google Play 서비스의 일부인 Nearby Connections API를 사용해 물리적 근접성에 따라 사용자들이 서로 소통할 수 있게 하는 방법을 알려줍니다. 사용자는 서로 약 100m 이내에 있어야 합니다. 인터넷 연결이 없더라도 사용자 간에 공유 가능한 데이터 유형이나 양에는 제한이 없습니다. 사용자는 동영상을 스트리밍하고 음성 메시지를 주고받고 문자 메시지를 보내는 등 다양한 작업을 할 수 있습니다.
기본 요건
- Kotlin 및 Android 개발에 관한 기본 지식
- Android 스튜디오에서 앱을 만들고 실행하는 방법
- 코드를 실행하고 테스트할 Android 기기 2대 이상
- Android API 수준 16 이상 실행
- Google Play 서비스 설치됨
- Android 스튜디오 최신 버전
학습할 내용
- Google Play 서비스 Nearby Connections 라이브러리를 앱에 추가하는 방법
- 관심이 있음을 광고해 근처 기기와 소통하는 방법
- 관심 있는 근처 기기를 찾는 방법
- 연결된 기기와 통신하는 방법
- 개인 정보 보호 및 데이터 보호를 위한 권장사항
빌드할 항목
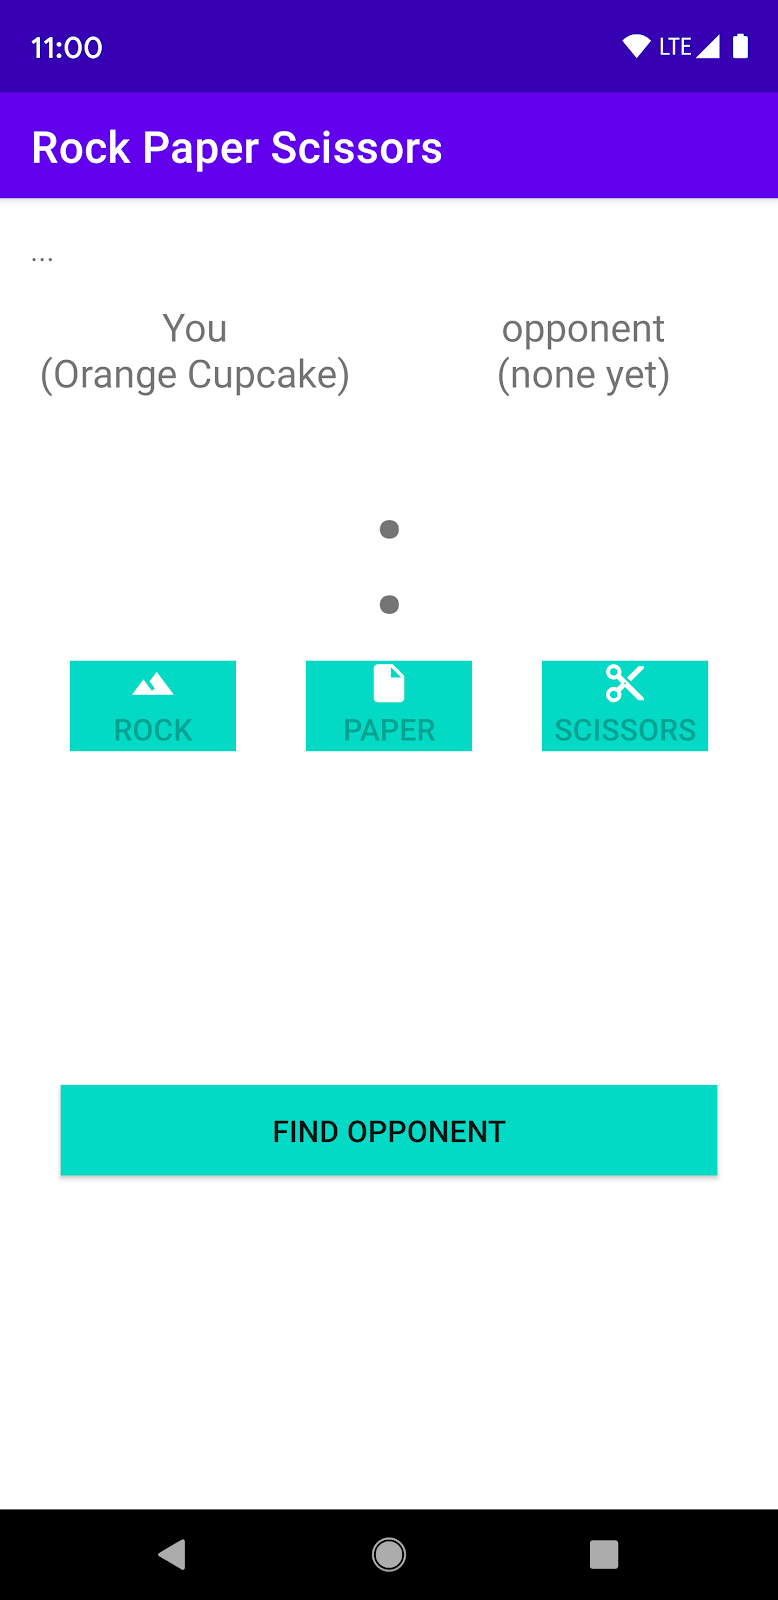
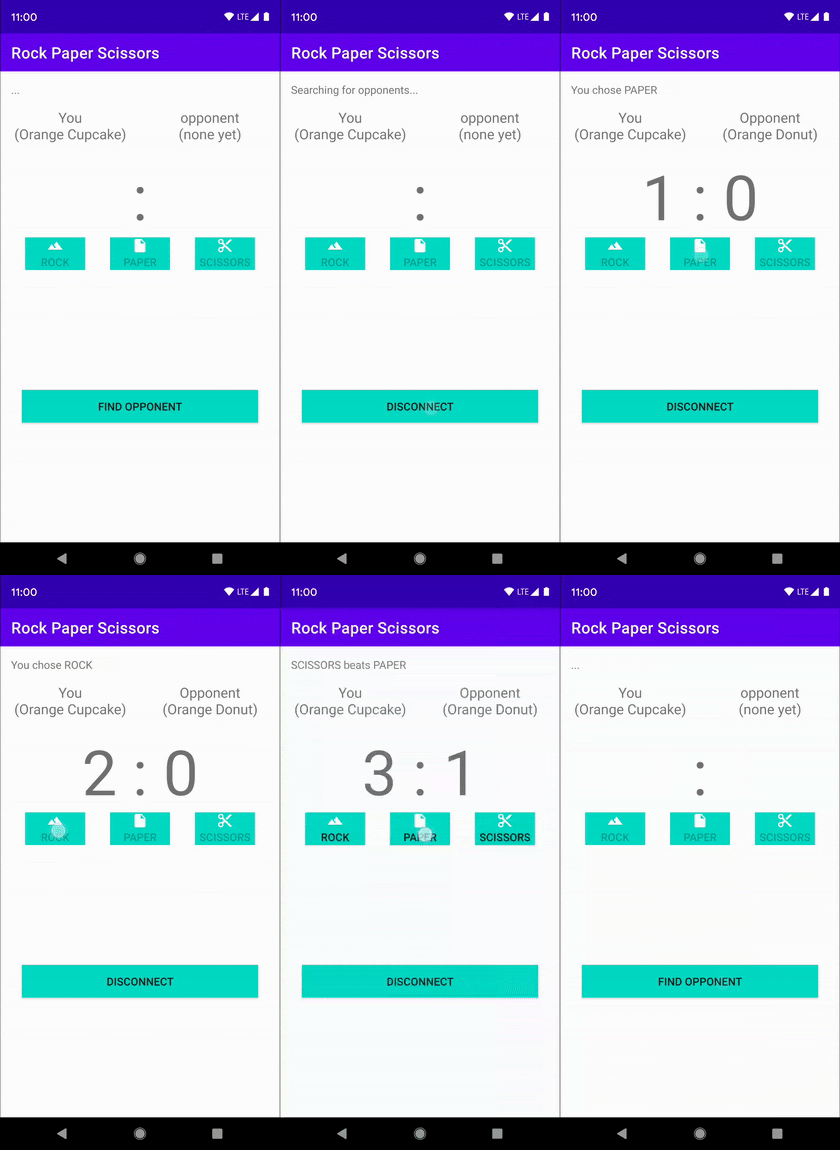
이 Codelab에서는 사용자가 상대를 찾아 가위바위보 게임을 할 수 있는 단일 Activity 앱을 빌드하는 방법을 보여줍니다. 앱의 UI 요소는 다음과 같습니다.
- 상대를 찾기 위한 버튼
- 사용자가 가위, 바위, 보를 선택할 수 있는 버튼 3개가 있는 게임 컨트롤러
- 점수를 표시할
TextView - 상태를 표시할
TextView

그림 1
2. Android 스튜디오 프로젝트 만들기
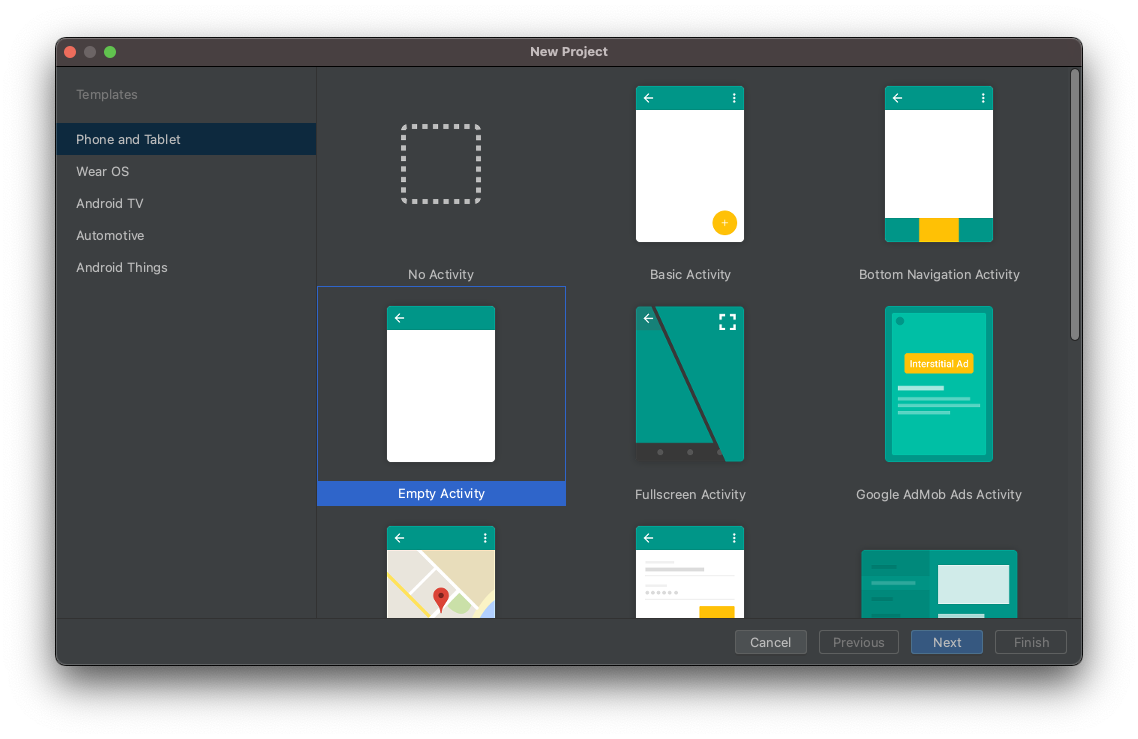
- 새 Android 스튜디오 프로젝트를 시작합니다.
- Empty Activity를 선택합니다.

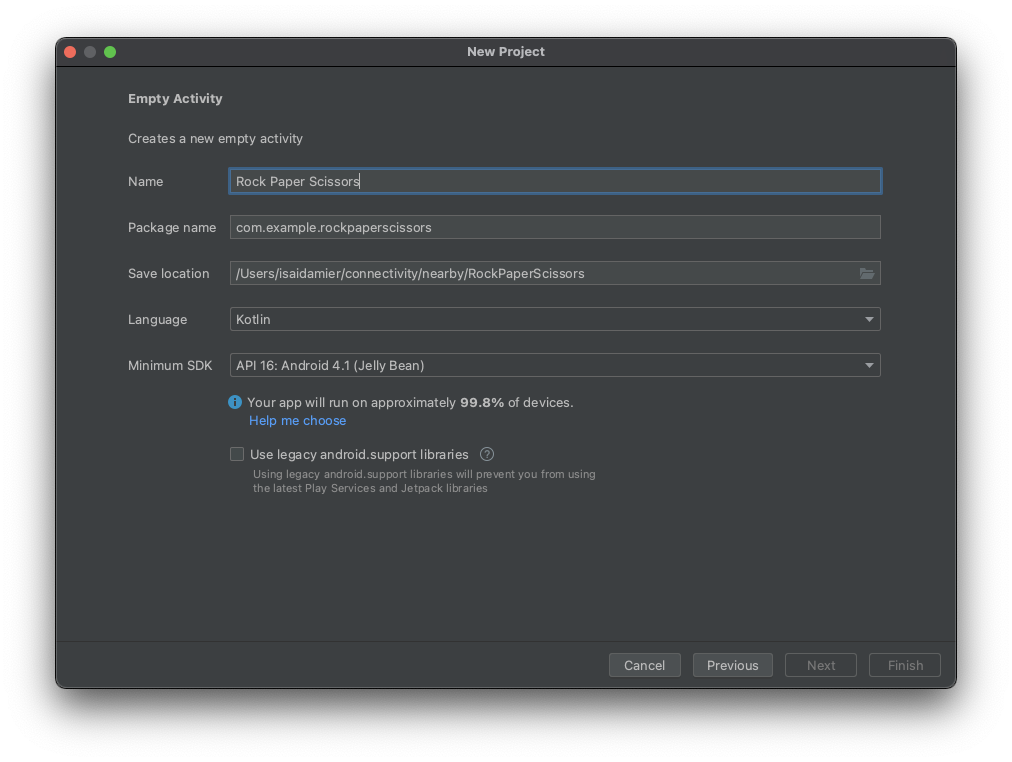
- 프로젝트 이름을 Rock Paper Scissors로 지정하고 언어를 Kotlin으로 설정합니다.

3. 코드 설정
- Nearby 종속 항목의 최신 버전을 앱 수준
build.gradle파일에 추가합니다. 이렇게 하면 앱에서 Nearby Connections API를 사용하여 근처 기기를 탐색하고 연결하여 통신할 의사를 광고합니다.
implementation 'com.google.android.gms:play-services-nearby:LATEST_VERSION'
android블록에서 viewBinding 빌드 옵션을true로 설정하여 View Binding을 사용 설정합니다. 그러면findViewById를 사용하지 않고도 뷰와 상호작용할 수 있습니다.
android {
   ...
   buildFeatures {
       viewBinding true
   }
}
- Sync Now 또는 녹색 망치 버튼을 클릭하여 Android 스튜디오에서 Gradle 변경사항을 고려하도록 합니다.

- 현재 가위, 바위, 보 이미지에 벡터 드로어블을 사용하고 있습니다. 다음 XML 파일 세 개를
res/drawable디렉터리에 추가합니다.
res/drawables/rock.xml
<vector xmlns:android="http://schemas.android.com/apk/res/android"
   android:height="24dp"
   android:tintMode="multiply"
   android:viewportHeight="48.0"
   android:viewportWidth="48.0"
   android:width="24dp">
 <path
     android:fillColor="#ffffff"
     android:pathData="M28,12l-7.5,10 5.7,7.6L23,32c-3.38,-4.5 -9,-12 -9,-12L2,36h44L28,12z"/>
</vector>
res/drawables/paper.xml
<vector xmlns:android="http://schemas.android.com/apk/res/android"
   android:height="24dp"
   android:tintMode="multiply"
   android:viewportHeight="48.0"
   android:viewportWidth="48.0"
   android:width="24dp">
 <path
     android:fillColor="#ffffff"
     android:pathData="M28,4L12,4C9.79,4 8.02,5.79 8.02,8L8,40c0,2.21 1.77,4 3.98,4L36,44c2.21,0 4,-1.79 4,-4L40,16L28,4zM26,18L26,7l11,11L26,18z"/>
</vector>
res/drawables/scissors.xml
<vector xmlns:android="http://schemas.android.com/apk/res/android"
   android:width="24dp"
   android:height="24dp"
   android:tintMode="multiply"
   android:viewportWidth="48.0"
   android:viewportHeight="48.0">
   <path
       android:fillColor="#ffffff"
       android:pathData="M19.28,15.28c0.45,-1 0.72,-2.11 0.72,-3.28 0,-4.42 -3.58,-8 -8,-8s-8,3.58 -8,8 3.58,8 8,8c1.17,0 2.28,-0.27 3.28,-0.72L20,24l-4.72,4.72c-1,-0.45 -2.11,-0.72 -3.28,-0.72 -4.42,0 -8,3.58 -8,8s3.58,8 8,8 8,-3.58 8,-8c0,-1.17 -0.27,-2.28 -0.72,-3.28L24,28l14,14h6v-2L19.28,15.28zM12,16c-2.21,0 -4,-1.79 -4,-4s1.79,-4 4,-4 4,1.79 4,4 -1.79,4 -4,4zM12,40c-2.21,0 -4,-1.79 -4,-4s1.79,-4 4,-4 4,1.79 4,4 -1.79,4 -4,4zM24,25c-0.55,0 -1,-0.45 -1,-1s0.45,-1 1,-1 1,0.45 1,1 -0.45,1 -1,1zM38,6L26,18l4,4L44,8L44,6z" />
</vector>
- 게임 화면에 사용할 게임 컨트롤러(즉, 플레이 버튼), 점수 및 상태
TextView를 추가합니다.activity_main.xml파일에서 코드를 다음으로 바꿉니다.
<?xml version="1.0" encoding="utf-8"?>
<androidx.constraintlayout.widget.ConstraintLayout
   xmlns:android="http://schemas.android.com/apk/res/android"
   xmlns:app="http://schemas.android.com/apk/res-auto"
   xmlns:tools="http://schemas.android.com/tools"
   android:layout_width="match_parent"
   android:layout_height="match_parent"
   tools:context=".MainActivity">

   <TextView
       android:id="@+id/status"
       android:layout_width="match_parent"
       android:layout_height="wrap_content"
       android:padding="16dp"
       android:text="searching..."
       app:layout_constraintBottom_toTopOf="@+id/myName"
       app:layout_constraintEnd_toEndOf="parent"
       app:layout_constraintStart_toStartOf="parent"
       app:layout_constraintTop_toTopOf="parent"
       />

   <TextView
       android:id="@+id/myName"
       android:layout_width="0dp"
       android:layout_height="wrap_content"
       android:layout_gravity="center"
       android:text="You (codeName)"
       android:textAlignment="center"
       android:textAppearance="?android:textAppearanceMedium"
       app:layout_constraintEnd_toStartOf="@+id/opponentName"
       app:layout_constraintStart_toStartOf="parent"
       app:layout_constraintTop_toBottomOf="@+id/status"
       />

   <TextView
       android:id="@+id/opponentName"
       android:layout_width="0dp"
       android:layout_height="wrap_content"
       android:layout_gravity="center"
       android:text="Opponent (codeName)"
       android:textAlignment="center"
       android:textAppearance="?android:textAppearanceMedium"
       app:layout_constraintEnd_toEndOf="parent"
       app:layout_constraintStart_toEndOf="@+id/myName"
       app:layout_constraintTop_toBottomOf="@+id/status"
       />

   <TextView
       android:id="@+id/score"
       android:layout_width="match_parent"
       android:layout_height="wrap_content"
       android:layout_gravity="center"
       android:layout_margin="16dp"
       android:text=":"
       android:textAlignment="center"
       android:textSize="80sp"
       app:layout_constraintEnd_toEndOf="parent"
       app:layout_constraintStart_toStartOf="parent"
       app:layout_constraintTop_toBottomOf="@+id/myName"
       />

   <androidx.appcompat.widget.AppCompatButton
       android:id="@+id/rock"
       android:layout_width="wrap_content"
       android:layout_height="wrap_content"
       android:drawableTop="@drawable/rock"
       android:text="Rock"
       app:layout_constraintEnd_toStartOf="@+id/paper"
       app:layout_constraintHorizontal_chainStyle="spread"
       app:layout_constraintStart_toStartOf="parent"
       app:layout_constraintTop_toBottomOf="@+id/score"
       />

   <androidx.appcompat.widget.AppCompatButton
       android:id="@+id/paper"
       android:layout_width="wrap_content"
       android:layout_height="wrap_content"
       android:drawableTop="@drawable/paper"
       android:text="Paper"
       app:layout_constraintEnd_toStartOf="@+id/scissors"
       app:layout_constraintStart_toEndOf="@+id/rock"
       app:layout_constraintTop_toBottomOf="@+id/score"
       />

   <androidx.appcompat.widget.AppCompatButton
       android:id="@+id/scissors"
       android:layout_width="wrap_content"
       android:layout_height="wrap_content"
       android:drawableTop="@drawable/scissors"
       android:text="Scissors"
       app:layout_constraintEnd_toEndOf="parent"
       app:layout_constraintStart_toEndOf="@+id/paper"
       app:layout_constraintTop_toBottomOf="@+id/score"
       />

   <androidx.appcompat.widget.AppCompatButton
       android:id="@+id/disconnect"
       android:layout_width="match_parent"
       android:layout_height="wrap_content"
       android:layout_margin="32dp"
       android:text="disconnect"
       app:layout_constraintBottom_toBottomOf="parent"
       app:layout_constraintEnd_toEndOf="parent"
       app:layout_constraintStart_toStartOf="parent"
       app:layout_constraintTop_toBottomOf="@+id/paper"
       />

   <androidx.appcompat.widget.AppCompatButton
       android:id="@+id/findOpponent"
       android:layout_width="match_parent"
       android:layout_height="wrap_content"
       android:layout_margin="32dp"
       android:text="find opponent"
       app:layout_constraintBottom_toBottomOf="parent"
       app:layout_constraintEnd_toEndOf="parent"
       app:layout_constraintStart_toStartOf="parent"
       app:layout_constraintTop_toBottomOf="@+id/paper"
       />

</androidx.constraintlayout.widget.ConstraintLayout>
이제 레이아웃이 위 그림 1처럼 표시됩니다.
참고: 프로젝트에서 16dp와 같은 값을 @dimen/activity_vertical_margin과 같은 리소스로 변경합니다.
4. 앱에 Nearby Connections 추가
manifest.xml 파일 준비
매니페스트 파일에 다음 권한을 추가합니다. ACCESS_FINE_LOCATION은 위험한 권한이기 때문에, 앱을 대신하여 사용자에게 액세스 허용 또는 거부를 묻는 메시지를 표시하도록 시스템을 트리거하는 코드가 앱에 포함됩니다. Wi-Fi 권한은 인터넷 연결이 아닌 P2P 연결에 적용됩니다.
<!-- Required for Nearby Connections →

<!--    Because ACCESS_FINE_LOCATION is a dangerous permission, the app will have to-->
<!--    request it at runtime, and the user will be prompted to grant or deny access.-->

<uses-permission android:name="android.permission.BLUETOOTH"/>
<uses-permission android:name="android.permission.BLUETOOTH_ADMIN"/>
<uses-permission android:name="android.permission.ACCESS_WIFI_STATE"/>
<uses-permission android:name="android.permission.CHANGE_WIFI_STATE"/>
<uses-permission android:name="android.permission.ACCESS_FINE_LOCATION"/>
Strategy 선택
Nearby Connections API를 사용하려면 앱을 다른 근처 기기와 어떻게 연결할지 결정하는 Strategy를 선택해야 합니다. P2P_CLUSTER, P2P_STAR 또는 P2P_POINT_TO_POINT를 선택합니다.
이 Codelab의 목적상 P2P_STAR를 선택합니다. 도전하려는 플레이어가 보내는 많은 요청을 볼 수 있으면서 한 번에 한 명과만 게임을 하고자 하기 때문입니다.
선택하는 Strategy는 앱 내 광고와 탐색에 모두 사용되어야 합니다. 아래 그림은 각 Strategy의 작동 방식을 보여줍니다.
기기에서 발신 연결 N개 요청 가능 | 기기에서 수신 연결 M개 받기 가능 | |||
| N = 다수 | M = 다수 | 저대역폭 연결 결과 | |
| N = 1 | M = 다수 | 고대역폭 연결 결과 | |
| N = 1 | M = 1 | 가능한 최고 처리량 | |
MainActivity에서 변수 정의
- 기본 활동(
MainActivity.kt) 내부에서onCreate()함수 위에 이 코드 스니펫을 붙여넣어 다음 변수를 정의합니다. 이 변수는 게임별 로직과 런타임 권한을 정의합니다.
/**
* Enum class for defining the winning rules for Rock-Paper-Scissors. Each player will make a
* choice, then the beats function in this class will be used to determine whom to reward the
* point to.
*/
private enum class GameChoice {
   ROCK, PAPER, SCISSORS;

   fun beats(other: GameChoice): Boolean =
       (this == ROCK && other == SCISSORS)
               || (this == SCISSORS && other == PAPER)
               || (this == PAPER && other == ROCK)
}

/**
* Instead of having each player enter a name, in this sample we will conveniently generate
* random human readable names for players.
*/
internal object CodenameGenerator {
   private val COLORS = arrayOf(
       "Red", "Orange", "Yellow", "Green", "Blue", "Indigo", "Violet", "Purple", "Lavender"
   )
   private val TREATS = arrayOf(
       "Cupcake", "Donut", "Eclair", "Froyo", "Gingerbread", "Honeycomb",
       "Ice Cream Sandwich", "Jellybean", "Kit Kat", "Lollipop", "Marshmallow", "Nougat",
       "Oreo", "Pie"
   )
   private val generator = Random()

   /** Generate a random Android agent codename  */
   fun generate(): String {
       val color = COLORS[generator.nextInt(COLORS.size)]
       val treat = TREATS[generator.nextInt(TREATS.size)]
       return "$color $treat"
   }
}

/**
* Strategy for telling the Nearby Connections API how we want to discover and connect to
* other nearby devices. A star shaped strategy means we want to discover multiple devices but
* only connect to and communicate with one at a time.
*/
private val STRATEGY = Strategy.P2P_STAR

/**
* Our handle to the [Nearby Connections API][ConnectionsClient].
*/
private lateinit var connectionsClient: ConnectionsClient


/**
* The request code for verifying our call to [requestPermissions]. Recall that calling
* [requestPermissions] leads to a callback to [onRequestPermissionsResult]
*/
private val REQUEST_CODE_REQUIRED_PERMISSIONS = 1

/*
The following variables are convenient ways of tracking the data of the opponent that we
choose to play against.
*/
private var opponentName: String? = null
private var opponentEndpointId: String? = null
private var opponentScore = 0
private var opponentChoice: GameChoice? = null

/*
The following variables are for tracking our own data
*/
private var myCodeName: String = CodenameGenerator.generate()
private var myScore = 0
private var myChoice: GameChoice? = null

/**
* This is for wiring and interacting with the UI views.
*/
private lateinit var binding: ActivityMainBinding
ViewBinding객체를setContentView()에 전달하도록onCreate()함수를 변경합니다. 그러면activity_main.xml레이아웃 파일의 콘텐츠가 표시됩니다. 또한 앱이 API와 통신할 수 있도록connectionsClient를 초기화합니다.
override fun onCreate(savedInstanceState: Bundle?) {
   super.onCreate(savedInstanceState)
   binding = ActivityMainBinding.inflate(layoutInflater)
   setContentView(binding.root)
   connectionsClient = Nearby.getConnectionsClient(this)
}
필수 권한 확인
일반적으로 위험한 권한은 AndroidManifest.xml 파일에서 선언되지만 런타임 시 요청해야 합니다. 다른 필수 권한의 경우에도 런타임 시 확인하여 결과가 예상과 같은지 확인해야 합니다. 사용자가 권한 중 하나라도 거부할 경우 샘플 앱은 권한 없이는 사용할 수 없으므로 권한을 승인하지 않으면 작업을 진행할 수 없음을 사용자에게 알리는 토스트 메시지를 표시합니다.
onCreate()함수 아래에 다음 코드 스니펫을 추가하여 권한이 있는지 확인합니다.
@CallSuper
override fun onStart() {
   super.onStart()
   if (checkSelfPermission(Manifest.permission.ACCESS_FINE_LOCATION) != PackageManager.PERMISSION_GRANTED) {
       requestPermissions(
           arrayOf(Manifest.permission.ACCESS_FINE_LOCATION),
           REQUEST_CODE_REQUIRED_PERMISSIONS
       )
   }
}

@CallSuper
override fun onRequestPermissionsResult(
   requestCode: Int,
   permissions: Array<out String>,
   grantResults: IntArray
) {
   super.onRequestPermissionsResult(requestCode, permissions, grantResults)
   val errMsg = "Cannot start without required permissions"
   if (requestCode == REQUEST_CODE_REQUIRED_PERMISSIONS) {
       grantResults.forEach {
           if (it == PackageManager.PERMISSION_DENIED) {
               Toast.makeText(this, errMsg, Toast.LENGTH_LONG).show()
               finish()
               return
           }
       }
       recreate()
   }
}
이제 다음 작업을 위한 코드를 작성했습니다.
- 레이아웃 파일 생성
- 매니페스트에서 필요한 권한 선언
- 런타임에 필요한 위험 권한 확인
역순으로 둘러보기
이제 사전 작업을 처리했으므로 근처 사용자와 연결하여 소통하기 위한 Nearby Connections 코드를 작성할 준비가 되었습니다. 일반적으로 근처 기기와 실제로 통신하려면 앱은 다른 기기가 자신을 찾도록 허용해야 하고 다른 기기를 탐색해야 합니다.
다시 말해서, 가위바위보 게임에서 게임을 시작하려면 양쪽 플레이어가 서로를 찾아야 합니다.
광고라고 하는 프로세스를 통해 본인의 기기를 찾을 수 있도록 설정할 수 있습니다. 마찬가지로 탐색이라는 프로세스를 통해 근처 상대방을 발견할 수 있습니다.
프로세스 이해를 돕기 위해 코드를 역순으로 처리하는 것이 가장 좋습니다. 이를 위해 다음과 같이 진행합니다.
- 이미 연결된 것으로 간주하고 메시지를 주고받기 위한 코드를 작성합니다. 현재 목적에서는 실제로 가위바위보 게임을 하기 위한 코드를 작성하는 것을 의미합니다.
- 근처 기기와 연결할 의사를 광고하기 위한 코드를 작성합니다.
- 근처 기기를 탐색하기 위한 코드를 작성합니다.
데이터 주고받기
connectionsClient.sendPayload() 메서드를 사용하여 데이터를 Payload로 보내고 PayloadCallback 객체를 사용하여 페이로드를 수신할 수 있습니다. Payload는 동영상, 사진, 스트림 등 기타 모든 유형의 데이터가 될 수 있습니다. 데이터 한도도 없습니다.
- 이 게임에서 페이로드는 가위, 바위, 보 중 선택한 항목입니다. 사용자가 컨트롤러 버튼 중 하나를 클릭하면 앱은 사용자의 선택을 상대방 앱에 페이로드로 전송합니다. 사용자의 행동을 기록하기 위해
onRequestPermissionsResult()함수 아래에 다음 코드 스니펫을 추가합니다.
/** Sends the user's selection of rock, paper, or scissors to the opponent. */
private fun sendGameChoice(choice: GameChoice) {
   myChoice = choice
   connectionsClient.sendPayload(
       opponentEndpointId!!,
       Payload.fromBytes(choice.name.toByteArray(UTF_8))
   )
   binding.status.text = "You chose ${choice.name}"
   // For fair play, we will disable the game controller so that users don't change their
   // choice in the middle of a game.
   setGameControllerEnabled(false)
}

/**
* Enables/Disables the rock, paper and scissors buttons. Disabling the game controller
* prevents users from changing their minds after making a choice.
*/
private fun setGameControllerEnabled(state: Boolean) {
   binding.apply {
       rock.isEnabled = state
       paper.isEnabled = state
       scissors.isEnabled = state
   }
}
- 기기는 메서드가 두 개 있는
PayloadCallback객체를 통해 페이로드를 수신합니다.onPayloadReceived()메서드는 메시지를 수신하면 이를 앱에 알리고,onPayloadTransferUpdate()메서드는 받은 메시지와 보낸 메시지 양쪽의 상태를 추적합니다.
이 Codelab의 목적상 onPayloadReceived()에서 받은 메시지를 상대방의 행동으로 해석하고, onPayloadTransferUpdate() 메서드를 사용하여 양쪽 플레이어가 행동을 취한 시점을 추적하고 확인합니다. onCreate() 메서드 위에 다음 코드 스니펫을 추가합니다.
/** callback for receiving payloads */
private val payloadCallback: PayloadCallback = object : PayloadCallback() {
   override fun onPayloadReceived(endpointId: String, payload: Payload) {
       payload.asBytes()?.let {
           opponentChoice = GameChoice.valueOf(String(it, UTF_8))
       }
   }

   override fun onPayloadTransferUpdate(endpointId: String, update: PayloadTransferUpdate) {
       // Determines the winner and updates game state/UI after both players have chosen.
       // Feel free to refactor and extract this code into a different method
       if (update.status == PayloadTransferUpdate.Status.SUCCESS
           && myChoice != null && opponentChoice != null) {
           val mc = myChoice!!
           val oc = opponentChoice!!
           when {
               mc.beats(oc) -> { // Win!
                   binding.status.text = "${mc.name} beats ${oc.name}"
                   myScore++
               }
               mc == oc -> { // Tie
                   binding.status.text = "You both chose ${mc.name}"
               }
               else -> { // Loss
                   binding.status.text = "${mc.name} loses to ${oc.name}"
                   opponentScore++
               }
           }
           binding.score.text = "$myScore : $opponentScore"
           myChoice = null
           opponentChoice = null
           setGameControllerEnabled(true)
       }
   }
}
광고
근처에 있는 누군가가 나를 알아차리고 연결 요청을 하기를 바라면서 내 존재나 관심사를 광고할 수 있습니다. 따라서 Nearby Connections API의 startAdvertising() 메서드에는 콜백 객체가 필요합니다. ConnectionLifecycleCallback 콜백은 내 광고를 본 누군가가 연결을 원하면 이를 알려줍니다. 이 콜백 객체에는 다음과 같은 세 가지 메서드가 있습니다.
onConnectionInitiated()메서드는 누군가가 내 광고를 보고 연결을 원한다고 알려줍니다. 따라서connectionsClient.acceptConnection()을 통해 연결을 수락하도록 선택할 수 있습니다.- 누군가가 광고를 발견하고 나에게 연결 요청을 보낼 수 있습니다. 나와 보내는 사람이 실제로 연결되려면 모두 연결 요청을 수락해야 합니다.
onConnectionResult()메서드를 사용하여 연결이 설정되었는지를 알 수 있습니다. onDisconnected()함수는 연결이 더 이상 활성 상태가 아님을 알려줍니다. 이러한 일은 나나 상대방이 연결 종료를 결정하는 경우에 발생할 수 있습니다.
광고하려면 다음 단계를 따르세요.
- 이 앱에서
onConnectionInitiated()콜백을 받으면 연결을 수락합니다. 연결이 설정된 경우onConnectionResult()내부에서 광고와 탐색을 중단합니다. 게임하기 위해 단 한 명의 상대와 연결해야 하기 때문입니다. 마지막으로onConnectionResult()에서 게임을 재설정합니다.
onCreate() 메서드 앞에 다음 코드 스니펫을 붙여넣습니다.
// Callbacks for connections to other devices
private val connectionLifecycleCallback = object : ConnectionLifecycleCallback() {
   override fun onConnectionInitiated(endpointId: String, info: ConnectionInfo) {
       // Accepting a connection means you want to receive messages. Hence, the API expects
       // that you attach a PayloadCall to the acceptance
       connectionsClient.acceptConnection(endpointId, payloadCallback)
       opponentName = "Opponent\n(${info.endpointName})"
   }

   override fun onConnectionResult(endpointId: String, result: ConnectionResolution) {
       if (result.status.isSuccess) {
           connectionsClient.stopAdvertising()
           connectionsClient.stopDiscovery()
           opponentEndpointId = endpointId
           binding.opponentName.text = opponentName
           binding.status.text = "Connected"
           setGameControllerEnabled(true) // we can start playing
       }
   }

   override fun onDisconnected(endpointId: String) {
       resetGame()
   }
}
resetGame()은 다양한 시점에 호출하는 데 편리하기 때문에 이를 고유한 하위 루틴으로 만듭니다.MainActivity클래스 하단에 다음 코드를 추가합니다.
/** Wipes all game state and updates the UI accordingly. */
private fun resetGame() {
   // reset data
   opponentEndpointId = null
   opponentName = null
   opponentChoice = null
   opponentScore = 0
   myChoice = null
   myScore = 0
   // reset state of views
   binding.disconnect.visibility = View.GONE
   binding.findOpponent.visibility = View.VISIBLE
   setGameControllerEnabled(false)
   binding.opponentName.text="opponent\n(none yet)"
   binding.status.text ="..."
   binding.score.text = ":"
}
- 다음 스니펫은 Nearby Connections API에 광고 모드 시작 의사를 알리는 실제 광고 호출입니다. 이를
onCreate()메서드 아래에 추가합니다.
private fun startAdvertising() {
   val options = AdvertisingOptions.Builder().setStrategy(STRATEGY).build()
   // Note: Advertising may fail. To keep this demo simple, we don't handle failures.
   connectionsClient.startAdvertising(
       myCodeName,
       packageName,
       connectionLifecycleCallback,
       options
   )
}
탐색
광고를 보완해 주는 것이 탐색입니다. 두 호출은 서로 다른 콜백을 사용한다는 점을 제외하고는 매우 유사합니다. startDiscovery() 호출의 콜백은 EndpointDiscoveryCallback 객체입니다. 이 객체에는 콜백 메서드가 두 개 있습니다. onEndpointFound()는 광고가 감지될 때마다 호출되고, onEndpointLost()는 광고를 더 이상 사용할 수 없을 때마다 호출됩니다.
- 앱은 감지된 첫 번째 광고주와 연결됩니다. 다시 말해,
onEndpointFound()메서드 내에서 연결 요청을 만들고onEndpointLost()메서드로는 아무것도 하지 않습니다.onCreate()메서드 앞에 콜백을 추가합니다.
// Callbacks for finding other devices
private val endpointDiscoveryCallback = object : EndpointDiscoveryCallback() {
   override fun onEndpointFound(endpointId: String, info: DiscoveredEndpointInfo) {
       connectionsClient.requestConnection(myCodeName, endpointId, connectionLifecycleCallback)
   }

   override fun onEndpointLost(endpointId: String) {
   }
}
- Nearby Connections API에 실제로 탐색 모드 시작 의사를 알리는 스니펫도 추가합니다. 이를
MainActivity클래스 하단에 추가합니다.
private fun startDiscovery(){
   val options = DiscoveryOptions.Builder().setStrategy(STRATEGY).build()
   connectionsClient.startDiscovery(packageName,endpointDiscoveryCallback,options)
}
- 이제 전체 작업 중 Nearby Connections 부분이 완료되었습니다. 나를 광고하고 근처 기기를 탐색하고 통신할 수 있습니다. 하지만 아직 게임을 할 수가 없습니다. 다음과 같이 UI 뷰 연결을 마무리해야 합니다.
- 사용자가 FIND OPPONENT 버튼을 클릭하면 앱은
startAdvertising()과startDiscovery()를 모두 호출해야 합니다. 이렇게 하면 발견하는 동시에 발견됩니다. - 사용자가 ROCK, PAPER, SCISSORS의 컨트롤러 버튼 중 하나를 클릭하면 앱은
sendGameChoice()를 호출하여 관련 데이터를 상대방에게 전송해야 합니다. - 사용자가 DISCONNECT 버튼을 클릭하면 앱은 게임을 재설정해야 합니다.
이러한 상호작용을 반영하도록 onCreate() 메서드를 업데이트합니다.
override fun onCreate(savedInstanceState: Bundle?) {
   super.onCreate(savedInstanceState)
   binding = ActivityMainBinding.inflate(layoutInflater)
   setContentView(binding.root)
   connectionsClient = Nearby.getConnectionsClient(this)

   binding.myName.text = "You\n($myCodeName)"
   binding.findOpponent.setOnClickListener {
       startAdvertising()
       startDiscovery()
       binding.status.text = "Searching for opponents..."
       // "find opponents" is the opposite of "disconnect" so they don't both need to be
       // visible at the same time
       binding.findOpponent.visibility = View.GONE
       binding.disconnect.visibility = View.VISIBLE
   }
   // wire the controller buttons
   binding.apply {
       rock.setOnClickListener { sendGameChoice(GameChoice.ROCK) }
       paper.setOnClickListener { sendGameChoice(GameChoice.PAPER) }
       scissors.setOnClickListener { sendGameChoice(GameChoice.SCISSORS) }
   }
   binding.disconnect.setOnClickListener {
       opponentEndpointId?.let { connectionsClient.disconnectFromEndpoint(it) }
       resetGame()
   }

   resetGame() // we are about to start a new game
}
정리
더는 필요하지 않으면 Nearby API 사용을 중지해야 합니다. 샘플 게임의 경우 onStop() 활동 수명 주기 함수 내에서 모든 애셋을 해제할 수 있습니다.
@CallSuper
override fun onStop(){
   connectionsClient.apply {
       stopAdvertising()
       stopDiscovery()
       stopAllEndpoints()
   }
   resetGame()
   super.onStop()
}
5. 앱 실행
두 기기에서 앱을 실행하여 게임을 즐기세요.

6. 개인 정보 보호를 위한 권장사항
가위바위보 게임에서는 민감한 정보가 공유되지 않습니다. 코드명도 무작위로 생성됩니다. 그렇기 때문에 onConnectionInitiated(String, ConnectionInfo) 내에서 연결을 자동으로 허용했습니다.
ConnectionInfo 객체에는 연결마다 고유 토큰이 포함되어 있고, 앱은 getAuthenticationDigits()를 통해 토큰에 액세스할 수 있습니다. 보안문자 확인을 위해 양쪽 사용자에게 토큰을 표시할 수 있습니다. 다른 방법으로는, 민감한 정보를 공유하기 전에 한 기기에서 원시 토큰을 암호화한 후 다른 기기에서 복호화되도록 원시 토큰을 페이로드 형태로 전송할 수 있습니다. Android 암호화에 관한 자세한 내용은 블로그 게시물 '메시지 인증부터 사용자 존재까지 앱의 암호화 개선'을 참고하세요.
7. 축하합니다
축하합니다. 이제 Nearby Connections API를 통해 인터넷 연결 없이도 사용자를 연결하는 방법을 알게 되었습니다.
요약하자면 Nearby Connections API를 사용하려면 play-services-nearby의 종속 항목을 추가해야 합니다. 또한 AndroidManifest.xml 파일에서 권한을 요청하고 런타임 시 그러한 권한을 확인해야 합니다. 다음 작업의 방법도 배웠습니다.
- 근처 사용자와 연결할 때 내 관심사 광고
- 연결하고 싶은 근처 사용자 탐색
- 연결 수락
- 메시지 보내기
- 메시지 수신
- 사용자 개인 정보 보호
다음 단계는 무엇인가요?
블로그 시리즈 및 샘플을 확인해 보세요.
