
1. 始める前に
インターネットにアクセスできない環境でも、モバイル デバイスを使用してグループ プロジェクトでの共同作業、動画の共有、コンテンツのストリーミング、マルチプレーヤー ゲームのプレイができたらよいと思いませんか。実際に、これらのことが可能です。この Codelab では、そのための方法について学びます。
簡潔にするため、ここではインターネットに接続せずに機能するマルチプレーヤー型ゲームとしてじゃんけんゲームを作成します。この Codelab では、Google Play 開発者サービスの一部である Nearby Connections API を使用して、ユーザー同士の物理的距離が近い場合に互いに通信できるようにする方法を説明します。ユーザー間の距離は、約 100 m 以内にする必要があります。インターネット接続がない状態であっても、ユーザーが共有できるデータの種類や量に制限はありません。動画のストリーミング、音声メッセージの送受信、テキスト メッセージの送信などを行うことができます。
前提条件
- Kotlin と Android の開発に関する基本的な知識
- Android Studio でアプリを作成して実行するための知識
- コードの実行とテストに使用する 2 台以上の Android デバイス
- Android API レベル 16 以上を実行している
- Google Play 開発者サービスがインストールされている
- Android Studio の最新バージョン
学習内容
- Google Play 開発者サービスの Nearby Connections ライブラリをアプリに追加する方法
- 付近のデバイスとの通信を希望していることをアドバタイズする方法
- 付近の候補デバイスを検出する方法
- 接続済みのデバイスと通信する方法
- プライバシーとデータ保護に関するベスト プラクティス
作成するアプリの概要
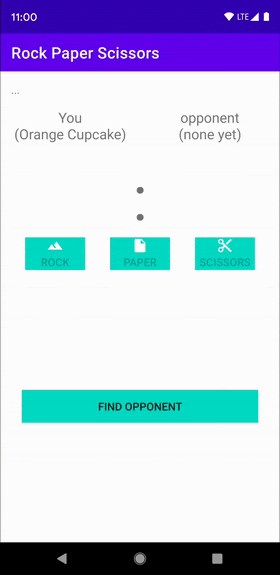
この Codelab では、1 つのアクティビティ アプリを作成して、ユーザーが対戦相手を見つけてじゃんけんゲームをプレイできるようにする方法を説明します。アプリには次の UI 要素があります。
- 対戦相手を見つけるためのボタン
- 3 つのボタンが配置されており、ユーザーが、グー、パー、チョキを選択してプレイできるようにするゲーム コントローラ
- スコアを表示するための
TextView - ステータスを表示するための
TextView
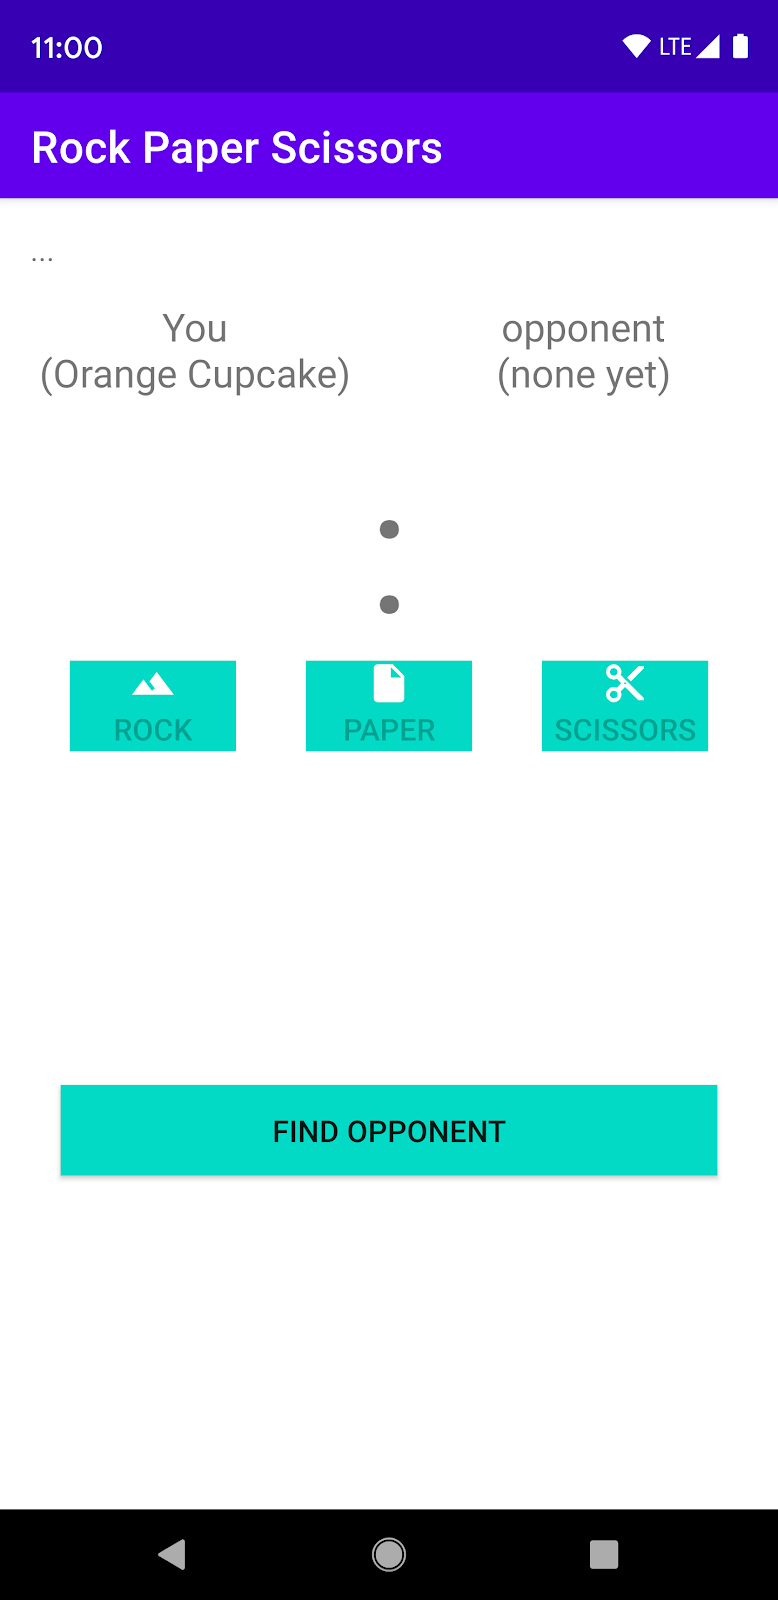
図 1.
2. Android Studio プロジェクトを作成する
- 新しい Android Studio プロジェクトを開始します。
- [Empty Activity] を選択します。
- プロジェクトに「Rock Paper Scissors」という名前を付け、言語を Kotlin に設定します。

3. コードをセットアップする
- Nearby 依存関係の最新バージョンをアプリレベルの
build.gradleファイルに追加します。これにより、アプリは Nearby Connections API を使用して、接続、付近のデバイスの検出、通信を希望していることをアドバタイズできます。
implementation 'com.google.android.gms:play-services-nearby:LATEST_VERSION'
androidブロックで viewBinding ビルド オプションをtrueに設定してビュー バインディングを有効にします。これにより、findViewByIdを使用してビューとやり取りする必要がなくなります。
android {
   ...
   buildFeatures {
       viewBinding true
   }
}
- [Sync Now] または緑色のハンマーボタンをクリックして、Android Studio で Gradle の変更が反映されるようにします。

- ベクター型ドローアブルをグー、チョキ、パーの画像に使用します。次の 3 つの XML ファイルを
res/drawableディレクトリに追加します。
res/drawables/rock.xml
<vector xmlns:android="http://schemas.android.com/apk/res/android"
   android:height="24dp"
   android:tintMode="multiply"
   android:viewportHeight="48.0"
   android:viewportWidth="48.0"
   android:width="24dp">
 <path
     android:fillColor="#ffffff"
     android:pathData="M28,12l-7.5,10 5.7,7.6L23,32c-3.38,-4.5 -9,-12 -9,-12L2,36h44L28,12z"/>
</vector>
res/drawables/paper.xml
<vector xmlns:android="http://schemas.android.com/apk/res/android"
   android:height="24dp"
   android:tintMode="multiply"
   android:viewportHeight="48.0"
   android:viewportWidth="48.0"
   android:width="24dp">
 <path
     android:fillColor="#ffffff"
     android:pathData="M28,4L12,4C9.79,4 8.02,5.79 8.02,8L8,40c0,2.21 1.77,4 3.98,4L36,44c2.21,0 4,-1.79 4,-4L40,16L28,4zM26,18L26,7l11,11L26,18z"/>
</vector>
res/drawables/scissors.xml
<vector xmlns:android="http://schemas.android.com/apk/res/android"
   android:width="24dp"
   android:height="24dp"
   android:tintMode="multiply"
   android:viewportWidth="48.0"
   android:viewportHeight="48.0">
   <path
       android:fillColor="#ffffff"
       android:pathData="M19.28,15.28c0.45,-1 0.72,-2.11 0.72,-3.28 0,-4.42 -3.58,-8 -8,-8s-8,3.58 -8,8 3.58,8 8,8c1.17,0 2.28,-0.27 3.28,-0.72L20,24l-4.72,4.72c-1,-0.45 -2.11,-0.72 -3.28,-0.72 -4.42,0 -8,3.58 -8,8s3.58,8 8,8 8,-3.58 8,-8c0,-1.17 -0.27,-2.28 -0.72,-3.28L24,28l14,14h6v-2L19.28,15.28zM12,16c-2.21,0 -4,-1.79 -4,-4s1.79,-4 4,-4 4,1.79 4,4 -1.79,4 -4,4zM12,40c-2.21,0 -4,-1.79 -4,-4s1.79,-4 4,-4 4,1.79 4,4 -1.79,4 -4,4zM24,25c-0.55,0 -1,-0.45 -1,-1s0.45,-1 1,-1 1,0.45 1,1 -0.45,1 -1,1zM38,6L26,18l4,4L44,8L44,6z" />
</vector>
- ゲーム コントローラ(再生ボタン)、スコア、ゲーム画面の
TextViewステータスを追加します。activity_main.xmlファイルで、コードを次のコードに置き換えます。
<?xml version="1.0" encoding="utf-8"?>
<androidx.constraintlayout.widget.ConstraintLayout
   xmlns:android="http://schemas.android.com/apk/res/android"
   xmlns:app="http://schemas.android.com/apk/res-auto"
   xmlns:tools="http://schemas.android.com/tools"
   android:layout_width="match_parent"
   android:layout_height="match_parent"
   tools:context=".MainActivity">

   <TextView
       android:id="@+id/status"
       android:layout_width="match_parent"
       android:layout_height="wrap_content"
       android:padding="16dp"
       android:text="searching..."
       app:layout_constraintBottom_toTopOf="@+id/myName"
       app:layout_constraintEnd_toEndOf="parent"
       app:layout_constraintStart_toStartOf="parent"
       app:layout_constraintTop_toTopOf="parent"
       />

   <TextView
       android:id="@+id/myName"
       android:layout_width="0dp"
       android:layout_height="wrap_content"
       android:layout_gravity="center"
       android:text="You (codeName)"
       android:textAlignment="center"
       android:textAppearance="?android:textAppearanceMedium"
       app:layout_constraintEnd_toStartOf="@+id/opponentName"
       app:layout_constraintStart_toStartOf="parent"
       app:layout_constraintTop_toBottomOf="@+id/status"
       />

   <TextView
       android:id="@+id/opponentName"
       android:layout_width="0dp"
       android:layout_height="wrap_content"
       android:layout_gravity="center"
       android:text="Opponent (codeName)"
       android:textAlignment="center"
       android:textAppearance="?android:textAppearanceMedium"
       app:layout_constraintEnd_toEndOf="parent"
       app:layout_constraintStart_toEndOf="@+id/myName"
       app:layout_constraintTop_toBottomOf="@+id/status"
       />

   <TextView
       android:id="@+id/score"
       android:layout_width="match_parent"
       android:layout_height="wrap_content"
       android:layout_gravity="center"
       android:layout_margin="16dp"
       android:text=":"
       android:textAlignment="center"
       android:textSize="80sp"
       app:layout_constraintEnd_toEndOf="parent"
       app:layout_constraintStart_toStartOf="parent"
       app:layout_constraintTop_toBottomOf="@+id/myName"
       />

   <androidx.appcompat.widget.AppCompatButton
       android:id="@+id/rock"
       android:layout_width="wrap_content"
       android:layout_height="wrap_content"
       android:drawableTop="@drawable/rock"
       android:text="Rock"
       app:layout_constraintEnd_toStartOf="@+id/paper"
       app:layout_constraintHorizontal_chainStyle="spread"
       app:layout_constraintStart_toStartOf="parent"
       app:layout_constraintTop_toBottomOf="@+id/score"
       />

   <androidx.appcompat.widget.AppCompatButton
       android:id="@+id/paper"
       android:layout_width="wrap_content"
       android:layout_height="wrap_content"
       android:drawableTop="@drawable/paper"
       android:text="Paper"
       app:layout_constraintEnd_toStartOf="@+id/scissors"
       app:layout_constraintStart_toEndOf="@+id/rock"
       app:layout_constraintTop_toBottomOf="@+id/score"
       />

   <androidx.appcompat.widget.AppCompatButton
       android:id="@+id/scissors"
       android:layout_width="wrap_content"
       android:layout_height="wrap_content"
       android:drawableTop="@drawable/scissors"
       android:text="Scissors"
       app:layout_constraintEnd_toEndOf="parent"
       app:layout_constraintStart_toEndOf="@+id/paper"
       app:layout_constraintTop_toBottomOf="@+id/score"
       />

   <androidx.appcompat.widget.AppCompatButton
       android:id="@+id/disconnect"
       android:layout_width="match_parent"
       android:layout_height="wrap_content"
       android:layout_margin="32dp"
       android:text="disconnect"
       app:layout_constraintBottom_toBottomOf="parent"
       app:layout_constraintEnd_toEndOf="parent"
       app:layout_constraintStart_toStartOf="parent"
       app:layout_constraintTop_toBottomOf="@+id/paper"
       />

   <androidx.appcompat.widget.AppCompatButton
       android:id="@+id/findOpponent"
       android:layout_width="match_parent"
       android:layout_height="wrap_content"
       android:layout_margin="32dp"
       android:text="find opponent"
       app:layout_constraintBottom_toBottomOf="parent"
       app:layout_constraintEnd_toEndOf="parent"
       app:layout_constraintStart_toStartOf="parent"
       app:layout_constraintTop_toBottomOf="@+id/paper"
       />

</androidx.constraintlayout.widget.ConstraintLayout>
レイアウトは上に示した図 1 のようになります。
注: 実際のプロジェクトでは、値(例: 16dp)をリソース(例: @dimen/activity_vertical_margin)に変更します。
4. アプリに付近の接続を追加する
manifest.xml ファイルを準備する
マニフェスト ファイルに以下の権限を追加します。ACCESS_FINE_LOCATION は危険な権限であるため、アプリに代わってアクセスを許可または拒否することをユーザーに求めるプロンプトを表示するようにシステムをトリガーするコードが設定されています。Wi-Fi 権限は、インターネット接続ではなくピアツーピア接続に適用されます。
<!-- Required for Nearby Connections →

<!--    Because ACCESS_FINE_LOCATION is a dangerous permission, the app will have to-->
<!--    request it at runtime, and the user will be prompted to grant or deny access.-->

<uses-permission android:name="android.permission.BLUETOOTH"/>
<uses-permission android:name="android.permission.BLUETOOTH_ADMIN"/>
<uses-permission android:name="android.permission.ACCESS_WIFI_STATE"/>
<uses-permission android:name="android.permission.CHANGE_WIFI_STATE"/>
<uses-permission android:name="android.permission.ACCESS_FINE_LOCATION"/>
方法の選択
Nearby Connections API では、アプリと付近のデバイスとの接続方法を指定する Strategy を選択する必要があります。P2P_CLUSTER、P2P_STAR、または P2P_POINT_TO_POINT を選択します。
今回は、P2P_STAR を選択します。これは、ゲームにはチャレンジしたいものの、一度に対戦するユーザーは 1 人にしたいと考えているプレーヤーからのリクエストを多く受信できるようにする必要があるためです。
選択した Strategy は、アプリでのアドバタイズと検出の両方に使用する必要があります。下記の図に、各 Strategy の仕組みを示します。
デバイスは N 個の送信接続をリクエストできます | デバイスは M 個の受信接続を受信できます | |||
| N = 多数 | M = 多数 | 接続の帯域幅が減少する | |
| N = 1 | M = 多数 | 接続の帯域幅が増加する | |
| N = 1 | M = 1 | 可能な限り最大のスループット | |
MainActivity で変数を定義する
- メイン アクティビティ(
MainActivity.kt)の内部で、onCreate()関数の上にこのコード スニペットを貼り付けて次の変数を定義します。これらの変数は、ゲーム固有のロジックと実行時の権限を定義します。
/**
* Enum class for defining the winning rules for Rock-Paper-Scissors. Each player will make a
* choice, then the beats function in this class will be used to determine whom to reward the
* point to.
*/
private enum class GameChoice {
   ROCK, PAPER, SCISSORS;

   fun beats(other: GameChoice): Boolean =
       (this == ROCK && other == SCISSORS)
               || (this == SCISSORS && other == PAPER)
               || (this == PAPER && other == ROCK)
}

/**
* Instead of having each player enter a name, in this sample we will conveniently generate
* random human readable names for players.
*/
internal object CodenameGenerator {
   private val COLORS = arrayOf(
       "Red", "Orange", "Yellow", "Green", "Blue", "Indigo", "Violet", "Purple", "Lavender"
   )
   private val TREATS = arrayOf(
       "Cupcake", "Donut", "Eclair", "Froyo", "Gingerbread", "Honeycomb",
       "Ice Cream Sandwich", "Jellybean", "Kit Kat", "Lollipop", "Marshmallow", "Nougat",
       "Oreo", "Pie"
   )
   private val generator = Random()

   /** Generate a random Android agent codename  */
   fun generate(): String {
       val color = COLORS[generator.nextInt(COLORS.size)]
       val treat = TREATS[generator.nextInt(TREATS.size)]
       return "$color $treat"
   }
}

/**
* Strategy for telling the Nearby Connections API how we want to discover and connect to
* other nearby devices. A star shaped strategy means we want to discover multiple devices but
* only connect to and communicate with one at a time.
*/
private val STRATEGY = Strategy.P2P_STAR

/**
* Our handle to the [Nearby Connections API][ConnectionsClient].
*/
private lateinit var connectionsClient: ConnectionsClient


/**
* The request code for verifying our call to [requestPermissions]. Recall that calling
* [requestPermissions] leads to a callback to [onRequestPermissionsResult]
*/
private val REQUEST_CODE_REQUIRED_PERMISSIONS = 1

/*
The following variables are convenient ways of tracking the data of the opponent that we
choose to play against.
*/
private var opponentName: String? = null
private var opponentEndpointId: String? = null
private var opponentScore = 0
private var opponentChoice: GameChoice? = null

/*
The following variables are for tracking our own data
*/
private var myCodeName: String = CodenameGenerator.generate()
private var myScore = 0
private var myChoice: GameChoice? = null

/**
* This is for wiring and interacting with the UI views.
*/
private lateinit var binding: ActivityMainBinding
onCreate()関数を変更して、ViewBindingオブジェクトをsetContentView()に渡します。これにより、activity_main.xmlレイアウト ファイルの内容が表示されます。また、アプリが API と通信できるようにconnectionsClientを初期化します。
override fun onCreate(savedInstanceState: Bundle?) {
   super.onCreate(savedInstanceState)
   binding = ActivityMainBinding.inflate(layoutInflater)
   setContentView(binding.root)
   connectionsClient = Nearby.getConnectionsClient(this)
}
必要な権限を確認する
一般に、危険な権限は AndroidManifest.xml ファイルで宣言されますが、実行時にリクエストする必要があります。その他の必要な権限については、実行時に想定どおりの結果が得られるかどうかを確認する必要があります。ユーザーがいずれかの権限を拒否した場合、サンプルアプリは権限がないと使用できないため、権限を付与しないと続行できない旨をトーストに表示します。
onCreate()関数の下に、次のコード スニペットを追加して権限が付与されていることを確認します。
@CallSuper
override fun onStart() {
   super.onStart()
   if (checkSelfPermission(Manifest.permission.ACCESS_FINE_LOCATION) != PackageManager.PERMISSION_GRANTED) {
       requestPermissions(
           arrayOf(Manifest.permission.ACCESS_FINE_LOCATION),
           REQUEST_CODE_REQUIRED_PERMISSIONS
       )
   }
}

@CallSuper
override fun onRequestPermissionsResult(
   requestCode: Int,
   permissions: Array<out String>,
   grantResults: IntArray
) {
   super.onRequestPermissionsResult(requestCode, permissions, grantResults)
   val errMsg = "Cannot start without required permissions"
   if (requestCode == REQUEST_CODE_REQUIRED_PERMISSIONS) {
       grantResults.forEach {
           if (it == PackageManager.PERMISSION_DENIED) {
               Toast.makeText(this, errMsg, Toast.LENGTH_LONG).show()
               finish()
               return
           }
       }
       recreate()
   }
}
この時点で、コードを記述して次のタスクを完了しています。
- レイアウト ファイルの作成
- マニフェストでの必要な権限の宣言
- 実行時に危険な必須権限の確認
逆順のチュートリアル
これで、Nearby Connections コードを記述して、付近のユーザーと接続し、通信を行う準備が整いました。通常、付近のデバイスとの通信を開始する際は、アプリが事前に他のデバイスによる検出を許可し、また他のデバイスをスキャンしておく必要があります。
つまり、じゃんけんゲームのコンテキストでは、ユーザーと対戦相手はゲームのプレイを開始する前にお互いを見つけなければなりません。
デバイスを検出可能にするには、アドバタイズと呼ばれるプロセスを使用します。同様に、検出と呼ばれるプロセスを通じて付近の対戦相手を見つけることができます。
プロセスを理解するために、ここではコードを時系列の逆順に見ていきます。そのため、次のように進めます。
- すでに接続していると仮定して、メッセージを送受信するためのコードを記述します。つまり、ここでは実際にじゃんけんゲームをプレイするためのコードを記述します。
- 付近のデバイスとの接続を希望する旨をアドバタイズするコードを記述します。
- 付近のデバイスを検出するコードを記述します。
データの送受信
connectionsClient.sendPayload() メソッドを使用して、データを Payload として送信し、PayloadCallback オブジェクトを使用してペイロードを受信します。Payload には、動画、写真、ストリームなど、あらゆる種類のデータを使用できます。データの上限はありません。
- このゲームのペイロードは、グー、パー、チョキの選択を示します。ユーザーがコントローラ ボタンのいずれかをクリックすると、選択項目がペイロードとして対戦相手のアプリに送信されます。ユーザーの選んだ手を記録するには、
onRequestPermissionsResult()関数の下に次のコード スニペットを追加します。
/** Sends the user's selection of rock, paper, or scissors to the opponent. */
private fun sendGameChoice(choice: GameChoice) {
   myChoice = choice
   connectionsClient.sendPayload(
       opponentEndpointId!!,
       Payload.fromBytes(choice.name.toByteArray(UTF_8))
   )
   binding.status.text = "You chose ${choice.name}"
   // For fair play, we will disable the game controller so that users don't change their
   // choice in the middle of a game.
   setGameControllerEnabled(false)
}

/**
* Enables/Disables the rock, paper and scissors buttons. Disabling the game controller
* prevents users from changing their minds after making a choice.
*/
private fun setGameControllerEnabled(state: Boolean) {
   binding.apply {
       rock.isEnabled = state
       paper.isEnabled = state
       scissors.isEnabled = state
   }
}
- デバイスは
PayloadCallbackオブジェクトを介してペイロードを受け取ります。このオブジェクトには 2 つのメソッドがあります。onPayloadReceived()メソッドは、メッセージを受信するとアプリに通知します。onPayloadTransferUpdate()メソッドは、受信メッセージと送信メッセージの両方のステータスを追跡します。
ここでは、onPayloadReceived() からの着信メッセージ(相手の選んだ手)を読み、onPayloadTransferUpdate() メソッドで両方のプレーヤーの手を追跡して確認します。このコード スニペットを onCreate() メソッドの上に追加します。
/** callback for receiving payloads */
private val payloadCallback: PayloadCallback = object : PayloadCallback() {
   override fun onPayloadReceived(endpointId: String, payload: Payload) {
       payload.asBytes()?.let {
           opponentChoice = GameChoice.valueOf(String(it, UTF_8))
       }
   }

   override fun onPayloadTransferUpdate(endpointId: String, update: PayloadTransferUpdate) {
       // Determines the winner and updates game state/UI after both players have chosen.
       // Feel free to refactor and extract this code into a different method
       if (update.status == PayloadTransferUpdate.Status.SUCCESS
           && myChoice != null && opponentChoice != null) {
           val mc = myChoice!!
           val oc = opponentChoice!!
           when {
               mc.beats(oc) -> { // Win!
                   binding.status.text = "${mc.name} beats ${oc.name}"
                   myScore++
               }
               mc == oc -> { // Tie
                   binding.status.text = "You both chose ${mc.name}"
               }
               else -> { // Loss
                   binding.status.text = "${mc.name} loses to ${oc.name}"
                   opponentScore++
               }
           }
           binding.score.text = "$myScore : $opponentScore"
           myChoice = null
           opponentChoice = null
           setGameControllerEnabled(true)
       }
   }
}
広告
自分の存在や接続希望をアドバタイズして、近くにいる人がアドバタイズに気づいて接続を依頼してくれるよう促します。そのため、Nearby Connections API の startAdvertising() メソッドにはコールバック オブジェクトが必要です。このコールバック(ConnectionLifecycleCallback)は、アドバタイズに気づき接続を希望しているプレーヤーがいることを通知する機能です。コールバック オブジェクトには次の 3 つのメソッドがあります。
onConnectionInitiated()メソッドは、誰かがアドバタイズに気づき、接続を希望していることを通知します。その結果、connectionsClient.acceptConnection()を使用して接続を承諾することを選択できます。- 誰かがアドバタイズに気づくと、接続リクエストが届きます。実際に接続するには、リクエストの受信者と送信者の双方が接続リクエストを承認する必要があります。
onConnectionResult()メソッドは、接続が確立されたかどうかを示します。 onDisconnected()関数は、接続がアクティブでなくなったことを通知します。この状態は、いずれかのプレーヤーが接続を終了した場合などに発生します。
アドバタイズするには:
- Google のアプリでは、
onConnectionInitiated()コールバックを受信した場合に接続を承諾します。onConnectionResult()内で接続が確立すると、必要なのはゲームをプレイする他のプレーヤー 1 人との接続のみであるため、アドバタイズと検出を終了します。最後に、onConnectionResult()で、ゲームをリセットします。
次のコード スニペットを onCreate() メソッドの前に貼り付けます。
// Callbacks for connections to other devices
private val connectionLifecycleCallback = object : ConnectionLifecycleCallback() {
   override fun onConnectionInitiated(endpointId: String, info: ConnectionInfo) {
       // Accepting a connection means you want to receive messages. Hence, the API expects
       // that you attach a PayloadCall to the acceptance
       connectionsClient.acceptConnection(endpointId, payloadCallback)
       opponentName = "Opponent\n(${info.endpointName})"
   }

   override fun onConnectionResult(endpointId: String, result: ConnectionResolution) {
       if (result.status.isSuccess) {
           connectionsClient.stopAdvertising()
           connectionsClient.stopDiscovery()
           opponentEndpointId = endpointId
           binding.opponentName.text = opponentName
           binding.status.text = "Connected"
           setGameControllerEnabled(true) // we can start playing
       }
   }

   override fun onDisconnected(endpointId: String) {
       resetGame()
   }
}
resetGame()は、さまざまに異なる重要なタイミングで非常に簡便に呼び出すことができるため、独自のサブルーティンとして設定しています。このコードをMainActivityクラスの一番下に追加します。
/** Wipes all game state and updates the UI accordingly. */
private fun resetGame() {
   // reset data
   opponentEndpointId = null
   opponentName = null
   opponentChoice = null
   opponentScore = 0
   myChoice = null
   myScore = 0
   // reset state of views
   binding.disconnect.visibility = View.GONE
   binding.findOpponent.visibility = View.VISIBLE
   setGameControllerEnabled(false)
   binding.opponentName.text="opponent\n(none yet)"
   binding.status.text ="..."
   binding.score.text = ":"
}
- 次のスニペットは実際のアドバタイズの呼び出しです。この呼び出しにより、アドバタイズ モードに移行するよう Nearby Connections API に指示します。
onCreate()メソッドの下に追加します。
private fun startAdvertising() {
   val options = AdvertisingOptions.Builder().setStrategy(STRATEGY).build()
   // Note: Advertising may fail. To keep this demo simple, we don't handle failures.
   connectionsClient.startAdvertising(
       myCodeName,
       packageName,
       connectionLifecycleCallback,
       options
   )
}
検出
アドバタイズを補完するのが検出です。使用するコールバックが異なるだけで、2 つの呼び出しは非常に類似しています。startDiscovery() 呼び出しのコールバックは、EndpointDiscoveryCallback オブジェクトです。このオブジェクトには 2 つのコールバック メソッドがあります。onEndpointFound() は、アドバタイズが検出されるたびに呼び出されます。onEndpointLost() は、アドバタイズが利用できなくなるたびに呼び出されます。
- アプリは最初に検出したアドバタイザーと接続します。つまり、
onEndpointFound()メソッド内で接続リクエストを行いますが、onEndpointLost()メソッドでは何も行いません。onCreate()メソッドの前にコールバックを追加します。
// Callbacks for finding other devices
private val endpointDiscoveryCallback = object : EndpointDiscoveryCallback() {
   override fun onEndpointFound(endpointId: String, info: DiscoveredEndpointInfo) {
       connectionsClient.requestConnection(myCodeName, endpointId, connectionLifecycleCallback)
   }

   override fun onEndpointLost(endpointId: String) {
   }
}
- 検出モードに移行するように Nearby Connections API に実際に指示するためのスニペットも追加します。このスニペットは
MainActivityクラスの一番下に追加します。
private fun startDiscovery(){
   val options = DiscoveryOptions.Builder().setStrategy(STRATEGY).build()
   connectionsClient.startDiscovery(packageName,endpointDiscoveryCallback,options)
}
- この時点で、作業のうち Nearby Connections の部分は完了です。アドバタイズして付近のデバイスを検出し、通信を行うことができます。ただし、この段階ではゲームをまったくプレイできません。UI ビューの接続を完了する必要があります。
- ユーザーが [FIND OPPONENT] ボタンをクリックすると、アプリは
startAdvertising()とstartDiscovery()の両方を呼び出す必要があります。そうすることで、ユーザーは自身が検出を行うと同時に検出される対象となることができます。 - ユーザーが [ROCK]、[PAPER]、[SCISSORS] のいずれかのコントローラ ボタンをクリックしたとき、アプリは
sendGameChoice()を呼び出してそのデータを対戦相手に送信する必要があります。 - どちらかのユーザーが [DISCONNECT] ボタンをクリックすると、アプリがゲームをリセットします。
onCreate() メソッドを更新して、これらのインタラクションを反映します。
override fun onCreate(savedInstanceState: Bundle?) {
   super.onCreate(savedInstanceState)
   binding = ActivityMainBinding.inflate(layoutInflater)
   setContentView(binding.root)
   connectionsClient = Nearby.getConnectionsClient(this)

   binding.myName.text = "You\n($myCodeName)"
   binding.findOpponent.setOnClickListener {
       startAdvertising()
       startDiscovery()
       binding.status.text = "Searching for opponents..."
       // "find opponents" is the opposite of "disconnect" so they don't both need to be
       // visible at the same time
       binding.findOpponent.visibility = View.GONE
       binding.disconnect.visibility = View.VISIBLE
   }
   // wire the controller buttons
   binding.apply {
       rock.setOnClickListener { sendGameChoice(GameChoice.ROCK) }
       paper.setOnClickListener { sendGameChoice(GameChoice.PAPER) }
       scissors.setOnClickListener { sendGameChoice(GameChoice.SCISSORS) }
   }
   binding.disconnect.setOnClickListener {
       opponentEndpointId?.let { connectionsClient.disconnectFromEndpoint(it) }
       resetGame()
   }

   resetGame() // we are about to start a new game
}
クリーンアップ
不要になった時点で Nearby API の使用を停止してください。このサンプルゲームでは、onStop() アクティビティ ライフサイクル関数内のすべてのアセットを公開しています。
@CallSuper
override fun onStop(){
   connectionsClient.apply {
       stopAdvertising()
       stopDiscovery()
       stopAllEndpoints()
   }
   resetGame()
   super.onStop()
}
5. アプリを実行する
2 台のデバイスでアプリを実行して、ゲームを楽しみましょう。
6. プライバシーに関するベスト プラクティス
じゃんけんゲームでは機密データは共有されていません。コード名もランダムに生成されます。そのため、onConnectionInitiated(String, ConnectionInfo) 内の接続を自動的に承諾しています。
ConnectionInfo オブジェクトには、接続ごとに一意のトークンが含まれます。このトークンには、アプリから getAuthenticationDigits() を介してアクセスできます。両方のユーザーにトークンを表示して、視覚的に確認できます。代替手法として、機密データの共有を開始する前に、一方のデバイスで未加工トークンを暗号化し、もう一方のデバイスで復号するためのペイロードとして送信できます。Android での暗号化について詳しくは、メッセージの認証からユーザー プレゼンスまで、アプリの暗号化を改善するというブログ投稿をご覧ください。
7. 完了
お疲れさまでした。Nearby Connections API を使用して、インターネットに接続せずにユーザーを接続できるようになりました。
まとめると、Nearby Connections API を使用するには、play-services-nearby の依存関係を追加する必要があります。AndroidManifest.xml ファイルで権限を要求し、実行時にそれらの権限を確認する必要もあります。また、以下の方法についても学習しました。
- 付近のユーザーとの接続を希望していることをアドバタイズする
- 接続を希望する付近のユーザーを見つける
- 接続を承諾する
- メッセージを送信する
- メッセージの受信
- ユーザーのプライバシーを保護する
次のステップ
ブログシリーズとサンプルを確認する