
1. 시작하기 전에
스타일러스는 사용자가 정확한 작업을 할 수 있도록 도와주는 펜 모양의 도구입니다. 이 Codelab에서는 android.os와 androidx 라이브러리를 사용하여 유기적인 스타일러스 환경을 구현하는 방법을 알아봅니다. 또한, MotionEvent 클래스를 사용하여 압력, 기울기, 방향을 지원하고 손바닥 움직임을 무시하여 원치 않는 터치를 방지하는 방법도 알아봅니다. 이외에도 모션을 예측하고 OpenGL 및 SurfaceView 클래스로 지연 시간이 짧은 그래픽을 사용하여 스타일러스 지연 시간을 줄이는 방법을 알아봅니다.
기본 요건
- Kotlin 및 람다 관련 경험
- Android 스튜디오 사용 방법에 관한 기본 지식
- Jetpack Compose에 관한 기본 지식
- 지연 시간이 짧은 그래픽을 위한 OpenGL의 기본 이해
학습할 내용
- 스타일러스에
MotionEvent클래스를 사용하는 방법 - 압력, 기울기, 방향 지원을 포함한 스타일러스 기능을 구현하는 방법
Canvas클래스에 그리는 방법- 모션 예측을 구현하는 방법
- OpenGL 및
SurfaceView클래스로 지연 시간이 짧은 그래픽을 렌더링하는 방법
필요한 항목
- Android 스튜디오 최신 버전
- 람다를 포함한 Kotlin 문법 사용 경험
- Compose의 기본 사용 경험. Compose에 익숙하지 않다면 Jetpack Compose 기본사항 Codelab을 완료하세요.
- 스타일러스가 지원되는 기기
- 활성 스타일러스
- Git
2. 시작 코드 가져오기
시작 앱의 테마 설정과 기본 설정이 포함된 코드를 가져오려면 다음 단계를 따르세요.
- 이 GitHub 저장소를 클론합니다.
git clone https://github.com/android/large-screen-codelabs
advanced-stylus폴더를 엽니다.start폴더에는 시작 코드가 있고end폴더에 솔루션 코드가 있습니다.
3. 기본 그리기 앱 구현
먼저 사용자가 그릴 수 있고 Canvas Composable 함수를 사용하여 화면에 스타일러스 속성을 표시하는 기본 그리기 앱용 레이아웃을 빌드합니다. 아래 이미지와 같이 표시됩니다.
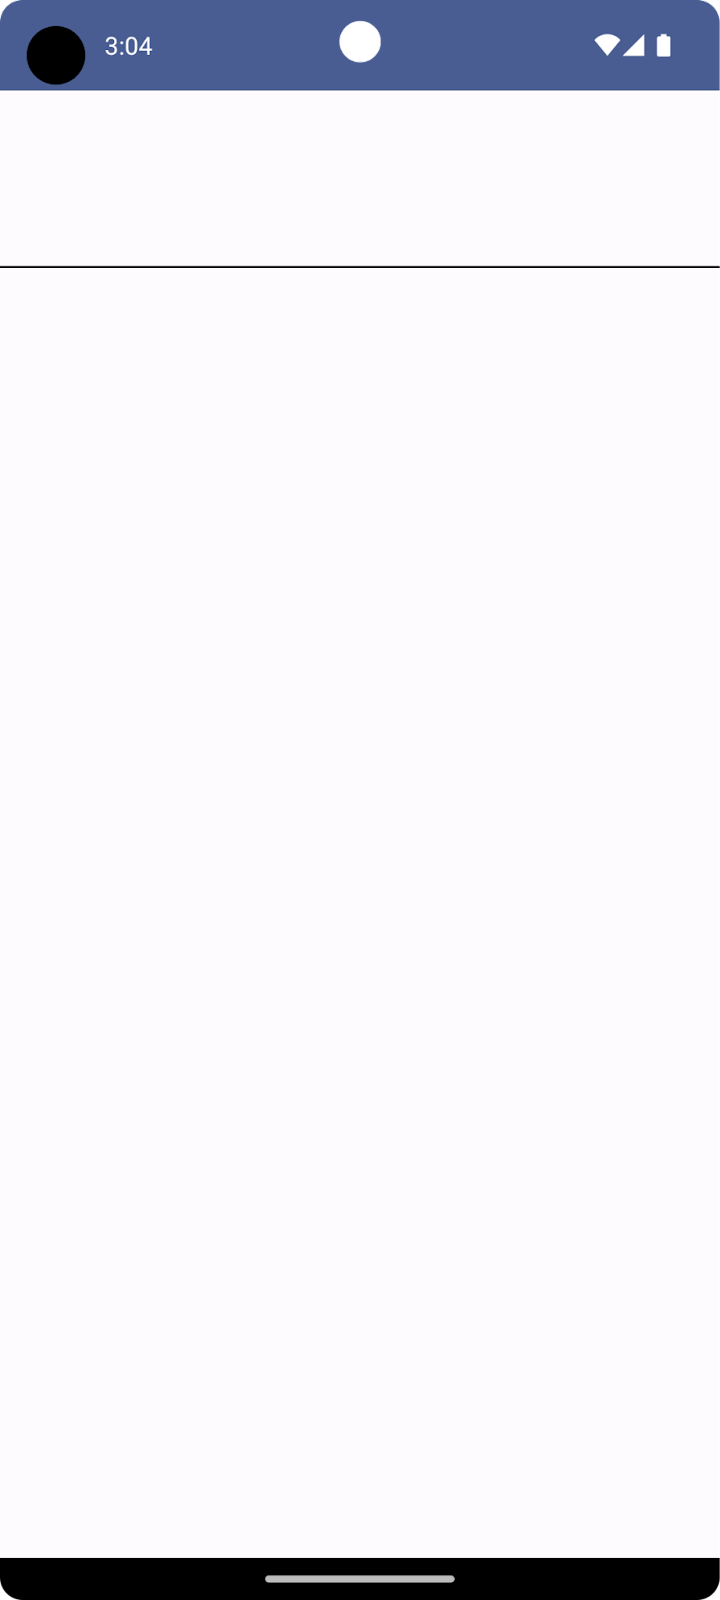
상단은 스타일러스를 시각화하여 그리고 스타일러스의 다양한 속성(예: 방향, 기울기, 압력)을 보여주는 Canvas Composable 함수입니다. 하단은 또 다른 Canvas Composable 함수로, 스타일러스 입력을 받고 간단한 획을 그립니다.
그리기 앱의 기본 레이아웃을 구현하려면 다음 단계를 따르세요.
- Android 스튜디오에서 클론된 저장소를 엽니다.
app>java>com.example.stylus를 클릭한 다음MainActivity를 더블클릭합니다.MainActivity.kt파일이 열립니다.MainActivity클래스에서StylusVisualization및DrawAreaComposable함수에 주목해 보세요. 이 섹션에서는DrawAreaComposable함수에 중점을 둡니다.
StylusState 클래스 만들기
- 동일한
ui디렉터리에서 File > New > Kotlin/Class file을 클릭합니다. - 텍스트 상자에서 Name 플레이스홀더를
StylusState.kt로 바꾸고Enter(macOS의 경우return)를 누릅니다. StylusState.kt파일에서StylusState데이터 클래스를 만든 후 다음 표의 변수를 추가합니다.
변수 | 유형 | 기본값 | 설명 |
|
| 0~1.0 범위의 값 | |
|
| -pi~pi 범위의 라디안 값 | |
|
| 0~pi/2 범위의 라디안 값 | |
|
|
|
StylusState.kt
package com.example.stylus.ui
import androidx.compose.ui.graphics.Path

data class StylusState(
   var pressure: Float = 0F,
   var orientation: Float = 0F,
   var tilt: Float = 0F,
   var path: Path = Path(),
)
MainActivity.kt파일에서MainActivity클래스를 찾은 다음mutableStateOf()함수로 스타일러스 상태를 추가합니다.
MainActivity.kt
import androidx.compose.runtime.setValue
import androidx.compose.runtime.getValue
import androidx.compose.runtime.mutableStateOf
import com.example.stylus.ui.StylusState

class MainActivity : ComponentActivity() {
    private var stylusState: StylusState by mutableStateOf(StylusState())
DrawPoint 클래스
DrawPoint 클래스는 화면에 그려진 각 지점에 관한 데이터를 저장합니다. 이러한 점을 연결하면 선이 만들어집니다. 이 클래스는 Path 객체의 작동 방식을 모방합니다.
DrawPoint 클래스는 PointF 클래스를 확장한 것입니다. 여기에는 다음 데이터가 포함됩니다.
매개변수 | 유형 | 설명 |
|
| 좌표 |
|
| 좌표 |
|
| 점 유형 |
DrawPoint 객체에는 두 가지 유형이 있으며 DrawPointType enum으로 설명할 수 있습니다.
유형 | 설명 |
| 선의 시작점을 위치로 이동합니다. |
| 이전 지점에서부터 선을 추적합니다. |
DrawPoint.kt
import android.graphics.PointF
class DrawPoint(x: Float, y: Float, val type: DrawPointType): PointF(x, y)
데이터 포인트를 경로에 렌더링
이 앱은 StylusViewModel 클래스에서 선의 데이터를 보유하고 렌더링할 데이터를 준비하며 손바닥 움직임을 무시하기 위한 Path 객체의 일부 작업을 실행합니다.
- 선의 데이터를 유지하려면
StylusViewModel클래스에서DrawPoint객체의 변경 가능한 목록을 만듭니다.
StylusViewModel.kt
import androidx.lifecycle.ViewModel
import com.example.stylus.data.DrawPoint

class StylusViewModel : ViewModel() {private var currentPath = mutableListOf<DrawPoint>()
데이터 포인트를 경로에 렌더링하려면 다음 단계를 따르세요.
StylusViewModel.kt파일의StylusViewModel클래스에createPath함수를 추가합니다.Path()생성자를 사용하여Path유형의path변수를 만듭니다.currentPath변수의 각 데이터 포인트를 반복해서 지나는for루프를 만듭니다.- 데이터 포인트가
START유형이면moveTo메서드를 호출하여 지정된x,y좌표에서 선을 시작합니다. - 데이터 포인트가 다른 유형이면 데이터 포인트의
x,y좌표로lineTo메서드를 호출하여 이전 지점에 연결합니다. path객체를 반환합니다.
StylusViewModel.kt
import androidx.compose.ui.graphics.Path
import com.example.stylus.data.DrawPoint
import com.example.stylus.data.DrawPointType


class StylusViewModel : ViewModel() {
   private var currentPath = mutableListOf<DrawPoint>()

   private fun createPath(): Path {
      val path = Path()

      for (point in currentPath) {
          if (point.type == DrawPointType.START) {
              path.moveTo(point.x, point.y)
          } else {
              path.lineTo(point.x, point.y)
          }
      }
      return path
   }

private fun cancelLastStroke() {
}
MotionEvent 객체 처리
스타일러스 이벤트는 실행될 작업과 작업에 연결된 데이터에 관한 정보(예: 포인터 위치 및 압력)를 제공하는 MotionEvent 객체를 통해 이루어집니다. 다음 표에는 MotionEvent 객체의 상수와 그 데이터가 포함되어 있으며 이 상수를 사용하여 사용자가 화면에서 어떤 작업을 하는지 식별할 수 있습니다.
상수 | 데이터 |
| 포인터가 화면을 터치합니다. |
| 포인터가 화면에서 이동합니다. 선이 그려집니다. |
| 포인터가 화면 터치를 중지합니다. 선이 끝납니다. |
| 원치 않는 터치가 감지되었습니다. 마지막 획을 취소합니다. |
앱에서 새 MotionEvent 객체를 수신하면 화면은 새 사용자 입력을 반영하도록 렌더링되어야 합니다.
StylusViewModel클래스에서MotionEvent객체를 처리하기 위해 선 좌표를 수집하는 함수를 만듭니다.
StylusViewModel.kt
import android.view.MotionEvent

class StylusViewModel : ViewModel() {
   private var currentPath = mutableListOf<DrawPoint>()

   ...

   fun processMotionEvent(motionEvent: MotionEvent): Boolean {
      when (motionEvent.actionMasked) {
          MotionEvent.ACTION_DOWN -> {
              currentPath.add(
                  DrawPoint(motionEvent.x, motionEvent.y, DrawPointType.START)
              )
          }
          MotionEvent.ACTION_MOVE -> {
              currentPath.add(DrawPoint(motionEvent.x, motionEvent.y, DrawPointType.LINE))
          }
          MotionEvent.ACTION_UP -> {
              currentPath.add(DrawPoint(motionEvent.x, motionEvent.y, DrawPointType.LINE))
          }
          MotionEvent.ACTION_CANCEL -> {
              // Unwanted touch detected.
              cancelLastStroke()
          }
          else -> return false
      }

      return true
   }
UI에 데이터 보내기
UI가 StylusState 데이터 클래스의 변경사항을 수집할 수 있도록 StylusViewModel 클래스를 업데이트하려면 다음 단계를 따르세요.
StylusViewModel클래스에 유형이MutableStateFlow인StylusState클래스의_stylusState변수와 유형이StateFlow인StylusState클래스의stylusState변수를 만듭니다._stylusState변수는StylusViewModel클래스에서 스타일러스 상태가 변경될 때마다 수정되고stylusState변수는MainActivity클래스에서 UI가 사용합니다.
StylusViewModel.kt
import com.example.stylus.ui.StylusState
import kotlinx.coroutines.flow.MutableStateFlow
import kotlinx.coroutines.flow.StateFlow

class StylusViewModel : ViewModel() {

   private var _stylusState = MutableStateFlow(StylusState())
   val stylusState: StateFlow<StylusState> = _stylusState
StylusState객체 매개변수를 허용하는requestRendering함수를 만듭니다.
StylusViewModel.kt
import kotlinx.coroutines.flow.update

...

class StylusViewModel : ViewModel() {
   private var _stylusState = MutableStateFlow(StylusState())
   val stylusState: StateFlow<StylusState> = _stylusState

   ...

    private fun requestRendering(stylusState: StylusState) {
      // Updates the stylusState, which triggers a flow.
      _stylusState.update {
          return@update stylusState
      }
   }
processMotionEvent함수 끝에StylusState매개변수를 사용하는requestRendering함수 호출을 추가합니다.StylusState매개변수의motionEvent변수에서 기울기, 압력, 방향 값을 가져오고createPath()함수를 사용하여 경로를 만듭니다. 이렇게 하면 흐름 이벤트가 트리거되며 나중에 이 흐름 이벤트를 UI에 연결할 수 있습니다.
StylusViewModel.kt
...

class StylusViewModel : ViewModel() {

   ...

   fun processMotionEvent(motionEvent: MotionEvent): Boolean {

      ...
         else -> return false
      }


      requestRendering(
         StylusState(
             tilt = motionEvent.getAxisValue(MotionEvent.AXIS_TILT),
             pressure = motionEvent.pressure,
             orientation = motionEvent.orientation,
             path = createPath()
         )
      )
UI를 StylusViewModel 클래스와 연결
MainActivity클래스에서onCreate함수의super.onCreate함수를 찾은 다음 상태 컬렉션을 추가합니다. 상태 컬렉션에 관한 자세한 내용은 수명 주기 인식 방식으로 흐름 수집을 참고하세요.
MainActivity.kt
import androidx.lifecycle.lifecycleScope
import kotlinx.coroutines.launch
import androidx.lifecycle.repeatOnLifecycle
import kotlinx.coroutines.flow.onEach
import androidx.lifecycle.Lifecycle
import kotlinx.coroutines.flow.collect

...
class MainActivity : ComponentActivity() {
   override fun onCreate(savedInstanceState: Bundle?) {
      super.onCreate(savedInstanceState)

      lifecycleScope.launch {
          lifecycle.repeatOnLifecycle(Lifecycle.State.STARTED) {
              viewModel.stylusState
                  .onEach {
                      stylusState = it
                  }
                  .collect()
          }
      }
이제 StylusViewModel 클래스가 새 StylusState 상태를 게시할 때마다 활동이 이 상태를 수신하고, 새 StylusState 객체가 로컬 MainActivity 클래스의 stylusState 변수를 업데이트합니다.
DrawAreaComposable함수의 본문에서pointerInteropFilter수정자를CanvasComposable함수에 추가하여MotionEvent객체를 제공합니다.
- 처리를 위해
MotionEvent객체를 StylusViewModel의processMotionEvent함수로 전송합니다.
MainActivity.kt
import androidx.compose.ui.ExperimentalComposeUiApi
import androidx.compose.ui.input.pointer.pointerInteropFilter

...
class MainActivity : ComponentActivity() {

   ...

@Composable
@OptIn(ExperimentalComposeUiApi::class)
fun DrawArea(modifier: Modifier = Modifier) {
   Canvas(modifier = modifier
       .clipToBounds()

 .pointerInteropFilter {
              viewModel.processMotionEvent(it)
          }

   ) {

   }
}
stylusStatepath속성과 함께drawPath함수를 호출한 다음 색상과 획 스타일을 제공합니다.
MainActivity.kt
class MainActivity : ComponentActivity() {

...

   @Composable
   @OptIn(ExperimentalComposeUiApi::class)
   fun DrawArea(modifier: Modifier = Modifier) {
      Canvas(modifier = modifier
          .clipToBounds()
          .pointerInteropFilter {
              viewModel.processMotionEvent(it)
          }
      ) {
          with(stylusState) {
              drawPath(
                  path = this.path,
                  color = Color.Gray,
                  style = strokeStyle
              )
          }
      }
   }
- 앱을 실행하면 화면에 그릴 수 있습니다.
4. 압력, 방향, 기울기 지원 기능 구현
이전 섹션에서는 MotionEvent 객체에서 압력, 방향, 기울기와 같은 스타일러스 정보를 가져오는 방법을 살펴봤습니다.
StylusViewModel.kt
tilt = motionEvent.getAxisValue(MotionEvent.AXIS_TILT),
pressure = motionEvent.pressure,
orientation = motionEvent.orientation,
그러나 이 방법은 첫 번째 포인터에만 작동합니다. 멀티 터치가 감지되면 여러 포인터가 감지되고 이 방법은 첫 번째 포인터 값, 즉 화면의 첫 번째 포인터 값만 반환합니다. 특정 포인터에 관한 데이터를 요청하려면 pointerIndex 매개변수를 사용하면 됩니다.
StylusViewModel.kt
tilt = motionEvent.getAxisValue(MotionEvent.AXIS_TILT, pointerIndex),
pressure = motionEvent.getPressure(pointerIndex),
orientation = motionEvent.getOrientation(pointerIndex)
포인터 및 멀티 터치에 관한 자세한 내용은 멀티 터치 동작 처리를 참고하세요.
압력, 방향, 기울기에 시각화 추가
MainActivity.kt파일에서StylusVisualizationComposable함수를 찾은 다음StylusState흐름 객체에 관한 정보를 사용하여 시각화를 렌더링합니다.
MainActivity.kt
import StylusVisualization.drawOrientation
import StylusVisualization.drawPressure
import StylusVisualization.drawTilt
...
class MainActivity : ComponentActivity() {

   ...

   @Composable
   fun StylusVisualization(modifier: Modifier = Modifier) {
      Canvas(
          modifier = modifier
      ) {
          with(stylusState) {
              drawOrientation(this.orientation)
              drawTilt(this.tilt)
              drawPressure(this.pressure)
          }
      }
   }
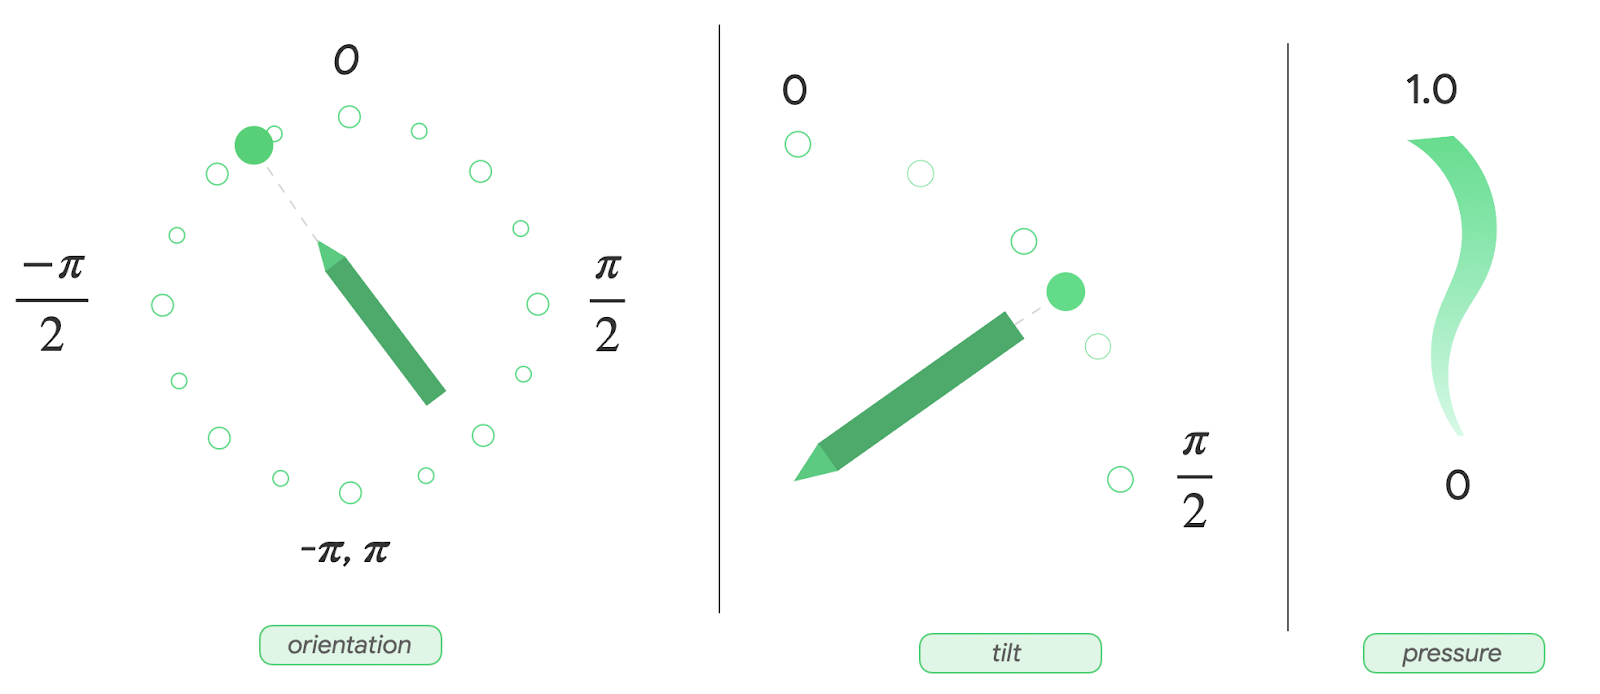
- 앱을 실행합니다. 화면 상단에 방향, 압력, 기울기를 나타내는 세 개의 표시기가 표시됩니다.
- 화면에 스타일러스로 자유롭게 그리고 각 시각화가 입력에 어떻게 반응하는지 관찰합니다.

StylusVisualization.kt파일을 검사하여 각 시각화가 생성되는 방식을 파악합니다.
5. 손바닥 움직임 무시 기능 구현
화면에서 원치 않는 터치가 등록될 수 있습니다. 예를 들어 사용자가 필기할 때 자연스럽게 손바닥을 화면에 대면 이런 일이 발생합니다.
손바닥 움직임 무시는 이 동작을 감지하고 개발자에게 마지막 MotionEvent 객체 세트를 취소하도록 알리는 메커니즘입니다. MotionEvent 객체 세트는 ACTION_DOWN 상수로 시작합니다.
즉, 화면에서 원치 않는 터치를 삭제하고 유효한 사용자 입력을 다시 렌더링할 수 있도록 입력 기록을 유지해야 합니다. 다행히 currentPath 변수의 StylusViewModel 클래스에 이미 기록을 저장했습니다.
Android는 MotionEvent 객체의 ACTION_CANCEL 상수를 통해 개발자에게 원치 않는 터치를 알립니다. Android 13부터 MotionEvent 객체는 ACTION_POINTER_UP 상수에서 확인해야 하는 FLAG_CANCELED 상수를 제공합니다.
cancelLastStroke 함수 구현
- 마지막
START데이터 포인트에서 데이터 포인트를 삭제하려면StylusViewModel클래스로 돌아간 다음 마지막START데이터 포인트의 인덱스를 찾아 인덱스에서 1을 뺀 값까지 첫 번째 데이터 포인트의 데이터만 유지하는cancelLastStroke함수를 만듭니다.
StylusViewModel.kt
...
class StylusViewModel : ViewModel() {
    ...

   private fun cancelLastStroke() {
      // Find the last START event.
      val lastIndex = currentPath.findLastIndex {
          it.type == DrawPointType.START
      }

      // If found, keep the element from 0 until the very last event before the last MOVE event.
      if (lastIndex > 0) {
          currentPath = currentPath.subList(0, lastIndex - 1)
      }
   }
ACTION_CANCEL 및 FLAG_CANCELED 상수 추가
StylusViewModel.kt파일에서processMotionEvent함수를 찾습니다.ACTION_UP상수에서 현재 SDK 버전이 Android 13 이상인지 확인하고FLAG_CANCELED상수가 활성화되는지를 확인하는canceled변수를 만듭니다.- 다음 줄에는
canceled변수가 true인지 확인하는 조건문을 만듭니다. 조건이 true인 경우cancelLastStroke함수를 호출하여 마지막MotionEvent객체 세트를 삭제합니다. 조건이 true가 아닌 경우currentPath.add메서드를 호출하여 마지막MotionEvent객체 집합을 추가합니다.
StylusViewModel.kt
import android.os.Build
...
class StylusViewModel : ViewModel() {
    ...
    fun processMotionEvent(motionEvent: MotionEvent): Boolean {
    ...
        MotionEvent.ACTION_POINTER_UP,
        MotionEvent.ACTION_UP -> {
           val canceled = Build.VERSION.SDK_INT >= Build.VERSION_CODES.TIRAMISU &&
           (motionEvent.flags and MotionEvent.FLAG_CANCELED) == MotionEvent.FLAG_CANCELED

           if(canceled) {
               cancelLastStroke()
           } else {
               currentPath.add(DrawPoint(motionEvent.x, motionEvent.y, DrawPointType.LINE))
           }
        }
ACTION_CANCEL상수에서cancelLastStroke함수에 주목해 보세요.
StylusViewModel.kt
...
class StylusViewModel : ViewModel() {
    ...
    fun processMotionEvent(motionEvent: MotionEvent): Boolean {
        ...
        MotionEvent.ACTION_CANCEL -> {
           // unwanted touch detected
           cancelLastStroke()
        }
손바닥 움직임 무시 기능이 구현되었습니다. palm-rejection 폴더에서 작동하는 코드를 찾을 수 있습니다.
6. 짧은 지연 시간 구현
이 섹션에서는 사용자 입력과 화면 렌더링 간의 지연 시간을 줄여 성능을 개선합니다. 지연 시간에는 여러 원인이 있으며 그중 하나는 긴 그래픽 파이프라인입니다. 전면 버퍼 렌더링을 사용하여 그래픽 파이프라인을 줄입니다. 개발자는 전면 버퍼 렌더링을 통해 화면 버퍼에 직접 액세스할 수 있으므로 필기 입력 및 스케칭 시 탁월한 결과를 얻을 수 있습니다.
androidx.graphics 라이브러리에서 제공하는 GLFrontBufferedRenderer 클래스가 전면 및 이중 버퍼 렌더링을 처리합니다. 이 클래스는 SurfaceView 객체를 최적화하여 onDrawFrontBufferedLayer 콜백 함수를 사용한 빠른 렌더링과 onDrawDoubleBufferedLayer 콜백 함수를 사용한 일반 렌더링을 지원합니다. GLFrontBufferedRenderer 클래스와 GLFrontBufferedRenderer.Callback 인터페이스는 사용자 제공 데이터 유형을 사용하여 작동합니다. 이 Codelab에서는 Segment 클래스를 사용합니다.
시작하려면 다음 단계를 따르세요.
- Android 스튜디오에서
low-latency폴더를 열고 필요한 모든 파일을 가져옵니다. - 프로젝트에서 다음과 같은 새 파일을 확인합니다.
build.gradle파일에는implementation "androidx.graphics:graphics-core:1.0.0-alpha03"선언으로 가져온androidx.graphics라이브러리가 있습니다.LowLatencySurfaceView클래스는SurfaceView클래스를 확장하여 화면에 OpenGL 코드를 렌더링합니다.LineRenderer클래스는 OpenGL 코드를 사용하여 화면에 선을 렌더링합니다.FastRenderer클래스는 빠른 렌더링을 허용하고GLFrontBufferedRenderer.Callback인터페이스를 구현합니다. 또한MotionEvent객체를 가로챕니다.StylusViewModel클래스는LineManager인터페이스를 사용하여 데이터 포인트를 유지합니다.Segment클래스는 세그먼트를 다음과 같이 정의합니다.x1,y1: 첫 번째 점의 좌표x2,y2: 두 번째 점의 좌표
다음 이미지는 각 클래스 간에 데이터가 이동하는 방식을 보여줍니다.

지연 시간이 짧은 노출 영역 및 레이아웃 만들기
MainActivity.kt파일에서MainActivity클래스의onCreate함수를 찾습니다.onCreate함수의 본문에서FastRenderer객체를 만든 후viewModel객체를 전달합니다.
MainActivity.kt
class MainActivity : ComponentActivity() {
   ...
   override fun onCreate(savedInstanceState: Bundle?) {
      super.onCreate(savedInstanceState)

      fastRendering = FastRenderer(viewModel)

      lifecycleScope.launch {
      ...
- 같은 파일에서
DrawAreaLowLatencyComposable함수를 만듭니다. - 함수 본문에서
AndroidViewAPI를 사용하여LowLatencySurfaceView뷰를 래핑한 후fastRendering객체를 제공합니다.
MainActivity.kt
import androidx.compose.ui.viewinterop.AndroidView
import com.example.stylus.gl.LowLatencySurfaceView
class MainActivity : ComponentActivity() {
...
@Composable
fun DrawAreaLowLatency(modifier: Modifier = Modifier) {
AndroidView(factory = { context ->
LowLatencySurfaceView(context, fastRenderer = fastRendering)
}, modifier = modifier)
}
onCreate함수에서DividerComposable함수 다음에 레이아웃에 관한DrawAreaLowLatencyComposable함수를 추가합니다.
MainActivity.kt
class MainActivity : ComponentActivity() {
   ...
   override fun onCreate(savedInstanceState: Bundle?) {
   ...
   Surface(
      modifier = Modifier
          .fillMaxSize(),
      color = MaterialTheme.colorScheme.background
   ) {
      Column {
          StylusVisualization(
              modifier = Modifier
                  .fillMaxWidth()
                  .height(100.dp)
          )
          Divider(
              thickness = 1.dp,
              color = Color.Black,
          )
          DrawAreaLowLatency()
      }
   }
gl디렉터리에서LowLatencySurfaceView.kt파일을 열고LowLatencySurfaceView클래스에서 다음을 확인합니다.
LowLatencySurfaceView클래스는SurfaceView클래스를 확장합니다. 이 클래스는fastRenderer객체의onTouchListener메서드를 사용합니다.- 콜백이
SurfaceView뷰에 렌더링할 수 있도록onAttachedToWindow함수가 호출될 때fastRenderer클래스를 통한GLFrontBufferedRenderer.Callback인터페이스가SurfaceView객체에 연결되어야 합니다. onDetachedFromWindow함수가 호출될 때fastRenderer클래스를 통한GLFrontBufferedRenderer.Callback인터페이스는 해제되어야 합니다.
LowLatencySurfaceView.kt
class LowLatencySurfaceView(context: Context, private val fastRenderer: FastRenderer) :
   SurfaceView(context) {

   init {
       setOnTouchListener(fastRenderer.onTouchListener)
   }

   override fun onAttachedToWindow() {
       super.onAttachedToWindow()
       fastRenderer.attachSurfaceView(this)
   }

   override fun onDetachedFromWindow() {
       fastRenderer.release()
       super.onDetachedFromWindow()
   }
}
onTouchListener 인터페이스로 MotionEvent 객체 처리
ACTION_DOWN 상수가 감지될 때 MotionEvent 객체를 처리하려면 다음 단계를 따르세요.
gl디렉터리에서FastRenderer.kt파일을 엽니다.ACTION_DOWN상수의 본문에서MotionEvent객체의x좌표를 저장하는currentX변수와y좌표를 저장하는currentY변수를 만듭니다.currentX매개변수의 인스턴스 두 개와currentY매개변수의 인스턴스 두 개를 허용하는Segment객체를 저장하는Segment변수를 만듭니다. 이 변수는 선의 시작이 됩니다.segment매개변수를 사용하는renderFrontBufferedLayer메서드를 호출하여onDrawFrontBufferedLayer함수에서 콜백을 트리거합니다.
FastRenderer.kt
class FastRenderer ( ... ) {
   ...
   val onTouchListener = View.OnTouchListener { view, event ->
   ...
   MotionEvent.ACTION_DOWN -> {
      // Ask that the input system not batch MotionEvent objects,
      // but instead deliver them as soon as they're available.
      view.requestUnbufferedDispatch(event)

      currentX = event.x
      currentY = event.y

      // Create a single point.
      val segment = Segment(currentX, currentY, currentX, currentY)

      frontBufferRenderer?.renderFrontBufferedLayer(segment)
   }
ACTION_MOVE 상수가 감지될 때 MotionEvent 객체를 처리하려면 다음 단계를 따르세요.
ACTION_MOVE상수의 본문에서currentX변수를 저장하는previousX변수와currentY변수를 저장하는previousY변수를 만듭니다.MotionEvent객체의 현재x좌표를 저장하는currentX변수와 현재y좌표를 저장하는currentY변수를 만듭니다.Segment변수를 만들어서previousX,previousY,currentX,currentY매개변수를 허용하는Segment객체를 저장합니다.segment매개변수를 사용하는renderFrontBufferedLayer메서드를 호출하여onDrawFrontBufferedLayer함수에서 콜백을 트리거하고 OpenGL 코드를 실행합니다.
FastRenderer.kt
class FastRenderer ( ... ) {
   ...
   val onTouchListener = View.OnTouchListener { view, event ->
   ...
   MotionEvent.ACTION_MOVE -> {
      previousX = currentX
      previousY = currentY
      currentX = event.x
      currentY = event.y

      val segment = Segment(previousX, previousY, currentX, currentY)

      // Send the short line to front buffered layer: fast rendering
      frontBufferRenderer?.renderFrontBufferedLayer(segment)
   }
ACTION_UP상수가 감지될 때MotionEvent객체를 처리하려면commit메서드를 호출하여onDrawDoubleBufferedLayer함수에서 호출을 트리거하고 OpenGL 코드를 실행합니다.
FastRenderer.kt
class FastRenderer ( ... ) {
   ...
   val onTouchListener = View.OnTouchListener { view, event ->
   ...
   MotionEvent.ACTION_UP -> {
      frontBufferRenderer?.commit()
   }
GLFrontBufferedRenderer 콜백 함수 구현
FastRenderer.kt 파일에서 onDrawFrontBufferedLayer와 onDrawDoubleBufferedLayer 콜백 함수는 OpenGL 코드를 실행합니다. 각 콜백 함수의 시작 부분에서 다음 OpenGL 함수는 Android 데이터를 OpenGL 작업공간에 매핑합니다.
GLES20.glViewport함수는 장면을 렌더링하는 직사각형의 크기를 정의합니다.Matrix.orthoM함수는ModelViewProjection행렬을 계산합니다.Matrix.multiplyMM함수는 행렬 곱셈을 실행하여 Android 데이터를 OpenGL 참조로 변환하고projection행렬을 설정합니다.
FastRenderer.kt
class FastRenderer( ... ) {
    ...
    override fun onDraw[Front/Double]BufferedLayer(
       eglManager: EGLManager,
       bufferInfo: BufferInfo,
       transform: FloatArray,
       params: Collection<Segment>
    ) {
        val bufferWidth = bufferInfo.width
        val bufferHeight = bufferInfo.height

        GLES20.glViewport(0, 0, bufferWidth, bufferHeight)
        // Map Android coordinates to OpenGL coordinates.
        Matrix.orthoM(
           mvpMatrix,
           0,
           0f,
           bufferWidth.toFloat(),
           0f,
           bufferHeight.toFloat(),
           -1f,
           1f
        )

        Matrix.multiplyMM(projection, 0, mvpMatrix, 0, transform, 0)
코드에서 설정된 부분을 사용하면 실제 렌더링을 실행하는 코드에 집중할 수 있습니다. onDrawFrontBufferedLayer 콜백 함수는 화면의 작은 영역을 렌더링합니다. 이 함수는 단일 세그먼트를 빠르게 렌더링할 수 있도록 Segment 유형의 param 값을 제공합니다. LineRenderer 클래스는 선의 색상과 크기를 적용하는 브러시용 OpenGL 렌더기입니다.
onDrawFrontBufferedLayer 콜백 함수를 구현하려면 다음 단계를 따르세요.
FastRenderer.kt파일에서onDrawFrontBufferedLayer콜백 함수를 찾습니다.onDrawFrontBufferedLayer콜백 함수의 본문에서obtainRenderer함수를 호출하여LineRenderer인스턴스를 가져옵니다.- 다음 매개변수를 사용하여
LineRenderer함수의drawLine메서드를 호출합니다.
- 이전에 계산된
projection행렬입니다. Segment객체의 목록(이 경우에는 단일 세그먼트)- 선의
color입니다.
FastRenderer.kt
import android.graphics.Color
import androidx.core.graphics.toColor

class FastRenderer( ... ) {
...
override fun onDrawFrontBufferedLayer(
   eglManager: EGLManager,
   bufferInfo: BufferInfo,
   transform: FloatArray,
   params: Collection<Segment>
) {
   ...

   Matrix.multiplyMM(projection, 0, mvpMatrix, 0, transform, 0)

   obtainRenderer().drawLine(projection, listOf(param), Color.GRAY.toColor())
}
- 앱을 실행하면 최소 지연 시간으로 화면에 그릴 수 있습니다. 그러나
onDrawDoubleBufferedLayer콜백 함수를 구현해야 하므로 앱은 선을 유지하지 않습니다.
onDrawDoubleBufferedLayer 콜백 함수는 commit 함수 다음에 호출되어 선을 유지할 수 있습니다. 이 콜백은 Segment 객체의 컬렉션을 포함하는 params 값을 제공합니다. 지속성을 위해 전면 버퍼의 모든 세그먼트가 이중 버퍼에서 다시 재생됩니다.
onDrawDoubleBufferedLayer 콜백 함수를 구현하려면 다음 단계를 따르세요.
StylusViewModel.kt파일에서StylusViewModel클래스를 찾은 다음Segment객체의 변경 가능한 목록을 저장하는openGlLines변수를 만듭니다.
StylusViewModel.kt
import com.example.stylus.data.Segment

class StylusViewModel : ViewModel() {
    private var _stylusState = MutableStateFlow(StylusState())
    val stylusState: StateFlow<StylusState> = _stylusState

    val openGlLines = mutableListOf<List<Segment>>()

    private fun requestRendering(stylusState: StylusState) {
FastRenderer.kt파일에서FastRenderer클래스의onDrawDoubleBufferedLayer콜백 함수를 찾습니다.onDrawDoubleBufferedLayer콜백 함수 본문에서 장면을 처음부터 렌더링할 수 있도록GLES20.glClearColor및GLES20.glClear메서드로 화면을 지우고 선을 유지할 수 있도록viewModel객체에 선을 추가합니다.
FastRenderer.kt
class FastRenderer( ... ) {
   ...
   override fun onDrawDoubleBufferedLayer(
      eglManager: EGLManager,
      bufferInfo: BufferInfo,
      transform: FloatArray,
      params: Collection<Segment>
   ) {
      ...
      // Clear the screen with black.
      GLES20.glClearColor(0.0f, 0.0f, 0.0f, 1.0f)
      GLES20.glClear(GLES20.GL_COLOR_BUFFER_BIT)

      viewModel.openGlLines.add(params.toList())
viewModel객체의 각 선을 반복하여 렌더링하는for루프를 만듭니다.
FastRenderer.kt
class FastRenderer( ... ) {
   ...
   override fun onDrawDoubleBufferedLayer(
      eglManager: EGLManager,
      bufferInfo: BufferInfo,
      transform: FloatArray,
      params: Collection<Segment>
   ) {
      ...
      // Clear the screen with black.
      GLES20.glClearColor(0.0f, 0.0f, 0.0f, 1.0f)
      GLES20.glClear(GLES20.GL_COLOR_BUFFER_BIT)

      viewModel.openGlLines.add(params.toList())

      // Render the entire scene (all lines).
      for (line in viewModel.openGlLines) {
         obtainRenderer().drawLine(projection, line, Color.GRAY.toColor())
      }
   }
- 앱을 실행하면 화면에 그릴 수 있으며
ACTION_UP상수가 트리거된 후에 선이 유지됩니다.
7. 모션 예측 구현
스타일러스의 경로를 분석하고 다음 지점의 위치를 예측하여 렌더링에 삽입하는 androidx.input 라이브러리로 지연 시간을 더욱 개선할 수 있습니다.
모션 예측을 설정하려면 다음 단계를 따르세요.
app/build.gradle파일의 종속 항목 섹션에서 라이브러리를 가져옵니다.
app/build.gradle
...
dependencies {
    ...
    implementation"androidx.input:input-motionprediction:1.0.0-beta01"
- File > Sync project with Gradle files를 클릭합니다.
FastRendering.kt파일의FastRendering클래스에서motionEventPredictor객체를 속성으로 선언합니다.
FastRenderer.kt
import androidx.input.motionprediction.MotionEventPredictor

class FastRenderer( ... ) {
   ...
   private var frontBufferRenderer: GLFrontBufferedRenderer<Segment>? = null
   private var motionEventPredictor: MotionEventPredictor? = null
attachSurfaceView함수에서motionEventPredictor변수를 초기화합니다.
FastRenderer.kt
class FastRenderer( ... ) {
   ...
   fun attachSurfaceView(surfaceView: SurfaceView) {
      frontBufferRenderer = GLFrontBufferedRenderer(surfaceView, this)
      motionEventPredictor = MotionEventPredictor.newInstance(surfaceView)
   }
motionEventPredictor객체에서 모션 데이터를 가져오도록onTouchListener변수에서motionEventPredictor?.record메서드를 호출합니다.
FastRendering.kt
class FastRenderer( ... ) {
   ...
   val onTouchListener = View.OnTouchListener { view, event ->
      motionEventPredictor?.record(event)
      ...
      when (event?.action) {
다음 단계는 predict 함수를 사용하여 MotionEvent 객체를 예측하는 것입니다. ACTION_MOVE 상수가 수신된 시점과 MotionEvent 객체가 기록된 후에 예측을 실행하는 것이 좋습니다. 즉, 획이 진행되는 시점을 예측해야 합니다.
predict메서드를 사용하여 인위적인MotionEvent객체를 예측합니다.- 현재 및 예측된 x와 y 좌표를 사용하는
Segment객체를 만듭니다. frontBufferRenderer?.renderFrontBufferedLayer(predictedSegment)메서드를 사용하여 예측된 세그먼트의 빠른 렌더링을 요청합니다.
FastRendering.kt
class FastRenderer( ... ) {
   ...
   val onTouchListener = View.OnTouchListener { view, event ->
       motionEventPredictor?.record(event)
       ...
       when (event?.action) {
          ...
          MotionEvent.ACTION_MOVE -> {
              ...
              frontBufferRenderer?.renderFrontBufferedLayer(segment)

              val motionEventPredicted = motionEventPredictor?.predict()
              if(motionEventPredicted != null) {
                 val predictedSegment = Segment(currentX, currentY,
       motionEventPredicted.x, motionEventPredicted.y)
                 frontBufferRenderer?.renderFrontBufferedLayer(predictedSegment)
              }

          }
          ...
       }
예측된 이벤트가 렌더링에 삽입되어 지연 시간이 개선됩니다.
- 앱을 실행하면 지연 시간이 개선된 것을 확인할 수 있습니다.
지연 시간을 개선하면 스타일러스 사용자에게 더 자연스러운 스타일러스 환경을 제공할 수 있습니다.
8. 축하합니다
축하합니다! 이제 전문가처럼 스타일러스를 처리할 수 있습니다.
MotionEvent 객체를 처리하여 압력, 방향, 기울기에 관한 정보를 추출하는 방법을 알아보았습니다. androidx.graphics 라이브러리와 androidx.input 라이브러리를 모두 구현하여 지연 시간을 개선하는 방법도 배웠습니다. 이러한 개선사항을 함께 구현하면 더 자연스러운 스타일러스 환경을 제공할 수 있습니다.