1. 導入と設定
この Codelab では、Jetpack Compose で作成された UI のテストについて学びます。単独でのテスト、デバッグテスト、セマンティクス ツリー、同期について学びながら、最初のテストを作成します。
必要なもの
- 最新の Android Studio
- Kotlin に関する知識
- Compose に関する基礎知識(
@Composableアノテーションなど) - 修飾子に関する基礎知識
- 省略可: この Codelab の前に Jetpack Compose の基礎に関する Codelab を受講することを検討してください。
この Codelab(Rally)のコードを確認する
この Codelab では、ベースとして Rally Material スタディを使用します。GitHub リポジトリ android-compose-codelabs で入手できます。次のコマンドを実行して、クローンを作成します。
git clone https://github.com/android/codelab-android-compose.git
ダウンロードが終わったら、TestingCodelab プロジェクトを開きます。
または、次の 2 つの zip ファイルをダウンロードします。
TestingCodelab フォルダを開きます。このフォルダには Rally というアプリがあります。
プロジェクトの構造を確認する
Compose テストはインストルメント化されたテストです。つまり、それを実行するデバイス(実機またはエミュレータ)が必要です。
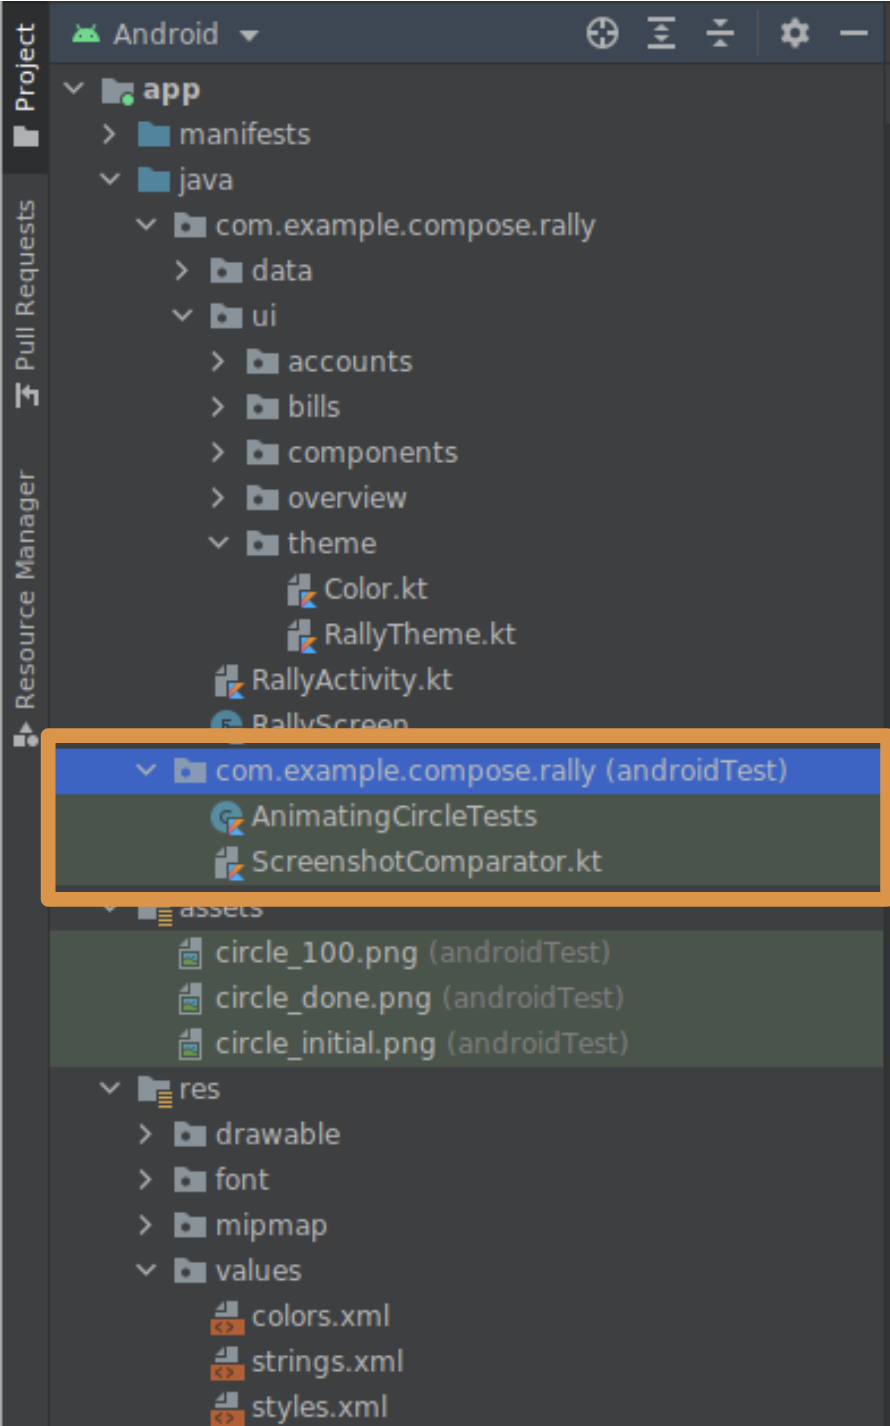
Rally にはすでに、インストルメント化された UI テストが含まれています。以下の androidTest ソースセットにあります。

これは新しいテストを置くディレクトリです。AnimatingCircleTests.kt ファイルを見ると、Compose テストの内容を確認できます。
Rally は設定済みですが、新しいプロジェクトで Compose テストを有効にするために、関連モジュールの build.gradle ファイルに次のテスト用依存関係が必要です。
androidTestImplementation "androidx.compose.ui:ui-test-junit4:$version"

debugImplementation "androidx.compose.ui:ui-test-manifest:$rootProject.composeVersion"
アプリを実行して、挙動を確認しましょう。
2. テスト項目
次に、3 つのタブ([Overview]、[Accounts]、[Bills])を含む Rally のタブバーに注目してみましょう。状況に応じて次のように表示されます。

この Codelab では、このバーの UI をテストします。
次のような内容が考えられます。
- タブに意図したアイコンとテキストが表示されることを確認する
- アニメーションが仕様を満たしていることを確認する
- トリガーされたナビゲーション イベントが正しいことを確認する
- 各状態で UI 要素の配置と要素間の距離を確認する
- バーのスクリーンショットを撮影し、前のスクリーンショットと比較する
コンポーネントのテストの程度や方法に厳密なルールはありません。上記をすべて行っても構いません。この Codelab では、以下を確認することで、状態ロジックの正しさを検証します。
- タブには、それが選択されたときにのみ、ラベルが表示される
- アクティブな画面が選択されるタブを決定する
3. シンプルな UI テストを作成する
TopAppBarTest ファイルを作成する
AnimatingCircleTests.ktと同じフォルダ(app/src/androidTest/com/example/compose/rally)に新しいファイルを作成し、TopAppBarTest.kt という名前を付けます。
Compose には ComposeTestRule が付属しています。これは createComposeRule() を呼び出して取得できます。このルールを使うことで、テストする Compose コンテンツを設定して操作できます。
ComposeTestRule を追加する
package com.example.compose.rally

import androidx.compose.ui.test.junit4.createComposeRule
import org.junit.Rule

class TopAppBarTest {

    @get:Rule
    val composeTestRule = createComposeRule()

    // TODO: Add tests
}
単独でのテスト
Compose テストでは、Espresso を使用する Android View の場合と同じように、アプリのメイン アクティビティを開始できます。createAndroidComposeRule を使うことで、これが可能になります。
// Don't copy this over

@get:Rule
val composeTestRule = createAndroidComposeRule(RallyActivity::class.java)
ただし、Compose では、コンポーネントを単独でテストすることにより、大幅に簡素化できます。テストで使用する Compose UI コンテンツは選択できます。これは、ComposeTestRule の setContent メソッドで行い、任意の場所で呼び出すことができます(ただし 1 回のみです)。
// Don't copy this over

class TopAppBarTest {

    @get:Rule
    val composeTestRule = createComposeRule()

    @Test
    fun myTest() {
        composeTestRule.setContent {
            Text("You can set any Compose content!")
        }
    }
}
テストするのは TopAppBar なので、これに焦点を当てましょう。setContent 内で RallyTopAppBar を呼び出し、パラメータの名前を Android Studio で補完します。
import androidx.compose.ui.test.junit4.createComposeRule
import com.example.compose.rally.ui.components.RallyTopAppBar
import org.junit.Rule
import org.junit.Test

class TopAppBarTest {

    @get:Rule
    val composeTestRule = createComposeRule()

    @Test
    fun rallyTopAppBarTest() {
        composeTestRule.setContent {
            RallyTopAppBar(
                allScreens = ,
                onTabSelected = { /*TODO*/ },
                currentScreen =
            )
        }
    }
}
テスト可能なコンポーザブルの重要性
RallyTopAppBar は、簡単に指定できる 3 つのパラメータを取り、これに渡すテスト用のデータを制御できるようになっています。次に例を示します。
    @Test
    fun rallyTopAppBarTest() {
        val allScreens = RallyScreen.values().toList()
        composeTestRule.setContent {
            RallyTopAppBar(
                allScreens = allScreens,
                onTabSelected = { },
                currentScreen = RallyScreen.Accounts
            )
        }
        Thread.sleep(5000)
    }
動作を視認できるように、sleep() を追加しています。rallyTopAppBarTest を右クリックし、[Run rallyTopAppBarTest()...] をクリックします。

このテストでは、最上部にアプリバーが 5 秒間表示されますが、テーマは意図したものとは異なり、ライトモードになっています。
これは、バーに使用しているマテリアル コンポーネントが、MaterialTheme 内にあることを想定しており、それ以外の場合は「ベースライン」スタイルの色になるためです。
MaterialTheme には適切なデフォルト設定があるため、クラッシュしません。テーマのテストもスクリーンショットの撮影も行わないため、テーマを省略してデフォルトのライトモードを使用できます。必要に応じて、RallyTopAppBar を RallyTheme でラップして、これを修正してください。
タブが選択されるのを確認する
UI 要素の発見、そのプロパティのチェック、アクションの実行は、次のパターンに沿ってテストルールを使って行われます。
composeTestRule{.finder}{.assertion}{.action}
このテストでは、「Accounts」という単語を見つけ、選択されているタブのラベルが表示されていることを確認します。

使用できるツールについては、Compose テストのクイック リファレンスまたはテスト パッケージのリファレンス ドキュメントをご覧ください。今回のケースに役立つ可能性のあるファインダーとアサーションを見つけてください(例: onNodeWithText、onNodeWithContentDescription、isSelected、hasContentDescription、assertIsSelected)。
タブによって内容説明は異なります。
- 概要
- アカウント
- 請求
このことを理解したうえで、Thread.sleep(5000) を、内容説明を発見して、それが存在することをアサートするステートメントに置き換えます。
import androidx.compose.ui.test.assertIsSelected
import androidx.compose.ui.test.onNodeWithContentDescription
...

@Test
fun rallyTopAppBarTest_currentTabSelected() {
    val allScreens = RallyScreen.values().toList()
    composeTestRule.setContent {
        RallyTopAppBar(
            allScreens = allScreens,
            onTabSelected = { },
            currentScreen = RallyScreen.Accounts
        )
    }

    composeTestRule
        .onNodeWithContentDescription(RallyScreen.Accounts.name)
        .assertIsSelected()
}
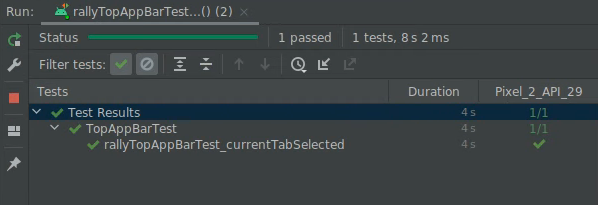
テストをもう一度実行すると、緑色のテストが表示されます。

お疲れさまでした。最初の Compose テストが完成しました。ここでは、単独でのテストを行う方法と、ファインダーとアサーションの使用方法について学習しました。
単純なものでしたが、コンポーネントに関する以前の知識(内容説明と selected プロパティ)が必要でした。次のステップでは、使用可能なプロパティを調べる方法を学習します。
4. テストのデバッグ
このステップでは、現在のタブのラベルが大文字で表示されていることを確認します。

1 つの方法は、テキストを見つけて、それが存在することをアサートすることです。
import androidx.compose.ui.test.onNodeWithText
...

@Test
fun rallyTopAppBarTest_currentLabelExists() {
    val allScreens = RallyScreen.values().toList()
    composeTestRule.setContent {
        RallyTopAppBar(
            allScreens = allScreens,
            onTabSelected = { },
            currentScreen = RallyScreen.Accounts
        )
    }

    composeTestRule
        .onNodeWithText(RallyScreen.Accounts.name.uppercase())
        .assertExists()
}
しかし、テストは失敗します 😱

このステップでは、セマンティクス ツリーを使用するデバッグ方法を説明します。
セマンティクス ツリー
Compose テストでは、セマンティクス ツリーと呼ばれる構造を使用して、画面上の要素を発見し、そのプロパティを読み取ります。この構造は、TalkBack などのサービスで読み取られることを想定しているため、ユーザー補助サービスでも使用されます。
ノードに printToLog 関数を使用すると、セマンティクス ツリーを出力できます。次の行をテストに追加します。
import androidx.compose.ui.test.onRoot
import androidx.compose.ui.test.printToLog
...

fun rallyTopAppBarTest_currentLabelExists() {
    val allScreens = RallyScreen.values().toList()
    composeTestRule.setContent {
        RallyTopAppBar(
            allScreens = allScreens,
            onTabSelected = { },
            currentScreen = RallyScreen.Accounts
        )
    }

    composeTestRule.onRoot().printToLog("currentLabelExists")

    composeTestRule
        .onNodeWithText(RallyScreen.Accounts.name.uppercase())
        .assertExists() // Still fails
}
テストを実行し、Android Studio で Logcat を確認します(currentLabelExists を確認できます)。
...com.example.compose.rally D/currentLabelExists: printToLog:
    Printing with useUnmergedTree = 'false'
    Node #1 at (l=0.0, t=63.0, r=1080.0, b=210.0)px
     |-Node #2 at (l=0.0, t=63.0, r=1080.0, b=210.0)px
       [SelectableGroup]
       MergeDescendants = 'true'
        |-Node #3 at (l=42.0, t=105.0, r=105.0, b=168.0)px
        | Role = 'Tab'
        | Selected = 'false'
        | StateDescription = 'Not selected'
        | ContentDescription = 'Overview'
        | Actions = [OnClick]
        | MergeDescendants = 'true'
        | ClearAndSetSemantics = 'true'
        |-Node #6 at (l=189.0, t=105.0, r=468.0, b=168.0)px
        | Role = 'Tab'
        | Selected = 'true'
        | StateDescription = 'Selected'
        | ContentDescription = 'Accounts'
        | Actions = [OnClick]
        | MergeDescendants = 'true'
        | ClearAndSetSemantics = 'true'
        |-Node #11 at (l=552.0, t=105.0, r=615.0, b=168.0)px
          Role = 'Tab'
          Selected = 'false'
          StateDescription = 'Not selected'
          ContentDescription = 'Bills'
          Actions = [OnClick]
          MergeDescendants = 'true'
          ClearAndSetSemantics = 'true'
セマンティクス ツリーを見ると、3 つの子要素を持つ SelectableGroup があることがわかります。この 3 つは、トップ アプリバーのタブです。その結果、値が「ACCOUNTS」である text プロパティがないため、テストが失敗します。しかし、各タブの内容説明はあります。このプロパティを RallyTopAppBar.kt の RallyTab コンポーザブルで設定する方法を確認してください。
private fun RallyTab(text: String...)
...
    Modifier
        .clearAndSetSemantics { contentDescription = text }
この修飾子によって子孫からプロパティがクリアされ、個別の内容説明が設定されているため、「ACCOUNTS」ではなく「Accounts」と表示されます。
ファインダー onNodeWithText を onNodeWithContentDescription に置き換えて、もう一度テストを実行します。
fun rallyTopAppBarTest_currentLabelExists() {
    val allScreens = RallyScreen.values().toList()
    composeTestRule.setContent {
        RallyTopAppBar(
            allScreens = allScreens,
            onTabSelected = { },
            currentScreen = RallyScreen.Accounts
        )
    }

    composeTestRule
        .onNodeWithContentDescription(RallyScreen.Accounts.name)
        .assertExists()
}

これで、テストが修正されました。そして、ComposeTestRule、単独でのテスト、ファインダー、アサーション、セマンティクス ツリーを使用したデバッグについて学習しました。
悪いニュース: このテストはあまり有用ではありません。セマンティクス ツリーをよく見ると、3 つのタブの内容説明は、タブが選択されていても選択されていなくても表示されています。改良が必要です。
5. マージされたセマンティクス ツリーとマージされていないセマンティクス ツリー
セマンティクス ツリーでは、常に可能な限りコンパクトにしようとして、関連する情報のみを表示します。
たとえば、TopAppBar で、アイコンとラベルを別のノードにする必要はありません。Overview ノードを見てみましょう。

        |-Node #3 at (l=42.0, t=105.0, r=105.0, b=168.0)px
        | Role = 'Tab'
        | Selected = 'false'
        | StateDescription = 'Not selected'
        | ContentDescription = 'Overview'
        | Actions = [OnClick]
        | MergeDescendants = 'true'
        | ClearAndSetSemantics = 'true'
このノードには、selectable コンポーネント専用に定義されたプロパティ(Selected、Role など)と、タブ全体の内容説明があります。これらは高いレベルのプロパティであり、単純なテストにとても便利です。アイコンまたはテキストの詳細は冗長なので表示されません。
Compose は、Text などのコンポーザブルで、これらのセマンティクス プロパティを自動的に公開します。また、これをカスタマイズしてマージすることで、1 つ以上の子孫からなる単一のコンポーネントを表すこともできます。たとえば、Text コンポーザブルを含む Button を表すことができます。プロパティ MergeDescendants = 'true' は、このノードには子孫があるが、子孫はノードにマージされていることを示しています。テストでは、すべてのノードにアクセスしなければならないことがよくあります。
タブ内の Text が表示されるかどうかを確認するために、onRoot ファインダーに useUnmergedTree = true を渡して、マージされていないセマンティクス ツリーをクエリすることができます。
@Test
fun rallyTopAppBarTest_currentLabelExists() {
    val allScreens = RallyScreen.values().toList()
    composeTestRule.setContent {
        RallyTopAppBar(
            allScreens = allScreens,
            onTabSelected = { },
            currentScreen = RallyScreen.Accounts
        )
    }

    composeTestRule.onRoot(useUnmergedTree = true).printToLog("currentLabelExists")


}
Logcat の出力が少し長くなりました。
    Printing with useUnmergedTree = 'true'
    Node #1 at (l=0.0, t=63.0, r=1080.0, b=210.0)px
     |-Node #2 at (l=0.0, t=63.0, r=1080.0, b=210.0)px
       [SelectableGroup]
       MergeDescendants = 'true'
        |-Node #3 at (l=42.0, t=105.0, r=105.0, b=168.0)px
        | Role = 'Tab'
        | Selected = 'false'
        | StateDescription = 'Not selected'
        | ContentDescription = 'Overview'
        | Actions = [OnClick]
        | MergeDescendants = 'true'
        | ClearAndSetSemantics = 'true'
        |-Node #6 at (l=189.0, t=105.0, r=468.0, b=168.0)px
        | Role = 'Tab'
        | Selected = 'true'
        | StateDescription = 'Selected'
        | ContentDescription = 'Accounts'
        | Actions = [OnClick]
        | MergeDescendants = 'true'
        | ClearAndSetSemantics = 'true'
        |  |-Node #9 at (l=284.0, t=105.0, r=468.0, b=154.0)px
        |    Text = 'ACCOUNTS'
        |    Actions = [GetTextLayoutResult]
        |-Node #11 at (l=552.0, t=105.0, r=615.0, b=168.0)px
          Role = 'Tab'
          Selected = 'false'
          StateDescription = 'Not selected'
          ContentDescription = 'Bills'
          Actions = [OnClick]
          MergeDescendants = 'true'
          ClearAndSetSemantics = 'true'
ノード #3 にはまだ子孫がありません。
        |-Node #3 at (l=42.0, t=105.0, r=105.0, b=168.0)px
        | Role = 'Tab'
        | Selected = 'false'
        | StateDescription = 'Not selected'
        | ContentDescription = 'Overview'
        | Actions = [OnClick]
        | MergeDescendants = 'true'
        | ClearAndSetSemantics = 'true'
選択されているタブ(ノード #6)には子孫があり、Text プロパティが表示されています。
        |-Node #6 at (l=189.0, t=105.0, r=468.0, b=168.0)px
        | Role = 'Tab'
        | Selected = 'true'
        | StateDescription = 'Selected'
        | ContentDescription = 'Accounts'
        | Actions = [OnClick]
        | MergeDescendants = 'true'
        |  |-Node #9 at (l=284.0, t=105.0, r=468.0, b=154.0)px
        |    Text = 'ACCOUNTS'
        |    Actions = [GetTextLayoutResult]
望み通りに正しく動作していることを確認するため、親ノードの内容説明が「Accounts」で、自身のテキストが「ACCOUNTS」であるノードを 1 つ見つけるマッチャーを作成します。
再度 Compose テストのクイック リファレンスで、マッチャーの作成方法を確認してください。マッチャーには and や or などのブール演算子を使用できます。
すべてのファインダーには、useUnmergedTree というパラメータがあります。マージされていないツリーを使用するには、true に設定します。
解答を確認せずにテストを作成してみましょう。
解決策
import androidx.compose.ui.test.hasParent
import androidx.compose.ui.test.hasText
...

@Test
fun rallyTopAppBarTest_currentLabelExists() {
    val allScreens = RallyScreen.values().toList()
    composeTestRule.setContent {
        RallyTopAppBar(
            allScreens = allScreens,
            onTabSelected = { },
            currentScreen = RallyScreen.Accounts
        )
    }

    composeTestRule
        .onNode(
            hasText(RallyScreen.Accounts.name.uppercase()) and
            hasParent(
                hasContentDescription(RallyScreen.Accounts.name)
            ),
            useUnmergedTree = true
        )
        .assertExists()
}
実行してみましょう。

お疲れさまでした。このステップでは、プロパティのマージ、マージされたセマンティクス ツリーとマージされていないセマンティクス ツリーについて学習しました。
6. 同期
テストを作成する際には、テスト対象と適切に同期する必要があります。たとえば、onNodeWithText などのファインダーを使用する場合、テストは、アプリがアイドルになるまで待ってから、セマンティクス ツリーをクエリします。同期がない場合は、表示される前に要素を探したり、不必要に待ったりします。
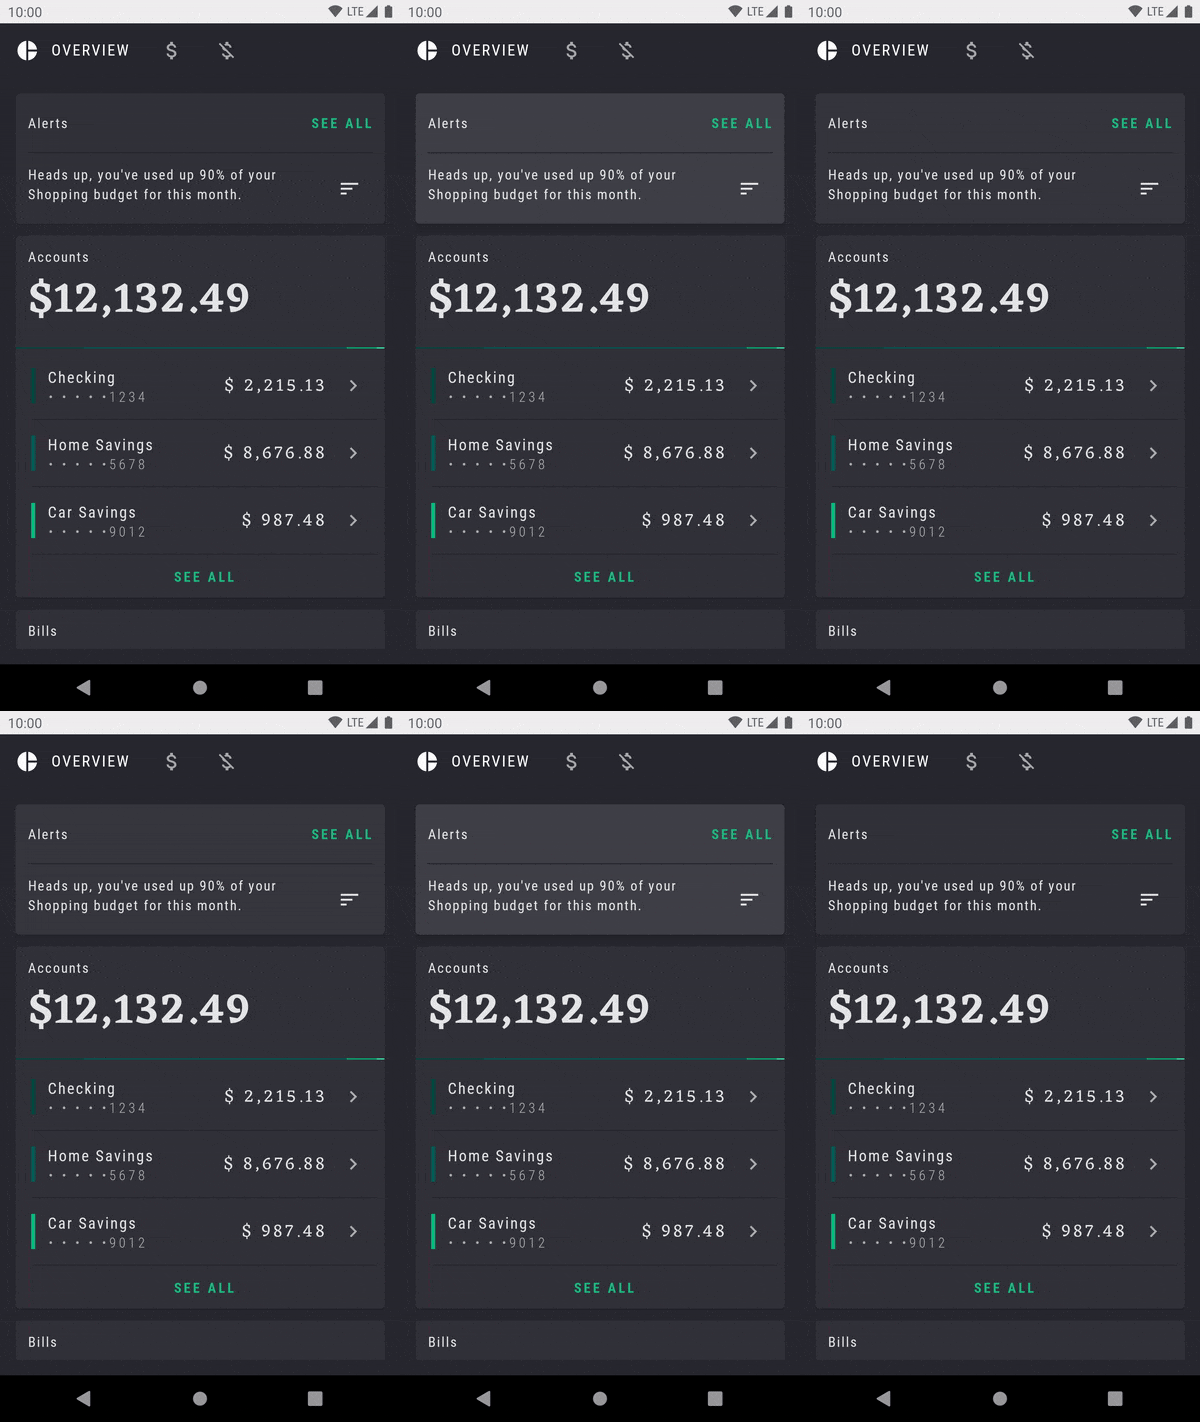
このステップでは、Overview 画面を使います。アプリを実行すると、次のように表示されます。

Alerts カードが点滅を繰り返すアニメーションで注意を引こうとしています。
OverviewScreenTest という別のテストクラスを作成し、次の内容を追加します。
package com.example.compose.rally

import androidx.compose.ui.test.assertIsDisplayed
import androidx.compose.ui.test.junit4.createComposeRule
import androidx.compose.ui.test.onNodeWithText
import com.example.compose.rally.ui.overview.OverviewBody
import org.junit.Rule
import org.junit.Test

class OverviewScreenTest {

    @get:Rule
    val composeTestRule = createComposeRule()

    @Test
    fun overviewScreen_alertsDisplayed() {
        composeTestRule.setContent {
            OverviewBody()
        }

        composeTestRule
            .onNodeWithText("Alerts")
            .assertIsDisplayed()
    }
}
このテストは実行すると終了しません(30 秒後にタイムアウトします)。

次のエラーが表示されます。
androidx.compose.ui.test.junit4.android.ComposeNotIdleException: Idling resource timed out: possibly due to compose being busy.
IdlingResourceRegistry has the following idling resources registered:
- [busy] androidx.compose.ui.test.junit4.android.ComposeIdlingResource@d075f91
これは基本的に、Compose のビジー状態が続いたため、アプリをテストと同期できないことを意味します。
すでに問題は無限に点滅を続けるアニメーションであると推測されているかもしれません。アプリがアイドル状態にならないため、テストを続けられないということです。
無限アニメーションの実装を見てみましょう。
app/src/main/java/com/example/compose/rally/ui/overview/OverviewBody.kt
var currentTargetElevation by remember {  mutableStateOf(1.dp) }
LaunchedEffect(Unit) {
    // Start the animation
    currentTargetElevation = 8.dp
}
val animatedElevation = animateDpAsState(
    targetValue = currentTargetElevation,
    animationSpec = tween(durationMillis = 500),
    finishedListener = {
        currentTargetElevation = if (currentTargetElevation > 4.dp) {
            1.dp
        } else {
            8.dp
        }
    }
)
Card(elevation = animatedElevation.value) { ... }
基本的にこのコードでは、アニメーションが終了するのを待ってから(finishedListener)、再度実行しています。
このテストを修正する方法としては、開発者向けオプションでアニメーションを無効にするという方法があります。これは View の場合に広く受け入れられている方法です。
Compose では、アニメーション API がテスト可能性を念頭に置いて設計されているため、正しい API を使用して問題を解決することができます。animateDpAsState アニメーションを再始動する代わりに、無限アニメーションを使用できます。
OverviewScreen のコードを適切な API に置き換えます。
import androidx.compose.animation.core.RepeatMode
import androidx.compose.animation.core.VectorConverter
import androidx.compose.animation.core.animateValue
import androidx.compose.animation.core.infiniteRepeatable
import androidx.compose.animation.core.rememberInfiniteTransition
import androidx.compose.animation.core.tween
import androidx.compose.ui.unit.Dp
...

    val infiniteElevationAnimation = rememberInfiniteTransition()
    val animatedElevation: Dp by infiniteElevationAnimation.animateValue(
        initialValue = 1.dp,
        targetValue = 8.dp,
        typeConverter = Dp.VectorConverter,
        animationSpec = infiniteRepeatable(
            animation = tween(500),
            repeatMode = RepeatMode.Reverse
        )
    )
    Card(elevation = animatedElevation) {
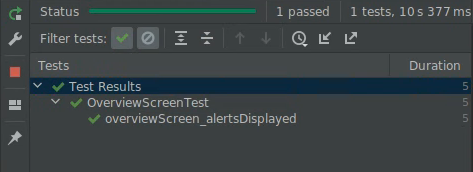
テストを実行すると、合格します。

お疲れさまでした。このステップでは、同期と、アニメーションがテストに与える影響について学習しました。
7. 追加の演習(任意)
このステップでは、アクション(テスト クイック リファレンスを参照)を使用して、RallyTopAppBar の別のタブをクリックすると選択が変更されることを確認します。
ヒント:
- テストの対象には、
RallyAppが所有する状態を含める必要があります。 - 動作ではなく、状態を確認してください。どのオブジェクトがどのように呼び出されたのかに依存するのではなく、UI の状態に関するアサーションを使用してください。
この演習の解答はありません。
8. 次のステップ
これで、Jetpack Compose でのテストは完了です。Compose UI の適切なテスト戦略を作成するための基本的な構成要素ができました。
テストと Compose について詳しくは、次の参考資料をご覧ください。
- テスト ドキュメントには、ファインダー、アサーション、アクション、マッチャー、同期メカニズム、時間操作などの詳細情報が記載されています。
- テスト クイック リファレンスをブックマークしましょう。
- Rally サンプルには、簡単なスクリーンショットのテストクラスが付属しています。詳しくは、
AnimatingCircleTests.ktファイルをご覧ください。 - Android アプリのテストに関する一般的なガイダンスについては、次の 3 つのコードラボを参考にしてください。
- GitHub の Compose サンプル リポジトリには、UI テストが付属しているアプリが複数あります。
- Jetpack Compose パスウェイには、Compose の使用を開始するための参考資料が挙げられています。
ぜひテストを行ってください。
