1. はじめに

最終更新日: 2023 年 11 月 21 日
この Codelab では、Jetpack Compose でアニメーション API を使用する方法を学びます。
Jetpack Compose は、UI 開発を簡素化するために設計された最新のツールキットです。Jetpack Compose を初めて使用する場合は、その前にいくつかの Codelab を参照することをおすすめします。
学習内容
- 基本的なアニメーション API の使用方法
前提条件
- Kotlin の基礎知識があること
- Compose に関する以下の基本的な知識があること:
- 簡単なレイアウト(列、行、ボックスなど)
- 簡単な UI 要素(ボタン、テキストなど)
- 状態と再コンポーズ
必要なもの
2. セットアップする
Codelab コードをダウンロードします。次のようにしてリポジトリのクローンを作成できます。
$ git clone https://github.com/android/codelab-android-compose.git
または、リポジトリを ZIP ファイルとしてダウンロードすることもできます。
Android Studio で AnimationCodelab プロジェクトをインポートします。
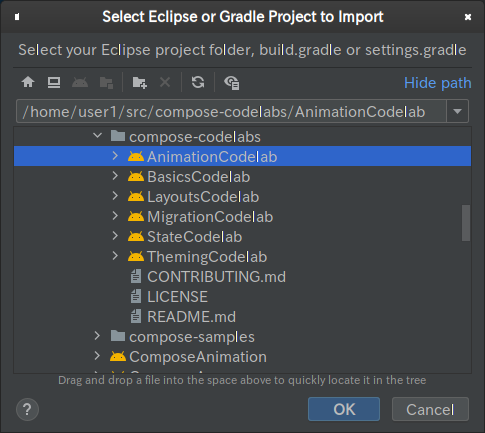
プロジェクトには複数のモジュールがあります。
startは、Codelab の開始状態です。finishedは、この Codelab の完了後のアプリの最終状態です。
実行設定のプルダウンで start が選択されていることを確認します。

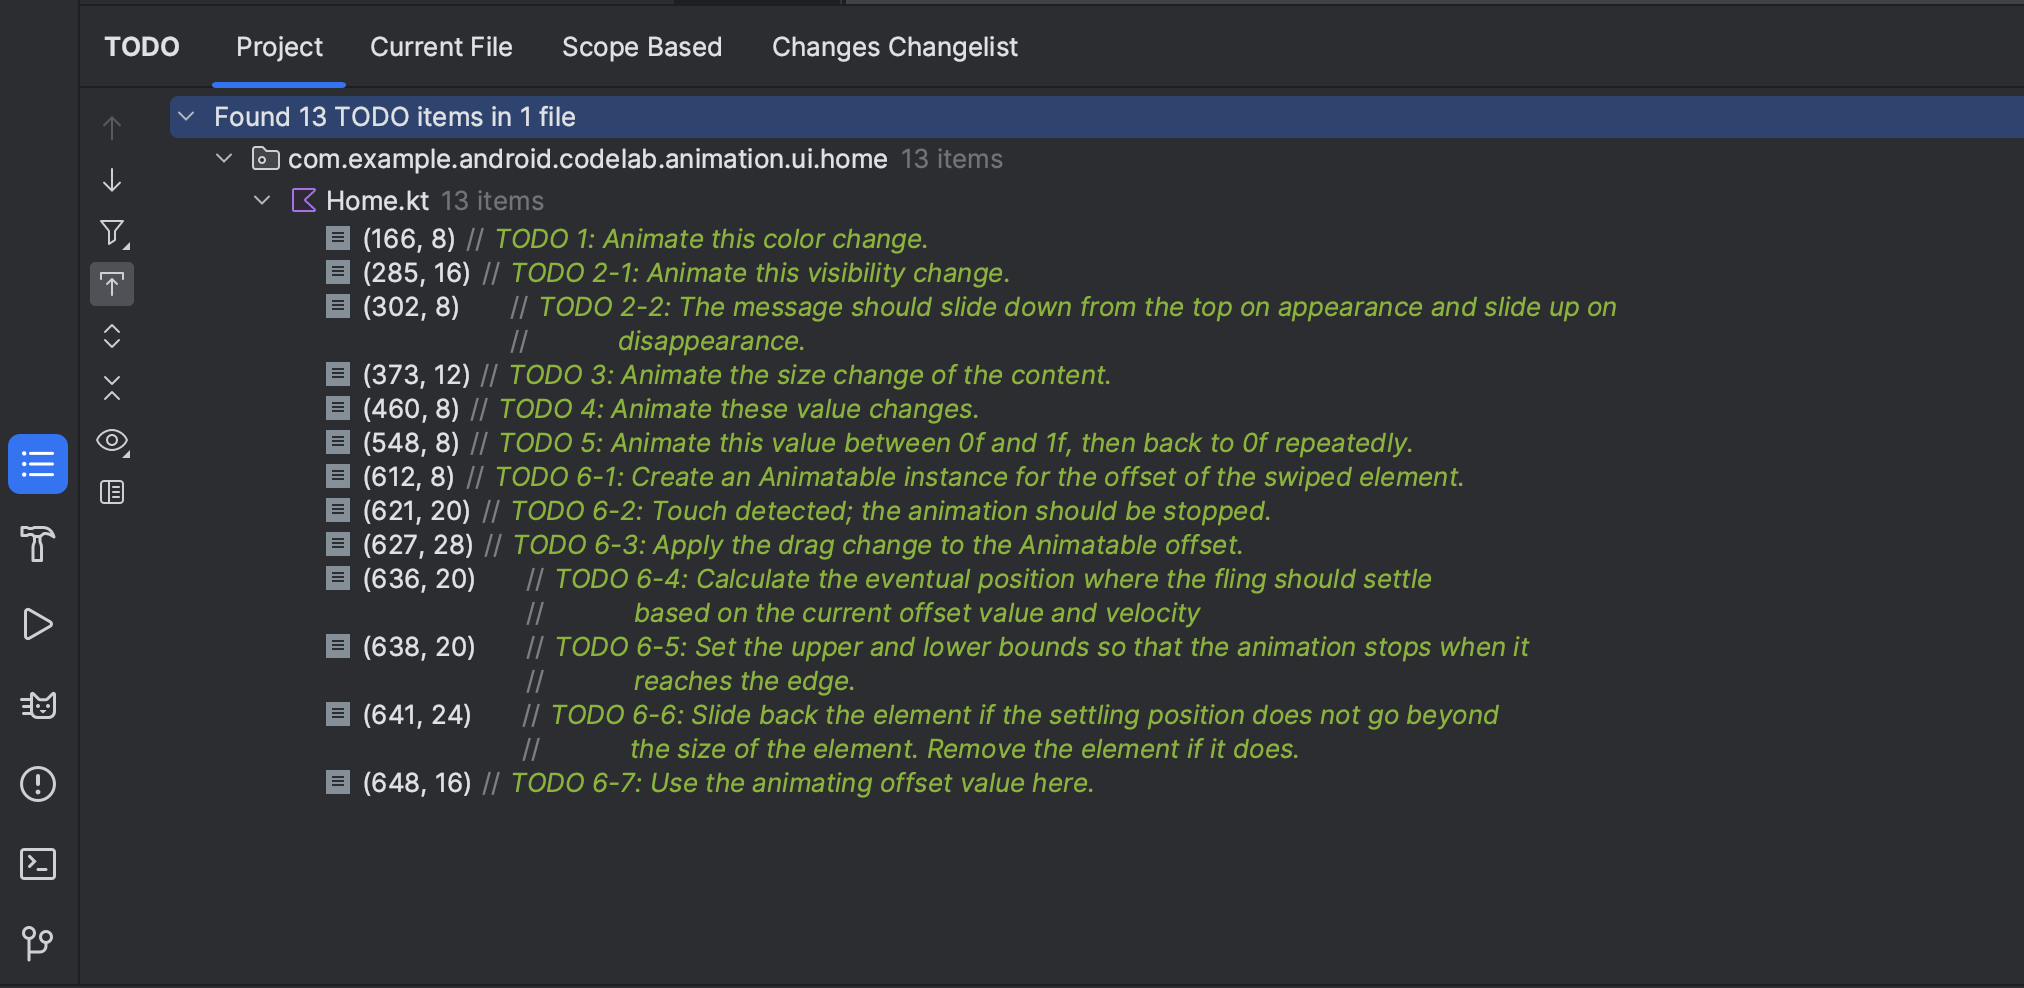
次の章では、いくつかのアニメーション シナリオを取り扱います。この Codelab で使用するすべてのコード スニペットには、// TODO コメントが付いています。Android Studio の TODO ツール ウィンドウを開いて、各章の TODO コメントに移動することもできます。
3. 単純な値の変更をアニメーション化する
最初は Compose で最も簡単なアニメーション API の 1 つである animate*AsState API です。この API は、State の変更をアニメーション化する場合に使用します。
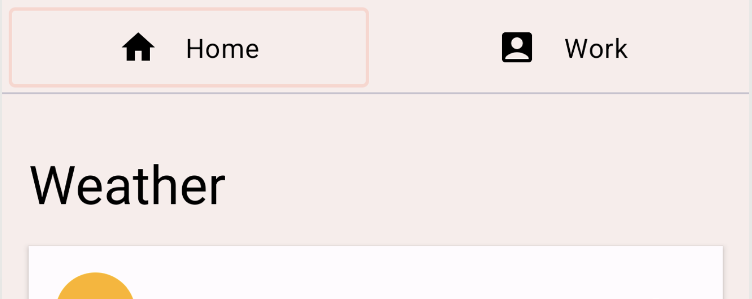
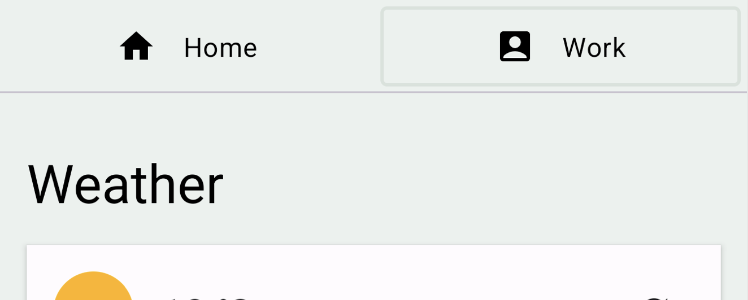
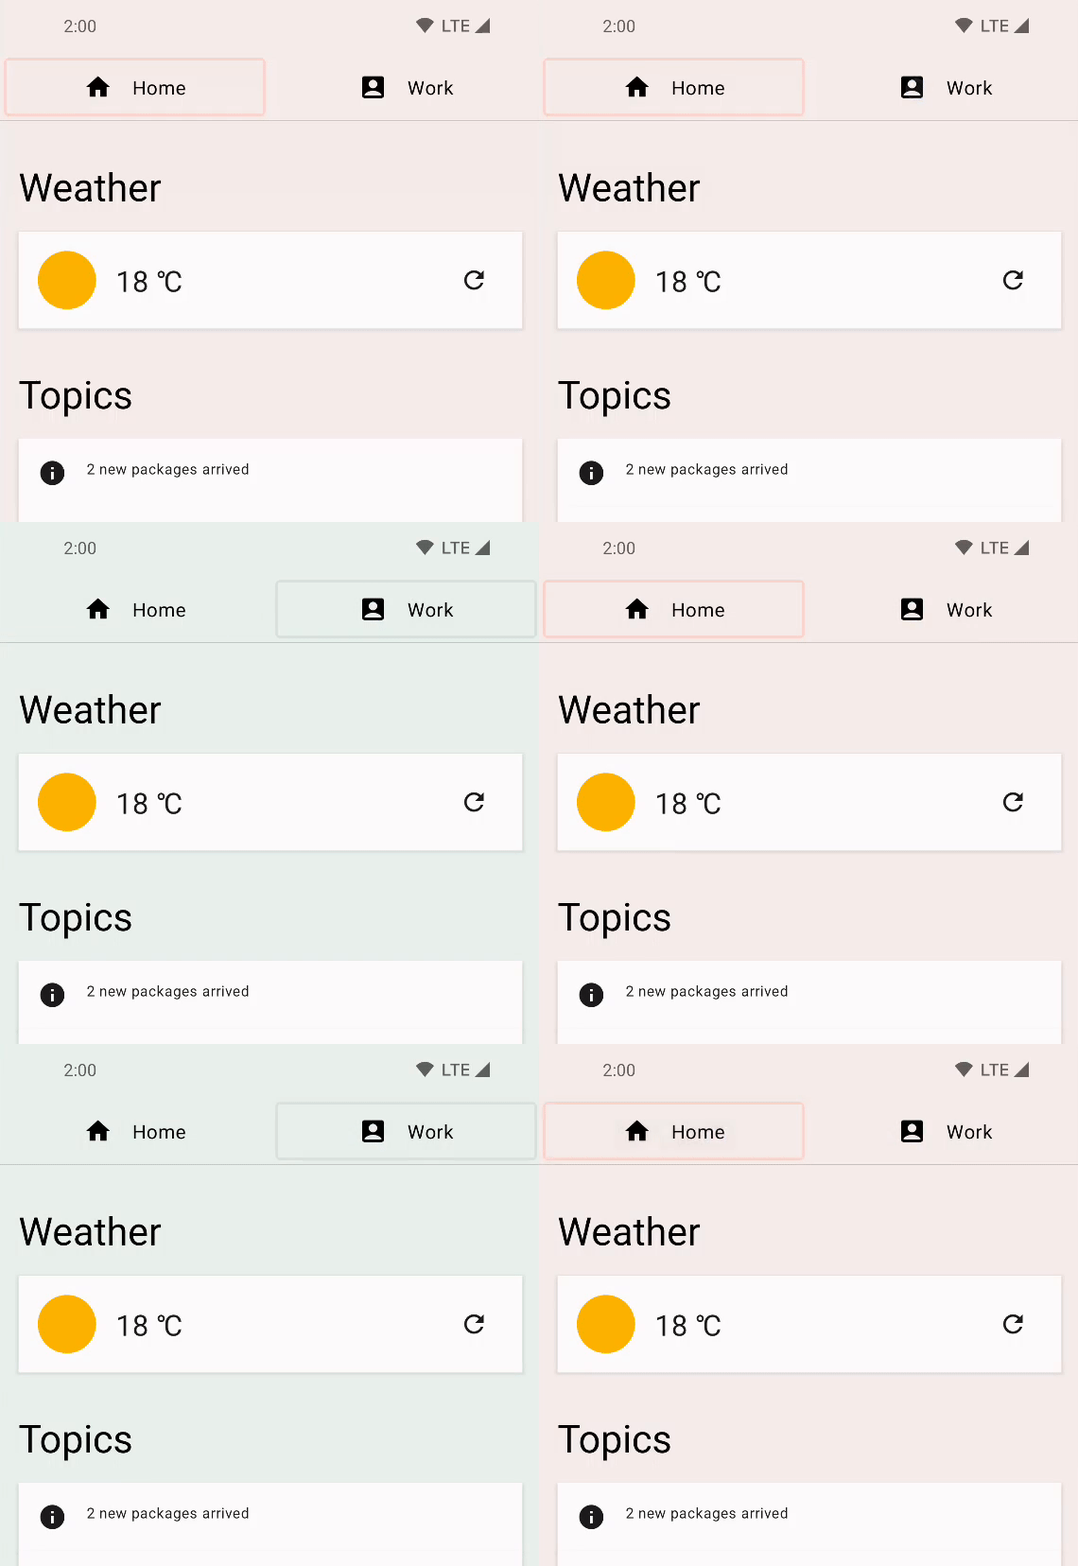
start の設定を実行し、上部のホームボタンと仕事用ボタンをクリックしてタブを切り替えます。タブのコンテンツ自体は切り替わりませんが、コンテンツの背景色が変わります。
|
|
TODO ツール ウィンドウで [TODO 1] をクリックし、実装方法を確認します。これは Home コンポーザブル内にあります。
val backgroundColor = if (tabPage == TabPage.Home) Seashell else GreenLight
ここで、tabPage は State オブジェクトを基盤とする TabPage です。この値に応じて、背景色が桃色と緑色の間で切り替わります。この値の変化をアニメーション化します。
このような単純な値の変化をアニメーション化するには、animate*AsState API を使用します。変化する値を、対応する animate*AsState コンポーザブルのバリアント(この場合は animateColorAsState)でラップすることで、アニメーション値を作成できます。戻り値は State<T> オブジェクトであるため、ローカルの委譲プロパティと by 宣言を使用して、通常の変数のように扱うことができます。
val backgroundColor by animateColorAsState(
        targetValue = if (tabPage == TabPage.Home) Seashell else GreenLight,
        label = "background color")
アプリを再実行し、タブを切り替えてみます。色の変化がアニメーション化されました。
4. 表示をアニメーション化する
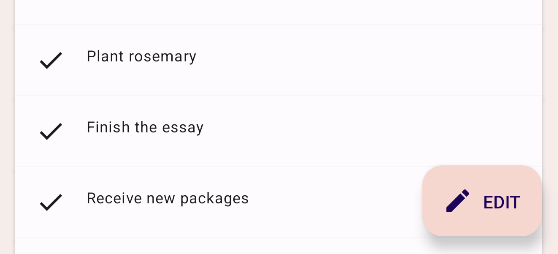
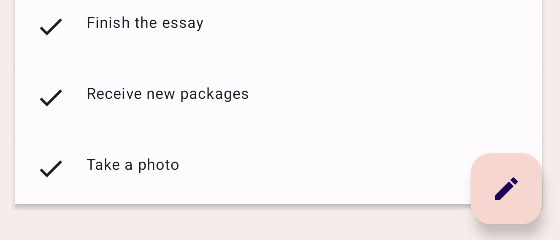
アプリのコンテンツをスクロールすると、フローティング アクション ボタン(FAB)がスクロールの方向に応じて拡大および縮小されます。
|
|
TODO 2-1 を見つけて、その仕組みを確認しましょう。これは HomeFloatingActionButton コンポーザブル内にあります。「EDIT」のテキストは、if ステートメントを使用して表示または非表示になります。
if (extended) {
    Text(
        text = stringResource(R.string.edit),
        modifier = Modifier
            .padding(start = 8.dp, top = 3.dp)
    )
}
この表示の変化をアニメーション化するには、if を AnimatedVisibility コンポーザブルに置き換えるだけです。
AnimatedVisibility(extended) {
    Text(
        text = stringResource(R.string.edit),
        modifier = Modifier
            .padding(start = 8.dp, top = 3.dp)
    )
}
アプリを実行して、FAB の拡大と縮小を確認します。
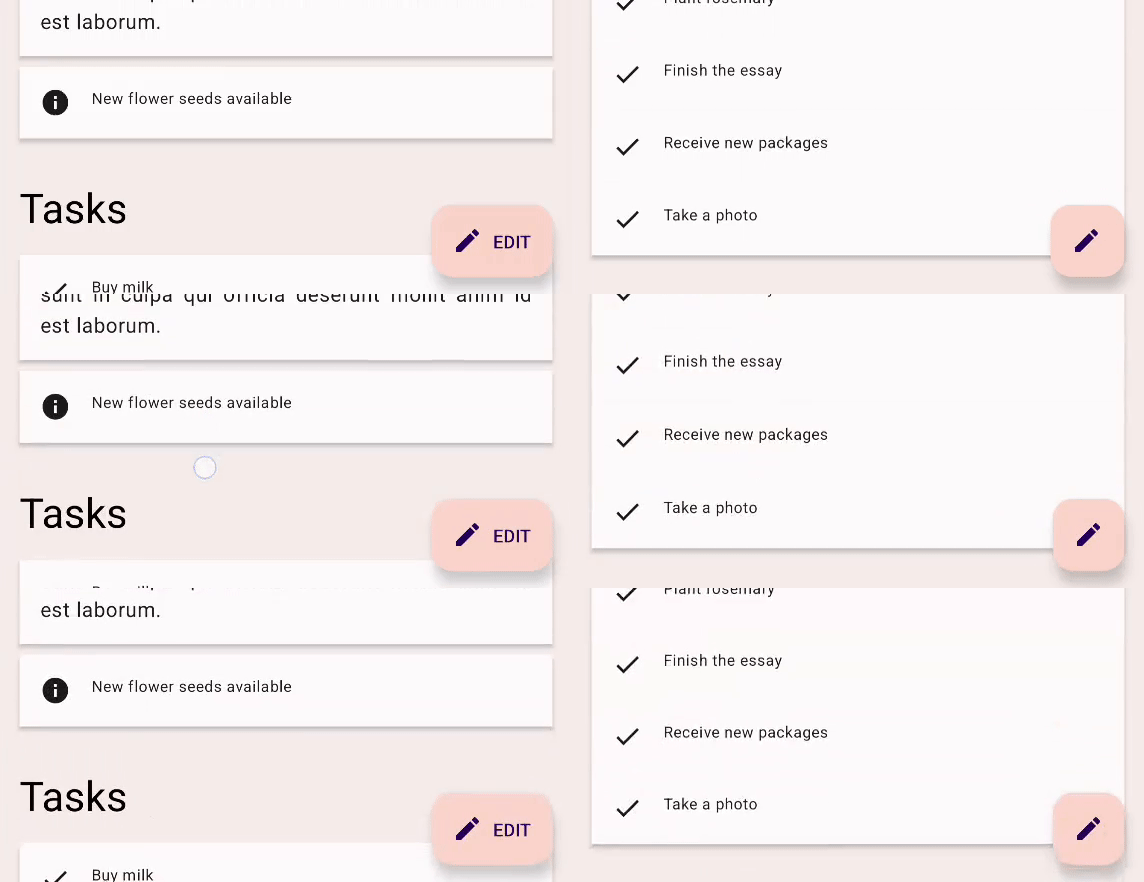
AnimatedVisibility は、指定された Boolean 値が変更されるたびにアニメーションを実行します。デフォルトでは、AnimatedVisibility は要素をフェードインして拡大することによって表示し、フェードアウトおよび縮小することによって非表示にします。この動作は、この例では FAB でうまく機能しますが、動作をカスタマイズすることもできます。
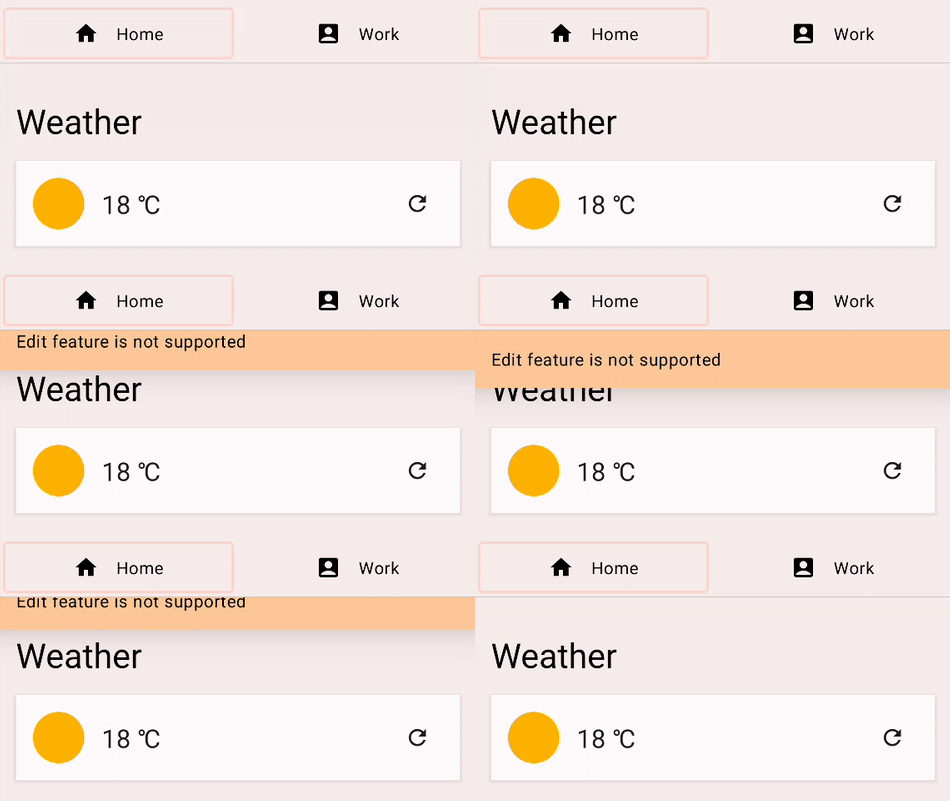
FAB をクリックすると、[Edit feature is not supported] というメッセージが表示されます。また、AnimatedVisibility を使用して表示と非表示をアニメーション化します。次に、メッセージを上からスライドイン、上にスライドアウトするようにこの動作をカスタマイズします。
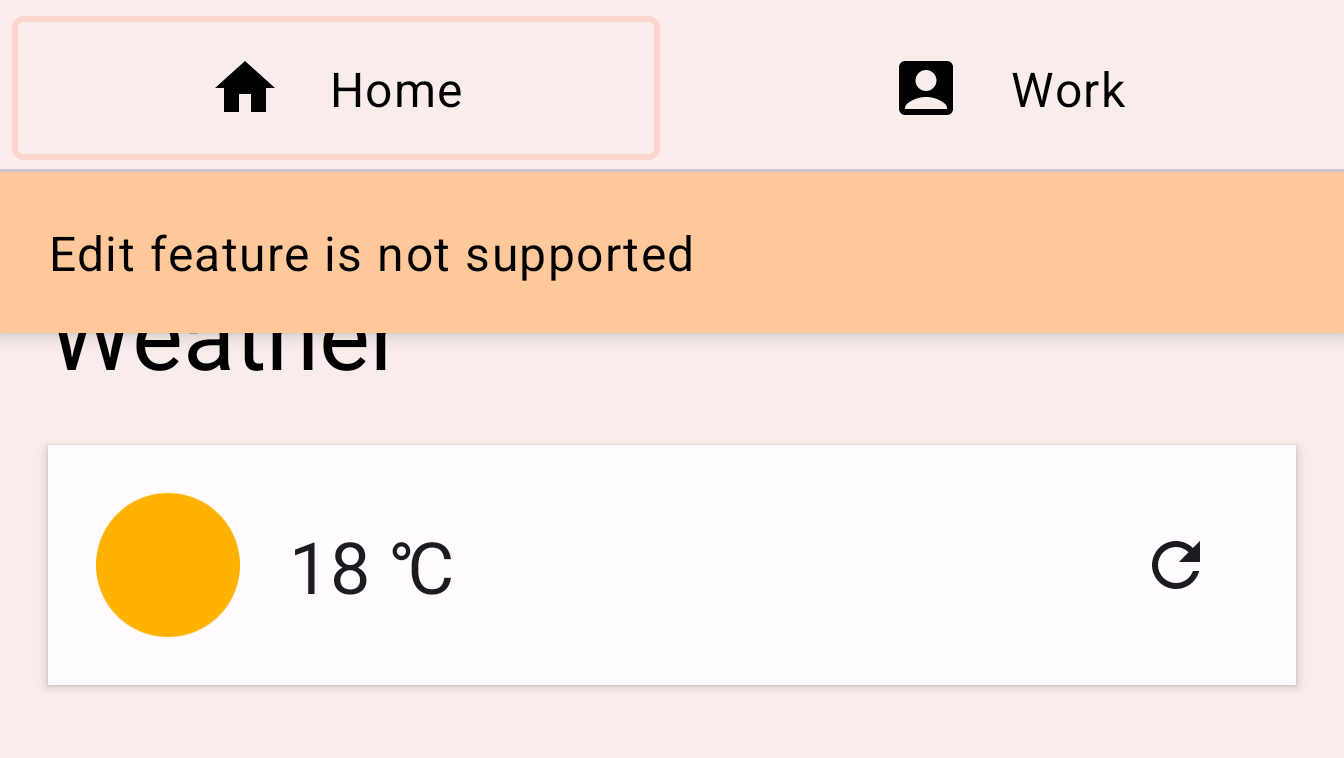
TODO 2-2 を見つけて、EditMessage コンポーザブル内のコードを確認します。
AnimatedVisibility(
    visible = shown
) {
    Surface(
        modifier = Modifier.fillMaxWidth(),
        color = MaterialTheme.colorScheme.secondary,
        elevation = 4.dp
    ) {
        Text(
            text = stringResource(R.string.edit_message),
            modifier = Modifier.padding(16.dp)
        )
    }
}
アニメーションをカスタマイズするには、AnimatedVisibility コンポーザブルに enter パラメータと exit パラメータを追加します。
enter パラメータは EnterTransition のインスタンスである必要があります。この例では、slideInVertically 関数を使用して、終了遷移の EnterTransition と slideOutVertically を作成します。次のようにコードを変更します。
AnimatedVisibility(
    visible = shown,
    enter = slideInVertically(),
    exit = slideOutVertically()
)
アプリを再度実行します。編集ボタンをクリックすると、アニメーションの表示は以前より良好にはなっても、正確には表示されない場合があります。これは、slideInVertically と slideOutVertically のデフォルトの動作ではアイテムの高さが半分であるためです。
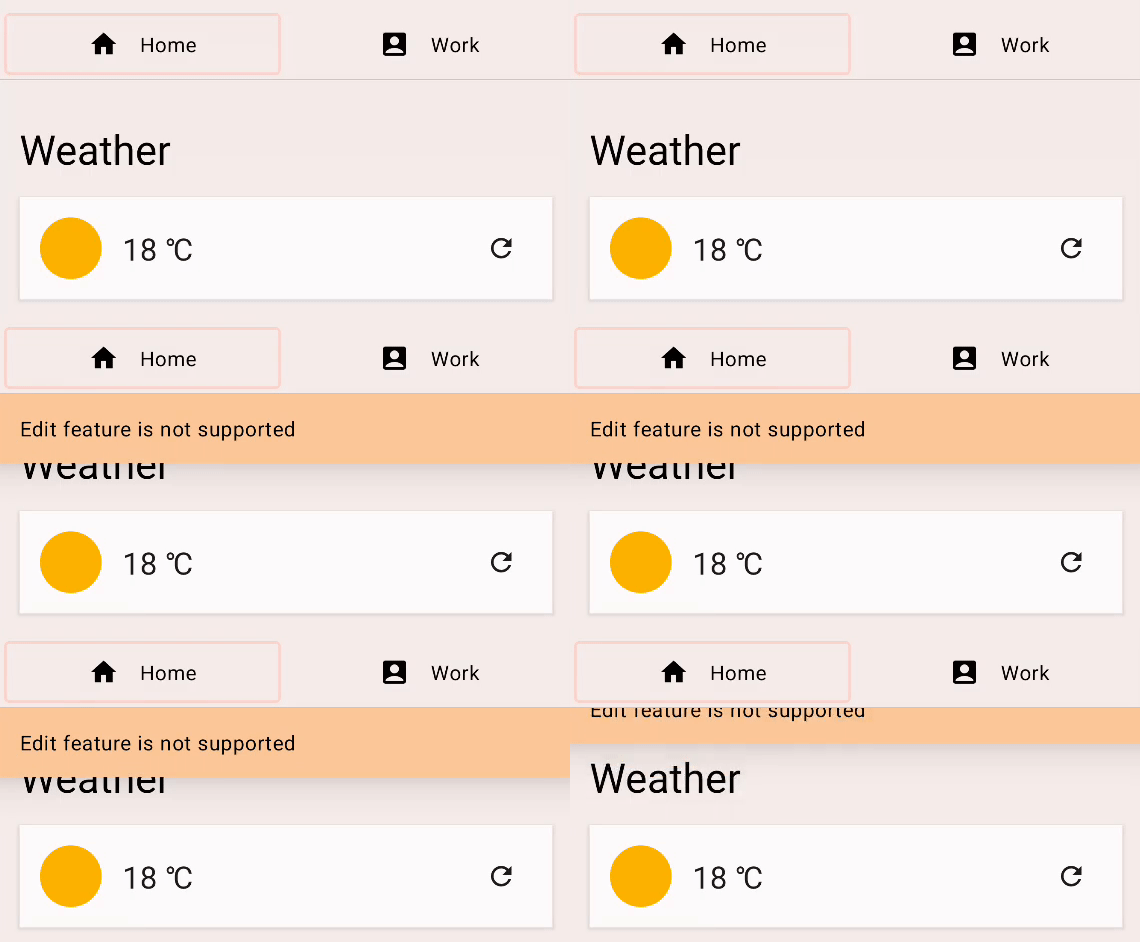
開始遷移の場合、initialOffsetY パラメータを設定することで、アイテムの高さ全体を使用して適切にアニメーション化されるようにデフォルトの動作を調整できます。initialOffsetY は初期位置を返すラムダにする必要があります。
このラムダは 1 つの引数、つまり要素の高さを受け取ります。画面の最上部の値は 0 となっているため、アイテムを画面の最上部からスライドインさせるには、負の値を返します。アニメーションの開始位置を -height から 0(最後の静止位置)にし、上から動き始めるアニメーションになるようにします。
slideInVertically を使用する場合、スライドイン後のターゲット オフセットは常に 0(ピクセル)です。initialOffsetY は、絶対値として指定するか、ラムダ関数による要素の高さに対するパーセンテージとして指定できます。
同様に、slideOutVertically では初期オフセットが 0 に設定されているため、targetOffsetY のみを指定する必要があります。
AnimatedVisibility(
    visible = shown,
    enter = slideInVertically(
        // Enters by sliding down from offset -fullHeight to 0.
        initialOffsetY = { fullHeight -> -fullHeight }
    ),
    exit = slideOutVertically(
        // Exits by sliding up from offset 0 to -fullHeight.
        targetOffsetY = { fullHeight -> -fullHeight }
    )
) {
    Surface(
        modifier = Modifier.fillMaxWidth(),
        color = MaterialTheme.colorScheme.secondary,
        elevation = 4.dp
    ) {
        Text(
            text = stringResource(R.string.edit_message),
            modifier = Modifier.padding(16.dp)
        )
    }
}
アプリを再度実行すると、アニメーションが期待していた内容に近づいたことがわかります。
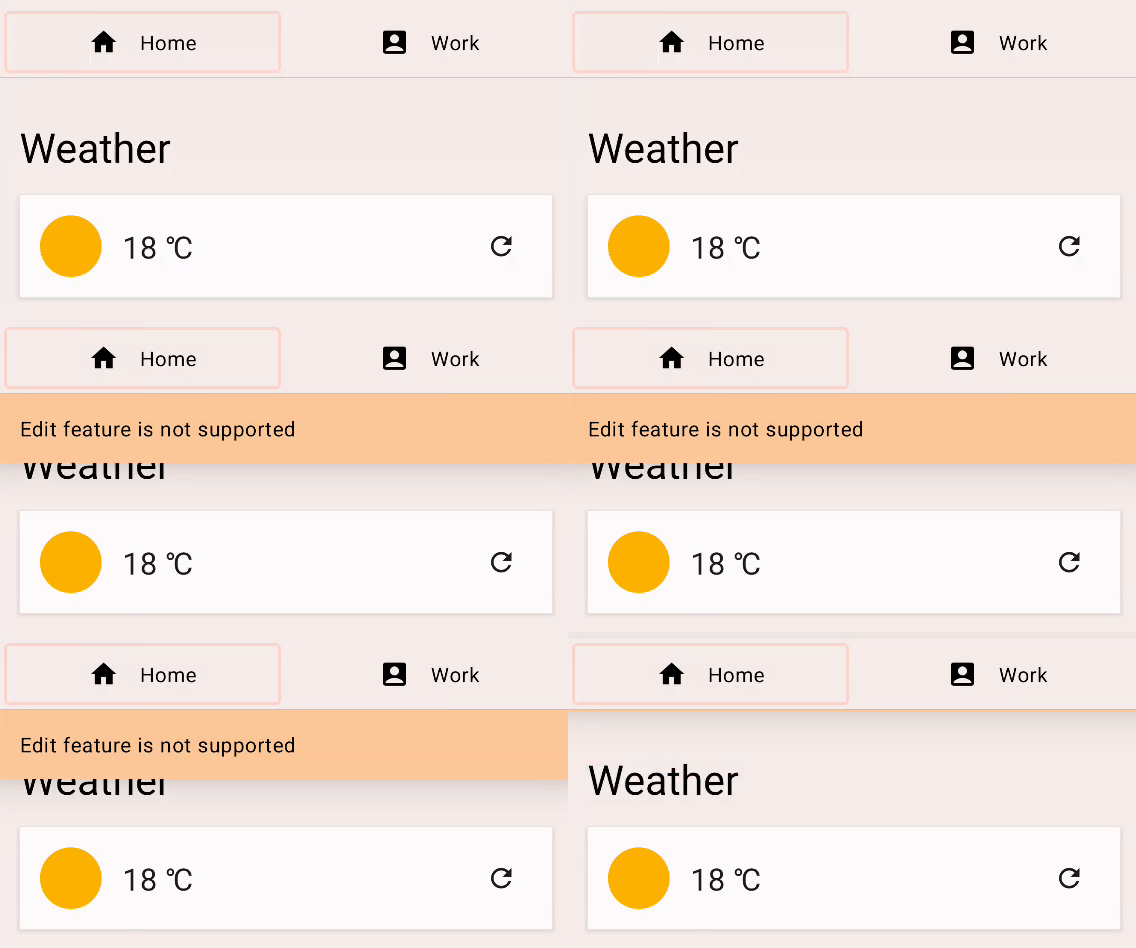
animationSpec パラメータを使用すると、アニメーションをさらにカスタマイズできます。animationSpec は、EnterTransition や ExitTransition など、多くのアニメーション API で一般的なパラメータです。さまざまな AnimationSpec タイプのいずれかを渡して、時間の経過にともなうアニメーション値の変化を指定できます。この例では、シンプルな期間ベースの AnimationSpec を使用します。これは tween 関数を使用して作成できます。持続時間は 150 ミリ秒、イージングは LinearOutSlowInEasing です。終了アニメーションでは、animationSpec パラメータに同じ tween 関数を使用しますが、持続時間は 250 ms、イージングは FastOutLinearInEasing にします。
変更後のコードは次のようになります。
AnimatedVisibility(
    visible = shown,
    enter = slideInVertically(
        // Enters by sliding down from offset -fullHeight to 0.
        initialOffsetY = { fullHeight -> -fullHeight },
        animationSpec = tween(durationMillis = 150, easing = LinearOutSlowInEasing)
    ),
    exit = slideOutVertically(
        // Exits by sliding up from offset 0 to -fullHeight.
        targetOffsetY = { fullHeight -> -fullHeight },
        animationSpec = tween(durationMillis = 250, easing = FastOutLinearInEasing)
    )
) {
    Surface(
        modifier = Modifier.fillMaxWidth(),
        color = MaterialTheme.colorScheme.secondary,
        elevation = 4.dp
    ) {
        Text(
            text = stringResource(R.string.edit_message),
            modifier = Modifier.padding(16.dp)
        )
    }
}
アプリを実行し、もう一度 FAB をクリックします。メッセージがさまざまなイージング関数と持続時間を使用して上下からスライドするようになりました。
5. コンテンツ サイズの変更をアニメーション化する
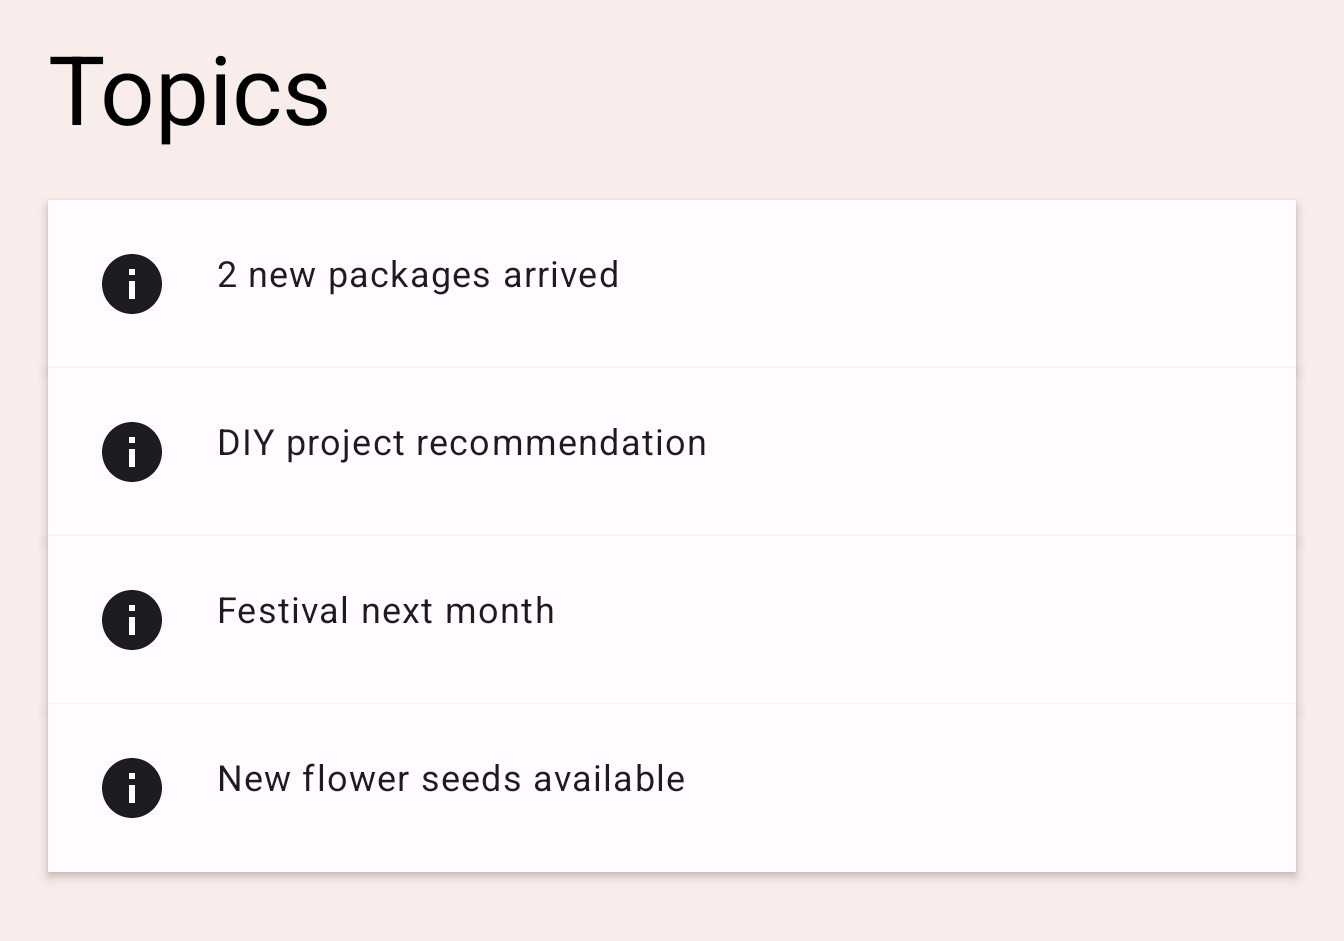
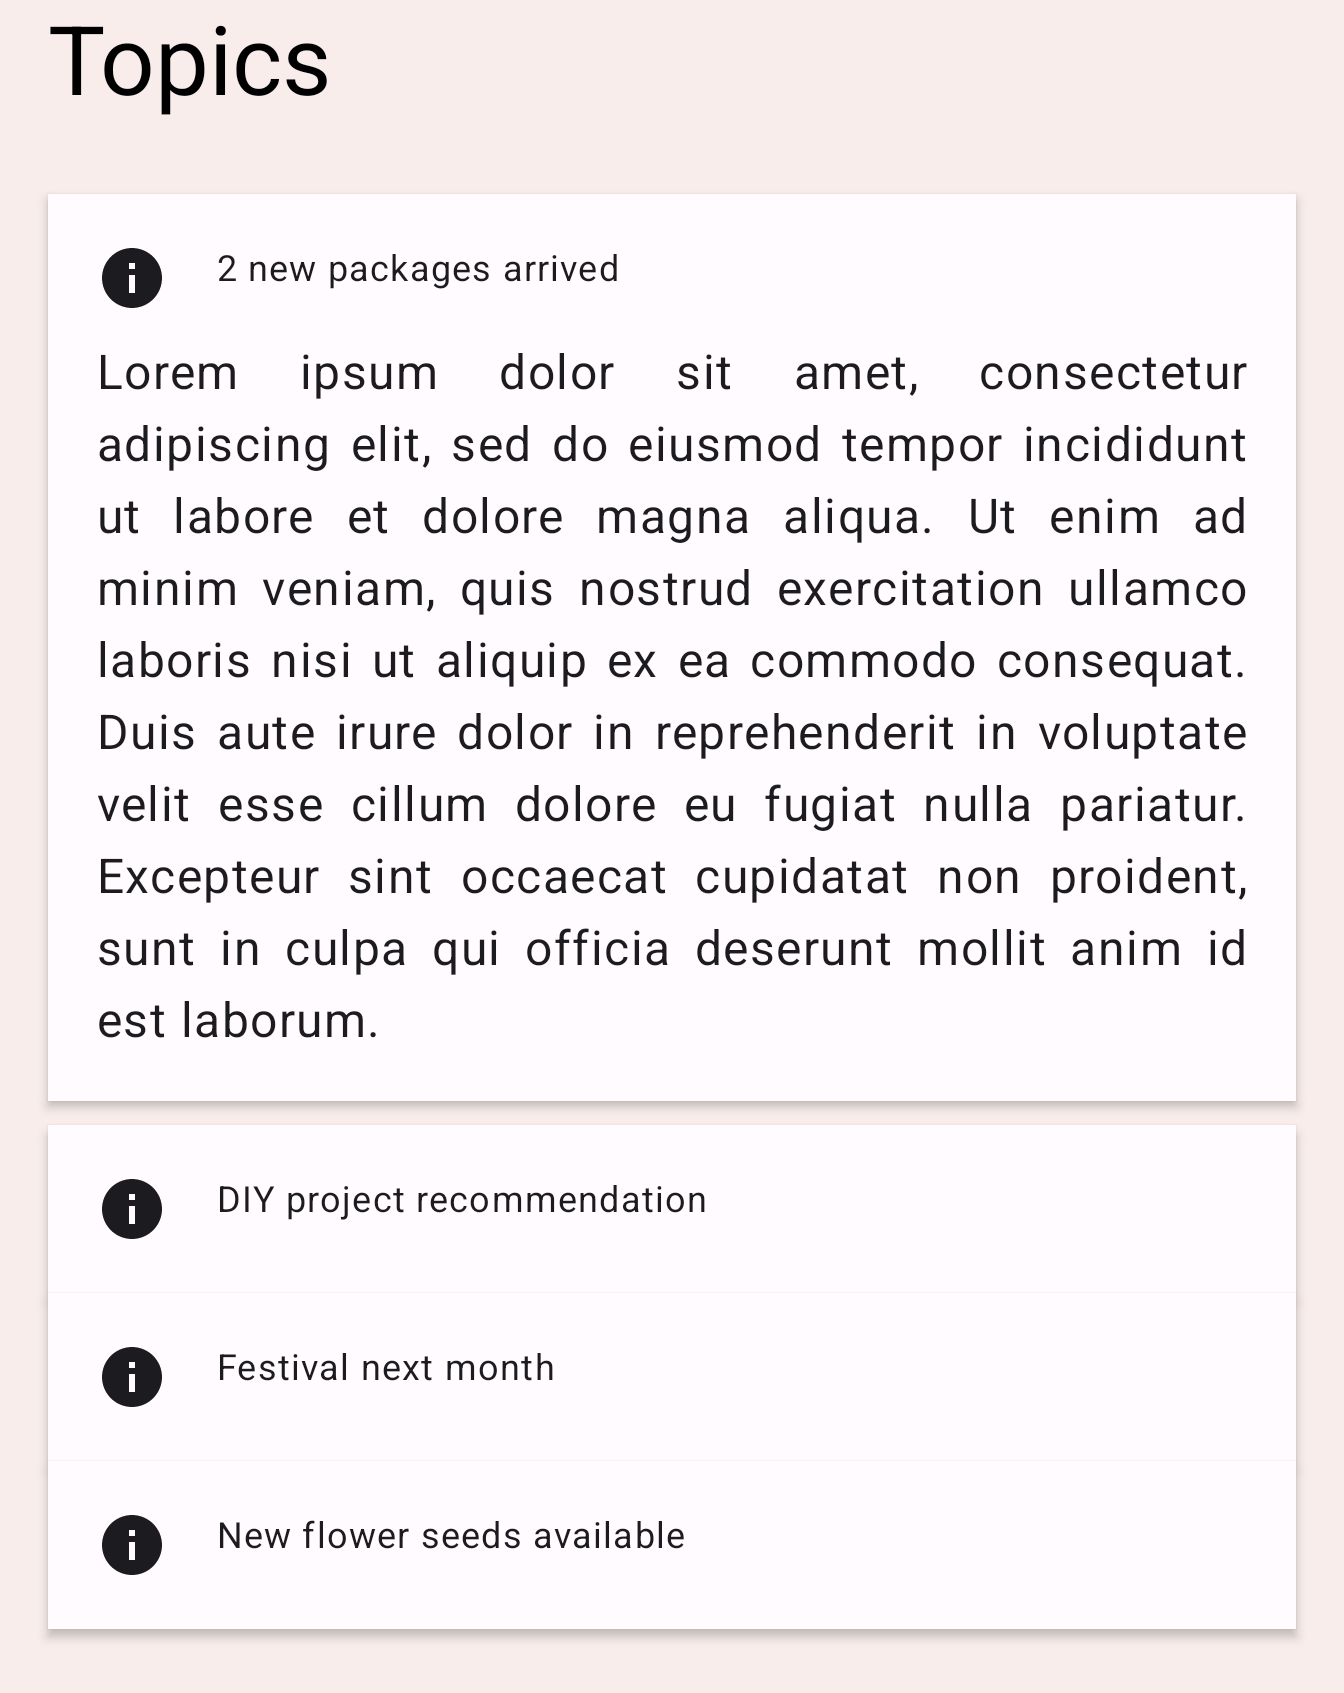
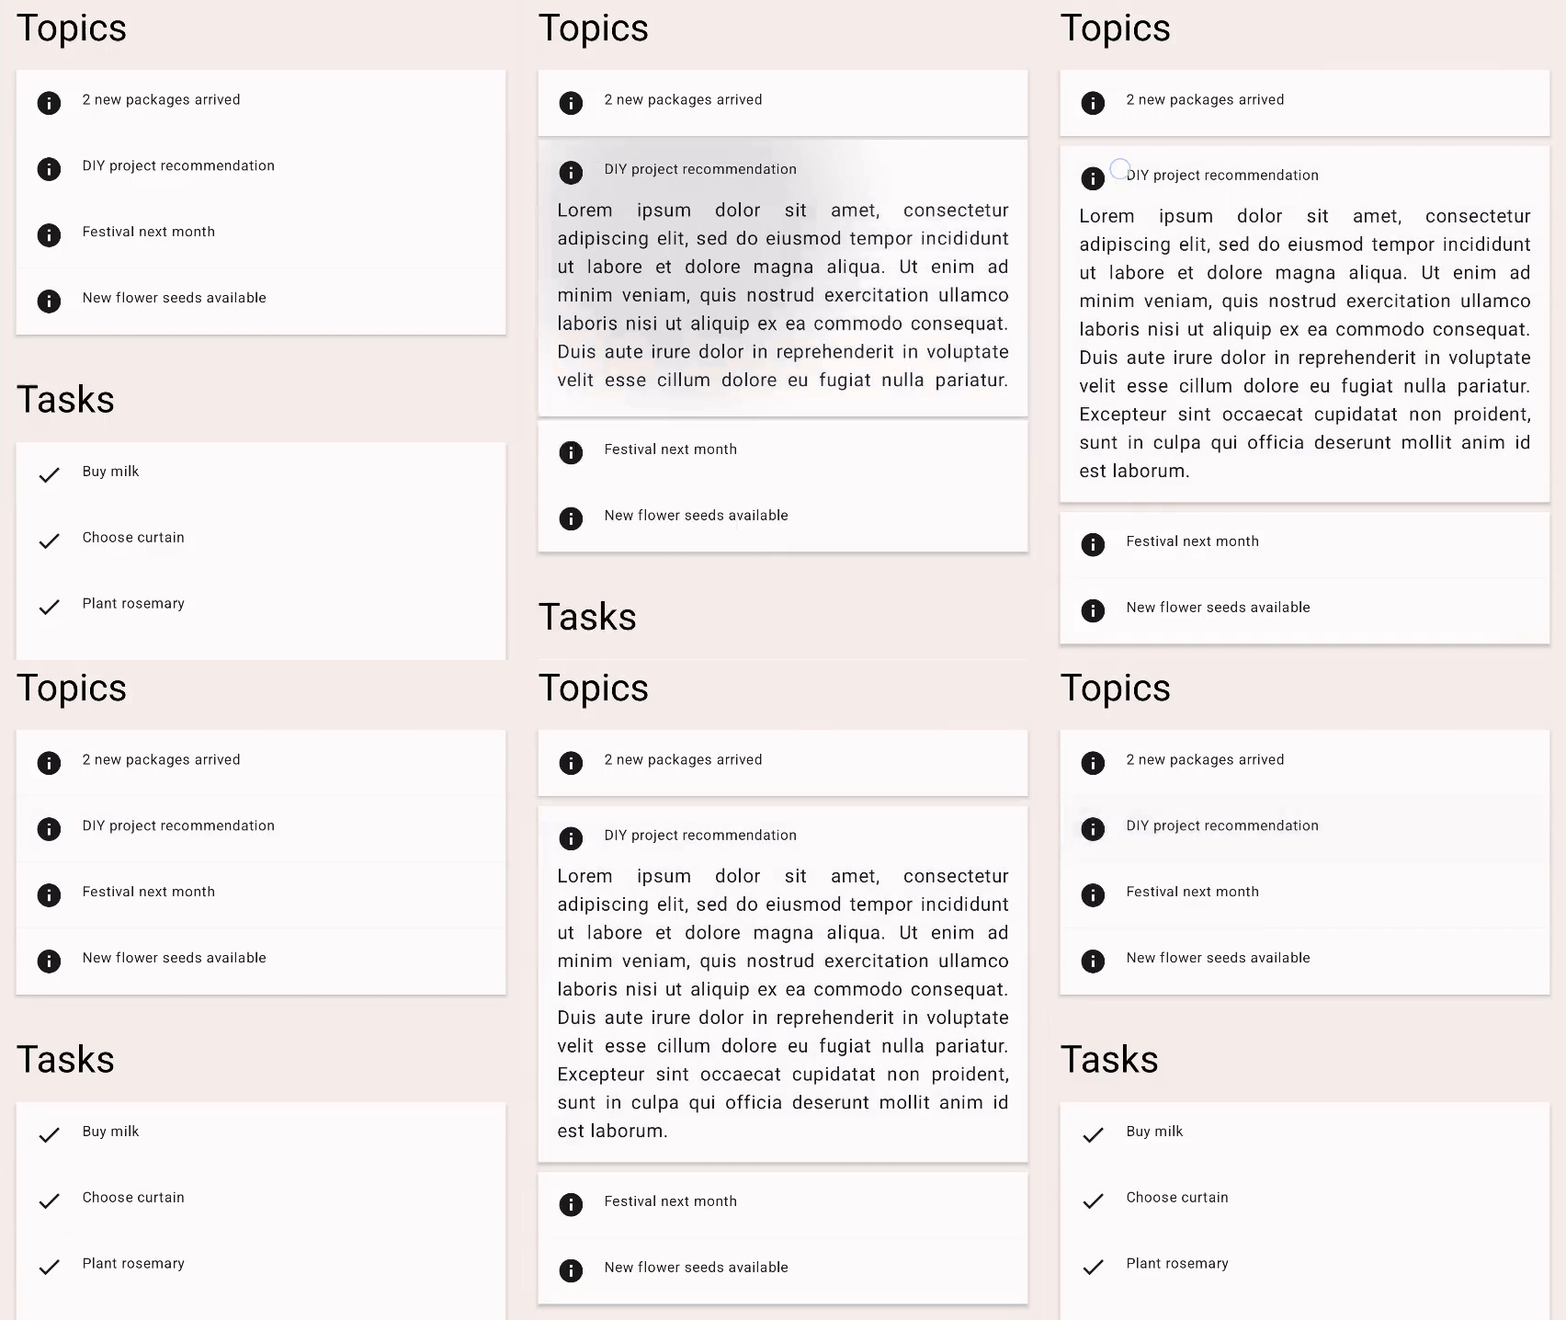
アプリでは、コンテンツに複数のトピックが表示されます。そのいずれかをクリックすると、そのトピックの本文テキストが表示されます。テキストを表示するカードは、本文を表示または非表示にするとそれに応じて拡大または縮小されます。
|
|
TopicRow コンポーザブルの TODO 3 のコードを確認します。
Column(
    modifier = Modifier
        .fillMaxWidth()
        .padding(16.dp)
) {
    // ... the title and the body
}
この Column コンポーザブルのサイズは、コンテンツの変更に応じて変わります。サイズの変化をアニメーション化するには、animateContentSize 修飾子を追加します。
Column(
    modifier = Modifier
        .fillMaxWidth()
        .padding(16.dp)
        .animateContentSize()
) {
    // ... the title and the body
}
アプリを実行し、トピックのいずれかをクリックします。アニメーションにより拡大 / 縮小することがわかります。
animateContentSize も、カスタムの animationSpec でカスタマイズできます。アニメーションのタイプを spring から tween などに変更するオプションを提供できます。詳しくは、アニメーションのカスタマイズに関するドキュメントをご覧ください。
6. 複数の値をアニメーション化する
基本的なアニメーション API を学んだところで、より複雑なアニメーションを作成できる Transition API を見てみましょう。Transition API を使用すると、Transition のすべてのアニメーションが終了したタイミングをトラッキングできます。これは、前に説明した個々の animate*AsState API を使用する場合にはできないことです。また、Transition API を使用すると、状態遷移時に異なる transitionSpec を定義できます。使用方法を見ていきましょう。
この例では、タブ インジケーターをカスタマイズします。これは、現在選択されているタブに表示される長方形です。
|
|
HomeTabIndicator コンポーザブルで TODO 4 を探し、タブ インジケーターの実装を確認します。
val indicatorLeft = tabPositions[tabPage.ordinal].left
val indicatorRight = tabPositions[tabPage.ordinal].right
val color = if (tabPage == TabPage.Home) PaleDogwood else Green
ここで、indicatorLeft はタブ行のインジケーターの左端の水平位置です。indicatorRight はインジケーターの右端の水平位置です。色も桃色と緑色の間で変わります。
これらの複数の値を同時にアニメーション化するには、Transition を使用します。Transition は、updateTransition 関数を使用して作成できます。現在選択されているタブのインデックスを targetState パラメータとして渡します。
各アニメーション値は、Transition の animate* 拡張関数で宣言できます。この例では、animateDp と animateColor を使用します。それらはラムダブロックを使用します。また、各状態の目標値を指定できます。目標値はあらかじめわかっているため、次のように値をラップできます。なお、animate* 関数は State オブジェクトを返すため、ここでは by 宣言を使用して、ローカル委任プロパティにできます。
val transition = updateTransition(tabPage, label = "Tab indicator")
val indicatorLeft by transition.animateDp(label = "Indicator left") { page ->
   tabPositions[page.ordinal].left
}
val indicatorRight by transition.animateDp(label = "Indicator right") { page ->
   tabPositions[page.ordinal].right
}
val color by transition.animateColor(label = "Border color") { page ->
   if (page == TabPage.Home) PaleDogwood else Green
}
アプリを実行すると、タブ切り替えがより面白いものになっています。タブをクリックすると tabPage 状態の値が変更されるため、transition に関連付けられたすべてのアニメーション値が、ターゲット状態に対して指定された値へのアニメーションを開始します。
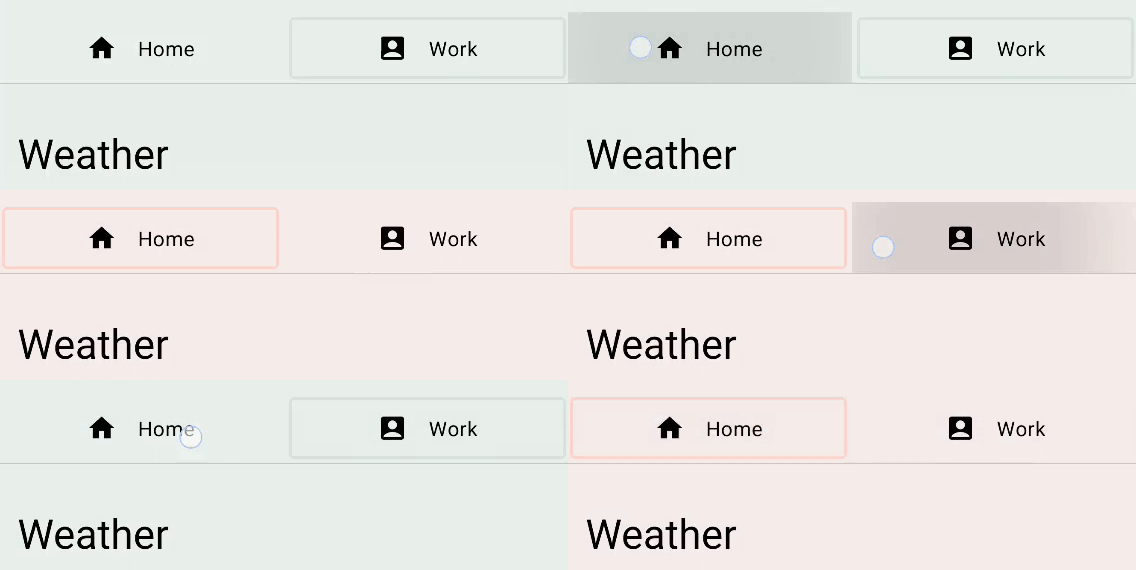
さらに、transitionSpec パラメータを指定して、アニメーションの動作をカスタマイズできます。たとえば、目的地に近いエッジをもう一方のエッジよりも速く動かすことで、インジケーターの弾力性効果を実現できます。transitionSpec ラムダの isTransitioningTo 中置関数を使用して、状態変化の方向を決定できます。
val transition = updateTransition(
    tabPage,
    label = "Tab indicator"
)
val indicatorLeft by transition.animateDp(
    transitionSpec = {
        if (TabPage.Home isTransitioningTo TabPage.Work) {
            // Indicator moves to the right.
            // The left edge moves slower than the right edge.
            spring(stiffness = Spring.StiffnessVeryLow)
        } else {
            // Indicator moves to the left.
            // The left edge moves faster than the right edge.
            spring(stiffness = Spring.StiffnessMedium)
        }
    },
    label = "Indicator left"
) { page ->
    tabPositions[page.ordinal].left
}
val indicatorRight by transition.animateDp(
    transitionSpec = {
        if (TabPage.Home isTransitioningTo TabPage.Work) {
            // Indicator moves to the right
            // The right edge moves faster than the left edge.
            spring(stiffness = Spring.StiffnessMedium)
        } else {
            // Indicator moves to the left.
            // The right edge moves slower than the left edge.
            spring(stiffness = Spring.StiffnessVeryLow)
        }
    },
    label = "Indicator right"
) { page ->
    tabPositions[page.ordinal].right
}
val color by transition.animateColor(
    label = "Border color"
) { page ->
    if (page == TabPage.Home) PaleDogwood else Green
}
アプリを再度実行し、タブを切り替えてみます。

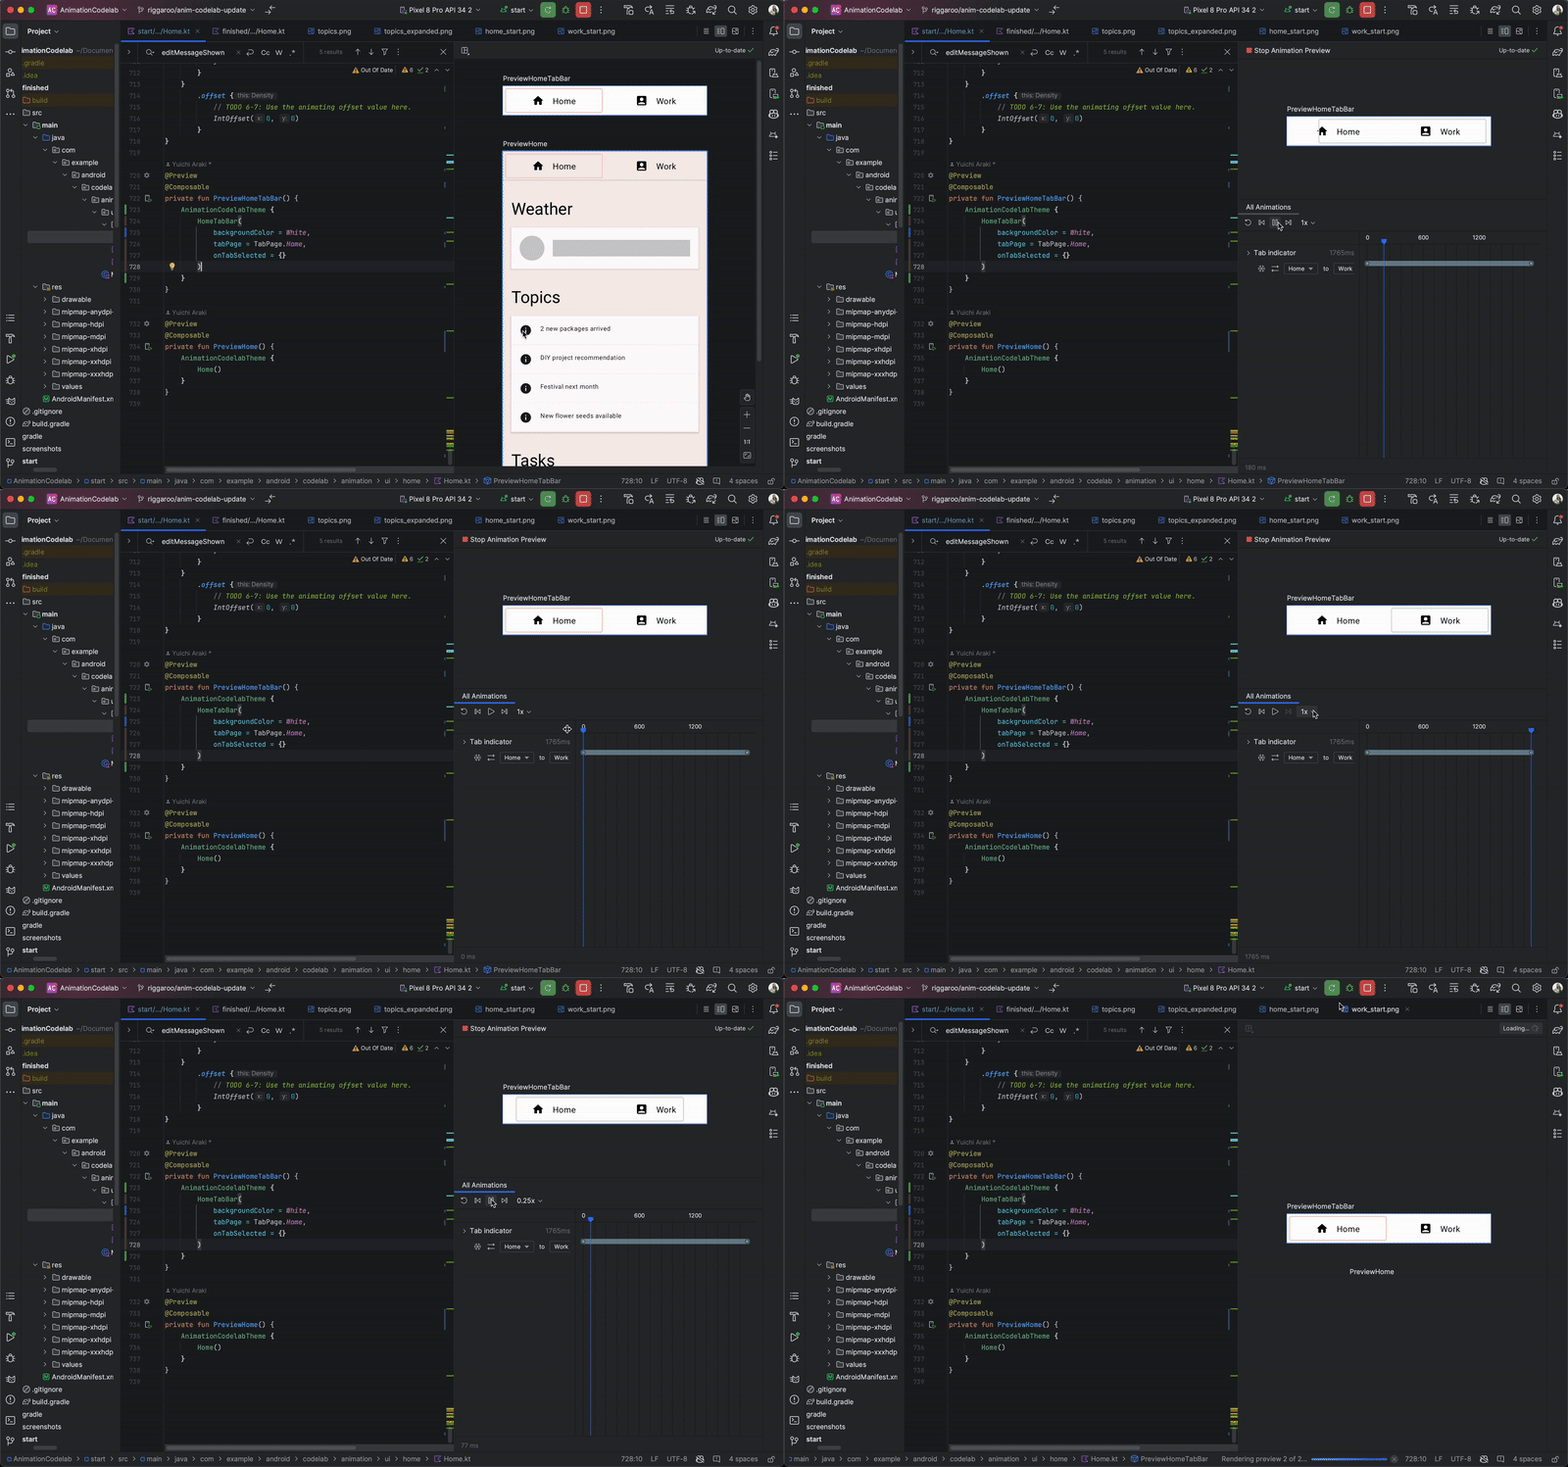
Android Studio は、Compose プレビューでの Transition の検査をサポートしています。アニメーション プレビューを使用するには、プレビューのコンポーザブル(![]() アイコン)の右上隅にある [Start Animation Preview] アイコンをクリックして、インタラクティブ モードを開始します。
アイコン)の右上隅にある [Start Animation Preview] アイコンをクリックして、インタラクティブ モードを開始します。PreviewHomeTabBar コンポーザブルのアイコンをクリックします。新しい [Animations] ペインが開きます。
[Play] アイコンボタンをクリックすると、アニメーションを実行できます。シークバーをドラッグすると、各アニメーション フレームを表示できます。アニメーション値を詳細に表せるように、updateTransition メソッドと animate* メソッドで label パラメータを指定できます。
7. アニメーションを繰り返す
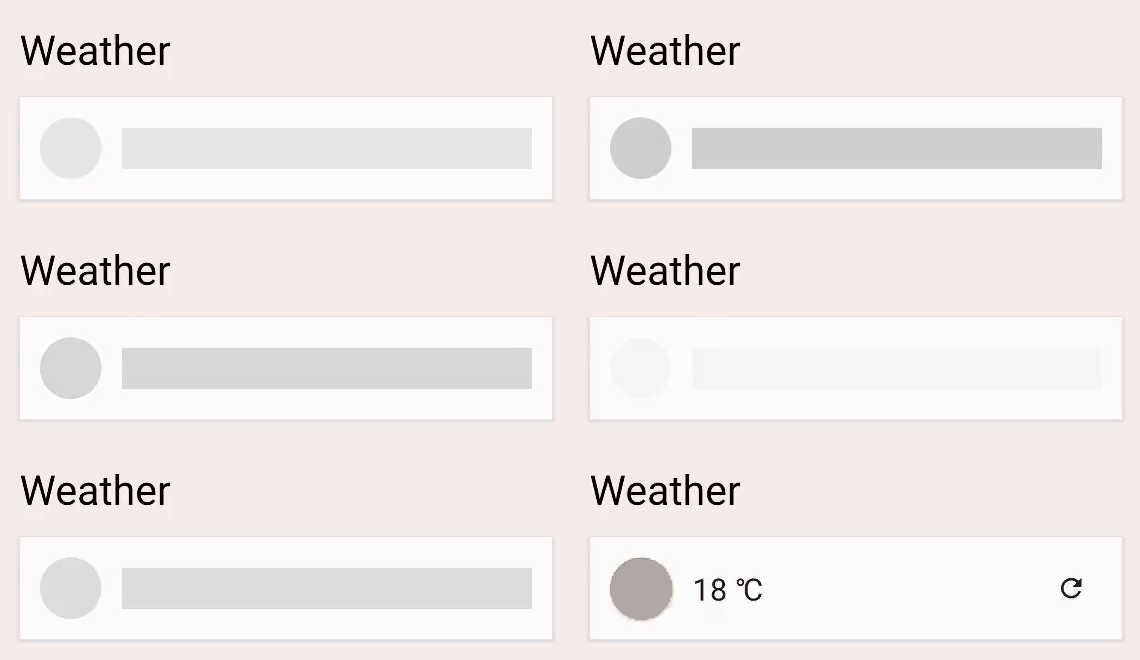
現在の温度の横にある更新アイコンをクリックします。アプリは(見かけ上)最新の天気情報の読み込みを開始します。読み込みが完了するまで、読み込みインジケーター(灰色の円と棒)が表示されます。処理が進行中であることを明確にするために、このインジケーターのアルファ値をアニメーション化します。
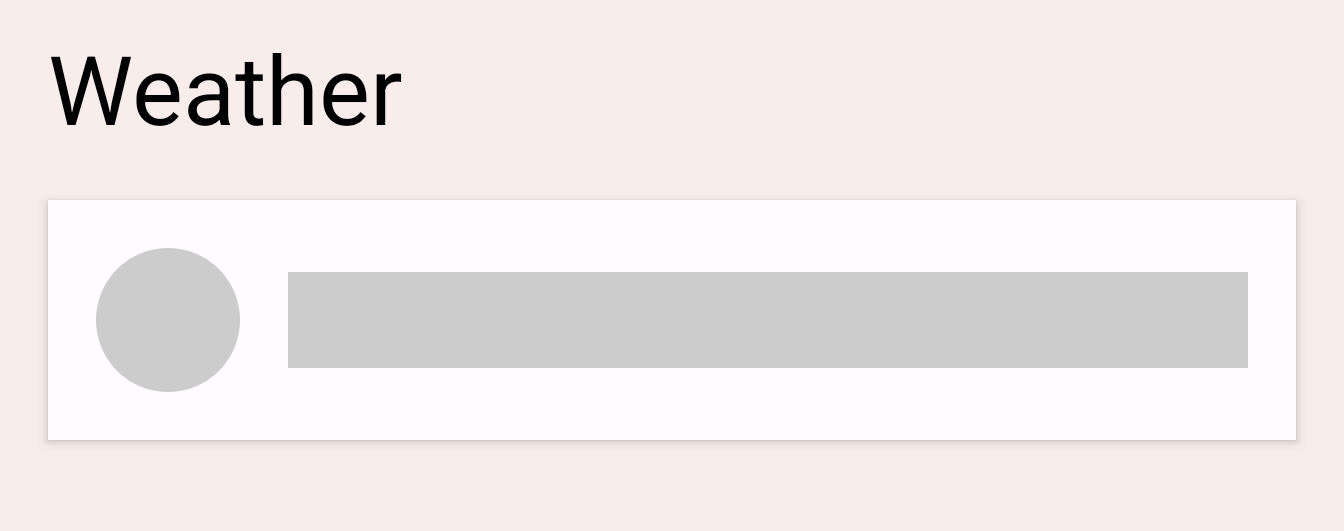
LoadingRow コンポーザブルで TODO 5 を見つけます。
val alpha = 1f
この値を 0f と 1f の間で繰り返しアニメーション表示します。このために InfiniteTransition を使用できます。この API は、前のセクションの Transition API に似ています。どちらも複数の値をアニメーション化しますが、Transition は状態変化に基づいて値をアニメーション化するのに対し、InfiniteTransition は値を無期限にアニメーション化します。
InfiniteTransition を作成するには、rememberInfiniteTransition 関数を使用します。その後、アニメーション化する各値の変化を、InfiniteTransition の animate* 拡張関数のいずれかで宣言できます。この場合、アルファ値をアニメーション化するため、animatedFloat を使用します。initialValue パラメータは 0f、targetValue パラメータは 1f である必要があります。このアニメーションには AnimationSpec も指定できますが、この API は InfiniteRepeatableSpec のみを使用します。infiniteRepeatable 関数を使用して作成します。この AnimationSpec は、持続時間ベースの AnimationSpec をラップし、繰り返せるようにします。たとえば、結果のコードは以下のようになります。
val infiniteTransition = rememberInfiniteTransition()
val alpha by infiniteTransition.animateFloat(
    initialValue = 0f,
    targetValue = 1f,
    animationSpec = infiniteRepeatable(
        animation = keyframes {
            durationMillis = 1000
            0.7f at 500
        },
        repeatMode = RepeatMode.Reverse
    ),
    label = "alpha"
)
デフォルトの repeatMode は RepeatMode.Restart です。これは initialValue から targetValue に推移し、initialValue から再度始まります。repeatMode を RepeatMode.Reverse に設定すると、アニメーションは initialValue から targetValue に進み、さらに targetValue から initialValue に進みます。アニメーションは 0 から 1 になり、その後 1 から 0 に進みます。
keyFrames アニメーションは別の種類の animationSpec で(他には tween や spring があります)、ミリ秒単位の複数の時点で進行中の値を変化させることができます。最初に durationMillis を 1,000 ミリ秒に設定しました。次に、アニメーションでキーフレームを定義できます。たとえば、アニメーションの 500 ms で、アルファ値を 0.7f にします。これにより、アニメーションの進行が変化します。アニメーションの 500 ミリ秒の間に 0 から 0.7 に、アニメーションの 500 ミリ秒から 1,000 ミリ秒への間に 0.7 から 1.0 に迅速に進行し、終盤は遅くなります。
複数のキーフレームが必要な場合は、次のように複数の keyFrames を定義できます。
animation = keyframes {
   durationMillis = 1000
   0.7f at 500
   0.9f at 800
}
アプリを実行し、更新ボタンをクリックします。読み込みインジケーターがアニメーション表示されます。
8. ジェスチャー アニメーション
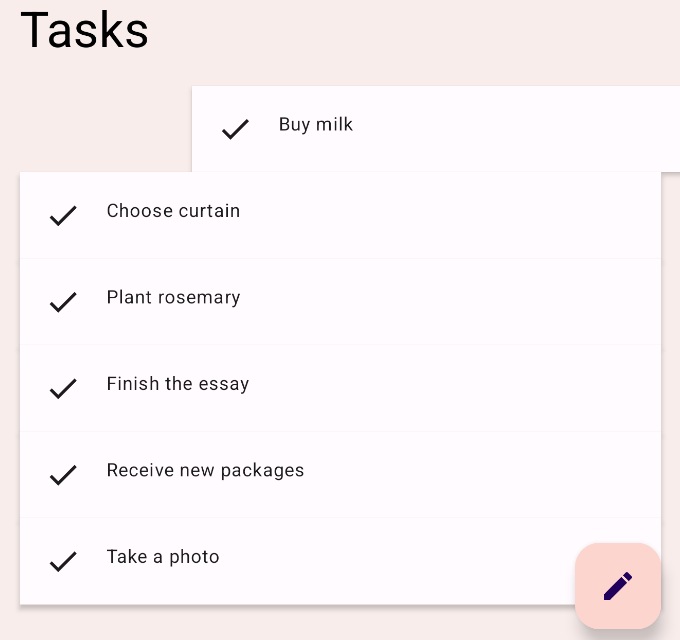
この最後のセクションでは、タップ入力に基づいてアニメーションを実行する方法について説明します。swipeToDismiss 修飾子を最初から作成します。
swipeToDismiss 修飾子で TODO 6-1 を見つけます。ここでは、タップで要素をスワイプできるようにする修飾子を作成しようとしています。要素が画面の端に達すると、onDismissed コールバックが呼び出され、要素を削除できます。
swipeToDismiss 修飾子を作成するには、いくつかの重要なコンセプトを理解する必要があります。まず、ユーザーが画面上に指を置くと、x 座標と y 座標を持つタッチイベントが生成されます。次に、指を左右に動かすと、その動きに基づいて x と y が移動します。ユーザーが触れているアイテムは指で動かす必要があるため、タッチイベントの位置と速度に基づいてアイテムの位置を更新します。
Compose の操作のドキュメントに記載されているコンセプトのいくつかを使用できます。pointerInput 修飾子を使用すると、受信ポインタのタッチイベントへの低レベルアクセスを取得し、同じポインタを使用してユーザーがドラッグする速度をトラッキングできます。アイテムが境界線を超えて閉じる前に放すと、元の位置に戻ります。
このシナリオでは、考慮すべき点がいくつかあります。まず、進行中のアニメーションがタッチイベントによって中断される可能性があります。次に、アニメーション値は唯一の信頼できる情報源ではない場合があります。つまり、アニメーション値をタッチイベントから取得した値と同期させる必要があるかもしれません。
Animatable は、ここまで説明してきた中で最も低いレベルの API です。この API には、操作のシナリオで役立つ機能がいくつか用意されています。たとえば、操作から取り込んだ新しい値に即座にスナップし、新しいタッチイベントがトリガーされたときに進行中のアニメーションを停止できます。Animatable のインスタンスを作成し、それを使用してスワイプ可能な要素の水平オフセットを表します。Animatable は androidx.compose.animation.Animatable ではなく androidx.compose.animation.core.Animatable からインポートしてください。
val offsetX = remember { Animatable(0f) } // Add this line
// used to receive user touch events
pointerInput {
    // Used to calculate a settling position of a fling animation.
    val decay = splineBasedDecay<Float>(this)
    // Wrap in a coroutine scope to use suspend functions for touch events and animation.
    coroutineScope {
        while (true) {
            // ...
TODO 6-2 では、タッチダウン イベントを受け取ったところです。現在実行中のアニメーションは中断する必要があります。これを行うには、Animatable で stop を呼び出します。アニメーションが実行されていない場合、この呼び出しは無視されます。VelocityTracker は、ユーザーが左から右に移動する速度を計算するために使用されます。awaitPointerEventScope は、ユーザー入力イベントを待機して応答できる suspend 関数です。
// Wait for a touch down event. Track the pointerId based on the touch
val pointerId = awaitPointerEventScope { awaitFirstDown().id }
offsetX.stop() // Add this line to cancel any on-going animations
// Prepare for drag events and record velocity of a fling gesture
val velocityTracker = VelocityTracker()
// Wait for drag events.
awaitPointerEventScope {
TODO 6-3 では、ドラッグ イベントを継続的に受け取っています。タップイベントの位置をアニメーション値に同期させる必要があります。そのためには、Animatable で snapTo を使用します。awaitPointerEventScope と horizontalDrag は制限付きコルーチン スコープなので、snapTo を別の launch ブロック内で呼び出す必要があります。つまり、awaitPointerEvents の suspend のみを実行できます。snapTo はポインタ イベントではありません。
horizontalDrag(pointerId) { change ->
    // Add these 4 lines
    // Get the drag amount change to offset the item with
    val horizontalDragOffset = offsetX.value + change.positionChange().x
    // Need to call this in a launch block in order to run it separately outside of the awaitPointerEventScope
    launch {
        // Instantly set the Animable to the dragOffset to ensure its moving
        // as the user's finger moves
        offsetX.snapTo(horizontalDragOffset)
    }
    // Record the velocity of the drag.
    velocityTracker.addPosition(change.uptimeMillis, change.position)

    // Consume the gesture event, not passed to external
    if (change.positionChange() != Offset.Zero) change.consume()

}
TODO 6-4 では、要素が放されフリングされています。要素を元の位置にスライドして戻すか、またはスライドして離しコールバックを呼び出すかを決めるには、フリングの最終的な停止位置を計算する必要があります。前に作成した decay オブジェクトを使用して、targetOffsetX を計算します。
// Dragging finished. Calculate the velocity of the fling.
val velocity = velocityTracker.calculateVelocity().x
// Add this line to calculate where it would end up with
// the current velocity and position
val targetOffsetX = decay.calculateTargetValue(offsetX.value, velocity)
TODO 6-5 では、アニメーションを開始しようとしています。その前に、値の上限と下限を Animatable に設定し、値が限度(-size.width および size.width。ここでは offsetX がこれらの値を超えないようにします)に達するとすぐに停止するようにします。pointerInput 修飾子を使用すると、size プロパティによって要素のサイズにアクセスできるため、これを使用して限度を取得します。
offsetX.updateBounds(
    lowerBound = -size.width.toFloat(),
    upperBound = size.width.toFloat()
)
TODO 6-6 では、いよいよアニメーションを開始します。まず、前に計算したフリングの停止位置と要素のサイズを比較します。停止位置がサイズを下回っている場合、フリングの速度が十分ではなかったことを意味します。animateTo を使用すると、値を 0f までアニメーション化できます。それ以外の場合は、animateDecay を使用してフリング アニメーションを開始します。アニメーションが終了した時点で(おそらくは前に設定した限度で)、コールバックを呼び出すことができます。
launch {
    if (targetOffsetX.absoluteValue <= size.width) {
        // Not enough velocity; Slide back.
        offsetX.animateTo(targetValue = 0f, initialVelocity = velocity)
    } else {
        // Enough velocity to slide away the element to the edge.
        offsetX.animateDecay(velocity, decay)
        // The element was swiped away.
        onDismissed()
    }
}
最後に、TODO 6-7 を見てみましょう。すべてのアニメーションと動作を設定したので、必ずオフセットを要素に適用してください。これにより、画面上の要素が動作またはアニメーションによって生成された値に移動します。
.offset { IntOffset(offsetX.value.roundToInt(), 0) }
その結果、最終的に次のようなコードになります。
private fun Modifier.swipeToDismiss(
    onDismissed: () -> Unit
): Modifier = composed {
    // This Animatable stores the horizontal offset for the element.
    val offsetX = remember { Animatable(0f) }
    pointerInput(Unit) {
        // Used to calculate a settling position of a fling animation.
        val decay = splineBasedDecay<Float>(this)
        // Wrap in a coroutine scope to use suspend functions for touch events and animation.
        coroutineScope {
            while (true) {
                // Wait for a touch down event.
                val pointerId = awaitPointerEventScope { awaitFirstDown().id }
                // Interrupt any ongoing animation.
                offsetX.stop()
                // Prepare for drag events and record velocity of a fling.
                val velocityTracker = VelocityTracker()
                // Wait for drag events.
                awaitPointerEventScope {
                    horizontalDrag(pointerId) { change ->
                        // Record the position after offset
                        val horizontalDragOffset = offsetX.value + change.positionChange().x
                        launch {
                            // Overwrite the Animatable value while the element is dragged.
                            offsetX.snapTo(horizontalDragOffset)
                        }
                        // Record the velocity of the drag.
                        velocityTracker.addPosition(change.uptimeMillis, change.position)
                        // Consume the gesture event, not passed to external
                        change.consumePositionChange()
                    }
                }
                // Dragging finished. Calculate the velocity of the fling.
                val velocity = velocityTracker.calculateVelocity().x
                // Calculate where the element eventually settles after the fling animation.
                val targetOffsetX = decay.calculateTargetValue(offsetX.value, velocity)
                // The animation should end as soon as it reaches these bounds.
                offsetX.updateBounds(
                    lowerBound = -size.width.toFloat(),
                    upperBound = size.width.toFloat()
                )
                launch {
                    if (targetOffsetX.absoluteValue <= size.width) {
                        // Not enough velocity; Slide back to the default position.
                        offsetX.animateTo(targetValue = 0f, initialVelocity = velocity)
                    } else {
                        // Enough velocity to slide away the element to the edge.
                        offsetX.animateDecay(velocity, decay)
                        // The element was swiped away.
                        onDismissed()
                    }
                }
            }
        }
    }
        // Apply the horizontal offset to the element.
        .offset { IntOffset(offsetX.value.roundToInt(), 0) }
}
アプリを実行し、いずれかのタスクアイテムをスワイプします。フリングの速度に応じて、要素がデフォルトの位置にスライドして戻るか、スライドして外に出て消えていきます。アニメーション化している間も要素をキャッチできます。
9. 完了
お疲れさまでした。Compose Animation API の基礎を習得しました。
この Codelab では、以下の使用方法を学びました。
高レベル アニメーション API:
animatedContentSizeAnimatedVisibility
下位レベル アニメーション API:
- 単一の値をアニメーション化するための
animate*AsState - 複数の値をアニメーション化するための
updateTransition - 値を無期限にアニメーション化するための
infiniteTransition - タップ操作でカスタム アニメーションを作成するための
Animatable
次のステップ
Compose パスウェイに関する他の Codelab をご確認ください。
詳しくは、Compose アニメーションと以下のリファレンス ドキュメントをご覧ください。

