
1. 簡介
本程式碼研究室會說明 Jetpack Compose 中有關 State 和 Side Effects API 的進階概念。您將瞭解如何為邏輯較複雜的有狀態可組合函式建立狀態容器、如何建立協同程式並透過 Compose 程式碼呼叫暫停函式,以及如何觸發連帶效果來達成各種用途。
如果您在閱讀本程式碼研究室時需要更多支援,請參閱下列程式碼:
課程內容
- 如何透過 Compose 程式碼觀察資料串流以更新使用者介面。
- 如何為有狀態可組合函式建立狀態容器。
- 連帶效果 API,例如
LaunchedEffect、rememberUpdatedState、DisposableEffect、produceState和derivedStateOf。 - 如何使用
rememberCoroutineScopeAPI 建立協同程式和呼叫暫停函式。
軟硬體需求
- 最新版 Android Studio
- 具備 Kotlin 語法經驗 (包括 lambda)。
- 有 Compose 的基本經驗。建議您先學習 Jetpack Compose 的基本程式碼研究室,再學習本程式碼研究室
- 瞭解 Compose 的基本狀態概念,例如單向資料串流 (UDF)、ViewModel、狀態提升、無狀態/有狀態可組合函式、Slot API,以及
remember和mutableStateOf狀態 API。如要瞭解這些相關知識,請參閱狀態與 Jetpack Compose 說明文件或完成「在 Jetpack Compose 中使用狀態」程式碼研究室。 - 具備 Kotlin 協同程式的基本知識。
- 對複合元件的生命週期有基礎瞭解。
建構項目
在本程式碼研究室中,您將從未完成的 Crane Material Study 應用程式著手,並新增各項功能來改善應用程式。

2. 開始設定
取得程式碼
您可以在 android-compose-codelabs GitHub 存放區中找到本程式碼研究室的程式碼。如要複製該存放區,請執行下列命令:
$ git clone https://github.com/android/codelab-android-compose
您也可以透過 ZIP 檔案下載存放區:
查看範例應用程式
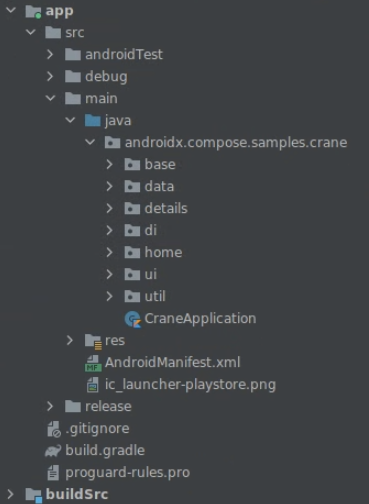
您剛才下載的程式碼包含所有 Compose 程式碼研究室可用的程式碼。如要完成本程式碼研究室,請在 Android Studio 中開啟 AdvancedStateAndSideEffectsCodelab 專案。
建議您先從 main 分支版本的程式碼著手,依自己的步調逐步完成本程式碼研究室。
在本程式碼研究室的學習過程中,我們會為您提供要新增到專案的程式碼片段。在某些地方,您還需要移除程式碼片段註解中明確提及的程式碼。
熟悉程式碼並執行範例應用程式
請花點時間瀏覽專案結構,然後執行應用程式。
從 main 分支版本執行應用程式時,您會發現部分功能 (例如導覽匣或載入航班目的地) 無法正常運作。這就是您在本程式碼研究室後續步驟中要解決的問題。
使用者介面測試
系統會對應用程式執行 androidTest 資料夾中所提供的最基本使用者介面測試。而 main 和 end 分支版本應一律通過這些測試。
[選用] 在詳細資料畫面上顯示地圖
您不一定要根據說明在詳細資料畫面上顯示城市地圖。不過,如果您想顯示地圖,就必須取得個人 API 金鑰,方法請參閱地圖說明文件中的說明。在 local.properties 檔案中加入該金鑰,方法如下:
// local.properties file
google.maps.key={insert_your_api_key_here}
本程式碼研究室的解決方案
如要使用 Git 取得 end 分支版本,請使用下列指令:
$ git clone -b end https://github.com/android/codelab-android-compose
或者,您也可以在以下位置下載解決方案程式碼:
常見問題
3. UI 狀態產生管道
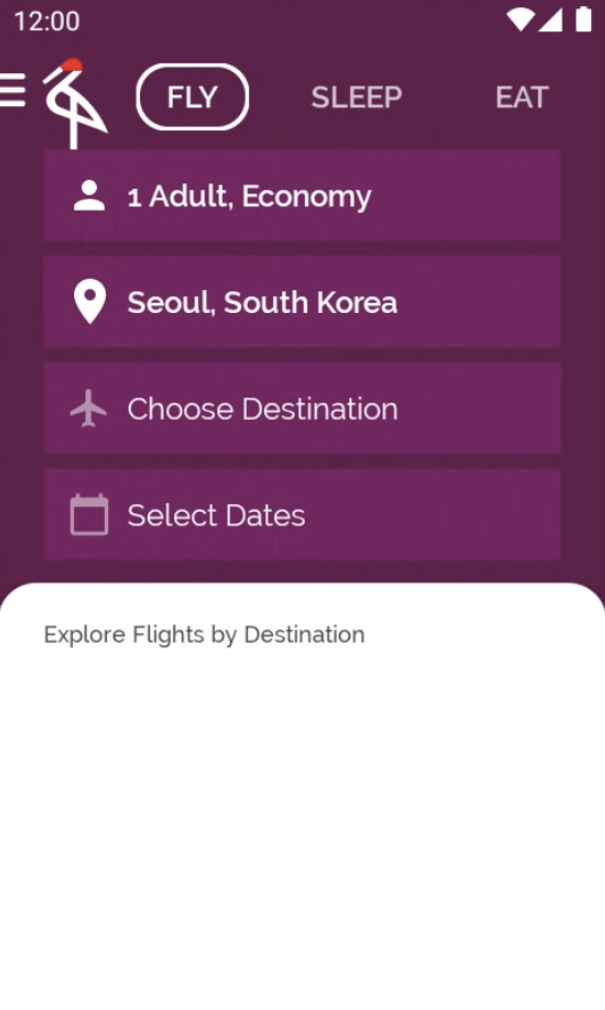
您可能已經發現,從 main 分支版本執行應用程式時,航班目的地清單竟一片空白!
如要解決這個問題,您必須完成以下兩個步驟:
在這個部分,您將完成第一個步驟。
良好的應用程式架構會劃分層級,遵循基本的好系統設計做法,例如關注點分離和可測試性。
UI 狀態產生作業是指應用程式存取資料層的程序,會視需要套用業務規則,並公開要從 UI 取用的 UI 狀態。
此應用程式已導入資料層。現在,您將產生狀態 (建議目的地清單),方便 UI 取用。
部分 API 可用於產生 UI 狀態。如要瞭解替代方案,請參閱「狀態產生管道的輸出類型」。一般來說,使用 Kotlin 的 StateFlow 產生 UI 狀態是不錯的做法。
如要產生 UI 狀態,請按照下列步驟操作:
- 開啟
home/MainViewModel.kt。 - 定義
MutableStateFlow類型的私人_suggestedDestinations變數,用於表示建議目的地清單,然後將空白清單設為起始值。
private val _suggestedDestinations = MutableStateFlow<List<ExploreModel>>(emptyList())
- 定義第二個不可變變數
suggestedDestinations,類型為StateFlow。這是可以從 UI 取用的可公開唯讀變數。建議您公開唯讀變數,並在內部使用可變動變數。這可確保 UI 狀態無法修改,除非是透過ViewModel並將其設為單一事實來源。擴充功能函式asStateFlow會將可變動資料流轉換為不可變資料流。
private val _suggestedDestinations = MutableStateFlow<List<ExploreModel>>(emptyList())

val suggestedDestinations: StateFlow<List<ExploreModel>> = _suggestedDestinations.asStateFlow()
- 在
ViewModel的 init 區塊新增destinationsRepository中的呼叫,從資料層取得目的地。
private val _suggestedDestinations = MutableStateFlow<List<ExploreModel>>(emptyList())

val suggestedDestinations: StateFlow<List<ExploreModel>> = _suggestedDestinations.asStateFlow()

init {
    _suggestedDestinations.value = destinationsRepository.destinations
}
- 最後,取消註解在這個類別中找到的內部變數
_suggestedDestinations使用情況,以便利用來自 UI 的事件正確更新這個變數。
這樣就完成第一個步驟了!現在,ViewModel 已能產生 UI 狀態。在下一個步驟中,您將從 UI 中取用這個狀態。
4. 從 ViewModel 安全取用資料流
航班目的地清單仍是一片空白。在上一個步驟中,您在 MainViewModel 產生了 UI 狀態。現在您將取用要在 UI 中顯示,並由 MainViewModel 公開的 UI 狀態。
開啟 home/CraneHome.kt 檔案,然後查看 CraneHomeContent 可組合函式。
在分配給已記住空白清單的 suggestedDestinations 定義上方,有一個 TODO 註解。這是畫面上顯示的內容:一份空白清單!在這個步驟中,您將修正這項錯誤,並顯示 MainViewModel 提供的建議目的地。
開啟 home/MainViewModel.kt 並查看 suggestedDestinations StateFlow (已初始化為 destinationsRepository.destinations,並且會在 updatePeople 或 toDestinationChanged 函式獲呼叫時更新)。
如果希望每次有新項目發送到 suggestedDestinations 資料串流時,CraneHomeContent 可組合函式中的 UI 都會更新,可以使用 collectAsStateWithLifecycle() 函式。collectAsStateWithLifecycle() 會以生命週期感知方式,從 StateFlow 收集各個值,並透過 Compose 的 State API 呈現最新的值。如此一來,讀取狀態值的 Compose 程式碼就會在新項目發出時重組。
如要開始使用 collectAsStateWithLifecycle API,請先在 app/build.gradle 中新增下列依附元件。此專案已使用適當版本定義變數 lifecycle_version。
dependencies {
    implementation "androidx.lifecycle:lifecycle-runtime-compose:$lifecycle_version"
}
返回 CraneHomeContent 可組合函式,將指派 suggestedDestinations 的該行程式碼替換為在 ViewModel 的 suggestedDestinations 屬性上對 collectAsStateWithLifecycle 的呼叫:
import androidx.lifecycle.compose.collectAsStateWithLifecycle

@Composable
fun CraneHomeContent(
    onExploreItemClicked: OnExploreItemClicked,
    openDrawer: () -> Unit,
    modifier: Modifier = Modifier,
    viewModel: MainViewModel = viewModel(),
) {
    val suggestedDestinations by viewModel.suggestedDestinations.collectAsStateWithLifecycle()
    // ...
}
執行應用程式時,系統就會顯示已填入的目的地清單。每次輕觸旅遊人數時,目的地也都會隨之變更。

5. LaunchedEffect 和 rememberUpdatedState
專案中有一個目前未使用的 home/LandingScreen.kt 檔案。您要在應用程式中新增一個到達畫面,可用來在背景載入所有必要資料。
到達畫面會占用整個螢幕,並在畫面中央顯示應用程式的標誌。在理想情況下,您會顯示此畫面,並在所有資料載入完畢後,通知呼叫端可以使用 onTimeout 回呼來關閉到達畫面。
如要在 Android 中執行非同步作業,建議使用 Kotlin 協同程式。應用程式通常會在啟動時使用協同程式,在背景載入內容。您可以運用 Jetpack Compose 提供的 API,在 UI 層中安全地使用協同程式。這個應用程式不會與後端通訊,因此可以使用協同程式的 delay 函式,模擬在背景中載入內容的情形。
Compose 的連帶效果是可組合函式外發生的應用程式狀態變化,將狀態變更為顯示/隱藏到達畫面的操作會發生在 onTimeout 回呼中;而在呼叫 onTimeout 前,需要先使用協同程式載入內容,因此狀態變更必須發生在協同程式的情境中!
如要從可組合函式內部安全地呼叫暫停函式,請使用 LaunchedEffect API,在 Compose 中觸發協同程式範圍的連帶效果。
當 LaunchedEffect 進入組合時,就會啟動一個協同程式,並將程式碼區塊當做參數傳遞。如果 LaunchedEffect 離開組合,協同程式就會取消。
雖然接下來的程式碼不正確,但我們可以看看如何使用這個 API,並討論下列程式碼錯誤的原因。稍後會在此步驟中呼叫 LandingScreen 可組合函式。
// home/LandingScreen.kt file

import androidx.compose.runtime.LaunchedEffect
import kotlinx.coroutines.delay

@Composable
fun LandingScreen(onTimeout: () -> Unit, modifier: Modifier = Modifier) {
    Box(modifier = modifier.fillMaxSize(), contentAlignment = Alignment.Center) {
        // Start a side effect to load things in the background
        // and call onTimeout() when finished.
        // Passing onTimeout as a parameter to LaunchedEffect
        // is wrong! Don't do this. We'll improve this code in a sec.
        LaunchedEffect(onTimeout) {
            delay(SplashWaitTime) // Simulates loading things
            onTimeout()
        }
        Image(painterResource(id = R.drawable.ic_crane_drawer), contentDescription = null)
    }
}
某些連帶效果 API (例如 LaunchedEffect) 會使用任意數量的鍵做為參數,用於在其中一個鍵變更時重新觸發效果。您發現錯誤了嗎?如果對這個可組合函式發出的呼叫傳遞其他 onTimeout lambda 值,我們並不希望重新觸發 LaunchedEffect。這會讓 delay 再次啟動,因此不符合需求。
接著就來解決這個問題。如果只要在這個可組合函式的生命週期中觸發一次連帶效果,請使用常數做為鍵,例如 LaunchedEffect(Unit) { ... }。不過,現在還有另一個問題。
如果 onTimeout 於連帶效果持續期間發生變化,在效果結束時,不一定會呼叫最後一個 onTimeout。為確保能夠呼叫最後一個 onTimeout,請使用 rememberUpdatedState API 記住 onTimeout。這個 API 會擷取並更新最新的值:
// home/LandingScreen.kt file

import androidx.compose.runtime.getValue
import androidx.compose.runtime.rememberUpdatedState
import kotlinx.coroutines.delay

@Composable
fun LandingScreen(onTimeout: () -> Unit, modifier: Modifier = Modifier) {
    Box(modifier = modifier.fillMaxSize(), contentAlignment = Alignment.Center) {
        // This will always refer to the latest onTimeout function that
        // LandingScreen was recomposed with
        val currentOnTimeout by rememberUpdatedState(onTimeout)

        // Create an effect that matches the lifecycle of LandingScreen.
        // If LandingScreen recomposes or onTimeout changes,
        // the delay shouldn't start again.
        LaunchedEffect(Unit) {
            delay(SplashWaitTime)
            currentOnTimeout()
        }

        Image(painterResource(id = R.drawable.ic_crane_drawer), contentDescription = null)
    }
}
如果長期存在的 lambda 或物件運算式參照組合期間計算的參數或值 (處理 LaunchedEffect 時可能很常發生),建議您使用 rememberUpdatedState。
顯示到達畫面
現在,您需要在應用程式開啟時顯示到達畫面。開啟 home/MainActivity.kt 檔案,然後查看第一個呼叫的 MainScreen 可組合函式。
在 MainScreen 可組合函式中,只需新增一種內部狀態,即可追蹤是否應顯示到達畫面:
// home/MainActivity.kt file

import androidx.compose.runtime.getValue
import androidx.compose.runtime.mutableStateOf
import androidx.compose.runtime.remember
import androidx.compose.runtime.setValue

@Composable
private fun MainScreen(onExploreItemClicked: OnExploreItemClicked) {
    Surface(color = MaterialTheme.colors.primary) {
        var showLandingScreen by remember { mutableStateOf(true) }
        if (showLandingScreen) {
            LandingScreen(onTimeout = { showLandingScreen = false })
        } else {
            CraneHome(onExploreItemClicked = onExploreItemClicked)
        }
    }
}
如果現在執行應用程式,LandingScreen 應該會出現,然後在 2 秒後消失。

6. rememberCoroutineScope
在這個步驟中,您將讓導覽匣正常運作。目前就算嘗試輕觸漢堡選單,也不會執行任何動作。
開啟 home/CraneHome.kt 檔案並查看 CraneHome 可組合函式,即可得知需要在 openDrawer 回呼中開啟導覽匣。
CraneHome 中有一個包含 DrawerState 的 scaffoldState。DrawerState 提供透過程式輔助開啟及關閉導覽匣的方法。不過,如果您嘗試在 openDrawer 回呼中寫入 scaffoldState.drawerState.open(),就會收到錯誤訊息!這是因為 open 函式是一個暫停函式。我們又再次回到協同程式了。
除了讓您安全地從使用者介面圖層呼叫協同程式的 API 外,某些 Compose API 屬於暫停函式。其中一個例子就是開啟導覽匣的 API。暫停函式除了能執行非同步程式碼外,也有助於表示隨著時間推移而出現的概念。開啟導覽匣需要花費時間、進行移動,有時候還需要顯示動畫,這點非常符合暫停函式的特質,這類函式會在受到呼叫的位置暫停執行協同程式,等到函式完成後再繼續執行。
您必須在協同程式內呼叫 scaffoldState.drawerState.open()。該怎麼做?openDrawer 是個簡單的回呼函式,因此:
- 不能只在其中呼叫暫停函式,因為
openDrawer並未在協同程式的情境中執行。 - 無法像先前一樣使用
LaunchedEffect,因為無法在openDrawer中呼叫可組合函式。此外,我們並不在組合中。
如果想要啟動協同程式,應使用哪個範圍?在理想情況下,會希望 CoroutineScope 依循其呼叫點的生命週期。使用 rememberCoroutineScope API 會傳回 CoroutineScope,此範圍會繫結至組合中該 API 的呼叫點。離開組合後,範圍就會自動取消。有了這個範圍,即使您不在組合中 (例如在 openDrawer 回呼中),也能啟動協同程式。
// home/CraneHome.kt file

import androidx.compose.runtime.rememberCoroutineScope
import kotlinx.coroutines.launch

@Composable
fun CraneHome(
    onExploreItemClicked: OnExploreItemClicked,
    modifier: Modifier = Modifier,
) {
    val scaffoldState = rememberScaffoldState()
    Scaffold(
        scaffoldState = scaffoldState,
        modifier = Modifier.statusBarsPadding(),
        drawerContent = {
            CraneDrawer()
        }
    ) {
        val scope = rememberCoroutineScope()
        CraneHomeContent(
            modifier = modifier,
            onExploreItemClicked = onExploreItemClicked,
            openDrawer = {
                scope.launch {
                    scaffoldState.drawerState.open()
                }
            }
        )
    }
}
如果您執行應用程式,只要輕觸漢堡選單圖示就會開啟導覽匣圖示。

LaunchedEffect 和 rememberCoroutineScope
您需要觸發呼叫,才能在組合以外的一般回呼中建立協同程式,因此無法在此情況下使用 LaunchedEffect。
回想一下先前用到 LaunchedEffect 的到達畫面步驟,是否可以使用 rememberCoroutineScope 並呼叫 scope.launch { delay(); onTimeout(); },而不使用 LaunchedEffect?
您本來可以這樣做,也似乎可行,但這樣並不正確。如 Compose 中的思維說明文件中所述,Compose 可以隨時呼叫複合元件。在對該複合元件的呼叫進入組合時,LaunchedEffect 保證會執行連帶效果。如果在 LandingScreen 的主體中使用 rememberCoroutineScope 和 scope.launch,則每次 Compose 呼叫 LandingScreen 時,不論該呼叫是否對組合產生連帶效果,系統都會執行協同程式。因此,您不僅會浪費資源,還無法在受管控的環境中執行這個連帶效果。
7. 建立狀態容器
您發現了嗎?只要輕觸「Choose Destination」,您就能編輯欄位,並根據搜尋輸入內容篩選城市。您可能也會注意到,每次修改「Choose Destination」時,文字樣式都會隨之改變。

開啟 base/EditableUserInput.kt 檔案。有狀態的可組合函式 CraneEditableUserInput 會採用部分參數,例如 hint 和 caption,後者對應至圖示旁的選用文字。舉例來說,搜尋目的地時,系統會顯示 caption「To」。
// base/EditableUserInput.kt file - code in the main branch

@Composable
fun CraneEditableUserInput(
    hint: String,
    caption: String? = null,
    @DrawableRes vectorImageId: Int? = null,
    onInputChanged: (String) -> Unit
) {
    // TODO Codelab: Encapsulate this state in a state holder
    var textState by remember { mutableStateOf(hint) }
    val isHint = { textState == hint }

    ...
}
原因是什麼?
用來更新 textState 及判定顯示內容是否與提示對應的邏輯,全都位於 CraneEditableUserInput 可組合函式的內文中。這樣會帶來一些缺點:
TextField的值並未提升,因此無法從外部控制,使得測試變得困難。- 此可組合函式的邏輯可能會變得更加複雜,且內部狀態也無法輕鬆同步。
只要建立負責這個可組合函式內部狀態的狀態容器,就能將所有狀態變更集中在一處。這樣一來,狀態要不同步就更難了,且所有相關的邏輯全都會歸類到單一類別中。此外,這個狀態很容易提升,而且可以從這個可組合函式的呼叫端使用。
在這種情況下,提升狀態是不錯的做法,因為這是低階的使用者介面元件,可能會重複用於應用程式的其他部分。因此,如果該元件越靈活、越方便控制就越好。
建立狀態容器
CraneEditableUserInput 是可重複使用的元件,因此請在同一個檔案中建立名為 EditableUserInputState 的一般類別做為狀態容器,如下所示:
// base/EditableUserInput.kt file

import androidx.compose.runtime.getValue
import androidx.compose.runtime.mutableStateOf
import androidx.compose.runtime.setValue

class EditableUserInputState(private val hint: String, initialText: String) {

    var text by mutableStateOf(initialText)
       private set

    fun updateText(newText: String) {
       text = newText
    }

    val isHint: Boolean
        get() = text == hint
}
該類別應具備以下特徵:
text是String類型的可變動狀態,就像在CraneEditableUserInput中一樣。請務必使用mutableStateOf,讓 Compose 追蹤值的變更,並在有變化時重組。text是具有私人set的var,因此無法直接從類別外部變更。您可以藉由公開updateText事件來修改這個變數,讓類別成為單一事實來源,而不需公開該變數。- 該類別將
initialText做為依附元件,用來初始化text。 - 用來判斷
text是否為提示的邏輯位於隨選執行檢查的isHint屬性中。
如果日後邏輯變得更加複雜,您只需變更一個類別:EditableUserInputState。
記住狀態容器
請務必記住狀態容器,以便保留在組合中,而不必每次都新增一個。建議您在同一個檔案中建立執行此操作的方法,這樣就能移除樣板並避免發生任何錯誤。在 base/EditableUserInput.kt 檔案中,新增下列程式碼:
// base/EditableUserInput.kt file

@Composable
fun rememberEditableUserInputState(hint: String): EditableUserInputState =
    remember(hint) {
        EditableUserInputState(hint, hint)
    }
如果「只」使用 remember 記住這個狀態,就無法在活動重建後保留狀態。為達到這個目標,可以改用 rememberSaveable API,這個 API 的行為與 remember 類似,但在活動和程序重建後,仍會保留儲存的值。在內部,這個 API 會使用已儲存的例項狀態機制。
對於可儲存在 Bundle 內的物件,無須任何額外操作,rememberSaveable 就可以執行所有這些工作。不過,這不適用於您在專案中建立的 EditableUserInputState 類別。因此,您需要告知 rememberSaveable 如何使用 Saver 來儲存及還原這個類別的例項。
建立自訂儲存工具
Saver 說明了如何將物件轉換為 Saveable 的內容。實作 Saver 需要覆寫兩個函式:
save:將原始值轉換為可儲存的值。restore:將還原的值轉換為原始類別的例項。
在本例中,可以使用一些現有的 Compose API,例如 listSaver 或 mapSaver (用於存放要儲存在 List 或 Map 的值),減少需要編寫的程式碼數量,而不要為 EditableUserInputState 類別建立 Saver 的自訂實作內容。
建議您將 Saver 定義置於與其搭配使用的類別附近。由於需要以靜態方式存取,請在 companion object 中新增 EditableUserInputState 的 Saver。在 base/EditableUserInput.kt 檔案中,新增 Saver 的實作:
// base/EditableUserInput.kt file

import androidx.compose.runtime.saveable.Saver
import androidx.compose.runtime.saveable.listSaver

class EditableUserInputState(private val hint: String, initialText: String) {
    var text by mutableStateOf(initialText)

    val isHint: Boolean
        get() = text == hint

    companion object {
        val Saver: Saver<EditableUserInputState, *> = listSaver(
            save = { listOf(it.hint, it.text) },
            restore = {
                EditableUserInputState(
                    hint = it[0],
                    initialText = it[1],
                )
            }
        )
    }
}
本例使用 listSaver 做為實作詳細資料,在儲存工具中保存及還原 EditableUserInputState 的例項。
現在,您可以利用之前建立的 rememberEditableUserInputState 方法,在 rememberSaveable (而不是 remember) 中使用這個儲存工具。
// base/EditableUserInput.kt file
import androidx.compose.runtime.saveable.rememberSaveable

@Composable
fun rememberEditableUserInputState(hint: String): EditableUserInputState =
    rememberSaveable(hint, saver = EditableUserInputState.Saver) {
        EditableUserInputState(hint, hint)
    }
這樣,在程序和活動重建後,就會保留 EditableUserInput 記住的狀態。
使用狀態容器
您要改用 EditableUserInputState 來取代 text 和 isHint,但不會僅用於 CraneEditableUserInput 的內部狀態,因為呼叫端的可組合函式無法控制狀態。反之,您需要「提升」EditableUserInputState,讓呼叫端能控制 CraneEditableUserInput 的狀態。如果提升狀態,由於您可以從呼叫端修改可組合函式的狀態,就能在預覽畫面中使用這個可組合函式,也更易於測試。
為此,您需要變更可組合函式的參數,並視需求提供預設值。您可能想要允許有空白提示的 CraneEditableUserInput,因此要新增預設引數:
@Composable
fun CraneEditableUserInput(
    state: EditableUserInputState = rememberEditableUserInputState(""),
    caption: String? = null,
    @DrawableRes vectorImageId: Int? = null
) { /* ... */ }
相信您已經發現,onInputChanged 參數已經不存在了!狀態可以提升,因此如果呼叫端想知道輸入內容是否改變,便可控制狀態,並將狀態傳入這個函式。
接著,請調整函式主體,使用提升後的狀態,而不是先前使用的內部狀態。重構後,函式應如下所示:
@Composable
fun CraneEditableUserInput(
    state: EditableUserInputState = rememberEditableUserInputState(""),
    caption: String? = null,
    @DrawableRes vectorImageId: Int? = null
) {
    CraneBaseUserInput(
        caption = caption,
        tintIcon = { !state.isHint },
        showCaption = { !state.isHint },
        vectorImageId = vectorImageId
    ) {
        BasicTextField(
            value = state.text,
            onValueChange = { state.updateText(it) },
            textStyle = if (state.isHint) {
                captionTextStyle.copy(color = LocalContentColor.current)
            } else {
                MaterialTheme.typography.body1.copy(color = LocalContentColor.current)
            },
            cursorBrush = SolidColor(LocalContentColor.current)
        )
    }
}
狀態容器呼叫端
由於您變更了 CraneEditableUserInput 的 API,因此需要檢查所有呼叫該 API 的位置,確保傳入的參數正確無誤。
在此專案中,您只有在 home/SearchUserInput.kt 檔案中呼叫這個 API。開啟這個檔案,前往 ToDestinationUserInput 可組合函式後,應該會看到建構錯誤。由於這個提示現在已是狀態容器的一部分,而您希望在組合中自訂此 CraneEditableUserInput 例項的提示,請記住 ToDestinationUserInput 層級的狀態並傳入 CraneEditableUserInput:
// home/SearchUserInput.kt file

import androidx.compose.samples.crane.base.rememberEditableUserInputState

@Composable
fun ToDestinationUserInput(onToDestinationChanged: (String) -> Unit) {
    val editableUserInputState = rememberEditableUserInputState(hint = "Choose Destination")
    CraneEditableUserInput(
        state = editableUserInputState,
        caption = "To",
        vectorImageId = R.drawable.ic_plane
    )
}
snapshotFlow
上述程式碼缺少在輸入內容有變時,通知 ToDestinationUserInput 呼叫端的功能。基於應用程式的結構,您不希望將 EditableUserInputState 提升到階層中更高的層級。此外,也不想將 FlySearchContent 等其他可組合函式與這個狀態結合。那麼,該如何從 ToDestinationUserInput 呼叫 onToDestinationChanged lambda,並確保能夠繼續重複使用這個可組合函式?
您可以在每次輸入內容有變時,使用 LaunchedEffect 觸發連帶效果,並呼叫 onToDestinationChanged lambda:
// home/SearchUserInput.kt file

import androidx.compose.runtime.LaunchedEffect
import androidx.compose.runtime.rememberUpdatedState
import androidx.compose.runtime.snapshotFlow
import kotlinx.coroutines.flow.collect
import kotlinx.coroutines.flow.filter

@Composable
fun ToDestinationUserInput(onToDestinationChanged: (String) -> Unit) {
    val editableUserInputState = rememberEditableUserInputState(hint = "Choose Destination")
    CraneEditableUserInput(
        state = editableUserInputState,
        caption = "To",
        vectorImageId = R.drawable.ic_plane
    )

    val currentOnDestinationChanged by rememberUpdatedState(onToDestinationChanged)
    LaunchedEffect(editableUserInputState) {
        snapshotFlow { editableUserInputState.text }
            .filter { !editableUserInputState.isHint }
            .collect {
                currentOnDestinationChanged(editableUserInputState.text)
            }
    }
}
您之前已經用過 LaunchedEffect 和 rememberUpdatedState,但上述程式碼還使用了新的 API!snapshotFlow API 會將 Compose State<T> 物件轉換為 Flow。當 snapshotFlow 中讀取到的狀態有變時,Flow 就會向收集器發出新的值。在本例中,您將狀態轉換為 Flow,使用 Flow 運算子的強大功能。透過這種方式,您可以在 text 不是 hint 時使用 filter 進行篩選,並使用 collect 收集發出的項目,通知父項目前目的地已變更。
程式碼研究室的這個步驟沒有任何視覺上的變更,但您已改善這部分程式碼的品質。現在執行應用程式的話,應該會看到一切照常運作。
8. DisposableEffect
輕觸目的地會開啟詳細資料畫面,接著就能查看該城市在地圖上的位置。這個程式碼位於 details/DetailsActivity.kt 檔案中。您在 CityMapView 可組合函式中呼叫 rememberMapViewWithLifecycle 函式。如果您開啟 details/MapViewUtils.kt 檔案中的這個函式,會發現該函式並未連結至任何生命週期。它只是記住了 MapView,並對其呼叫 onCreate:
// details/MapViewUtils.kt file - code in the main branch

@Composable
fun rememberMapViewWithLifecycle(): MapView {
    val context = LocalContext.current
    // TODO Codelab: DisposableEffect step. Make MapView follow the lifecycle
    return remember {
        MapView(context).apply {
            id = R.id.map
            onCreate(Bundle())
        }
    }
}
雖然應用程式可以正常執行,但 MapView 並未遵循正確的生命週期,因此也是個問題。因此,它不知道應用程式是否已移至背景、何時應暫停 View 等等。讓我們來修正這個問題!
MapView 是 View 而非可組合函式,因此您希望依循使用這個 View 的 Activity 生命週期,以及組合的生命週期。也就是說,您需要建立 LifecycleEventObserver,用於監聽生命週期事件,並對 MapView 呼叫正確的方法。接著,將這個觀察器加進目前活動的生命週期。
首先建立一個可傳回 MapView 的函式;發生特定事件時,這個函式會呼叫 LifecycleEventObserver 中的對應方法:
// details/MapViewUtils.kt file

import androidx.lifecycle.Lifecycle
import androidx.lifecycle.LifecycleEventObserver

private fun getMapLifecycleObserver(mapView: MapView): LifecycleEventObserver =
    LifecycleEventObserver { _, event ->
        when (event) {
            Lifecycle.Event.ON_CREATE -> mapView.onCreate(Bundle())
            Lifecycle.Event.ON_START -> mapView.onStart()
            Lifecycle.Event.ON_RESUME -> mapView.onResume()
            Lifecycle.Event.ON_PAUSE -> mapView.onPause()
            Lifecycle.Event.ON_STOP -> mapView.onStop()
            Lifecycle.Event.ON_DESTROY -> mapView.onDestroy()
            else -> throw IllegalStateException()
        }
    }
現在,請將這個觀察器加進目前的生命週期,您可以使用目前的 LifecycleOwner 搭配 LocalLifecycleOwner 本機組合來取得該生命週期。但光是加入觀察器還不夠,您還需要能移除這個觀察器!您需要一個連帶效果,可以在連帶效果離開組合時通知您,以便執行一些清理程式碼。您要尋找的連帶效果 API 是 DisposableEffect。
DisposableEffect 適用於在鍵有變或可組合函式離開組合後,需要清理的連帶效果。最終的 rememberMapViewWithLifecycle 程式碼正好起到這種作用。請在專案中實作下列程式碼:
// details/MapViewUtils.kt file

import androidx.compose.runtime.DisposableEffect
import androidx.compose.ui.platform.LocalLifecycleOwner

@Composable
fun rememberMapViewWithLifecycle(): MapView {
    val context = LocalContext.current
    val mapView = remember {
        MapView(context).apply {
            id = R.id.map
        }
    }

    val lifecycle = LocalLifecycleOwner.current.lifecycle
    DisposableEffect(key1 = lifecycle, key2 = mapView) {
        // Make MapView follow the current lifecycle
        val lifecycleObserver = getMapLifecycleObserver(mapView)
        lifecycle.addObserver(lifecycleObserver)
        onDispose {
            lifecycle.removeObserver(lifecycleObserver)
        }
    }

    return mapView
}
觀察工具已新增到目前的 lifecycle,只要目前的生命週期有所變更,或是這個複合元件離開組合時,系統都會移除觀測工具。只要使用 DisposableEffect 中的 key,當 lifecycle 或 mapView 改變時,觀察器就會先移除,再重新添加到正確的 lifecycle。
完成剛才的變更後,MapView 一律會依循目前 LifecycleOwner 的 lifecycle,其行為也會像在 View 環境中使用一樣。
您可以隨時執行應用程式並開啟詳細資料畫面,確保 MapView 仍可正確顯示。這個步驟不含任何視覺上的變更。
9. produceState
您會在這部分改善詳細資料畫面的啟動方式。details/DetailsActivity.kt 檔案中的 DetailsScreen 可組合函式會從 ViewModel 同步取得 cityDetails,如果結果成功,就會呼叫 DetailsContent。
不過,cityDetails 可能需要耗費較多成本才能在 UI 執行緒上載入,也可能使用協同程式,將載入資料的工作移至其他執行緒。您將改善這個程式碼,新增載入畫面,並在資料準備就緒時顯示 DetailsContent。
模擬畫面狀態的一種方法是使用下列類別,此類別涵蓋了所有可能性:要在畫面上顯示的資料,以及載入操作和錯誤信號。將 DetailsUiState 類別新增到 DetailsActivity.kt 檔案:
// details/DetailsActivity.kt file

data class DetailsUiState(
    val cityDetails: ExploreModel? = null,
    val isLoading: Boolean = false,
    val throwError: Boolean = false
)
您可以使用資料串流 (DetailsUiState 類型的 StateFlow),對應畫面需顯示的內容和 ViewModel 圖層中的 UiState。ViewModel 會在資訊準備就緒時更新資料串流,而 Compose 則會透過您先前學過的 collectAsStateWithLifecycle() API 收集資料串流。
不過,為了方便執行本練習,您會實作替代方案。如要將 uiState 對應邏輯移至 Compose 環境,可以使用 produceState API。
produceState 可將非 Compose 狀態轉換為 Compose 狀態,它會啟動一個限定範圍為組合的協同程式,該協同程式可以使用 value 屬性將值推送至傳回的 State。與 LaunchedEffect 相同,produceState 也採用鍵來取消並重新啟動運算。
以您的用途為例,可以使用 produceState 發出初始值為 DetailsUiState(isLoading = true) 的 uiState 更新,如下所示:
// details/DetailsActivity.kt file

import androidx.compose.runtime.produceState

@Composable
fun DetailsScreen(
    onErrorLoading: () -> Unit,
    modifier: Modifier = Modifier,
    viewModel: DetailsViewModel = viewModel()
) {

    val uiState by produceState(initialValue = DetailsUiState(isLoading = true)) {
        // In a coroutine, this can call suspend functions or move
        // the computation to different Dispatchers
        val cityDetailsResult = viewModel.cityDetails
        value = if (cityDetailsResult is Result.Success<ExploreModel>) {
            DetailsUiState(cityDetailsResult.data)
        } else {
            DetailsUiState(throwError = true)
        }
    }

    // TODO: ...
}
接下來,根據 uiState 顯示資料、顯示載入畫面或回報錯誤。以下是 DetailsScreen 可組合函式的完整程式碼:
// details/DetailsActivity.kt file

import androidx.compose.foundation.layout.Box
import androidx.compose.material.CircularProgressIndicator

@Composable
fun DetailsScreen(
    onErrorLoading: () -> Unit,
    modifier: Modifier = Modifier,
    viewModel: DetailsViewModel = viewModel()
) {
    val uiState by produceState(initialValue = DetailsUiState(isLoading = true)) {
        val cityDetailsResult = viewModel.cityDetails
        value = if (cityDetailsResult is Result.Success<ExploreModel>) {
            DetailsUiState(cityDetailsResult.data)
        } else {
            DetailsUiState(throwError = true)
        }
    }

    when {
        uiState.cityDetails != null -> {
            DetailsContent(uiState.cityDetails!!, modifier.fillMaxSize())
        }
        uiState.isLoading -> {
            Box(modifier.fillMaxSize()) {
                CircularProgressIndicator(
                    color = MaterialTheme.colors.onSurface,
                    modifier = Modifier.align(Alignment.Center)
                )
            }
        }
        else -> { onErrorLoading() }
    }
}
如果您執行應用程式,就會在顯示城市詳細資料之前,看到載入旋轉圖示如何出現。

10. derivedStateOf
接下來是最後一個要對 Crane 執行的改善項目:在捲動航班目的地清單時,一旦經過畫面上第一個元素,就顯示可捲動至頂端的按鈕。只要輕觸該按鈕,即可前往清單中的第一個元素。

開啟包含此程式碼的 base/ExploreSection.kt 檔案。ExploreSection 可組合函式會對應至 Scaffold 背景中顯示的內容。
如要計算使用者是否經過第一個項目,可以使用 LazyColumn 的 LazyListState,並確認是否 listState.firstVisibleItemIndex > 0。
簡易的實作方式如下所示:
// DO NOT DO THIS - It's executed on every recomposition
val showButton = listState.firstVisibleItemIndex > 0
這項解決方案的效率不如預期,因為每當 firstVisibleItemIndex 改變 (捲動畫面時經常發生),讀取 showButton 的可組合函式都會重組。您希望這個函式只在條件於 true 和 false 之間變化時才重組。
derivedStateOf API 有助於達成這個目標。
listState 是可觀察的 Compose State。此外,計算結果 (意即 showButton) 也需要是 Compose State,因為想讓 UI 在其值改變時重組,並且顯示或隱藏按鈕。
當所需 Compose State 衍生自另一個 State 時,請使用 derivedStateOf。每當內部狀態改變,都會執行 derivedStateOf 計算區塊,但可組合函式只會在計算結果與上次不同時重組。如此一來,讀取 showButton 的函式就能盡量減少重組次數。
在這種情況下,使用 derivedStateOf API 是更理想、更有效率的替代方案。您也會透過 remember API 納入呼叫,這樣就能在重組後保留算出的值。
// Show the button if the first visible item is past
// the first item. We use a remembered derived state to
// minimize unnecessary recompositions
val showButton by remember {
    derivedStateOf {
        listState.firstVisibleItemIndex > 0
    }
}
您應該已經熟悉 ExploreSection 可組合函式的新程式碼。您將使用 Box 將有條件顯示的 Button 置於 ExploreList 頂端,並透過 rememberCoroutineScope 呼叫 listState.scrollToItem 暫停函式,這個函式位於 Button 的 onClick 回呼中。
// base/ExploreSection.kt file

import androidx.compose.material.FloatingActionButton
import androidx.compose.runtime.derivedStateOf
import androidx.compose.runtime.getValue
import androidx.compose.runtime.remember
import androidx.compose.runtime.rememberCoroutineScope
import androidx.compose.foundation.layout.navigationBarsPadding
import kotlinx.coroutines.launch

@Composable
fun ExploreSection(
    modifier: Modifier = Modifier,
    title: String,
    exploreList: List<ExploreModel>,
    onItemClicked: OnExploreItemClicked
) {
    Surface(modifier = modifier.fillMaxSize(), color = Color.White, shape = BottomSheetShape) {
        Column(modifier = Modifier.padding(start = 24.dp, top = 20.dp, end = 24.dp)) {
            Text(
                text = title,
                style = MaterialTheme.typography.caption.copy(color = crane_caption)
            )
            Spacer(Modifier.height(8.dp))
            Box(Modifier.weight(1f)) {
                val listState = rememberLazyListState()
                ExploreList(exploreList, onItemClicked, listState = listState)

                // Show the button if the first visible item is past
                // the first item. We use a remembered derived state to
                // minimize unnecessary compositions
                val showButton by remember {
                    derivedStateOf {
                        listState.firstVisibleItemIndex > 0
                    }
                }
                if (showButton) {
                    val coroutineScope = rememberCoroutineScope()
                    FloatingActionButton(
                        backgroundColor = MaterialTheme.colors.primary,
                        modifier = Modifier
                            .align(Alignment.BottomEnd)
                            .navigationBarsPadding()
                            .padding(bottom = 8.dp),
                        onClick = {
                            coroutineScope.launch {
                                listState.scrollToItem(0)
                            }
                        }
                    ) {
                        Text("Up!")
                    }
                }
            }
        }
    }
}
現在執行應用程式的話,只要捲動畫面並經過第一個元素,該按鈕就會顯示在底部。
11. 恭喜!
恭喜!您已成功完成本程式碼研究室,並瞭解 Jetpack Compose 應用程式中有關狀態和連帶效果 API 的進階概念!
您瞭解如何建立狀態容器、連帶效果 API (例如 LaunchedEffect、rememberUpdatedState、DisposableEffect、produceState 和 derivedStateOf),以及如何在 Jetpack Compose 中使用協同程式。
後續步驟
請查看 Compose 課程的其他程式碼研究室,以及 Crane 等其他程式碼範例。
說明文件
如需有關這些主題的更多資訊和指南,請參閱以下說明文件: