
1. Before you begin
Congratulations! You built your first app with a scrollable list. Now you're ready to put what you learned into practice.
This exercise focuses on creating the components necessary to build a scrollable list. The material expands upon what you learned in the Add a scrollable list codelab, and allows you to apply that knowledge to build a scrollable grid.
Some sections might require you to use composables or modifiers, which you may not have seen before. In such cases, see the References available for each problem, where you can find links to documentation related to the modifiers, properties, or composables that you are not familiar with. You can read the documentation and determine how to incorporate the concepts in the app. The ability to understand documentation is an essential skill that you should develop to grow your knowledge.
The solution code is available at the end, but try to solve the exercises before you check the answers. Consider the solution as one way to implement the app.
Prerequisites
- Complete the Android Basics in Compose coursework through the Add a scrollable list codelab.
What you'll need
- A computer with internet access and Android Studio installed.
Resources
You will need the following resources to complete the code for these practice problems
- Topic images. These images represent each topic in the list.
- ic_grain.xml. This is the decorative icon that appears next to the number of courses in the topic.
What you'll build
In these practice problems, you will build out the Courses app from scratch. The Courses app displays a list of course topics.
The practice problems are split into sections, where you will build:
- A course topic data class:
The topic data will have an image, a name, and the number of associated courses in that topic.
- A composable to represent a course topic grid item:
Each topic item will display the image, the name, the number of associated courses, and a decorative icon.
- A composable to display a grid of those course topic items.
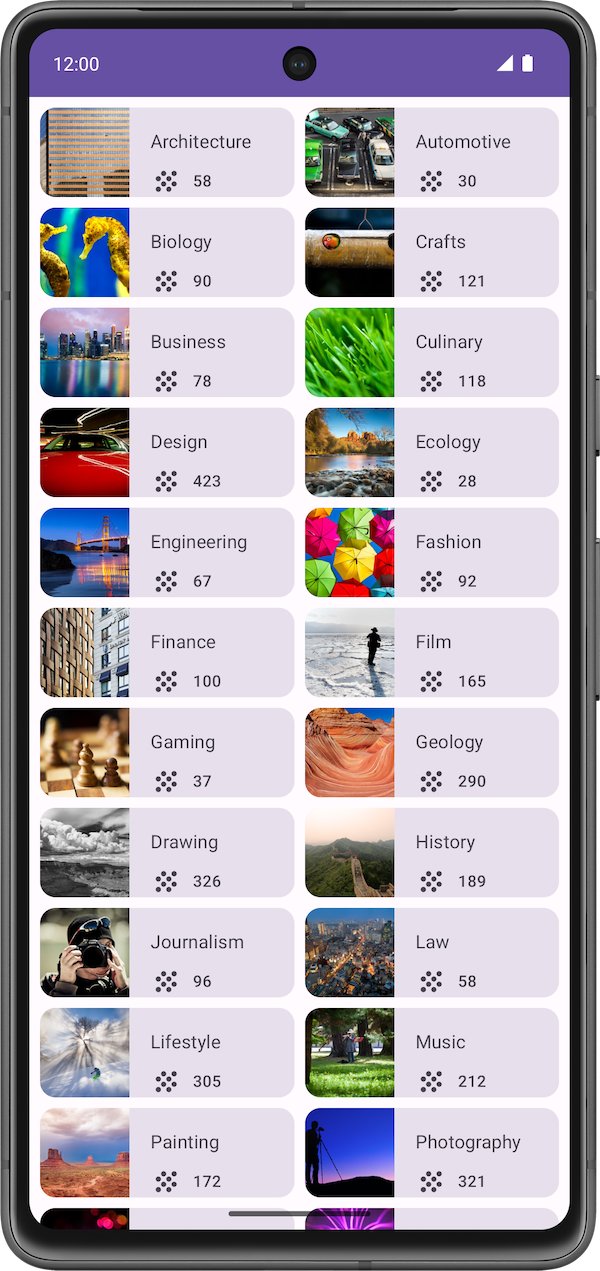
The final app will look like this:
2. Get started
Create a New Project with the Empty Activity template and a minimum SDK of 24.
3. Topic data class
In this section, you build a class to hold the data for each course topic.
Take a look at the items from the final app.
Each course topic holds three pieces of unique information. Using the unique content of each item as a reference, create a class to hold this data.
4. Data source
In this section, you create a data set for the grid of courses.
Copy the following items into app/src/main/res/values/strings.xml:
<string name="architecture">Architecture</string>
<string name="crafts">Crafts</string>
<string name="business">Business</string>
<string name="culinary">Culinary</string>
<string name="design">Design</string>
<string name="fashion">Fashion</string>
<string name="film">Film</string>
<string name="gaming">Gaming</string>
<string name="drawing">Drawing</string>
<string name="lifestyle">Lifestyle</string>
<string name="music">Music</string>
<string name="painting">Painting</string>
<string name="photography">Photography</string>
<string name="tech">Tech</string>
Create an empty file called DataSource.kt. Copy the following code into the file:
object DataSource {
    val topics = listOf(
        Topic(R.string.architecture, 58, R.drawable.architecture),
        Topic(R.string.crafts, 121, R.drawable.crafts),
        Topic(R.string.business, 78, R.drawable.business),
        Topic(R.string.culinary, 118, R.drawable.culinary),
        Topic(R.string.design, 423, R.drawable.design),
        Topic(R.string.fashion, 92, R.drawable.fashion),
        Topic(R.string.film, 165, R.drawable.film),
        Topic(R.string.gaming, 164, R.drawable.gaming),
        Topic(R.string.drawing, 326, R.drawable.drawing),
        Topic(R.string.lifestyle, 305, R.drawable.lifestyle),
        Topic(R.string.music, 212, R.drawable.music),
        Topic(R.string.painting, 172, R.drawable.painting),
        Topic(R.string.photography, 321, R.drawable.photography),
        Topic(R.string.tech, 118, R.drawable.tech)
    )
}
5. Topic grid item
Create a composable to represent a topic grid item.
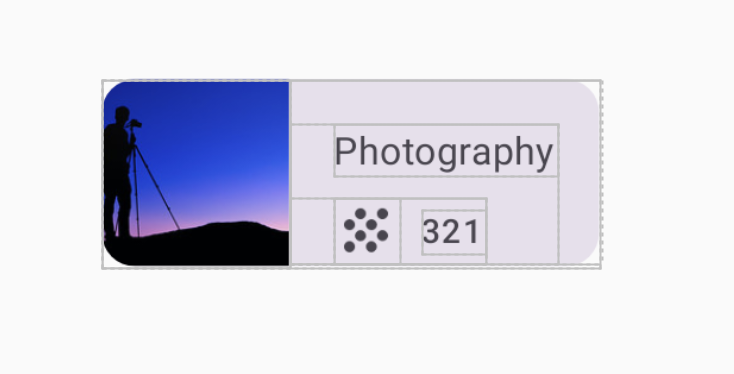
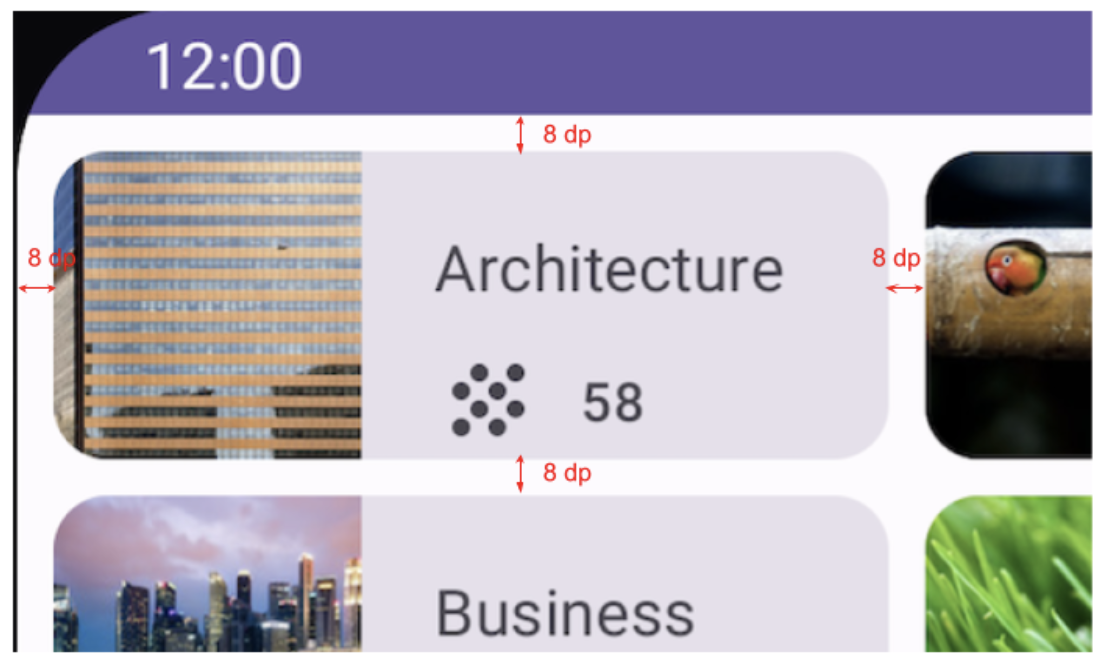
Final screenshot
After you finish the implementation, your topic item layout should match the screenshot below:

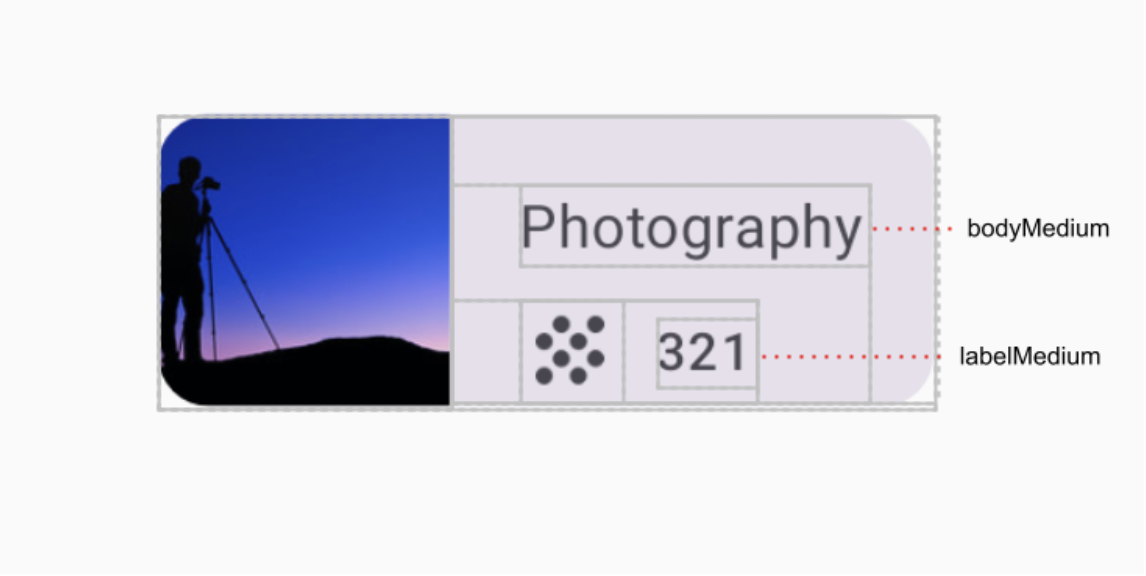
UI specifications
Use the following UI specifications:
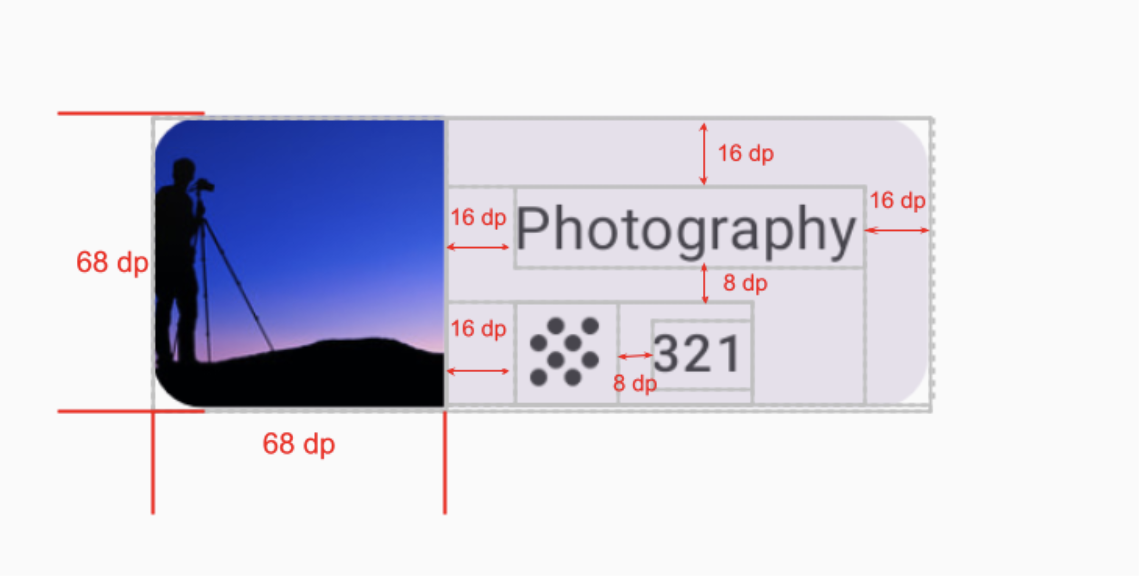
Hint: Which composable arranges its children vertically and which arranges its children horizontally?
References
- Typography
- Standard layout components
BoxlayoutColumnlayoutRowlayoutaspectRatiopainterResource
6. Courses grid
Once the topic grid item is created, it can be used to make a grid of course topics.
In this exercise, you use your grid item composable to make a grid with two columns.
Final screenshot
After you finish the implementation, your design should match the screenshot below:
UI specification
Use the following UI specifications:
References
7. Get the solution code
To download the code for the finished codelab, you can use this git command:
$ git clone https://github.com/google-developer-training/basic-android-kotlin-compose-training-courses.git
Alternatively, you can download the repository as a zip file, unzip it, and open it in Android Studio.
If you want to see the solution code, view it on GitHub.
The app that you built in this exercise is a modified version of the Owl app courses screen. The Owl app is a comprehensive sample app demonstrating the capabilities of Compose. Other Compose sample apps can be found in the compose-samples GitHub repository.