1. Before you begin
Introduction
In this unit, you learned how to take your app to the next level by retrieving data from the internet. Your app can now show the latest data available from the server and is not restricted to what was statically available when you opened the app. This is very important functionality in most of the real world applications.
In this practice set, you will take the concepts you learned and create an Amphibians app. This app will retrieve amphibian data from the internet and display it in a scrolling list.
The solution code is available at the end. To make the most of this learning experience, try to implement and troubleshoot as much as you can before looking at the provided solution code. It is during this hands-on time that you will learn the most.
Prerequisites
- Android Basics with Compose coursework through the Load and display images from the internet codelab.
What you'll need
- A computer with internet access and Android Studio installed.
What you'll build
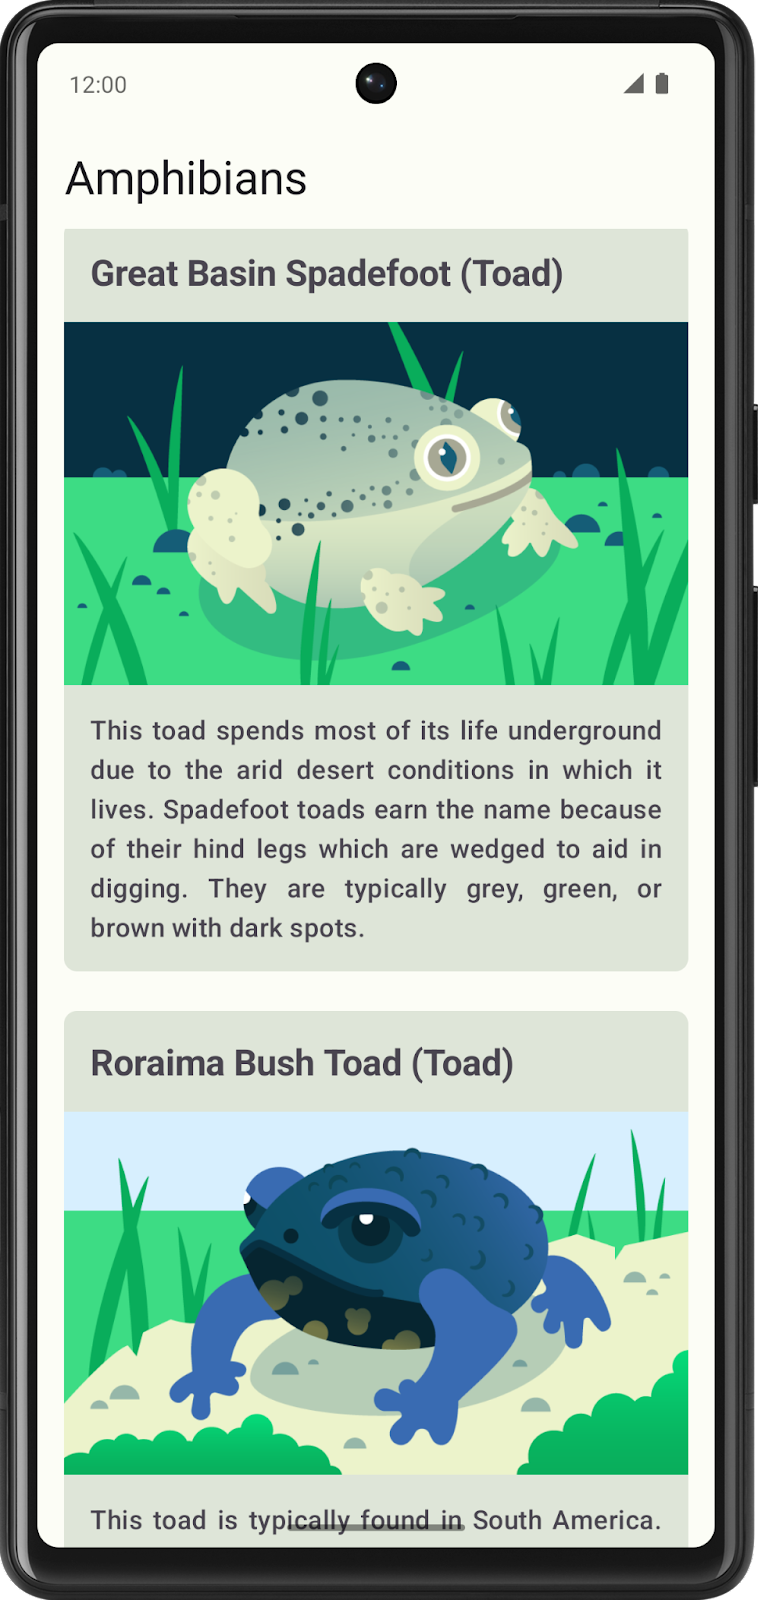
In this practice set, you will build an app to display a list of amphibians, along with their details and image. The data is retrieved from the internet by making a network request and contains each amphibian's name, type, description, and image URL.
The amphibian JSON data is hosted at https://android-kotlin-fun-mars-server.appspot.com/amphibians.
The provided solution code displays the following UI design:

The following sections provide the general steps to create the app. You are not required to follow them, but they are provided to help guide you along the way.
2. Plan the app
Before you begin coding, take some time to sketch out the different elements for your app and how they connect together.
Doing this preparation work helps identify what you need to do, might indicate where you can run into problems, and helps you think about ways to resolve issues.
3. Create a new project
Start with a new project in Android Studio:
- Open Android Studio and select New Project.
- Under Templates, select Phone and Tablet.
- Select Empty Activity and click Next.
- Change the name to Amphibians.
- Click Finish.
You are now ready to begin coding!
4. Set up dependencies
The app uses Retrofit for network requests, Coil for image loading, and the kotlinx.serialization library for parsing the JSON returned by the Amphibians API.
Add their dependencies to app/build.gradle.kts.
5. Create UI layer
It is recommended that you follow Android app architecture best practices and create a UI layer for this app.
This layer contains the ViewModel and composable functions that display the UiState coming from the ViewModel on the screen. The ViewModel is in charge of exposing the screen UI state, and handling the business logic in the UI layer and calling the business logic from other layers of the hierarchy.
The UI layer also contains the visual elements that your users see and interact with. This layer is where you decide how the various elements go together to create the UI you envision. You are deciding on the colors, fonts, and how you display images.
6. Create data layer
The data layer is responsible for retrieving the amphibian data from the API.
You probably want to include a data class for the amphibian data, a repository to manage the data, and a data source class to retrieve the data from the network.
If you need some help making the network calls, you can refer to Web services and Retrofit from the Get data from the internet codelab.
For help parsing the network response, refer to Parse the JSON response with kotlinx.serialization.
For loading images with Coil, you can check out the official documentation or refer back to the Display a downloaded image section of the Load and display images from the Internet codelab.
7. Implement Dependency Injection
You should use Dependency Injection (DI) to keep your app flexible, robust, and ready to scale.
DI keeps app components loosely coupled and easier to test.
When implementing DI, you need to create an application container, which is used to get the dependencies that your app needs.
The application container needs to be accessible to the whole application. You can achieve this by holding the dependencies container in a custom Application class. This class then inherits from the Application class.
If you need help implementing this functionality:
- For the application container, refer to Dependency injection and Attach application container to the app from the codelab Add repository and Manual DI.
- For the application class code, refer to Attach application container to the app.
