
1. Before you begin
Introduction
In this unit, you have learned how to use SQL and Room to save data locally on a device. SQL and Room are powerful tools. However, in cases where you don't need to store relational data, DataStore can provide a simple solution. The DataStore Jetpack Component is a great way to store small and simple data sets with low overhead. DataStore has two different implementations, Preferences DataStore and Proto DataStore.
Preferences DataStorestores key-value pairs. The values can be Kotlin's basic data types, such asString,Boolean, andInteger. It does not store complex datasets. It does not require a predefined schema. The primary use case of thePreferences Datastoreis to store user preferences on their device.Proto DataStorestores custom data types. It requires a predefined schema that maps proto definitions with object structures.
Only Preferences DataStore is covered in this codelab, but you can read more about Proto DataStore in the DataStore documentation.
Preferences DataStore is a great way to store user-controlled settings, and in this codelab, you learn how to implement DataStore to do exactly that!
Prerequisites:
- Complete the Android Basics with Compose coursework through the Read and Update Data with Room codelab.
What you'll need
- A computer with internet access and Android Studio
- A device or emulator
- The starter code for the Dessert Release app
What you'll build
The Dessert Release app shows a list of Android releases. The icon in the app bar toggles the layout between a grid view and a list view.
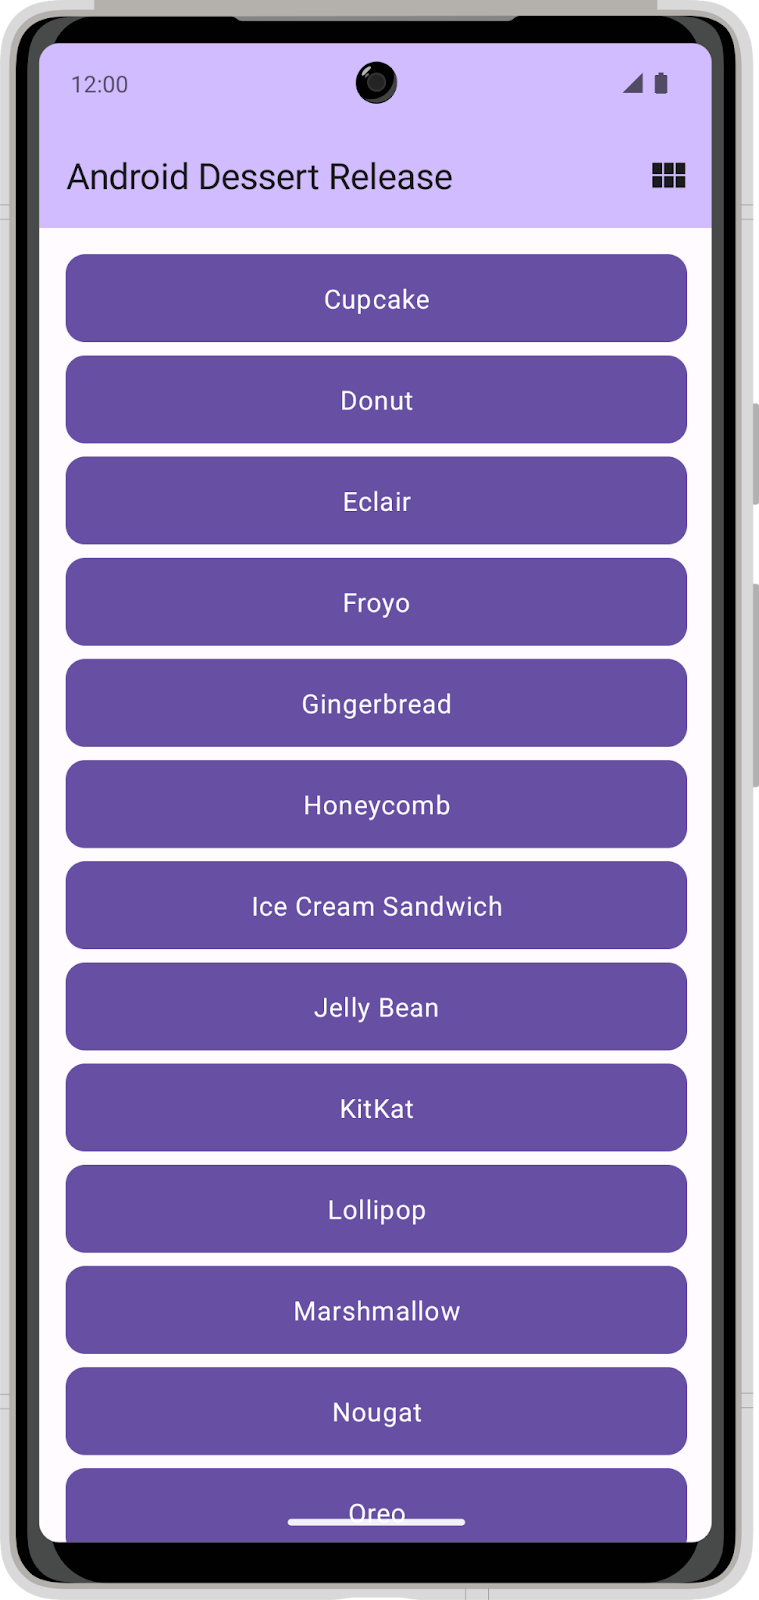
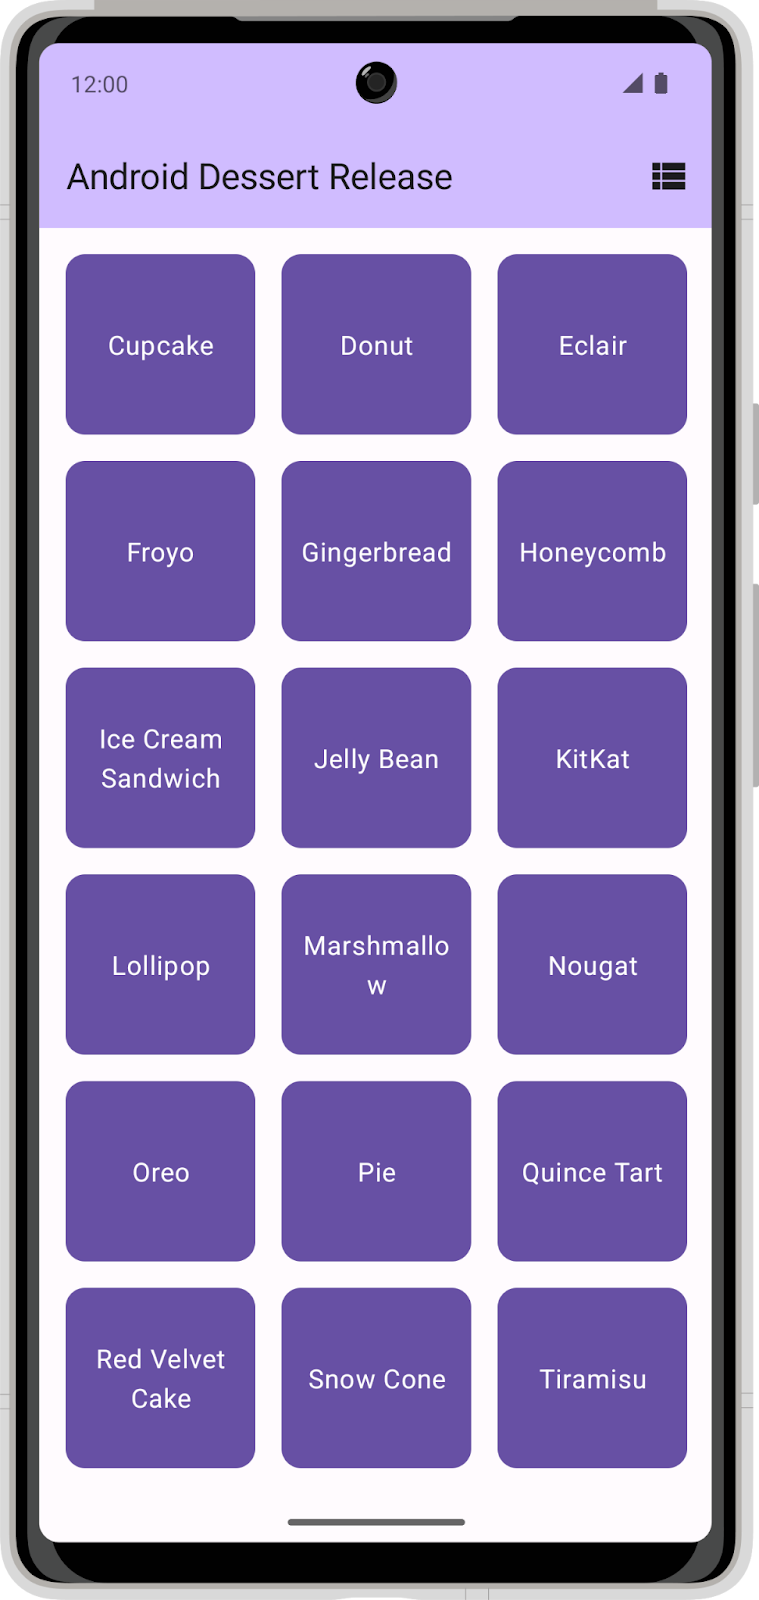
In its current state, the app does not persist the layout selection. When you close the app, your layout selection does not save and the setting returns to the default selection. In this codelab, you add DataStore to the Dessert Release app and use it to store a layout selection preference.
2. Download the starter code
Click the following link to download all the code for this codelab:
Or if you prefer, you can clone the Dessert Release code from GitHub:
$ git clone https://github.com/google-developer-training/basic-android-kotlin-compose-training-dessert-release.git
$ cd basic-android-kotlin-compose-training-dessert-release
$ git checkout starter
- In Android Studio, open the
basic-android-kotlin-compose-training-dessert-releasefolder. - Open the Dessert Release app code in Android Studio.
3. Set up dependencies
Add the following to dependencies in the app/build.gradle.kts file:
implementation("androidx.datastore:datastore-preferences:1.0.0")
4. Implement the user preferences repository
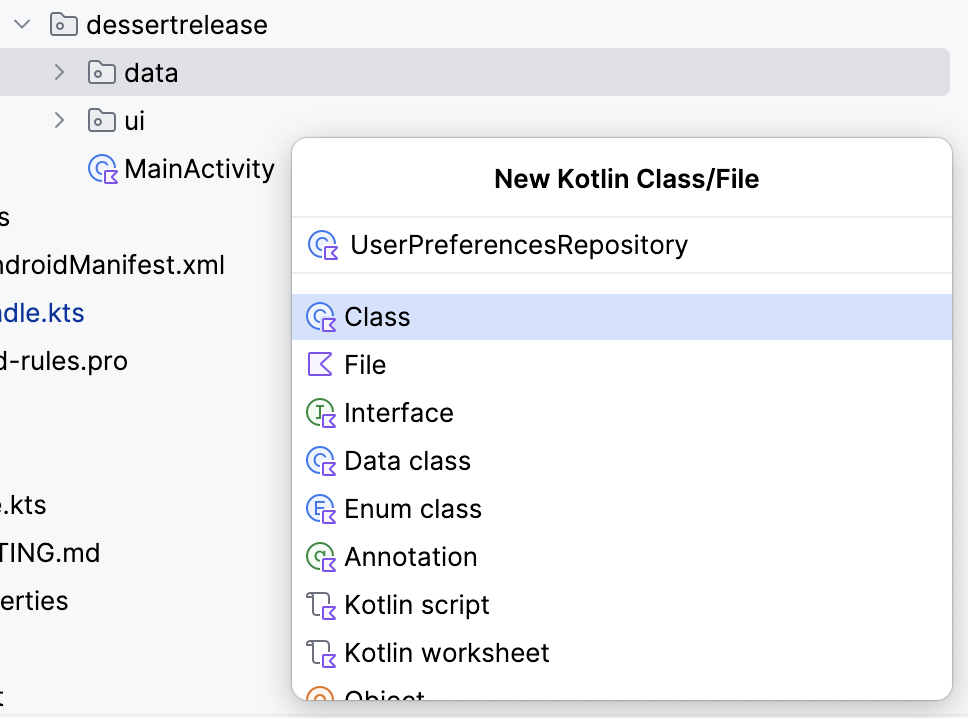
- In the
datapackage, create a new class calledUserPreferencesRepository.
- In the
UserPreferencesRepositoryconstructor, define a private value property to represent aDataStoreobject instance with aPreferencestype.
class UserPreferencesRepository(
    private val dataStore: DataStore<Preferences>
){
}
DataStore stores key-value pairs. To access a value you must define a key.
- Create a
companion objectinside theUserPreferencesRepositoryclass. - Use the
booleanPreferencesKey()function to define a key and pass it the nameis_linear_layout. Similar to SQL table names, the key needs to use an underscore format. This key is used to access a boolean value indicating whether the linear layout should be shown.
class UserPreferencesRepository(
    private val dataStore: DataStore<Preferences>
){
    private companion object {
        val IS_LINEAR_LAYOUT = booleanPreferencesKey("is_linear_layout")
    }
    ...
}
Write to the DataStore
You create and modify the values within a DataStore by passing a lambda to the edit() method. The lambda is passed an instance of MutablePreferences, which you can use to update values in the DataStore. All the updates inside this lambda are executed as a single transaction. Put another way, the update is atomic — it happens all at one time. This type of update prevents a situation in which some values update but others do not.
- Create a suspend function and call it
saveLayoutPreference(). - In the
saveLayoutPreference()function, call theedit()method on thedataStoreobject.
suspend fun saveLayoutPreference(isLinearLayout: Boolean) {
    dataStore.edit {

    }
}
- To make your code more readable, define a name for the
MutablePreferencesprovided in the lambda body. Use that property to set a value with the key you defined and the boolean passed to thesaveLayoutPreference()function.
suspend fun saveLayoutPreference(isLinearLayout: Boolean) {
    dataStore.edit { preferences ->
        preferences[IS_LINEAR_LAYOUT] = isLinearLayout
    }
}
Read from the DataStore
Now that you have created a way to write isLinearLayout into dataStore, take the following steps to read it:
- Create a property in
UserPreferencesRepositoryof typeFlow<Boolean>calledisLinearLayout.
val isLinearLayout: Flow<Boolean> =
- You can use the
DataStore.dataproperty to exposeDataStorevalues. SetisLinearLayoutto thedataproperty of theDataStoreobject.
val isLinearLayout: Flow<Boolean> = dataStore.data
The data property is a Flow of Preferences objects. The Preferences object contains all the key-value pairs in the DataStore. Each time the data in the DataStore is updated, a new Preferences object is emitted into the Flow.
- Use the map function to convert the
Flow<Preferences>into aFlow<Boolean>.
This function accepts a lambda with the current Preferences object as a parameter. You can specify the key you previously defined to obtain the layout preference. Bear in mind that the value might not exist if saveLayoutPreference hasn't been called yet, so you must also supply a default value.
- Specify
trueto default to the linear layout view.
val isLinearLayout: Flow<Boolean> = dataStore.data.map { preferences ->
    preferences[IS_LINEAR_LAYOUT] ?: true
}
Exception handling
Any time you interact with the file system on a device, it's possible that something can fail. For example, a file might not exist, or the disk could be full or unmounted. As DataStore reads and writes data from files, IOExceptions can occur when accessing the DataStore. You use the catch{} operator to catch exceptions and handle these failures.
- In the companion object, implement an immutable
TAGstring property to use for logging.
private companion object {
    val IS_LINEAR_LAYOUT = booleanPreferencesKey("is_linear_layout")
    const val TAG = "UserPreferencesRepo"
}
Preferences DataStorethrows anIOExceptionwhen an error is encountered while reading data. In theisLinearLayoutinitialization block, beforemap(), use thecatch{}operator to catch theIOException.
val isLinearLayout: Flow<Boolean> = dataStore.data
    .catch {}
    .map { preferences ->
        preferences[IS_LINEAR_LAYOUT] ?: true
    }
- In the catch block, if there is an
IOexception, log the error and emitemptyPreferences(). If a different type of exception is thrown, prefer re-throwing that exception. By emittingemptyPreferences()if there is an error, the map function can still map to the default value.
val isLinearLayout: Flow<Boolean> = dataStore.data
    .catch {
        if(it is IOException) {
            Log.e(TAG, "Error reading preferences.", it)
            emit(emptyPreferences())
        } else {
            throw it
        }
    }
    .map { preferences ->
        preferences[IS_LINEAR_LAYOUT] ?: true
    }
5. Initialize the DataStore
In this codelab, you must handle the dependency injection manually. Therefore, you must manually provide the UserPreferencesRepository class with a Preferences DataStore. Follow these steps to inject DataStore into the UserPreferencesRepository.
- Find the
dessertreleasepackage. - Within this directory, create a new class called
DessertReleaseApplicationand implement theApplicationclass. This is the container for your DataStore.
class DessertReleaseApplication: Application() {
}
- Inside of the
DessertReleaseApplication.ktfile, but outside theDessertReleaseApplicationclass, declare aprivate const valcalledLAYOUT_PREFERENCE_NAME. - Assign the
LAYOUT_PREFERENCE_NAMEvariable the string valuelayout_preferences, which you can then use as the name of thePreferences Datastorethat you instantiate in the next step.
private const val LAYOUT_PREFERENCE_NAME = "layout_preferences"
- Still outside the
DessertReleaseApplicationclass body but in theDessertReleaseApplication.ktfile, create a private value property of typeDataStore<Preferences>calledContext.dataStoreusing thepreferencesDataStoredelegate. PassLAYOUT_PREFERENCE_NAMEfor thenameparameter of thepreferencesDataStoredelegate.
private const val LAYOUT_PREFERENCE_NAME = "layout_preferences"
private val Context.dataStore: DataStore<Preferences> by preferencesDataStore(
    name = LAYOUT_PREFERENCE_NAME
)
- Inside the
DessertReleaseApplicationclass body, create alateinit varinstance of theUserPreferencesRepository.
private const val LAYOUT_PREFERENCE_NAME = "layout_preferences"
private val Context.dataStore: DataStore<Preferences> by preferencesDataStore(
    name = LAYOUT_PREFERENCE_NAME
)

class DessertReleaseApplication: Application() {
    lateinit var userPreferencesRepository: UserPreferencesRepository
}
- Override the
onCreate()method.
private const val LAYOUT_PREFERENCE_NAME = "layout_preferences"
private val Context.dataStore: DataStore<Preferences> by preferencesDataStore(
    name = LAYOUT_PREFERENCE_NAME
)

class DessertReleaseApplication: Application() {
    lateinit var userPreferencesRepository: UserPreferencesRepository

    override fun onCreate() {
        super.onCreate()
    }
}
- Inside the
onCreate()method, initializeuserPreferencesRepositoryby constructing aUserPreferencesRepositorywithdataStoreas its parameter.
private const val LAYOUT_PREFERENCE_NAME = "layout_preferences"
private val Context.dataStore: DataStore<Preferences> by preferencesDataStore(
    name = LAYOUT_PREFERENCE_NAME
)

class DessertReleaseApplication: Application() {
    lateinit var userPreferencesRepository: UserPreferencesRepository

    override fun onCreate() {
        super.onCreate()
        userPreferencesRepository = UserPreferencesRepository(dataStore)
    }
}
- Add the following line inside the
<application>tag in theAndroidManifest.xmlfile.
<application
    android:name=".DessertReleaseApplication"
    ...
</application>
This approach defines DessertReleaseApplication class as the entry point of the app. The purpose of this code is to initialize the dependencies defined in the DessertReleaseApplication class before launching the MainActivity.
6. Use the UserPreferencesRepository
Provide the repository to the ViewModel
Now that the UserPreferencesRepository is available through dependency injection, you can use it in DessertReleaseViewModel.
- In the
DessertReleaseViewModel, create aUserPreferencesRepositoryproperty as a constructor parameter.
class DessertReleaseViewModel(
    private val userPreferencesRepository: UserPreferencesRepository
) : ViewModel() {
    ...
}
- Within the
ViewModel's companion object, in theviewModelFactory initializerblock, obtain an instance of theDessertReleaseApplicationusing the following code.
    ...
    companion object {
        val Factory: ViewModelProvider.Factory = viewModelFactory {
            initializer {
                val application = (this[APPLICATION_KEY] as DessertReleaseApplication)
                ...
            }
        }
    }
}
- Create an instance of the
DessertReleaseViewModeland pass theuserPreferencesRepository.
    ...
    companion object {
        val Factory: ViewModelProvider.Factory = viewModelFactory {
            initializer {
                val application = (this[APPLICATION_KEY] as DessertReleaseApplication)
                DessertReleaseViewModel(application.userPreferencesRepository)
            }
        }
    }
}
The UserPreferencesRepository is now accessible by the ViewModel. The next steps are to use the read and write capabilities of the UserPreferencesRepository that you implemented previously.
Store the layout preference
- Edit the
selectLayout()function in theDessertReleaseViewModelto access the preferences repository and update the layout preference. - Recall that writing to the
DataStoreis done asynchronously with asuspendfunction. Start a new Coroutine to call the preference repository'ssaveLayoutPreference()function.
fun selectLayout(isLinearLayout: Boolean) {
    viewModelScope.launch {
        userPreferencesRepository.saveLayoutPreference(isLinearLayout)
    }
}
Read the layout preference
In this section, you refactor the existing uiState: StateFlow in the ViewModel to reflect the isLinearLayout: Flow from the repository.
- Delete the code that initializes the
uiStateproperty toMutableStateFlow(DessertReleaseUiState).
val uiState: StateFlow<DessertReleaseUiState> =
The linear layout preference from the repository has two possible values, true or false, in the form of a Flow<Boolean>. This value must map to a UI state.
- Set the
StateFlowto the result of themap()collection transformation called on theisLinearLayout Flow.
val uiState: StateFlow<DessertReleaseUiState> =
    userPreferencesRepository.isLinearLayout.map { isLinearLayout ->
}
- Return an instance of the
DessertReleaseUiStatedata class, passing theisLinearLayout Boolean. The screen uses this UI state to determine the correct strings and icons to display.
val uiState: StateFlow<DessertReleaseUiState> =
    userPreferencesRepository.isLinearLayout.map { isLinearLayout ->
        DessertReleaseUiState(isLinearLayout)
    }
UserPreferencesRepository.isLinearLayout is a Flow which is cold. However, for providing state to the UI, it's better to use a hot flow, like StateFlow, so that the state is always available immediately to the UI.
- Use the
stateIn()function to convert aFlowto aStateFlow. - The
stateIn()function accepts three parameters:scope,started, andinitialValue. Pass inviewModelScope,SharingStarted.WhileSubscribed(5_000), andDessertReleaseUiState()for these parameters, respectively.
val uiState: StateFlow<DessertReleaseUiState> =
    userPreferencesRepository.isLinearLayout.map { isLinearLayout ->
        DessertReleaseUiState(isLinearLayout)
    }
.stateIn(
        scope = viewModelScope,
        started = SharingStarted.WhileSubscribed(5_000),
        initialValue = DessertReleaseUiState()
    )
- Launch the app. Notice that you can click on the toggle icon to toggle between a grid layout and a linear layout.
Congratulations! You successfully added Preferences DataStore to your app to save the user's layout preference.
7. Get the solution code
To download the code for the finished codelab, you can use these git commands:
$ git clone https://github.com/google-developer-training/basic-android-kotlin-compose-training-dessert-release.git
$ cd basic-android-kotlin-compose-training-dessert-release
$ git checkout main
Alternatively, you can download the repository as a zip file, unzip it, and open it in Android Studio.
If you want to see the solution code, view it on GitHub.