1. 始める前に
たとえば、混雑しているモールで友人のジェーンを見つけたとします。あなたはジェーンの注意を引くために、手を振ったり大声で声をかけようとするかもしれません。Google の Nearby Messages API を使用すると、アプリがユーザーに代わって注意を引いてくれるので、近くにいる友だちをお互い簡単に見つけることができます。この Codelab では、Nearby Messages API を使用して、物理的距離に基づいてユーザー同士のやり取りを可能にする方法について説明します。説明をシンプルにするため、この Codelab のユーザーは各自のスマートフォンのビルドモデル(android.os.Build.MODEL)を公開します。しかし実際の場合、ユーザーは各自の userId、またはユースケースに適したその他の情報を近くの友だちに公開できます。Nearby Messages API はインターネット接続や Bluetooth などの技術を組み合わせることで、この機能を提供します。
前提条件
- Kotlin と Android の開発に関する基本的な知識
- Android Studio でアプリを作成して実行するための知識
- コードの実行とテストに使用する 2 台以上の Android デバイス
学習内容
- Nearby ライブラリをアプリに追加する方法
- 対象のユーザーにメッセージをブロードキャストする方法
- 物理的距離に基づいてメッセージを検出する方法
- メッセージの API キーを取得する方法
- バッテリー寿命に関するおすすめの方法
必要なもの
- Google API キーを取得するための Google アカウント(Gmail アドレスなど)
- Android Studio の最新バージョン
- Google Play 開発者サービス(別名: Play ストア)がインストールされている 2 台の Android デバイス
- インターネット接続(インターネット接続を必要としない Nearby Connections API とは異なります)
作成するアプリの概要
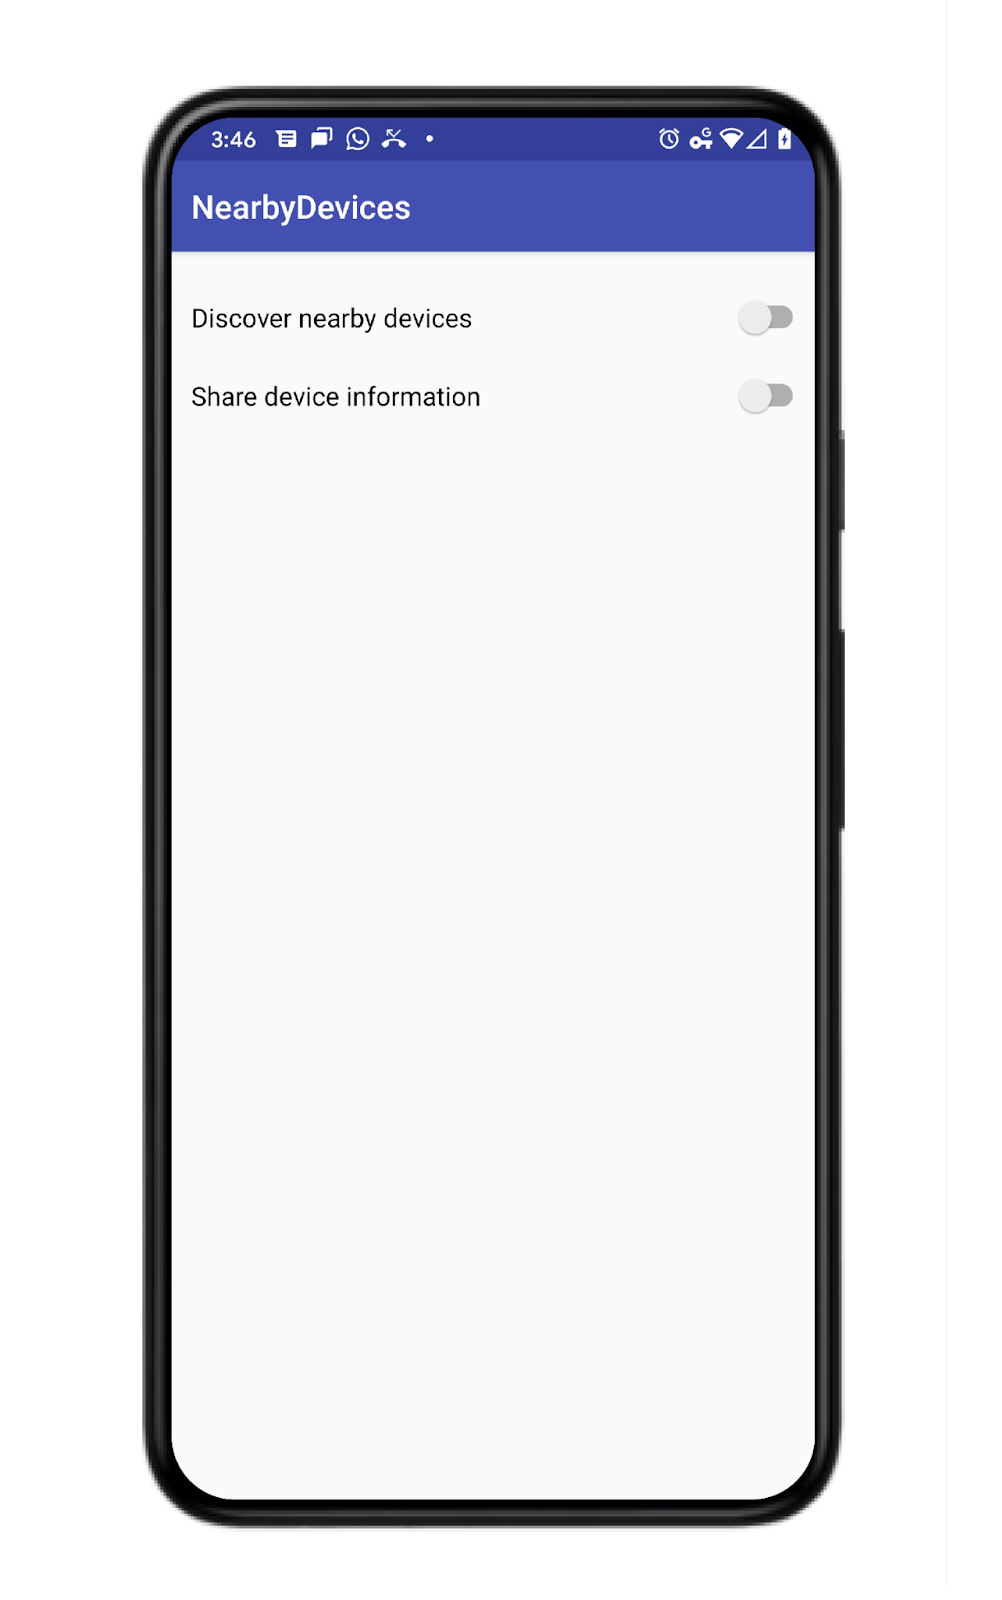
ユーザーがデバイス情報を公開し、付近のデバイスに関する情報を受信できるようにする、単一の Activity アプリを作成します。アプリには、切り替え可能なスイッチが 2 つあります。1 つ目は近くのメッセージの検出を開始または停止するためのスイッチで、2 つ目はメッセージを公開または公開停止するためのスイッチです。このアプリでは、公開と検出の両方を 120 秒後に停止します。これを行うために、この API についてさらに詳しく説明し、PublishOptions と SubscribeOptions オブジェクトの作成を行い、onExpired() コールバックを使用して公開 UI スイッチと登録 UI スイッチをオフにします。

2. Android Studio プロジェクトを作成する
- 新しい Android Studio プロジェクトを開始します。
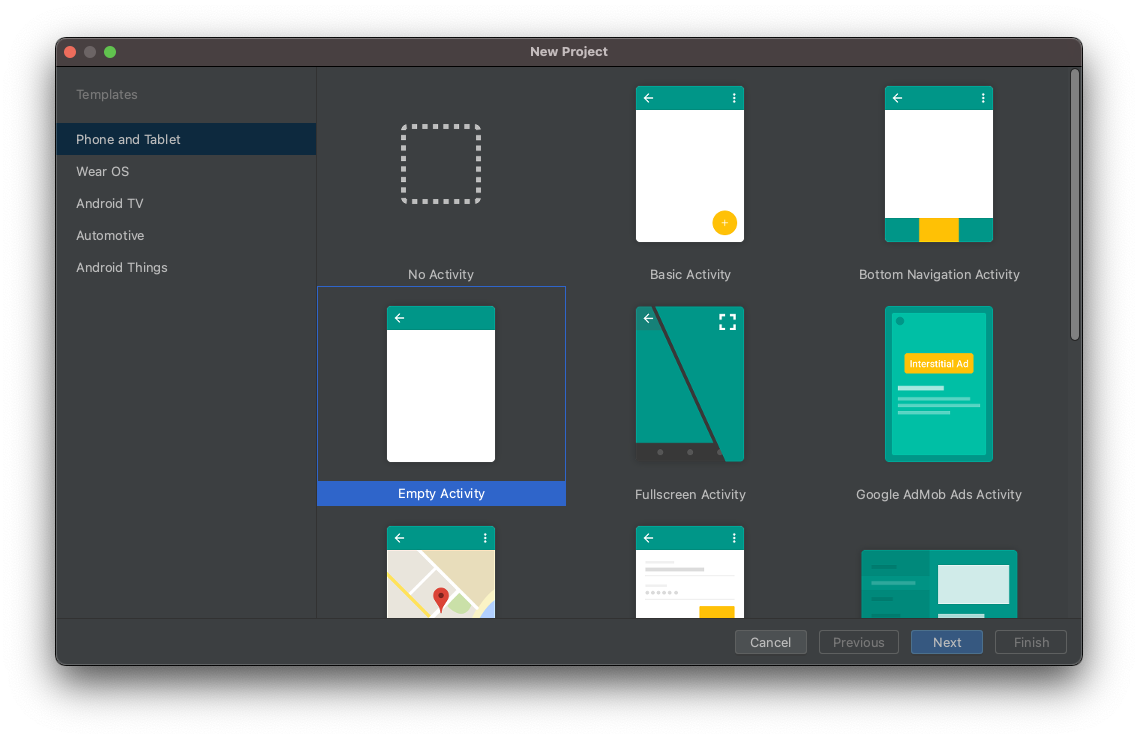
- [Empty Activity] を選択します。

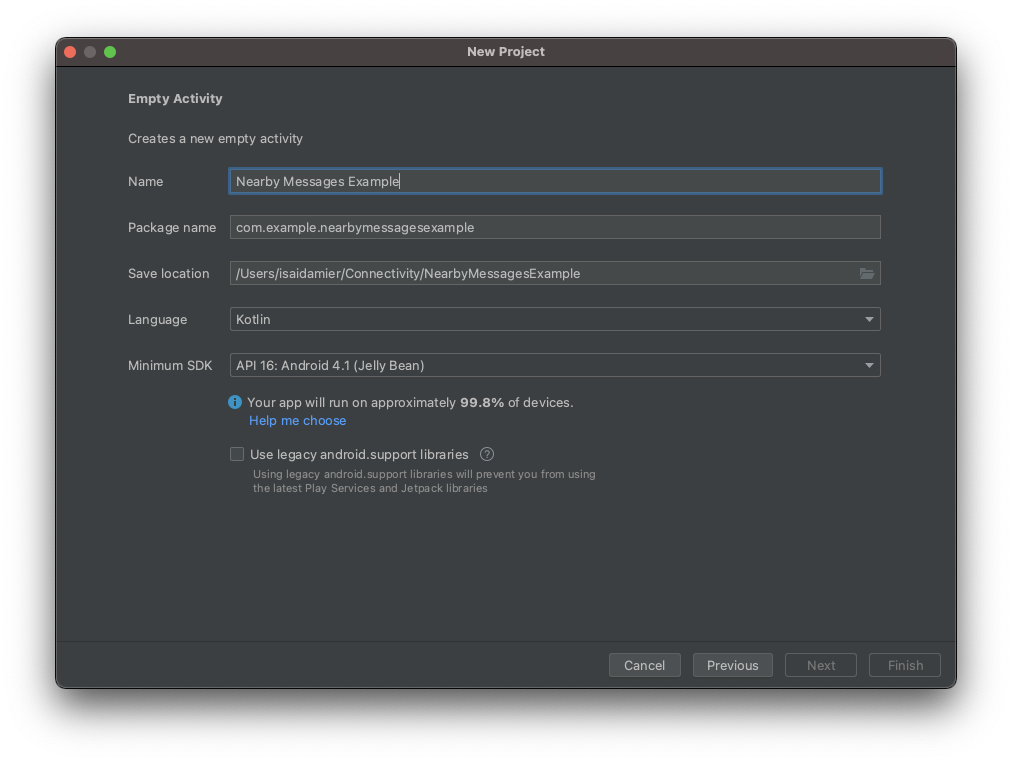
- プロジェクトに「Nearby Messages Example」という名前を付けて、言語を Kotlin に設定します。

3.コードをセットアップする
- Nearby 依存関係の最新バージョンをアプリレベルの
build.gradleファイルに追加します。これにより、Nearby Messages API を使用して、付近のデバイスにメッセージを送信したり、付近のデバイスからメッセージを検出したりできるようになります。
implementation 'com.google.android.gms:play-services-nearby:18.0.0'
- Android ブロックで viewBinding ビルド オプションを
trueに設定して ViewBinding を有効にします。
android {
   ...
   buildFeatures {
       viewBinding true
   }
}
- [Sync Now] または緑色のハンマーボタンをクリックして、Android Studio でこれらの Gradle の変更を登録できるようにします。

- 「付近のデバイスを検出する」と「デバイス情報を共有する」の切り替えボタンと、デバイスの一覧を含む RecycleView を追加します。
activity_main.xmlファイルで、コードを次のコードに置き換えます。
<?xml version="1.0" encoding="utf-8"?>
<LinearLayout xmlns:android="http://schemas.android.com/apk/res/android"
   xmlns:app="http://schemas.android.com/apk/res-auto"
   xmlns:tools="http://schemas.android.com/tools"
   android:id="@+id/activity_main_container"
   android:layout_width="match_parent"
   android:layout_height="match_parent"
   android:orientation="vertical"
   android:padding="16dp"
   tools:context=".MainActivity">

   <androidx.appcompat.widget.SwitchCompat
       android:id="@+id/subscribe_switch"
       android:layout_width="match_parent"
       android:layout_height="wrap_content"
       android:text="Discover nearby devices" />

   <androidx.appcompat.widget.SwitchCompat
       android:id="@+id/publish_switch"
       android:layout_width="match_parent"
       android:layout_height="wrap_content"
       android:text="Share device information" />

   <androidx.recyclerview.widget.RecyclerView
       android:id="@+id/nearby_msg_recycler_view"
       android:layout_width="match_parent"
       android:layout_height="wrap_content"
       android:transcriptMode="alwaysScroll" />
</LinearLayout>
注: 実際のプロジェクトでは、値(例: 16dp)をリソース(例: @dimen/activity_vertical_margin)に変更します。
4. Nearby Messages をアプリに追加する
変数の定義
- メイン アクティビティ(
MainActivity.kt)の内部で、onCreate()関数の上にこのコード スニペットを貼り付けて次の変数を定義します。
/**
* For accessing layout variables
*/
private lateinit var binding: ActivityMainBinding

/**
* Sets the time to live in seconds for the publish or subscribe.
*/
private val TTL_IN_SECONDS = 120 // Two minutes.

/**
* Choose of strategies for publishing or subscribing for nearby messages.
*/
private val PUB_SUB_STRATEGY = Strategy.Builder().setTtlSeconds(TTL_IN_SECONDS).build()

/**
* The [Message] object used to broadcast information about the device to nearby devices.
*/
private lateinit var message: Message

/**
* A [MessageListener] for processing messages from nearby devices.
*/
private lateinit var messageListener: MessageListener

/**
* MessageAdapter is a custom class that we will define later. It's for adding
* [messages][Message] to the [RecyclerView]
*/
private lateinit var msgAdapter: MessageAdapter
上記のコードでは、ブロードキャストの継続時間をカスタマイズするため、Strategy を定義しました。この Codelab では 120 秒を選択します。Strategy を指定しない場合は、API にはデフォルトの値が使用されます。また、この Codelab では公開と登録の両方に同じ Strategy を使用していますが、必須ではありません。
onCreate()関数を変更して、ViewBinding オブジェクトをsetContentView()に渡します。これにより、activity_main.xmlレイアウト ファイルの内容が表示されます。
override fun onCreate(savedInstanceState: Bundle?) {
   super.onCreate(savedInstanceState)
   binding = ActivityMainBinding.inflate(layoutInflater)
   setContentView(binding.root)
}
UI ボタンを接続する
このアプリは、スイッチの切り替えに応じてメッセージを公開する、スイッチの切り替えに応じてメッセージを検出する、RecyclerView にメッセージを表示するという 3 つのことを行います。
- 今回は、ユーザーがメッセージの公開と公開停止とメッセージの検出(つまり登録)を行うようにします。これを実現するために、
publish()、unpublish()、subscribe()、unsubscribe()というスタブメソッドを作成します。実装は後のステップで作成します。
private fun publish() {
   TODO("Not yet implemented")
}

private fun unpublish() {
   TODO("Not yet implemented")
}

private fun subscribe() {
   TODO("Not yet implemented")
}

private fun unsubscribe() {
   TODO("Not yet implemented")
}
- ユーザーは、アクティビティのレイアウトに追加されたスイッチを使用して、メッセージを公開(または登録)できます。2 つの
Switchesを接続して、onCreate()関数の最後に定義したメソッドを呼び出します。
   binding.subscribeSwitch.setOnCheckedChangeListener { buttonView, isChecked ->
       if (isChecked) {
           subscribe()
       } else {
           unsubscribe()
       }
   }

   binding.publishSwitch.setOnCheckedChangeListener { buttonView, isChecked ->
       if (isChecked) {
           publish()
       } else {
           unpublish()
       }
   }
- メッセージを公開して検出するための UI コードを追加したら、メッセージの表示と削除を行うための
RecyclerViewを設定します。RecyclerViewは、現在公開されているメッセージを表示します。登録者がメッセージをリッスンします。メッセージが検出されると、登録者はそれをRecyclerViewに追加します。メッセージが失われた場合、つまり公開者が公開を停止した場合、登録者はメッセージをRecyclerViewから削除します。
private fun setupMessagesDisplay() {
   msgAdapter = MessageAdapter()
   with(binding.nearbyMsgRecyclerView) {
       layoutManager = LinearLayoutManager(context)
       this.adapter = msgAdapter
   }
}

class MessageAdapter : RecyclerView.Adapter<MessageAdapter.MessageVH>() {
   private var itemsList: MutableList<String> = arrayListOf()

   override fun onCreateViewHolder(parent: ViewGroup, viewType: Int): MessageVH {
       return MessageVH(TextView(parent.context))
   }

   override fun onBindViewHolder(holder: MessageVH, position: Int) {
       holder.bind(getItem(position))
   }

   override fun getItemCount(): Int = itemsList.size

   private fun getItem(pos: Int): String? = if (itemsList.isEmpty()) null else itemsList[pos]

   fun addItem(item: String) {
       itemsList.add(item)
       notifyItemInserted(itemsList.size)
   }

   fun removeItem(item: String) {
       val pos = itemsList.indexOf(item)
       itemsList.remove(item)
       notifyItemRemoved(pos)
   }

   inner class MessageVH(private val tv: TextView) : RecyclerView.ViewHolder(tv) {
       fun bind(item: String?) {
           item?.let { tv.text = it }
       }
   }
}
onCreate()関数の最後に、setupMessagesDisplay()関数への呼び出しを追加します。
override fun onCreate(savedInstanceState: Bundle?) {
   ...
   setupMessagesDisplay()
}
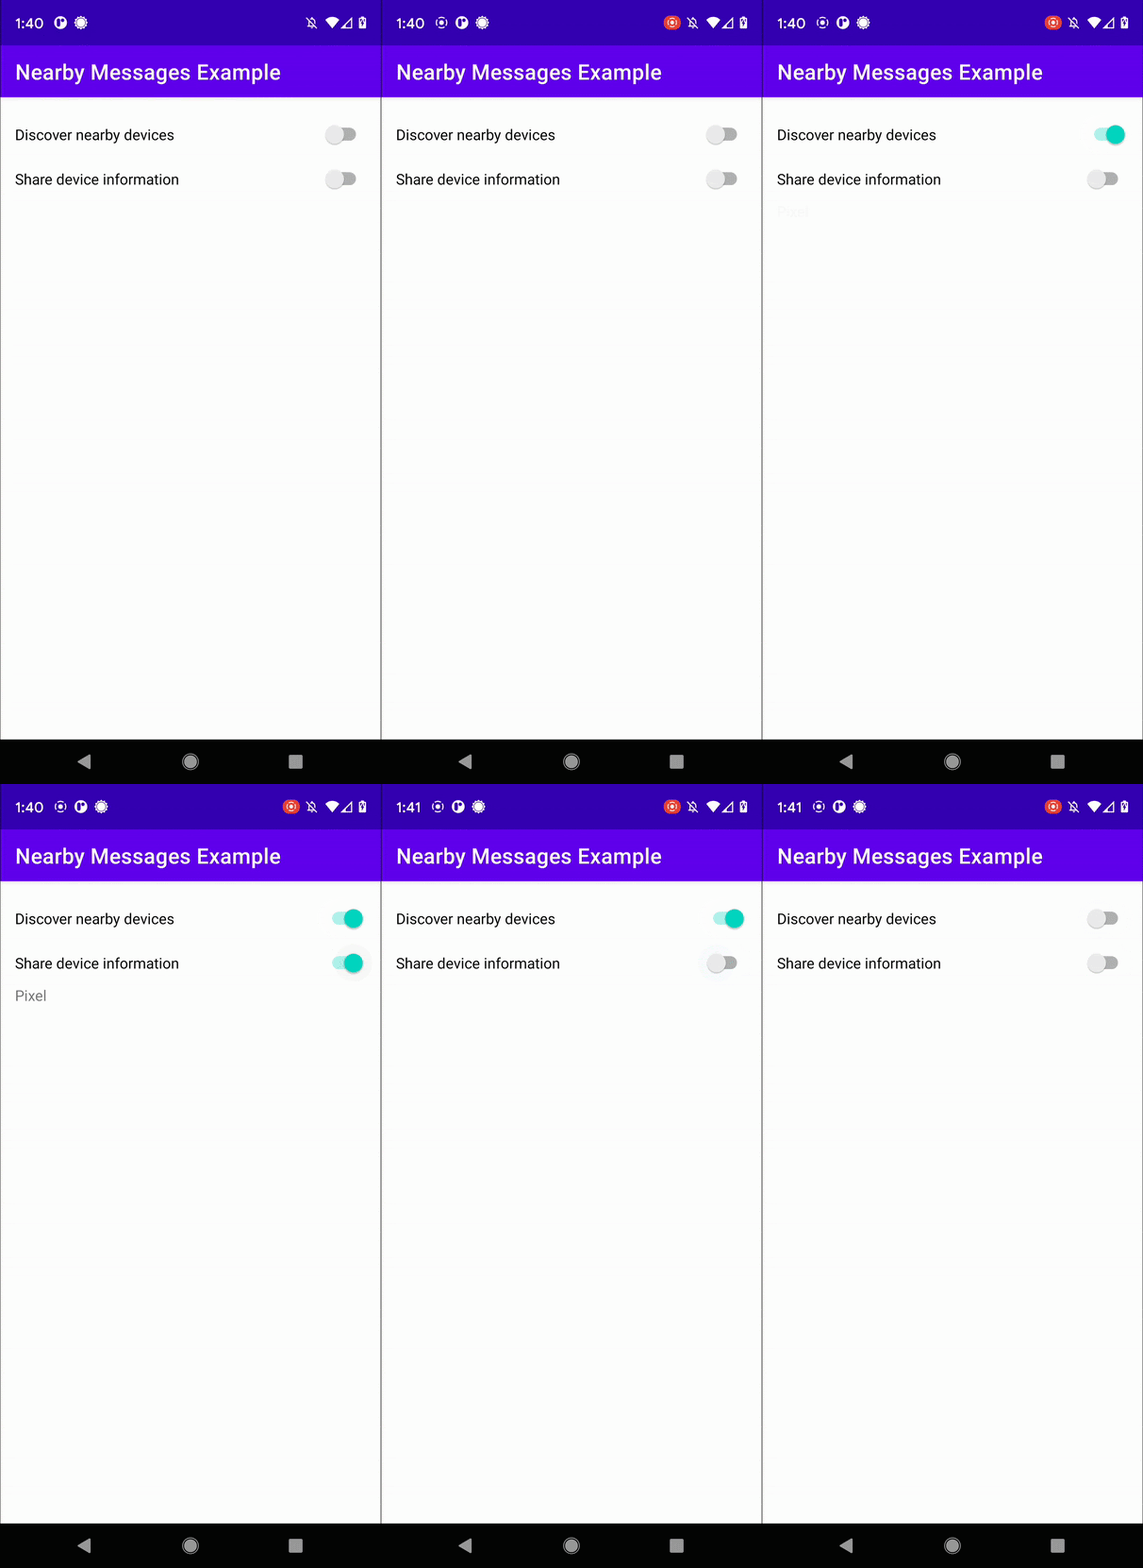
これで UI の設定がすべて完了し、メッセージの公開を開始したり、付近にある他のデバイスがメッセージを検出したりできるようになりました。この時点で、アプリは次のように表示されます。

公開コードと検出コードを追加する
- メッセージを送信するには、まず
Messageオブジェクトが必要です。これはデモであるため、デバイスのモデルだけを送信します。次のコードをonCreate()関数に追加して、送信するメッセージを作成します。
override fun onCreate(savedInstanceState: Bundle?) {
   ...

   // The message being published is simply the Build.MODEL of the device. But since the
   // Messages API is expecting a byte array, you must convert the data to a byte array.
   message = Message(Build.MODEL.toByteArray(Charset.forName("UTF-8")))

}
- 付近の他のデバイスが検出できる
Messageを公開するには、Nearby.getMessagesClient(activity).publish(message)を呼び出すだけです。ただし、さらに一歩進んで独自のPublishOptionsオブジェクトを作成することをおすすめします。これにより、独自のカスタムStrategyを指定し、公開メッセージの有効期限が切れたときに通知を行うPublishCallbackを利用できるようになります。次のコードでは、公開済みのTTLの有効期限が切れたときに自動でスイッチをオフにできるオプションを作成します。その後、publish()を呼び出すときに、そのオプションを渡します。publish()関数を次のように更新します。
private fun publish() {
   val options = PublishOptions.Builder()
       .setStrategy(PUB_SUB_STRATEGY)
       .setCallback(object : PublishCallback() {
           override fun onExpired() {
               super.onExpired()
               // flick the switch off since the publishing has expired.
               // recall that we had set expiration time to 120 seconds
               // Use runOnUiThread to force the callback
               // to run on the UI thread
               runOnUiThread{
                   binding.publishSwitch.isChecked = false
               }
           }
       }).build()

   Nearby.getMessagesClient(this).publish(message, options)
}
このコードは、ユーザーが公開スイッチをオンにするたびに実行されます。
- 公開するには
Messageが必要ですが、登録するにはMessageListenerが必要です。ただしここでも、API が機能するために必要でなくても、SubscribeOptionsオブジェクトを作成することをおすすめします。独自のSubscriptionOptionを作成することで、たとえば、検出モードの期間を指定できるようになります。
次の MessageListener コードを onCreate() 関数に追加します。メッセージが検出されると、リスナーによりそのメッセージが RecyclerView に追加されます。メッセージが失われると、リスナーによりそのメッセージが RecyclerView から削除されます。
messageListener = object : MessageListener() {
   override fun onFound(message: Message) {
       // Called when a new message is found.
       val msgBody = String(message.content)
       msgAdapter.addItem(msgBody)
   }

   override fun onLost(message: Message) {
       // Called when a message is no longer detectable nearby.
       val msgBody = String(message.content)
       msgAdapter.removeItem(msgBody)
   }
}
- 技術的には、登録者は
TTLを必要としません(TTLを infinity に設定できます)。しかし、この Codelab では 120 秒後に検出を停止します。そこで、独自のSubscribeOptionsを作成し、そのonExpired()コールバックを使用して登録 UISwitchを無効にします。次のコードで登録関数を更新します。
private fun subscribe() {
   val options = SubscribeOptions.Builder()
       .setStrategy(PUB_SUB_STRATEGY)
       .setCallback(object : SubscribeCallback() {
           override fun onExpired() {
               super.onExpired()
               // flick the switch off since the subscribing has expired.
               // recall that we had set expiration time to 120 seconds
               // Use runOnUiThread to force the callback
               // to run on the UI thread
               runOnUiThread {
                   binding.subscribeSwitch.isChecked = false
               }
           }
       }).build()

   Nearby.getMessagesClient(this).subscribe(messageListener, options)
}
- ユーザーが情報共有を無効にできるようにすることは重要です。つまり、公開者は公開を停止でき、登録者は登録を停止できるようにする必要があります。公開者が公開を停止するには、公開を停止するメッセージを指定する必要があります。そのため、ブロードキャストされているメッセージが 10 件ある場合は、1 件の公開を停止して、9 件の公開を継続できます。
private fun unpublish() {
   Nearby.getMessagesClient(this).unpublish(message)
}
- アプリは同時に複数のメッセージを公開できますが、
MessageListenerは一度に 1 つしか動作させることができません。そのため、登録解除の方が一般的です。登録を停止するには、登録者がリスナーを指定する必要があります。
private fun unsubscribe() {
   Nearby.getMessagesClient(this).unsubscribe(messageListener)
}
- なお、クライアント プロセスが終了すると API はそのプロセスをシャットダウンしますが、
onDestroy()ライフサイクル メソッドで登録(および必要に応じて公開)を停止することをおすすめします。
override fun onDestroy() {
   super.onDestroy()
   // although the API should shutdown its processes when the client process dies,
   // you may want to stop subscribing (and publishing if convenient)
   Nearby.getMessagesClient(this).unpublish(message)
   Nearby.getMessagesClient(this).unsubscribe(messageListener)
}
この時点で、コードをコンパイルできますが、API キーがないため、アプリはまだ想定どおりに機能しません。MainActivity は以下のようになります。
package com.example.nearbymessagesexample

import android.os.Build
import android.os.Bundle
import android.view.ViewGroup
import android.widget.TextView
import androidx.appcompat.app.AppCompatActivity
import androidx.recyclerview.widget.LinearLayoutManager
import androidx.recyclerview.widget.RecyclerView
import com.example.nearbymessagesexample.databinding.ActivityMainBinding
import com.google.android.gms.nearby.Nearby
import com.google.android.gms.nearby.messages.Message
import com.google.android.gms.nearby.messages.MessageListener
import com.google.android.gms.nearby.messages.PublishCallback
import com.google.android.gms.nearby.messages.PublishOptions
import com.google.android.gms.nearby.messages.Strategy
import com.google.android.gms.nearby.messages.SubscribeCallback
import com.google.android.gms.nearby.messages.SubscribeOptions
import java.nio.charset.Charset

class MainActivity : AppCompatActivity() {

   /**
    * For accessing layout variables
    */
   private lateinit var binding: ActivityMainBinding

   /**
    * Sets the time to live in seconds for the publish or subscribe.
    */
   private val TTL_IN_SECONDS = 120 // Two minutes.

   /**
    * Choose of strategies for publishing or subscribing for nearby messages.
    */
   private val PUB_SUB_STRATEGY = Strategy.Builder().setTtlSeconds(TTL_IN_SECONDS).build()

   /**
    * The [Message] object used to broadcast information about the device to nearby devices.
    */
   private lateinit var message: Message

   /**
    * A [MessageListener] for processing messages from nearby devices.
    */
   private lateinit var messageListener: MessageListener

   /**
    * For adding [messages][Message] to the [RecyclerView]
    */
   private lateinit var msgAdapter: MessageAdapter

   override fun onCreate(savedInstanceState: Bundle?) {
       super.onCreate(savedInstanceState)
       binding = ActivityMainBinding.inflate(layoutInflater)
       setContentView(binding.root)

       binding.subscribeSwitch.setOnCheckedChangeListener { buttonView, isChecked ->
           if (isChecked) {
               subscribe()
           } else {
               unsubscribe()
           }
       }

       binding.publishSwitch.setOnCheckedChangeListener { buttonView, isChecked ->
           if (isChecked) {
               publish()
           } else {
               unpublish()
           }
       }
       setupMessagesDisplay()

       // The message being published is simply the Build.MODEL of the device. But since the
       // Messages API is expecting a byte array, you must convert the data to a byte array.
       message = Message(Build.MODEL.toByteArray(Charset.forName("UTF-8")))

       messageListener = object : MessageListener() {
           override fun onFound(message: Message) {
               // Called when a new message is found.
               val msgBody = String(message.content)
               msgAdapter.addItem(msgBody)
           }

           override fun onLost(message: Message) {
               // Called when a message is no longer detectable nearby.
               val msgBody = String(message.content)
               msgAdapter.removeItem(msgBody)
           }
       }

   }

   override fun onDestroy() {
       super.onDestroy()
       // although the API should shutdown its processes when the client process dies,
       // you may want to stop subscribing (and publishing if convenient)
       Nearby.getMessagesClient(this).unpublish(message)
       Nearby.getMessagesClient(this).unsubscribe(messageListener)
   }

   private fun publish() {
       val options = PublishOptions.Builder()
           .setStrategy(PUB_SUB_STRATEGY)
           .setCallback(object : PublishCallback() {
               override fun onExpired() {
                   super.onExpired()
                   // flick the switch off since the publishing has expired.
                   // recall that we had set expiration time to 120 seconds
                   runOnUiThread {
                       binding.publishSwitch.isChecked = false
                   }
                   runOnUiThread() {
                       binding.publishSwitch.isChecked = false
                   }
               }
           }).build()

       Nearby.getMessagesClient(this).publish(message, options)
   }

   private fun unpublish() {
       Nearby.getMessagesClient(this).unpublish(message)
   }

   private fun subscribe() {
       val options = SubscribeOptions.Builder()
           .setStrategy(PUB_SUB_STRATEGY)
           .setCallback(object : SubscribeCallback() {
               override fun onExpired() {
                   super.onExpired()
                   runOnUiThread {
                       binding.subscribeSwitch.isChecked = false
                   }
               }
           }).build()

       Nearby.getMessagesClient(this).subscribe(messageListener, options)
   }

   private fun unsubscribe() {
       Nearby.getMessagesClient(this).unsubscribe(messageListener)
   }

   private fun setupMessagesDisplay() {
       msgAdapter = MessageAdapter()
       with(binding.nearbyMsgRecyclerView) {
           layoutManager = LinearLayoutManager(context)
           this.adapter = msgAdapter
       }
   }

   class MessageAdapter : RecyclerView.Adapter<MessageAdapter.MessageVH>() {
       private var itemsList: MutableList<String> = arrayListOf()

       override fun onCreateViewHolder(parent: ViewGroup, viewType: Int): MessageVH {
           return MessageVH(TextView(parent.context))
       }

       override fun onBindViewHolder(holder: MessageVH, position: Int) {
           holder.bind(getItem(position))
       }

       override fun getItemCount(): Int = itemsList.size

       private fun getItem(pos: Int): String? = if (itemsList.isEmpty()) null else itemsList[pos]

       fun addItem(item: String) {
           itemsList.add(item)
           notifyItemInserted(itemsList.size)
       }

       fun removeItem(item: String) {
           val pos = itemsList.indexOf(item)
           itemsList.remove(item)
           notifyItemRemoved(pos)
       }

       inner class MessageVH(private val tv: TextView) : RecyclerView.ViewHolder(tv) {
           fun bind(item: String?) {
               item?.let { tv.text = it }
           }
       }
   }
}
Google の API キーをマニフェスト ファイルに追加する
Nearby Messages API には Google が提供するサーバー コンポーネントが付属しています。ユーザーがメッセージを公開すると、Nearby Messages API はそのメッセージを Google サーバーに送信します。登録者は、Google サーバーでメッセージのクエリを行います。Google にアプリを認識させるようにするには、Google が提供する API_KEY を Manifest.xml ファイルに追加する必要があります。あとはアプリを実行して操作するだけです。
API キーを取得するには、次の 3 つの手順を実行します。
- Google Developers Console に移動します。
- [+ Create Credentials] をクリックして、[API Key] を選択します。
- 作成した API キーをコピーし、Android プロジェクトのマニフェスト ファイルに貼り付けます。
マニフェスト ファイルに、アプリ内の com.google.android.nearby.messages.API_KEY メタデータ アイテムを追加します。マニフェスト ファイルは次のようになります。
<?xml version="1.0" encoding="utf-8"?>
<manifest xmlns:android="http://schemas.android.com/apk/res/android"
   package="com.example.nearbymessagesexample">

   <application
       android:allowBackup="true"
       android:icon="@mipmap/ic_launcher"
       android:label="@string/app_name"
       android:roundIcon="@mipmap/ic_launcher_round"
       android:supportsRtl="true"
       android:theme="@style/Theme.NearbyMessagesExample">

       <meta-data
           android:name="com.google.android.nearby.messages.API_KEY"
           android:value="ADD_KEY_HERE" />

       <activity android:name=".MainActivity">
           <intent-filter>
               <action android:name="android.intent.action.MAIN" />

               <category android:name="android.intent.category.LAUNCHER" />
           </intent-filter>
       </activity>
   </application>

</manifest>
API キーを追加したら、2 台以上のデバイスでアプリを実行して、互いに通信できることを確認します。

5. バッテリー寿命に関するおすすめの方法
- ユーザーのプライバシーを保護し、バッテリー消費を抑えるため、ユーザーが機能を停止したら、直ちに公開と登録を停止する必要があります。
- Nearby Messages はデバイス間の接近での通信を確立するために使用するものですが、継続的な通信には使用しないでください。継続的な通信に使用すると、デバイスのバッテリーが通常のバッテリー消費率の 2.5~3.5 倍で消耗される可能性があります。
6. 完了
お疲れさまでした。ここでは、Nearby Messages API を使用して近くのデバイス間でメッセージを送信、検出する方法について説明しました。
まとめると、Nearby Messages API を使用するには、play-services-nearby の依存関係を追加し、Google Developer Console から API キーを取得して Manifest.xml ファイルに追加する必要があります。公開者が Google サーバーにメッセージを送信して、登録者が取得できるようにするためには、API が必要であり、API にはインターネット接続が必要です。
- メッセージの送信方法を確認しました
- メールを検出するための登録方法を確認しました
- メッセージの使い方を確認しました(このケースでは、シンプルに
RecyclerViewで表示しました)。
次のステップ
ブログシリーズとサンプルを確認する
