1. Introduction
We carry phones with us everywhere, but until now, it's been hard for apps to adjust their experience to a user's continually changing environment and activity.
To do this in the past, developers spent valuable engineering time combining various signals (location,sensor, etc.) to determine when an activity like walking or driving had started or ended. Even worse, when apps are independently and continuously checking for changes in user activity, battery life suffers.
The Activity Recognition Transition API solves these problems by providing a simple API that does all the processing for you and just tells you what you actually care about: when a user's activity has changed. Your app simply subscribes to a transition in activities you are interested in and the API notifies you of the changes
As an example, a messaging app can ask, "tell me when the user has entered or exited a vehicle", to set the user's status as busy. Similarly, a parking detection app can ask,"tell me when the user has exited a vehicle and started walking", to save the user's parking location.
In this codelab, you will learn how to use the Activity Recognition Transition API to determine when a user starts/stops an activity like walking or running.
Prerequisites
Familiarity with Android development and some familiarity with callbacks.
What you'll learn
- Registering for activity transitions
- Processing those events
- Unregistering for activity transitions when they are no longer needed
What you'll need
- Android Studio Bumblebee
- An Android device or emulator
2. Getting Started
Clone the starter project repo
To get you started as quickly as possible, we have prepared a starter project for you to build on. If you have git installed, you can simply run the command below. (You can check by typing git --version in the terminal / command line and verify it executes correctly.)
git clone https://github.com/android/codelab-activity_transitionapi
If you do not have git you can get the project as a zip file:
Import the project
Start Android Studio, and select "Open an existing Android Studio project" from the Welcome screen and open the project directory.
After the project has loaded, you may also see an alert that Git isn't tracking all your local changes, you can click "Ignore" or the "X" in the upper right. (You won't be pushing any changes back to the Git repo.)
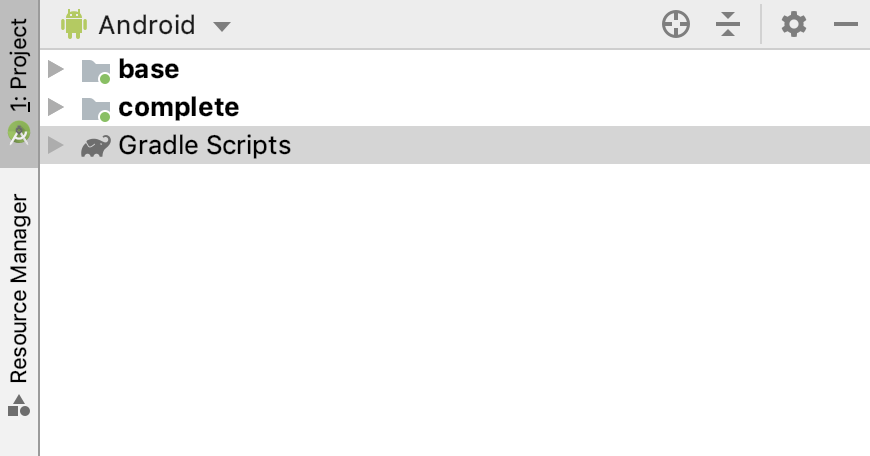
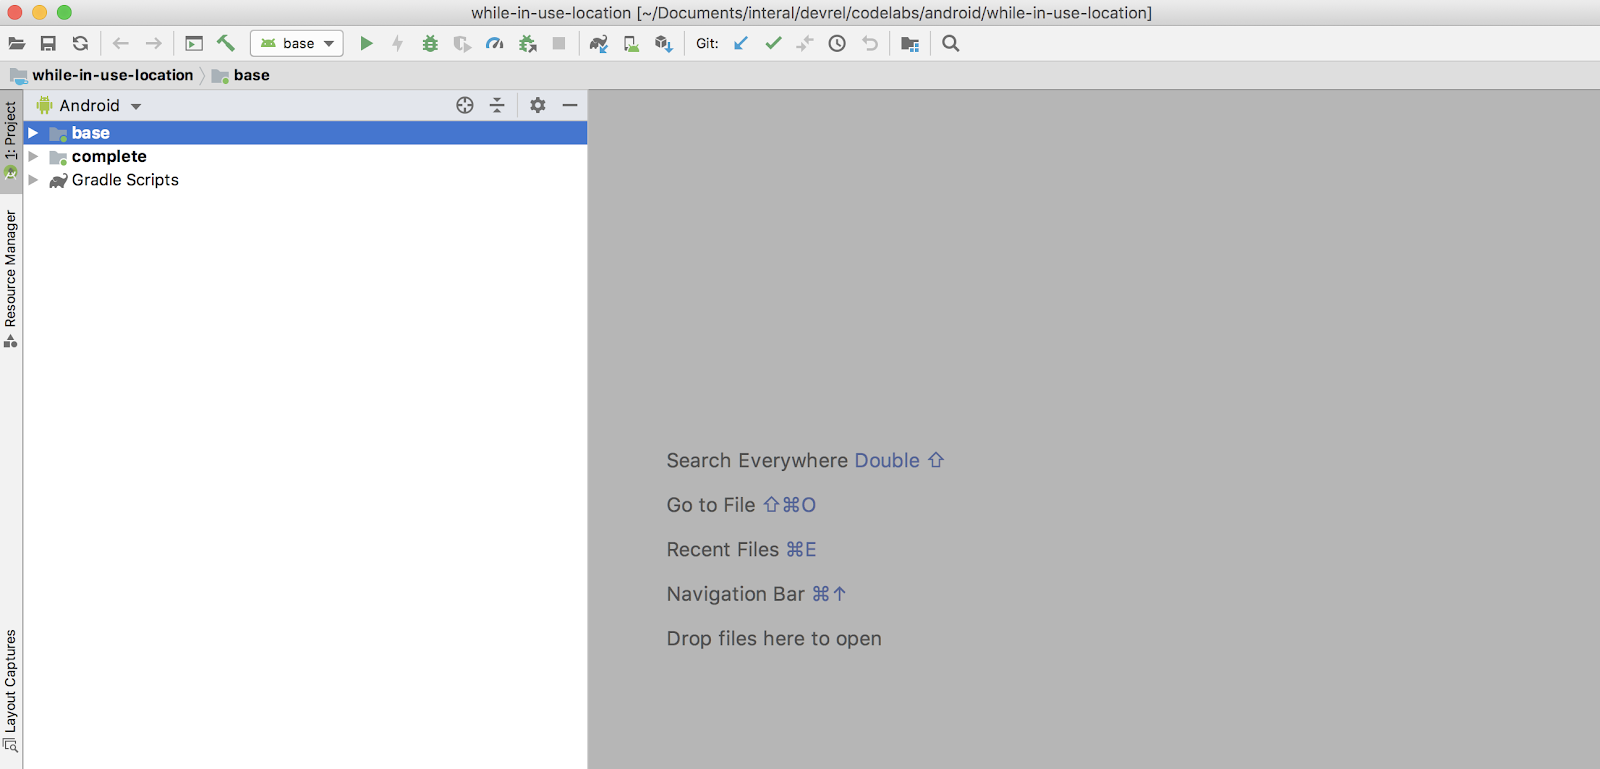
In the upper-left corner of the project window, you should see something like the image below if you are in the Android view. (If you are in the Project view, you will need to expand the project to see the same thing.)

There are two folder icons (base and complete). Each of them is known as a "module".
Please note that Android Studio might take several seconds to compile the project in the background for the first time. During this time you will see a spinner in the status bar at the bottom of Android Studio:

We recommend that you wait until this has finished before making code changes. This will allow Android Studio to pull in all the necessary components.
In addition, if you get a prompt saying "Reload for language changes to take effect?" or something similar, select "Yes".
Understand the starter project
All right, you're set up and ready to add activity recognition. We'll be using the base module, which is the starting point for this codelab. In other words, you'll add code from each step to base.
The complete module can be used for checking your work, or for you to reference if you encounter any issues.
Overview of key components:
MainActivity: Contains all code needed for activity recognition.
Emulator setup
If you need help setting up an Android emulator, refer to the Run your app article.
Run the starter project
Let's run our app.
- Connect your Android device to your computer or start an emulator.
- In the toolbar, select the
baseconfiguration from the drop-down selector and click the green triangle (Run) button next to it:

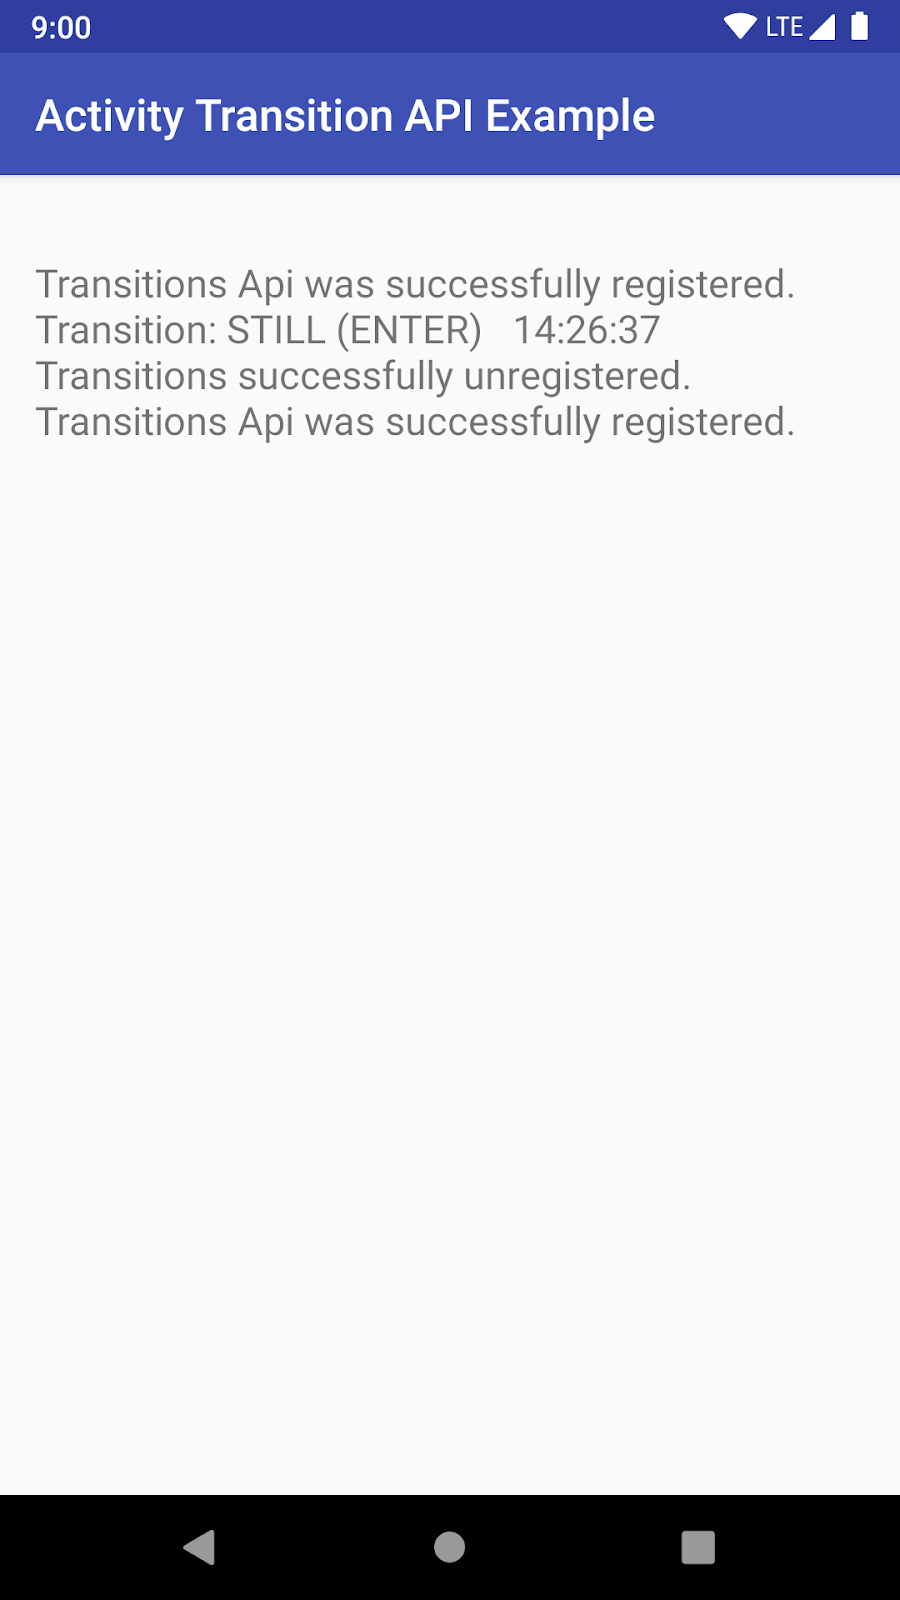
- You should see the application below:

- The app doesn't do anything now beyond print a message. We'll now add activity recognition.
Summary
In this step you've learned about:
- General setup for the codelab.
- The basics of our app.
- How to deploy your app.
3. Review the library and add permission to manifest
To use the Transition API in your app, you must declare a dependency to the Google Location and Activity Recognition API and specify the com.google.android.gms.permission.ACTIVITY_RECOGNITION permission in the app manifest.
- Search for the TODO: Review play services library required for activity recognition in the build.gradle file. There is no action for this step (step 1), just review the declared dependency we require. It should look like this:
    // TODO: Review play services library required for activity recognition.
    implementation 'com.google.android.gms:play-services-location:19.0.1'
- In the
basemodule, search for TODO: Add both activity recognition permissions to the manifest in theAndroidManifest.xmland add the code below to the<manifest>element.
<!-- TODO: Add both activity recognition permissions to the manifest. -->
<!-- Required for 28 and below. -->
<uses-permission android:name="com.google.android.gms.permission.ACTIVITY_RECOGNITION" />
<!-- Required for 29+. -->
<uses-permission android:name="android.permission.ACTIVITY_RECOGNITION" />
Your code should now look something similar to this:
<manifest xmlns:android="http://schemas.android.com/apk/res/android"
         package="com.example.myapp">
<!-- TODO: Add both activity recognition permissions to the manifest. -->
<!-- Required for 28 and below. -->
<uses-permission android:name="com.google.android.gms.permission.ACTIVITY_RECOGNITION" />
<!-- Required for 29+. -->
<uses-permission android:name="android.permission.ACTIVITY_RECOGNITION" />

  ...
</manifest>
As you can see from the comments, you need to add a second permission for Android 10. This is required for the runtime permission that was added in API version 29.
That's it! Your app can now support activity recognition, we just need to add the code to get it.
Run app
Run your app from Android Studio. It should look exactly the same. We haven't actually added any code to track transitions yet, that will be in the next section.
4. Checking/Request runtime permissions in Android
While we are covered for permission on API version 28 and below, we need to support runtime permissions in API version 29 and beyond:
- In the
MainActivity.java, we will check if the user is on Android 10 (29) or later, and if they are, we will check the activity recognition permissions. - If permissions are not granted, we will send the user to a splash screen (
PermissionRationalActivity.java) explaining why the app needs the permission and allow them to approve it.
Review code checking Android version
In the base module, search for TODO: Review check for devices with Android 10 (29+) in MainActivity.java. You should see this code snippet.
Note, there is no action for this section.
// TODO: Review check for devices with Android 10 (29+).
private boolean runningQOrLater =
    android.os.Build.VERSION.SDK_INT >= android.os.Build.VERSION_CODES.Q;
As stated before, you need approval for the runtime permission android.permission.ACTIVITY_RECOGNITION in Android 10 and above. We use this simple check to decide whether or not we need to check the runtime permissions.
Review runtime permission check for activity recognition if needed
In the base module, search for TODO: Review permission check for 29+ in MainActivity.java. You should see this code snippet.
Note, there is no action for this section.
// TODO: Review permission check for 29+.
if (runningQOrLater) {

   return PackageManager.PERMISSION_GRANTED == ActivityCompat.checkSelfPermission(
           this,
           Manifest.permission.ACTIVITY_RECOGNITION
   );
} else {
   return true;
}
We use the variable we created in the previous step to see if we need to check runtime permissions.
For Q and higher, we check and return the result for the runtime permission. This is part of a larger method called activityRecognitionPermissionApproved() which let's the dev know in one simple call if we need to request a permission or not.
Request runtime permissions and enable/disable activity recognition transitions
In the base module, search for TODO: Enable/Disable activity tracking and ask for permissions if needed in MainActivity.java. Add the code below after the comment.
// TODO: Enable/Disable activity tracking and ask for permissions if needed.
if (activityRecognitionPermissionApproved()) {

   if (activityTrackingEnabled) {
      disableActivityTransitions();

   } else {
      enableActivityTransitions();
   }

} else {
   // Request permission and start activity for result. If the permission is approved, we
   // want to make sure we start activity recognition tracking.
   Intent startIntent = new Intent(this, PermissionRationalActivity.class);
   startActivityForResult(startIntent, 0);

}
Here we ask if activity recognition is approved. If it is and activity recognition is already enabled, we disable it. Otherwise, we enable it.
For the case when the permission is not approved, we send the user to the splash screen activity that explains why we need the permission and allow them to enable it.
Review permission request code
In the base module, search for TODO: Review permission request for activity recognition in PermissionRationalActivity.java. You should see this code snippet.
Note, there is no action for this section.
// TODO: Review permission request for activity recognition.
ActivityCompat.requestPermissions(
             this,
             new String[]{Manifest.permission.ACTIVITY_RECOGNITION},
             PERMISSION_REQUEST_ACTIVITY_RECOGNITION)
This is the most important part of the Activity and the part to review. The code triggers the request for the permission when the user requests it.
Outside of that, the PermissionRationalActivity.java class displays a rationale as to why the user should approve the activity recognition permission (best practice). The user can either click the No Thanks button or the Continue button (which triggers the code above).
Feel free to review the file if you want to learn more.
5. Register/Unregister receiver for activity transitions
Before we setup the activity recognition code, we want to make sure our Activity can handle transition actions raised by the system.
Create a BroadcastReceiver for the transition
In the base module, search for TODO: Create a BroadcastReceiver to listen for activity transitions in MainActivity.java. Paste the snippet below.
// TODO: Create a BroadcastReceiver to listen for activity transitions.
// The receiver listens for the PendingIntent above that is triggered by the system when an
// activity transition occurs.
mTransitionsReceiver = new TransitionsReceiver();
Register a BroadcastReceiver for the transition
In the base module, search for TODO: Register a BroadcastReceiver to listen for activity transitions in MainActivity.java. (It's in onStart()). Paste the snippet below.
// TODO: Register a BroadcastReceiver to listen for activity transitions.
registerReceiver(mTransitionsReceiver, new IntentFilter(TRANSITIONS_RECEIVER_ACTION));
Now we have a way to get updates when the activity transitions are raised via the PendingIntent.
Unregister BroadcastReceiver
In the base module, search for Unregister activity transition receiver when user leaves the app in MainActivity.java. (It's in onStop()).Paste the snippet below.
// TODO: Unregister activity transition receiver when user leaves the app.
unregisterReceiver(mTransitionsReceiver);
It's best practice to unregister a receiver when the Activity is shutting down.
6. Setup activity transitions and request updates
To start receiving activity transition updates, you must implement:
- An ActivityTransitionRequest object that specifies the type of activity and transition.
- A PendingIntent callback where your app receives notifications. For more information, see using a pending intent.
Create a list of ActivitiyTransitions to follow
To create the ActivityTransitionRequest object, you must create a list of ActivityTransition objects, which represent the transition you want to track. An ActivityTransition object includes the following data:
- An activity type, represented by the DetectedActivity class. The Transition API supports the following activities:
- A transition type, represented by the ActivityTransition class. The transition types are:
In the base module, search for TODO: Add activity transitions to track in MainActivity.java. Add the code below after the comment.
// TODO: Add activity transitions to track.
activityTransitionList.add(new ActivityTransition.Builder()
        .setActivityType(DetectedActivity.WALKING)
        .setActivityTransition(ActivityTransition.ACTIVITY_TRANSITION_ENTER)
        .build());
activityTransitionList.add(new ActivityTransition.Builder()
        .setActivityType(DetectedActivity.WALKING)
        .setActivityTransition(ActivityTransition.ACTIVITY_TRANSITION_EXIT)
        .build());
activityTransitionList.add(new ActivityTransition.Builder()
        .setActivityType(DetectedActivity.STILL)
        .setActivityTransition(ActivityTransition.ACTIVITY_TRANSITION_ENTER)
        .build());
activityTransitionList.add(new ActivityTransition.Builder()
        .setActivityType(DetectedActivity.STILL)
        .setActivityTransition(ActivityTransition.ACTIVITY_TRANSITION_EXIT)
        .build());
This code adds the transitions we want to track to a previously empty list.
Create a PendingIntent
As called out earlier, we need a PendingIntent if we want to be alerted for any changes in our ActivityTransitionRequest, so before we set up our ActivityTransitionRequest, we need to create a PendingIntent.
In the base module, search for TODO: Initialize PendingIntent that will be triggered when a activity transition occurs in MainActivity.java. Add the code below after the comment.
// TODO: Initialize PendingIntent that will be triggered when a activity transition occurs.
Intent intent = new Intent(TRANSITIONS_RECEIVER_ACTION);
mActivityTransitionsPendingIntent =
        PendingIntent.getBroadcast(MainActivity.this, 0, intent, 0);
Now we have a PendingIntent we can trigger when one of the ActivityTransition occurs.
Create an ActivityTransitionRequest and request updates
You can create an ActivityTransitionRequest object by passing the list of ActivityTransitions to the ActivityTransitionRequest class.
In the base module, search for Create request and listen for activity changes in MainActivity.java. Add the code below after the comment.
// TODO: Create request and listen for activity changes.
ActivityTransitionRequest request = new ActivityTransitionRequest(activityTransitionList);

// Register for Transitions Updates.
Task<Void> task =
        ActivityRecognition.getClient(this)
                .requestActivityTransitionUpdates(request, mActivityTransitionsPendingIntent);


task.addOnSuccessListener(
        new OnSuccessListener<Void>() {
            @Override
            public void onSuccess(Void result) {
                activityTrackingEnabled = true;
                printToScreen("Transitions Api was successfully registered.");

            }
        });
task.addOnFailureListener(
        new OnFailureListener() {
            @Override
            public void onFailure(@NonNull Exception e) {
                printToScreen("Transitions Api could NOT be registered: " + e);
                Log.e(TAG, "Transitions Api could NOT be registered: " + e);

            }
        });
Let's review the code. First, we create an ActivityTransitionRequest from our activity transition list.
ActivityTransitionRequest request = new ActivityTransitionRequest(activityTransitionList);
Next, we register for activity transition updates by passing your instance of ActivityTransitionRequest and our PendingIntent object we created in the last step to the requestActivityTransitionUpdates() method. The requestActivityTransitionUpdates() method returns a Task object that you can check for success or failure, as shown in the next block of the code:
// Register for Transitions Updates.
Task<Void> task =
        ActivityRecognition.getClient(this)
                .requestActivityTransitionUpdates(request, mActivityTransitionsPendingIntent);


task.addOnSuccessListener(
        new OnSuccessListener<Void>() {
            @Override
            public void onSuccess(Void result) {
                activityTrackingEnabled = true;
                printToScreen("Transitions Api was successfully registered.");

            }
        });
task.addOnFailureListener(
        new OnFailureListener() {
            @Override
            public void onFailure(@NonNull Exception e) {
                printToScreen("Transitions Api could NOT be registered: " + e);
                Log.e(TAG, "Transitions Api could NOT be registered: " + e);

            }
        });
After successfully registering for activity transition updates, your app receives notifications in the registered PendingIntent. We also set a variable that activity tracking is enabled to allow us to know whether to disable/enable if the user clicks on the button again.
Remove updates when app is closing
It's important we remove transition updates when the app is closing.
In the base module, search for Stop listening for activity changes in MainActivity.java. Add the code below after the comment.
// TODO: Stop listening for activity changes.
ActivityRecognition.getClient(this).removeActivityTransitionUpdates(mActivityTransitionsPendingIntent)
        .addOnSuccessListener(new OnSuccessListener<Void>() {
            @Override
            public void onSuccess(Void aVoid) {
                activityTrackingEnabled = false;
                printToScreen("Transitions successfully unregistered.");
            }
        })
        .addOnFailureListener(new OnFailureListener() {
            @Override
            public void onFailure(@NonNull Exception e) {
                printToScreen("Transitions could not be unregistered: " + e);
                Log.e(TAG,"Transitions could not be unregistered: " + e);
            }
        });
Now we need to call the method containing the code above when the app is shutting down
In the base module, search for TODO: Disable activity transitions when user leaves the app in MainActivity.java in onPause(). Add the code below after the comment.
// TODO: Disable activity transitions when user leaves the app.
if (activityTrackingEnabled) {
    disableActivityTransitions();
}
That's it for tracking the changes to activity transitions. Now we just need to process the updates.
7. Processing Events
When the requested activity transition occurs, your app receives an Intent callback. An ActivityTransitionResult object can be extracted from the Intent, which includes a list of ActivityTransitionEvent objects. The events are ordered in chronological order, for example, if an app requests for the IN_VEHICLE activity type on the ACTIVITY_TRANSITION_ENTER and ACTIVITY_TRANSITION_EXIT transitions, then it receives an ActivityTransitionEvent object when the user starts driving, and another one when the user transitions to any other activity.
Let's add the code to handle those events.
In the base module, search for TODO: Extract activity transition information from listener in MainActivity.java in onReceive()of the BroadcastReceiver we created earlier. Add the code below after the comment.
// TODO: Extract activity transition information from listener.
if (ActivityTransitionResult.hasResult(intent)) {

    ActivityTransitionResult result = ActivityTransitionResult.extractResult(intent);

    for (ActivityTransitionEvent event : result.getTransitionEvents()) {

        String info = "Transition: " + toActivityString(event.getActivityType()) +
                " (" + toTransitionType(event.getTransitionType()) + ")" + "   " +
                new SimpleDateFormat("HH:mm:ss", Locale.US).format(new Date());

        printToScreen(info);
    }
}
This will convert the information to a String and print it out to the screen.
That's it, you are finished! Try running the app.
IMPORTANT NOTE: It's hard to reproduce activity changes on the emulator, so we recommend using a physical device.
You should be able to track activity changes.
For best results, install the app on a physical device and walk around. :)
8. Review the Code
You built a simple app that tracks Activity transitions and list them on the screen.
Feel free to read through the code in its entirety to review what you have done and get a better idea of how it works together.
