
1. Introdução
Última atualização: 25/07/2022
O que é necessário
- Versão mais recente do Android Studio.
- Conhecimento sobre Kotlin e lambdas finais (em inglês).
- Noções básicas sobre navegação e sobre termos relacionados, como backstack.
- Noções básicas sobre o Compose.
- É recomendável fazer o codelab Noções básicas do Jetpack Compose antes deste.
- Noções básicas sobre o gerenciamento de estado no Compose
- É recomendável fazer o codelab Estado no Jetpack Compose antes deste.
Como navegar com o Compose
A biblioteca de navegação do Jetpack permite navegar de um destino a outro dentro do app. Ela também oferece um artefato específico para proporcionar uma experiência consistente e idiomática de como navegar com o Jetpack Compose. Esse artefato, navigation-compose, é o foco deste codelab.
O que você vai fazer
Você vai usar o estudo sobre o app Rally do Material Design (em inglês) como base para este codelab, com o objetivo de implementar o componente de navegação do Jetpack e permitir a navegação entre telas combináveis no app Rally.
O que você vai aprender
- Noções básicas sobre como usar a navegação do Jetpack com o Jetpack Compose.
- Como navegar entre elementos combináveis
- Como integrar uma barra de guias personalizada combinável à hierarquia de navegação.
- Como navegar usando argumentos.
- Como navegar usando links diretos.
- Como testar a navegação.
2. Configuração
Para acompanhar, clone o ponto de partida (ramificação main) do codelab.
$ git clone https://github.com/android/codelab-android-compose.git
Outra opção é fazer o download de dois arquivos ZIP:
Depois de fazer o download do código, abra a pasta do projeto NavigationCodelab no Android Studio. Está tudo pronto para começar.
3. Visão geral do app Rally
Para começar, você precisa conhecer o app Rally e a base de código dele. Execute o app e navegue pelas telas por um tempo.
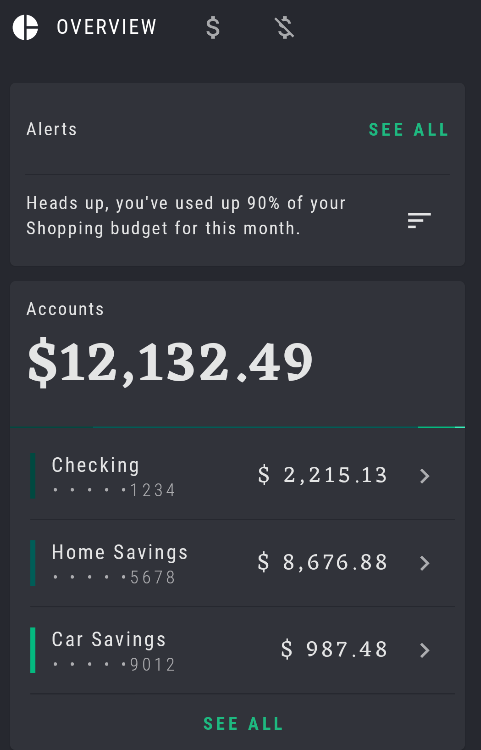
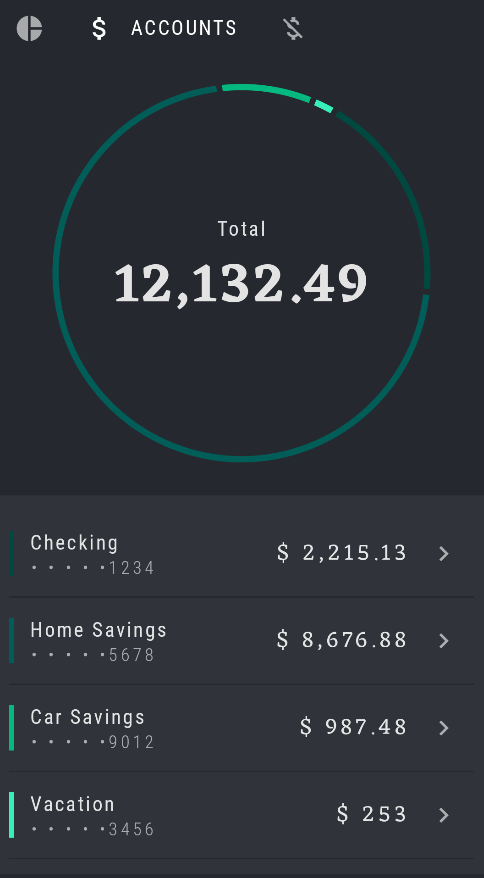
O Rally tem três telas principais como elementos combináveis:
OverviewScreen: uma visão geral de todas as transações financeiras e alertas.AccountsScreen: informações sobre suas contas.BillsScreen: despesas agendadas.


No parte de cima da tela, o Rally usa um elemento combinável de barra de guias personalizada (RallyTabRow) para navegar entre as três telas. Toque no ícone para abrir cada seleção e acessar a tela correspondente:


Você também pode considerar que essas telas são destinos de navegação, já que queremos acessar cada uma delas em um ponto específico. Esses destinos são definidos previamente no arquivo RallyDestinations.kt.
Dentro dele, você vai encontrar todos os três destinos principais definidos como objetos (Overview, Accounts e Bills) além de uma SingleAccount, que vai ser adicionada ao app mais adiante. Cada objeto é uma extensão da interface RallyDestination e contém as informações necessárias sobre cada destino para possibilitar a navegação:
- Um
iconpara a barra na parte de cima da tela. - Uma string
route, necessária para o Navigation no Compose como um caminho que leva ao destino. - Uma
screen, que representa os elementos combináveis como um todo para um determinado destino.
Ao executar o app, você vai perceber que é possível acessar os diferentes destinos usando a barra na parte de cima da tela. No entanto, o app ainda não está usando a navegação do Compose. Em vez disso, o mecanismo de navegação atual depende da alternância manual de elementos combináveis e aciona a recomposição para mostrar o novo conteúdo. O objetivo deste codelab é migrar para a navegação do Compose e implementá-la corretamente no app.
4. Como migrar para a navegação do Compose
É necessário seguir várias etapas para realizar a migração básica para o Jetpack Compose:
- Adicionar a dependência de navegação do Compose mais recente (em inglês).
- Configurar o
NavController. - Adicionar um
NavHoste criar o gráfico de navegação. - Preparar rotas para navegação entre diferentes destinos no app.
- Substituir o mecanismo de navegação atual pela navegação do Compose.
Vamos analisar essas etapas uma a uma.
Adicionar a dependência de navegação.
Abra o arquivo de build do app, localizado em app/build.gradle. Na seção de dependências, adicione a dependência navigation-compose.
dependencies {
  implementation "androidx.navigation:navigation-compose:{latest_version}"
  // ...
}
A versão mais recente do componente navigation-compose pode ser encontrada neste link.
Sincronize o projeto para começar a usar a navegação no Compose.
Configurar o NavController
O NavController é o componente central da navegação no Compose. Ele monitora as entradas da backstack, move a pilha adiante e permite a manipulação da backstack e a navegação entre os estados de destino. Como o NavController é fundamental para a navegação, esse é o primeiro elemento a ser criado ao configurar a navegação no Compose.
Chame a função rememberNavController() para gerar um NavController. Essa função cria e armazena na memória um NavController que resiste a mudanças de configuração, usando rememberSaveable.
Sempre crie e posicione o NavController no nível superior da hierarquia combinável, que geralmente é App. Dessa forma, todos os elementos combináveis que precisam referenciar o NavController podem ter acesso a ele. Essa abordagem está de acordo com os princípios da elevação de estado e garante que o NavController seja a principal fonte da verdade para navegar entre as telas e manter a backstack.
Abra RallyActivity.kt. Busque o NavController, usando rememberNavController() no RallyApp, já que ele é o elemento raiz e o ponto de entrada de todo o aplicativo:
import androidx.navigation.compose.rememberNavController
// ...

@Composable
fun RallyApp() {
    RallyTheme {
        var currentScreen: RallyDestination by remember { mutableStateOf(Overview) }
        val navController = rememberNavController()
        Scaffold(
            // ...
        ) {
            // ...
       }
}
Rotas na navegação do Compose
Como mencionado anteriormente, o app Rally tem três destinos principais e mais um outro que vai ser adicionado depois (SingleAccount). Eles são definidos em RallyDestinations.kt. Também mencionamos que cada destino tem um icon, uma route e uma screen definidos:
A próxima etapa é adicionar esses destinos ao gráfico de navegação, definindo Overview como destino inicial ao abrir o app.
Ao usar a navegação no Compose, cada destino combinável no gráfico de navegação é associado a uma rota. As rotas são representadas como strings que definem o caminho para sua composição e orientam o navController para que ele chegue ao lugar certo. Pense nas rotas como um link direto implícito que leva a um destino específico. Cada destino precisa ter uma rota exclusiva.
Para isso, vamos usar a route propriedade de cada objeto RallyDestination. Por exemplo, Overview.route é a rota que leva os elementos combináveis da tela Overview.
Como chamar a função combinável NavHost com o gráfico de navegação
A próxima etapa é adicionar um NavHost e criar o gráfico de navegação.
Os três principais elementos da navegação são: NavController, NavGraph e NavHost. O NavController é sempre associado a um único NavHost combinável. O NavHost funciona como um contêiner e é responsável por mostrar o destino atual do gráfico. À medida que você navega entre os elementos combináveis, ocorre automaticamente a recomposição do conteúdo do NavHost. Ele também vincula o NavController a um gráfico de navegação (NavGraph), que especifica quais destinos podem ser acessados. Esse elemento é essencialmente uma coleção de possíveis destinos.
Volte para o elemento combinável RallyApp em RallyActivity.kt. Substitua o elemento Box no Scaffold, que contém o conteúdo da tela atual para a troca manual entre as telas, por um novo NavHost, que pode ser criado seguindo o exemplo de código abaixo.
Transmita o navController criado na etapa anterior para vinculá-lo ao NavHost. Como mencionado anteriormente, cada NavController precisa ser associado a um único NavHost.
O NavHost também precisa de uma rota startDestination, para saber qual destino vai ser exibido ao iniciar o app. Defina o destino como Overview.route. Transmita também um Modifier para aceitar o padding externo do Scaffold e aplicá-lo ao NavHost.
O parâmetro final builder: NavGraphBuilder.() -> Unit é responsável por definir e criar o gráfico de navegação. Ele usa a sintaxe lambda da DSL de navegação do Kotlin e, portanto, pode ser transmitido como uma lambda final dentro do corpo da função e extraído dos parênteses:
import androidx.navigation.compose.NavHost
...

Scaffold(...) { innerPadding ->
    NavHost(
        navController = navController,
        startDestination = Overview.route,
        modifier = Modifier.padding(innerPadding)
    ) {
       // builder parameter will be defined here as the graph
    }
}
Como adicionar destinos ao NavGraph
Agora, você pode definir o gráfico de navegação e os destinos em que o NavController pode navegar. Como mencionado, o parâmetro builder precisa de uma função. A navegação do Compose oferece a função de extensão NavGraphBuilder.composable, para adicionar elementos de destinos combináveis individuais ao gráfico de navegação e definir as informações necessárias.
O primeiro destino é Overview. É necessário adicioná-lo usando a função de extensão composable e definir a string da route exclusiva. Ao fazer isso, você adiciona o destino ao gráfico de navegação, mas ainda é necessário definir a interface que vai ser exibida ao chegar a esse destino. Você também vai usar uma lambda final no corpo da função composable para fazer isso. Esse é um padrão utilizado com frequência no Compose:
import androidx.navigation.compose.composable
// ...

NavHost(
    navController = navController,
    startDestination = Overview.route,
    modifier = Modifier.padding(innerPadding)
) {
    composable(route = Overview.route) {
        Overview.screen()
    }
}
Seguindo esse padrão, vamos adicionar todos os três elementos combináveis da tela principal como três destinos:
NavHost(
    navController = navController,
    startDestination = Overview.route,
    modifier = Modifier.padding(innerPadding)
) {
    composable(route = Overview.route) {
        Overview.screen()
    }
    composable(route = Accounts.route) {
        Accounts.screen()
    }
    composable(route = Bills.route) {
        Bills.screen()
    }
}
Agora, execute o app. A Overview aparece como o destino inicial e a interface correspondente é mostrada.
Em uma seção anterior, mencionamos uma barra de guias personalizada, a RallyTabRow, que processava a navegação manual entre as telas. No momento, essa barra ainda não está conectada à nova navegação. Observe que, ao clicar nas guias, o destino da tela mostrada não muda. Vamos corrigir isso na próxima etapa.
5. Integrar a RallyTabRow à navegação
Nesta etapa, você vai vincular a RallyTabRow ao navController e ao gráfico de navegação, para que seja possível chegar aos destinos corretos.
Para fazer isso, é necessário usar o novo navController para definir a ação de navegação correta para o callback onTabSelected da RallyTabRow. Esse callback define o que vai acontecer quando um ícone específico da guia for selecionado e executa a ação de navegação usando navController.navigate(route).
Seguindo essa orientação, em RallyActivity, encontre a RallyTabRow e o parâmetro de callback onTabSelected.
Como queremos que a guia navegue para um destino específico quando tocada, também é necessário saber qual ícone foi selecionado. Felizmente, esse dado já é incluído no parâmetro onTabSelected: (RallyDestination) -> Unit. Use essa informação e a rota RallyDestination para guiar o navController e chamar navController.navigate(newScreen.route) quando uma guia for selecionada:
@Composable
fun RallyApp() {
    RallyTheme {
        var currentScreen: RallyDestination by remember { mutableStateOf(Overview) }
        val navController = rememberNavController()
        Scaffold(
            topBar = {
                RallyTabRow(
                    allScreens = rallyTabRowScreens,
                    // Pass the callback like this,
                    // defining the navigation action when a tab is selected:
                    onTabSelected = { newScreen ->
                        navController.navigate(newScreen.route)
                    },
                    currentScreen = currentScreen,
                )
            }
Se executar o app agora, você vai observar que o destino certo é mostrado ao tocar em uma guia na RallyTabRow. No entanto, talvez você tenha percebido dois problemas:
- Ao tocar mais de uma vez seguida na mesma guia, várias cópias do mesmo destino são iniciadas.
- A interface da guia não corresponde ao destino certo, ou seja, a função de abrir e fechar a guia selecionada não está funcionando conforme o esperado:
Vamos corrigir os dois.
Como abrir uma única cópia de um destino
Para corrigir o primeiro problema e garantir que haja no máximo uma cópia de cada destino na parte de cima da backstack, a API Compose Navigation oferece uma flag launchSingleTop, que pode ser transmitida à ação navController.navigate(), como neste exemplo:
navController.navigate(route) { launchSingleTop = true }
Como queremos implementar esse comportamento em todo o app, para todos os destinos, em vez de copiar e colar essa flag em todas as chamadas de .navigate(...), é possível extraí-la em uma extensão auxiliar na parte de baixo da RallyActivity:
import androidx.navigation.NavHostController
// ...

fun NavHostController.navigateSingleTopTo(route: String) =
    this.navigate(route) { launchSingleTop = true }
Agora você pode substituir a chamada de navController.navigate(newScreen.route) por .navigateSingleTopTo(...). Execute o app novamente e verifique se apenas uma cópia do destino é mostrada ao clicar várias vezes em um ícone na barra de guias:
@Composable
fun RallyApp() {
    RallyTheme {
        var currentScreen: RallyDestination by remember { mutableStateOf(Overview) }
        val navController = rememberNavController()
        Scaffold(
            topBar = {
                RallyTabRow(
                    allScreens = rallyTabRowScreens,
                    onTabSelected = { newScreen ->
                        navController
                            .navigateSingleTopTo(newScreen.route)
                    },
                    currentScreen = currentScreen,
                )
            }
Como controlar as opções de navegação e o estado da backstack
Além de launchSingleTop, também há outras flags que podem ser usadas pelo NavOptionsBuilder para controlar e personalizar ainda mais o comportamento de navegação. Como a RallyTabRow do nosso exemplo funciona de maneira semelhante à BottomNavigation, também é necessário considerar se você pretende salvar e restaurar o estado de um determinado destino ao entrar e sair dele. Por exemplo, ao rolar até a parte de baixo de "Visão geral" e, depois, abrir a tela "Contas" e voltar novamente para a primeira tela, a posição de rolagem vai ser mantida? Você pretende recarregar o estado da tela ao tocar novamente no mesmo destino na RallyTabRow? Todas essas perguntas são válidas e são definidas de acordo com os requisitos de design do seu app.
Vamos apresentar algumas outras opções que podem ser usadas na mesma função de extensão navigateSingleTopTo:
launchSingleTop = true: como mencionado, essa função garante que haja no máximo uma cópia de um determinado destino na parte de cima da backstack.- No Rally, isso significa que ao tocar várias vezes na mesma guia, o app não abre várias cópias do mesmo destino.
popUpTo(startDestination) { saveState = true }: abre o destino inicial do gráfico para evitar o acúmulo de uma grande pilha de destinos na backstack ao selecionar as guias.- No Rally, isso significa que ao pressionar a seta "Voltar" em qualquer tela, a backstack inteira é redirecionada para a tela "Visão geral".
restoreState = true: determina se essa ação de navegação precisa restaurar algum estado salvo anteriormente porPopUpToBuilder.saveStateou pelo atributopopUpToSaveState. Caso nenhum estado tenha sido salvo com o ID de destino da navegação, essa função não vai ter nenhum efeito.- No Rally, isso significa que ao tocar novamente na mesma guia, os dados e o estado do usuário anteriores são mantidos na tela, sem precisar carregá-los novamente.
Adicione todas essas opções ao código uma a uma e execute o app depois de cada mudança para verificar o comportamento exato que dele com a inclusão de cada flag. Você vai poder observar na prática como cada uma muda o estado da navegação e da backstack:
import androidx.navigation.NavHostController
import androidx.navigation.NavGraph.Companion.findStartDestination
// ...

fun NavHostController.navigateSingleTopTo(route: String) =
    this.navigate(route) {
        popUpTo(
            this@navigateSingleTopTo.graph.findStartDestination().id
        ) {
            saveState = true
        }
        launchSingleTop = true
        restoreState = true
}
Como corrigir a interface da guia
No início deste codelab, quando o app ainda implementava o mecanismo de navegação manual, a RallyTabRow usava a variável currentScreen para determinar se era necessário abrir ou fechar cada guia.
No entanto, com as mudanças que você fez, a currentScreen não vai ser mais atualizada. É por esse motivo que o recurso de abrir e fechar as guias selecionadas na RallyTabRow não está mais funcionando.
Para reativar esse comportamento usando a navegação do Compose, é necessário saber qual destino está sendo mostrado na tela a cada momento ou, em termos de navegação, qual destino está na parte de cima da backstack atual, e, então, atualizar a RallyTabRow sempre que essa informação mudar.
Para receber atualizações sobre o destino da backstack em tempo real na forma de um State, use o método navController.currentBackStackEntryAsState() e extraia o respectivo destination:
import androidx.navigation.compose.currentBackStackEntryAsState
import androidx.compose.runtime.getValue
// ...

@Composable
fun RallyApp() {
    RallyTheme {
        val navController = rememberNavController()

        val currentBackStack by navController.currentBackStackEntryAsState()
        // Fetch your currentDestination:
        val currentDestination = currentBackStack?.destination
        // ...
    }
}
currentBackStack?.destination retorna NavDestination.Para atualizar corretamente currentScreen mais uma vez, encontre uma maneira de fazer com que o retorno do NavDestination corresponda a um dos três elementos combináveis da tela principal do Rally. Você precisa determinar qual tela está sendo mostrada no momento para que seja possível transmitir essas informações à RallyTabRow. Como mencionado anteriormente, cada destino tem uma rota única, portanto, podemos usar essa rota de string como um ID e executar uma comparação verificada para encontrar uma correspondência exclusiva.
Para atualizar a currentScreen, é necessário iterar as rallyTabRowScreens para encontrar uma rota correspondente e retornar o respectivo RallyDestination. O Kotlin oferece uma função .find() (link em inglês) que é útil para isso:
import androidx.navigation.compose.currentBackStackEntryAsState
import androidx.compose.runtime.getValue
// ...

@Composable
fun RallyApp() {
    RallyTheme {
        val navController = rememberNavController()

        val currentBackStack by navController.currentBackStackEntryAsState()
        val currentDestination = currentBackStack?.destination

        // Change the variable to this and use Overview as a backup screen if this returns null
        val currentScreen = rallyTabRowScreens.find { it.route == currentDestination?.route } ?: Accounts
        // ...
    }
}
Como a currentScreen já está sendo transmitida para a RallyTabRow, execute o app e verifique se a interface da barra de guias é atualizada corretamente.
6. Como extrair os elementos combináveis da tela de RallyDestinations
Até agora, para simplificar, estávamos usando a propriedade screen da interface RallyDestination, assim como os objetos de tela que se estendem dela, para adicionar a interface combinável ao NavHost (RallyActivity.kt:
import com.example.compose.rally.ui.overview.OverviewScreen
// ...

NavHost(
    navController = navController,
    startDestination = Overview.route,
    modifier = Modifier.padding(innerPadding)
) {
    composable(route = Overview.route) {
        Overview.screen()
    }
    // ...
}
Contudo, no caso das próximas etapas deste codelab, como os eventos de clique, é necessário transmitir mais informações diretamente para os elementos combináveis das telas. Em um ambiente de produção, certamente vai existir ainda mais dados que precisam ser transmitidos.
A maneira correta e mais simples de fazer isso é adicionar as funções combináveis diretamente ao gráfico de navegação NavHost e extrair do RallyDestination. Depois disso, o RallyDestination e os objetos de tela passam a incluir apenas informações específicas sobre a navegação, como icon e route, ficando separados de tudo que é relacionado à interface do Compose.
Abra RallyDestinations.kt. Extraia o elemento combinável de cada tela do parâmetro screen dos objetos RallyDestination e adicione-os às funções composable correspondentes no NavHost, substituindo a chamada .screen() anterior. Veja o exemplo:
import com.example.compose.rally.ui.accounts.AccountsScreen
import com.example.compose.rally.ui.bills.BillsScreen
import com.example.compose.rally.ui.overview.OverviewScreen
// ...

NavHost(
    navController = navController,
    startDestination = Overview.route,
    modifier = Modifier.padding(innerPadding)
) {
    composable(route = Overview.route) {
        OverviewScreen()
    }
    composable(route = Accounts.route) {
        AccountsScreen()
    }
    composable(route = Bills.route) {
        BillsScreen()
    }
}
Agora, você pode remover o parâmetro screen de RallyDestination e dos objetos correspondentes:
interface RallyDestination {
    val icon: ImageVector
    val route: String
}

/**
 * Rally app navigation destinations
 */
object Overview : RallyDestination {
    override val icon = Icons.Filled.PieChart
    override val route = "overview"
}
// ...
Execute o app novamente e confira se tudo ainda está funcionando como antes. Agora que você concluiu essa etapa, é possível configurar eventos de cliques nas telas do app.
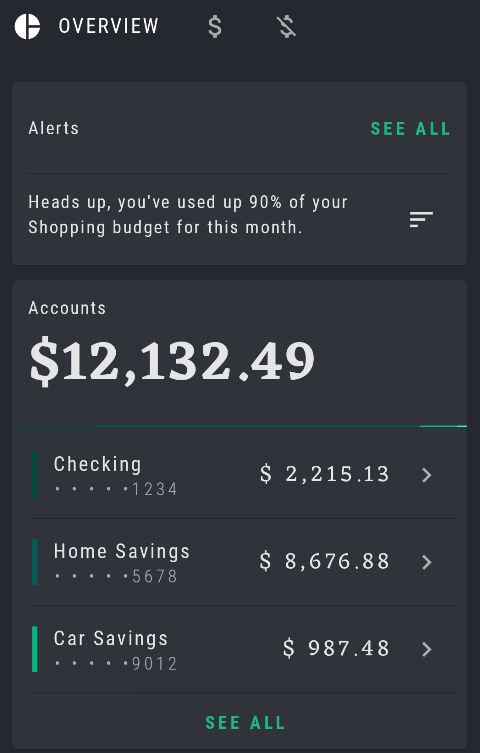
Ativar cliques na OverviewScreen
No momento, todos os eventos de clique na OverviewScreen são ignorados. Isso significa que os botões "SEE ALL" (MOSTRAR TUDO) das subseções "Accounts" (Contas) e "Bills" (Despesas) são clicáveis, mas não levam a lugar algum. Nesta etapa, vamos ativar a navegação para esses eventos de clique.

O elemento combinável OverviewScreen aceita várias funções como callbacks que vão ser definidos como eventos de clique, que, nesse caso, são ações de navegação levando à tela AccountsScreen ou BillsScreen. Vamos transmitir esses callbacks de navegação a onClickSeeAllAccounts e onClickSeeAllBills para acessar os destinos correspondentes.
Abra RallyActivity.kt, encontre OverviewScreen no NavHost e transmita navController.navigateSingleTopTo(...) para os dois callbacks de navegação com as rotas correspondentes:
OverviewScreen(
    onClickSeeAllAccounts = {
        navController.navigateSingleTopTo(Accounts.route)
    },
    onClickSeeAllBills = {
        navController.navigateSingleTopTo(Bills.route)
    }
)
O navController agora tem informações suficientes, como a rota do destino exato, para abrir o destino certo como resposta ao clique no botão. Analisando a implementação do OverviewScreen, você vai observar que esses callbacks já estão sendo definidos para os parâmetros onClick correspondentes:
@Composable
fun OverviewScreen(...) {
    // ...
    AccountsCard(
        onClickSeeAll = onClickSeeAllAccounts,
        onAccountClick = onAccountClick
    )
    // ...
    BillsCard(
        onClickSeeAll = onClickSeeAllBills
    )
}
Como mencionado anteriormente, manter o navController no nível superior da hierarquia de navegação e elevá-lo ao nível do elemento combinável App, em vez de transmiti-lo diretamente à OverviewScreen), por exemplo, faz com que seja mais fácil visualizar, reutilizar e testar a OverviewScreen de forma isolada, sem depender de instâncias reais ou simuladas do navController. A transmissão de callbacks também permite fazer mudanças rápidas em eventos de clique.
7. Como navegar para a SingleAccountScreen com argumentos
Vamos adicionar novas funcionalidades às telas Accounts e Overview. No momento, essas telas mostram uma lista com vários tipos diferentes de contas: "Checking" (Conta corrente), "Home savings" (Poupança doméstica), entre outras.
No entanto, nada acontece ao clicar nos tipos de contas (por enquanto). Vamos corrigir isso. Ao tocar em cada tipo de conta, queremos mostrar uma nova tela com todos os detalhes. Para isso, precisamos transmitir mais informações ao navController sobre o tipo exato de conta em que estamos clicando. Isso pode ser feito usando argumentos.
Os argumentos são uma ferramenta muito eficiente que tornam a definição de rotas de navegação dinâmica, transmitindo um ou mais argumentos para uma rota. É possível mostrar informações diferentes de acordo com os diferentes argumentos fornecidos.
No RallyApp, adicione um novo destino da SingleAccountScreen ao gráfico, que vai processar a exibição de cada conta. Para isso, adicione uma nova função composable ao NavHost:
import com.example.compose.rally.ui.accounts.SingleAccountScreen
// ...

NavHost(
    navController = navController,
    startDestination = Overview.route,
    modifier = Modifier.padding(innerPadding)
) {
    ...
    composable(route = SingleAccount.route) {
        SingleAccountScreen()
    }
}
Configurar o destino da SingleAccountScreen
Ao acessar a SingleAccountScreen, seria necessário ter mais informações para que o app saiba qual tipo de conta vai ser exibido ao abrir essa página. Podemos usar argumentos para transmitir esse tipo de informação. É necessário especificar que a rota também exige um argumento {account_type}. Observando o RallyDestination e o objeto SingleAccount, você vai notar que esse argumento já foi definido para uso como uma string accountTypeArg.
Para transmitir o argumento junto à rota durante a navegação, é necessário os unir seguindo um padrão: "route/{argument}". Nesse caso, o resultado ficaria assim: "${SingleAccount.route}/{${SingleAccount.accountTypeArg}}". Lembre-se de que o sinal $ é usado para o escape de variáveis:
import androidx.navigation.NavType
import androidx.navigation.compose.navArgument
// ...

composable(
    route =
        "${SingleAccount.route}/{${SingleAccount.accountTypeArg}}"
) {
    SingleAccountScreen()
}
Isso vai garantir que um argumento accountTypeArg também seja transmitido quando uma ação for acionada para navegar para a SingleAccountScreen. Caso contrário, a navegação não vai funcionar. Pense nesse comportamento como uma assinatura ou um contrato que precisa ser seguido por outros destinos que querem navegar para SingleAccountScreen.
A segunda etapa a ser implementada é informar à função composable que ela precisa aceitar argumentos. Para isso, defina o parâmetro arguments. Você pode definir quantos argumentos forem necessários, já que, por padrão, a função composable aceita uma lista de argumentos. Nesse caso, só é necessário adicionar um único argumento, com o nome accountTypeArg, e especificar o tipo como String para aumentar a segurança. Se você não definir um tipo explicitamente, ele vai ser inferido de acordo com o valor padrão do argumento:
import androidx.navigation.NavType
import androidx.navigation.compose.navArgument
// ...

composable(
    route =
        "${SingleAccount.route}/{${SingleAccount.accountTypeArg}}",
    arguments = listOf(
        navArgument(SingleAccount.accountTypeArg) { type = NavType.StringType }
    )
) {
    SingleAccountScreen()
}
Isso funciona perfeitamente, e você poderia optar por deixar o código dessa forma. No entanto, como todas as informações de destino estão em RallyDestinations.kt e nos objetos dele, vamos continuar usando a mesma abordagem anterior, como fizemos para Overview, Accounts, e Bills. Mova a lista de argumentos para SingleAccount:
object SingleAccount : RallyDestination {
    // ...
    override val route = "single_account"
    const val accountTypeArg = "account_type"
    val arguments = listOf(
        navArgument(accountTypeArg) { type = NavType.StringType }
    )
}
Substitua os argumentos anteriores por SingleAccount.arguments na função composable do NavHost correspondente. Isso também garante que o NavHost seja o mais simples e legível possível:
composable(
    route = "${SingleAccount.route}/{${SingleAccount.accountTypeArg}}",
    arguments =  SingleAccount.arguments
) {
    SingleAccountScreen()
}
Agora que você definiu a rota completa com argumentos para a SingleAccountScreen, a próxima etapa é garantir que esse accountTypeArg seja transmitido ao elemento combinável SingleAccountScreen para que o app saiba qual tipo de conta mostrar. Analisando a implementação de SingleAccountScreen, é possível observar que esse elemento já está configurado e está aguardando para aceitar um parâmetro accountType:
fun SingleAccountScreen(
    accountType: String? = UserData.accounts.first().name
) {
   // ...
}
Vamos recapitular. Até agora:
- Você definiu que a rota precisa solicitar argumentos, como um sinal para os destinos anteriores.
- Você especificou que
composableprecisa aceitar argumentos.
A etapa final é extrair o valor do argumento transmitido.
Na navegação no Compose, cada função combinável NavHost tem acesso à NavBackStackEntry, uma classe que armazena as informações sobre a rota atual e transmite argumentos de uma entrada na backstack. Você pode usar isso para acessar a lista de arguments do navBackStackEntry e, em seguida, pesquisar e extrair o argumento exato necessário e, então, transmiti-lo à tela combinável.
Nesse caso, solicite o accountTypeArg da navBackStackEntry. Em seguida, é necessário transmitir o argumento ao parâmetro accountType da SingleAccountScreen'.
Também é possível fornecer um valor padrão para o argumento, como um marcador de posição, caso ele não tenha sido fornecido. Assim, você abrange um caso extremo e garante que o código fique ainda mais seguro.
Seu código vai ficar assim:
NavHost(...) {
    // ...
    composable(
        route =
          "${SingleAccount.route}/{${SingleAccount.accountTypeArg}}",
        arguments = SingleAccount.arguments
    ) { navBackStackEntry ->
        // Retrieve the passed argument
        val accountType =
            navBackStackEntry.arguments?.getString(SingleAccount.accountTypeArg)

        // Pass accountType to SingleAccountScreen
        SingleAccountScreen(accountType)
    }
}
Agora, a SingleAccountScreen tem as informações necessárias para mostrar o tipo de conta certo após navegar até ela. Na implementação da SingleAccountScreen, podemos observar que ela já realiza a correspondência entre o accountType transmitido e a fonte de UserData para buscar os respectivos detalhes da conta.
Vamos fazer mais uma pequena otimização e mover a rota "${SingleAccount.route}/{${SingleAccount.accountTypeArg}}" e o objeto SingleAccount dela também para o arquivo RallyDestinations.kt:
object SingleAccount : RallyDestination {
    // ...
    override val route = "single_account"
    const val accountTypeArg = "account_type"
    val routeWithArgs = "${route}/{${accountTypeArg}}"
    val arguments = listOf(
        navArgument(accountTypeArg) { type = NavType.StringType }
    )
}
Agora, substitua a rota novamente no respectivo NavHost composable:
// ...
composable(
    route = SingleAccount.routeWithArgs,
    arguments = SingleAccount.arguments
) {...}
Configurar os destinos iniciais das telas "Accounts" e "Overview"
Agora que você definiu a rota SingleAccountScreen e o argumento necessário para executar a navegação corretamente para SingleAccountScreen, você precisa garantir que o mesmo argumento accountTypeArg esteja sendo transmitido no destino anterior, ou seja, qualquer destino de origem.
Há dois lados a se considerar: o destino inicial, que fornece e transmite um argumento, e o destino final, que aceita esse argumento e o usa para mostrar as informações certas. Ambos precisam ser definidos explicitamente.
Por exemplo, quando você estiver no destino Accounts e tocar no tipo de conta "Checking", o destino de "Accounts" vai precisar transmitir uma string "Checking" como argumento, anexada à rota de string "single_account", para abrir a SingleAccountScreen correspondente. A rota de string ficaria assim: "single_account/Checking"
Use essa mesma rota com o argumento transmitido ao implementar navController.navigateSingleTopTo(...), desta maneira:
navController.navigateSingleTopTo("${SingleAccount.route}/$accountType").
Transmita esse callback da ação de navegação ao parâmetro onAccountClick de OverviewScreen e AccountsScreen. Observe que esses parâmetros são predefinidos como onAccountClick: (String) -> Unit, com a string como entrada. Isso significa que, quando o usuário toca em um tipo de conta específico em Overview e Account, ele já fica disponível e pode ser facilmente transmitido como um argumento de navegação:
OverviewScreen(
    // ...
    onAccountClick = { accountType ->
        navController
          .navigateSingleTopTo("${SingleAccount.route}/$accountType")
    }
)
// ...

AccountsScreen(
    // ...
    onAccountClick = { accountType ->
        navController
          .navigateSingleTopTo("${SingleAccount.route}/$accountType")
    }
)
Para facilitar a leitura, remova essa ação de navegação e a insira em um auxiliar particular na função de extensão:
import androidx.navigation.NavHostController
// ...
OverviewScreen(
    // ...
    onAccountClick = { accountType ->
        navController.navigateToSingleAccount(accountType)
    }
)

// ...

AccountsScreen(
    // ...
    onAccountClick = { accountType ->
        navController.navigateToSingleAccount(accountType)
    }
)

// ...

private fun NavHostController.navigateToSingleAccount(accountType: String) {
    this.navigateSingleTopTo("${SingleAccount.route}/$accountType")
}
Nesse momento, ao executar o app, você consegue clicar em cada tipo de conta e abrir a SingleAccountScreen correspondente, que mostra os dados da conta especificada.

8. Ativar a compatibilidade com links diretos
Além de adicionar argumentos, você também pode adicionar links diretos para associar um URL, uma ação ou um tipo MIME específico a um elemento combinável. No Android, um link direto é um link que leva você diretamente a um destino específico no app. A navegação do Compose oferece suporte a links diretos implícitos. Quando um link direto implícito é invocado, por exemplo, quando um usuário clica em um link, o Android pode abrir o app no destino correspondente.
Nesta seção, você vai adicionar um link direto para acessar a função combinável SingleAccountScreen com um tipo de conta correspondente e permitir que esse link direto também seja exposto a apps externos. Vamos relembrar: a rota dessa função combinável era "single_account/{account_type}". Essa é a rota que você vai usar para o link direto, com algumas pequenas mudanças relacionadas a esse tipo de link.
Como a opção de expor links diretos a apps externos não está ativada por padrão, também é necessário adicionar elementos <intent-filter> ao arquivo manifest.xml do app. Essa é a primeira etapa.
Comece adicionando o link direto no arquivo AndroidManifest.xml do app. Você precisa criar um novo filtro de intent usando <intent-filter> dentro da <activity>, com a ação VIEW e as categorias BROWSABLE e DEFAULT.
Em seguida, dentro do filtro, use a tag data para adicionar um scheme (rally: nome do app) e um host (single_account: rota para o elemento combinável). Isso vai definir o destino exato do link direto, fazendo com que rally://single_account seja o URL do link direto.
Não é necessário declarar o argumento account_type no AndroidManifest, já que ele vai ser anexado mais tarde à função combinável NavHost.
<activity
    android:name=".RallyActivity"
    android:windowSoftInputMode="adjustResize"
    android:label="@string/app_name"
    android:exported="true">
    <intent-filter>
        <action android:name="android.intent.action.MAIN" />
        <category android:name="android.intent.category.LAUNCHER" />
    </intent-filter>
    <intent-filter>
        <action android:name="android.intent.action.VIEW" />
        <category android:name="android.intent.category.DEFAULT" />
        <category android:name="android.intent.category.BROWSABLE" />
        <data android:scheme="rally" android:host="single_account" />
    </intent-filter>
</activity>
Acionar e verificar o link direto
Agora, é possível reagir às intentes recebidas da RallyActivity.
O elemento combinável SingleAccountScreen já aceita argumentos, mas agora ele também precisa aceitar o link direto que criamos e abrir esse destino quando o link for acionado.
Dentro da função combinável SingleAccountScreen, adicione mais um parâmetro deepLinks. Da mesma forma que os arguments, ele também aceita uma lista de navDeepLink, já que é possível definir vários links diretos que levam ao mesmo destino. Transmita o uriPattern, fazendo a correspondência com o definido no intent-filter do manifesto (rally://singleaccount). Mas, desta vez, também vamos anexar o argumento accountTypeArg:
import androidx.navigation.navDeepLink
// ...

composable(
    route = SingleAccount.routeWithArgs,
    // ...
    deepLinks = listOf(navDeepLink {
        uriPattern = "rally://${SingleAccount.route}/{${SingleAccount.accountTypeArg}}"
    })
)
Já sabe qual é a próxima etapa? Mover a lista para RallyDestinations SingleAccount:
object SingleAccount : RallyDestination {
    // ...
    val arguments = listOf(
        navArgument(accountTypeArg) { type = NavType.StringType }
    )
    val deepLinks = listOf(
       navDeepLink { uriPattern = "rally://$route/{$accountTypeArg}"}
    )
}
Agora, substitua a lista novamente no respectivo NavHost combinável:
// ...
composable(
    route = SingleAccount.routeWithArgs,
    arguments = SingleAccount.arguments,
    deepLinks = SingleAccount.deepLinks
) {...}
Testar o link direto usando o adb
Agora seu app e a SingleAccountScreen estão prontos para processar links diretos. Para testar o comportamento, instale o Rally em um emulador ou dispositivo conectado, abra uma linha de comando e execute o comando abaixo para simular o funcionamento de um link direto:
adb shell am start -d "rally://single_account/Checking" -a android.intent.action.VIEW
Você vai acessar a conta "Checking", mas também pode conferir se o link funciona para os outros tipos de conta.
9. Extrair o NavHost para o RallyNavHost
O NavHost está pronto. No entanto, para ser possível testar e manter a RallyActivity mais limpa, você pode extrair o NavHost atual e as funções auxiliares dele, como navigateToSingleAccount, de RallyApp para a própria função combinável, e nomear como RallyNavHost.
RallyApp é o único elemento combinável que funciona diretamente com o navController. Como mencionado anteriormente, todas as outras telas aninhadas podem receber apenas callbacks de navegação, e não o navController.
O novo RallyNavHost aceita navController e modifier como parâmetros do RallyApp:
@Composable
fun RallyNavHost(
    navController: NavHostController,
    modifier: Modifier = Modifier
) {
    NavHost(
        navController = navController,
        startDestination = Overview.route,
        modifier = modifier
    ) {
        composable(route = Overview.route) {
            OverviewScreen(
                onClickSeeAllAccounts = {
                    navController.navigateSingleTopTo(Accounts.route)
                },
                onClickSeeAllBills = {
                    navController.navigateSingleTopTo(Bills.route)
                },
                onAccountClick = { accountType ->
                   navController.navigateToSingleAccount(accountType)
                }
            )
        }
        composable(route = Accounts.route) {
            AccountsScreen(
                onAccountClick = { accountType ->
                   navController.navigateToSingleAccount(accountType)
                }
            )
        }
        composable(route = Bills.route) {
            BillsScreen()
        }
        composable(
            route = SingleAccount.routeWithArgs,
            arguments = SingleAccount.arguments,
            deepLinks = SingleAccount.deepLinks
        ) { navBackStackEntry ->
            val accountType =
              navBackStackEntry.arguments?.getString(SingleAccount.accountTypeArg)
            SingleAccountScreen(accountType)
        }
    }
}

fun NavHostController.navigateSingleTopTo(route: String) =
    this.navigate(route) { launchSingleTop = true }

private fun NavHostController.navigateToSingleAccount(accountType: String) {
    this.navigateSingleTopTo("${SingleAccount.route}/$accountType")
}
Agora, adicione o novo RallyNavHost ao RallyApp e execute o app novamente para conferir se tudo está funcionando como antes:
fun RallyApp() {
    RallyTheme {
    ...
        Scaffold(
        ...
        ) { innerPadding ->
            RallyNavHost(
                navController = navController,
                modifier = Modifier.padding(innerPadding)
            )
        }
     }
}
10. Como testar a navegação no Compose
Desde o início deste codelab, tomamos o cuidado de não transmitir o navController diretamente a nenhum elemento combinável, com exceção do app de alto nível. Em vez disso, transmitimos callbacks de navegação como parâmetros. Isso permite que todas as funções combináveis sejam testadas isoladamente, já que não exigem uma instância do navController nos testes.
Para testar se o mecanismo de navegação do Compose funciona da forma esperada no app, sempre teste o RallyNavHost e as ações de navegação transmitidas às funções combináveis. Esses são os principais assuntos que vamos abordar nesta seção. Para testar funções combináveis isoladamente, faça o codelab Como testar no Jetpack Compose.
Para começar a testar, primeiro precisamos adicionar as dependências de teste necessárias. Abra novamente o arquivo de build do app, em app/build.gradle. Na seção de dependências de testes, adicione a dependência navigation-testing:
dependencies {
// ...
  androidTestImplementation "androidx.navigation:navigation-testing:$rootProject.composeNavigationVersion"
  // ...
}
Preparar a classe NavigationTest
O RallyNavHost pode ser testado de forma isolada da Activity.
Como esse teste ainda vai ser executado em um dispositivo Android, é necessário criar o diretório de teste /app/src/androidTest/java/com/example/compose/rally e, em seguida, criar um novo arquivo para a classe de teste, com o nome NavigationTest.
Para começar, adicione uma regra de teste do Compose para usar as APIs de teste do Compose e para testar e controlar funções combináveis e aplicativos usando o Compose:
import androidx.compose.ui.test.junit4.createComposeRule
import org.junit.Rule

class NavigationTest {

    @get:Rule
    val composeTestRule = createComposeRule()

}
Criar seu primeiro teste
Crie uma função de teste pública rallyNavHost e adicione a anotação @Test a ela. Nessa função, primeiro defina o conteúdo do Compose que você pretende testar. Para isso, use o setContent da composeTestRule. Ela usa um parâmetro combinável como corpo da função e permite criar o código do Compose e adicionar funções combináveis em um ambiente de teste, da mesma forma que em um ambiente de produção normal.
Na função setContent,, é possível configurar o elemento do teste atual, RallyNavHost, e transmitir uma nova instância do navController a ele. O artefato de teste de navegação inclui um TestNavHostController útil que pode ser usado para isso. Agora, vamos adicionar essa etapa:
import androidx.compose.ui.platform.LocalContext
import androidx.navigation.compose.ComposeNavigator
import androidx.navigation.testing.TestNavHostController
import org.junit.Assert.fail
import org.junit.Test
// ...

class NavigationTest {

    @get:Rule
    val composeTestRule = createComposeRule()

    lateinit var navController: TestNavHostController

    @Test
    fun rallyNavHost() {
        composeTestRule.setContent {
            // Creates a TestNavHostController
            navController =
                TestNavHostController(LocalContext.current)
            // Sets a ComposeNavigator to the navController so it can navigate through composables
            navController.navigatorProvider.addNavigator(
                ComposeNavigator()
            )
            RallyNavHost(navController = navController)
        }
        fail()
    }
}
Caso você tenha copiado o código acima, a chamada fail() vai fazer com que o teste falhe até que uma declaração real seja feita. Isso serve como um lembrete para concluir a implementação do teste.
Para verificar se a tela certa é mostrada, use a contentDescription e declare o destino a ser exibido. Neste codelab, as contentDescriptions dos destinos "Accounts" e "Overview" foram definidas anteriormente, então você já pode usá-las para fazer os testes.
Para começar, confira se a tela "Overview" aparece como o primeiro destino quando o RallyNavHost é inicializado pela primeira vez. É importante renomear o teste como rallyNavHost_verifyOverviewStartDestination para refletir esse comportamento. Para isso, substitua a chamada fail() pelo seguinte:
import androidx.compose.ui.test.assertIsDisplayed
import androidx.compose.ui.test.onNodeWithContentDescription
// ...

class NavigationTest {

    @get:Rule
    val composeTestRule = createComposeRule()

    lateinit var navController: TestNavHostController

    @Test
    fun rallyNavHost_verifyOverviewStartDestination() {
        composeTestRule.setContent {
            navController =
                TestNavHostController(LocalContext.current)
            navController.navigatorProvider.addNavigator(
                ComposeNavigator()
            )
            RallyNavHost(navController = navController)
        }

        composeTestRule
            .onNodeWithContentDescription("Overview Screen")
            .assertIsDisplayed()
    }
}
Execute o teste novamente e confira se o resultado é o esperado.
Como é necessário configurar o RallyNavHost da mesma forma para os próximos testes, você pode extrair a inicialização para uma função com a anotação @Before para evitar repetições desnecessárias e manter os testes mais concisos:
import org.junit.Before
// ...

class NavigationTest {

    @get:Rule
    val composeTestRule = createComposeRule()
    lateinit var navController: TestNavHostController

    @Before
    fun setupRallyNavHost() {
        composeTestRule.setContent {
            navController =
                TestNavHostController(LocalContext.current)
            navController.navigatorProvider.addNavigator(
                ComposeNavigator()
            )
            RallyNavHost(navController = navController)
        }
    }

    @Test
    fun rallyNavHost_verifyOverviewStartDestination() {
        composeTestRule
            .onNodeWithContentDescription("Overview Screen")
            .assertIsDisplayed()
    }
}
Como navegar em testes
Você pode testar a implementação da navegação de várias maneiras. Para isso, clique nos elementos da interface e verifique o destino mostrado ou compare a rota esperada com a rota exibida.
Como fazer testes usando cliques na IU e a contentDescription da tela
Como o objetivo é testar a implementação concreta do app, recomendamos optar por realizar cliques na IU. No próximo teste, você vai verificar se ao clicar no botão "SEE ALL" na subseção "Accounts" da tela "Overview", o destino "Accounts" aparece:
Use novamente a contentDescription definida para esse botão específico no OverviewScreenCard e simule um clique, usando o método performClick(), para verificar se o destino "Accounts" é mostrado:
import androidx.compose.ui.test.performClick
// ...

@Test
fun rallyNavHost_clickAllAccount_navigatesToAccounts() {
    composeTestRule
        .onNodeWithContentDescription("All Accounts")
        .performClick()

    composeTestRule
        .onNodeWithContentDescription("Accounts Screen")
        .assertIsDisplayed()
}
Siga esse padrão para testar todas as outras ações de navegação por clique do app.
Como fazer testes usando cliques na IU e comparação de rotas
Também é possível usar o navController para verificar suas declarações, comparando as rotas de string mostradas com as esperadas. Para isso, execute um clique na IU, da maneira apresentada na seção anterior, e compare a rota exibida com a esperada, usando navController.currentBackStackEntry?.destination?.route.
É importante lembrar de rolar a tela "Overview" até a subseção "Bills" antes de executar o teste. Caso contrário, o teste vai resultar em uma falha por não conseguir encontrar um nó com a contentDescription de "All bills" (Todas as despesas):
import androidx.compose.ui.test.performScrollTo
import org.junit.Assert.assertEquals
// ...

@Test
fun rallyNavHost_clickAllBills_navigateToBills() {
    composeTestRule.onNodeWithContentDescription("All Bills")
        .performScrollTo()
        .performClick()

    val route = navController.currentBackStackEntry?.destination?.route
    assertEquals(route, "bills")
}
Seguindo esses padrões, você vai concluir a classe de teste abrangendo todas as outras rotas, destinos e ações de clique de navegação. Agora, execute todo o conjunto de testes e confira se todos apresentam o resultado esperado.
11. Parabéns
Parabéns! Você concluiu este codelab. Você pode consultar o código da solução (link em inglês) e comparar com o seu.
Você adicionou a navegação do Jetpack Compose ao app Rally e agora conhece os principais conceitos de navegação. Você aprendeu a configurar um gráfico de navegação de destinos combináveis, definir rotas e ações de navegação, transmitir outras informações para as rotas usando argumentos, configurar links diretos e testar a navegação.
Para saber mais sobre outros temas e informações, como a integração da barra de navegação na parte de baixo da tela, navegação com vários módulos e gráficos aninhados, confira o repositório Now in Android do GitHub (em inglês) e entenda como é feita a implementação.
Qual é a próxima etapa?
Confira os materiais abaixo para continuar seu Programa de treinamentos do Jetpack Compose:
- Codelab: Como testar no Compose
- Problemas comuns de performance no Jetpack Compose (vídeo em inglês)
Mais informações sobre a navegação do Jetpack Compose: