
1. 시작하기 전에
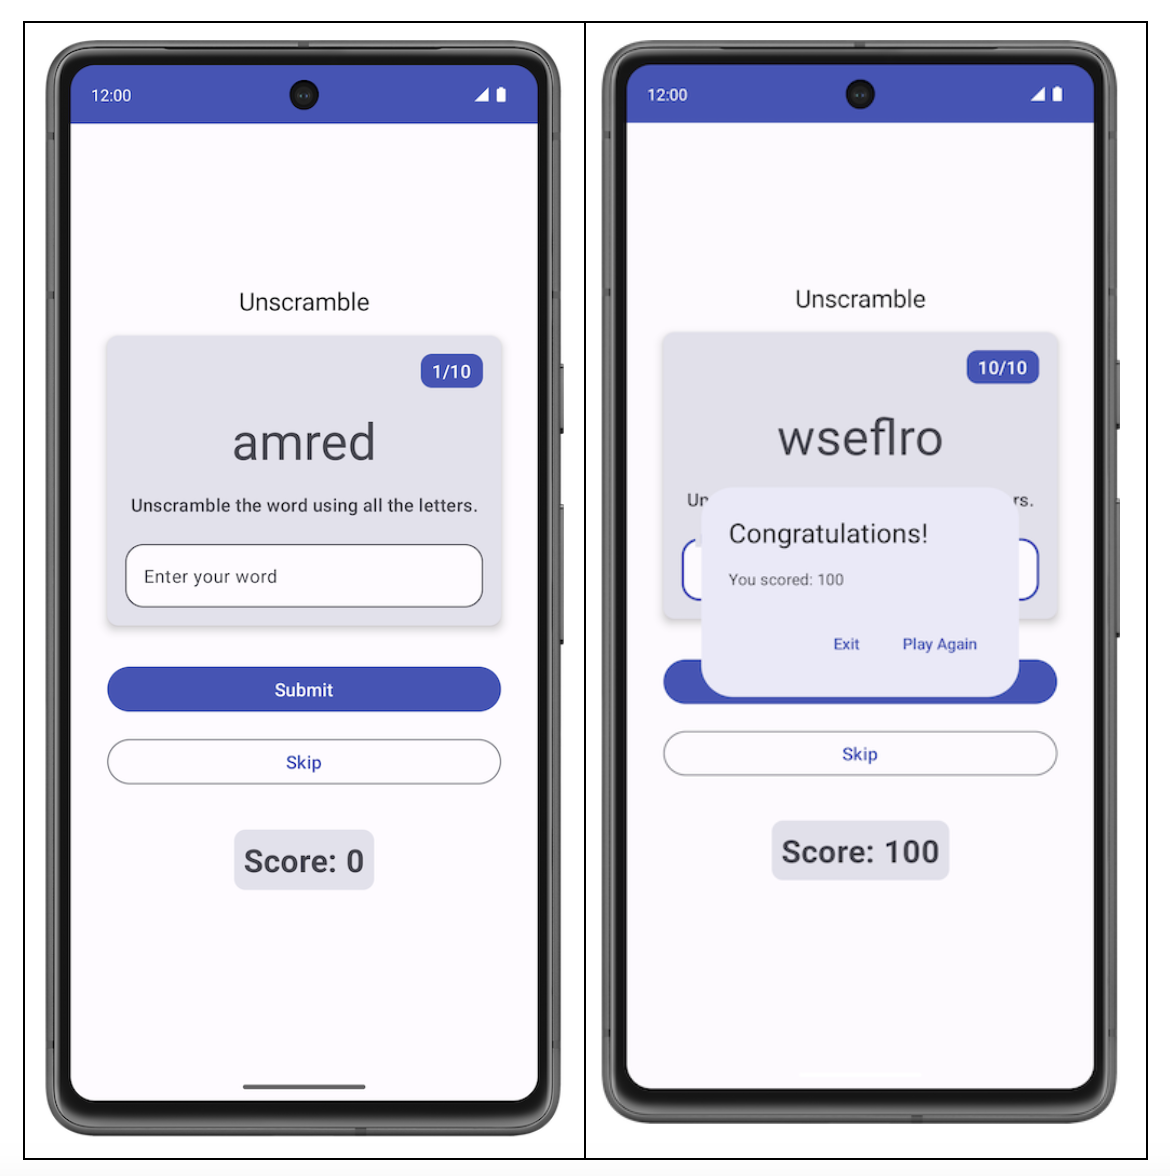
이 Codelab에서는 ViewModel 구성요소를 테스트하는 단위 테스트의 작성 방법을 설명합니다. Unscramble 게임 앱의 단위 테스트를 추가합니다. Unscramble 앱은 사용자가 글자가 뒤섞인 단어를 추측하고 추측이 맞았을 때 포인트를 얻는 재미있는 단어 게임입니다. 다음 이미지는 앱의 미리보기를 보여줍니다.
자동 테스트 작성 Codelab에서는 자동 테스트가 무엇이며 왜 중요한지 알아봤습니다. 단위 테스트를 구현하는 방법도 배웠습니다.
배운 내용은 다음과 같습니다.
- 자동 테스트는 다른 코드의 정확성을 확인하는 코드입니다.
- 테스트는 앱 개발 프로세스에서 중요한 부분입니다. 앱 테스트를 일관되게 실행하여 앱을 공개적으로 출시하기 전에 앱의 기능 동작과 사용성을 확인할 수 있습니다.
- 단위 테스트를 사용하여 함수, 클래스, 속성을 테스트할 수 있습니다.
- 로컬 단위 테스트는 워크스테이션에서 실행되므로 Android 기기나 에뮬레이터 없이도 개발 환경에서 실행됩니다. 즉, 로컬 테스트는 컴퓨터에서 실행됩니다.
계속하기 전에 자동 테스트 작성 및 Compose의 ViewModel 및 상태 Codelab을 완료했는지 확인합니다.
기본 요건
- 함수, 람다, 구성 가능한 스테이트리스(Stateless) 함수를 비롯한 Kotlin 지식
- Jetpack Compose에서 레이아웃을 빌드하는 방법에 관한 기본 지식
- Material Design 관련 기본 지식
- ViewModel 구현 방법에 관한 기본 지식
학습할 내용
- 앱 모듈의
build.gradle.kts파일에 단위 테스트 종속 항목을 추가하는 방법 - 단위 테스트를 구현하기 위한 테스트 전략을 만드는 방법
- JUnit4를 사용하여 단위 테스트를 작성하고 테스트 인스턴스 수명 주기를 이해하는 방법
- 코드 적용 범위를 실행, 분석, 개선하는 방법
빌드할 항목
- Unscramble 게임 앱의 단위 테스트
필요한 항목
- 최신 버전의 Android 스튜디오
시작 코드 가져오기
시작하려면 시작 코드를 다운로드하세요.
GitHub 저장소를 클론하여 코드를 가져와도 됩니다.
$ git clone https://github.com/google-developer-training/basic-android-kotlin-compose-training-unscramble.git
$ cd basic-android-kotlin-compose-training-unscramble
$ git checkout viewmodel
Unscramble GitHub 저장소에서 코드를 찾아볼 수 있습니다.
2. 시작 코드 개요
2단원에서는 단위 테스트 코드를 src 폴더 아래에 있는 test 소스 세트에 배치하는 방법을 알아봅니다(다음 이미지 참고).
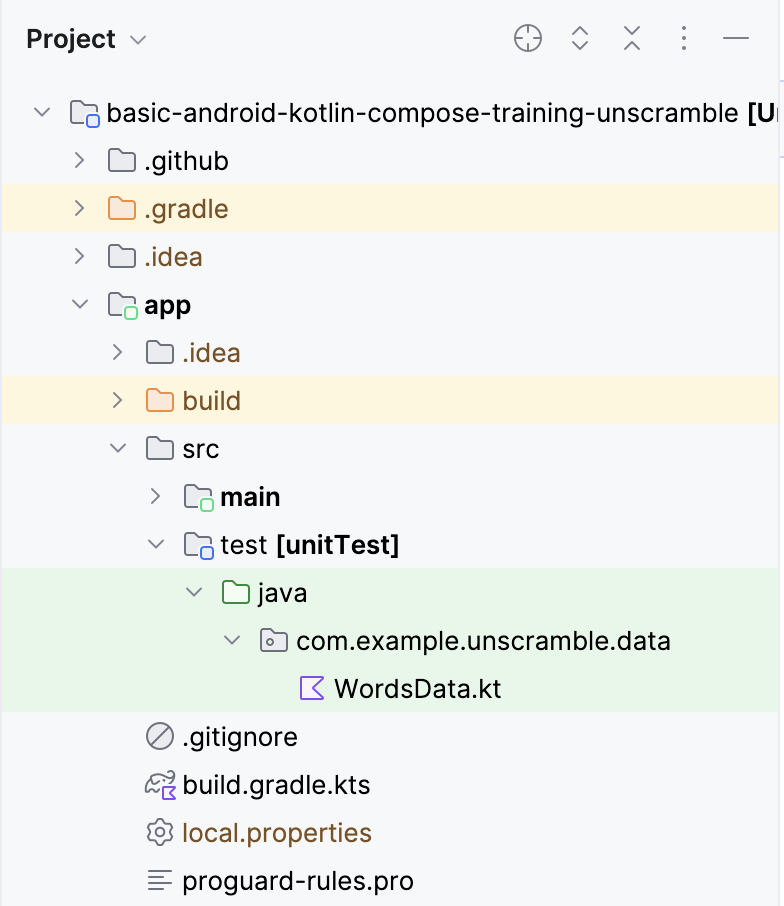
시작 코드의 파일은 다음과 같습니다.
WordsData.kt: 이 파일에는 테스트에 사용할 단어 목록과 글자가 뒤섞인 단어에서 원래 단어를 가져오는getUnscrambledWord()도우미 함수가 포함되어 있습니다. 이 파일은 수정할 필요가 없습니다.
3. 테스트 종속 항목 추가
이 Codelab에서는 JUnit 프레임워크를 사용하여 단위 테스트를 작성합니다. 프레임워크를 사용하려면 프레임워크를 앱 모듈의 build.gradle.kts 파일에 종속 항목으로 추가해야 합니다.
implementation 구성을 사용하여 앱에 필요한 종속 항목을 지정합니다. 예를 들어 애플리케이션에서 ViewModel 라이브러리를 사용하려면 다음 코드 스니펫과 같이 androidx.lifecycle:lifecycle-viewmodel-compose에 종속 항목을 추가해야 합니다.
dependencies {

    ...
    implementation("androidx.lifecycle:lifecycle-viewmodel-compose:2.6.1")
}
이제 이 라이브러리를 앱의 소스 코드에서 사용할 수 있으며, Android 스튜디오를 사용하면 생성된 애플리케이션 패키지 파일(APK)에 이 라이브러리를 추가할 수 있습니다. 그러나 단위 테스트 코드가 APK 파일에 포함되는 것은 좋지 않습니다. 테스트 코드는 사용자가 사용할 수 있는 기능을 추가하지 않으며 APK 크기에도 영향을 줍니다. 테스트 코드에 필요한 종속 항목도 마찬가지입니다. 분리해서 사용해야 합니다. 이렇게 하려면 구성이 로컬 테스트 소스 코드에는 적용되지만 애플리케이션 코드에는 적용되지 않는다고 나타내는 testImplementation 구성을 사용하세요.
프로젝트에 종속 항목을 추가하려면 build.gradle.kts 파일의 종속 항목 블록에 implementation 또는 testImplementation과 같은 종속 항목 구성을 지정합니다. 각 종속 항목 구성은 Gradle에 종속 항목 사용 방법에 관한 다양한 안내를 제공합니다.
종속 항목을 추가하려면 다음 안내를 따르세요.
- Project 창의
app디렉터리에 있는app모듈의build.gradle.kts파일을 엽니다.
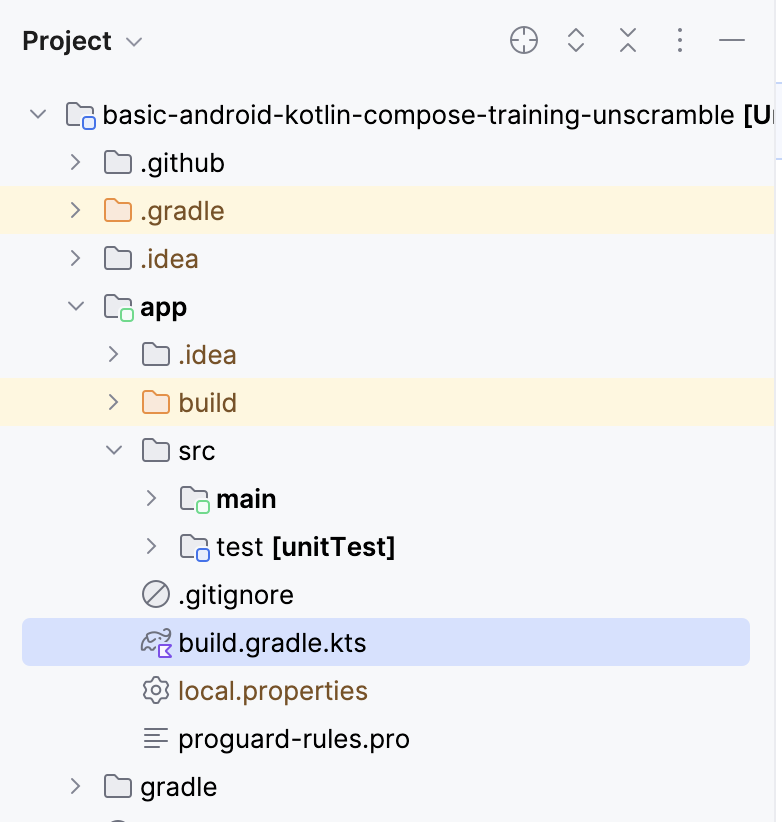
- 파일 내에서
dependencies{}블록이 표시될 때까지 아래로 스크롤합니다.junit의testImplementation구성을 사용하여 종속 항목을 추가합니다.
plugins {
    ...
}

android {
    ...
}

dependencies {
    ...
    testImplementation("junit:junit:4.13.2")
}
- build.gradle.kts 파일 상단의 알림바에서 Sync Now를 클릭하여 다음 스크린샷과 같이 가져오기와 빌드를 완료합니다.

Compose 재료명세서(BOM)
Compose BOM은 Compose 라이브러리 버전을 관리하는 데 권장되는 방법입니다. BOM을 사용하면 BOM 버전만 지정하여 모든 Compose 라이브러리 버전을 관리할 수 있습니다.
app 모듈의 build.gradle.kts 파일에서 종속 항목 섹션을 확인하세요.
// No need to copy over
// This is part of starter code
dependencies {

   // Import the Compose BOM
    implementation (platform("androidx.compose:compose-bom:2023.06.01"))
    ...
    implementation("androidx.compose.material3:material3")
    implementation("androidx.compose.ui:ui")
    implementation("androidx.compose.ui:ui-graphics")
    implementation("androidx.compose.ui:ui-tooling-preview")
    ...
}
다음 사항을 확인하세요.
- Compose 라이브러리 버전 번호가 지정되지 않았습니다.
implementation platform("androidx.compose:compose-bom:2023.06.01")을 사용하여 BOM을 가져옵니다.
이는 BOM 자체에는 서로 잘 작동하는 방식으로 다양한 Compose 라이브러리의 최신 안정화 버전에 대한 링크가 있기 때문입니다. 앱에서 BOM을 사용할 때는 Compose 라이브러리 종속 항목 자체에 버전을 추가할 필요가 없습니다. BOM 버전을 업데이트하면 사용 중인 모든 라이브러리가 새 버전으로 자동 업데이트됩니다.
Compose 테스트 라이브러리(계측 테스트)와 함께 BOM을 사용하려면 androidTestImplementation platform("androidx.compose:compose-bom:xxxx.xx.xx")을 가져와야 합니다. 다음과 같이 변수를 만들어 implementation 및 androidTestImplementation에 재사용할 수 있습니다.
// Example, not need to copy over
dependencies {

   // Import the Compose BOM
    implementation(platform("androidx.compose:compose-bom:2023.06.01"))
    implementation("androidx.compose.material:material")
    implementation("androidx.compose.ui:ui")
    implementation("androidx.compose.ui:ui-tooling-preview")

    // ...
    androidTestImplementation(platform("androidx.compose:compose-bom:2023.06.01"))
    androidTestImplementation("androidx.compose.ui:ui-test-junit4")

}
잘하셨습니다. 테스트 종속 항목을 앱에 추가하고 BOM에 관해 알아봤습니다. 이제 단위 테스트를 추가해 보겠습니다.
4. 테스트 전략
좋은 테스트 전략의 핵심은 코드의 여러 경로와 경계를 포괄하는 것입니다. 아주 기본적인 수준에서 테스트는 성공 경로, 오류 경로, 경계 사례라는 세 가지 시나리오로 분류할 수 있습니다.
- 성공 경로: 성공 경로 테스트(해피 패스 테스트라고도 함)는 긍정적인 흐름의 기능 테스트에 집중합니다. 긍정적인 흐름은 예외나 오류 조건이 없는 흐름입니다. 오류 경로 및 경계 사례 시나리오에 비해 성공 경로 시나리오는 전체 목록을 만들기 쉽습니다. 앱의 의도된 동작에 초점을 맞추기 때문입니다.
Unscramble 앱의 성공 경로 예는 사용자가 올바른 단어를 입력하고 Submit 버튼을 클릭할 때 점수, 단어 개수, 글자가 뒤섞인 단어의 올바른 업데이트입니다.
- 오류 경로: 오류 경로 테스트는 부정적인 흐름의 기능 테스트, 즉 앱이 오류 조건 또는 잘못된 사용자 입력에 어떻게 응답하는지 확인하는 데 초점을 맞춥니다. 가능한 오류 흐름을 모두 파악하기란 매우 어렵습니다. 의도된 동작이 실행되지 않을 때 발생할 수 있는 결과가 많기 때문입니다.
일반적으로, 가능한 모든 오류 경로를 나열하고 이에 관한 테스트를 작성하여 다양한 시나리오를 발견하면서 단위 테스트를 계속 개선하는 것이 좋습니다.
Unscramble 앱에서 오류 경로의 예는 사용자가 잘못된 단어를 입력하고 Submit 버튼을 클릭하면 오류 메시지가 표시되고 점수와 단어 개수가 업데이트되지 않는 것입니다.
- 경계 사례: 경계 사례는 앱의 경계 조건을 테스트하는 데 초점을 맞춥니다. Unscramble 앱에서 경계는 앱이 로드될 때의 UI 상태와 사용자가 최대 단어 수를 재생한 후의 UI 상태를 확인하는 것입니다.
이러한 카테고리에 관한 테스트 시나리오를 만들면 테스트 계획을 위한 가이드라인으로 삼을 수 있습니다.
테스트 만들기
좋은 단위 테스트에는 일반적으로 다음 4가지 특성이 있습니다.
- 집중: 코드 조각과 같은 단위를 테스트하는 데 중점을 두어야 합니다. 이 코드 조각은 대부분 클래스 또는 메서드입니다. 테스트의 범위를 좁히고 동시에 여러 코드가 아닌, 개별 코드의 정확성을 검증하는 데 집중해야 합니다.
- 이해 가능: 코드를 읽을 때 간단하고 이해하기 쉬워야 합니다. 개발자는 테스트의 의도를 한눈에 파악할 수 있어야 합니다.
- 확정성: 일관되게 통과하거나 실패해야 합니다. 코드를 변경하지 않고 테스트를 여러 번 실행하면 테스트의 결과가 동일해야 합니다. 테스트는 코드를 수정하지 않았는데도 어떤 때는 실패하고 어떤 때는 통과하는 것처럼 불안정해서는 안 됩니다.
- 독립형: 사람이 상호작용하거나 설정할 필요가 없으며 개별적으로 실행됩니다.
성공 경로
성공 경로의 단위 테스트를 작성하려면 GameViewModel의 인스턴스가 초기화된 경우 updateUserGuess() 메서드가 올바른 추측 단어로 호출된 후 checkUserGuess() 메서드가 호출되면 다음 사항을 어설션해야 합니다.
- 올바른 추측 단어는
updateUserGuess()메서드에 전달됩니다. checkUserGuess()메서드가 호출됩니다.score및isGuessedWordWrong상태 값이 올바르게 업데이트됩니다.
테스트를 만들려면 다음 단계를 완료하세요.
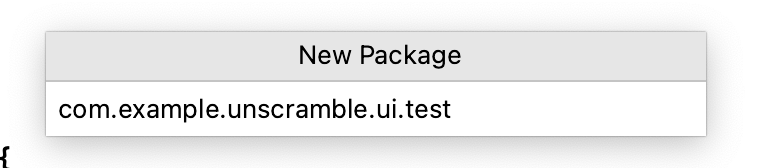
- 테스트 소스 세트 아래에 새 패키지
com.example.android.unscramble.ui.test를 만들고 다음 스크린샷과 같이 파일을 추가합니다.

GameViewModel 클래스의 단위 테스트를 작성하려면 클래스의 메서드를 호출하고 상태를 확인할 수 있도록 클래스의 인스턴스가 필요합니다.
GameViewModelTest클래스의 본문에서viewModel속성을 선언하고GameViewModel클래스의 인스턴스를 할당합니다.
class GameViewModelTest {
    private val viewModel = GameViewModel()
}
- 성공 경로의 단위 테스트를 작성하려면
gameViewModel_CorrectWordGuessed_ScoreUpdatedAndErrorFlagUnset()함수를 만들고@Test주석을 답니다.
class GameViewModelTest {
    private val viewModel = GameViewModel()

    @Test
    fun gameViewModel_CorrectWordGuessed_ScoreUpdatedAndErrorFlagUnset()  {
    }
}
- 다음을 가져옵니다.
import org.junit.Test
viewModel.updateUserGuess() 메서드에 플레이어의 올바른 단어를 전달하려면 GameUiState의 글자가 뒤섞인 단어에서 올바르게 원래 단어를 가져와야 합니다. 이렇게 하려면 먼저 현재 게임 UI 상태를 가져옵니다.
- 함수 본문에서
currentGameUiState변수를 만들고 이 변수에viewModel.uiState.value를 할당합니다.
@Test
fun gameViewModel_CorrectWordGuessed_ScoreUpdatedAndErrorFlagUnset() {
    var currentGameUiState = viewModel.uiState.value
}
- 플레이어의 올바른 추측 단어를 가져오려면
getUnscrambledWord()함수를 사용합니다. 이 함수는currentGameUiState.currentScrambledWord를 인수로 사용하고 원래 단어를 반환합니다. 반환된 이 값을 새로운 읽기 전용 변수correctPlayerWord에 저장하고getUnscrambledWord()함수에서 반환된 값을 할당합니다.
@Test
fun gameViewModel_CorrectWordGuessed_ScoreUpdatedAndErrorFlagUnset() {
    var currentGameUiState = viewModel.uiState.value
    val correctPlayerWord = getUnscrambledWord(currentGameUiState.currentScrambledWord)

}
- 추측한 단어가 올바른지 확인하려면
viewModel.updateUserGuess()메서드 호출을 추가하고correctPlayerWord변수를 인수로 전달합니다. 그런 다음viewModel.checkUserGuess()메서드 호출을 추가하여 추측한 단어를 확인합니다.
@Test
fun gameViewModel_CorrectWordGuessed_ScoreUpdatedAndErrorFlagUnset() {
    var currentGameUiState = viewModel.uiState.value
    val correctPlayerWord = getUnscrambledWord(currentGameUiState.currentScrambledWord)

    viewModel.updateUserGuess(correctPlayerWord)
    viewModel.checkUserGuess()
}
이제 게임 상태가 예상대로인지 어설션할 준비가 되었습니다.
viewModel.uiState속성 값에서GameUiState클래스의 인스턴스를 가져와currentGameUiState변수에 저장합니다.
@Test
fun gameViewModel_CorrectWordGuessed_ScoreUpdatedAndErrorFlagUnset() {
    var currentGameUiState = viewModel.uiState.value
    val correctPlayerWord = getUnscrambledWord(currentGameUiState.currentScrambledWord)
    viewModel.updateUserGuess(correctPlayerWord)
    viewModel.checkUserGuess()

    currentGameUiState = viewModel.uiState.value
}
- 추측한 단어가 올바르고 점수가 업데이트되는지 확인하려면
assertFalse()함수를 사용하여currentGameUiState.isGuessedWordWrong속성이false인지 확인하고assertEquals()함수를 사용하여currentGameUiState.score속성 값이20인지 확인합니다.
@Test
fun gameViewModel_CorrectWordGuessed_ScoreUpdatedAndErrorFlagUnset() {
    var currentGameUiState = viewModel.uiState.value
    val correctPlayerWord = getUnscrambledWord(currentGameUiState.currentScrambledWord)
    viewModel.updateUserGuess(correctPlayerWord)
    viewModel.checkUserGuess()

    currentGameUiState = viewModel.uiState.value
    // Assert that checkUserGuess() method updates isGuessedWordWrong is updated correctly.
    assertFalse(currentGameUiState.isGuessedWordWrong)
    // Assert that score is updated correctly.
    assertEquals(20, currentGameUiState.score)
}
- 다음을 가져옵니다.
import org.junit.Assert.assertEquals
import org.junit.Assert.assertFalse
- 값
20을 읽을 수 있고 재사용할 수 있도록 하려면 컴패니언 객체를 만들고20을private상수SCORE_AFTER_FIRST_CORRECT_ANSWER에 할당합니다. 새로 만든 상수로 테스트를 업데이트합니다.
class GameViewModelTest {
    ...
    @Test
    fun gameViewModel_CorrectWordGuessed_ScoreUpdatedAndErrorFlagUnset() {
        ...
        // Assert that score is updated correctly.
        assertEquals(SCORE_AFTER_FIRST_CORRECT_ANSWER, currentGameUiState.score)
    }

    companion object {
        private const val SCORE_AFTER_FIRST_CORRECT_ANSWER = SCORE_INCREASE
    }
}
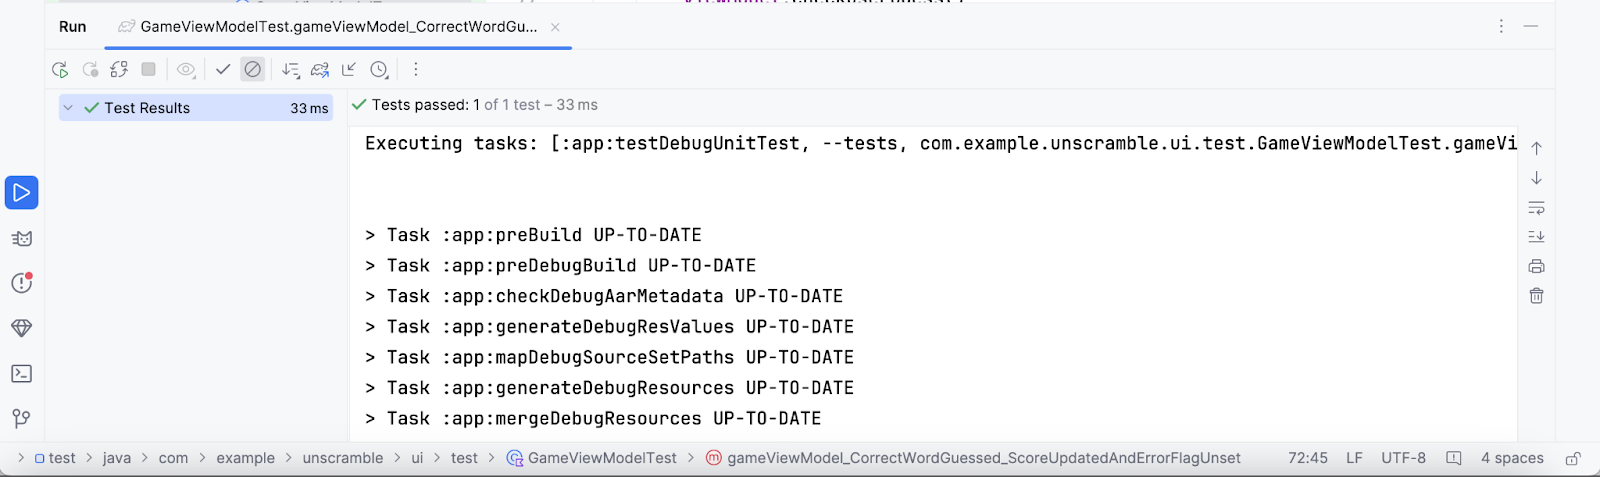
- 테스트를 실행합니다.
다음 스크린샷과 같이 모든 어설션이 유효했으므로 테스트가 통과됩니다.
오류 경로
오류 경로의 단위 테스트를 작성하려면 잘못된 단어가 viewModel.updateUserGuess() 메서드에 인수로 전달되고 viewModel.checkUserGuess() 메서드가 호출되면 다음 상황이 발생한다고 어설션해야 합니다.
currentGameUiState.score속성 값이 그대로 유지됩니다.- 추측이 잘못되었으므로
currentGameUiState.isGuessedWordWrong속성의 값은true로 설정됩니다.
테스트를 만들려면 다음 단계를 완료하세요.
GameViewModelTest클래스의 본문에서gameViewModel_IncorrectGuess_ErrorFlagSet()함수를 만들고@Test주석을 답니다.
@Test
fun gameViewModel_IncorrectGuess_ErrorFlagSet() {

}
incorrectPlayerWord변수를 정의하고"and"값을 할당합니다. 이는 단어 목록에 있어서는 안 됩니다.
@Test
fun gameViewModel_IncorrectGuess_ErrorFlagSet() {
    // Given an incorrect word as input
    val incorrectPlayerWord = "and"
}
viewModel.updateUserGuess()메서드 호출을 추가하고incorrectPlayerWord변수를 인수로 전달합니다.viewModel.checkUserGuess()메서드 호출을 추가하여 추측한 단어를 확인합니다.
@Test
fun gameViewModel_IncorrectGuess_ErrorFlagSet() {
    // Given an incorrect word as input
    val incorrectPlayerWord = "and"

    viewModel.updateUserGuess(incorrectPlayerWord)
    viewModel.checkUserGuess()
}
currentGameUiState변수를 추가하고viewModel.uiState.value상태 값을 할당합니다.- 어설션 함수를 사용하여
currentGameUiState.score속성의 값이0이고currentGameUiState.isGuessedWordWrong속성의 값이true로 설정되었음을 어설션합니다.
@Test
fun gameViewModel_IncorrectGuess_ErrorFlagSet() {
    // Given an incorrect word as input
    val incorrectPlayerWord = "and"

    viewModel.updateUserGuess(incorrectPlayerWord)
    viewModel.checkUserGuess()

    val currentGameUiState = viewModel.uiState.value
    // Assert that score is unchanged
    assertEquals(0, currentGameUiState.score)
    // Assert that checkUserGuess() method updates isGuessedWordWrong correctly
    assertTrue(currentGameUiState.isGuessedWordWrong)
}
- 다음을 가져옵니다.
import org.junit.Assert.assertTrue
- 테스트를 실행하여 통과하는지 확인합니다.
경계 사례
UI의 초기 상태를 테스트하려면 GameViewModel 클래스의 단위 테스트를 작성해야 합니다. 테스트에서는 GameViewModel을 초기화하면 다음 사항이 true임을 어설션해야 합니다.
currentWordCount속성이1로 설정됩니다.score속성이0으로 설정됩니다.isGuessedWordWrong속성이false로 설정됩니다.isGameOver속성이false로 설정됩니다.
테스트를 추가하려면 다음 단계를 따르세요.
gameViewModel_Initialization_FirstWordLoaded()메서드를 만들고@Test주석을 추가합니다.
@Test
fun gameViewModel_Initialization_FirstWordLoaded() {

}
viewModel.uiState.value속성에 액세스하여GameUiState클래스의 초기 인스턴스를 가져옵니다. 새gameUiState읽기 전용 변수에 이를 할당합니다.
@Test
fun gameViewModel_Initialization_FirstWordLoaded() {
    val gameUiState = viewModel.uiState.value
}
- 플레이어의 올바른 단어를 가져오려면
getUnscrambledWord()함수를 사용합니다. 이 함수는gameUiState.currentScrambledWord단어를 사용하고 원래 단어를 반환합니다. 반환된 값을 새로운 읽기 전용 변수unScrambledWord에 할당합니다.
@Test
fun gameViewModel_Initialization_FirstWordLoaded() {
    val gameUiState = viewModel.uiState.value
    val unScrambledWord = getUnscrambledWord(gameUiState.currentScrambledWord)

}
- 상태가 올바른지 확인하려면
assertTrue()함수를 추가하여currentWordCount속성이1로 설정되어 있고score속성이0으로 설정되어 있다고 어설션합니다. assertFalse()함수를 추가하여isGuessedWordWrong속성이false이고isGameOver속성이false로 설정되어 있는지 확인합니다.
@Test
fun gameViewModel_Initialization_FirstWordLoaded() {
    val gameUiState = viewModel.uiState.value
    val unScrambledWord = getUnscrambledWord(gameUiState.currentScrambledWord)

    // Assert that current word is scrambled.
    assertNotEquals(unScrambledWord, gameUiState.currentScrambledWord)
    // Assert that current word count is set to 1.
    assertTrue(gameUiState.currentWordCount == 1)
    // Assert that initially the score is 0.
    assertTrue(gameUiState.score == 0)
    // Assert that the wrong word guessed is false.
    assertFalse(gameUiState.isGuessedWordWrong)
    // Assert that game is not over.
    assertFalse(gameUiState.isGameOver)
}
- 다음을 가져옵니다.
import org.junit.Assert.assertNotEquals
- 테스트를 실행하여 통과하는지 확인합니다.
또 다른 경계 사례는 사용자가 모든 단어를 추측한 후 UI 상태를 테스트하는 것입니다. 사용자가 모든 단어를 올바르게 추측하면 다음 사항이 true임을 어설션해야 합니다.
- 점수가 최신 상태입니다.
currentGameUiState.currentWordCount속성이MAX_NO_OF_WORDS상수 값과 같습니다.currentGameUiState.isGameOver속성이true로 설정됩니다.
테스트를 추가하려면 다음 단계를 따르세요.
gameViewModel_AllWordsGuessed_UiStateUpdatedCorrectly()메서드를 만들고@Test주석을 추가합니다. 메서드에서expectedScore변수를 만들고 이 변수에0을 할당합니다.
@Test
fun gameViewModel_AllWordsGuessed_UiStateUpdatedCorrectly() {
    var expectedScore = 0
}
- 초기 상태를 가져오려면
currentGameUiState변수를 추가하고viewModel.uiState.value속성 값을 변수에 할당합니다.
@Test
fun gameViewModel_AllWordsGuessed_UiStateUpdatedCorrectly() {
    var expectedScore = 0
    var currentGameUiState = viewModel.uiState.value
}
- 플레이어의 올바른 단어를 가져오려면
getUnscrambledWord()함수를 사용합니다. 이 함수는currentGameUiState.currentScrambledWord단어를 사용하고 원래 단어를 반환합니다. 반환된 이 값을 새로운 읽기 전용 변수correctPlayerWord에 저장하고getUnscrambledWord()함수에서 반환된 값을 할당합니다.
@Test
fun gameViewModel_AllWordsGuessed_UiStateUpdatedCorrectly() {
    var expectedScore = 0
    var currentGameUiState = viewModel.uiState.value
    var correctPlayerWord = getUnscrambledWord(currentGameUiState.currentScrambledWord)
}
- 사용자가 모든 답을 추측하는지 테스트하려면
repeat블록을 사용하여viewModel.updateUserGuess()메서드와viewModel.checkUserGuess()메서드를MAX_NO_OF_WORDS만큼 반복합니다.
@Test
fun gameViewModel_AllWordsGuessed_UiStateUpdatedCorrectly() {
    var expectedScore = 0
    var currentGameUiState = viewModel.uiState.value
    var correctPlayerWord = getUnscrambledWord(currentGameUiState.currentScrambledWord)
    repeat(MAX_NO_OF_WORDS) {

    }
}
repeat블록에서SCORE_INCREASE상수 값을expectedScore변수에 추가하여 정답일 때마다 점수가 증가한다고 어설션합니다.viewModel.updateUserGuess()메서드 호출을 추가하고correctPlayerWord변수를 인수로 전달합니다.viewModel.checkUserGuess()메서드 호출을 추가하여 사용자 추측에 관한 확인을 트리거합니다.
@Test
fun gameViewModel_AllWordsGuessed_UiStateUpdatedCorrectly() {
    var expectedScore = 0
    var currentGameUiState = viewModel.uiState.value
    var correctPlayerWord = getUnscrambledWord(currentGameUiState.currentScrambledWord)
    repeat(MAX_NO_OF_WORDS) {
        expectedScore += SCORE_INCREASE
        viewModel.updateUserGuess(correctPlayerWord)
        viewModel.checkUserGuess()
    }
}
- 현재 플레이어의 단어를 업데이트하고
getUnscrambledWord()함수를 사용합니다. 이 함수는currentGameUiState.currentScrambledWord를 인수로 사용하고 원래 단어를 반환합니다. 반환된 이 값을 새로운 읽기 전용 변수correctPlayerWord.에 저장합니다. 상태가 올바른지 확인하려면assertEquals()함수를 추가하여currentGameUiState.score속성의 값이expectedScore변수의 값과 같은지 확인합니다.
@Test
fun gameViewModel_AllWordsGuessed_UiStateUpdatedCorrectly() {
    var expectedScore = 0
    var currentGameUiState = viewModel.uiState.value
    var correctPlayerWord = getUnscrambledWord(currentGameUiState.currentScrambledWord)
    repeat(MAX_NO_OF_WORDS) {
        expectedScore += SCORE_INCREASE
        viewModel.updateUserGuess(correctPlayerWord)
        viewModel.checkUserGuess()
        currentGameUiState = viewModel.uiState.value
        correctPlayerWord = getUnscrambledWord(currentGameUiState.currentScrambledWord)
        // Assert that after each correct answer, score is updated correctly.
        assertEquals(expectedScore, currentGameUiState.score)
    }
}
assertEquals()함수를 추가하여currentGameUiState.currentWordCount속성 값이MAX_NO_OF_WORDS상수 값과 같고currentGameUiState.isGameOver속성 값이true로 설정되어 있음을 어설션합니다.
@Test
fun gameViewModel_AllWordsGuessed_UiStateUpdatedCorrectly() {
    var expectedScore = 0
    var currentGameUiState = viewModel.uiState.value
    var correctPlayerWord = getUnscrambledWord(currentGameUiState.currentScrambledWord)
    repeat(MAX_NO_OF_WORDS) {
        expectedScore += SCORE_INCREASE
        viewModel.updateUserGuess(correctPlayerWord)
        viewModel.checkUserGuess()
        currentGameUiState = viewModel.uiState.value
        correctPlayerWord = getUnscrambledWord(currentGameUiState.currentScrambledWord)
        // Assert that after each correct answer, score is updated correctly.
        assertEquals(expectedScore, currentGameUiState.score)
    }
    // Assert that after all questions are answered, the current word count is up-to-date.
    assertEquals(MAX_NO_OF_WORDS, currentGameUiState.currentWordCount)
    // Assert that after 10 questions are answered, the game is over.
    assertTrue(currentGameUiState.isGameOver)
}
- 다음을 가져옵니다.
import com.example.unscramble.data.MAX_NO_OF_WORDS
- 테스트를 실행하여 통과하는지 확인합니다.
테스트 인스턴스 수명 주기 개요
테스트에서 viewModel이 초기화되는 방식을 자세히 살펴보면 모든 테스트에서 사용하는 경우에도 viewModel이 한 번만 초기화되는 것을 확인할 수 있습니다. 다음 코드 스니펫은 viewModel 속성의 정의를 보여줍니다.
class GameViewModelTest {
    private val viewModel = GameViewModel()

    @Test
    fun gameViewModel_Initialization_FirstWordLoaded() {
        val gameUiState = viewModel.uiState.value
        ...
    }
    ...
}
다음 사항이 궁금할 수 있습니다.
- 동일한
viewModel인스턴스가 모든 테스트에서 재사용된다는 의미인가요? - 문제가 발생하지 않나요? 예를 들어
gameViewModel_CorrectWordGuessed_ScoreUpdatedAndErrorFlagUnset테스트 메서드 다음에gameViewModel_Initialization_FirstWordLoaded테스트 메서드가 실행되면 어떻게 되나요? 초기화 테스트가 실패하나요?
두 질문에 대한 답은 '아니요'입니다. 테스트 메서드는 개별적으로 실행되어 변경 가능한 테스트 인스턴스 상태로 인한 예상치 못한 부작용을 방지합니다. 기본적으로 JUnit은 각 테스트 메서드가 실행되기 전에 테스트 클래스의 새 인스턴스를 만듭니다.
지금까지 GameViewModelTest 클래스에 4개의 테스트 메서드가 있으므로 GameViewModelTest는 4번 인스턴스화됩니다. 각 인스턴스에는 viewModel 속성의 자체 사본이 있습니다. 따라서 테스트 실행 순서는 중요하지 않습니다.
5. 코드 적용 범위 소개
코드 적용 범위는 앱을 구성하는 클래스, 메서드, 코드 줄을 적절하게 테스트하는지 확인하는 데 핵심 역할을 합니다.
Android 스튜디오는 로컬 단위 테스트를 위한 테스트 적용 범위 도구를 제공하여 단위 테스트에서 다루는 앱 코드의 비율과 영역을 추적합니다.
Android 스튜디오를 사용하여 적용 범위로 테스트 실행
적용 범위로 테스트를 실행하려면 다음 단계를 따르세요.
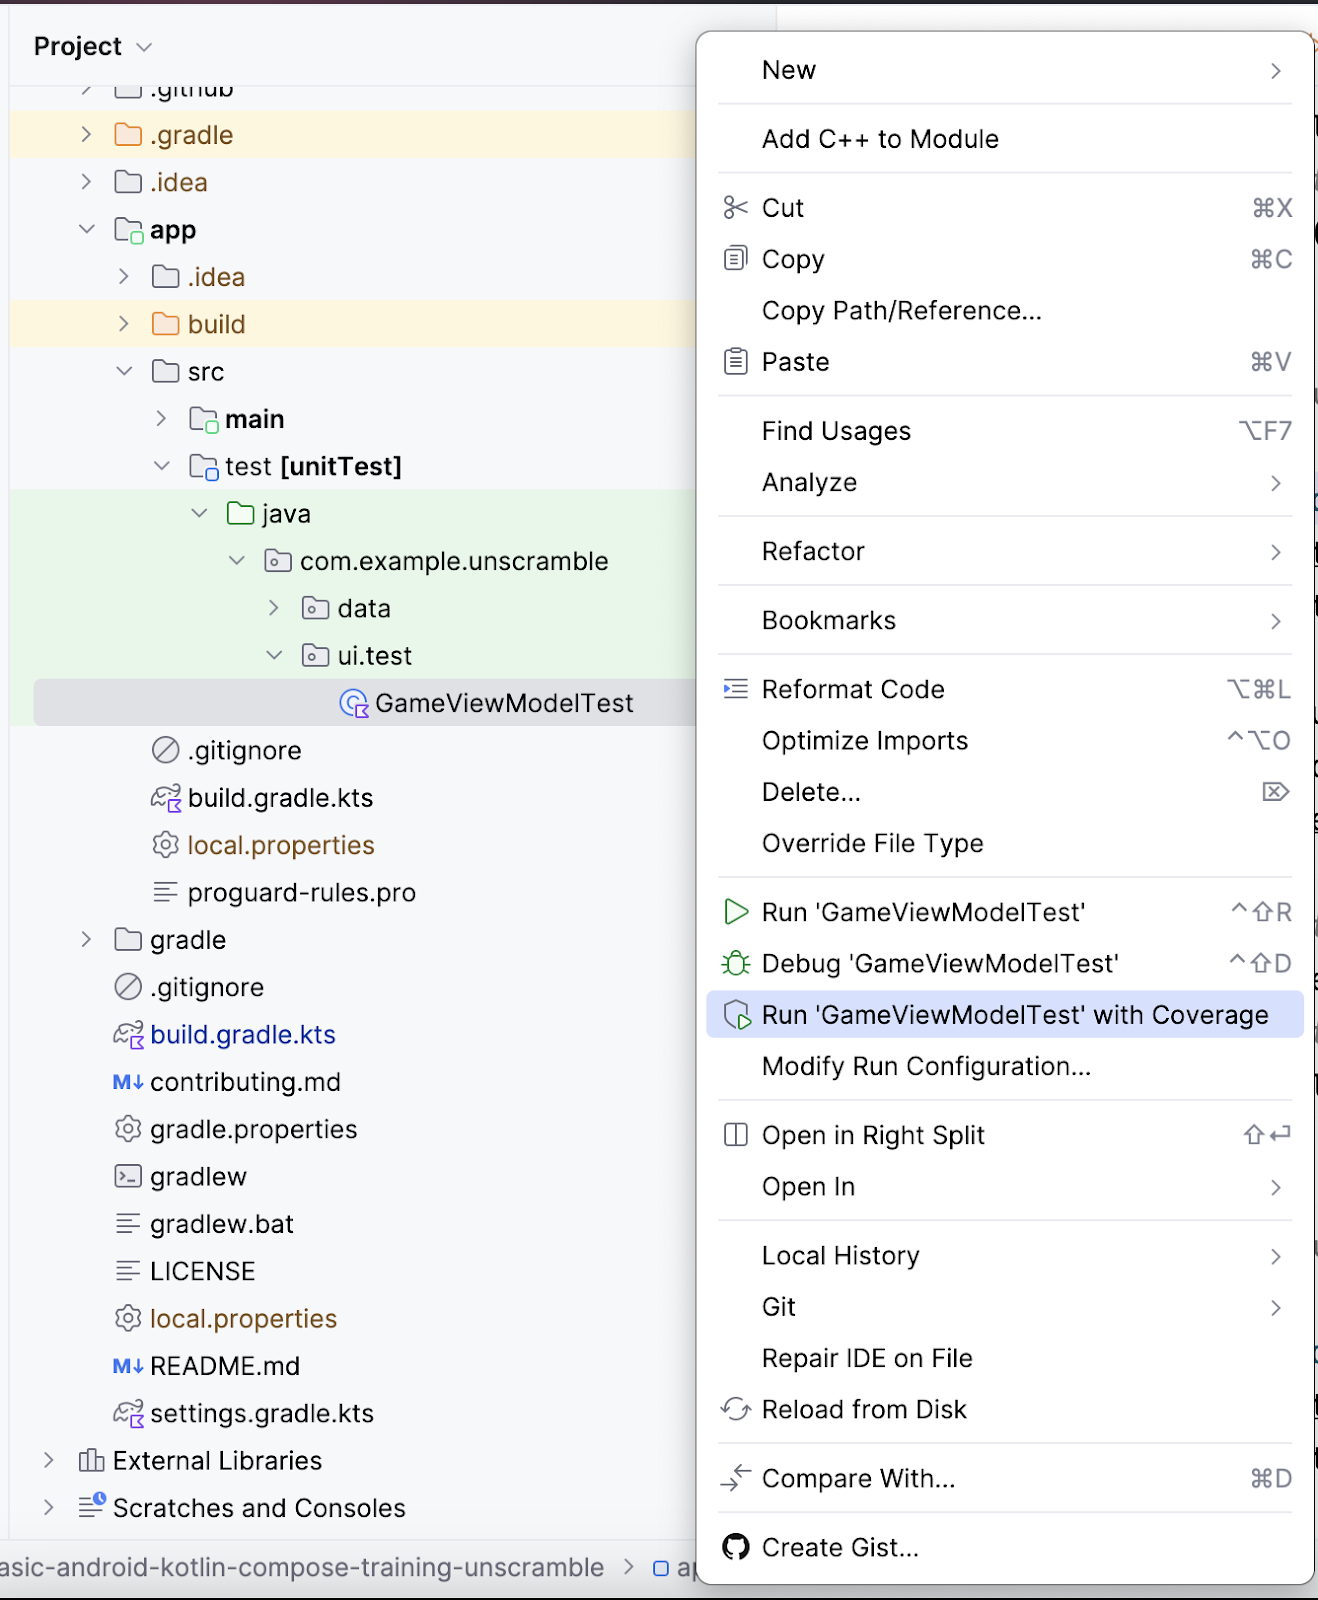
- 프로젝트 창에서
GameViewModelTest.kt파일을 마우스 오른쪽 버튼으로 클릭하고 Run 'GameViewModelTest' with Coverage를 선택합니다.
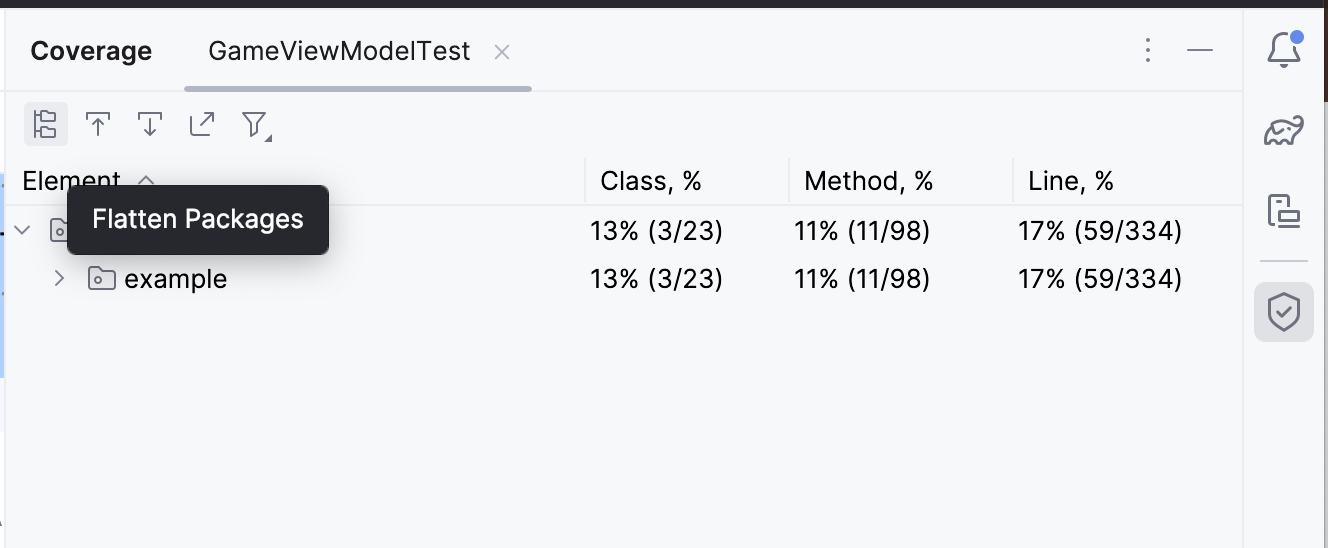
- 테스트 실행이 완료되면 오른쪽의 적용 범위 패널에서 Flatten Packages 옵션을 클릭합니다.
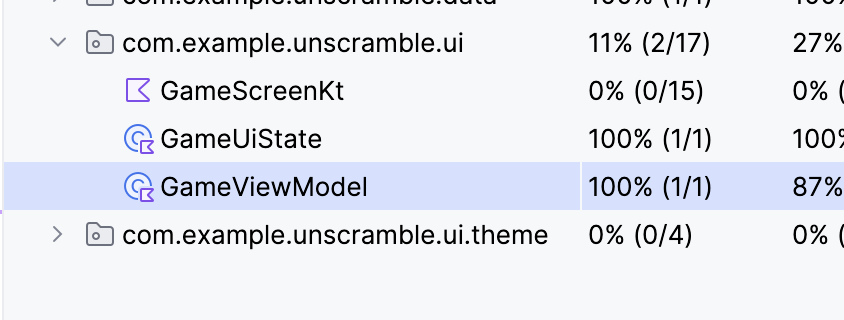
- 다음 이미지에서
com.example.android.unscramble.ui패키지를 확인합니다.
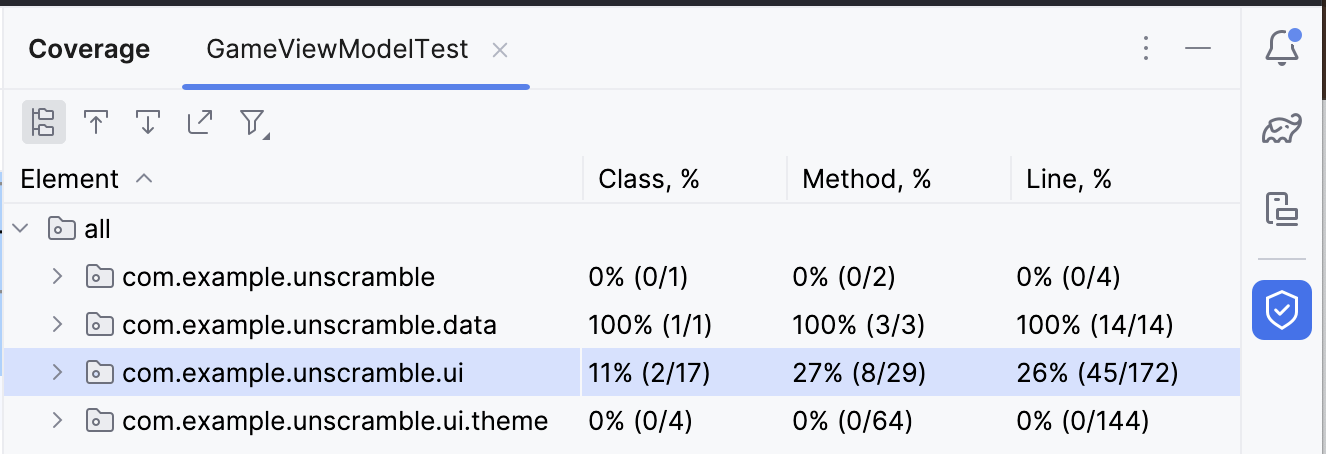
- 패키지
com.example.android.unscramble.ui이름을 더블클릭하면 다음 이미지와 같이GameViewModel의 적용 범위가 표시됩니다.
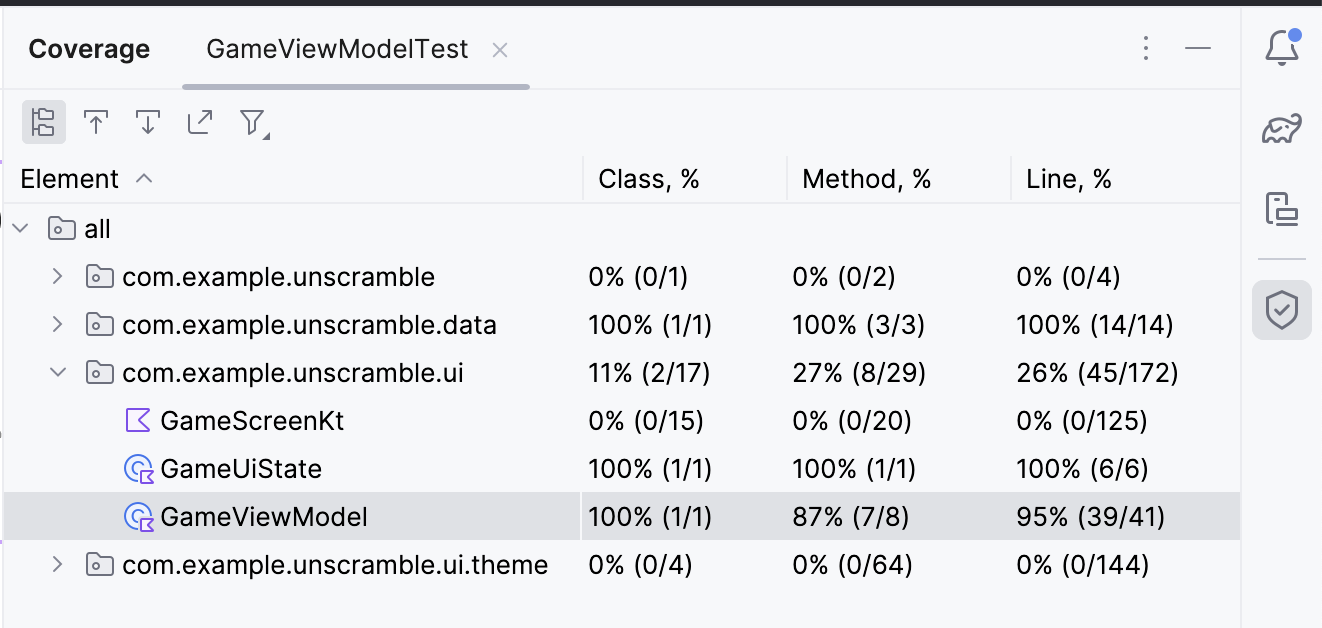
테스트 보고서 분석
다음 다이어그램에 표시된 보고서는 두 가지 측면으로 분류됩니다.
- 단위 테스트가 적용된 메서드의 비율: 다이어그램 예에서 개발자가 작성한 테스트는 지금까지 메서드 8개 중 7개에 적용되었습니다. 이는 총 메서드의 87%입니다.
- 단위 테스트가 적용된 줄 비율: 다이어그램 예에서 개발자가 작성한 테스트는 코드 줄 41개 중 39개에 적용되었습니다. 이는 코드 줄의 95%입니다.
보고서에 따르면 지금까지 작성된 단위 테스트에서 코드의 특정 부분이 누락되었습니다. 누락된 부분을 확인하려면 다음 단계를 완료하세요.
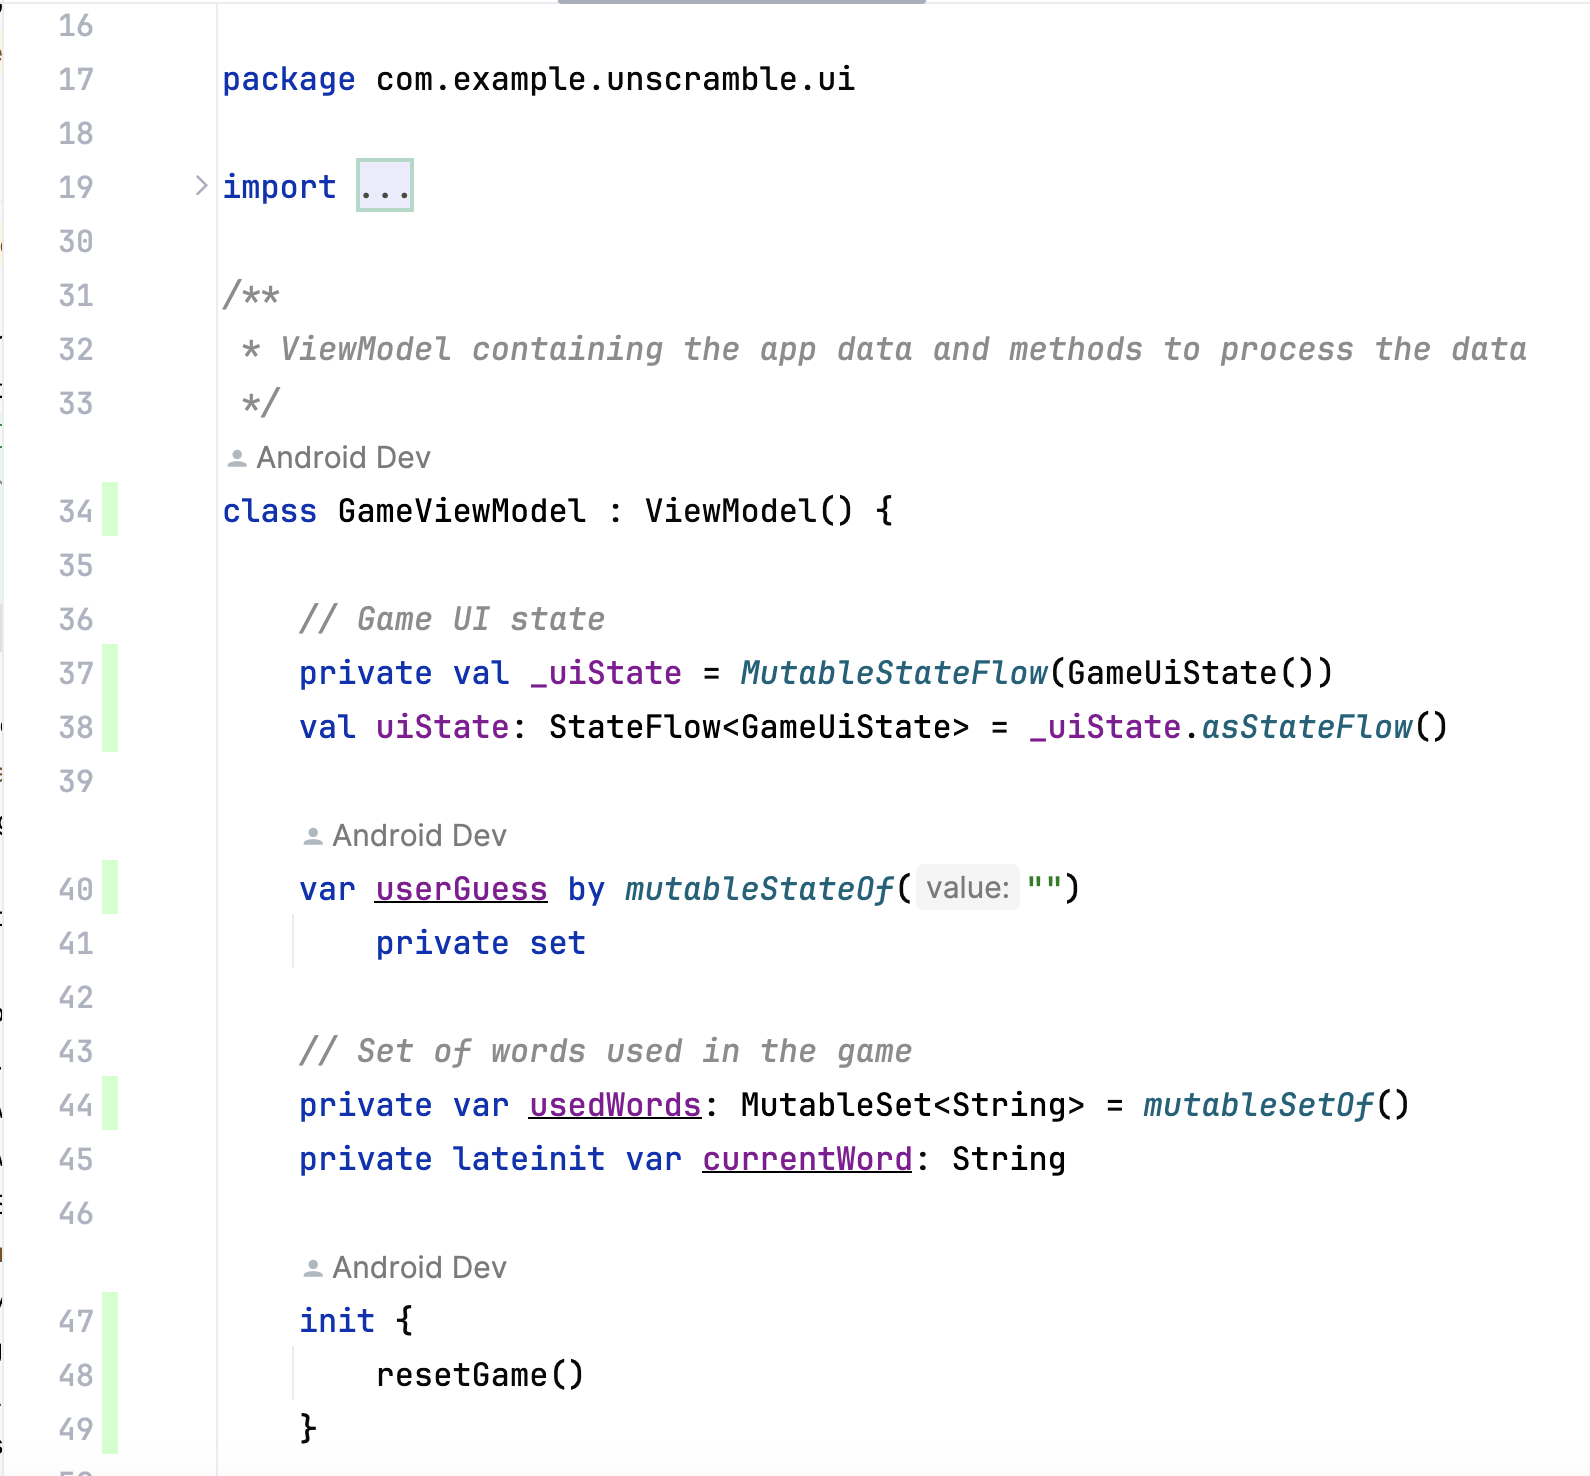
- GameViewModel을 더블클릭합니다.
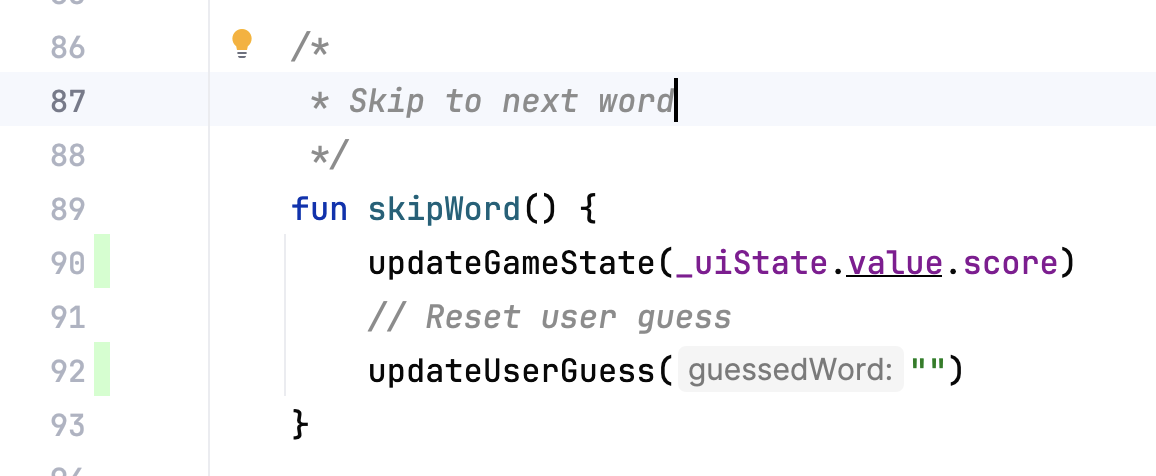
Android 스튜디오는 창 왼쪽의 추가 색 구분과 함께 GameViewModel.kt 파일을 표시합니다. 밝은 녹색은 이러한 코드 줄이 포함됐음을 나타냅니다.
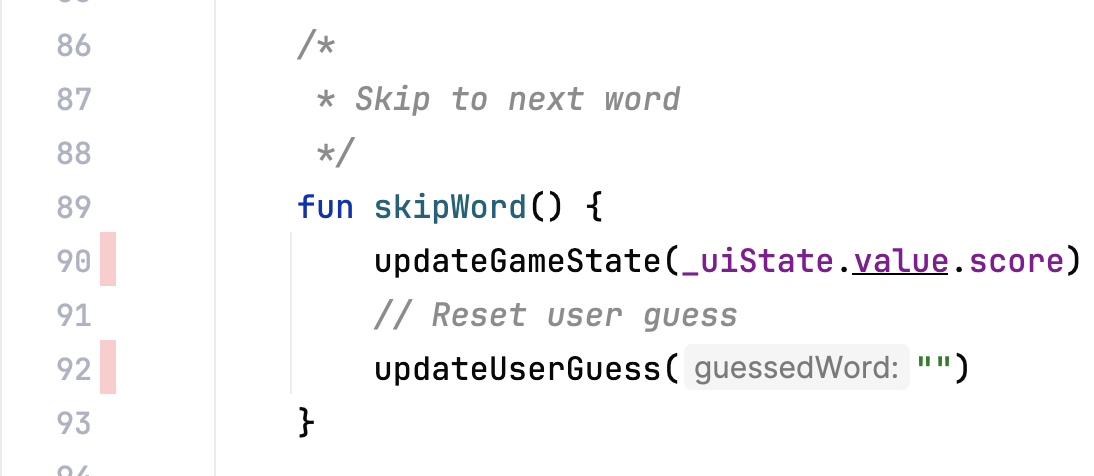
GameViewModel에서 아래로 스크롤하면 옅은 분홍색으로 표시된 두 줄을 확인할 수 있습니다. 이 색상은 이러한 코드 줄에 단위 테스트가 적용되지 않았음을 나타냅니다.
적용 범위 개선
적용 범위를 개선하려면 누락된 경로를 포함하는 테스트를 작성해야 합니다. 사용자가 단어를 건너뛰면 다음 항목이 true임을 어설션하는 테스트를 추가해야 합니다.
currentGameUiState.score속성이 그대로 유지됩니다.currentGameUiState.currentWordCount속성이 다음 코드 스니펫과 같이 1씩 증가합니다.
적용 범위를 개선하기 위해 GameViewModelTest 클래스에 다음 테스트 메서드를 추가합니다.
@Test
fun gameViewModel_WordSkipped_ScoreUnchangedAndWordCountIncreased() {
    var currentGameUiState = viewModel.uiState.value
    val correctPlayerWord = getUnscrambledWord(currentGameUiState.currentScrambledWord)
    viewModel.updateUserGuess(correctPlayerWord)
    viewModel.checkUserGuess()

    currentGameUiState = viewModel.uiState.value
    val lastWordCount = currentGameUiState.currentWordCount
    viewModel.skipWord()
    currentGameUiState = viewModel.uiState.value
    // Assert that score remains unchanged after word is skipped.
    assertEquals(SCORE_AFTER_FIRST_CORRECT_ANSWER, currentGameUiState.score)
    // Assert that word count is increased by 1 after word is skipped.
    assertEquals(lastWordCount + 1, currentGameUiState.currentWordCount)
}
적용 범위를 다시 실행하려면 다음 단계를 완료하세요.
GameViewModelTest.kt파일을 마우스 오른쪽 버튼으로 클릭하고 메뉴에서 Run ‘GameViewModelTest' with Coverage를 선택합니다.- 빌드에 성공하면 GameViewModel 요소로 다시 이동하여 적용 범위 비율이 100%인지 확인합니다. 최종 적용 범위 보고서는 다음 이미지에 나와 있습니다.

GameViewModel.kt파일로 이동하고 아래로 스크롤하여 이전에 누락된 경로가 포함되었는지 확인합니다.
애플리케이션 코드의 코드 적용 범위를 실행, 분석, 개선하는 방법을 알아봤습니다.
코드 적용 범위 비율이 높으면 앱 코드의 품질이 우수하다는 의미인가요? 아니요. 코드 적용 범위는 단위 테스트가 적용되거나 실행된 코드의 비율을 나타냅니다. 코드가 확인되었다는 의미는 아닙니다. 단위 테스트 코드에서 모든 어설션을 삭제하고 코드 적용 범위를 실행하더라도 여전히 100% 적용 범위가 표시됩니다.
적용 범위가 높다고 해서 테스트가 올바르게 설계되고 앱 동작을 확인한다는 의미는 아닙니다. 작성된 테스트에 테스트 중인 클래스의 동작을 확인하는 어설션이 있는지 확인해야 합니다. 또한 전체 앱에 관한 100% 테스트 적용 범위를 얻기 위해 단위 테스트를 작성하려고 하지 않아도 됩니다. 대신 UI 테스트를 사용하여 활동과 같은 앱 코드의 일부를 테스트해야 합니다.
그러나 낮은 적용 범위는 코드의 많은 부분이 완전히 테스트되지 않았음을 의미합니다. 코드 품질을 측정하는 도구가 아닌 코드 적용 범위를 도구로 사용하여 테스트에서 실행되지 않은 코드 부분을 찾습니다.
6. 솔루션 코드 가져오기
완료된 Codelab의 코드를 다운로드하려면 다음 git 명령어를 사용하면 됩니다.
$ git clone https://github.com/google-developer-training/basic-android-kotlin-compose-training-unscramble.git
$ cd basic-android-kotlin-compose-training-unscramble
$ git checkout main
또는 ZIP 파일로 저장소를 다운로드한 다음 압축을 풀고 Android 스튜디오에서 열어도 됩니다.
솔루션 코드를 보려면 GitHub에서 확인하세요.
7. 결론
축하합니다. 테스트 전략을 정의하는 방법을 알아보고 Unscramble 앱에서 ViewModel 및 StateFlow를 테스트하는 단위 테스트를 구현했습니다. Android 앱을 계속 빌드하면서 앱 기능과 함께 테스트를 작성하여 개발 프로세스 내내 앱이 제대로 작동하는지 확인해야 합니다.
요약
testImplementation구성을 사용하여 종속 항목이 애플리케이션 코드가 아닌 로컬 테스트 소스 코드에 적용됨을 나타냅니다.- 테스트를 세 가지 시나리오(성공 경로, 오류 경로, 경계 사례)로 분류하는 것을 목표로 합니다.
- 좋은 단위 테스트에는 집중, 이해 가능, 확정성, 독립형이라는 적어도 4가지 특성이 있습니다.
- 테스트 메서드는 개별적으로 실행되어 변경 가능한 테스트 인스턴스 상태로 인한 예상치 못한 부작용을 방지합니다.
- 기본적으로 JUnit은 각 테스트 메서드가 실행되기 전에 테스트 클래스의 새 인스턴스를 만듭니다.
- 코드 적용 범위는 앱을 구성하는 클래스, 메서드, 코드 줄을 적절하게 테스트하는지 확인하는 데 핵심 역할을 합니다.