
1. Introdução
No codelab Navegar entre telas com o Compose, você aprendeu a adicionar navegação a um app do Compose usando o componente de navegação do Jetpack.
O app Cupcake tem várias telas para navegar e uma variedade de ações que podem ser realizadas pelo usuário. Esse app é uma ótima oportunidade para você aprimorar suas habilidades de realizar testes automatizados. Neste codelab, você vai criar vários testes de interface para o app Cupcake e aprender a abordar a maximização da cobertura dos testes.
Pré-requisitos
- Conhecer a linguagem Kotlin, incluindo tipos de função, lambdas e funções de escopo.
- Já ter feito o codelab Navegar entre telas com o Compose.
O que você vai aprender
- Testar o componente de navegação do Jetpack com o Compose.
- Criar um estado de interface consistente para cada teste de interface.
- Criar funções auxiliares para testes.
O que você vai criar
- Testes de interface para o app Cupcake
O que é necessário
- A versão mais recente do Android Studio.
- Conexão de Internet para fazer o download do código inicial.
2. Fazer o download do código inicial
- No Android Studio, abra a pasta
basic-android-kotlin-compose-training-cupcake. - Abra o código do app Cupcake no Android Studio.
3. Configurar o Cupcake para testes de UI
Adicionar as dependências androidTest
A ferramenta de build do Gradle permite adicionar dependências a módulos específicos. Essa funcionalidade impede que as dependências sejam compiladas desnecessariamente. Você já se familiarizou com a configuração implementation ao incluir dependências em um projeto. Você usou essa palavra-chave para importar dependências no arquivo build.gradle.kts do módulo do app. Usar a palavra-chave implementation disponibiliza essa dependência para todos os conjuntos de origem nesse módulo. A essa altura do curso, você ganhou experiência com os conjuntos de origem main, test e androidTest.
Os testes de interface ficam nos próprios conjuntos de origem chamados androidTest. As dependências necessárias apenas para este módulo não precisam ser compiladas para outros módulos, como o módulo main, em que o código do app está incluído. Ao adicionar uma dependência usada apenas por testes de interface, use a palavra-chave androidTestImplementation para declarar a dependência no arquivo build.gradle.kts do módulo do app. Isso garante que as dependências de teste da interface sejam compiladas somente quando você executar testes de interface.
Para adicionar as dependências necessárias e criar testes de interface, siga estas etapas:
- Abra o arquivo
build.gradle.kts(Module :app). - Adicione as seguintes dependências à seção de
dependenciesdo arquivo:
androidTestImplementation(platform("androidx.compose:compose-bom:2023.05.01"))
androidTestImplementation("androidx.compose.ui:ui-test-junit4")
androidTestImplementation("androidx.navigation:navigation-testing:2.6.0")
androidTestImplementation("androidx.test.espresso:espresso-intents:3.5.1")
androidTestImplementation("androidx.test.ext:junit:1.1.5")
Criar o diretório de testes de interface
- Com o botão direito do mouse, clique no diretório
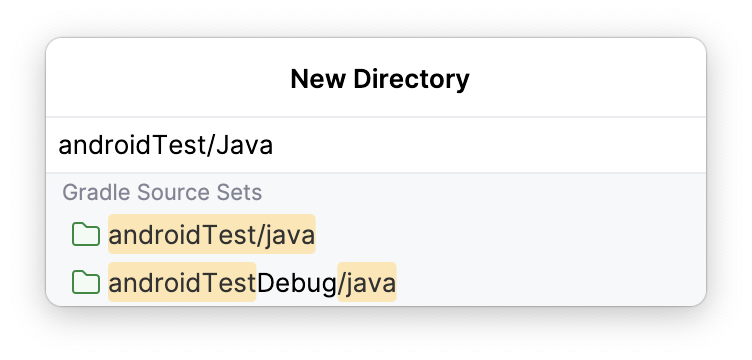
srcna visualização do projeto e selecione New > Directory.
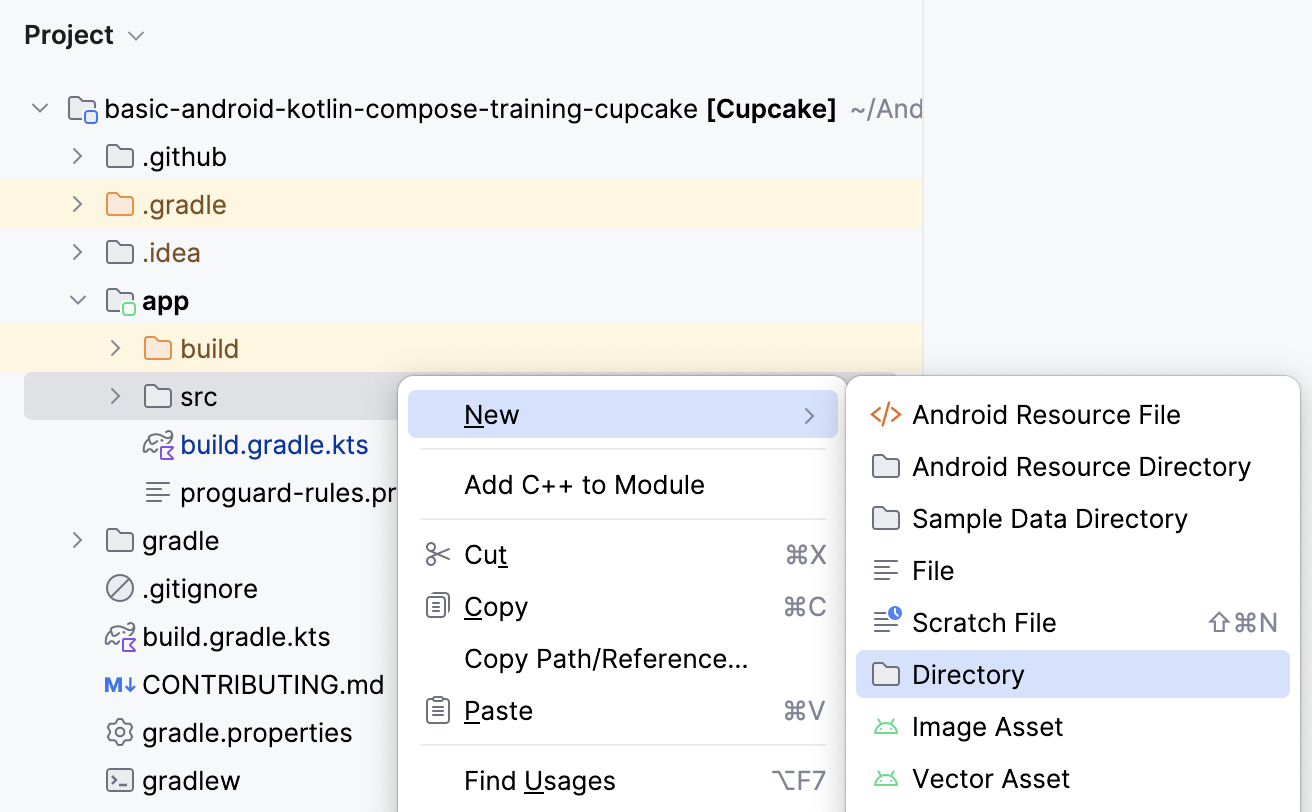
- Selecione a opção androidTest/java.
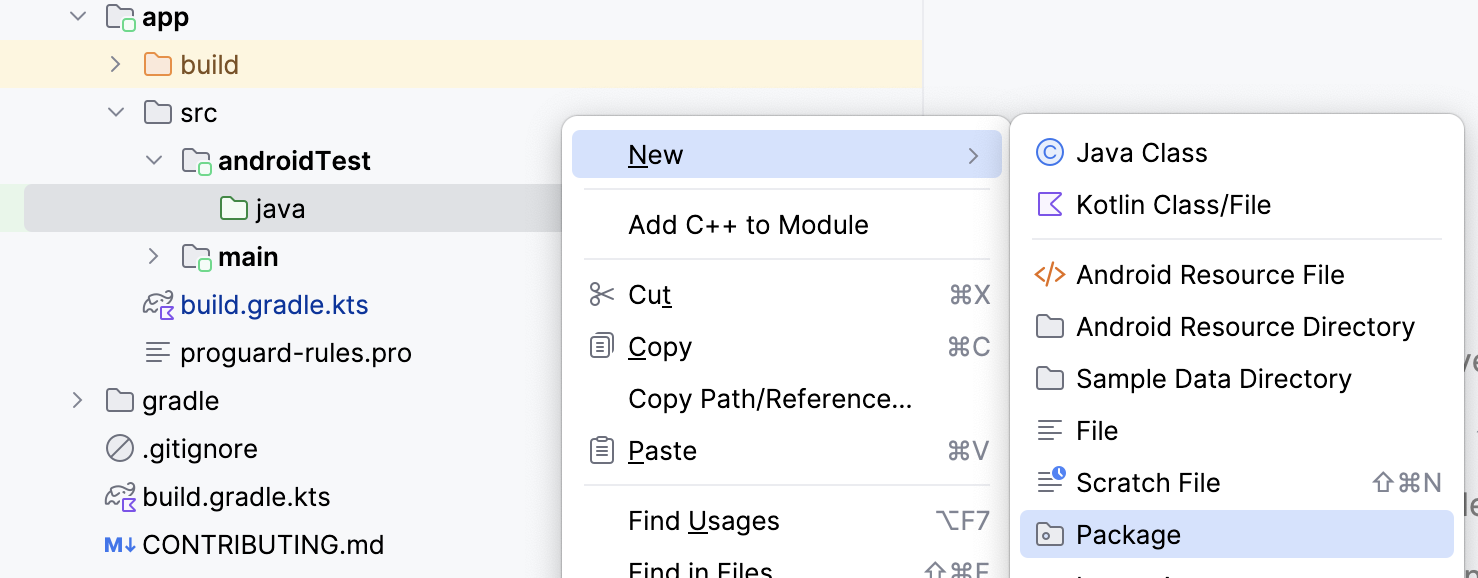
Criar o pacote de teste
- Com o botão direito do mouse, clique no diretório
androidTest/javana janela do projeto e selecione New > Package.
- Dê o nome com.example.cupcake.test.
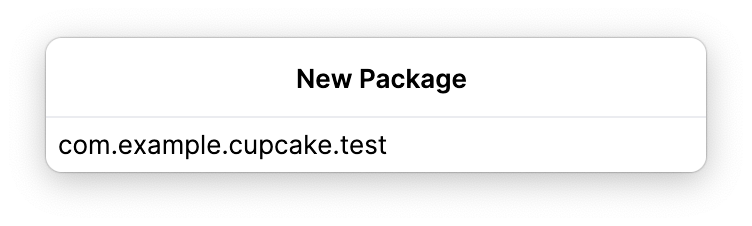 ao pacote.
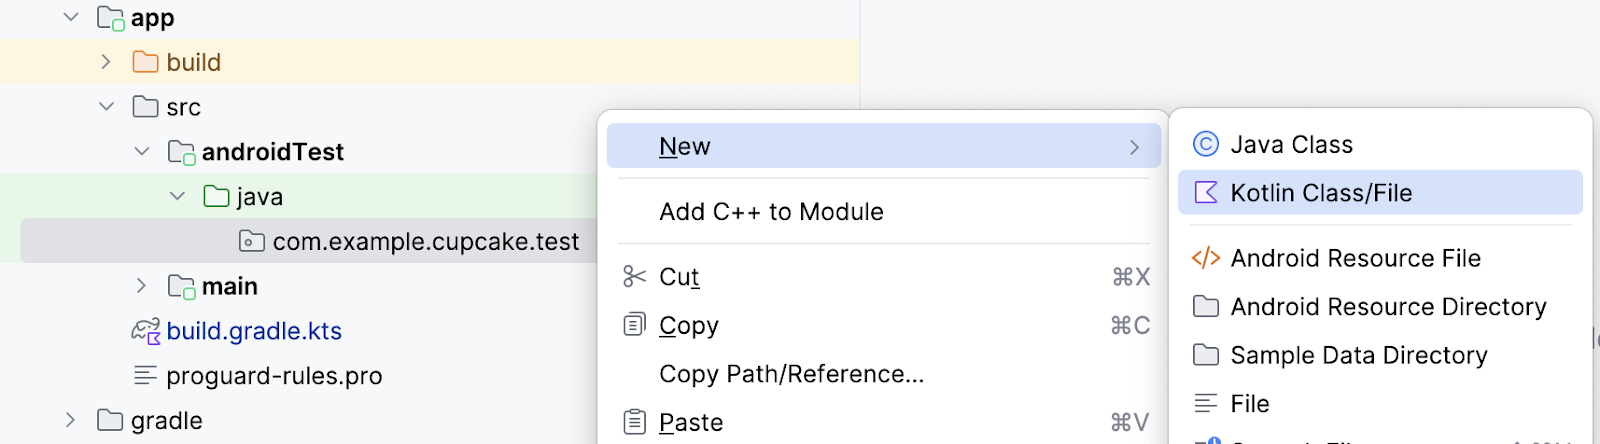
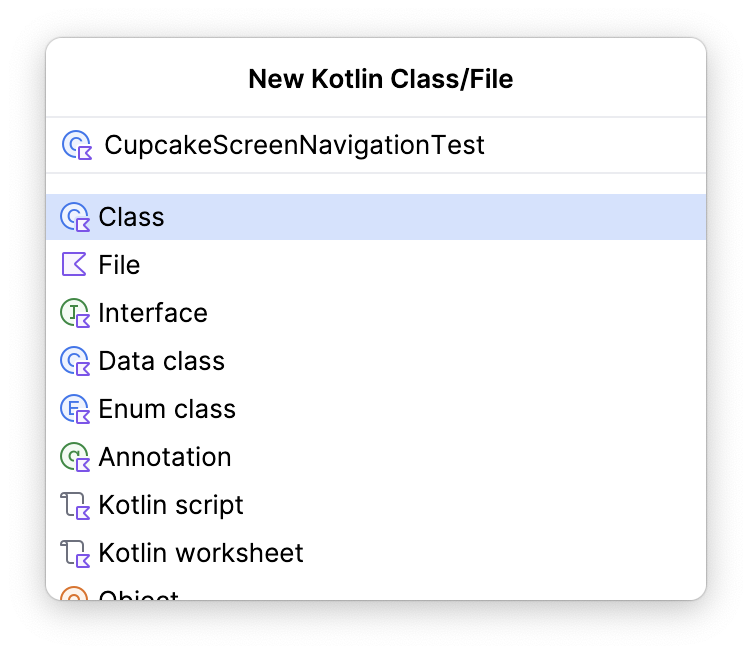
Criar a classe de teste de navegação
No diretório test, crie uma nova classe Kotlin com o nome CupcakeScreenNavigationTest.
4. Configurar o host de navegação
Em um codelab anterior, você aprendeu que os testes de interface no Compose exigem uma regra de teste. O mesmo acontece no teste da navegação do Jetpack. No entanto, testar a navegação exige algumas configurações adicionais na regra de teste do Compose.
Ao testar a navegação no Compose, você não vai ter acesso ao mesmo NavHostController usado no código do app. No entanto, é possível usar um TestNavHostController e configurar a regra de teste com esse controlador de navegação. Nesta seção, você vai aprender a configurar e reutilizar a regra para testes de navegação.
- Em
CupcakeScreenNavigationTest.kt, crie uma regra de teste usandocreateAndroidComposeRulee transmitindoComponentActivitycomo o parâmetro de tipo.
import androidx.activity.ComponentActivity
import androidx.compose.ui.test.junit4.createAndroidComposeRule
import org.junit.Rule

@get:Rule
val composeTestRule = createAndroidComposeRule<ComponentActivity>()
Para garantir que seu app vá para o lugar correto ao realizar ações de navegação, é necessário referenciar uma instância TestNavHostController para verificar a rota do host de navegação.
- Crie uma instância
TestNavHostControllercomo uma variávellateinit. No Kotlin, a palavra-chavelateinité usada para declarar uma propriedade que pode ser inicializada após a declaração do objeto.
import androidx.navigation.testing.TestNavHostController

private lateinit var navController: TestNavHostController
Em seguida, especifique o elemento combinável que você quer usar nos testes de interface.
- Crie um método com o nome
setupCupcakeNavHost(). - No método
setupCupcakeNavHost(), chame o métodosetContent()na regra de teste do Compose que você criou. - No lambda transmitido ao método
setContent(), chame o elemento combinávelCupcakeApp().
import com.example.cupcake.CupcakeApp

fun setupCupcakeNavHost() {
    composeTestRule.setContent {
        CupcakeApp()
    }
}
Agora você precisa criar o objeto TestNavHostContoller na classe de teste. Você vai usar esse objeto mais tarde para determinar o estado da navegação, porque o app usa o controlador para navegar pelas várias telas no app Cupcake.
- Configure o host de navegação usando o lambda criado anteriormente. Inicialize a variável
navControllercriada, registre um navegador e transmita esseTestNavHostControllerpara o elemento combinávelCupcakeApp.
import androidx.compose.ui.platform.LocalContext

fun setupCupcakeNavHost() {
    composeTestRule.setContent {
        navController = TestNavHostController(LocalContext.current).apply {
            navigatorProvider.addNavigator(ComposeNavigator())
        }
        CupcakeApp(navController = navController)
    }
}
Cada teste na classe CupcakeScreenNavigationTest envolve o teste de um aspecto da navegação. Portanto, cada teste depende do objeto TestNavHostController criado. Em vez de ter que chamar manualmente a função setupCupcakeNavHost() para cada teste e configurar o controlador de navegação, você pode fazer isso automaticamente usando a anotação @Before fornecida pela biblioteca junit. Quando um método é anotado com @Before, ele é executado antes de todos os métodos anotados com @Test.
- Adicione a anotação
@Beforeao métodosetupCupcakeNavHost().
import org.junit.Before

@Before
fun setupCupcakeNavHost() {
    composeTestRule.setContent {
        navController = TestNavHostController(LocalContext.current).apply {
            navigatorProvider.addNavigator(ComposeNavigator())
        }
        CupcakeApp(navController = navController)
    }
}
5. Criar testes de navegação
Verificar o destino inicial
Lembre que, ao criar o app Cupcake, você criou uma classe enum chamada CupcakeScreen que continha constantes para ditar a navegação do app.
CupcakeScreen.kt
/**
* enum values that represent the screens in the app
*/
enum class CupcakeScreen(@StringRes val title: Int) {
   Start(title = R.string.app_name),
   Flavor(title = R.string.choose_flavor),
   Pickup(title = R.string.choose_pickup_date),
   Summary(title = R.string.order_summary)
}
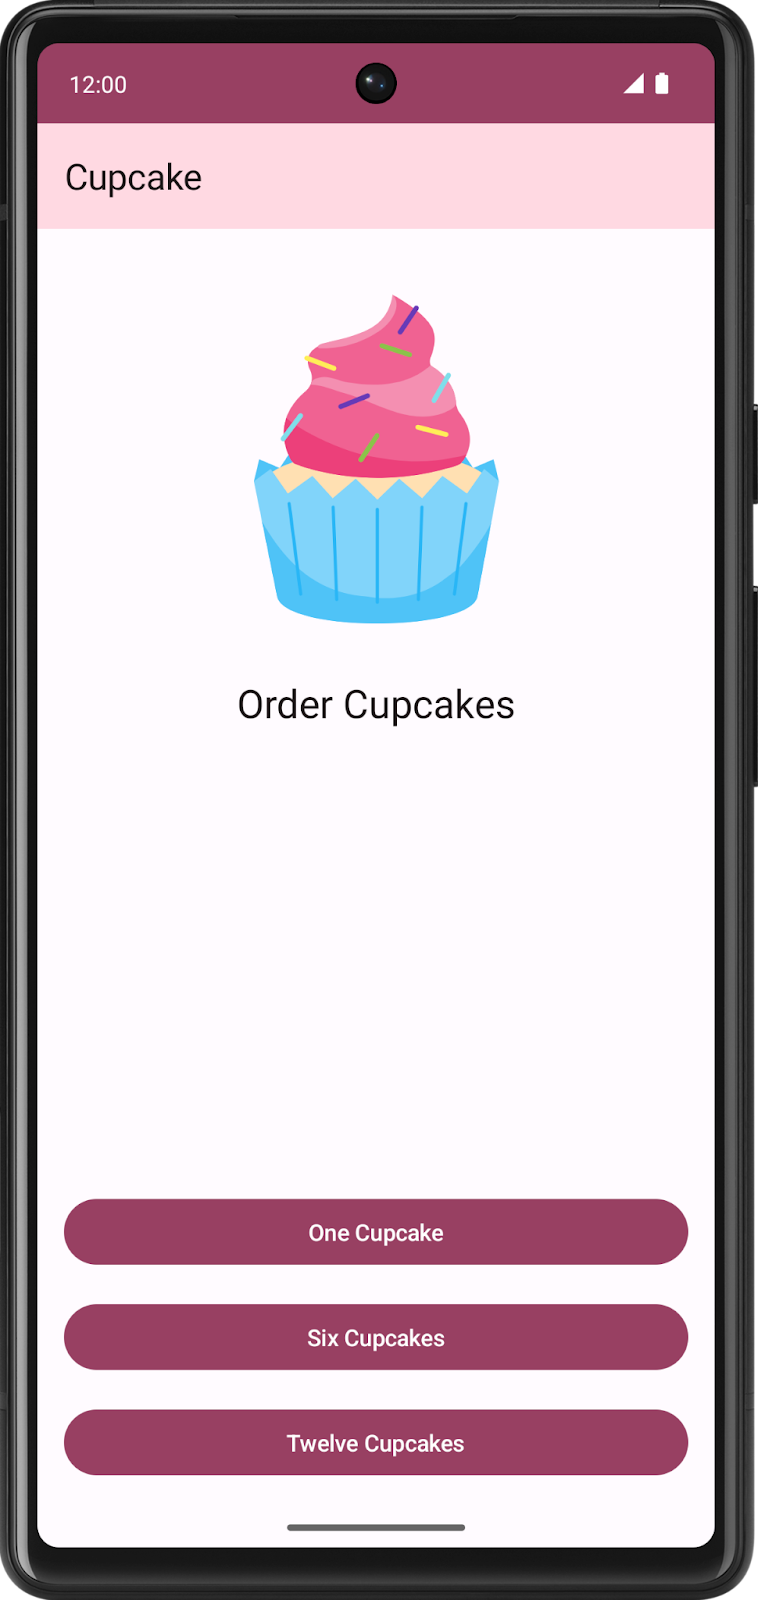
Todos os apps que têm uma interface têm uma tela inicial de algum tipo. Para o Cupcake, essa tela é Start Order. O controlador de navegação no elemento combinável CupcakeApp usa o item Start da enumeração CupcakeScreen para determinar quando navegar até essa tela. Quando o app for iniciado, se não houver uma rota de destino, a rota de destino do host de navegação vai ser definida como CupcakeScreen.Start.name.
Primeiro, faça um teste para verificar se a tela Start Order é a rota de destino atual quando o app é iniciado.
- Crie uma função com o nome
cupcakeNavHost_verifyStartDestination()e use a anotação@Test.
import org.junit.Test

@Test
fun cupcakeNavHost_verifyStartDestination() {
}
Agora, você precisa confirmar que a rota de destino inicial do controlador de navegação é a tela Start Order.
- Verifique se o nome da rota esperada, que neste caso é
CupcakeScreen.Start.name, é igual à rota de destino da entrada da backstack atual do controlador de navegação.
import org.junit.Assert.assertEquals
...

@Test
fun cupcakeNavHost_verifyStartDestination() {
    assertEquals(CupcakeScreen.Start.name, navController.currentBackStackEntry?.destination?.route)
}
Criar métodos auxiliares
Os testes de interface geralmente exigem a repetição de etapas para colocar a interface em um estado em que uma parte específica dela possa ser testada. Uma interface personalizada também pode exigir declarações complexas que precisam ter várias linhas de código. A declaração que você criou na seção anterior exige muito código, e você está usando essa mesma declaração várias vezes enquanto testa a navegação no app Cupcake. Nessas situações, a criação de métodos auxiliares em testes evita a necessidade de ter código duplicado.
Para cada teste de navegação que você criar, use a propriedade name dos itens de enumeração CupcakeScreen para verificar se a rota de destino atual do controlador de navegação está correta. Crie uma função auxiliar que possa ser chamada sempre que você quiser fazer essa declaração.
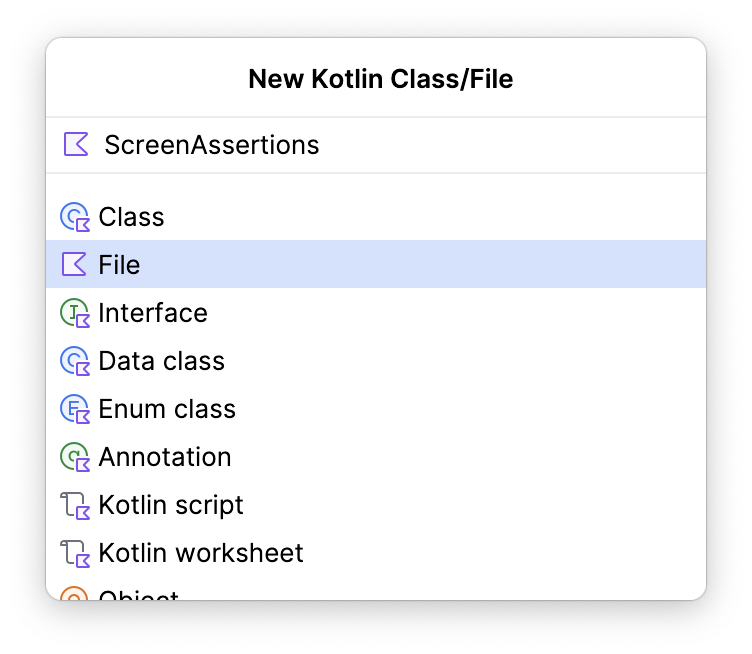
Conclua as etapas a seguir para criar essa função auxiliar:
- Crie um arquivo Kotlin vazio no diretório
testchamadoScreenAssertions.
- Adicione uma função de extensão com o nome
assertCurrentRouteName()à classeNavControllere transmita uma string para o nome da rota esperada na assinatura do método.
fun NavController.assertCurrentRouteName(expectedRouteName: String) {

}
- Nessa função, declare que o
expectedRouteNameé igual à rota de destino da entrada da backstack atual do controlador de navegação.
import org.junit.Assert.assertEquals
...

fun NavController.assertCurrentRouteName(expectedRouteName: String) {
    assertEquals(expectedRouteName, currentBackStackEntry?.destination?.route)
}
- Abra o arquivo CupcakeScreenNavigationTest e modifique a função
cupcakeNavHost_verifyStartDestination()para usar a nova função de extensão em vez da declaração longa.
@Test
fun cupcakeNavHost_verifyStartDestination() {
    navController.assertCurrentRouteName(CupcakeScreen.Start.name)
}
Vários testes também exigem a interação com componentes da interface. Neste codelab, esses componentes costumam ser encontrados usando uma string de recursos. É possível acessar um elemento combinável pela string de recurso com o método Context.getString(). Clique aqui para saber mais. Ao criar um teste de interface no Compose, a implementação desse método fica assim:
composeTestRule.onNodeWithText(composeTestRule.activity.getString(R.string.my_string)
Essa é uma instrução detalhada que pode ser simplificada adicionando uma função de extensão.
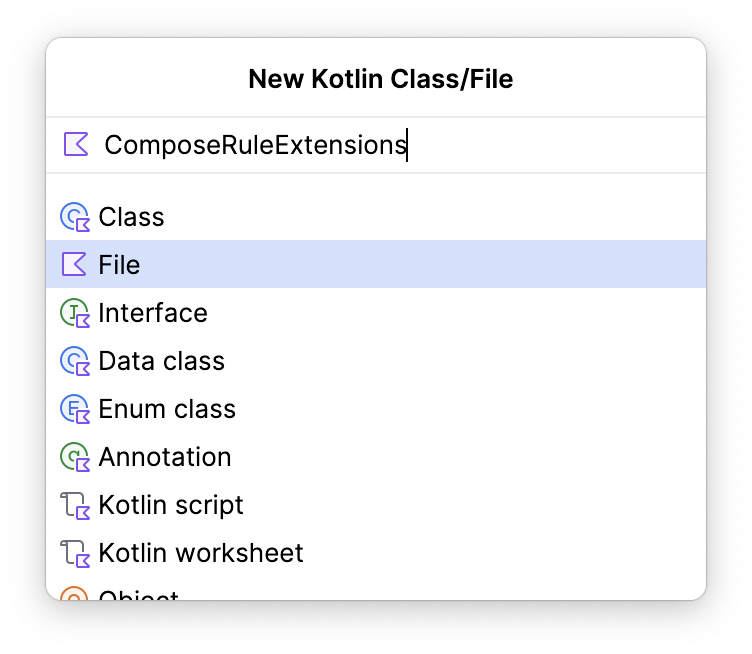
- Crie um novo arquivo no pacote
com.example.cupcake.testcom o nome ComposeRuleExtensions.kt. Ele precisa ser um arquivo Kotlin simples.
- Adicione o código abaixo ao arquivo.
import androidx.activity.ComponentActivity
import androidx.annotation.StringRes
import androidx.compose.ui.test.SemanticsNodeInteraction
import androidx.compose.ui.test.junit4.AndroidComposeTestRule
import androidx.compose.ui.test.onNodeWithText
import androidx.test.ext.junit.rules.ActivityScenarioRule

fun <A : ComponentActivity> AndroidComposeTestRule<ActivityScenarioRule<A>, A>.onNodeWithStringId(
    @StringRes id: Int
): SemanticsNodeInteraction = onNodeWithText(activity.getString(id))
Essa função de extensão permite reduzir a quantidade de código escrita ao encontrar um componente de interface pelo recurso de string dele. Em vez de escrever:
composeTestRule.onNodeWithText(composeTestRule.activity.getString(R.string.my_string)
Agora você pode usar estas instruções:
composeTestRule.onNodeWithStringId(R.string.my_string)
Verificar se a tela inicial não tem um botão "Para cima"
O design original do app Cupcake não tem um botão "Para cima" na barra de ferramentas da tela inicial.
A tela inicial não tem um botão porque não há lugar algum para navegar nessa direção, já que essa é a tela inicial. Siga estas etapas para criar uma função que confirme que a tela inicial não tem um botão "Up":
- Crie um método com o nome
cupcakeNavHost_verifyBackNavigationNotShownOnStartOrderScreen()e use a anotação@Test.
@Test
fun cupcakeNavHost_verifyBackNavigationNotShownOnStartOrderScreen() {
}
No app Cupcake, o botão "Up" tem uma descrição de conteúdo definida para a string do recurso R.string.back_button.
- Crie uma variável na função de teste com o valor do recurso
R.string.back_button.
@Test
fun cupcakeNavHost_verifyBackNavigationNotShownOnStartOrderScreen() {
    val backText = composeTestRule.activity.getString(R.string.back_button)
}
- Afirme que não existe um nó com esta descrição de conteúdo na tela.
@Test
fun cupcakeNavHost_verifyBackNavigationNotShownOnStartOrderScreen() {
    val backText = composeTestRule.activity.getString(R.string.back_button)
    composeTestRule.onNodeWithContentDescription(backText).assertDoesNotExist()
}
Verificar a navegação para a tela "Flavor"
Clicar em um dos botões na tela inicial aciona um método que instrui o controlador de navegação a navegar até a tela "Flavor".
Neste teste, você vai criar um comando para clicar em um botão e acionar a navegação, além de conferir se a rota de destino é a tela "Flavor".
- Crie uma função com o nome
cupcakeNavHost_clickOneCupcake_navigatesToSelectFlavorScreen()e use a anotação@Test.
@Test
fun cupcakeNavHost_clickOneCupcake_navigatesToSelectFlavorScreen(){
}
- Localize o botão One Cupcake pelo ID do recurso de string e execute uma ação de clique nele.
import com.example.cupcake.R
...

@Test
fun cupcakeNavHost_clickOneCupcake_navigatesToSelectFlavorScreen() {
    composeTestRule.onNodeWithStringId(R.string.one_cupcake)
        .performClick()
}
- Afirme que o nome atual do trajeto é o nome da tela "Flavor".
@Test
fun cupcakeNavHost_clickOneCupcake_navigatesToSelectFlavorScreen() {
    composeTestRule.onNodeWithStringId(R.string.one_cupcake)
        .performClick()
    navController.assertCurrentRouteName(CupcakeScreen.Flavor.name)
}
Criar mais métodos auxiliares
O app Cupcake tem um fluxo de navegação basicamente linear. Sem clicar no botão Cancel, só é possível navegar pelo app em uma direção. Portanto, ao testar telas mais profundas no app, você pode repetir o código para navegar até as áreas que quer testar. Essa situação merece o uso de mais métodos auxiliares para que você só precise criar esse código uma vez.
Agora que você testou a navegação para a tela "Flavor", crie um método que acesse essa tela para não precisar repetir esse código em testes futuros.
- Crie um método com o nome
navigateToFlavorScreen().
private fun navigateToFlavorScreen() {
}
- Programe um comando para encontrar o botão One Cupcake e execute uma ação de clique, como você fez na seção anterior.
private fun navigateToFlavorScreen() {
    composeTestRule.onNodeWithStringId(R.string.one_cupcake)
        .performClick()
}
Lembre-se de que o botão Next na tela "Flavor" não é clicável até que um sabor seja selecionado. Esse método serve apenas para preparar a interface para navegação. Depois de chamar esse método, a interface precisa estar em um estado em que o botão Next possa ser clicado.
- Encontre um nó na interface com a string
R.string.chocolatee execute uma ação de clique nele para o selecionar.
private fun navigateToFlavorScreen() {
    composeTestRule.onNodeWithStringId(R.string.one_cupcake)
        .performClick()
    composeTestRule.onNodeWithStringId(R.string.chocolate)
        .performClick()
}
Tente criar métodos auxiliares que naveguem até a tela "Pickup" e a de resumo. Faça este exercício por conta própria antes de ver a solução.
Use o seguinte código para fazer isso:
private fun getFormattedDate(): String {
    val calendar = Calendar.getInstance()
    calendar.add(java.util.Calendar.DATE, 1)
    val formatter = SimpleDateFormat("E MMM d", Locale.getDefault())
    return formatter.format(calendar.time)
}
private fun navigateToPickupScreen() {
    navigateToFlavorScreen()
    composeTestRule.onNodeWithStringId(R.string.next)
        .performClick()
}

private fun navigateToSummaryScreen() {
    navigateToPickupScreen()
    composeTestRule.onNodeWithText(getFormattedDate())
        .performClick()
    composeTestRule.onNodeWithStringId(R.string.next)
        .performClick()
}
Ao testar outras telas, além da tela inicial, você também deve testar a funcionalidade do botão "Up" para garantir que ele direcione a navegação para a tela anterior. Você pode criar uma função auxiliar para encontrar e clicar no botão "Up".
private fun performNavigateUp() {
    val backText = composeTestRule.activity.getString(R.string.back_button)
    composeTestRule.onNodeWithContentDescription(backText).performClick()
}
Maximizar a cobertura de testes
O pacote de testes de um app precisa testar o máximo de funcionalidades possível. No mundo ideal, um pacote de testes de interface iria abranger 100% da funcionalidade da interface. Na prática, é difícil atingir essa quantidade de cobertura de testes, porque há muitos fatores externos ao app que podem afetar a interface. Por exemplo, dispositivos com tamanhos de tela únicos, versões diferentes do sistema operacional Android e apps de terceiros que podem afetar outros apps no smartphone.
Uma maneira de ajudar a maximizar a cobertura de testes é gravando os testes com os recursos à medida que você os adiciona. Assim, você evita antecipar os novos recursos e ter que se lembrar de todos os cenários possíveis. O Cupcake é um app bem pequeno no momento, e você já testou uma parte significativa da navegação dele. No entanto, há mais estados de navegação para testar.
Veja se é possível programar os testes para verificar os estados de navegação a seguir. Tente implementar por conta própria antes de ver a solução.
- Navegue até a tela inicial clicando no botão "Up" na tela "Flavor".
- Navegue até a tela inicial clicando no botão "Cancel" na tela "Flavor".
- Navegue até a tela "Pickup".
- Acesse a tela "Flavor" clicando no botão "Up" na tela "Pickup".
- Navegue até a tela inicial clicando no botão "Cancel" na tela "Pickup".
- Navegue até a tela "Summary".
- Navegue até a tela inicial clicando no botão "Cancel" na tela "Summary".
@Test
fun cupcakeNavHost_clickNextOnFlavorScreen_navigatesToPickupScreen() {
    navigateToFlavorScreen()
    composeTestRule.onNodeWithStringId(R.string.next)
        .performClick()
    navController.assertCurrentRouteName(CupcakeScreen.Pickup.name)
}

@Test
fun cupcakeNavHost_clickBackOnFlavorScreen_navigatesToStartOrderScreen() {
    navigateToFlavorScreen()
    performNavigateUp()
    navController.assertCurrentRouteName(CupcakeScreen.Start.name)
}

@Test
fun cupcakeNavHost_clickCancelOnFlavorScreen_navigatesToStartOrderScreen() {
    navigateToFlavorScreen()
    composeTestRule.onNodeWithStringId(R.string.cancel)
        .performClick()
    navController.assertCurrentRouteName(CupcakeScreen.Start.name)
}

@Test
fun cupcakeNavHost_clickNextOnPickupScreen_navigatesToSummaryScreen() {
    navigateToPickupScreen()
    composeTestRule.onNodeWithText(getFormattedDate())
        .performClick()
    composeTestRule.onNodeWithStringId(R.string.next)
        .performClick()
    navController.assertCurrentRouteName(CupcakeScreen.Summary.name)
}

@Test
fun cupcakeNavHost_clickBackOnPickupScreen_navigatesToFlavorScreen() {
    navigateToPickupScreen()
    performNavigateUp()
    navController.assertCurrentRouteName(CupcakeScreen.Flavor.name)
}

@Test
fun cupcakeNavHost_clickCancelOnPickupScreen_navigatesToStartOrderScreen() {
    navigateToPickupScreen()
    composeTestRule.onNodeWithStringId(R.string.cancel)
        .performClick()
    navController.assertCurrentRouteName(CupcakeScreen.Start.name)
}

@Test
fun cupcakeNavHost_clickCancelOnSummaryScreen_navigatesToStartOrderScreen() {
    navigateToSummaryScreen()
    composeTestRule.onNodeWithStringId(R.string.cancel)
        .performClick()
    navController.assertCurrentRouteName(CupcakeScreen.Start.name)
}
6. Criar testes para a tela de pedidos
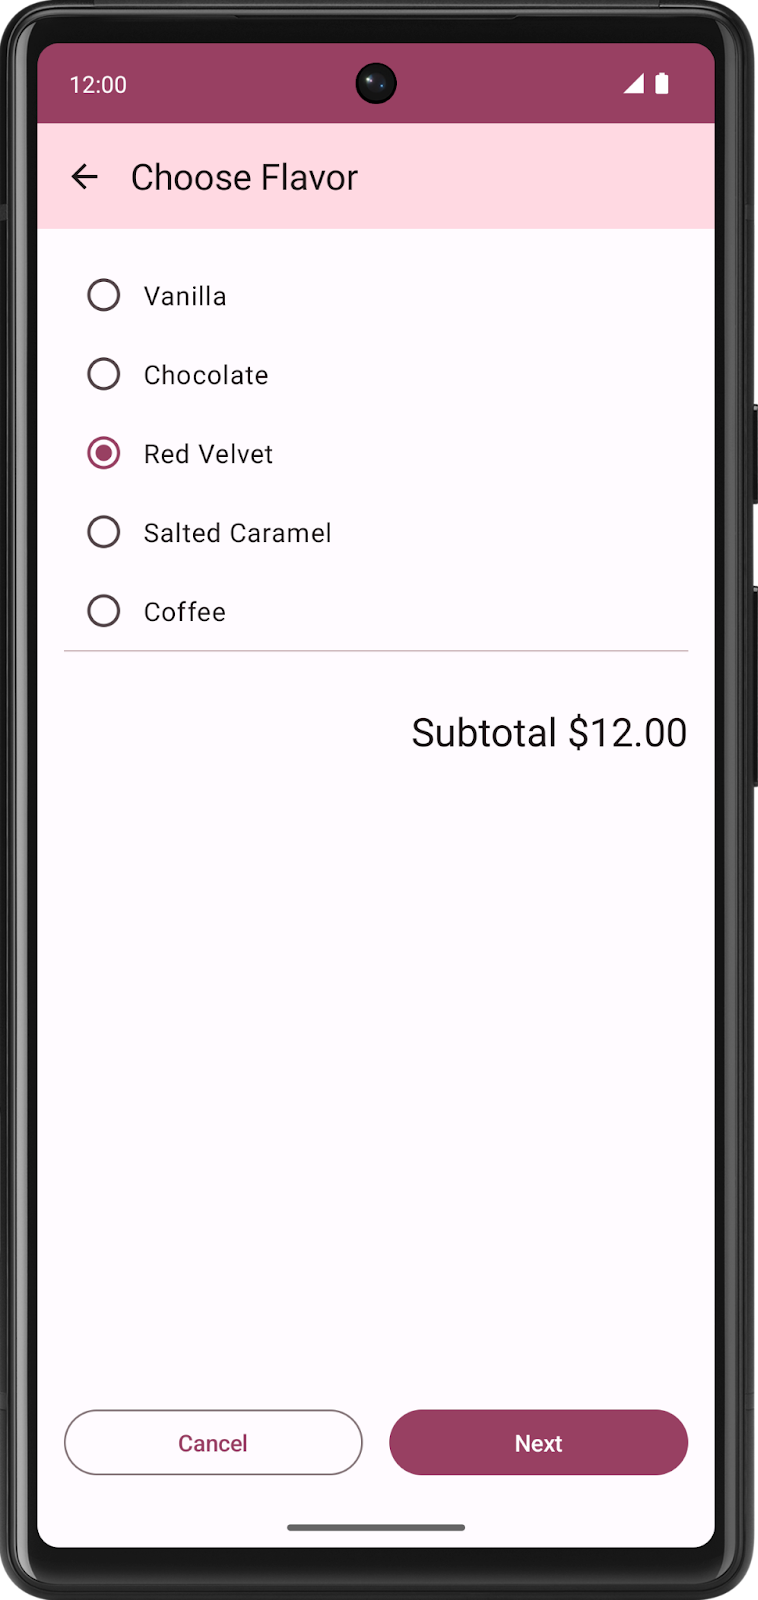
A navegação é apenas um aspecto da funcionalidade do app Cupcake. O usuário também interage com cada uma das telas do app. Você precisa verificar o que aparece nessas telas e se as ações realizadas nelas geram os resultados corretos. A tela SelectOptionScreen é uma parte importante do app.
Nesta seção, você vai criar um teste para verificar se o conteúdo dessa tela está definido corretamente.
Testar o conteúdo da tela de escolha do sabor
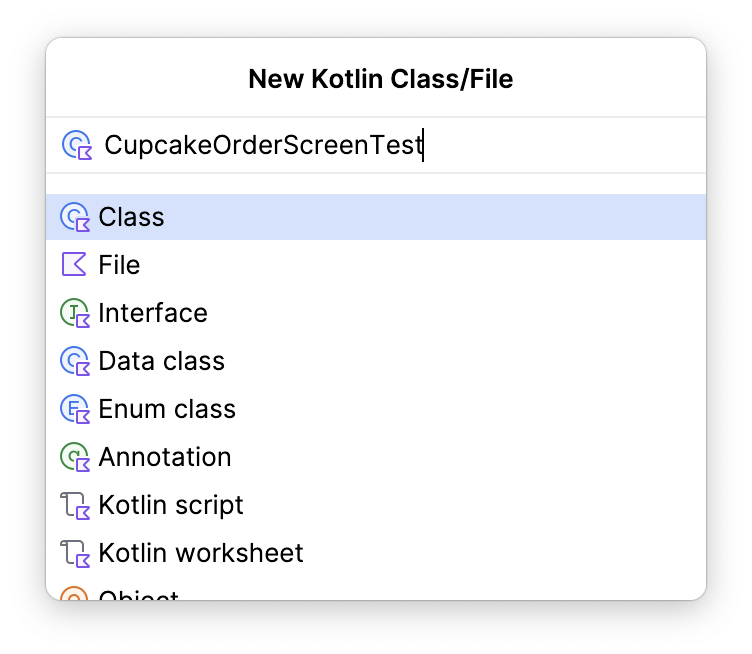
- Crie uma nova classe dentro do diretório
app/src/androidTest, chamadaCupcakeOrderScreenTest, em que os outros arquivos de teste estão contidos.
- Nesta classe, crie uma
AndroidComposeTestRule.
@get:Rule
val composeTestRule = createAndroidComposeRule<ComponentActivity>()
- Crie uma função com o nome
selectOptionScreen_verifyContent()e use a anotação@Test.
@Test
fun selectOptionScreen_verifyContent() {

}
Nessa função, o conteúdo da regra do Compose é definido para a SelectOptionScreen. Isso garante que o elemento combinável SelectOptionScreen seja iniciado diretamente para que a navegação não seja necessária. No entanto, essa tela exige dois parâmetros: uma lista de opções de sabor e um subtotal.
- Crie uma lista de opções de sabor e um subtotal a ser transmitido para a tela.
@Test
fun selectOptionScreen_verifyContent() {
    // Given list of options
    val flavors = listOf("Vanilla", "Chocolate", "Hazelnut", "Cookie", "Mango")
    // And subtotal
    val subtotal = "$100"
}
- Defina o conteúdo como o combinável
SelectOptionScreenusando os valores que você acabou de criar.
Essa abordagem é semelhante à inicialização de um elemento combinável da MainActivity. A única diferença é que MainActivity chama o elemento CupcakeApp, e aqui você está chamando o elemento SelectOptionScreen. A possibilidade de mudar o elemento combinável que você inicia no setContent() permite iniciar elementos específicos, em vez de fazer o teste explicitamente pelo app para chegar à área que você quer testar. Essa abordagem ajuda a evitar que o teste falhe em áreas do código que não estejam relacionadas ao teste atual.
@Test
fun selectOptionScreen_verifyContent() {
    // Given list of options
    val flavors = listOf("Vanilla", "Chocolate", "Hazelnut", "Cookie", "Mango")
    // And subtotal
    val subtotal = "$100"

    // When SelectOptionScreen is loaded
    composeTestRule.setContent {
        SelectOptionScreen(subtotal = subtotal, options = flavors)
    }
}
Nesse momento do teste, o app inicia o elemento combinável SelectOptionScreen e você pode interagir com ele pelas instruções de teste.
- Itere a lista
flavorse verifique se cada item de string na lista é mostrado na tela. - Use o método
onNodeWithText()para encontrar o texto na tela e use o métodoassertIsDisplayed()para verificar se o texto é mostrado no app.
@Test
fun selectOptionScreen_verifyContent() {
    // Given list of options
    val flavors = listOf("Vanilla", "Chocolate", "Hazelnut", "Cookie", "Mango")
    // And subtotal
    val subtotal = "$100"

    // When SelectOptionScreen is loaded
    composeTestRule.setContent {
        SelectOptionScreen(subtotal = subtotal, options = flavors)
    }

    // Then all the options are displayed on the screen.
    flavors.forEach { flavor ->
        composeTestRule.onNodeWithText(flavor).assertIsDisplayed()
    }
}
- Para usar a mesma técnica para verificar se o app mostra o texto, confira se ele mostra a string correta de subtotal na tela. Pesquise na tela o ID do recurso
R.string.subtotal_pricee o valor subtotal correto e, em seguida, declare que o app mostra o valor.
import com.example.cupcake.R
...

@Test
fun selectOptionScreen_verifyContent() {
    // Given list of options
    val flavors = listOf("Vanilla", "Chocolate", "Hazelnut", "Cookie", "Mango")
    // And subtotal
    val subtotal = "$100"

    // When SelectOptionScreen is loaded
    composeTestRule.setContent {
        SelectOptionScreen(subtotal = subtotal, options = flavors)
    }

    // Then all the options are displayed on the screen.
    flavors.forEach { flavor ->
        composeTestRule.onNodeWithText(flavor).assertIsDisplayed()
    }

    // And then the subtotal is displayed correctly.
    composeTestRule.onNodeWithText(
        composeTestRule.activity.getString(
            R.string.subtotal_price,
            subtotal
        )
    ).assertIsDisplayed()
}
Lembre-se de que o botão Next só é ativado quando um item é selecionado. Esse teste verifica apenas o conteúdo da tela. Portanto, o último teste a ser feito é se o botão Next está desativado.
- Para encontrar o botão Next, use a mesma abordagem para encontrar um nó por ID de recurso de string. No entanto, em vez de verificar se o app mostra o nó, use o método
assertIsNotEnabled().
@Test
fun selectOptionScreen_verifyContent() {
    // Given list of options
    val flavors = listOf("Vanilla", "Chocolate", "Hazelnut", "Cookie", "Mango")
    // And subtotal
    val subtotal = "$100"

    // When SelectOptionScreen is loaded
    composeTestRule.setContent {
        SelectOptionScreen(subtotal = subtotal, options = flavors)
    }

    // Then all the options are displayed on the screen.
    flavors.forEach { flavor ->
        composeTestRule.onNodeWithText(flavor).assertIsDisplayed()
    }

    // And then the subtotal is displayed correctly.
    composeTestRule.onNodeWithText(
        composeTestRule.activity.getString(
            R.string.subtotal_price,
            subtotal
        )
    ).assertIsDisplayed()

    // And then the next button is disabled
    composeTestRule.onNodeWithStringId(R.string.next).assertIsNotEnabled()
}
Maximizar a cobertura de testes
O teste do conteúdo da tela de escolha do sabor mostra apenas um aspecto de uma única tela. Há diversos outros testes que você pode criar para aumentar a cobertura do código. Tente criar os testes a seguir por conta própria antes de fazer o download do código da solução.
- Verifique o conteúdo da tela inicial.
- Verifique o conteúdo da tela "Summary".
- Verifique se o botão Next é ativado quando uma opção é selecionada na tela de escolha do sabor.
Ao criar os testes, lembre-se das funções auxiliares que podem reduzir a quantidade de código que você precisa criar.
7. Acessar o código da solução
Para baixar o código do codelab concluído, use este comando git:
$ git clone https://github.com/google-developer-training/basic-android-kotlin-compose-training-cupcake.git
Se preferir, você pode baixar o repositório como um arquivo ZIP, descompactar e abrir no Android Studio.
Se você quiser conferir o código da solução, acesse o GitHub (link em inglês).
8. Resumo
Parabéns! Você aprendeu a testar o componente de navegação do Jetpack. Você também aprendeu algumas habilidades fundamentais para criar testes de interface, por exemplo: criar métodos auxiliares reutilizáveis, usar o setContent() para criar testes concisos, configurar seus testes com a anotação @Before e pensar na máxima cobertura de testes. Ao continuar criando apps Android, continue programando testes junto com seu código de recursos.