
1. Antes de começar
Você vai usar o que aprendeu nesta unidade para criar um app que mostra uma coleção de obras de arte, um espaço personalizado de arte digital. Diferentemente dos codelabs anteriores, em que você recebeu instruções detalhadas, aqui vamos apresentar apenas diretrizes e sugestões sobre o que pode ser criado usando os conceitos que você aprendeu até agora. Recomendamos que você use sua criatividade para desenvolver o app de maneira independente, com orientações limitadas.
Criar um app por conta própria é um desafio, mas não se preocupe: você já praticou bastante. Use neste novo contexto as mesmas habilidades que aprendeu até agora. Você sempre pode consultar os codelabs anteriores se não souber como implementar certas partes do app.
Ao criar o app por conta própria e resolver os problemas encontrados, você aprende mais rápido e retém os conceitos por mais tempo. Outra vantagem é que o app é totalmente personalizado. Assim, você pode usá-lo para mostrar sua criação no portfólio de desenvolvedores.
Pré-requisitos
- Saber criar e executar um projeto no Android Studio.
- Experiência com a sintaxe do Kotlin, o que inclui expressões
Booleanewhen. - Capacidade de aplicar conceitos básicos do Jetpack Compose, como o uso de estado com o objeto
MutableState. - Experiência com funções de composição, incluindo os elementos de composição
Text,ImageeButton.
O que você vai aprender
- Como criar protótipos de baixa fidelidade e os converter em código.
- Como criar layouts simples com os elementos
RoweColumne organizá-los usando os parâmetroshorizontalAlignmenteverticalArrangement. - Como personalizar elementos do Compose com um objeto
Modifier. - Como identificar estados e os modificar após acionadores, como toques no botão.
O que você vai criar
- Um app Android para mostrar obras de arte ou fotos de família
Pré-requisitos
- Um computador com o Android Studio instalado.
- Fotos ou artes digitais para mostrar no app.
Confira um exemplo de como o app vai ficar ao final deste projeto:
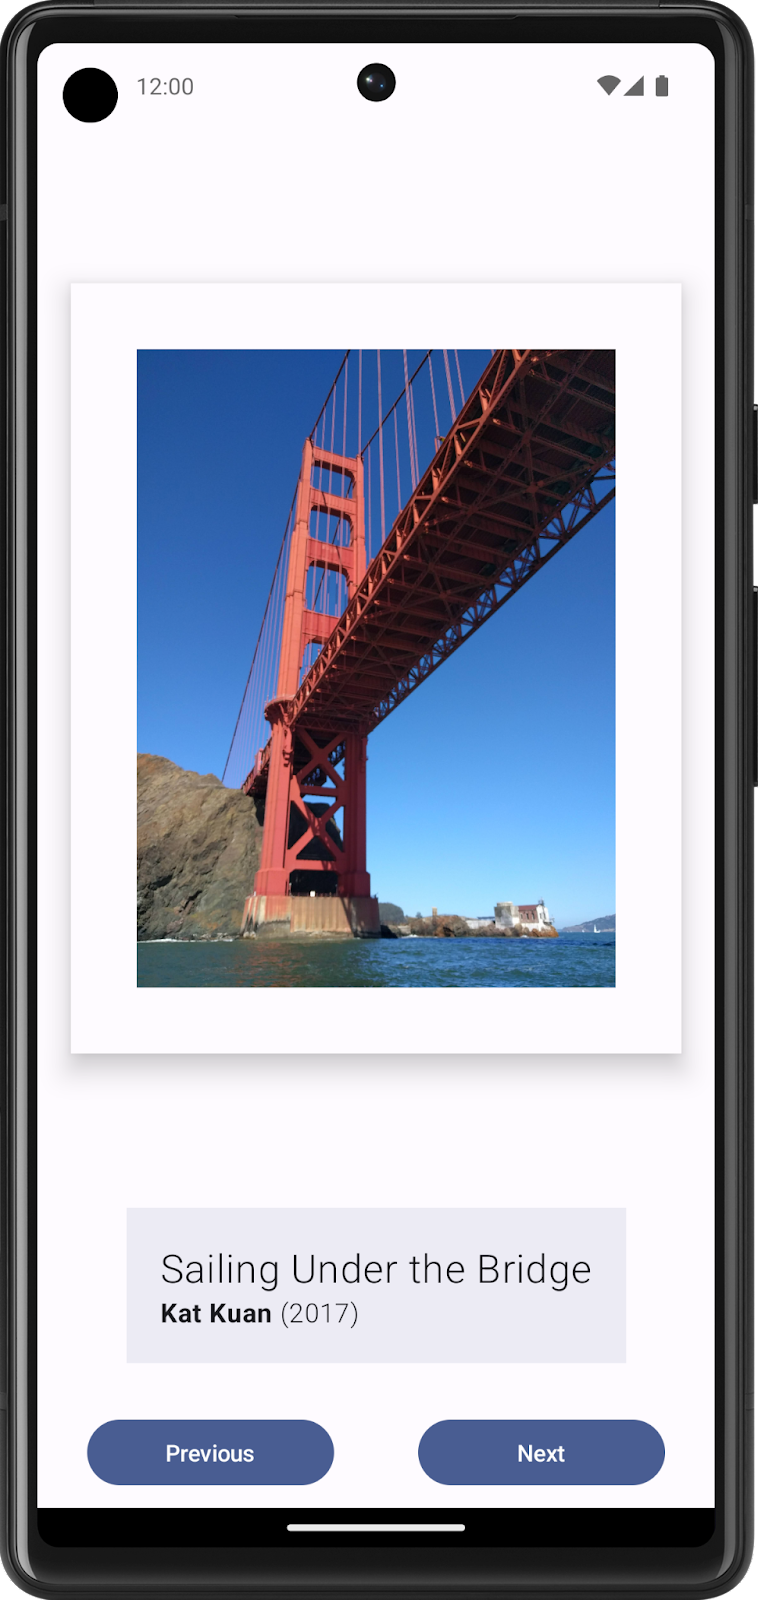
Um exemplo de app de galeria de arte que mostra uma coleção selecionada de obras de arte emolduradas, criado pela equipe de treinamento de noções básicas do Android.
2. Criar uma IU estática com elementos combináveis
Criar um protótipo de baixa fidelidade
Esse protótipo de baixa fidelidade se refere a um modelo ou desenho simples que dá uma ideia básica da aparência do app.
Criar um protótipo de baixa fidelidade:
- Pense sobre o que você quer exibir na galeria de arte e o público-alvo do app.
- No lugar que preferir, adicione os elementos para compor o app. Veja alguns exemplos a se considerar:
- Imagens de obras de arte
- Informações sobre a obra de arte, como título, artista e ano de criação
- Qualquer outro elemento, como botões, para tornar o app interativo e dinâmico
- Coloque esses elementos em posições diferentes e veja como eles ficam. Não se preocupe em acertar na primeira vez. Você pode escolher um design agora e fazer melhorias iterativas mais tarde.
- Você pode criar um design de baixa fidelidade parecido com esta imagem:
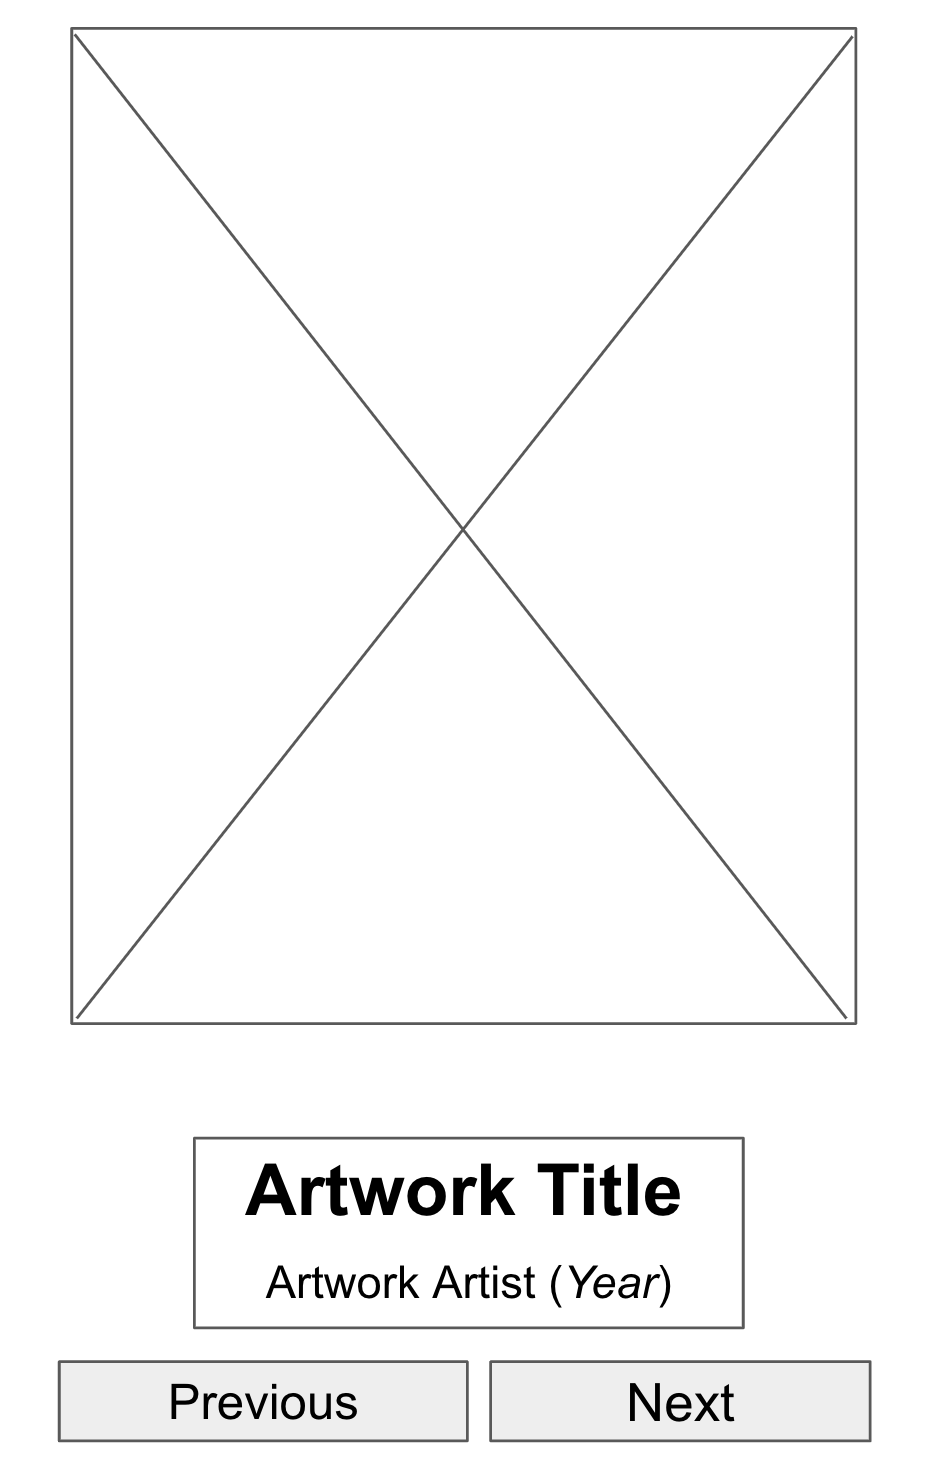
Figura 1. Elementos de marcador de posição em modelos de IU ajudam a visualizar o produto final.
Converter o design em código
Use o protótipo para traduzir o design em código:
- Identifique os elementos de IU necessários para criar o app.
Por exemplo, no exemplo de design criado, você precisa ter estes elementos de composição no código: um Image, dois Text e dois Button.
- Identifique diferentes seções lógicas dos apps e desenhe limites ao redor delas.
Essa etapa ajuda a dividir a tela em pequenos elementos de composição e a pensar na hierarquia deles.
Neste exemplo, você pode dividir a tela em três seções:
- Parede de obras de arte
- Descritor de obras de arte
- Controlador de exibição
É possível organizar cada uma dessas seções com elementos de composição de layout, como Row ou Column.
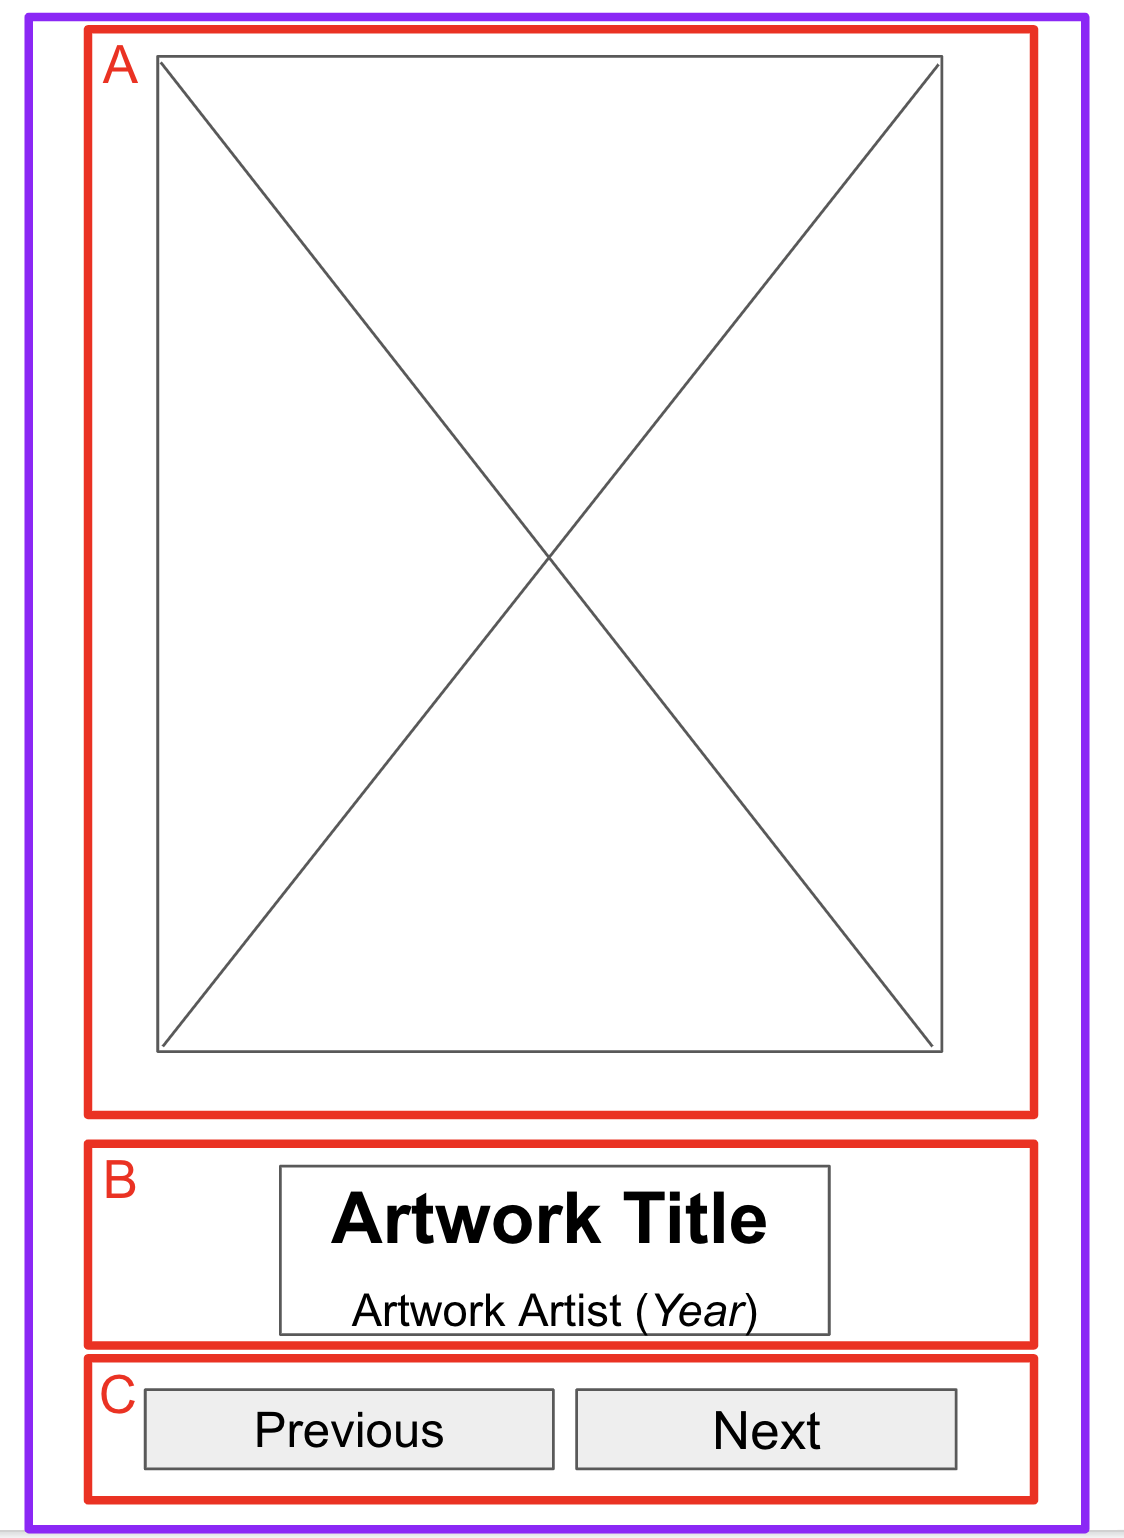
Figura 2. Os limites em torno das seções ajudam os desenvolvedores a enxergar os elementos de composição.
- Desenhe limites ao redor de cada seção do app que contém vários elementos da IU.
Esses limites ajudam você a ver como um elemento se relaciona com outro na seção.
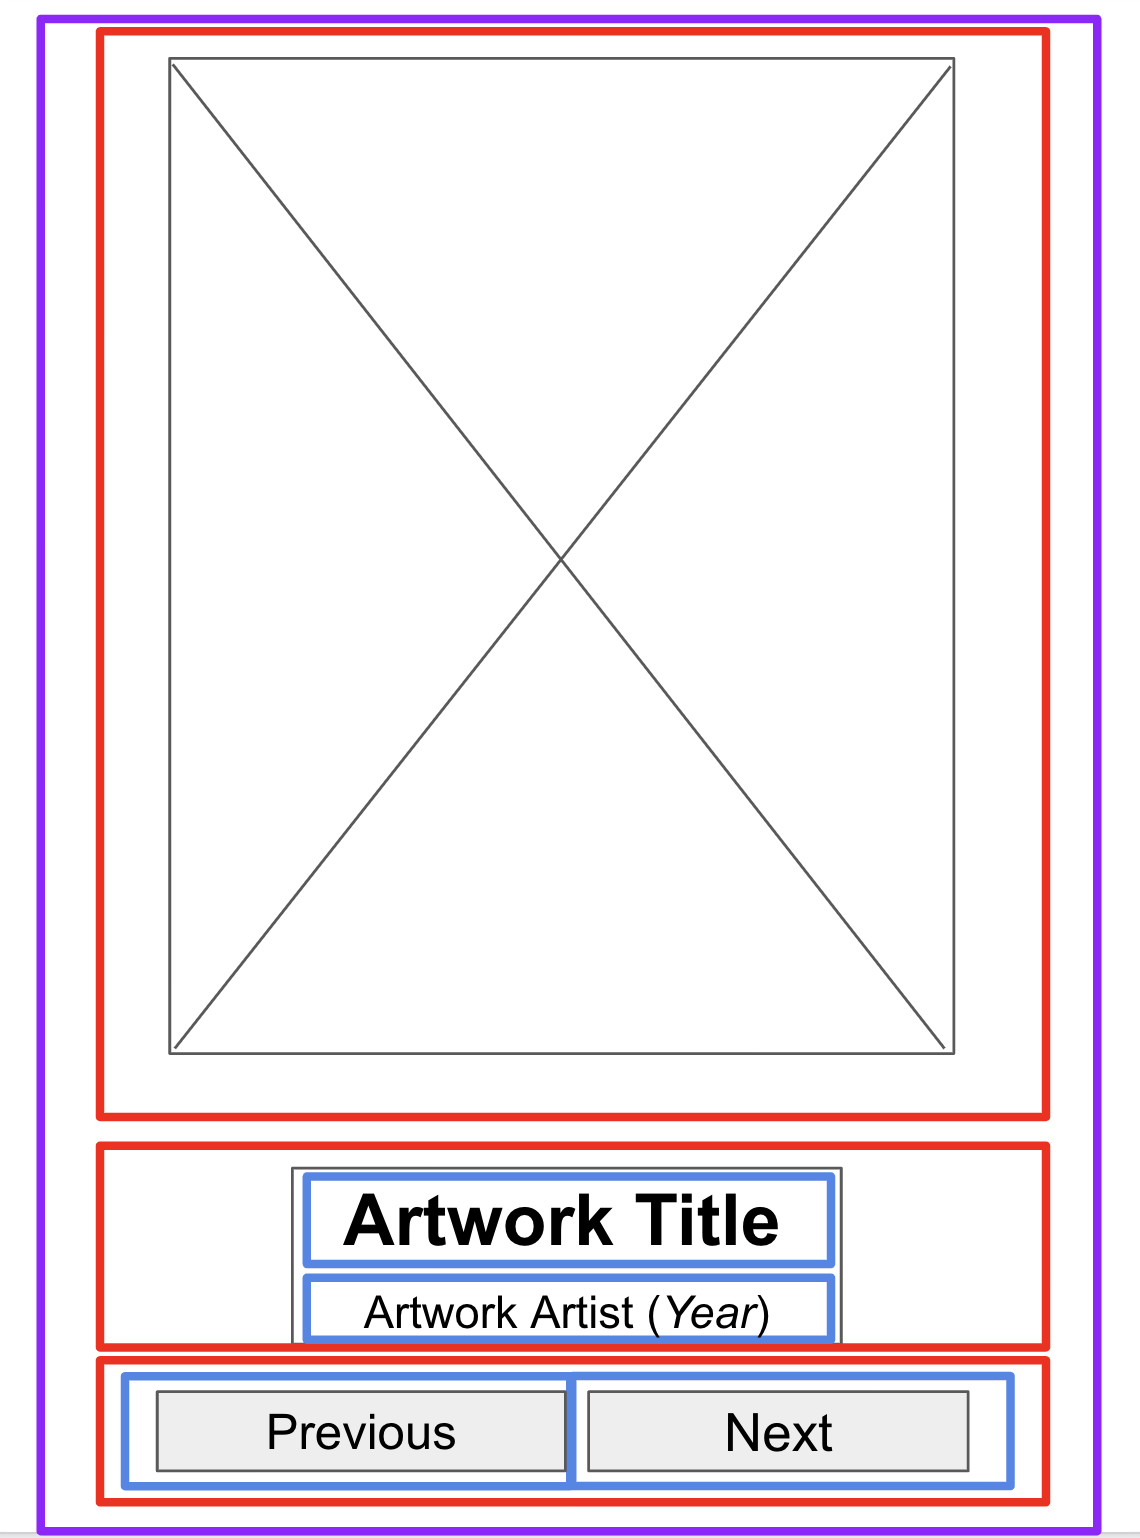
Figura 3. Ter mais limites ao redor do texto e dos botões ajuda os desenvolvedores a organizar os elementos combináveis.
Agora ficou mais fácil ver como você pode organizar os elementos combináveis, como Text e Button, com elementos de layout.
Algumas observações sobre vários elementos combináveis:
- Elementos de composição
RowouColumn. Teste vários parâmetroshorizontalArrangementeverticalAlignmentnos elementosRoweColumnde acordo com o design. - Elementos de composição
Image. Não se esqueça de preencher o parâmetrocontentDescription. Como mencionado no codelab anterior, o TalkBack usa o parâmetrocontentDescriptionpara ajudar na acessibilidade do app. Se o elemento combinávelImagefor usado apenas para fins decorativos ou se houver um elementoTextque descreva o elemento combinávelImage, defina o parâmetrocontentDescriptioncomonull. - Elementos de composição
Text. Você pode testar vários valores dos parâmetrosfontSize,textAlignefontWeightpara definir o estilo do texto. Também é possível usar uma funçãobuildAnnotatedStringpara aplicar vários estilos a um único elemento de composiçãoText. - Elementos de composição
Surface. Você pode testar vários valores deElevation,ColoreBorderStrokepara queModifier.bordercrie IUs diferentes nos elementos combináveisSurface. - Espaçamento e alinhamento. Você pode usar argumentos
Modifier, comopaddingeweight, para ajudar a organizar os elementos de composição.
- Execute o app em um emulador ou dispositivo Android.
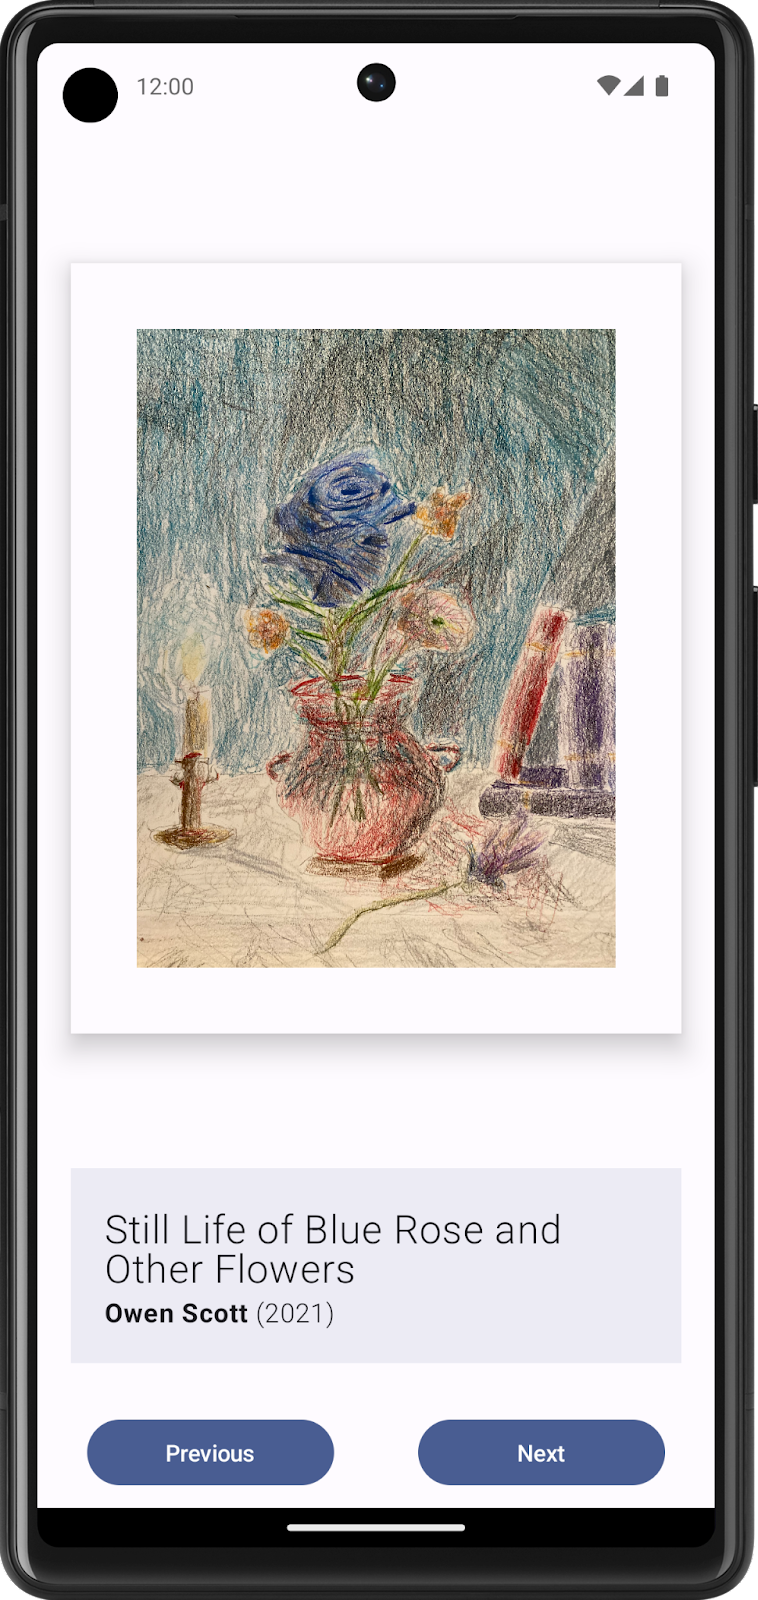
Figura 4. Este app mostra conteúdo estático, mas os usuários ainda não podem interagir com ele.
3. Tornar o app interativo
Determinar a interação do usuário
A vantagem de criar uma galeria de arte digital é torná-la interativa e dinâmica para os usuários. No design inicial, você criou dois botões para interação dos usuários. No entanto, esta galeria é sua. Você pode alterar o design e as formas de interação dos usuários no app como quiser. Considere como você quer que os usuários interajam com o app e como ele responde com base nessas interações. Estas são algumas das interações que você pode adicionar:
- Mostrar a próxima obra de arte ou a anterior após tocar no botão.
- Avançar da obra de arte exibida para o próximo álbum ao deslizar.
- Mostrar uma dica para mais informações ao manter o botão pressionado.
Criar estados para elementos dinâmicos
Trabalhe na parte da IU que mostra a próxima obra de arte ou a anterior com um toque no botão:
- Primeiro, identifique os elementos da IU que precisam ser alterados após a interação do usuário.
Nesse caso, os elementos da IU são a imagem, o título, o artista e o ano da obra de arte.
- Se necessário, crie um estado para cada elemento dinâmico da IU com o objeto
MutableState. - Lembre-se de substituir os valores fixados no código por
statesdefinidos.
Criar uma lógica condicional para interação
- Pense no comportamento de que você precisa quando um usuário toca nos botões, começando com o botão Próxima.
Quando os usuários tocam no botão Próxima, eles esperam ver a próxima obra de arte na sequência. Por enquanto, pode ser difícil determinar qual a próxima obra precisa ser mostrada.
- Adicione identificadores ou IDs, na forma de números sequenciais que comecem com 1, a cada obra de arte.
Agora está claro que a próxima obra de arte se refere à que tem o próximo ID na sequência.
Como você não tem um número infinito de obras de arte, é recomendável determinar o comportamento do botão Próxima ao exibir a última obra de arte na série. Um comportamento comum é voltar a exibir a primeira obra de arte depois da última.
- Primeiro, escreva em pseudocódigo para capturar a lógica do código sem a sintaxe Kotlin.
Se houver três obras de arte para mostrar, o pseudocódigo da lógica do botão Próxima pode se parecer com este snippet de código:
if (current artwork is the first artwork) {
    // Update states to show the second artwork.
}
else if (current artwork is the second artwork) {
    // Update states to show the third artwork.
}
else if (current artwork is the last artwork) {
   // Update state to show the first artwork.
}
- Converta o pseudocódigo em código Kotlin.
Em vez de instruções if else, você pode usar a instrução when para criar a lógica condicional para que o código fique mais legível quando gerenciar um grande número de obras de arte.
- Para que essa lógica seja executada após um toque de botão, coloque-a dentro do argumento
onClick()dos elementos de composiçãoButton. - Repita as mesmas etapas para criar a lógica do botão Anterior.
- Execute o app e toque nos botões para confirmar que eles mostram a próxima obra de arte ou a anterior.
4. Desafio: criar para diferentes tamanhos de tela
Um dos pontos fortes do Android é que ele oferece suporte a muitos dispositivos e tamanhos de tela, o que significa que o app criado pode alcançar uma grande variedade de públicos e ser usado de várias maneiras. Para garantir a melhor experiência a todos os usuários, teste seus apps nos dispositivos a que você pretende oferecer suporte. Por exemplo, no app do exemplo atual, talvez você tenha desenvolvido, criado e testado inicialmente o app para dispositivos móveis no modo retrato. No entanto, alguns usuários podem querer usar o app em uma tela maior no modo paisagem.
Embora os tablets não sejam o principal tipo de dispositivo a que esse app oferece suporte, ainda é recomendável garantir que ele não seja corrompido se usado em uma tela maior.
Para testar o app em telas maiores, veja se ele funciona em um tablet:
- Se você não tiver um tablet Android, crie um Dispositivo virtual Android (AVD, na sigla em inglês).
- Crie e execute o app em um AVD de tablet no modo paisagem.
- Inspecione visualmente para garantir que nada está inaceitável, como alguns elementos da interface cortados, alinhamentos irregulares ou interações com botões que não funcionam como o esperado.
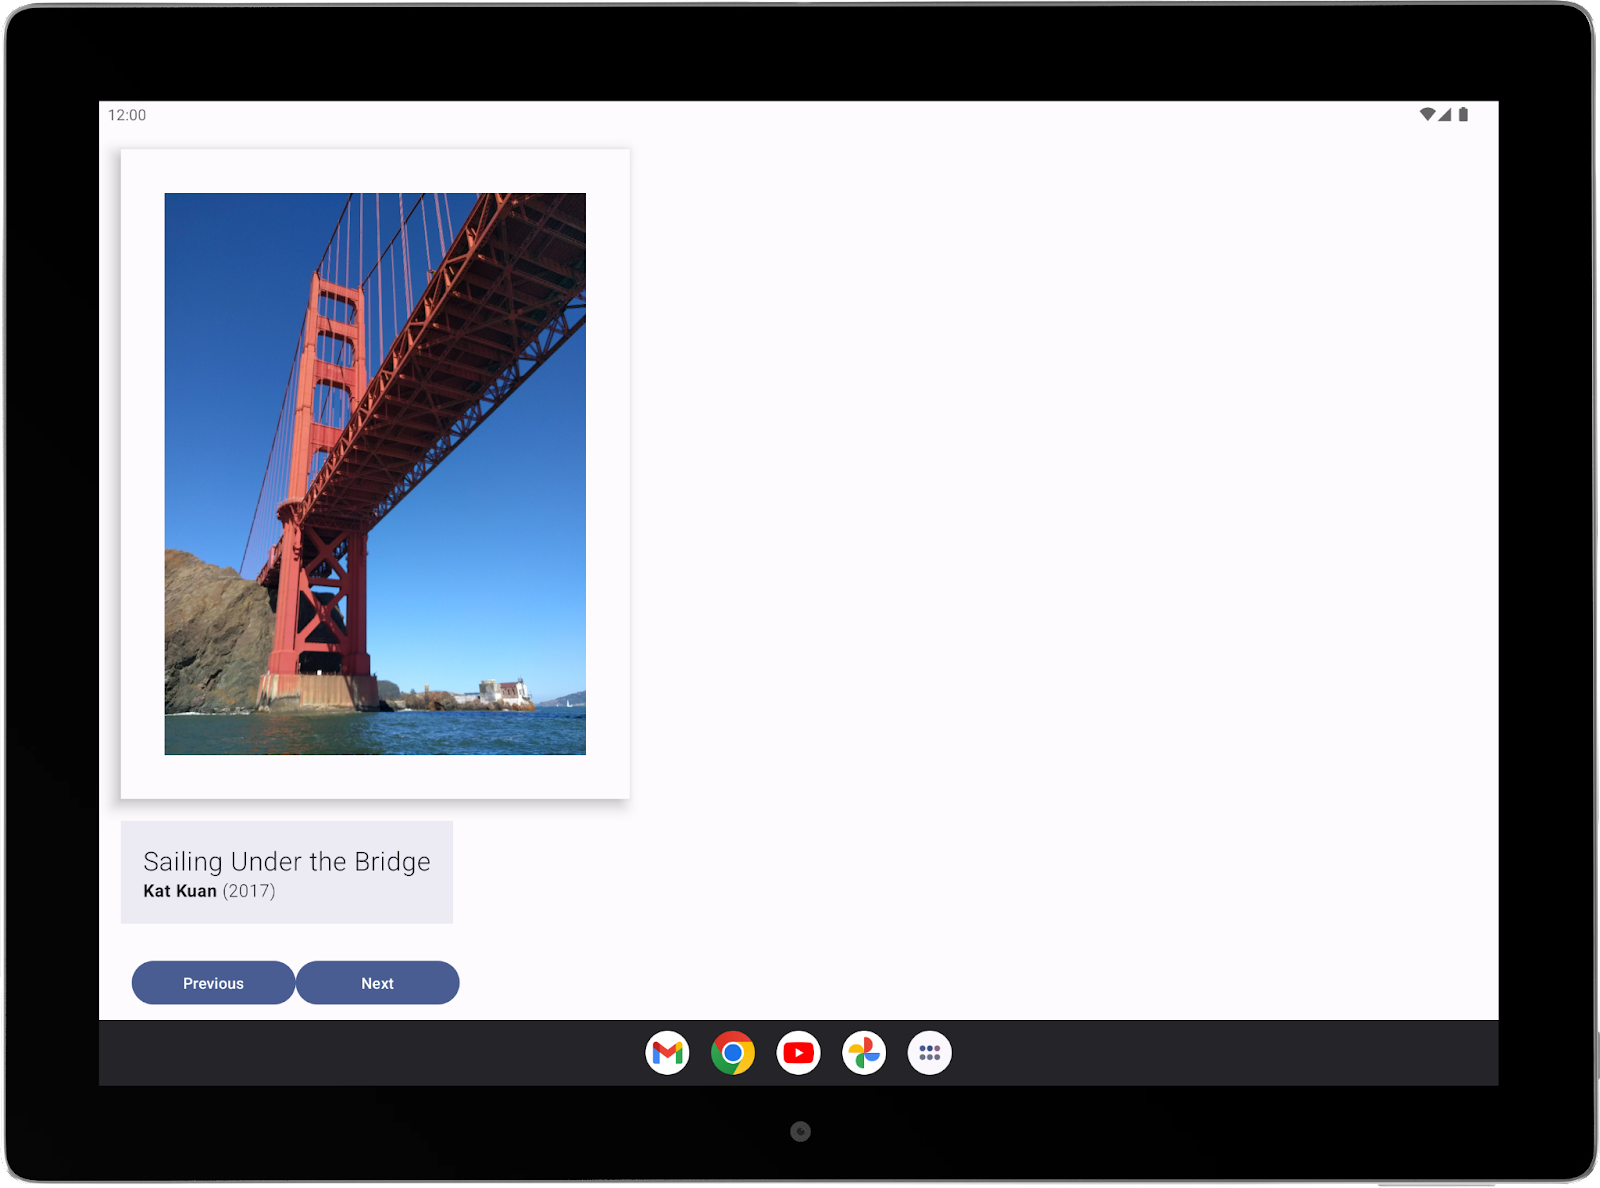
Figura 5. O app precisa ser reformulado para ser exibido corretamente em um dispositivo maior.
- Modifique o código para corrigir os bugs encontrados. Consulte as diretrizes básicas de compatibilidade para qualidade de apps para telas grandes.
- Teste o app novamente em tablets e smartphones para garantir que a correção de bug funcione nos dois tipos de dispositivos.
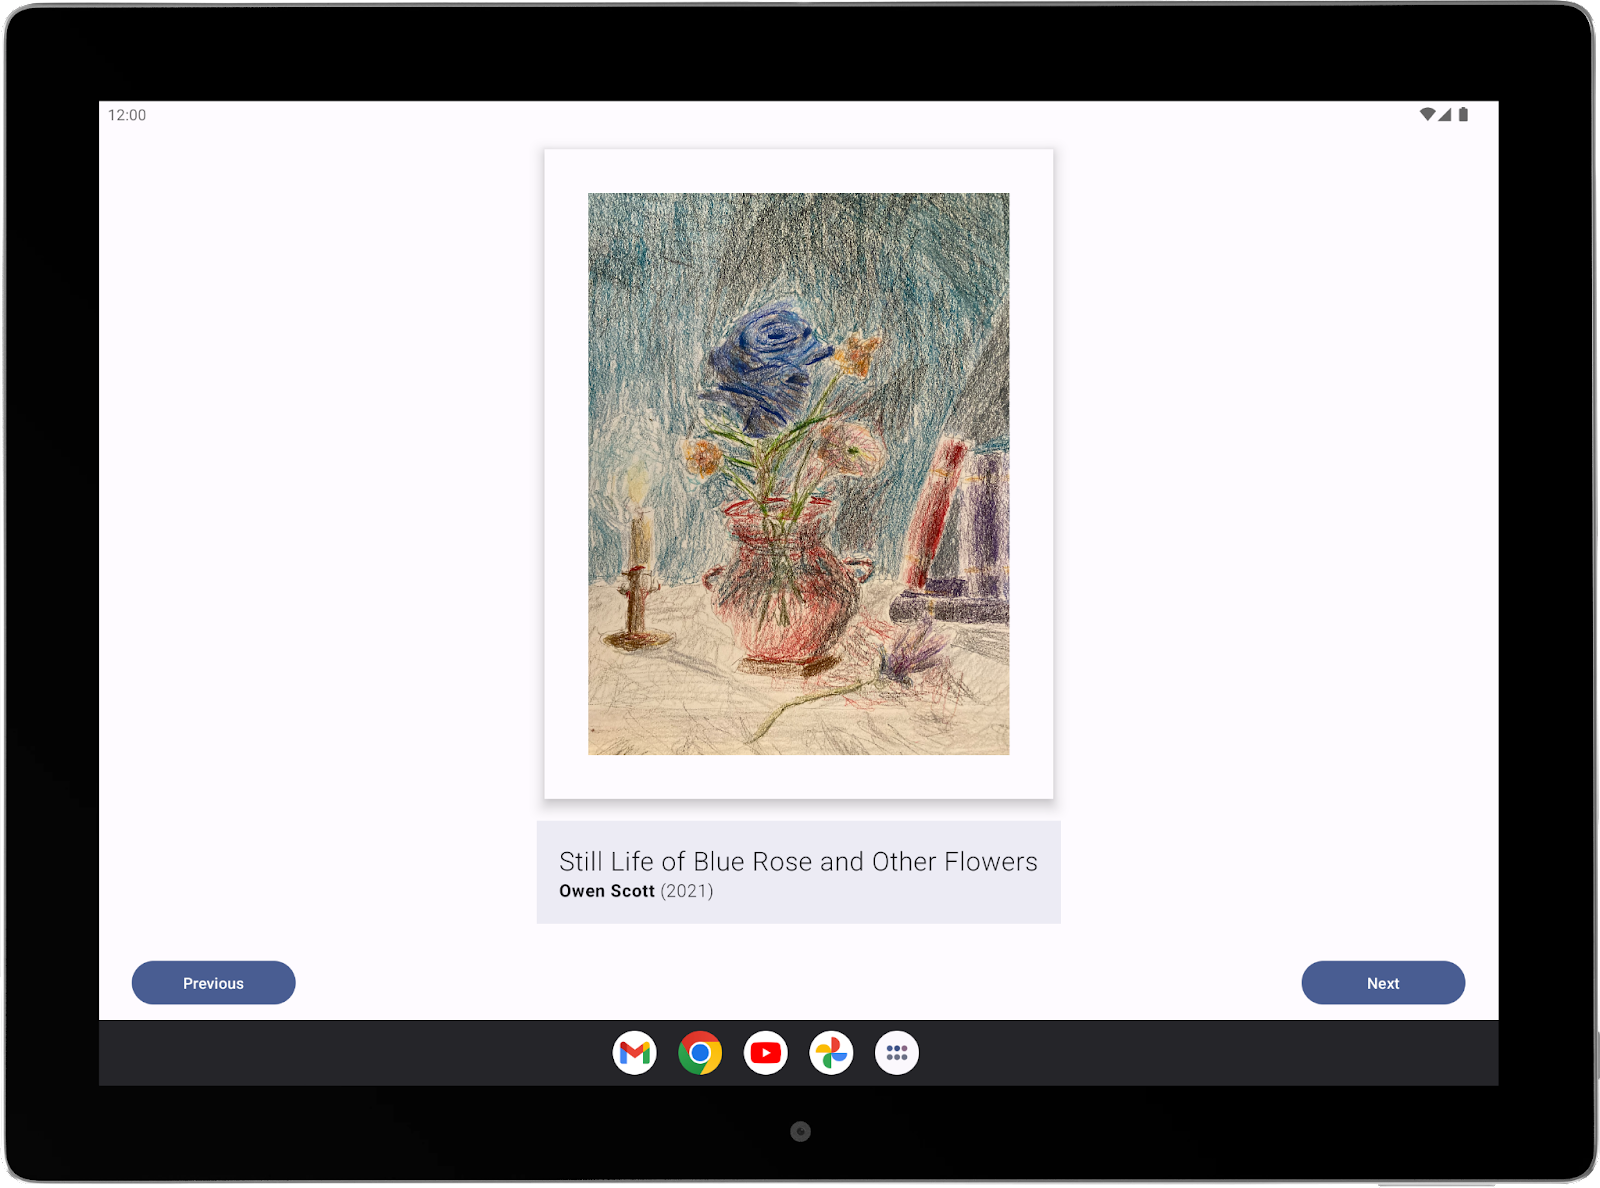
Figura 6. Agora o app tem uma boa aparência em telas grandes.
5. Boa sorte!
Esperamos que este guia inspire você a criar sua própria galeria de arte. Não é preciso que o app fique perfeito na primeira vez. Você pode desenvolver itens com base no seu conhecimento atual sobre o Android e os aprimorar quando aprender mais.
Quando terminar, mostre seu trabalho no seu portfólio e a amigos e familiares. Se quiser compartilhar seu trabalho nas mídias sociais, use a hashtag #AndroidBasics.