1. 시작하기 전에
혼잡한 쇼핑몰에서 친구 수지를 발견했다고 상상해 보세요. 수지가 나를 볼 수 있도록 손을 흔들면서 큰 소리로 부를 것입니다. Google의 Nearby Messages API를 사용하면 사용자들이 물리적으로 가까이 있을 때 서로를 쉽게 찾을 수 있도록 사용자 대신 앱에서 알려 줍니다. 이 Codelab에서는 Nearby Messages API를 사용해 물리적 근접성을 기반으로 한 사용자 상호작용을 지원하는 방법을 알아봅니다. Codelab의 편의성을 위해 여기에서는 각 사용자가 휴대전화의 빌드 모델(android.os.Build.MODEL)을 게시합니다. 하지만 실제로는 각 사용자가 userId 또는 사용 사례에 적합한 다른 정보를 근처에 있는 친구에게 게시하도록 할 수 있습니다. Nearby Messages API는 인터넷 연결, 블루투스, 기타 기술을 결합하여 이 기능을 제공합니다.
기본 요건
- Kotlin 및 Android 개발에 관한 기본 지식
- Android 스튜디오에서 앱을 만들고 실행하는 방법
- 코드를 실행하고 테스트할 Android 기기 2대 이상
학습할 내용
- 앱에 Nearby 라이브러리를 추가하는 방법
- 상대방에게 메시지를 브로드캐스트하는 방법
- 상대방의 메시지를 감지하는 방법
- 메시지의 API 키를 가져오는 방법
- 배터리 수명을 위한 권장사항
필요한 항목
- Google API 키를 얻을 Google 계정(예: Gmail 주소)
- 최신 버전의 Android 스튜디오
- Google Play 서비스(즉, Play 스토어)가 설치된 Android 기기 2대
- 인터넷 연결(인터넷 연결이 필요 없는 Nearby Connections API와 다름)
빌드할 항목
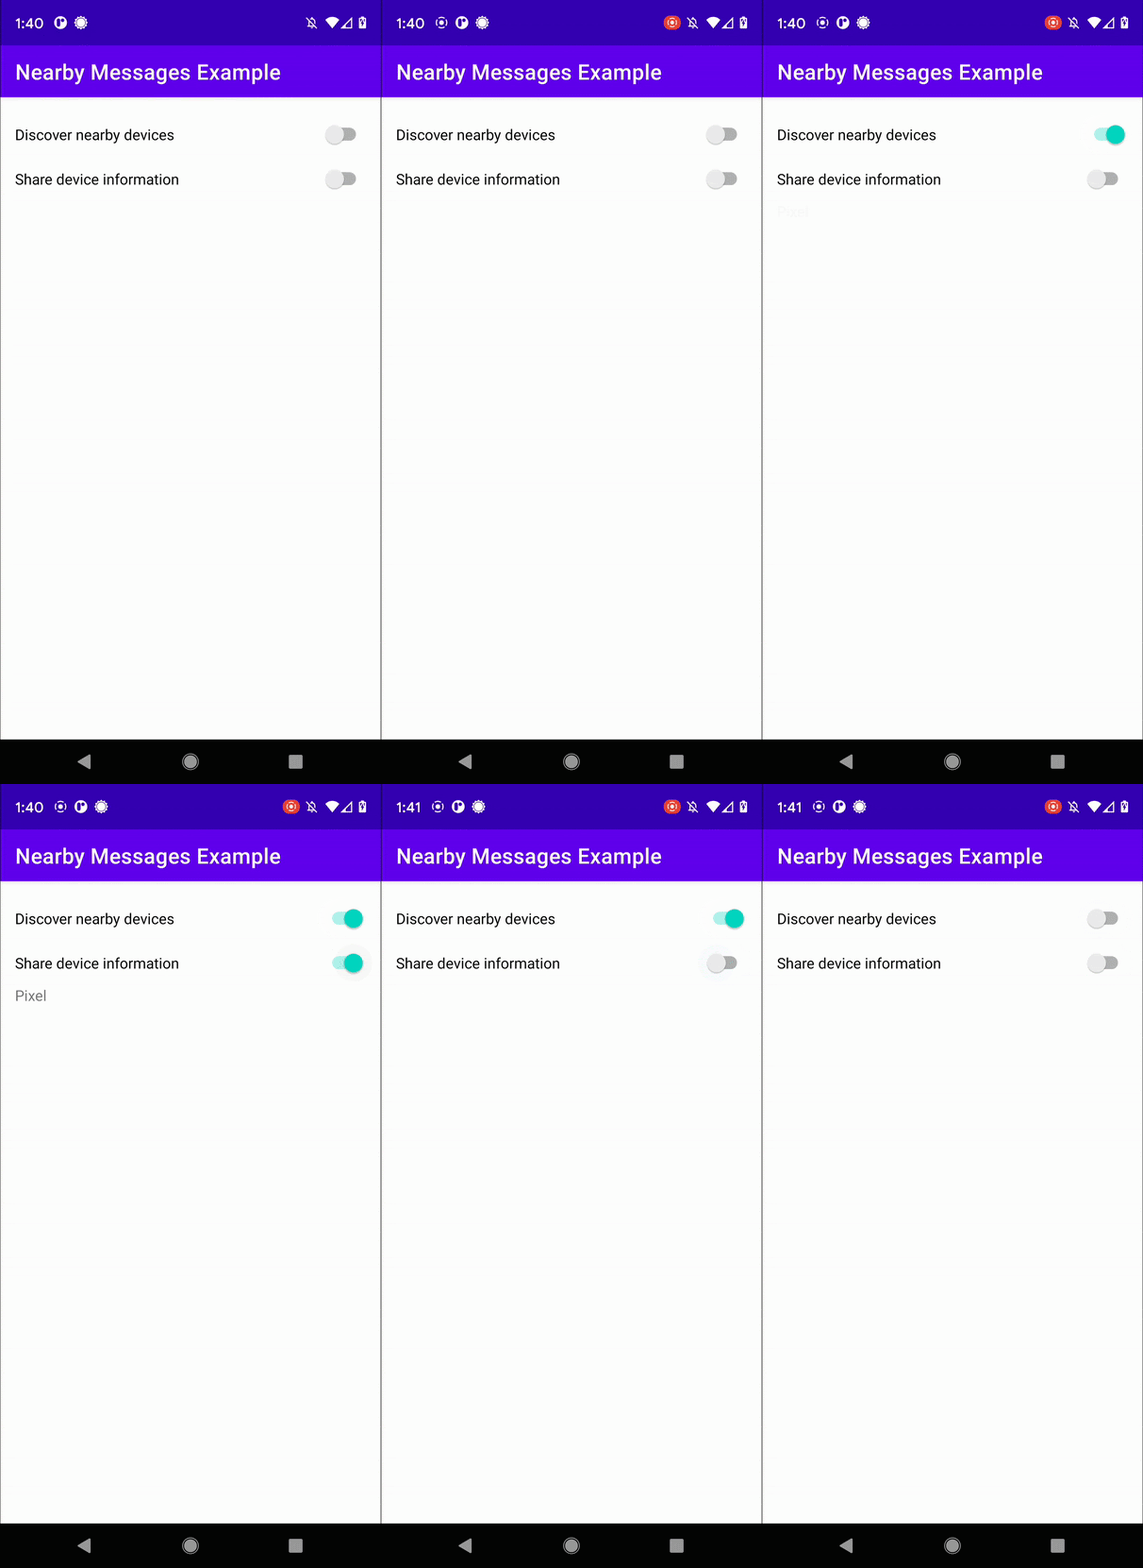
사용자가 기기 정보를 게시하고 근처 기기에 관한 정보를 수신할 수 있는 단일 Activity 앱을 빌드합니다. 앱에는 사용자가 전환할 수 있는 두 개의 스위치가 있습니다. 첫 번째 스위치는 근처 메시지를 검색하거나 검색 중지하고, 두 번째 스위치는 메시지를 게시하거나 게시 취소하는 데 사용됩니다. 임의적으로 게시와 검색이 모두 120초 후에 중지되도록 앱을 빌드하려고 합니다. 이를 위해 Nearby Messages API를 자세히 살펴보고 PublishOptions 및 SubscribeOptions 객체를 만든 다음 onExpired() 콜백을 사용하여 게시 및 수신 UI 스위치를 사용 중지하겠습니다.

2. Android 스튜디오 프로젝트 만들기
- 새 Android 스튜디오 프로젝트를 시작합니다.
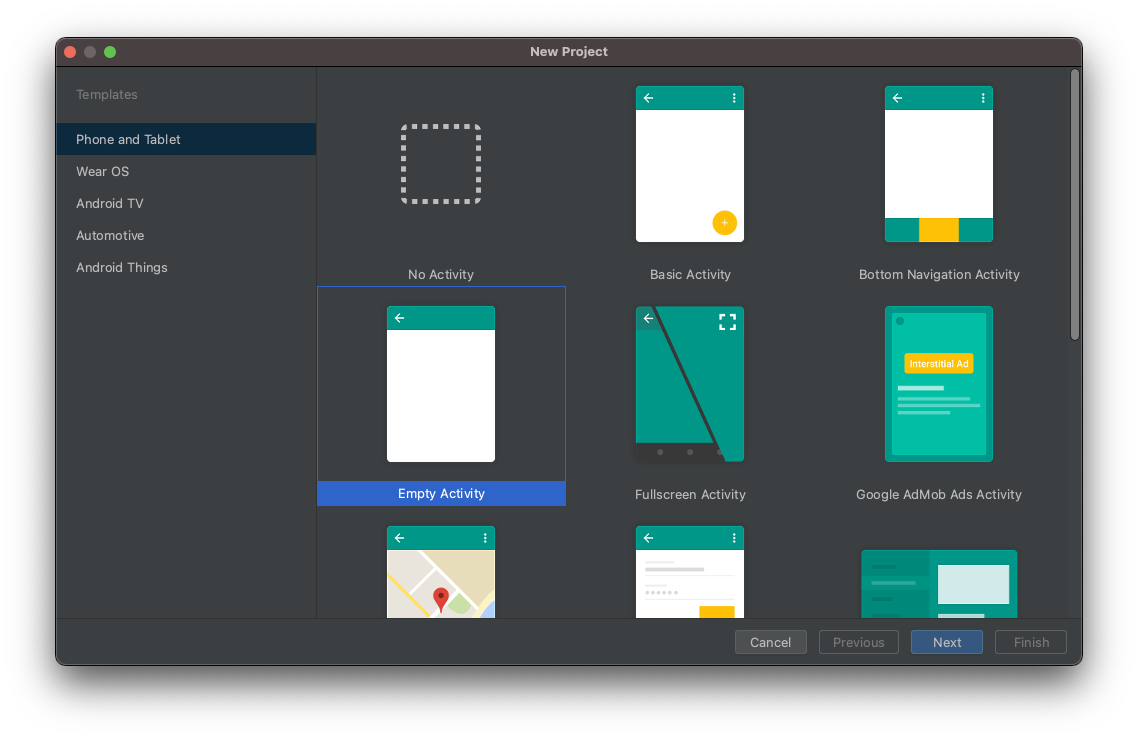
- Empty Activity를 선택합니다.

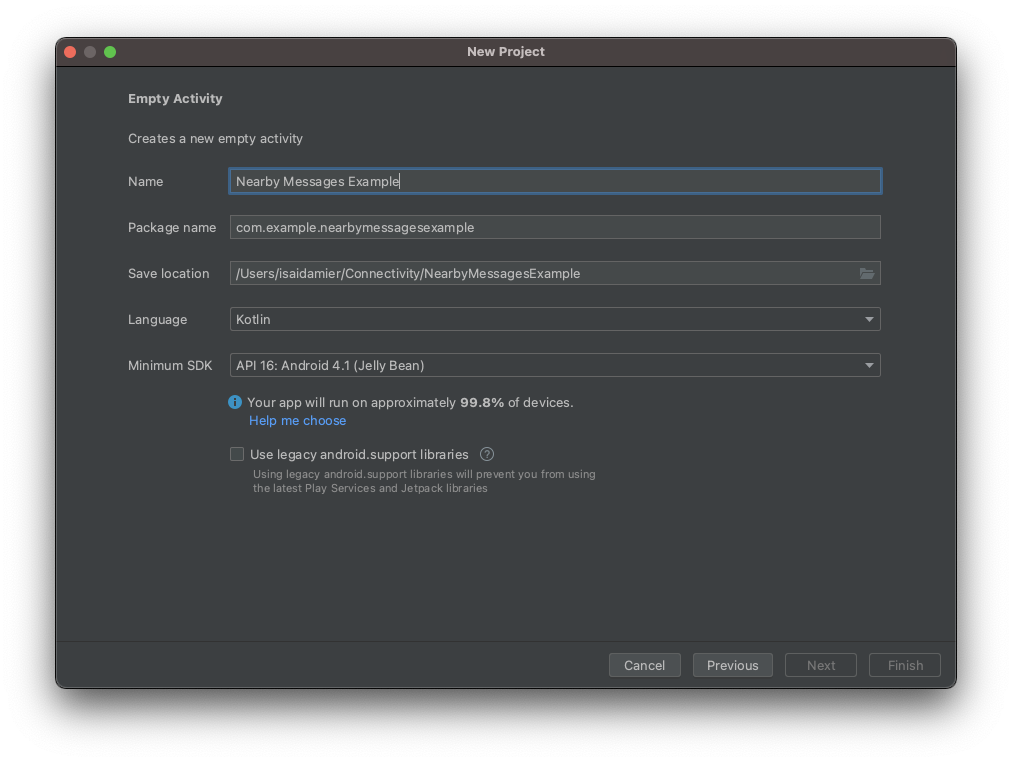
- 프로젝트의 이름을 Nearby Messages Example로 지정하고 언어를 Kotlin으로 설정합니다.

3. 코드 설정
- Nearby 종속 항목의 최신 버전을 앱 수준
build.gradle파일에 추가합니다. 이렇게 하면 Nearby Messages API를 사용하여 메시지를 보내고 근처 기기에서 보낸 메시지를 감지할 수 있습니다.
implementation 'com.google.android.gms:play-services-nearby:18.0.0'
- ViewBinding을 사용 설정하려면 Android 블록에서 viewBinding 빌드 옵션을
true로 설정합니다.
android {
   ...
   buildFeatures {
       viewBinding true
   }
}
- Sync Now 또는 녹색 망치 버튼을 클릭하여 Android 스튜디오에서 이러한 Gradle 변경사항을 등록할 수 있도록 합니다.

- '근처 기기 검색' 및 '기기 정보 공유' 전환과 기기 목록이 포함된 RecycleView를 추가합니다.
activity_main.xml파일에서 코드를 다음으로 바꿉니다.
<?xml version="1.0" encoding="utf-8"?>
<LinearLayout xmlns:android="http://schemas.android.com/apk/res/android"
   xmlns:app="http://schemas.android.com/apk/res-auto"
   xmlns:tools="http://schemas.android.com/tools"
   android:id="@+id/activity_main_container"
   android:layout_width="match_parent"
   android:layout_height="match_parent"
   android:orientation="vertical"
   android:padding="16dp"
   tools:context=".MainActivity">

   <androidx.appcompat.widget.SwitchCompat
       android:id="@+id/subscribe_switch"
       android:layout_width="match_parent"
       android:layout_height="wrap_content"
       android:text="Discover nearby devices" />

   <androidx.appcompat.widget.SwitchCompat
       android:id="@+id/publish_switch"
       android:layout_width="match_parent"
       android:layout_height="wrap_content"
       android:text="Share device information" />

   <androidx.recyclerview.widget.RecyclerView
       android:id="@+id/nearby_msg_recycler_view"
       android:layout_width="match_parent"
       android:layout_height="wrap_content"
       android:transcriptMode="alwaysScroll" />
</LinearLayout>
참고: 프로젝트에서 16dp와 같은 값을 @dimen/activity_vertical_margin과 같은 리소스로 변경합니다.
4. 앱에 Nearby Messages 추가
변수 정의
- 기본 활동(
MainActivity.kt) 내부에서onCreate()함수 위에 다음 코드 스니펫을 붙여넣어 다음 변수를 정의합니다.
/**
* For accessing layout variables
*/
private lateinit var binding: ActivityMainBinding

/**
* Sets the time to live in seconds for the publish or subscribe.
*/
private val TTL_IN_SECONDS = 120 // Two minutes.

/**
* Choose of strategies for publishing or subscribing for nearby messages.
*/
private val PUB_SUB_STRATEGY = Strategy.Builder().setTtlSeconds(TTL_IN_SECONDS).build()

/**
* The [Message] object used to broadcast information about the device to nearby devices.
*/
private lateinit var message: Message

/**
* A [MessageListener] for processing messages from nearby devices.
*/
private lateinit var messageListener: MessageListener

/**
* MessageAdapter is a custom class that we will define later. It's for adding
* [messages][Message] to the [RecyclerView]
*/
private lateinit var msgAdapter: MessageAdapter
브로드캐스트가 지속되어야 하는 기간을 맞춤설정하기 위해 Strategy를 정의했습니다. 이 Codelab에서는 120초를 선택합니다. Strategy를 지정하지 않으면 API에서 기본값을 사용합니다. 또한 이 Codelab에서는 게시와 수신 모두에 동일한 Strategy를 사용하지만 이는 필수는 아닙니다.
onCreate()함수를 변경하여 ViewBinding 객체를setContentView()로 전달합니다. 그러면activity_main.xml레이아웃 파일의 콘텐츠가 표시됩니다.
override fun onCreate(savedInstanceState: Bundle?) {
   super.onCreate(savedInstanceState)
   binding = ActivityMainBinding.inflate(layoutInflater)
   setContentView(binding.root)
}
UI 버튼 연결
스위치를 한 번 조작하여 메시지를 게시하고, 스위치를 한 번 조작하여 메시지를 검색하고, RecyclerView에 메시지를 표시하는 세 가지 작업을 하도록 앱을 빌드하겠습니다.
- 사용자가 메시지를 게시 및 게시 취소하고 메시지를 검색(즉, 수신)할 수 있도록 여기에서는
publish(),unpublish(),subscribe(),unsubscribe()라는 스텁 메서드를 만듭니다. 구현은 향후 단계에서 만들 것입니다.
private fun publish() {
   TODO("Not yet implemented")
}

private fun unpublish() {
   TODO("Not yet implemented")
}

private fun subscribe() {
   TODO("Not yet implemented")
}

private fun unsubscribe() {
   TODO("Not yet implemented")
}
- 사용자는 활동 레이아웃에 추가된 스위치를 사용하여 메시지를 게시하거나 검색(즉, 수신)할 수 있습니다. 두
Switches를 연결하여onCreate()함수의 끝에서 정의한 메서드를 호출합니다.
   binding.subscribeSwitch.setOnCheckedChangeListener { buttonView, isChecked ->
       if (isChecked) {
           subscribe()
       } else {
           unsubscribe()
       }
   }

   binding.publishSwitch.setOnCheckedChangeListener { buttonView, isChecked ->
       if (isChecked) {
           publish()
       } else {
           unpublish()
       }
   }
- 메시지를 게시하고 검색하기 위한 UI 코드를 추가했으므로 이제 메시지를 표시하고 삭제하기 위한
RecyclerView를 설정합니다.RecyclerView는 현재 게시된 메시지를 표시합니다. 수신자는 메시지를 수신 대기합니다. 메시지가 발견되면 수신자는 메시지를RecyclerView에 추가합니다. 메시지가 사라지면(예: 게시자가 메시지를 게시 중지함) 수신자가RecyclerView에서 메시지를 삭제합니다.
private fun setupMessagesDisplay() {
   msgAdapter = MessageAdapter()
   with(binding.nearbyMsgRecyclerView) {
       layoutManager = LinearLayoutManager(context)
       this.adapter = msgAdapter
   }
}

class MessageAdapter : RecyclerView.Adapter<MessageAdapter.MessageVH>() {
   private var itemsList: MutableList<String> = arrayListOf()

   override fun onCreateViewHolder(parent: ViewGroup, viewType: Int): MessageVH {
       return MessageVH(TextView(parent.context))
   }

   override fun onBindViewHolder(holder: MessageVH, position: Int) {
       holder.bind(getItem(position))
   }

   override fun getItemCount(): Int = itemsList.size

   private fun getItem(pos: Int): String? = if (itemsList.isEmpty()) null else itemsList[pos]

   fun addItem(item: String) {
       itemsList.add(item)
       notifyItemInserted(itemsList.size)
   }

   fun removeItem(item: String) {
       val pos = itemsList.indexOf(item)
       itemsList.remove(item)
       notifyItemRemoved(pos)
   }

   inner class MessageVH(private val tv: TextView) : RecyclerView.ViewHolder(tv) {
       fun bind(item: String?) {
           item?.let { tv.text = it }
       }
   }
}
onCreate()함수의 끝에setupMessagesDisplay()함수 호출을 추가합니다.
override fun onCreate(savedInstanceState: Bundle?) {
   ...
   setupMessagesDisplay()
}
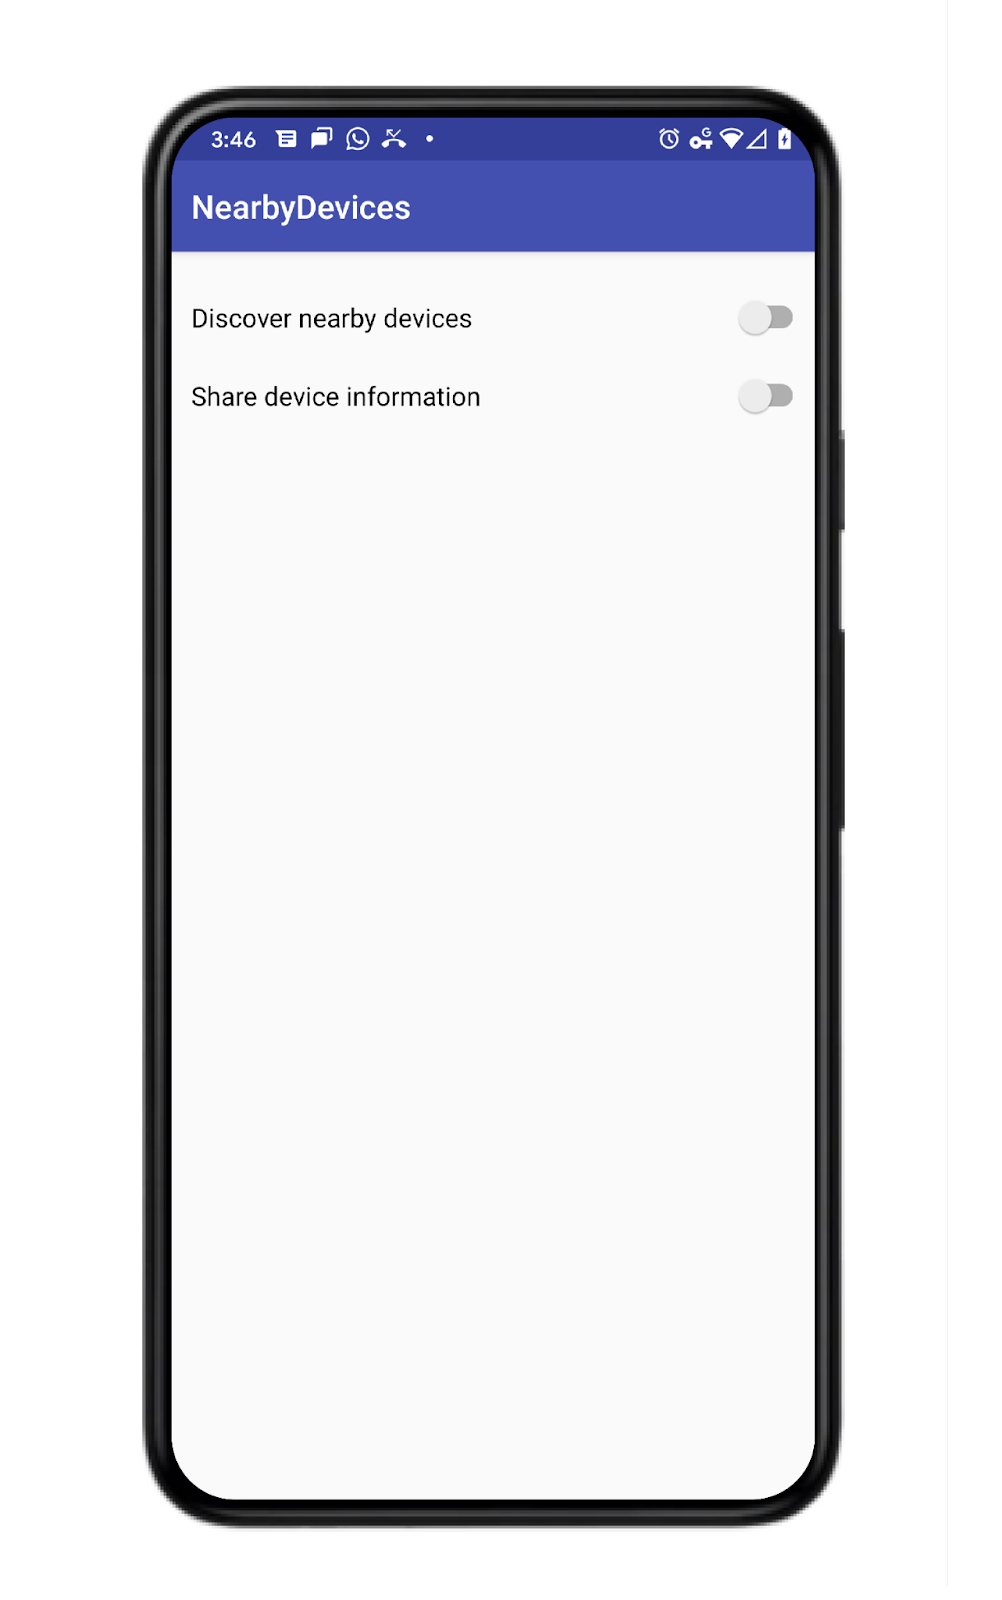
UI가 모두 설정되었으므로 이제 다른 근처 기기에서 검색할 수 있도록 메시지를 게시할 차례입니다. 이 단계에서 앱은 다음과 같이 보입니다.

게시 및 검색 코드 추가
- 메시지를 보내려면 먼저
Message객체가 필요합니다. 데모이므로 기기의 모델만 전송하겠습니다. 이 코드를onCreate()함수에 추가하여 전송할 메시지를 만듭니다.
override fun onCreate(savedInstanceState: Bundle?) {
   ...

   // The message being published is simply the Build.MODEL of the device. But since the
   // Messages API is expecting a byte array, you must convert the data to a byte array.
   message = Message(Build.MODEL.toByteArray(Charset.forName("UTF-8")))

}
- 다른 근처 기기에서 검색할 수 있는
Message를 게시하려면Nearby.getMessagesClient(activity).publish(message)를 호출하기만 하면 됩니다. 하지만 한 단계 더 나아가 자체PublishOptions객체를 빌드하는 것이 좋습니다. 이렇게 하면 나만의 맞춤Strategy를 지정하고 게시된 메시지가 만료되었을 때 알림을 전송하는PublishCallback을 활용할 수 있기 때문입니다. 다음 코드에서는 게시된TTL의 만료 시점에 사용자를 위해 스위치를 사용 중지하는 옵션을 만듭니다. 그런 다음publish()를 호출할 때 이 옵션을 전달합니다.publish()함수를 다음과 같이 업데이트합니다.
private fun publish() {
   val options = PublishOptions.Builder()
       .setStrategy(PUB_SUB_STRATEGY)
       .setCallback(object : PublishCallback() {
           override fun onExpired() {
               super.onExpired()
               // flick the switch off since the publishing has expired.
               // recall that we had set expiration time to 120 seconds
               // Use runOnUiThread to force the callback
               // to run on the UI thread
               runOnUiThread{
                   binding.publishSwitch.isChecked = false
               }
           }
       }).build()

   Nearby.getMessagesClient(this).publish(message, options)
}
이 코드는 사용자가 publish 스위치를 사용 설정할 때마다 실행됩니다.
- 게시하는 데
Message가 필요한 반면 수신하려면MessageListener가 필요합니다. 하지만 이 경우에도SubscribeOptions객체를 빌드하는 것이 좋습니다(API 작동을 위한 필수 요건은 아님). 예를 들어 나만의SubscriptionOption을 만들면 검색 모드의 지속 기간을 지정할 수 있습니다.
다음 MessageListener 코드를 onCreate() 함수에 추가합니다. 메시지가 감지되면 리스너는 메시지를 RecyclerView에 추가합니다. 메시지가 사라지면 리스너는 메시지를 RecyclerView에서 삭제합니다.
messageListener = object : MessageListener() {
   override fun onFound(message: Message) {
       // Called when a new message is found.
       val msgBody = String(message.content)
       msgAdapter.addItem(msgBody)
   }

   override fun onLost(message: Message) {
       // Called when a message is no longer detectable nearby.
       val msgBody = String(message.content)
       msgAdapter.removeItem(msgBody)
   }
}
- 엄밀히 말하면 수신자에게
TTL이 필요하지 않으며 오히려TTL을 무한대로 설정할 수 있습니다. 하지만 이 Codelab에서는 120초 후에 검색을 중지하려고 합니다. 따라서 자체SubscribeOptions를 빌드하고onExpired()콜백을 사용하여 수신 UISwitch를 사용 중지합니다. 이 코드로 수신 함수를 업데이트합니다.
private fun subscribe() {
   val options = SubscribeOptions.Builder()
       .setStrategy(PUB_SUB_STRATEGY)
       .setCallback(object : SubscribeCallback() {
           override fun onExpired() {
               super.onExpired()
               // flick the switch off since the subscribing has expired.
               // recall that we had set expiration time to 120 seconds
               // Use runOnUiThread to force the callback
               // to run on the UI thread
               runOnUiThread {
                   binding.subscribeSwitch.isChecked = false
               }
           }
       }).build()

   Nearby.getMessagesClient(this).subscribe(messageListener, options)
}
- 사용자가 정보 공유를 사용 중지할 수 있도록 허용하는 것이 중요합니다. 즉, 게시자가 게시를 중지할 수 있고 수신자가 수신을 중지할 수 있도록 해야 합니다. 게시를 중지하려면 게시자는 게시를 중지할 메시지를 지정해야 합니다. 따라서 브로드캐스트되는 메시지가 10개라면 메시지 하나만 게시 중지하고 9개를 유지할 수 있습니다.
private fun unpublish() {
   Nearby.getMessagesClient(this).unpublish(message)
}
- 앱은 동시에 여러 메시지를 게시할 수 있지만 한 번에 하나의
MessageListener만 보유할 수 있습니다. 따라서 수신 거부가 더 일반적입니다. 수신을 중지하려면 수신자가 리스너를 지정해야 합니다.
private fun unsubscribe() {
   Nearby.getMessagesClient(this).unsubscribe(messageListener)
}
- 참고로 클라이언트 프로세스가 종료되면 API에서 프로세스를 종료해야 하지만
onDestroy()수명 주기 메서드에서 수신(및 편의상 필요한 경우 게시)을 중지할 수도 있습니다.
override fun onDestroy() {
   super.onDestroy()
   // although the API should shutdown its processes when the client process dies,
   // you may want to stop subscribing (and publishing if convenient)
   Nearby.getMessagesClient(this).unpublish(message)
   Nearby.getMessagesClient(this).unsubscribe(messageListener)
}
이제 코드가 컴파일됩니다. 하지만 API 키가 누락되어 있으므로 앱이 제대로 작동하지 않습니다. MainActivity가 다음과 같아야 합니다.
package com.example.nearbymessagesexample

import android.os.Build
import android.os.Bundle
import android.view.ViewGroup
import android.widget.TextView
import androidx.appcompat.app.AppCompatActivity
import androidx.recyclerview.widget.LinearLayoutManager
import androidx.recyclerview.widget.RecyclerView
import com.example.nearbymessagesexample.databinding.ActivityMainBinding
import com.google.android.gms.nearby.Nearby
import com.google.android.gms.nearby.messages.Message
import com.google.android.gms.nearby.messages.MessageListener
import com.google.android.gms.nearby.messages.PublishCallback
import com.google.android.gms.nearby.messages.PublishOptions
import com.google.android.gms.nearby.messages.Strategy
import com.google.android.gms.nearby.messages.SubscribeCallback
import com.google.android.gms.nearby.messages.SubscribeOptions
import java.nio.charset.Charset

class MainActivity : AppCompatActivity() {

   /**
    * For accessing layout variables
    */
   private lateinit var binding: ActivityMainBinding

   /**
    * Sets the time to live in seconds for the publish or subscribe.
    */
   private val TTL_IN_SECONDS = 120 // Two minutes.

   /**
    * Choose of strategies for publishing or subscribing for nearby messages.
    */
   private val PUB_SUB_STRATEGY = Strategy.Builder().setTtlSeconds(TTL_IN_SECONDS).build()

   /**
    * The [Message] object used to broadcast information about the device to nearby devices.
    */
   private lateinit var message: Message

   /**
    * A [MessageListener] for processing messages from nearby devices.
    */
   private lateinit var messageListener: MessageListener

   /**
    * For adding [messages][Message] to the [RecyclerView]
    */
   private lateinit var msgAdapter: MessageAdapter

   override fun onCreate(savedInstanceState: Bundle?) {
       super.onCreate(savedInstanceState)
       binding = ActivityMainBinding.inflate(layoutInflater)
       setContentView(binding.root)

       binding.subscribeSwitch.setOnCheckedChangeListener { buttonView, isChecked ->
           if (isChecked) {
               subscribe()
           } else {
               unsubscribe()
           }
       }

       binding.publishSwitch.setOnCheckedChangeListener { buttonView, isChecked ->
           if (isChecked) {
               publish()
           } else {
               unpublish()
           }
       }
       setupMessagesDisplay()

       // The message being published is simply the Build.MODEL of the device. But since the
       // Messages API is expecting a byte array, you must convert the data to a byte array.
       message = Message(Build.MODEL.toByteArray(Charset.forName("UTF-8")))

       messageListener = object : MessageListener() {
           override fun onFound(message: Message) {
               // Called when a new message is found.
               val msgBody = String(message.content)
               msgAdapter.addItem(msgBody)
           }

           override fun onLost(message: Message) {
               // Called when a message is no longer detectable nearby.
               val msgBody = String(message.content)
               msgAdapter.removeItem(msgBody)
           }
       }

   }

   override fun onDestroy() {
       super.onDestroy()
       // although the API should shutdown its processes when the client process dies,
       // you may want to stop subscribing (and publishing if convenient)
       Nearby.getMessagesClient(this).unpublish(message)
       Nearby.getMessagesClient(this).unsubscribe(messageListener)
   }

   private fun publish() {
       val options = PublishOptions.Builder()
           .setStrategy(PUB_SUB_STRATEGY)
           .setCallback(object : PublishCallback() {
               override fun onExpired() {
                   super.onExpired()
                   // flick the switch off since the publishing has expired.
                   // recall that we had set expiration time to 120 seconds
                   runOnUiThread {
                       binding.publishSwitch.isChecked = false
                   }
                   runOnUiThread() {
                       binding.publishSwitch.isChecked = false
                   }
               }
           }).build()

       Nearby.getMessagesClient(this).publish(message, options)
   }

   private fun unpublish() {
       Nearby.getMessagesClient(this).unpublish(message)
   }

   private fun subscribe() {
       val options = SubscribeOptions.Builder()
           .setStrategy(PUB_SUB_STRATEGY)
           .setCallback(object : SubscribeCallback() {
               override fun onExpired() {
                   super.onExpired()
                   runOnUiThread {
                       binding.subscribeSwitch.isChecked = false
                   }
               }
           }).build()

       Nearby.getMessagesClient(this).subscribe(messageListener, options)
   }

   private fun unsubscribe() {
       Nearby.getMessagesClient(this).unsubscribe(messageListener)
   }

   private fun setupMessagesDisplay() {
       msgAdapter = MessageAdapter()
       with(binding.nearbyMsgRecyclerView) {
           layoutManager = LinearLayoutManager(context)
           this.adapter = msgAdapter
       }
   }

   class MessageAdapter : RecyclerView.Adapter<MessageAdapter.MessageVH>() {
       private var itemsList: MutableList<String> = arrayListOf()

       override fun onCreateViewHolder(parent: ViewGroup, viewType: Int): MessageVH {
           return MessageVH(TextView(parent.context))
       }

       override fun onBindViewHolder(holder: MessageVH, position: Int) {
           holder.bind(getItem(position))
       }

       override fun getItemCount(): Int = itemsList.size

       private fun getItem(pos: Int): String? = if (itemsList.isEmpty()) null else itemsList[pos]

       fun addItem(item: String) {
           itemsList.add(item)
           notifyItemInserted(itemsList.size)
       }

       fun removeItem(item: String) {
           val pos = itemsList.indexOf(item)
           itemsList.remove(item)
           notifyItemRemoved(pos)
       }

       inner class MessageVH(private val tv: TextView) : RecyclerView.ViewHolder(tv) {
           fun bind(item: String?) {
               item?.let { tv.text = it }
           }
       }
   }
}
매니페스트 파일에 Google의 API 키 추가
Nearby Messages API에는 Google에서 개발자에게 제공하는 서버 구성요소가 있습니다. 메시지를 게시하면 Nearby Messages API는 실제로 Google 서버에 메시지를 보냅니다. 그러면 수신자가 서버에서 메시지를 쿼리할 수 있습니다. Google에서 앱을 인식할 수 있도록 Google에서 제공한 API_KEY를 Manifest.xml 파일에 추가해야 합니다. 그런 다음에는 앱을 실행하고 플레이만 하면 됩니다.
API 키를 가져오는 단계는 세 단계로 이루어집니다.
- Google Play Console로 이동합니다.
- + 사용자 인증 정보 만들기를 클릭하고 API 키*.*를 선택합니다.
- 생성된 API 키를 복사하여 Android 프로젝트의 매니페스트 파일에 붙여넣습니다.
매니페스트 파일 내 애플리케이션에 com.google.android.nearby.messages.API_KEY 메타데이터 항목을 추가합니다. 파일은 다음과 같이 표시됩니다.
<?xml version="1.0" encoding="utf-8"?>
<manifest xmlns:android="http://schemas.android.com/apk/res/android"
   package="com.example.nearbymessagesexample">

   <application
       android:allowBackup="true"
       android:icon="@mipmap/ic_launcher"
       android:label="@string/app_name"
       android:roundIcon="@mipmap/ic_launcher_round"
       android:supportsRtl="true"
       android:theme="@style/Theme.NearbyMessagesExample">

       <meta-data
           android:name="com.google.android.nearby.messages.API_KEY"
           android:value="ADD_KEY_HERE" />

       <activity android:name=".MainActivity">
           <intent-filter>
               <action android:name="android.intent.action.MAIN" />

               <category android:name="android.intent.category.LAUNCHER" />
           </intent-filter>
       </activity>
   </application>

</manifest>
API 키를 추가한 후 두 대 이상의 기기에서 앱을 실행하여 서로 통신하는지 확인합니다.

5. 배터리 수명을 위한 권장사항
- 사용자 개인 정보를 보호하고 배터리 수명을 유지하려면 기능이 필요한 위치에서 사용자가 기능을 종료하는 즉시 게시와 수신을 중지해야 합니다.
- 기기가 서로 가까워지기 위해서는 Nearby Messages를 사용해야 하지만, 지속적으로 통신할 때는 Nearby Messages가 필요하지 않습니다. 지속적으로 통신하면 기기 배터리가 평소보다 2.5~3.5배 빠르게 소모될 수 있습니다.
6. 축하합니다
축하합니다. 이제 Nearby Messages API를 사용하여 근처 기기 간에 메시지를 전송하고 검색하는 방법을 알게 되었습니다.
요약하자면 Nearby Messages API를 사용하기 위해서는 play-services-nearby에 종속 항목을 추가하고 Google Play Console에서 API 키를 가져와 Manifest.xml 파일에 추가해야 합니다. 게시자가 Google 서버에 메시지를 전송하여 수신자가 받아볼 수 있도록 하려면 API 사용 시 인터넷에 연결되어 있어야 합니다.
- 메시지를 보내는 방법을 알아봤습니다.
- 메시지를 검색하여 수신하는 방법을 알아봤습니다.
- 메시지 사용 방법을 알아봤습니다(이 경우
RecyclerView에 메시지를 표시하기만 하면 됨).
다음 단계는 무엇인가요?
블로그 시리즈 및 샘플을 확인해 보세요.
