
Hacer que los objetos se muevan de acuerdo con un programa preestablecido como el triángulo que rota es útil para
captar algo de atención, pero ¿y si quieres que los usuarios interactúen con tus gráficos de OpenGL ES?
La clave para que tu aplicación de OpenGL ES sea interactiva táctil es expandir tu implementación de
GLSurfaceView para anular el
onTouchEvent() para escuchar eventos táctiles.
En esta lección, se muestra cómo escuchar eventos táctiles para permitir que los usuarios roten un objeto de OpenGL ES.
Cómo configurar un objeto de escucha táctil
Para que tu aplicación OpenGL ES responda a eventos táctiles, debes implementar el
onTouchEvent() en tu
Clase GLSurfaceView. En la siguiente implementación de ejemplo, se muestra cómo escuchar
MotionEvent.ACTION_MOVE y traducirlos al
un ángulo de rotación de una forma.
Kotlin
private const val TOUCH_SCALE_FACTOR: Float = 180.0f / 320f
...
private var previousX: Float = 0f
private var previousY: Float = 0f

override fun onTouchEvent(e: MotionEvent): Boolean {
    // MotionEvent reports input details from the touch screen
    // and other input controls. In this case, you are only
    // interested in events where the touch position changed.

    val x: Float = e.x
    val y: Float = e.y

    when (e.action) {
        MotionEvent.ACTION_MOVE -> {

            var dx: Float = x - previousX
            var dy: Float = y - previousY

            // reverse direction of rotation above the mid-line
            if (y > height / 2) {
                dx *= -1
            }

            // reverse direction of rotation to left of the mid-line
            if (x < width / 2) {
                dy *= -1
            }

            renderer.angle += (dx + dy) * TOUCH_SCALE_FACTOR
            requestRender()
        }
    }

    previousX = x
    previousY = y
    return true
}
Java
private final float TOUCH_SCALE_FACTOR = 180.0f / 320;
private float previousX;
private float previousY;

@Override
public boolean onTouchEvent(MotionEvent e) {
    // MotionEvent reports input details from the touch screen
    // and other input controls. In this case, you are only
    // interested in events where the touch position changed.

    float x = e.getX();
    float y = e.getY();

    switch (e.getAction()) {
        case MotionEvent.ACTION_MOVE:

            float dx = x - previousX;
            float dy = y - previousY;

            // reverse direction of rotation above the mid-line
            if (y > getHeight() / 2) {
              dx = dx * -1 ;
            }

            // reverse direction of rotation to left of the mid-line
            if (x < getWidth() / 2) {
              dy = dy * -1 ;
            }

            renderer.setAngle(
                    renderer.getAngle() +
                    ((dx + dy) * TOUCH_SCALE_FACTOR));
            requestRender();
    }

    previousX = x;
    previousY = y;
    return true;
}
Ten en cuenta que, después de calcular el ángulo de rotación, este método llama
requestRender() para indicarle
representativo de que es el momento
de renderizar el fotograma. Este enfoque es el más eficiente en este ejemplo
porque no es necesario volver a dibujar el marco, a menos que haya un cambio en la rotación. Sin embargo,
no tiene ningún impacto en la eficiencia, a menos que también solicites que el renderizador solo vuelva a dibujar cuando
los datos cambian con setRenderMode()
así que asegúrate de que esta línea no esté comentada en el procesador:
Kotlin
class MyGlSurfaceView(context: Context) : GLSurfaceView(context) {

    init {
        // Render the view only when there is a change in the drawing data
        renderMode = GLSurfaceView.RENDERMODE_WHEN_DIRTY
    }
}
Java
public MyGLSurfaceView(Context context) {
    ...
    // Render the view only when there is a change in the drawing data
    setRenderMode(GLSurfaceView.RENDERMODE_WHEN_DIRTY);
}
Expón el ángulo de rotación
El código de ejemplo anterior requiere que expongas el ángulo de rotación a través del renderizador. Para ello, haz lo siguiente:
agregando un miembro público. Dado que el código del procesador se ejecuta en un subproceso independiente del usuario principal
de la aplicación, debes declarar esta variable pública como volatile.
Aquí está el código para declarar la variable y exponer el par captador y establecedor:
Kotlin
class MyGLRenderer4 : GLSurfaceView.Renderer {

    @Volatile
    var angle: Float = 0f
}
Java
public class MyGLRenderer implements GLSurfaceView.Renderer {
    ...

    public volatile float mAngle;

    public float getAngle() {
        return mAngle;
    }

    public void setAngle(float angle) {
        mAngle = angle;
    }
}
Cómo aplicar rotación
Para aplicar la rotación generada por la entrada táctil, comenta el código que genera un ángulo y Agrega una variable que contenga el ángulo generado por la entrada táctil:
Kotlin
override fun onDrawFrame(gl: GL10) {
    ...
    val scratch = FloatArray(16)

    // Create a rotation for the triangle
    // long time = SystemClock.uptimeMillis() % 4000L;
    // float angle = 0.090f * ((int) time);
    Matrix.setRotateM(rotationMatrix, 0, angle, 0f, 0f, -1.0f)

    // Combine the rotation matrix with the projection and camera view
    // Note that the mvpMatrix factor *must be first* in order
    // for the matrix multiplication product to be correct.
    Matrix.multiplyMM(scratch, 0, mvpMatrix, 0, rotationMatrix, 0)

    // Draw triangle
    triangle.draw(scratch)
}
Java
public void onDrawFrame(GL10 gl) {
    ...
    float[] scratch = new float[16];

    // Create a rotation for the triangle
    // long time = SystemClock.uptimeMillis() % 4000L;
    // float angle = 0.090f * ((int) time);
    Matrix.setRotateM(rotationMatrix, 0, mAngle, 0, 0, -1.0f);

    // Combine the rotation matrix with the projection and camera view
    // Note that the vPMatrix factor *must be first* in order
    // for the matrix multiplication product to be correct.
    Matrix.multiplyMM(scratch, 0, vPMatrix, 0, rotationMatrix, 0);

    // Draw triangle
    mTriangle.draw(scratch);
}
Cuando hayas completado los pasos descritos anteriormente, ejecuta el programa y arrastra el dedo sobre el pantalla para rotar el triángulo:
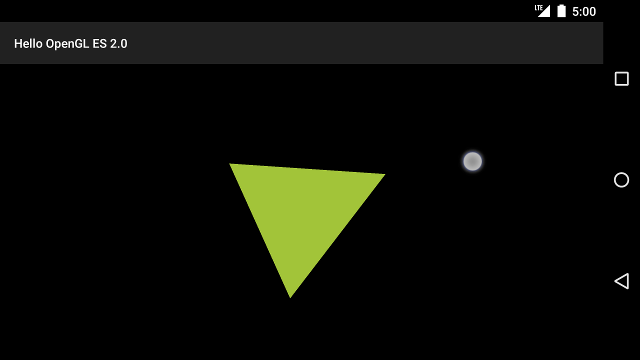
Figura 1: Triángulo rotado con entrada táctil (el círculo muestra el tacto ubicación).