[Concepts and Jetpack Compose implementation](https://developer.android.com/studio/write/translations-editor)
The Translations Editor provides a consolidated and editable view of all of your
default and translated [string resources](https://developer.android.com/guide/topics/resources/string-resource).
For an introduction to translating your app for different languages, read
[Support different languages and cultures](https://developer.android.com/training/basics/supporting-devices/languages).
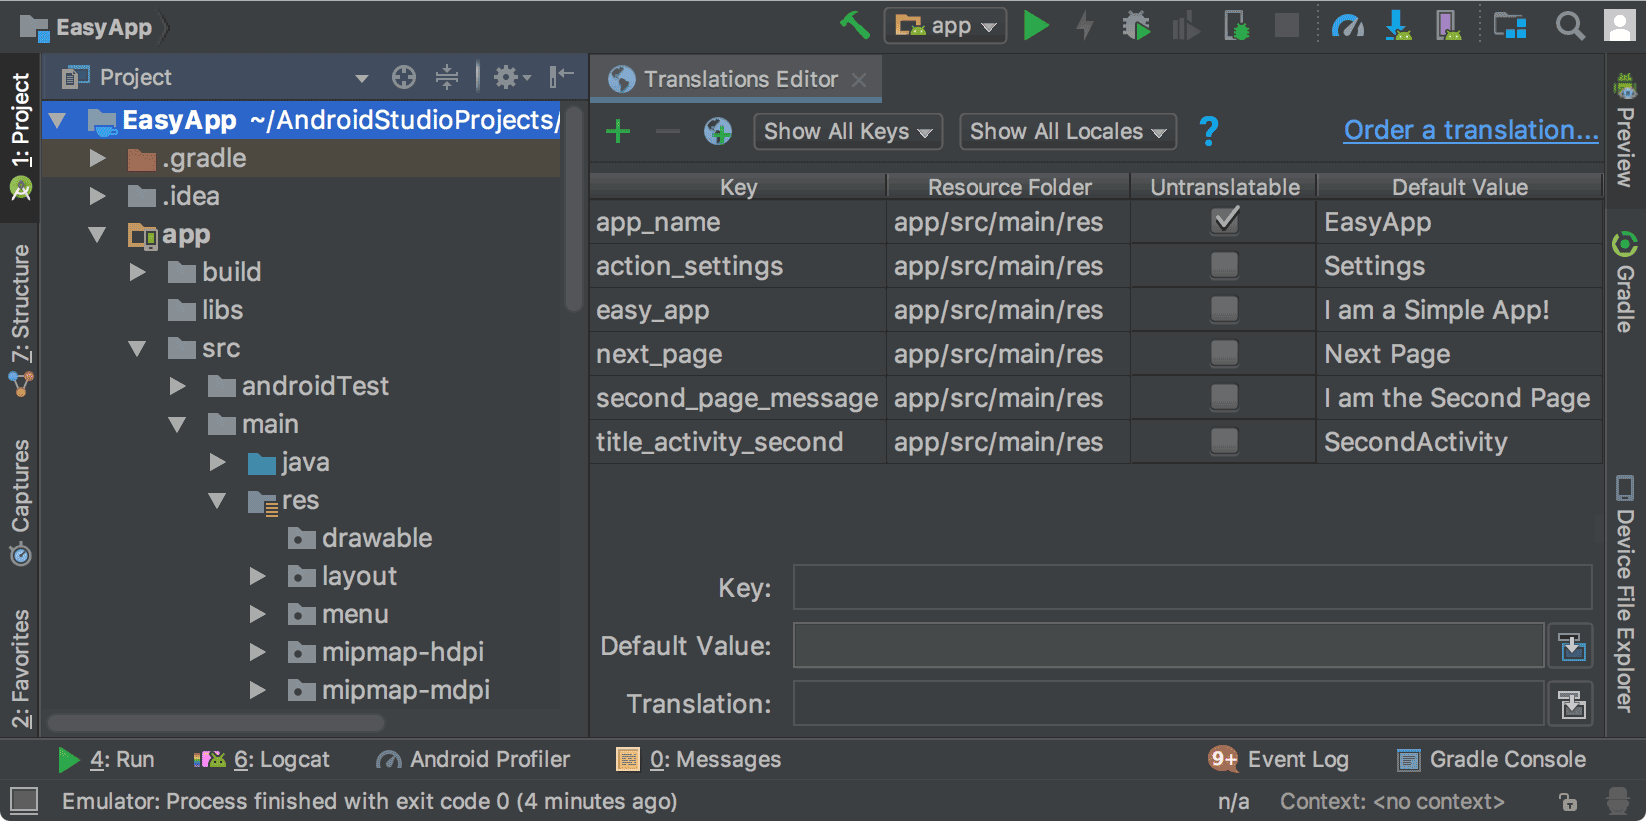
**Figure 1.** The **Translations Editor** showing app text before
translation
## Open the Translations Editor from the Design Editor
You can open the **Translations Editor** from the Layout Editor's Design Editor
to edit your default and translated text to better fit your layout. For
information about switching languages in the Design Editor, see [Display
translated text in the Design Editor](https://developer.android.com/studio/views/translations-editor-views#display-translated).
1. In the **Project \> Android** panel on the left, select **ModuleName \> res \> layout**.
2. Double-click **content_main.xml** to open it for editing.
3. Click the **Design** tab in the lower-left corner to display the **Design** Editor.
4. In the Design Editor, select the **Language**  drop-down list.
5. Select **Edit Translations** .
## Display translated text in the Design Editor
To see how the translated text displays in your app layout, toggle the text
between the default and translated versions in the Design Editor, as follows:
1. In the **Project \> Android** panel on the left, select **ModuleName \> res \> layout**.
2. Double-click **content_main.xml** to open it for editing.
3. Click the **Design** tab in the lower-left corner to display the **Design** Editor.
4. In the Design Editor, select the **Language**  drop-down list.
5. Select **Edit Translations** .
6. Select the language you want to use to view your app.

**Figure 2.** The language drop-down list with Spanish selected
The Design Editor displays your app layout in the selected language, which in this case is
Spanish.

**Figure 3.** The Design Editor displaying translated text in
Spanish
## Set the Design Editor to the default language
To set the language back to the default, select **es \> Language**
.
## Manage and test localizable text
The Android platform and Android Studio provide several features to help you
manage and test your localizable app text. These features have options to help
you target issues with right-to-left (RTL) scripts, such as Arabic or Hebrew.
Testing your localizable text lets you make adjustments to the UI text and
its layout before you commit your messages to the source repository to be sent
for translation later.
### Refactor your project for RTL support
Android Studio has a refactoring command that enables support for bidirectional
text in [`TextView`](https://developer.android.com/reference/android/widget/TextView), [`ConstraintLayout`](https://developer.android.com/reference/androidx/constraintlayout/widget/ConstraintLayout), and [`LinearLayout`](https://developer.android.com/reference/android/widget/LinearLayout)
elements so your apps can display and allow users to edit text in both
left-to-right (LTR) and right-to-left (RTL) scripts. The command also provides
automatic mirroring of app UI layouts and all view widgets. To see the text
direction change and the layout mirroring, you must also set the [text and
layout direction properties](https://developer.android.com/studio/views/translations-editor-views#text-and) in the [Layout Editor](https://developer.android.com/studio/views/layout-editor).
The following procedure shows how to refactor your project for RTL support:
1. Select **Refactor \> Add RTL support where possible** to display the dialog shown in figure 4. 
**Figure 4.** Add RTL support
- If the `` element in your `AndroidManifest.xml` file does not have the `android:supportsRTL="true"` attribute, then select the **Update AndroidManifest.xml** checkbox.
- If your app's `targetSdkVersion` is 17 or higher, select **Replace
Left/Right Properties with Start/End Properties** . In this case, your properties should use "start" and "end" instead of "left" and "right". For example, `android:paddingLeft` becomes `android:paddingStart`.
- If your app's `targetSdkVersion` is 16 or less, select **Generate -v17
Versions** In this case, your XML should use both sets of properties. For example, your XML should use both `android:paddingLeft` and `android:paddingStart`.
2. To display the **Find Refactoring Preview** window, click **Run** . 
**Figure 5.** Check the preview
3. Click **Do Refactor**.
For more information about refactoring your project for RTL support, see [Native
RTL support in Android 4.2](https://android-developers.googleblog.com/2013/03/native-rtl-support-in-android-42.html).
### Text and layout direction properties
The Properties window on the right provides the **textDirection** property to
use with text widgets and the **layoutDirection** property to use with layout
widgets to change the direction of text and layout components. The direction
properties are listed in the **Properties** window on the right, and work with
API Level 17 or higher.
To see the text direction change and the layout mirroring, you must also
[refactor](https://developer.android.com/studio/views/translations-editor-views#refactor-project) the project for RTL support. In English, the text direction
change moves only punctuation from the right side to the left side of the text;
for example, "Hello World!" becomes "!Hello World". To see LTR text switch to
RTL, you have to use an RTL language in your app. If you want to use English and
see the text switch to RTL for testing purposes, use [pseudolocales](https://developer.android.com/studio/write/translations-editor#pseudolocales).
Pseudolocales are independent of the refactoring command and the direction
properties.
To access and use the direction properties, do the following:
1. In the [Layout Editor](https://developer.android.com/studio/views/layout-editor#intro), select a text widget.
2. Open the **Properties** window and search for the RTL property you want to
use. To set the property value, select one of the following:
- **firstStrong**: Default for the root view. The first strong directional character determines the paragraph direction. If there is no strong directional character, the paragraph direction is the view's resolved layout direction.
- **anyRtl**: The paragraph direction is RTL if it contains any strong RTL character; otherwise, it is LTR if it contains any strong LTR characters. If there are neither, the paragraph direction is the view's resolved layout direction.
- **ltr**: The paragraph direction is LTR.
- **rtl**: The paragraph direction is RTL.
- **locale**: The paragraph direction comes from the system locale.
- **inherit**: Default. Use the direction set in the parent.
**Note**: Strong directional characters have their own predefined direction,
such as most alphabetic and syllabic characters, non-European and non-Arabic
digits, Han ideographs, and punctuation characters that are specific to only
those scripts.
3. To review the reversed text and layout, run the app.