On the Android Emulator, you can use a proxy to debug application traffic or to
access the internet from behind a corporate firewall. The emulator offers two
distinct proxy mechanisms to support these different use cases: the Android
System Proxy and the Emulator Proxy.
## Choosing the Right Proxy
Before configuring a proxy, it's important to understand the two use cases. The
**Android System Proxy** is for inspecting application traffic, while the
**Emulator Proxy** is for navigating network restrictions. These two proxies are
mutually exclusive; you can only have one enabled at a time.
| Feature | Android System Proxy | Emulator Proxy |
|---|---|---|
| **Primary Use Case** | [App Debugging](https://developer.android.com/studio/run/emulator-networking-proxy#application-debugging) | [Firewall Bypass](https://developer.android.com/studio/run/emulator-networking-proxy#firewall-traversal) |
| **Operating Layer** | Network Layer | Application Layer |
| **Configuration** | Android System Wi-Fi Settings UI | Emulator Extended Controls UI or `-http-proxy` flag. |
| **HTTPS Debugging** | **Yes** - Allows tools like Charles Proxy to intercept traffic when a certificate is installed. | **No** - Creates a TCP tunnel, preventing SSL inspection. |
| **Handles Non-HTTP/HTTPS Traffic** | **No** - Primarily handles only HTTP and HTTPS traffic. | **Yes** - Forwards all TCP traffic. |
## Use Case 1: Application Debugging with Android System Proxy
For debugging your application's network traffic, such as inspecting HTTPS
requests with a tool like Charles Proxy, you should use the **Android System
Proxy**.
This proxy operates at the application layer within the Android OS. It allows
debugging tools to intercept and inspect traffic, but this requires installing
the necessary security certificates on the emulated device.
> [!NOTE]
> **Note:** This proxy is used by web browsers and most applications, but some apps may ignore the system's proxy settings.

### Configuration
You can configure the Android System Proxy in two ways:
1. **Manual Configuration** : In the emulator, go to **Settings \> Network \&
Internet \> Wi-Fi**, select your network, and manually enter the proxy settings.
2. **Automated Configuration** : You can programmatically configure the Android System Proxy. This is done by creating an instrumentation test that uses a UI automation framework, such as [UI
Automator](https://developer.android.com/training/testing/other-components/ui-automator), to open the Android Settings app and apply the proxy configuration without manual intervention.
## Use Case 2: Bypassing Corporate Firewalls with Emulator Proxy
On many corporate networks, direct connections to the internet are refused by
network administrators and must instead pass through a specific proxy. To access
external resources from within such a restricted network, you should use the
**Emulator Proxy**.
This mechanism operates at a lower network level and routes all of the emulated
device's TCP traffic through the specified proxy, making it ideal for firewall
traversal. It transparently rewrites HTTP requests from the virtual device
before sending them to the proxy, allowing them to work correctly.
#### Configuration
When using the emulator **within Android Studio** , you can configure a proxy
with the settings in the Android Studio Menu (
`Settings > Appearance & Behavior > System Settings > HTTP Proxy`). You can
find more details at
[Set up the Android Studio proxy](https://developer.android.com/studio/intro/studio-config#setup-proxy)
in the Android Studio documentation.
When using the emulator as standalone (**outside of Android Studio**), you can
configure the Emulator Proxy using one of the following methods:
1. **Command-Line Flag** : Launch the emulator from the command line with the
`-http-proxy ` flag. The `` information can be specified in
the format `http://:` or
`http://:@:`.
emulator -http-proxy http://:
or
emulator @MyAvd -http-proxy http://:@:
2. **Environment Variable** : Define the `http_proxy` environment variable with
your proxy settings. The emulator checks for this variable at startup and
uses its value automatically if it is defined.
3. **Extended Controls** : Open the emulator's **Extended controls** , navigate
to **Settings \> Proxy**, and manually enter your HTTP proxy configuration.
The emulator saves these settings for the device and restores them on
restart.
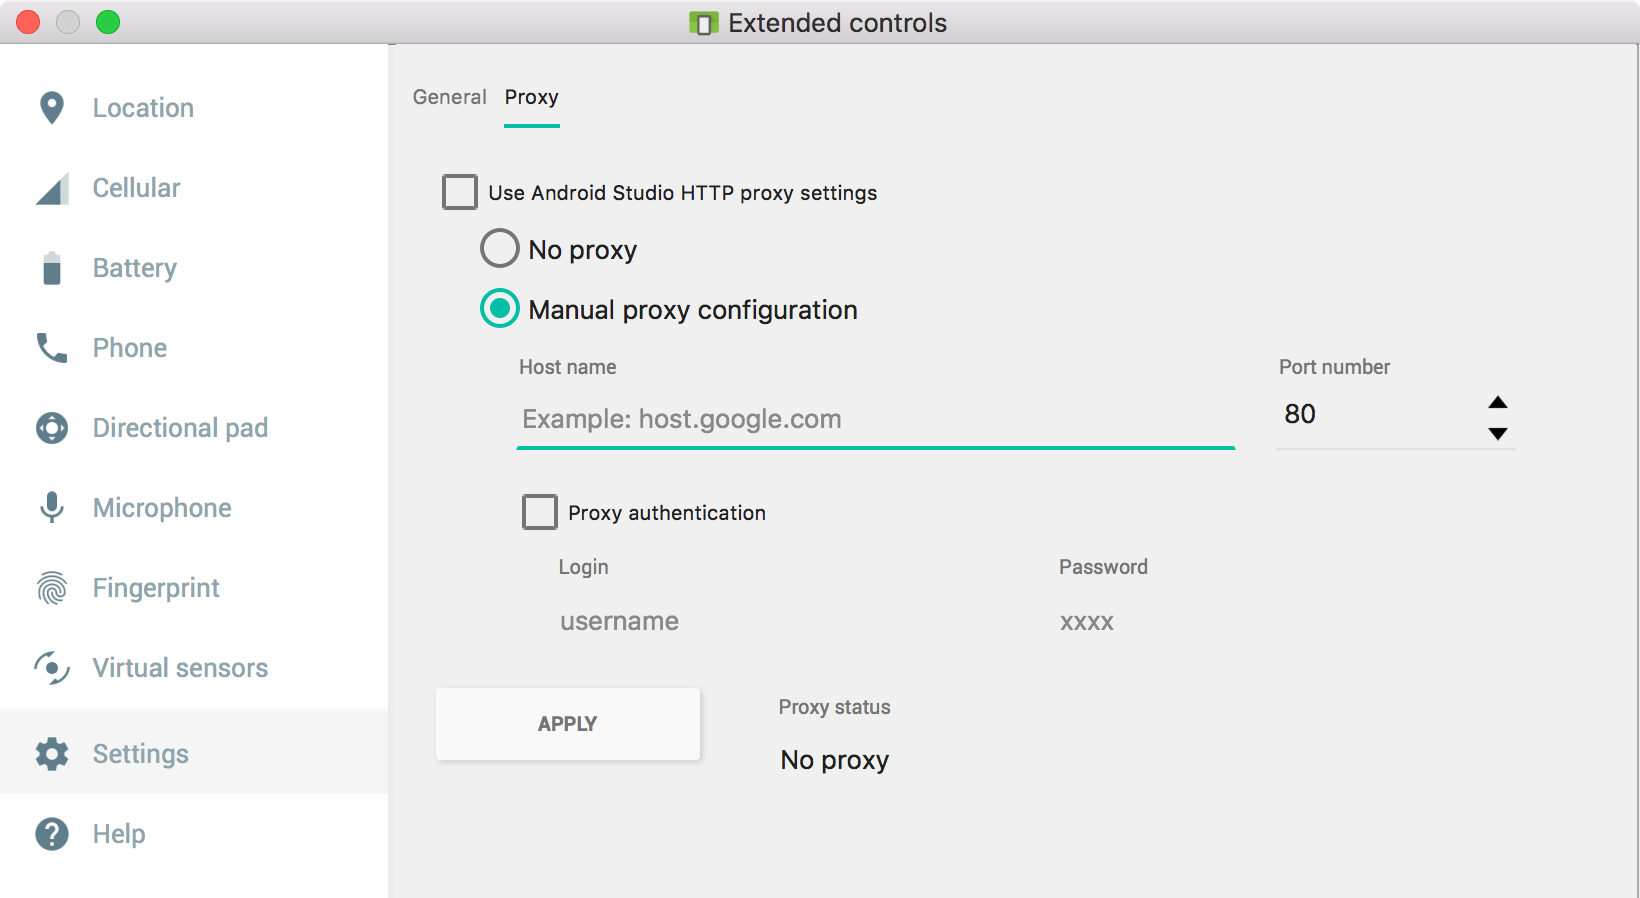
> [!NOTE]
> **Note:** After applying settings through the Extended Controls UI, you must restart the emulator for the changes to take effect. Additionally, the Emulator Proxy does not support a bypass mechanism for excluding specific hosts or domains (a "no-proxy-for" list).
The Emulator Proxy operates at the network layer. It tunnels HTTPS traffic over
TCP, but this traffic is forwarded without decryption, which prevents HTTPS
inspection. The Emulator Proxy doesn't support UDP redirection.
## Interaction with Android Studio
Android Studio has its own proxy configuration dialog for downloading updates
and libraries. When you launch an emulator from Android Studio, it will read the
IDE's proxy settings one time to populate the **Emulator Proxy** configuration.
However, these settings *do not* affect the **Android System Proxy**.